:: This post was brought to you in partnership with Waverly Inspirations and its parent company, Iconix. While we were paid for our expertise, all opinions and ideas are 100% ours. Please read our full disclosure pertaining to partnerships here ::
It’s round seven, y’all!
If you’ve been tuning in for a while now, then you know we’ve been a part of the Waverly inspirations challenge, where every month we get some more goodies in the mail. And from those goodies, we create something with their fabulous products.
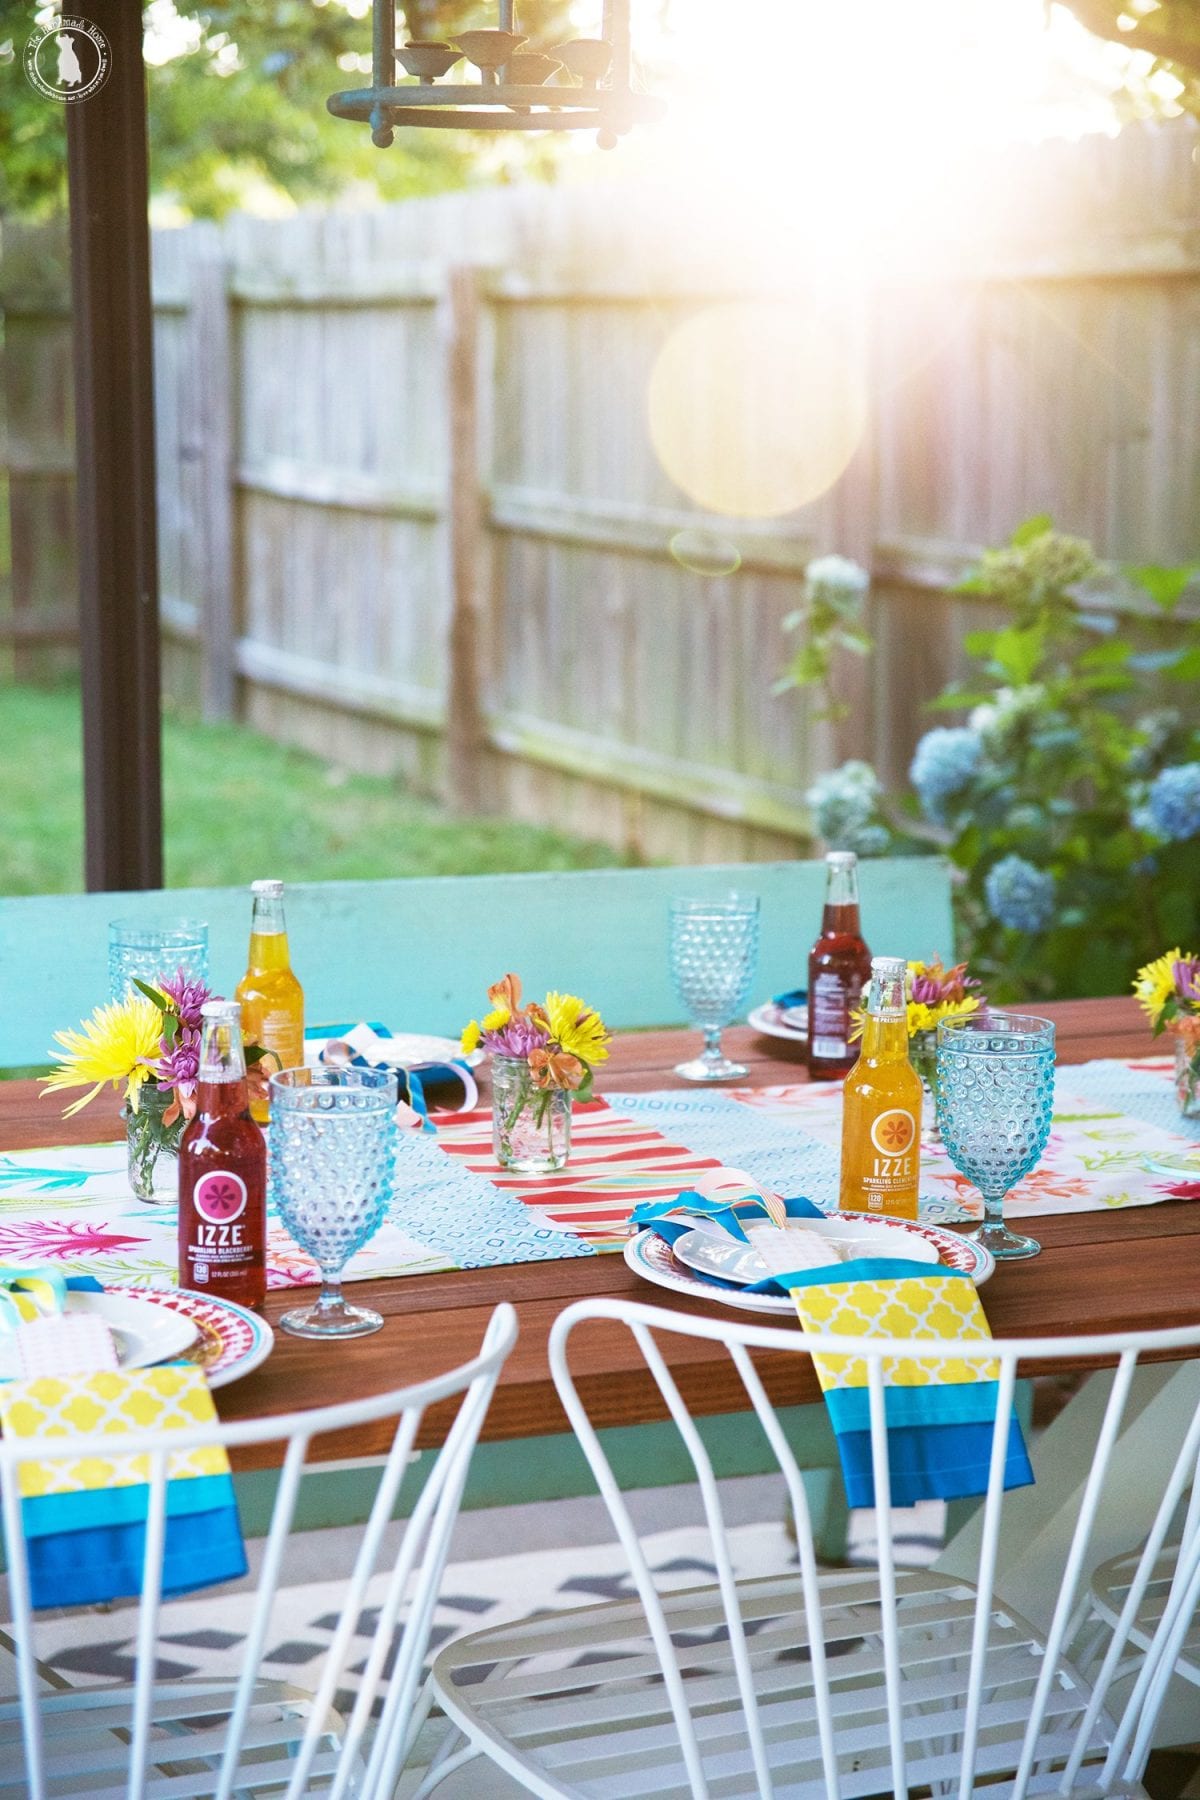
So for our first round, we decided to tackle a fun summer tablescape.
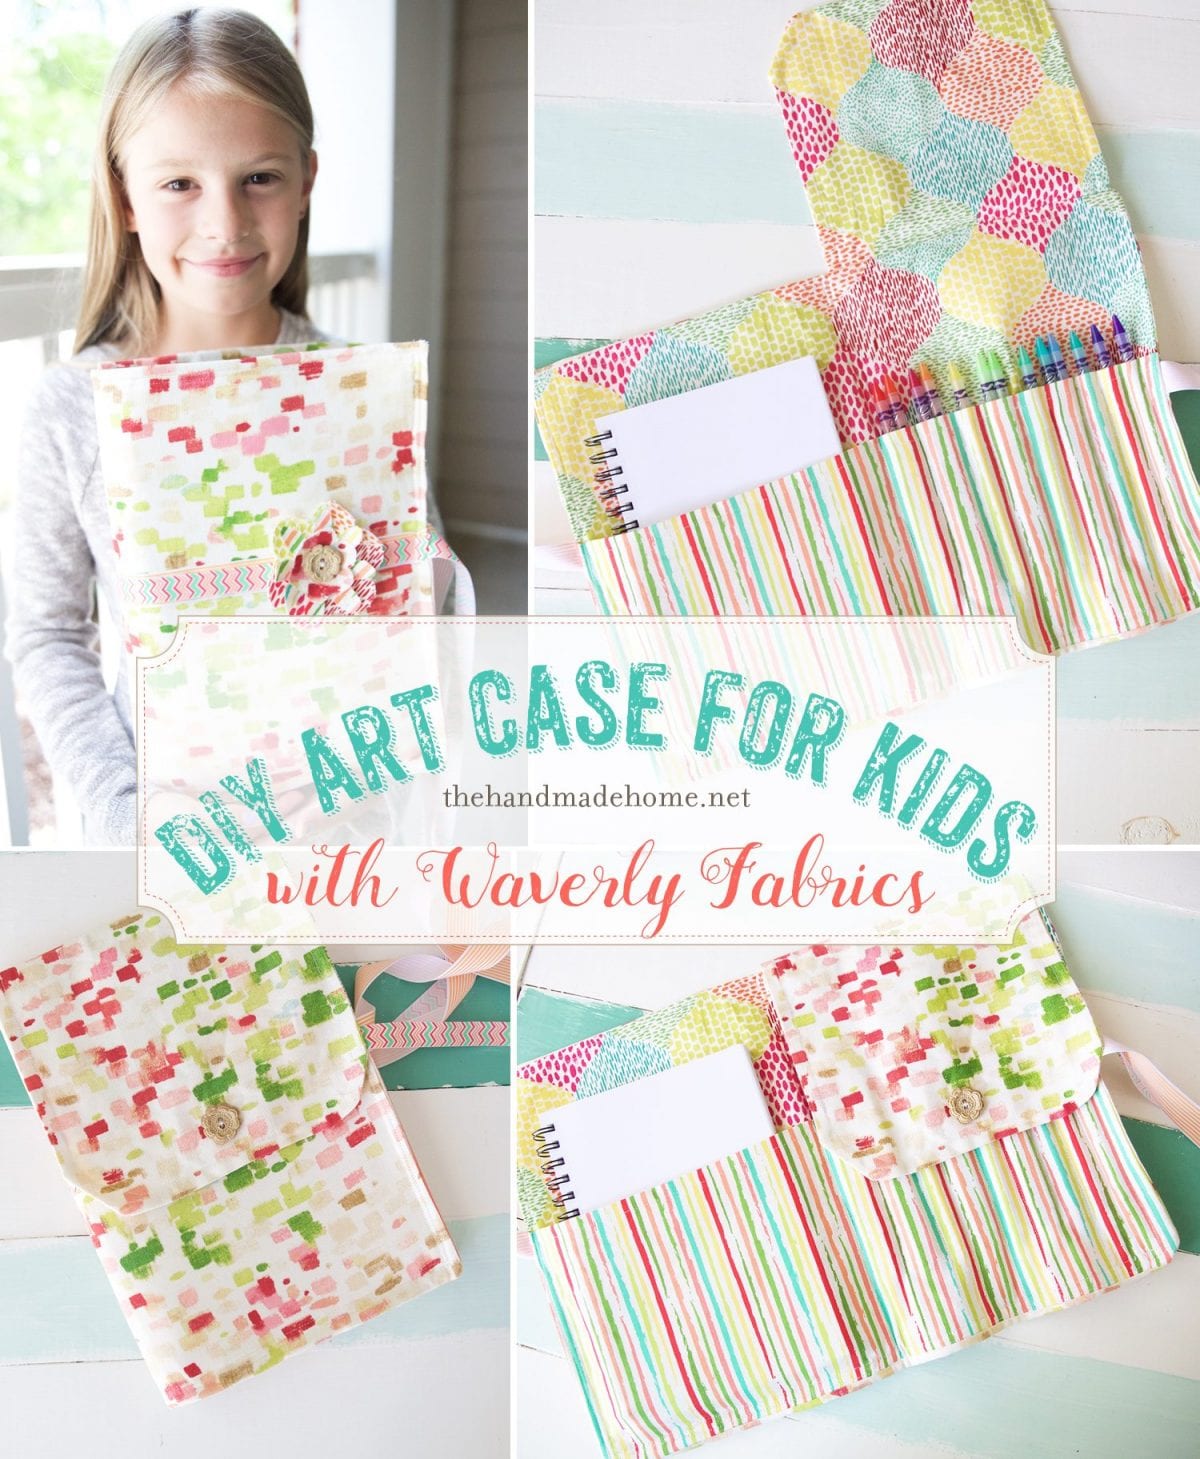
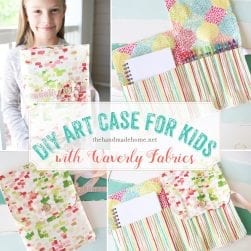
With round two, a diy art case for back to school!
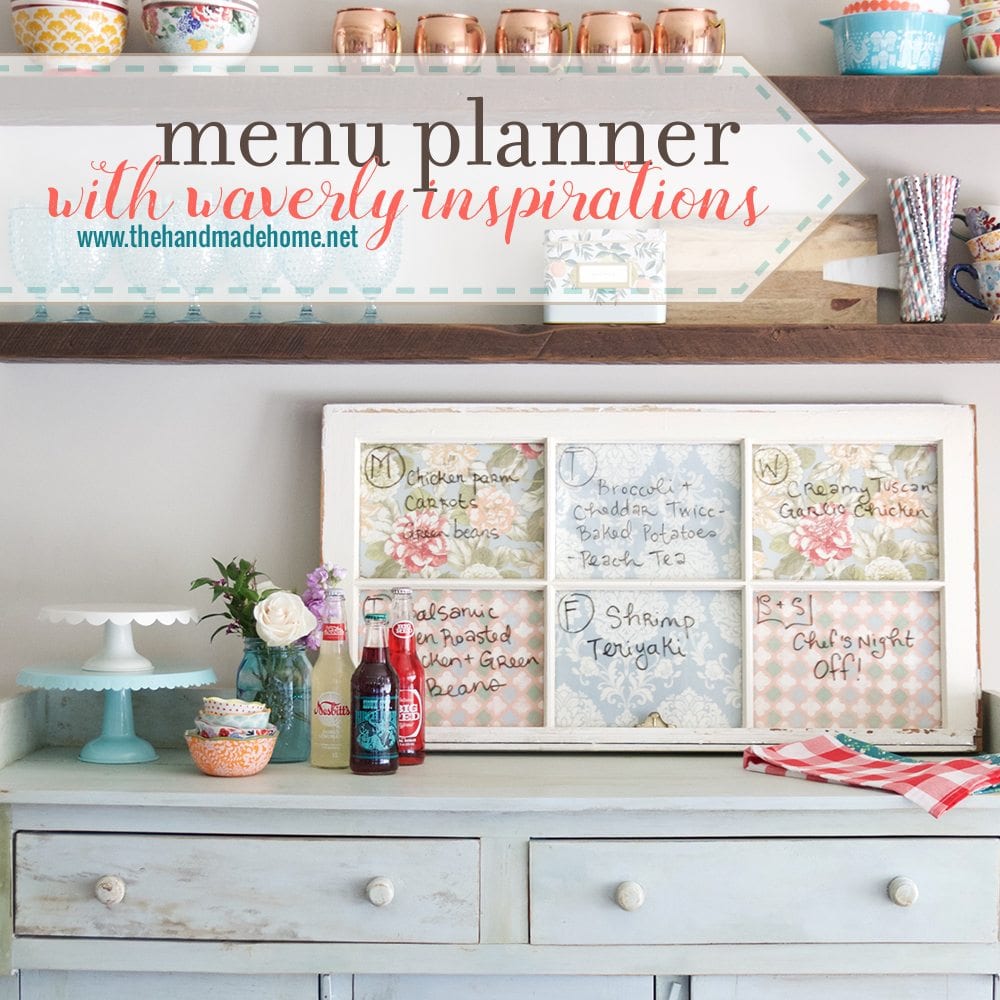
This awesome menu planner {If we do say so ourselves} for round three.
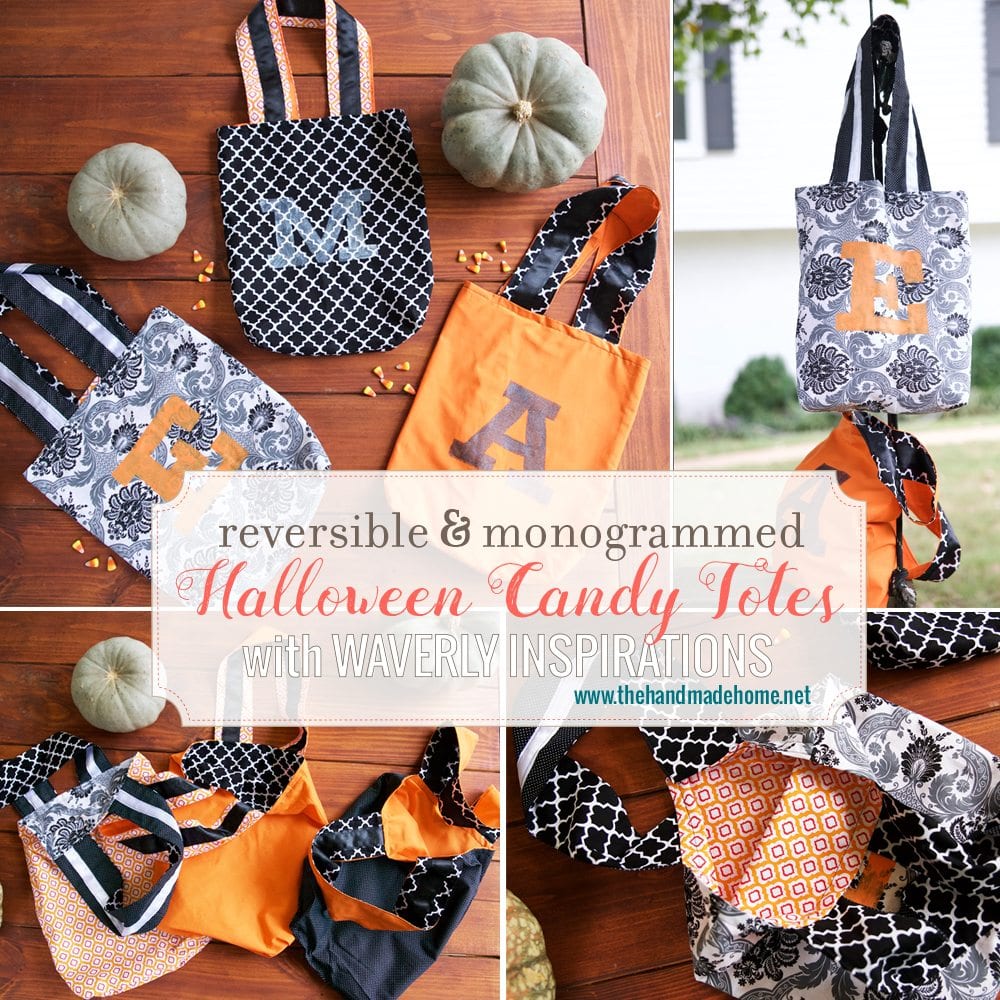
Our Halloween Totes for round four – you could change them for any every day occasion! So much fun.
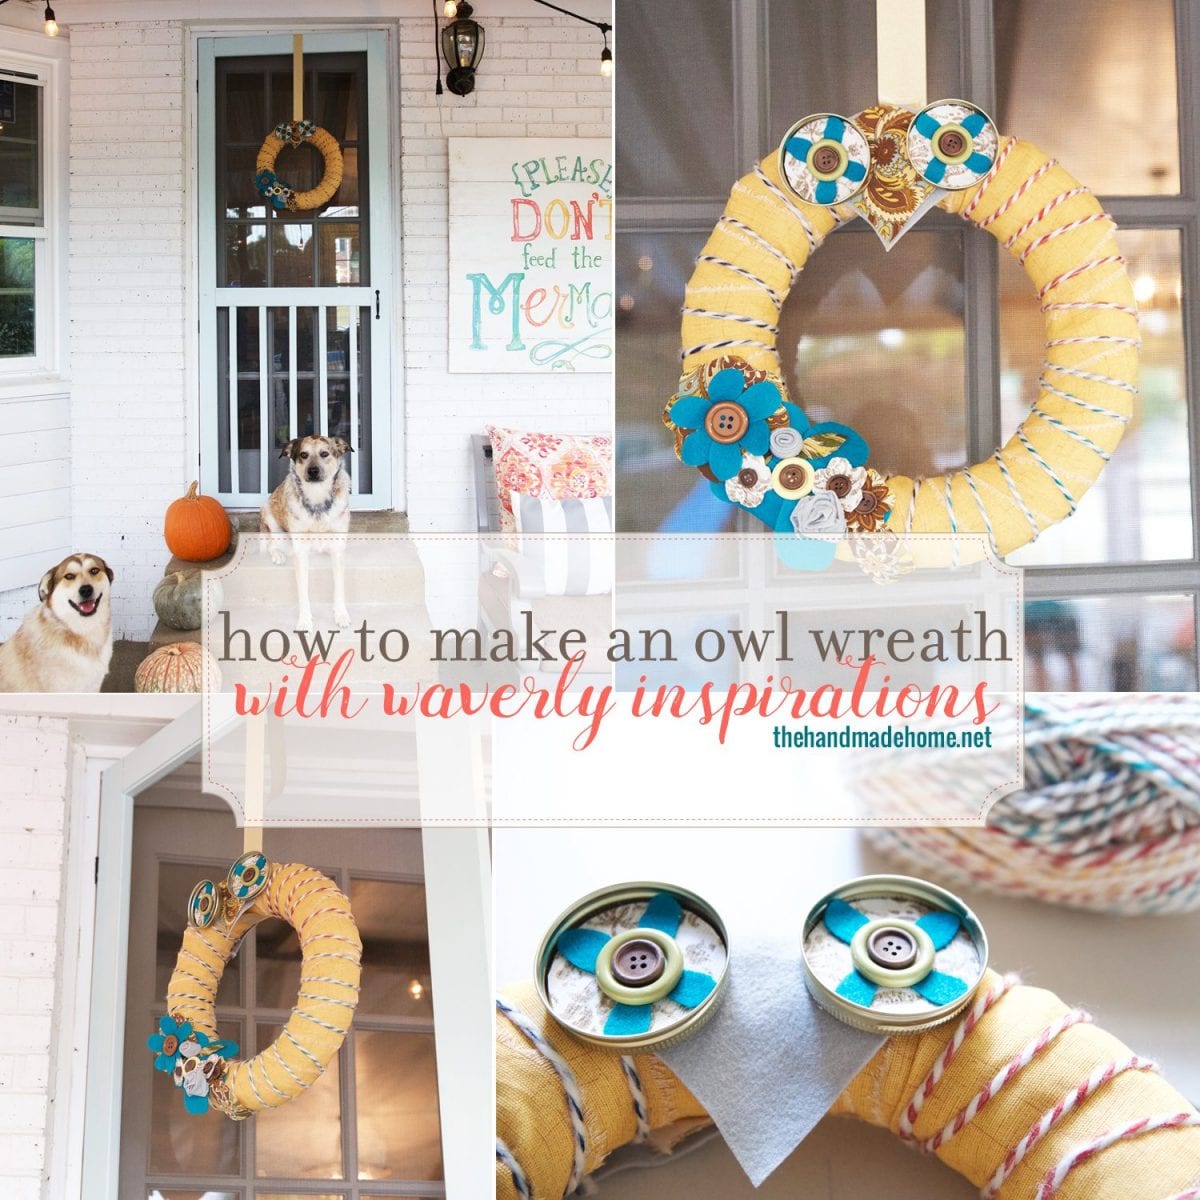
This owl wreath to warm up our home for fall was our little project for round five
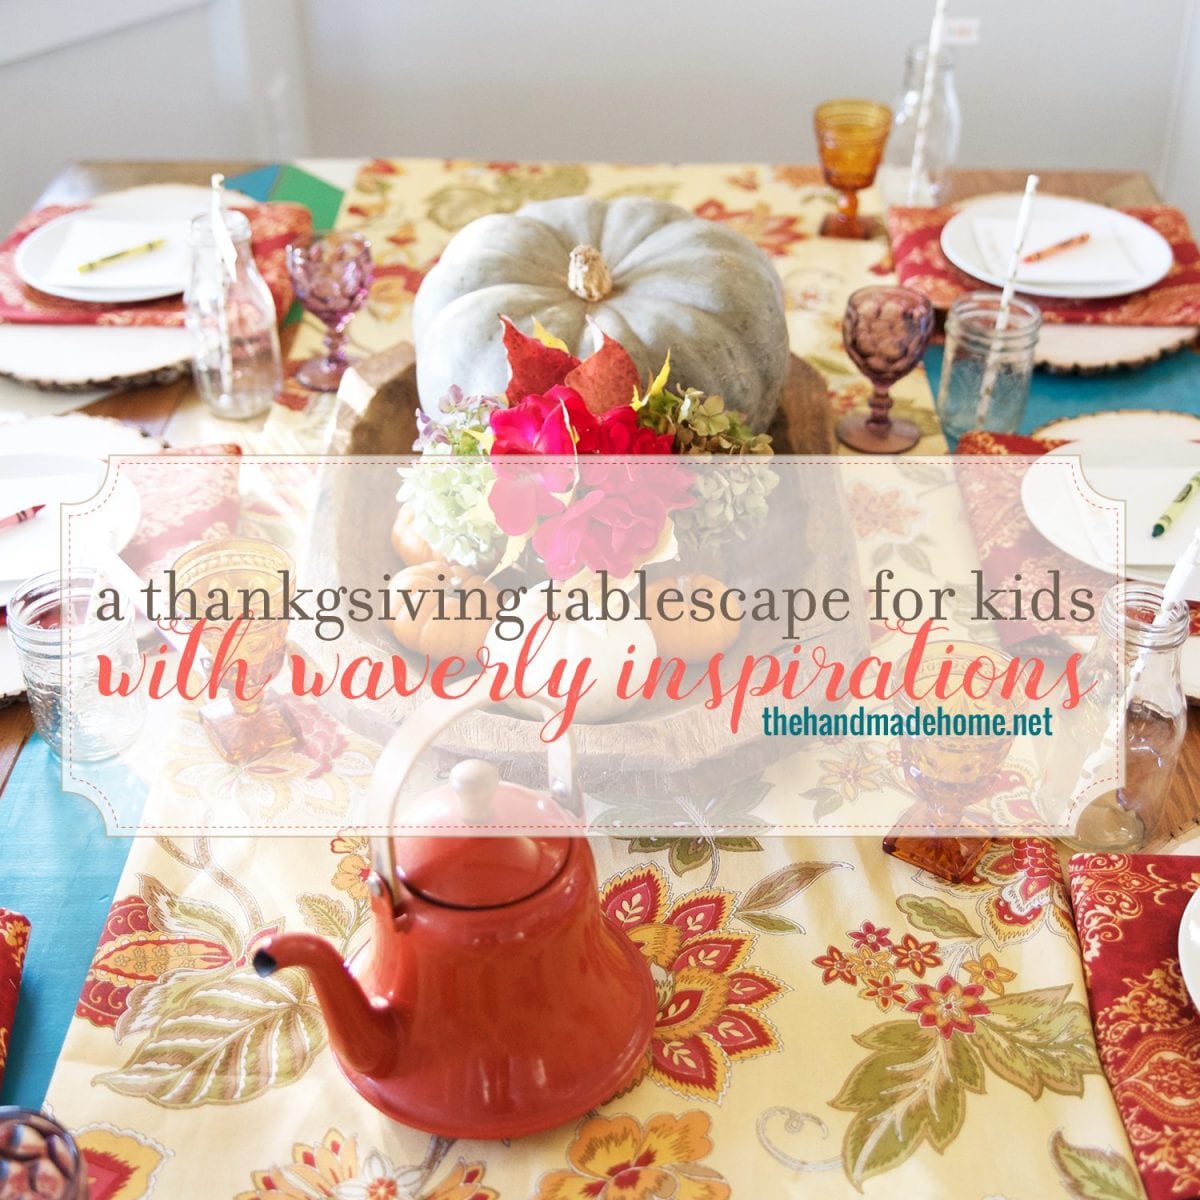
For round six, we did a fun Thanksgiving tablescape for the kiddos, along with some free printables!
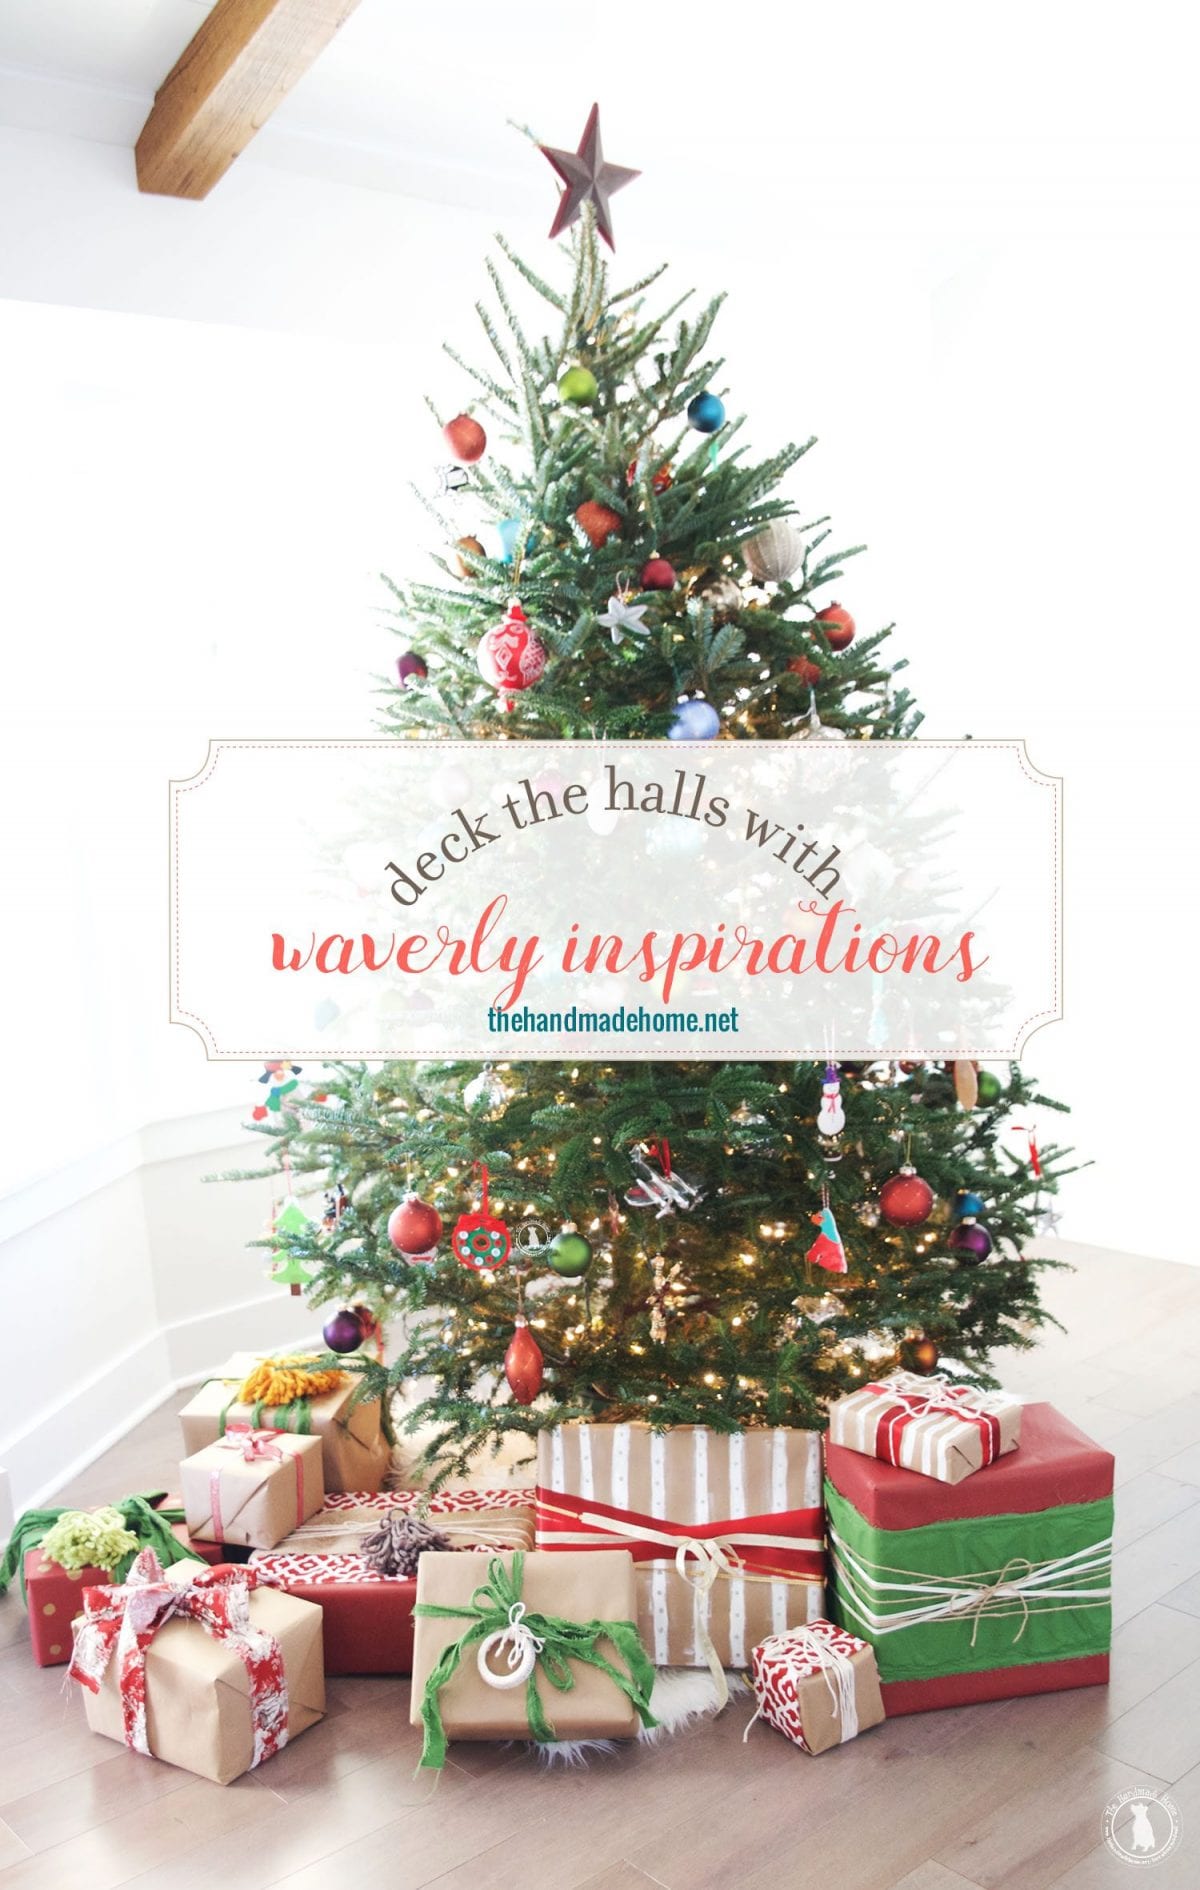
And this round… the theme was Deck The Halls!
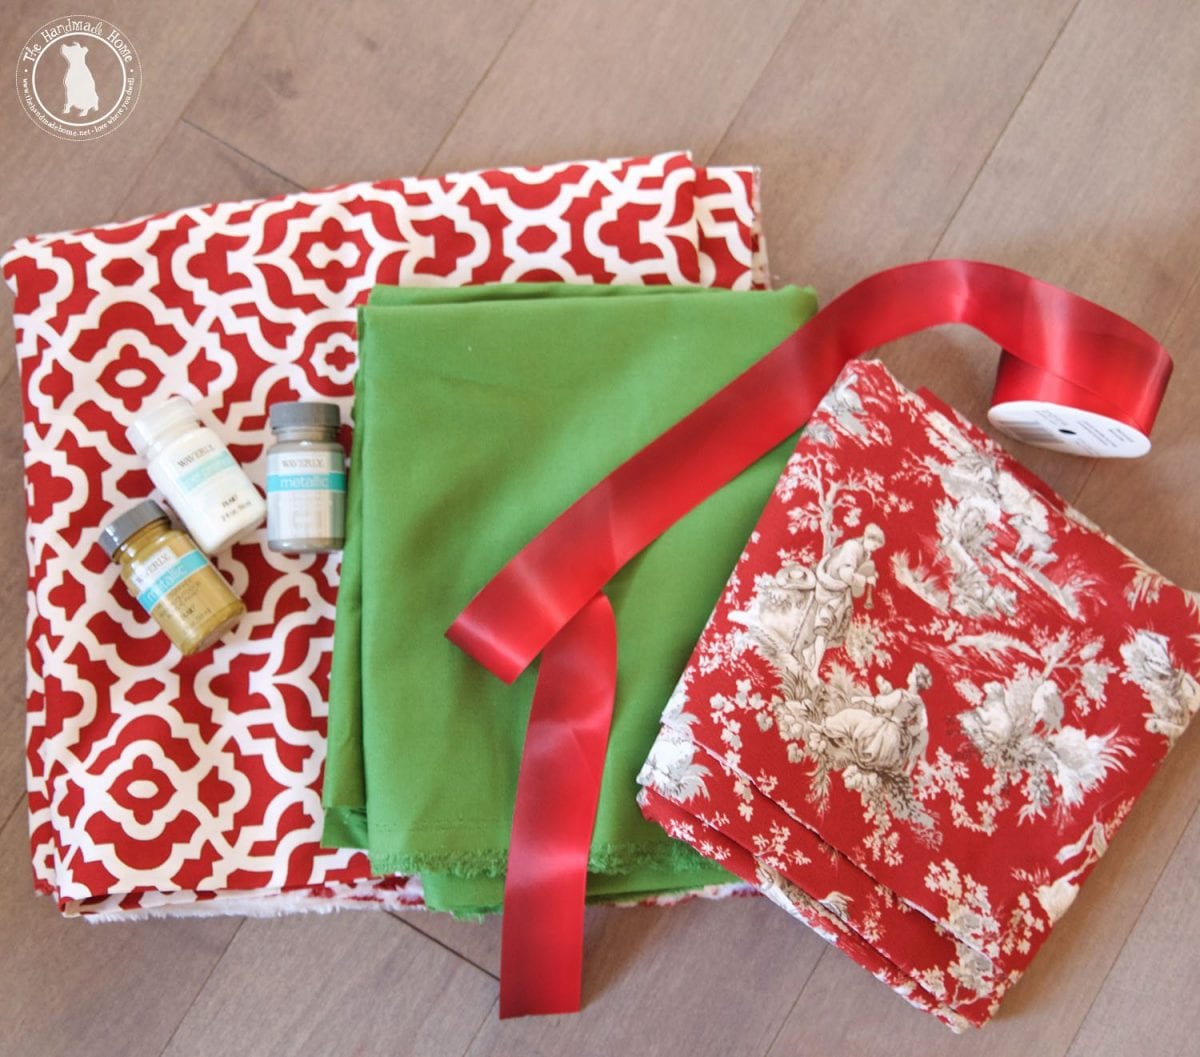
And Waverly sent us some beautiful fabrics, paints and ribbon that are a gorgeous, festive reflection of the season.
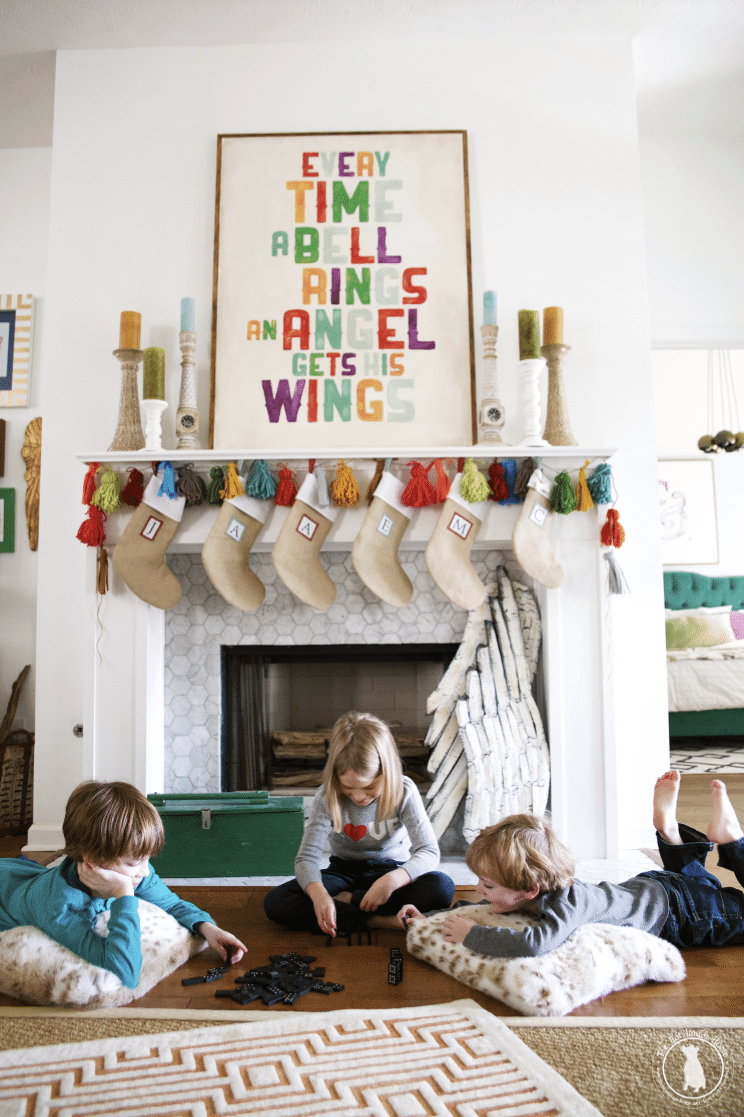
There’s something about being in our new house for the holidays right now, that’s giving us seriously warm fuzzies. We’re finally starting to feel normal again, and we have a good portion of all of our boxes and avalanches and all the things… kind of put away. Kind of. We’re really just enjoying taking a deep breath, and stepping back and appreciating the moment.
So when Waverly sent us these fabrics, we were inspired to make it extra festive inside.
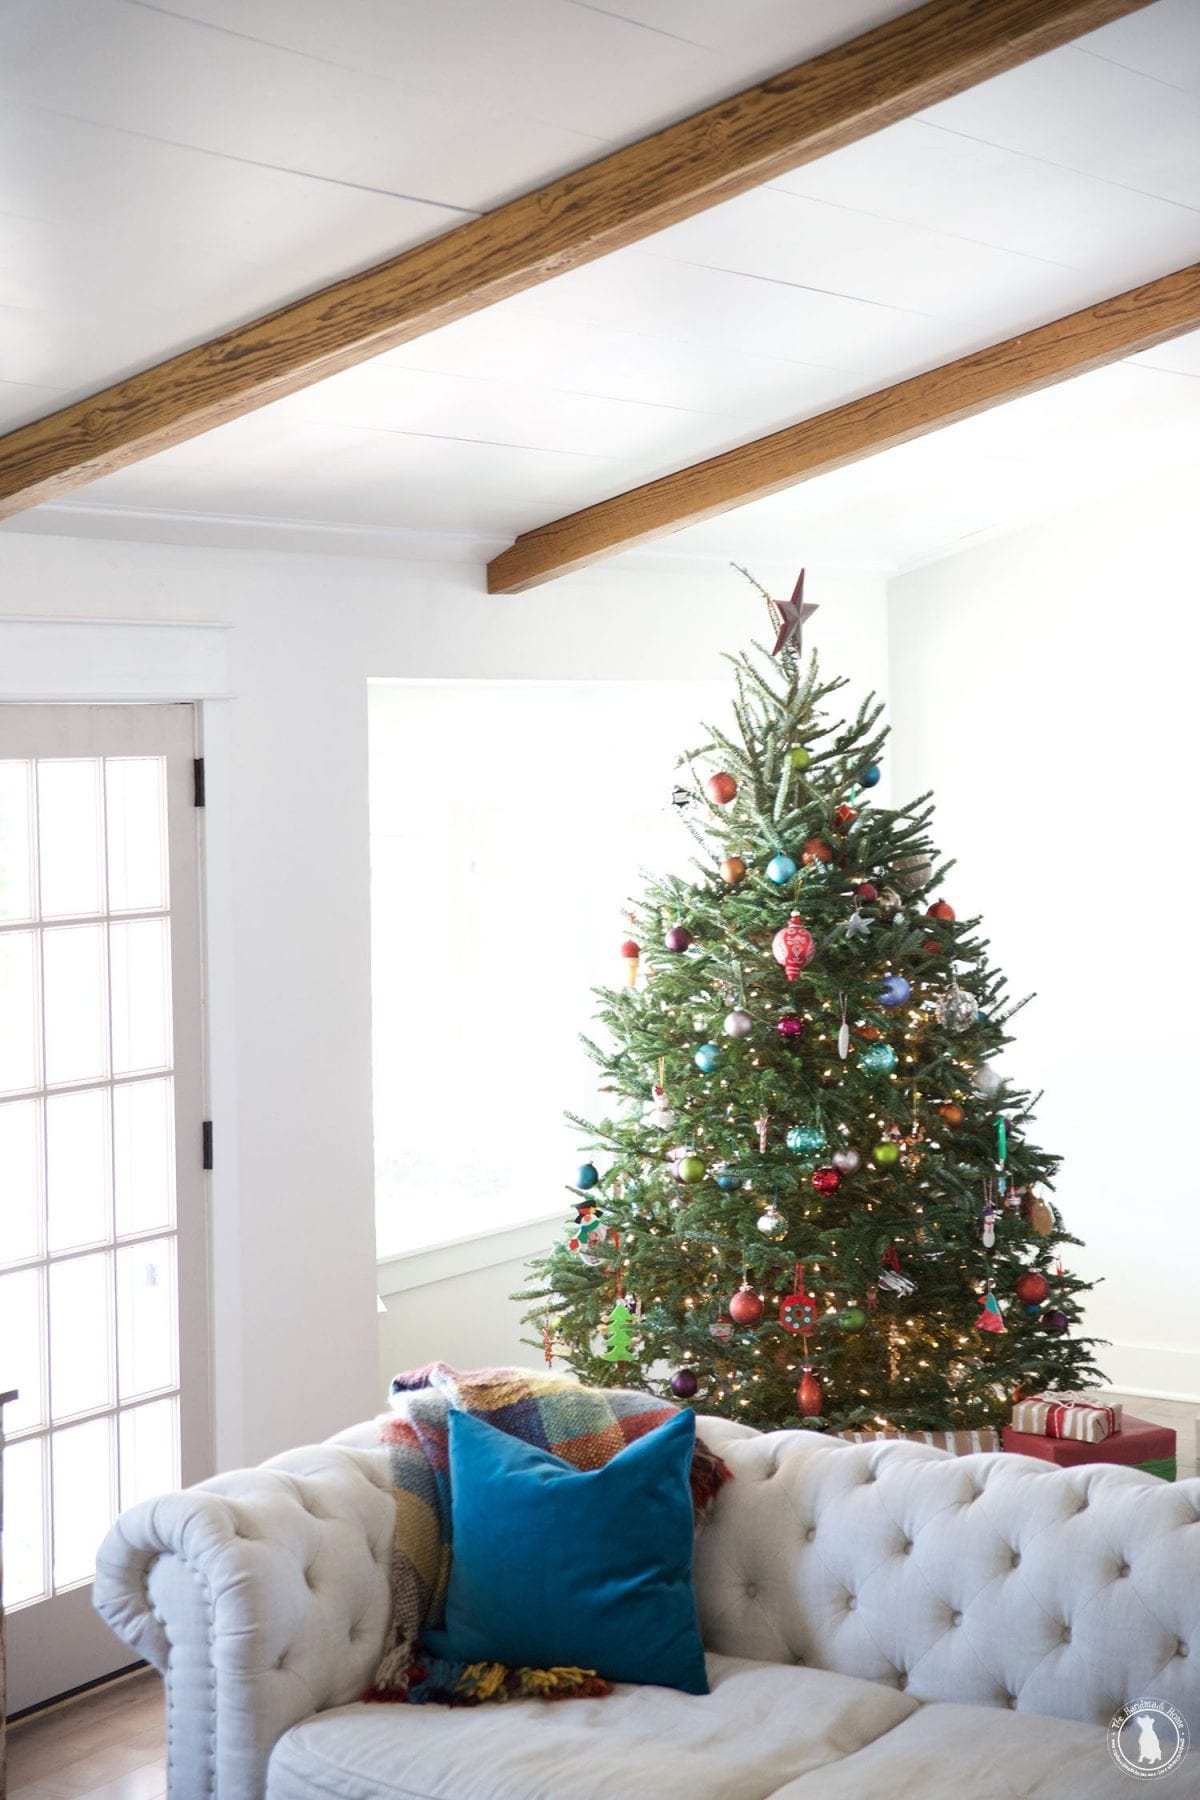
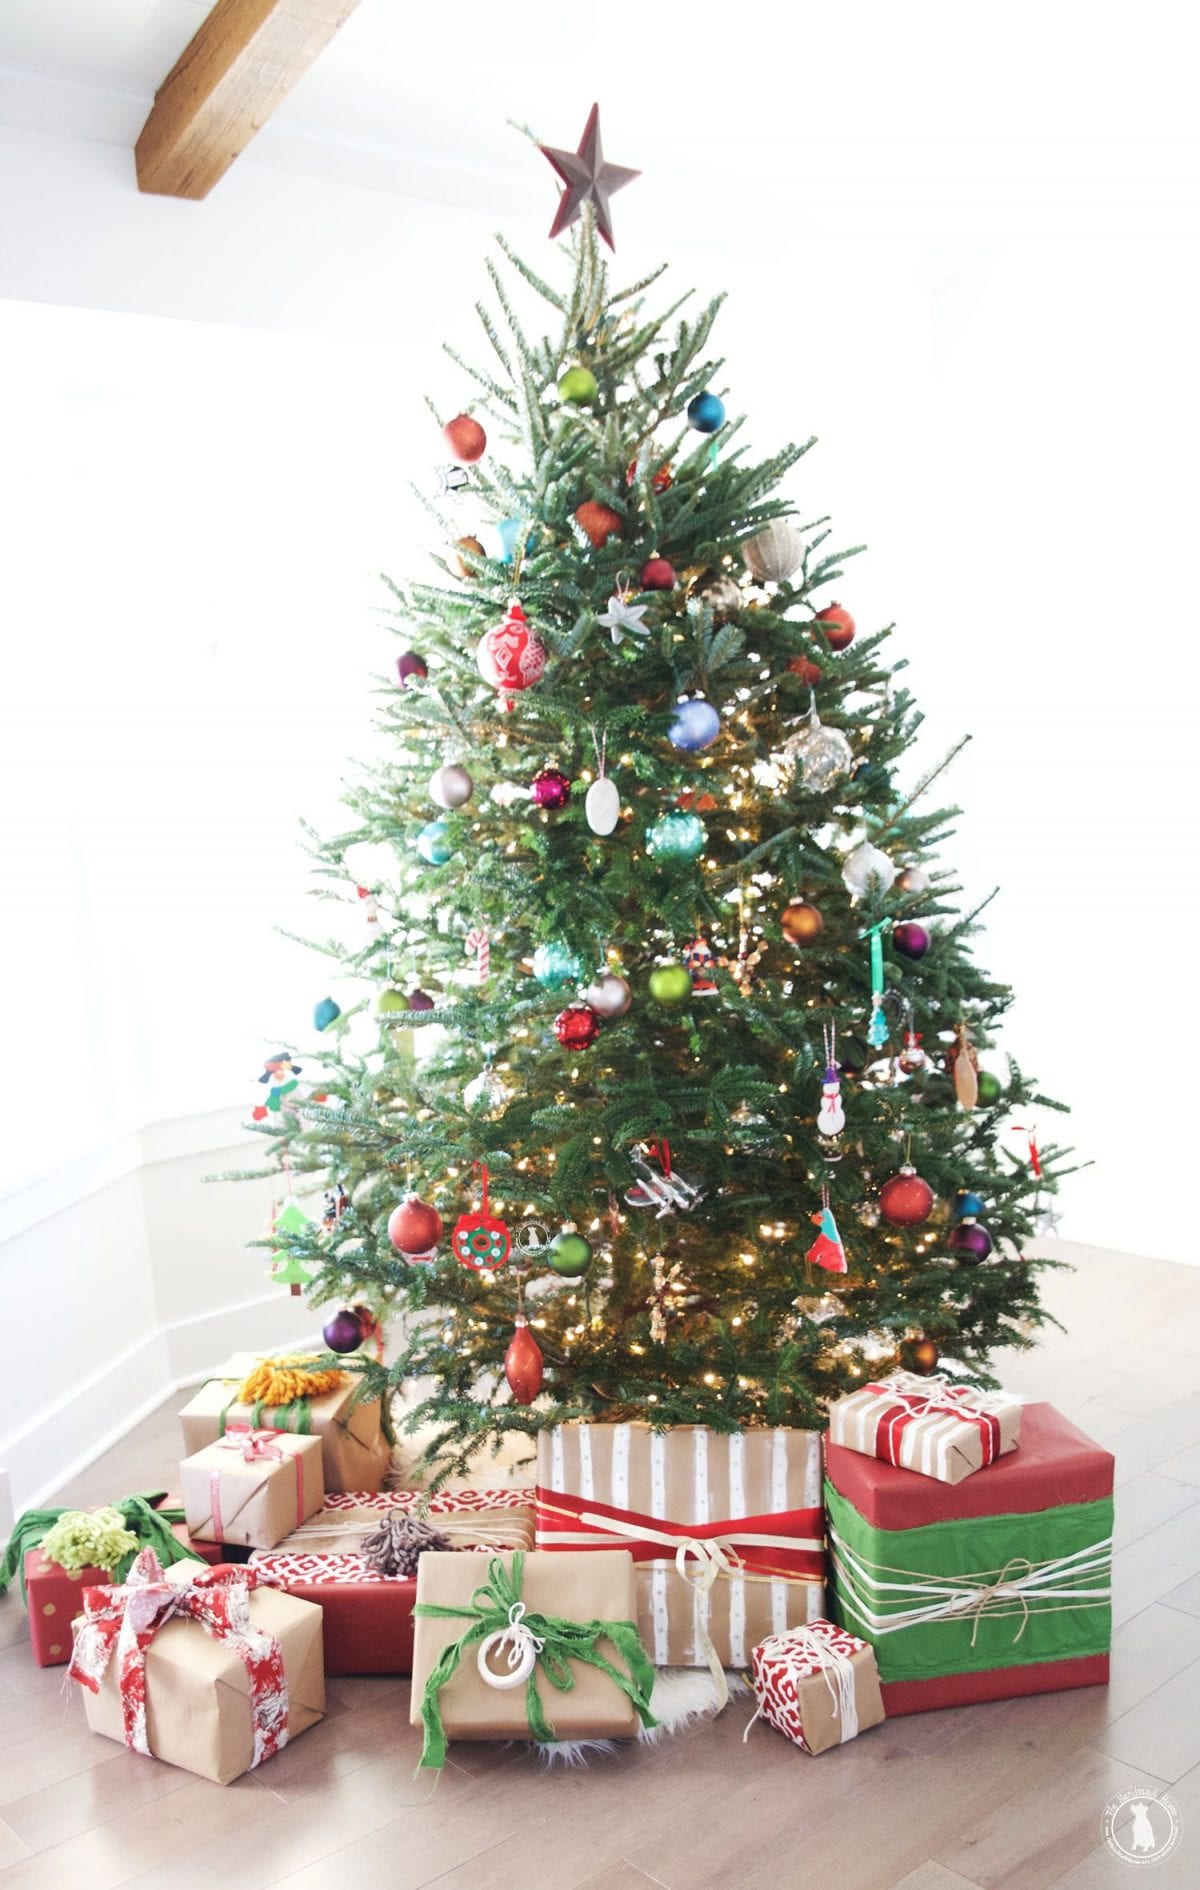
The entire time we were putting so much of this house together, I would walk down the stairs, and think about the view. About little things – what it would look like at different times… one of those things that I pictured, was what it would look like on Christmas morning. And while it’s by no means put together yet, we’re adoring this fresh cut tree we grabbed up the other night at the local tree farm.
When we spied it, Aiden said: “Mommy, I think we should call this tree ‘Christmas Miracle’ since it’s our first tree in our new house.
And Emerson responded with an equally excited “Let’s call him Bobby!”
So ‘Bobby Christmas Miracle’ the tree, it is. The kids are more than excited this year, so I literally let them have at it. The OCD in me may have only moved a few due to the fear of extra excited wagging dog tails… but other than that, this tree was pure kiddo decorated.
I think that’s what Christmas is all about this year for us. For every year, really. We don’t want things to feel untouchable. We want them to feel real.
I mean, how could I change anything when Malone asked us with a solemn face if he could “Have the honor of putting the star on this year?”
Heart. Melted. Can I just box him up and keep him 7 forever?
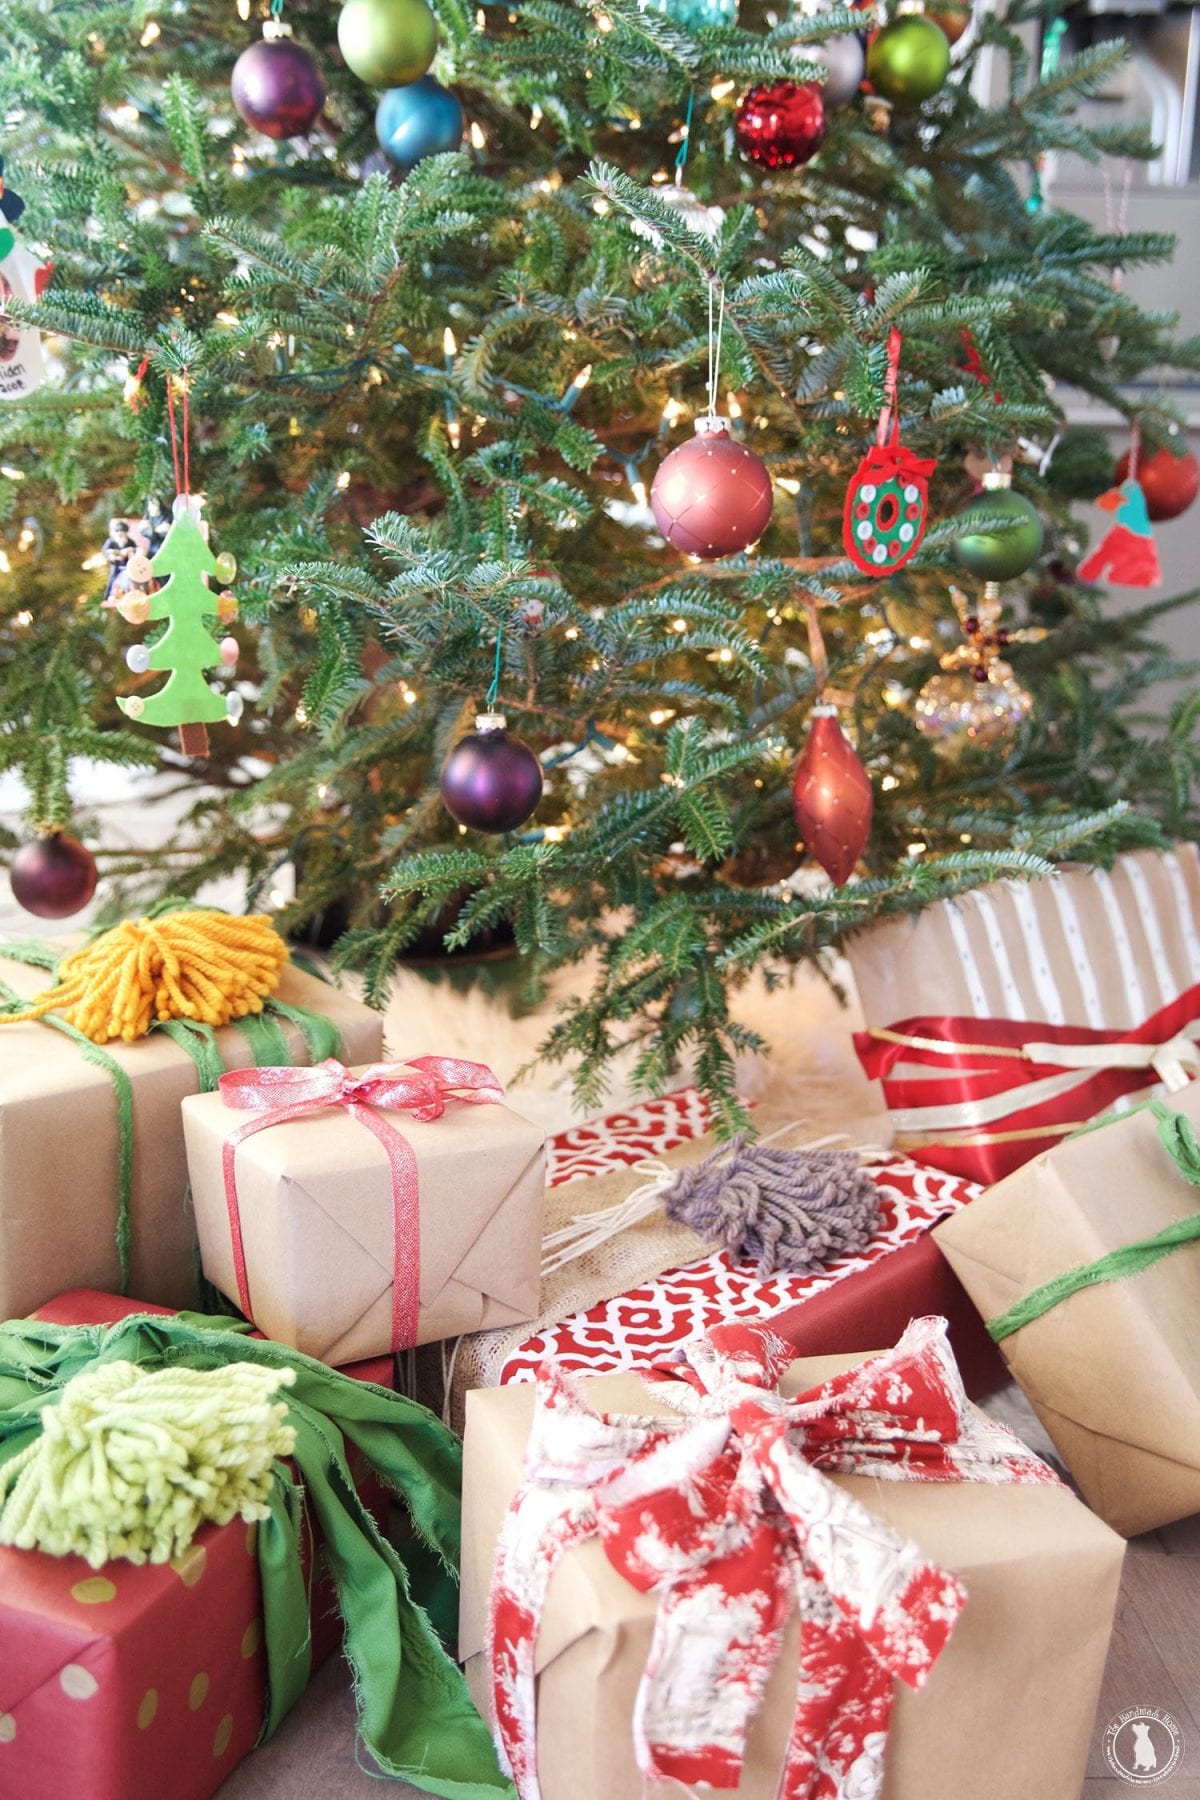
So it just felt right to add a little extra festive to the tree.
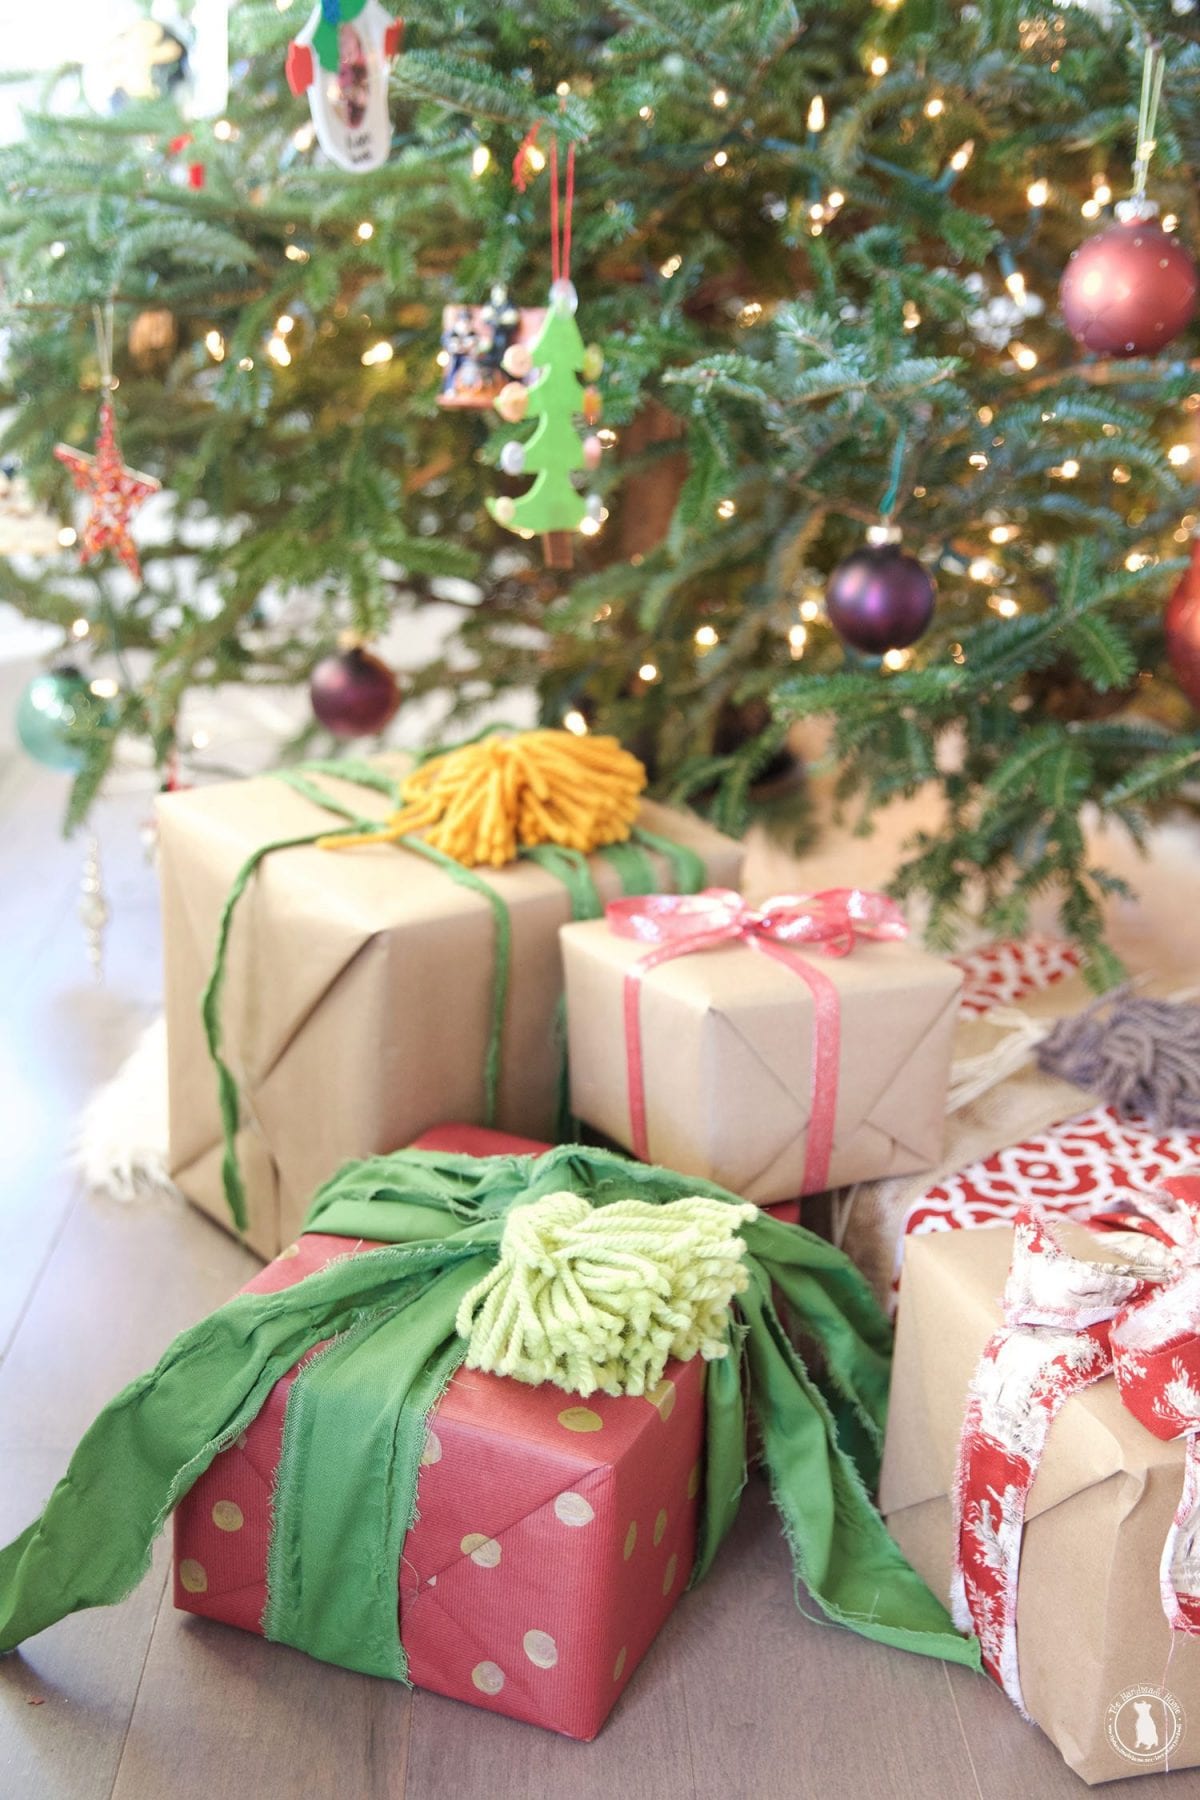
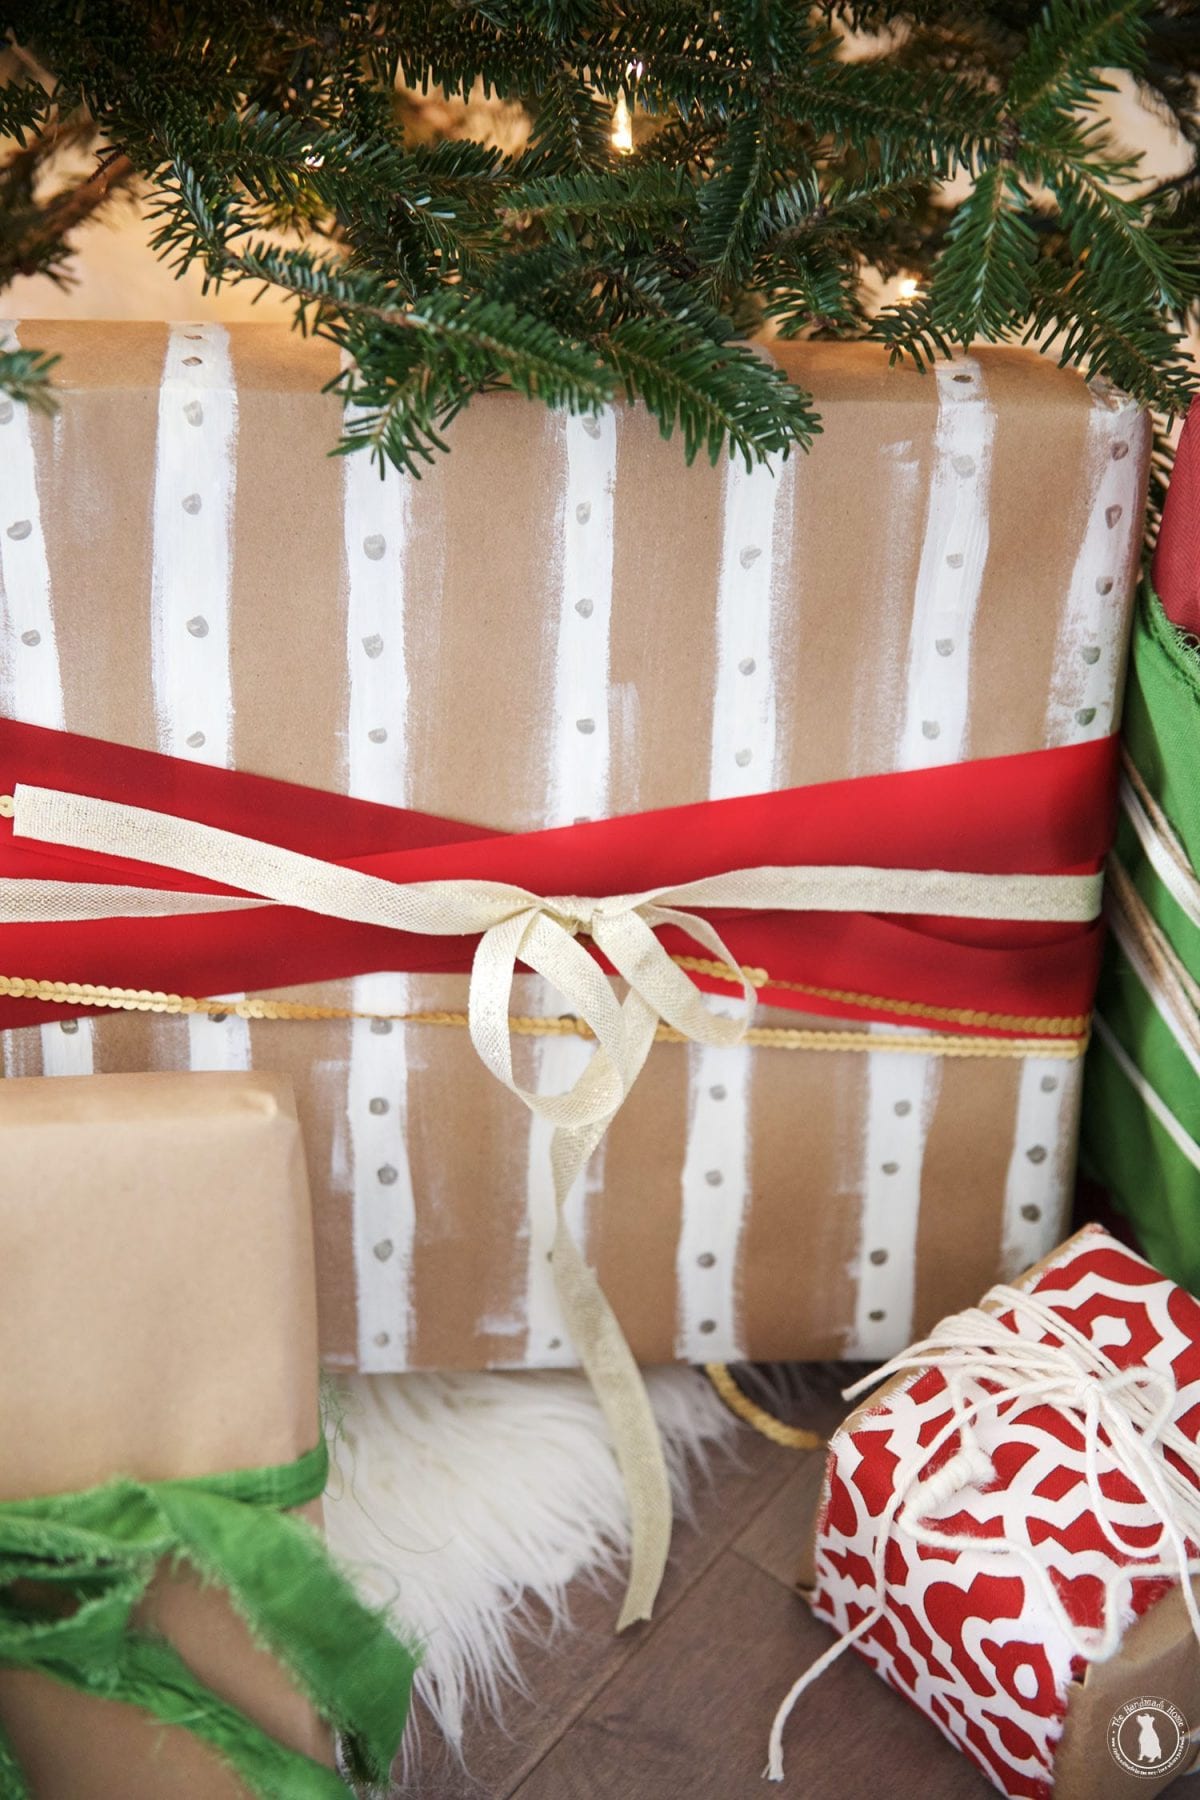
In the unexpected form of all things layers and fun gift wrapping.
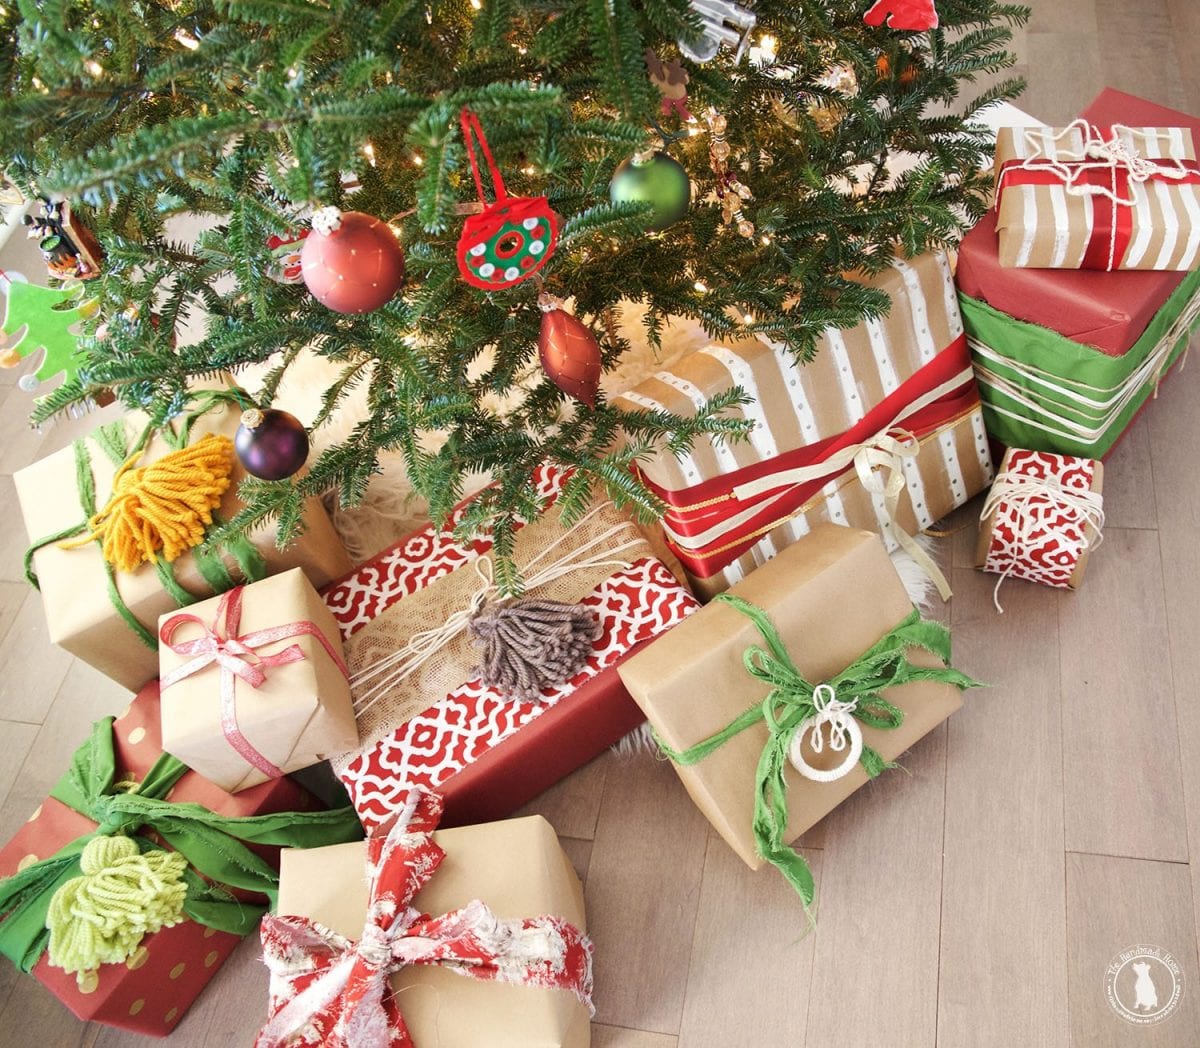
So we took a little butchers paper + some yarn, fabrics and ribbon from Waverly. Then we mixed them up a bit with some of our own vintage finds we had, a few handmade toppers, and some of the paint to add layers, interest, and fun takes on the traditional ideas of wrapping.
I won’t lie… usually I’m a little rushed, throwing things in bags and calling it a day. I mean, it is what it is. But this time, plain old paper combined with a few new ideas was actually kind of therapeutic, and added a lot of fun color to the space.
There’s just something about brown paper packages tied up in strings… with a twist.
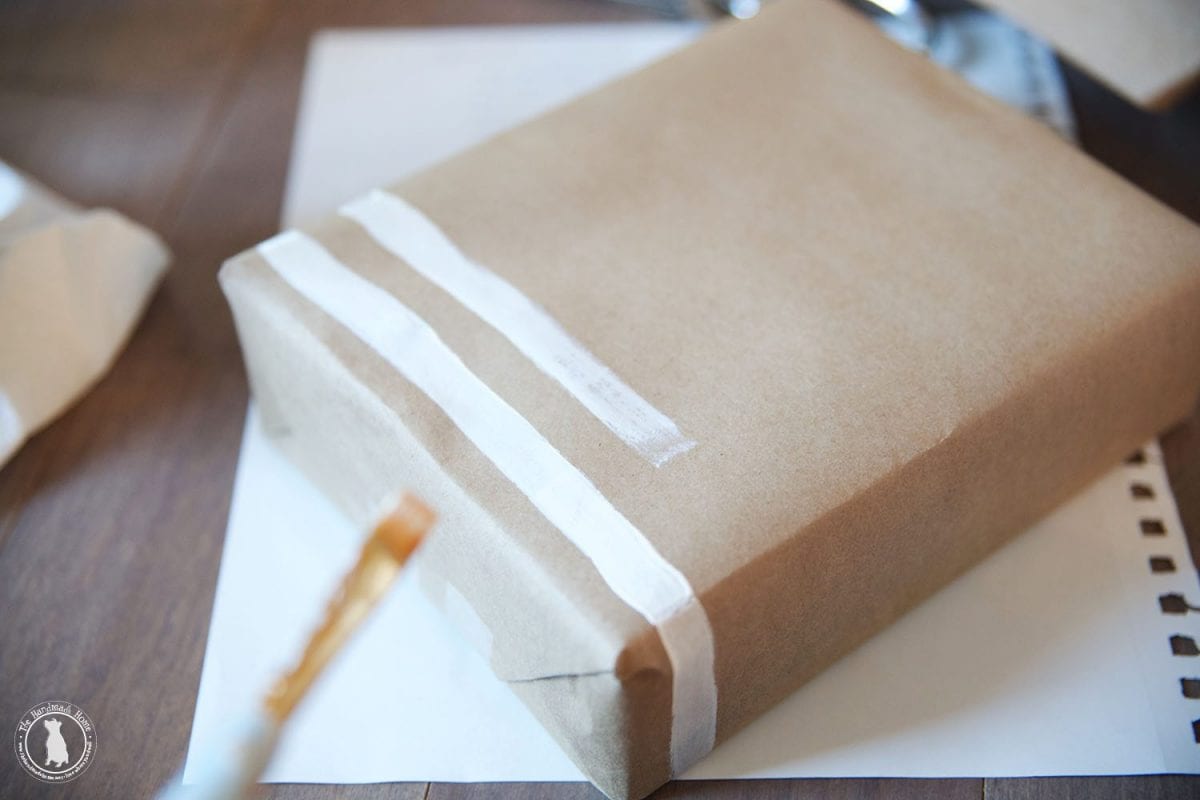
I literally added simple stripes with some of the paint…
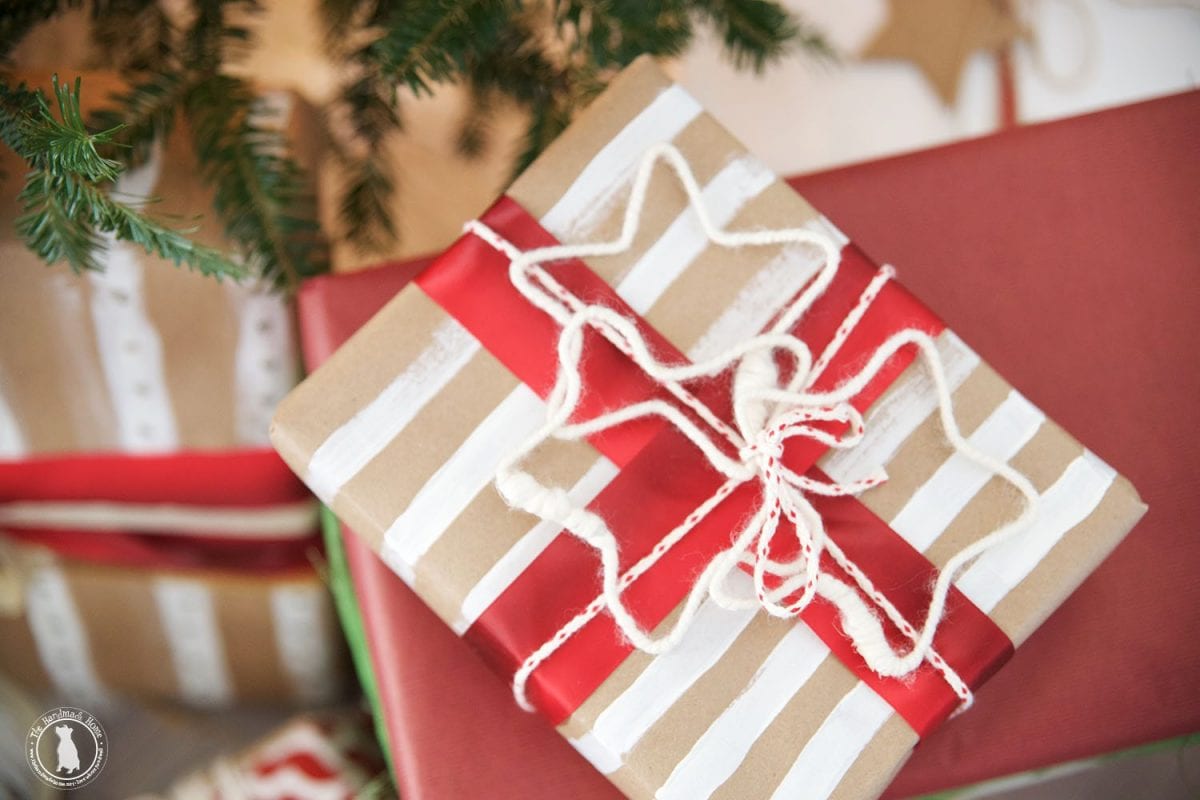
And then added some fun little embellishments.
Here’s how:
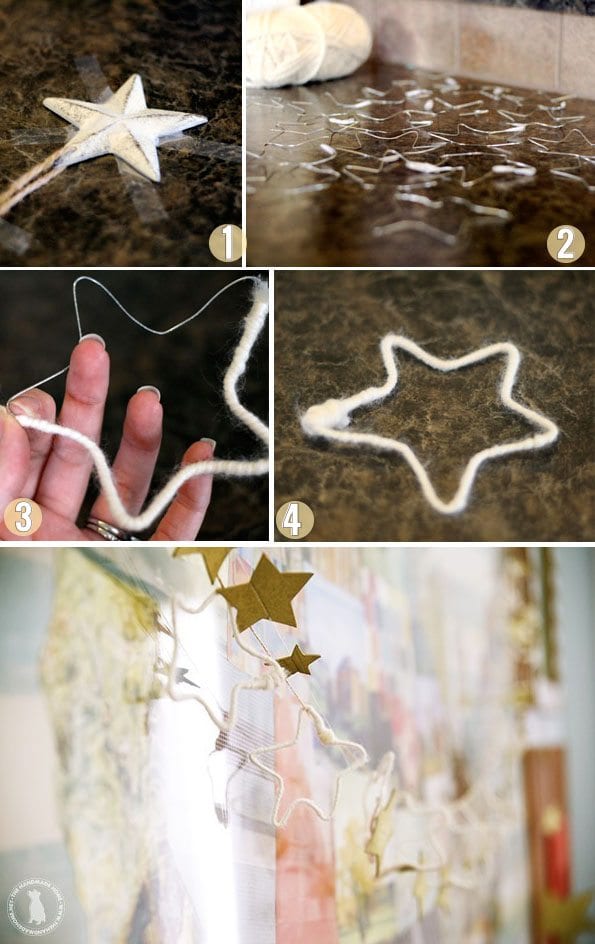
You may remember this project – a little oldie but goodie. They’re usually used as a fun garland… but they also make great gift toppers, too.
1. Take a star shaped ornament and tape it down. Or print off a simple star to use as a guide.
2. Wrap some wire {any little jewelry wire you grab at your local craft store will do} around the edges to form the shape.
3. Secure it with tape, and cut off the excess wire. With some yarn or twine, wrap it around. Anchor one end with a dab of hot glue. When you meet the other end, add a little dab of glue, and secure it with more yarn.
4. Tada! You have your star. They look great in a garland, too.
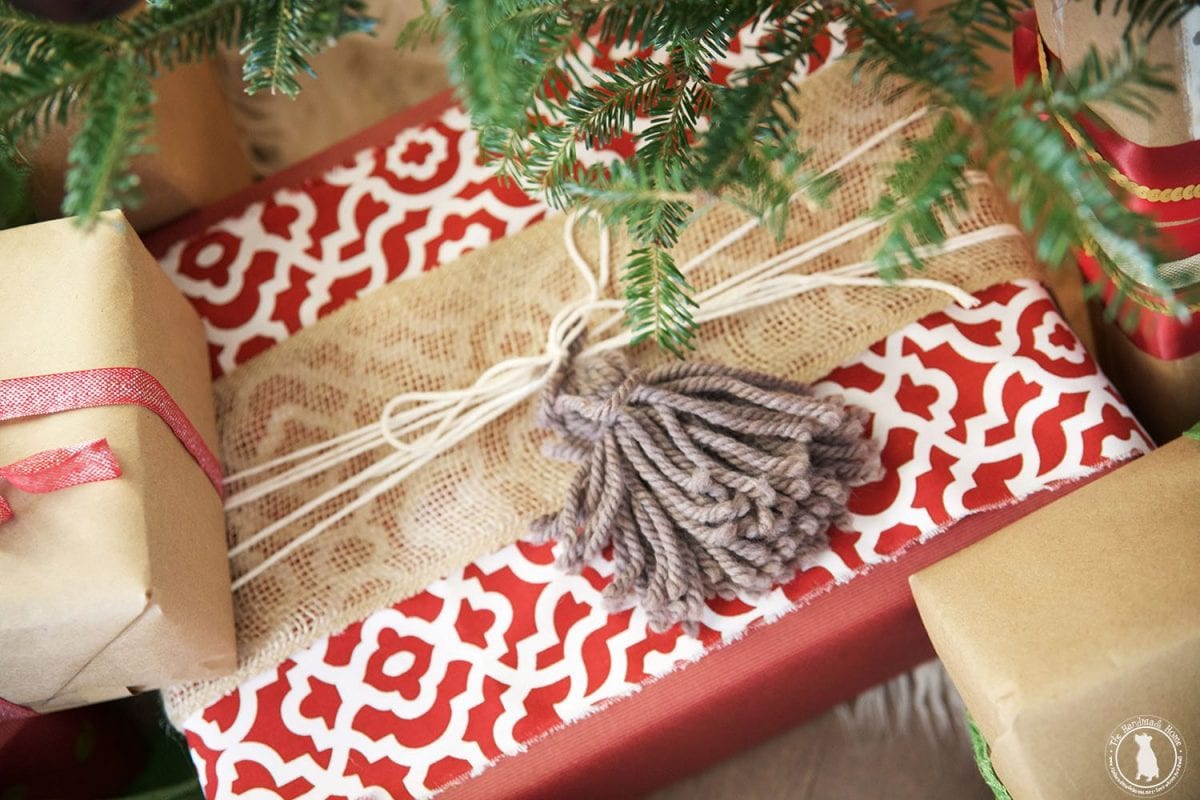
For the little wreath topper, I did the very same thing, but with part of a mason jar I had lying around.
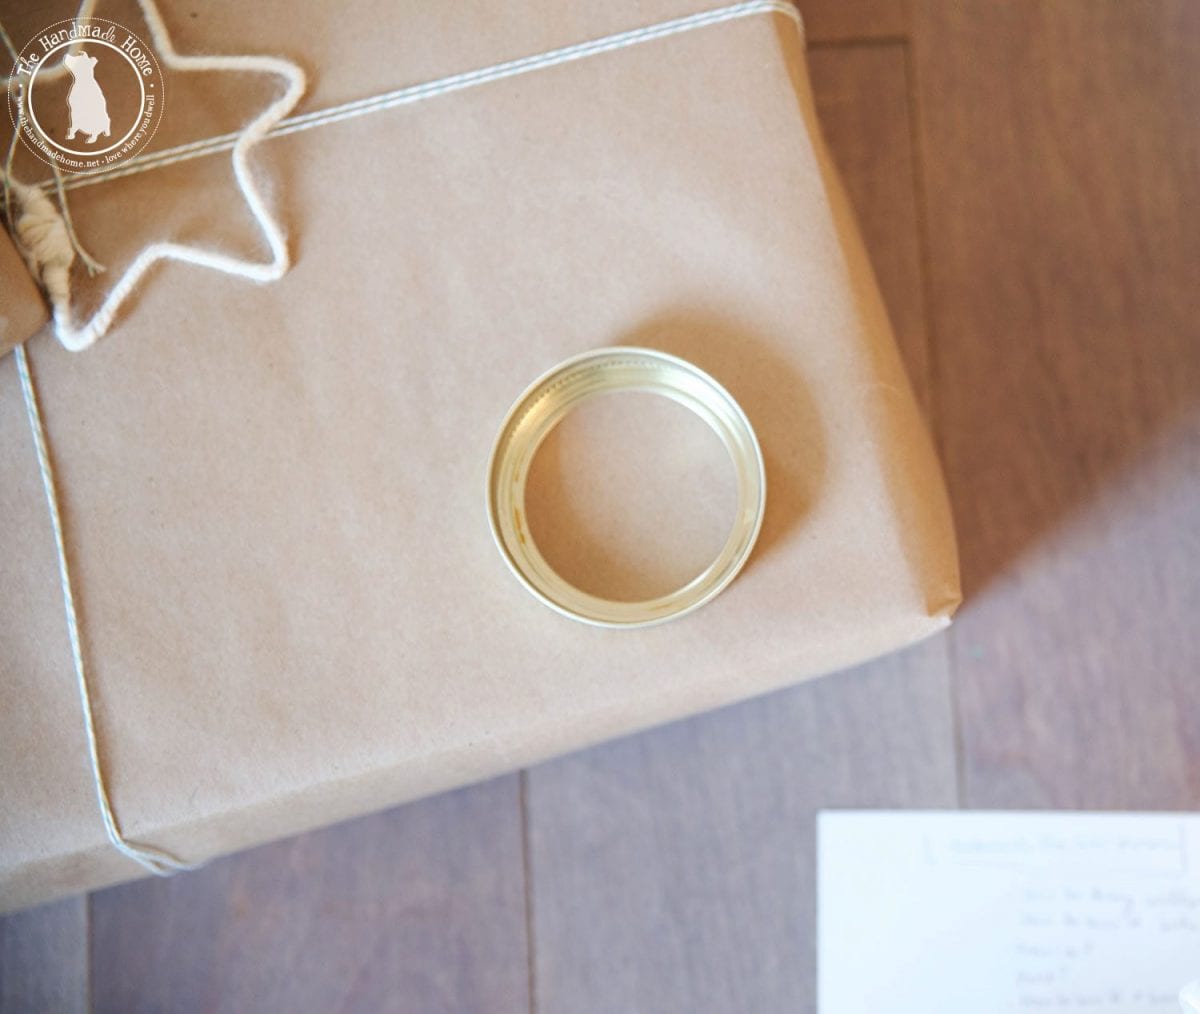
I simply secured it with hot glue at one end, and then again on the other end, when I was finished.
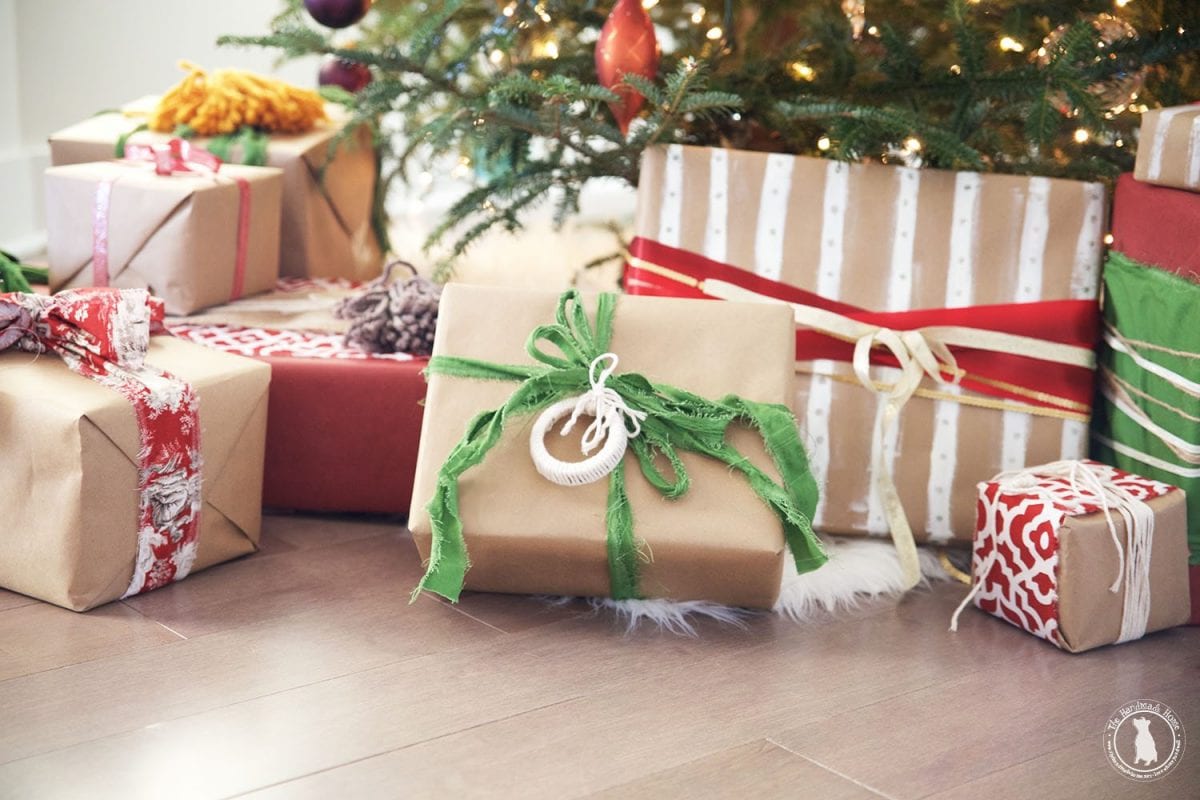
We added some great strips of Waverly fabric for a fun, handmade feel. I adore the character and color it brought to plain old butcher’s paper!
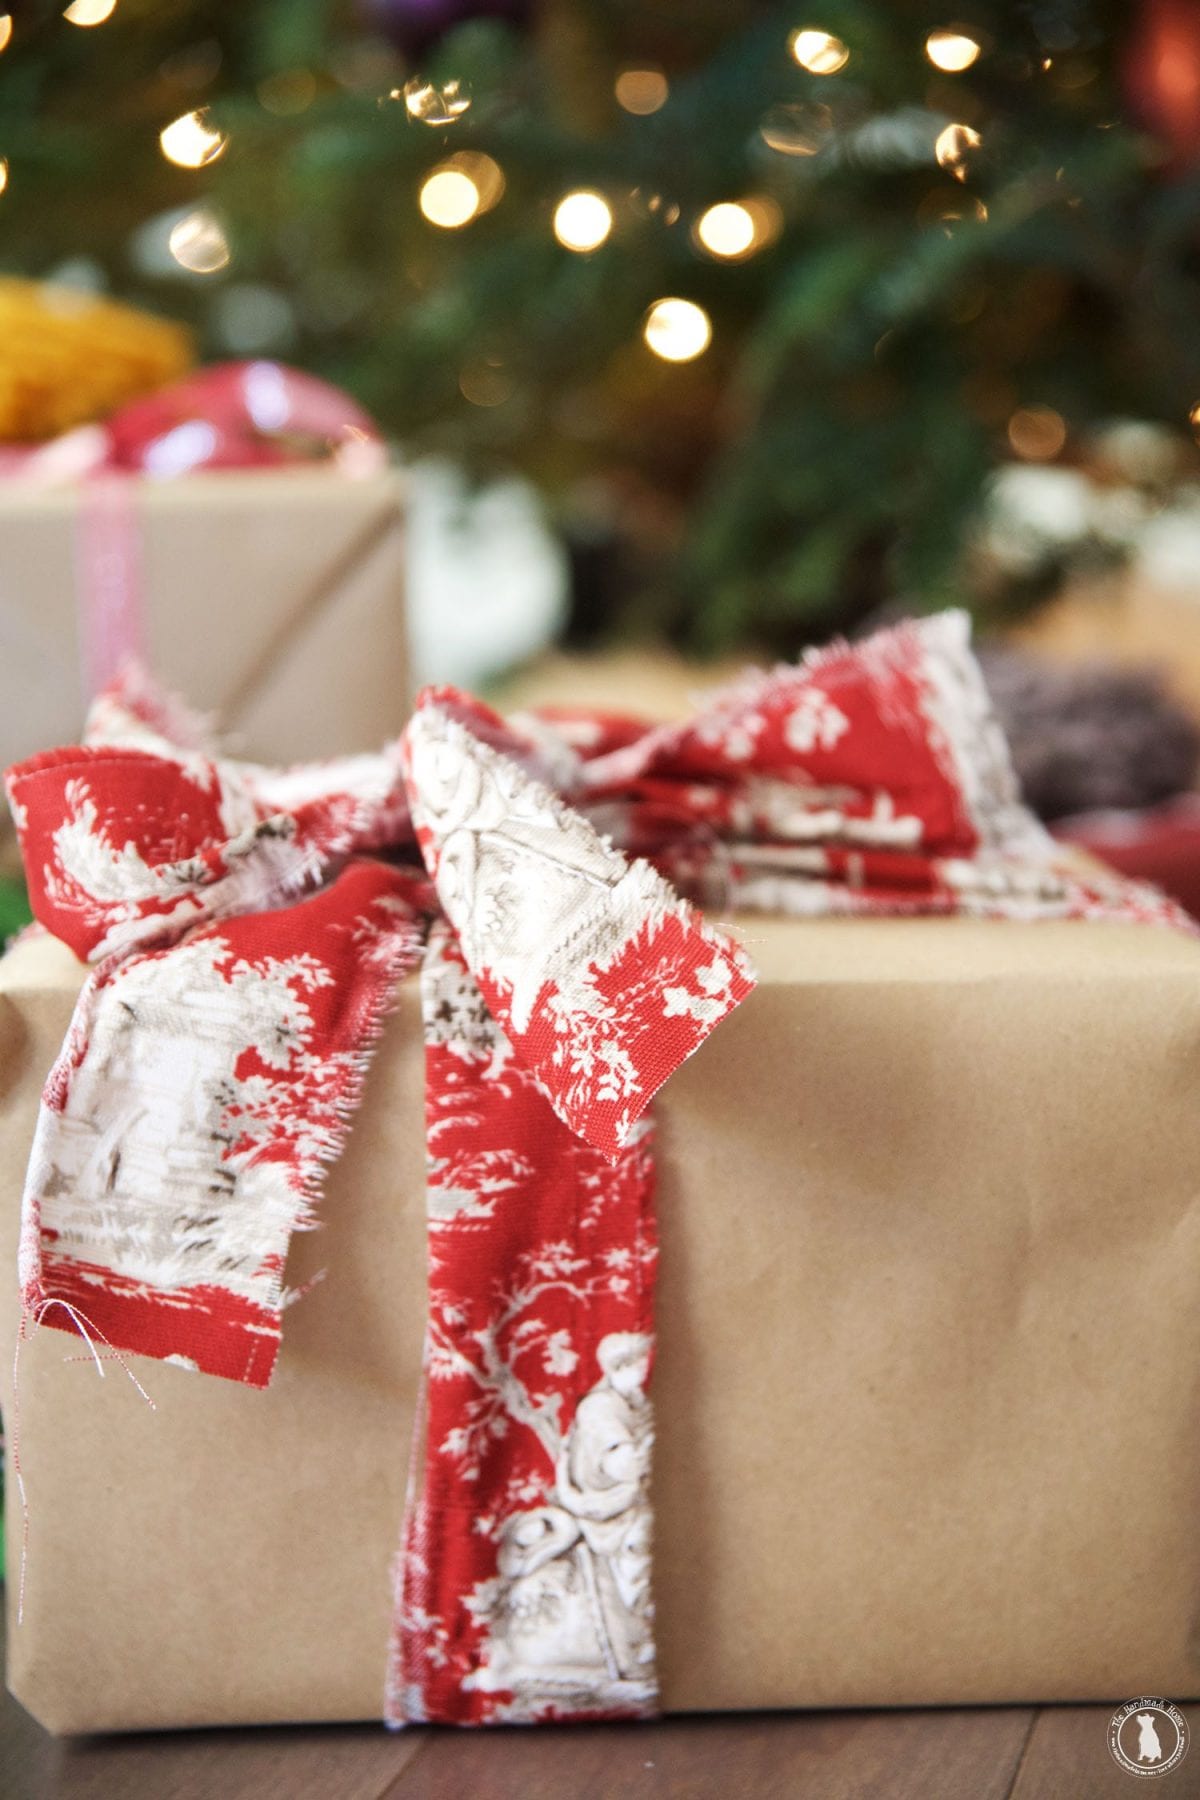
The Waverly fabrics add such a great, timeless feel.
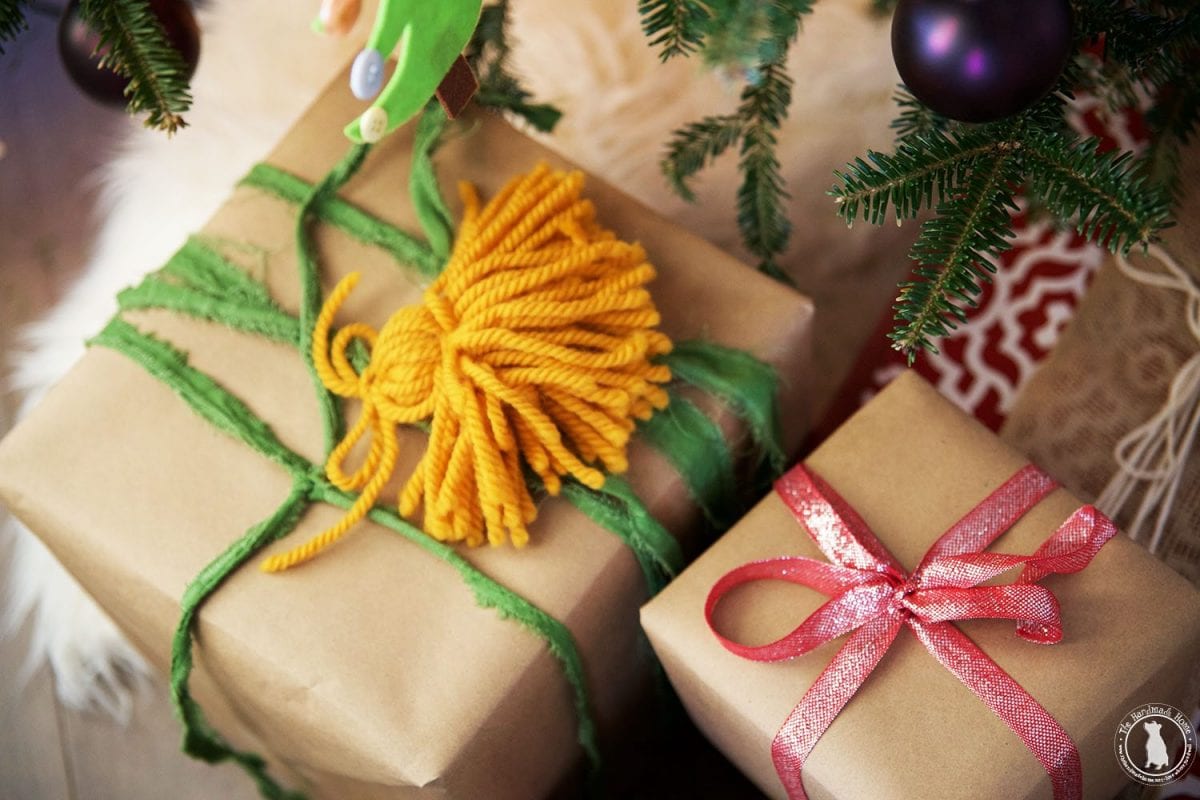
With the fabrics and ribbon, layers and stripes, we also added a few tassel toppers.
I think these are my fave.
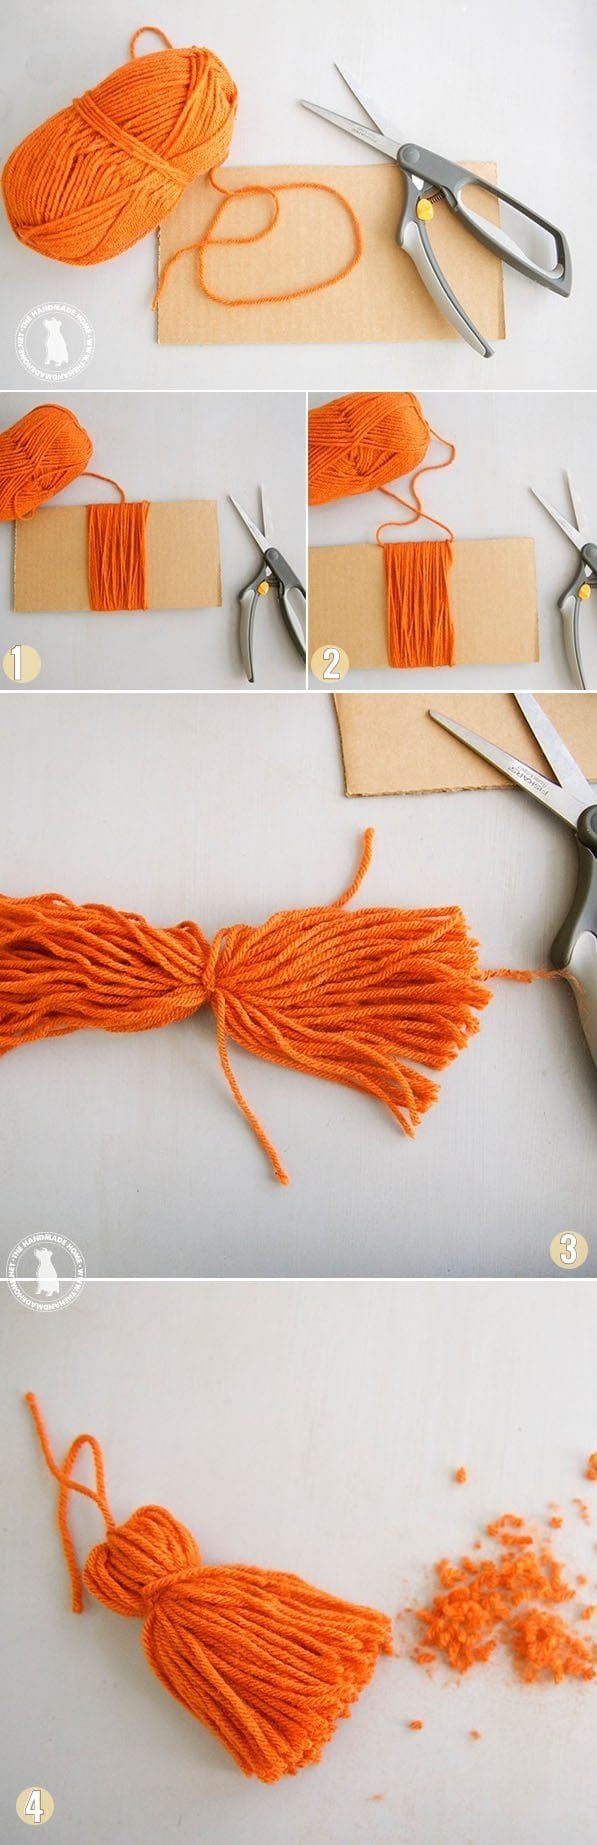
1. First up, grab a piece of cardboard, and wrap your yarn color of choice around it. This particular piece was around 5.5 inches thick, and it made really large tassels. We also had thick yarn, so this made the larger sizes easier to work with. {This step may look familiar, from our pompom tutorial, here… you could always add that to your garland, as well.}
2. Simply wrap it around the cardboard until you’ve reached your satisfactory level of thickness. Remember, it will be both sides combined when you’re finished.
3. Loosely thread one piece through at the top of one side, and lightly tie it to hold it in place with your hand while you cut the bottom portion, all the way across. Tada! This will free your thread, and you’ll have a piece to work with.
4. Go ahead and tighten your knot in the middle, leaving some thread {This is what you will add your tassel to the garland with} and smooth it out. At about 1/4 to 1/3 of the length, tie it together to give it that tassel look. Trim the bottom to even it out.
These make really fun garlands, too!
We had an absolute blast, literally decking the halls.

The best part? Almost everything you see here came from Walmart. And The Waverly Inspirations collection is so affordable, it’s a great way to add major character and fun to your own home. Before those gifts are handed out, you may as well use them for decorations, right?!
The tree is full of memories and a house full of kiddos just glad to be in their new home…
And two pups that are a little confused about what’s going on…

We hope this inspires you to get your wrapping on!
Have an inspired day! And as always, let us know if you try it!


This is absolutely gorgeous. I know you guys are so glad to be in your house and I love how that tree is as it should be decorated by the kids! So warm and pretty.
These are such great ideas. I love your creativity and fun element. And the Waverly products have such great versatility. When I saw the toile, I envisioned fabric baskets trimmed with green for a front porch Christmas welcoming. Thanks for the inspiration.
What a great idea Ashley. Love seeing your personal style shining right through each wrapped box. XO