
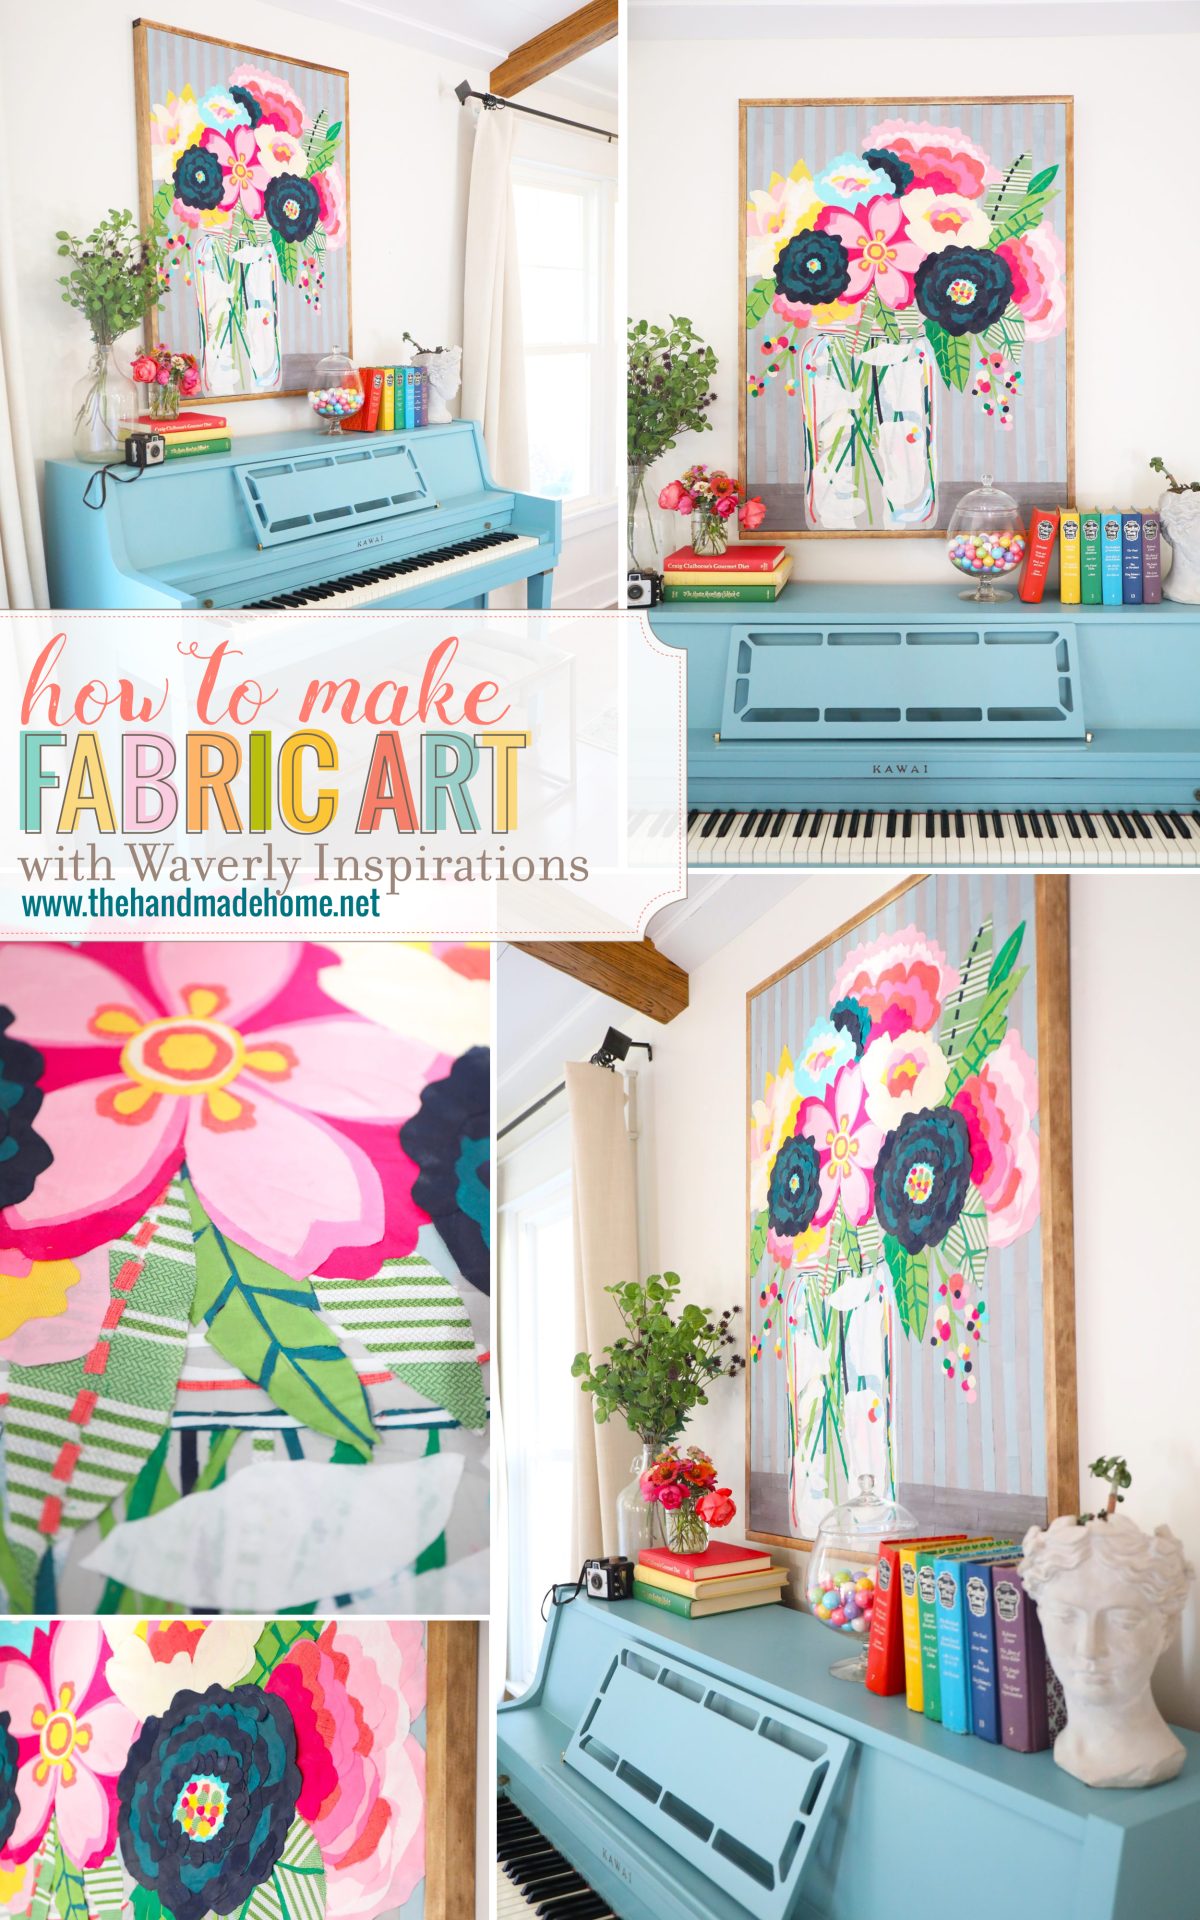
how to make fabric art with waverly fabrics
When Waverly Inspirations Fabric contacted us about working with them to showcase their beautiful fabrics, we couldn’t be more thrilled. We’ve done a lot of sewing projects with them in the past, and we loved creating those. But I really wanted to try my hand at something different. This time around, I loved {as usual} delving into their beautiful, colorful options. So I opted to create some art with it all.
If you guys have been following along for a while, then you know I’m an artist at heart. I love painting. So creating an image from their beautiful, bold fabrics was bit of a twist on what I usually adore. And it was so much fun!
They have such a wide array of colors and options, and they’re all available at Walmart. The possibilities really are endless.
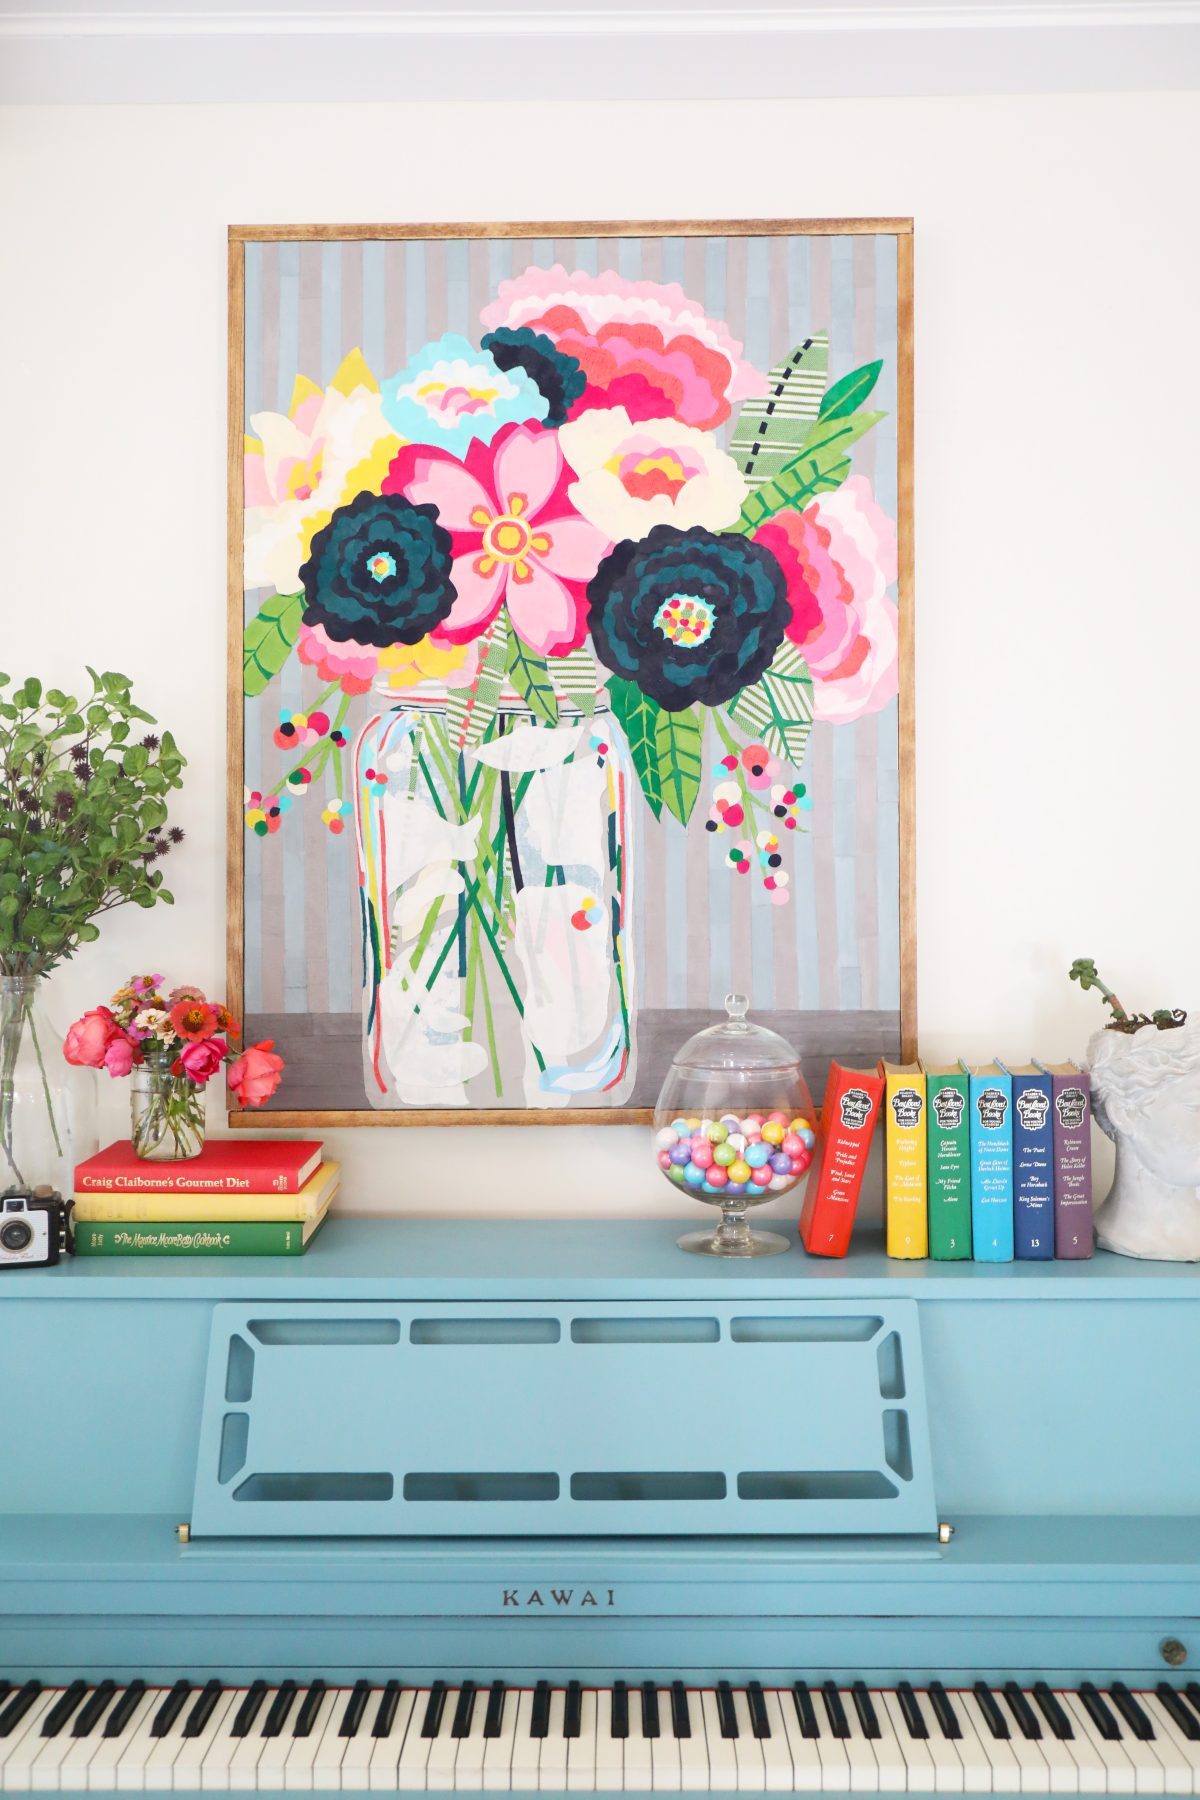
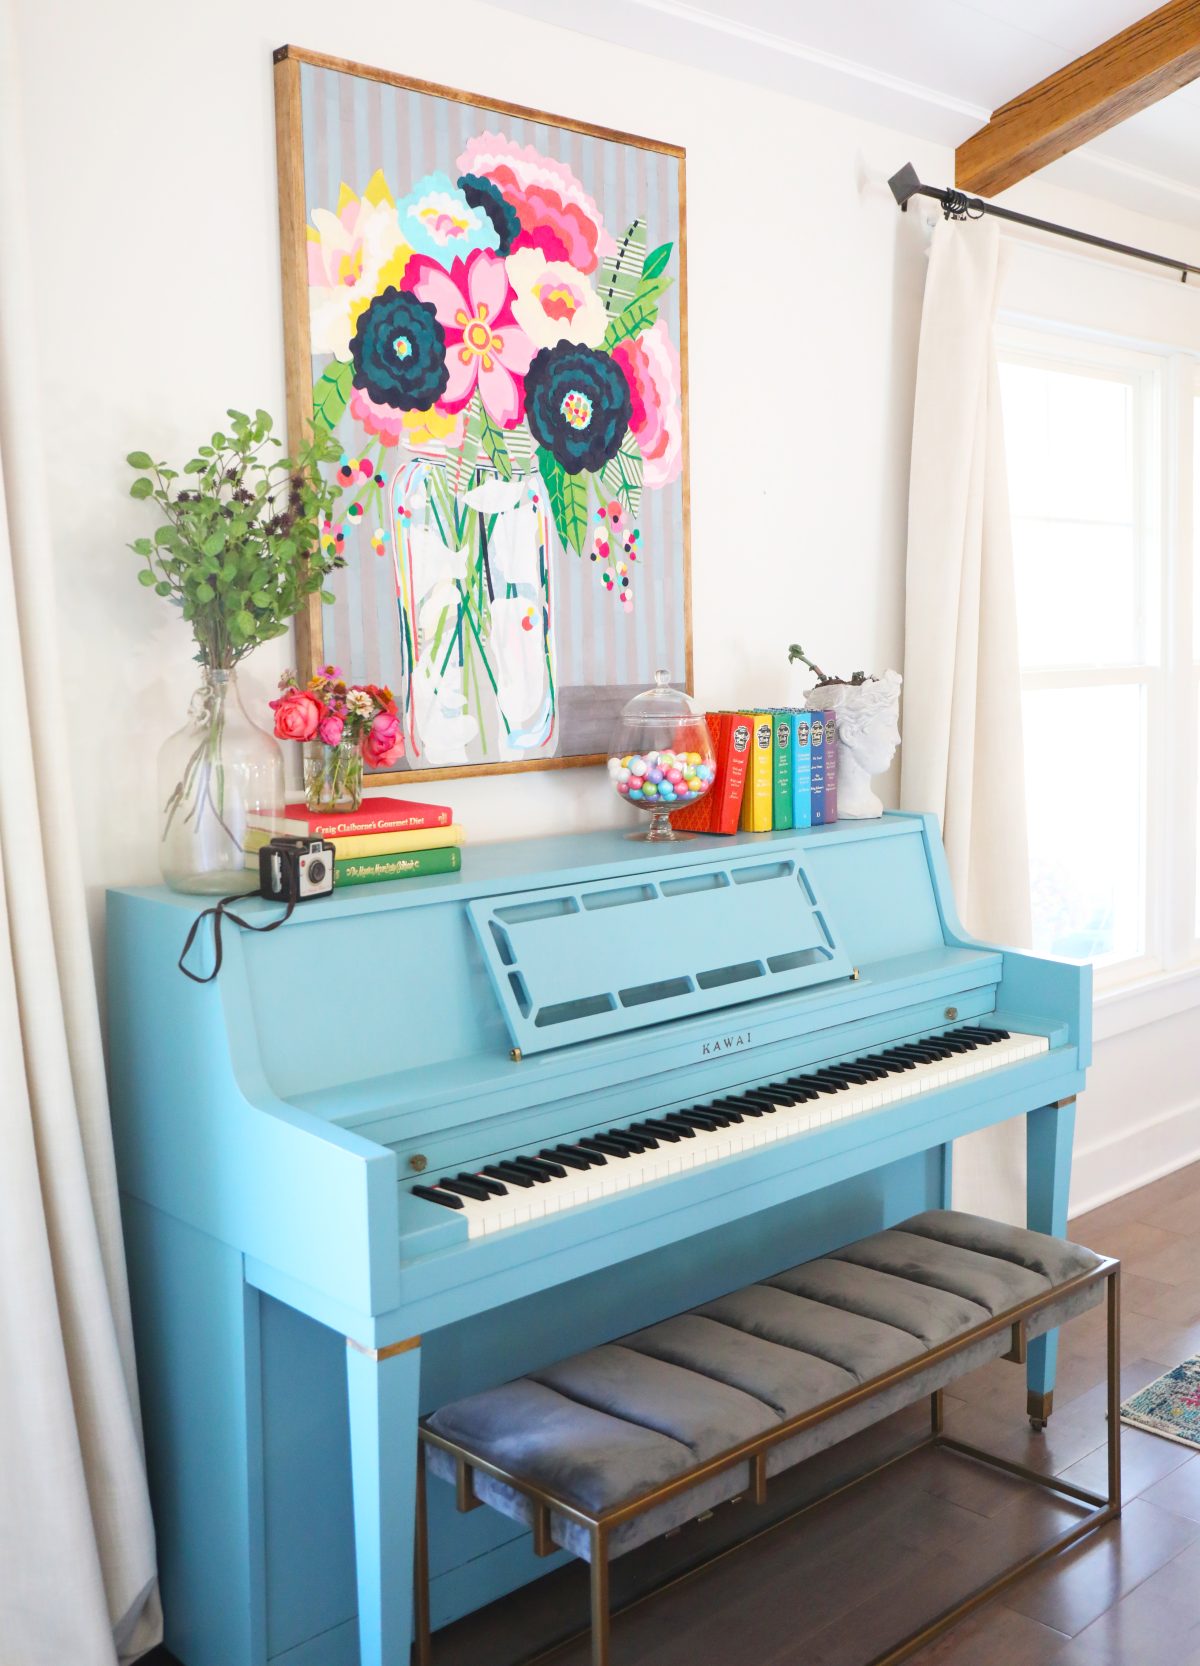
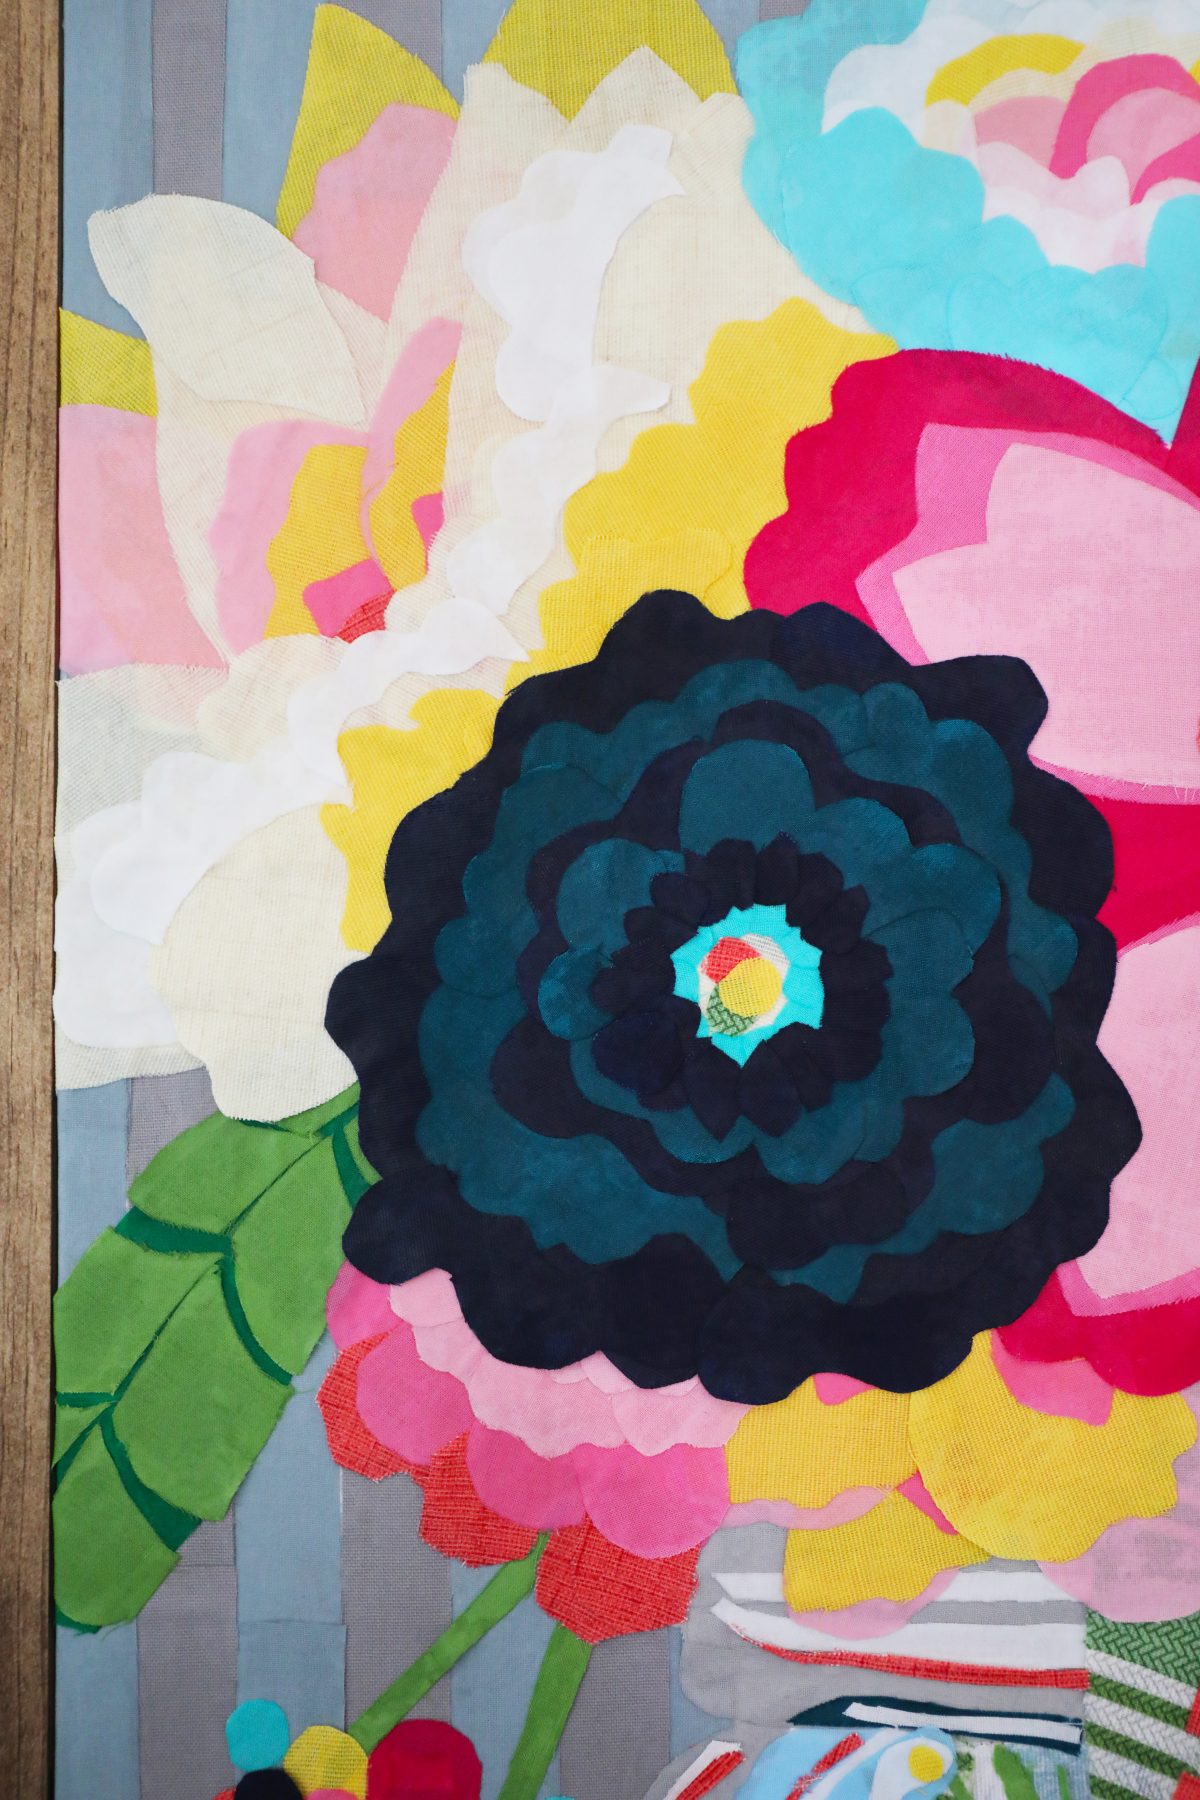
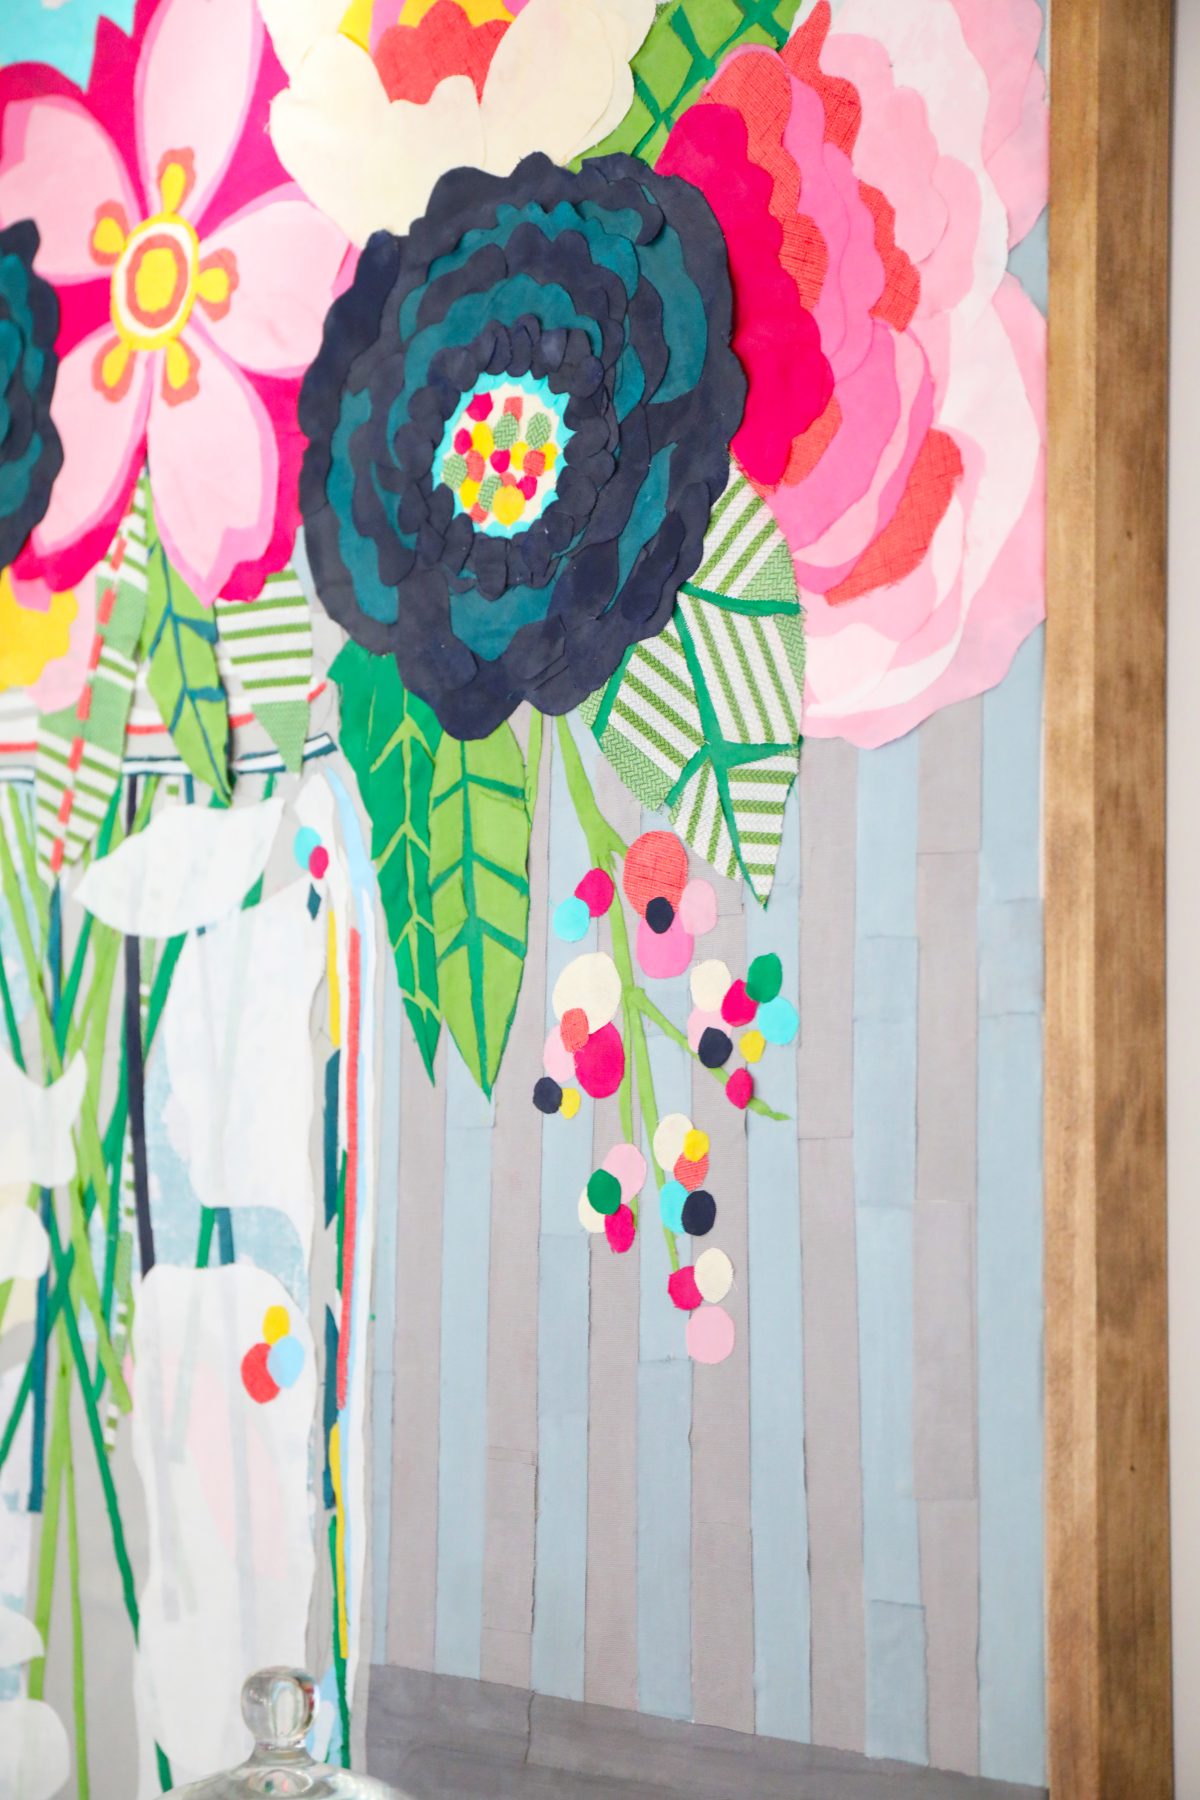
I love the quirky result that came from creating these awesome petals. I love that it has an imperfect, handmade feel since each one was cut by hand, and not by a machine. And I love the styled, final feel that it has, adding to our colorful home!
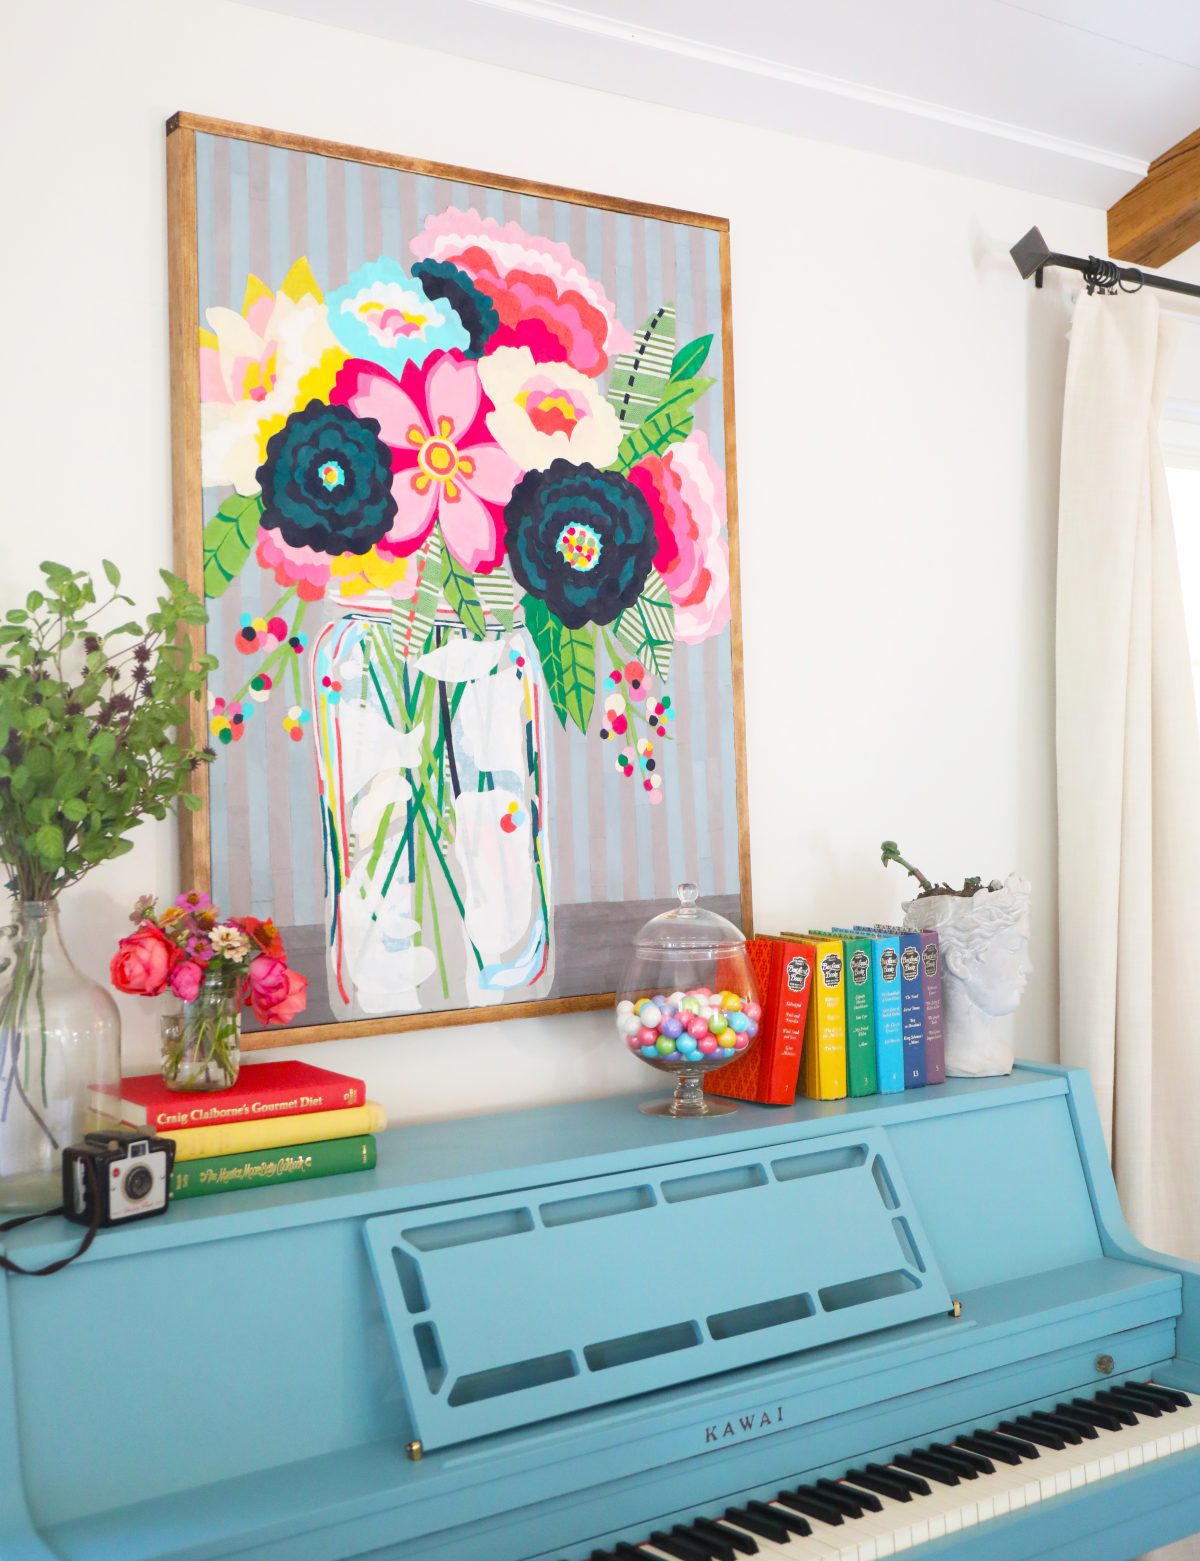
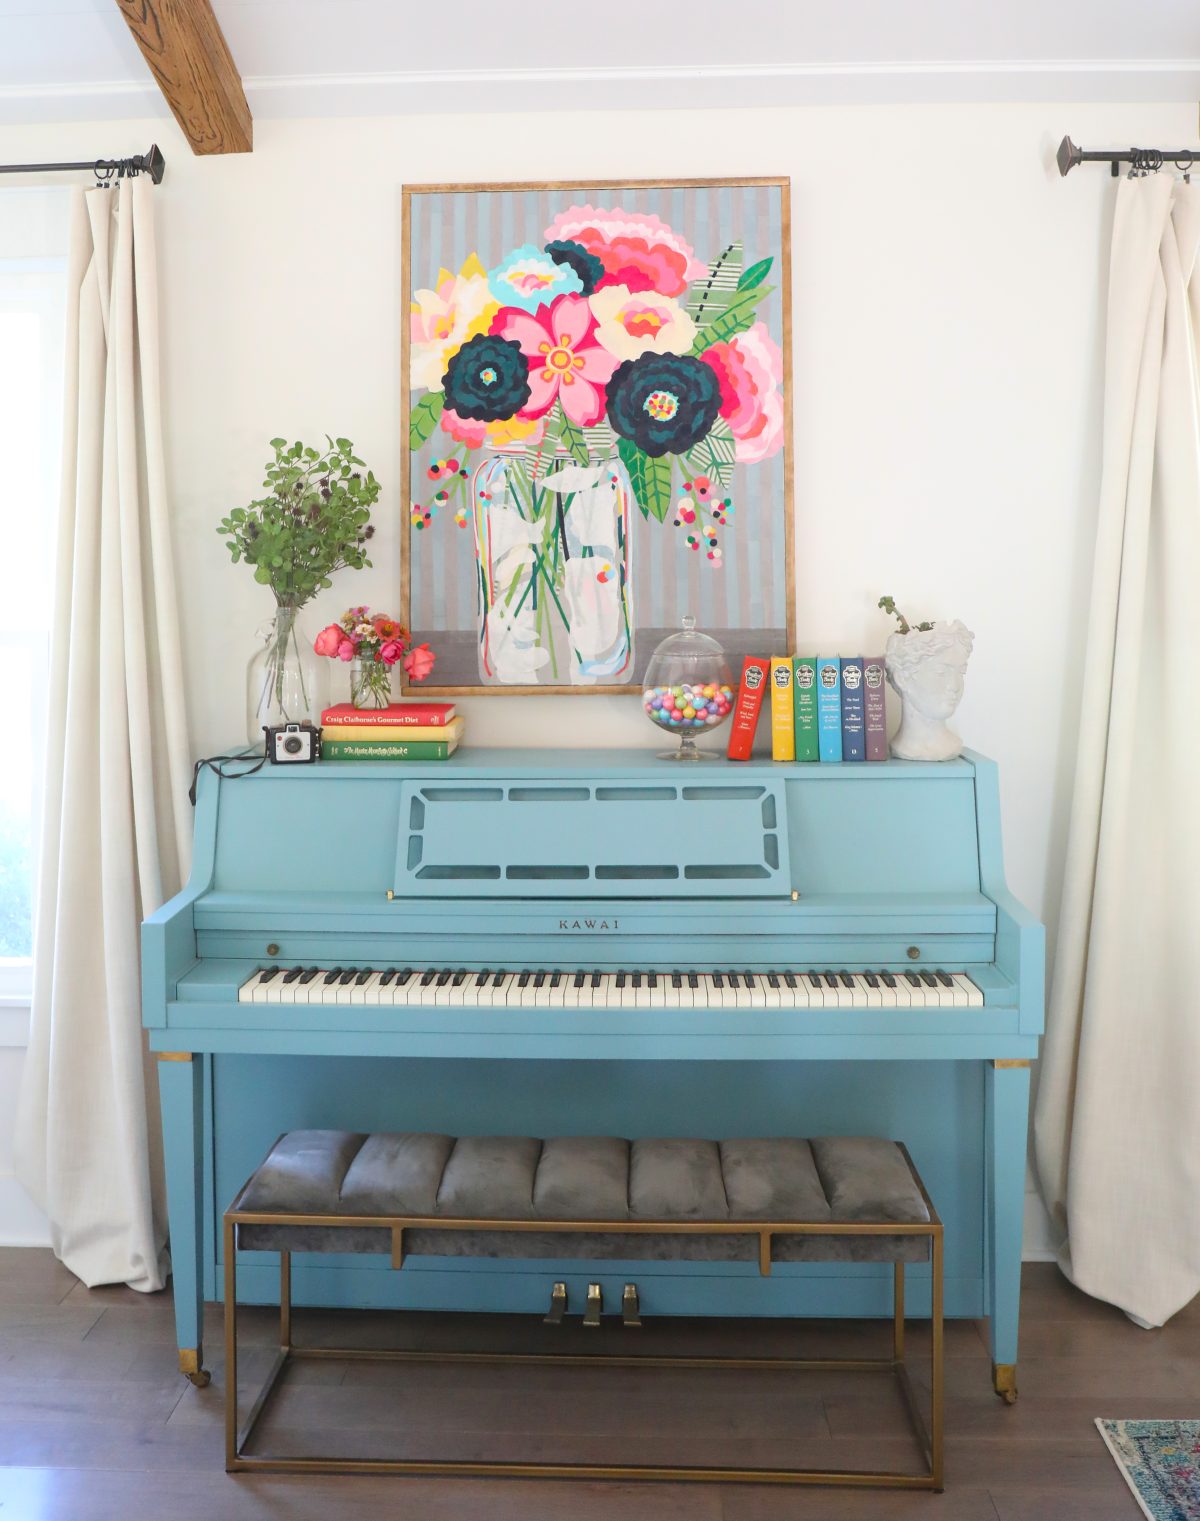
{For the record, my daughter already asked if she can have it.} I don’t know what I’ll get tired of it sitting over the piano like this! She may have to fight me for it.
We love that Waverly Inspirations Fabric comes in such a wide array of pattern + color. We mixed in just a little pattern, with a ton of their beautiful solids, in various way to create this fun art!

Want to create some of your own fabric art? Here’s what you’ll need.
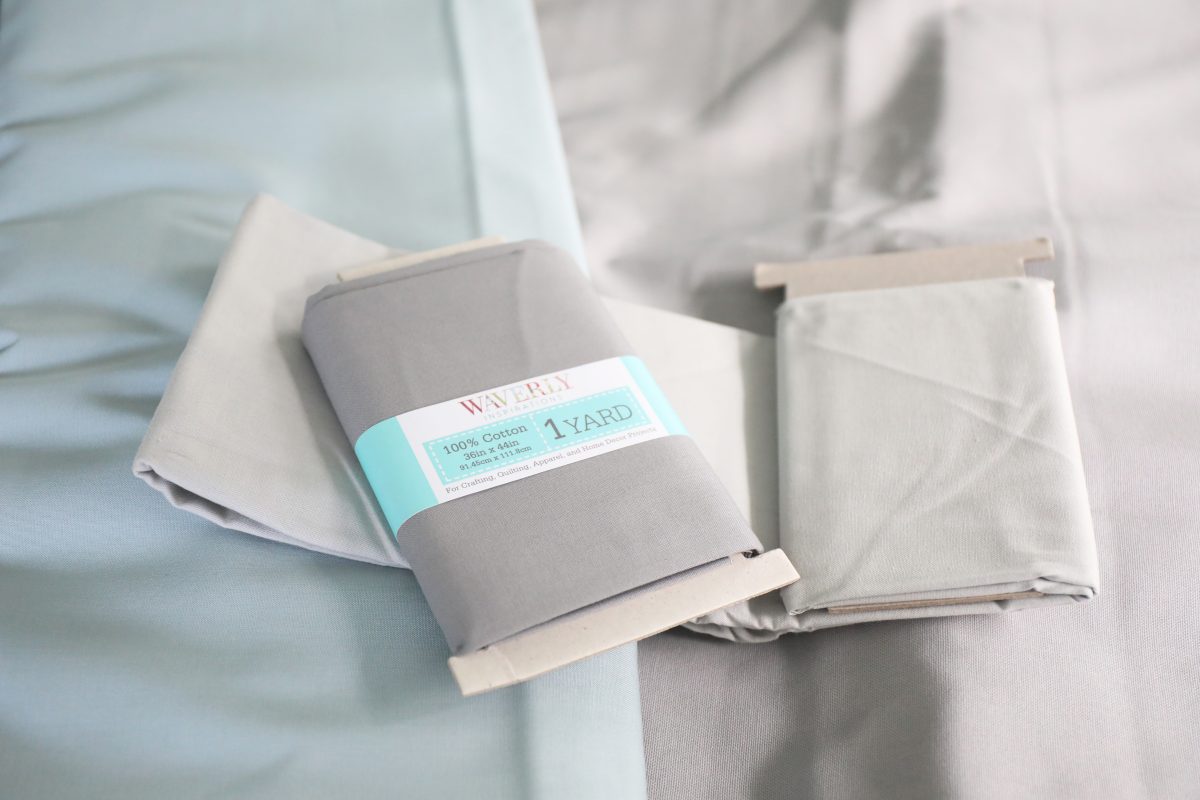
• Waverly Inspirations Fabric – available at Walmart!
• Canvas of any size
• Pencil +tracing paper
• Ruler
• self-healing mat
• paint brushes – I used a wide + smaller brush to handle both large and small applications
• a cup of water + paper towels
• X-Acto blade + a good pair of scissors
• Mod Podge
• to frame your art when it’s finished, be sure to check out our linked tutorial below.
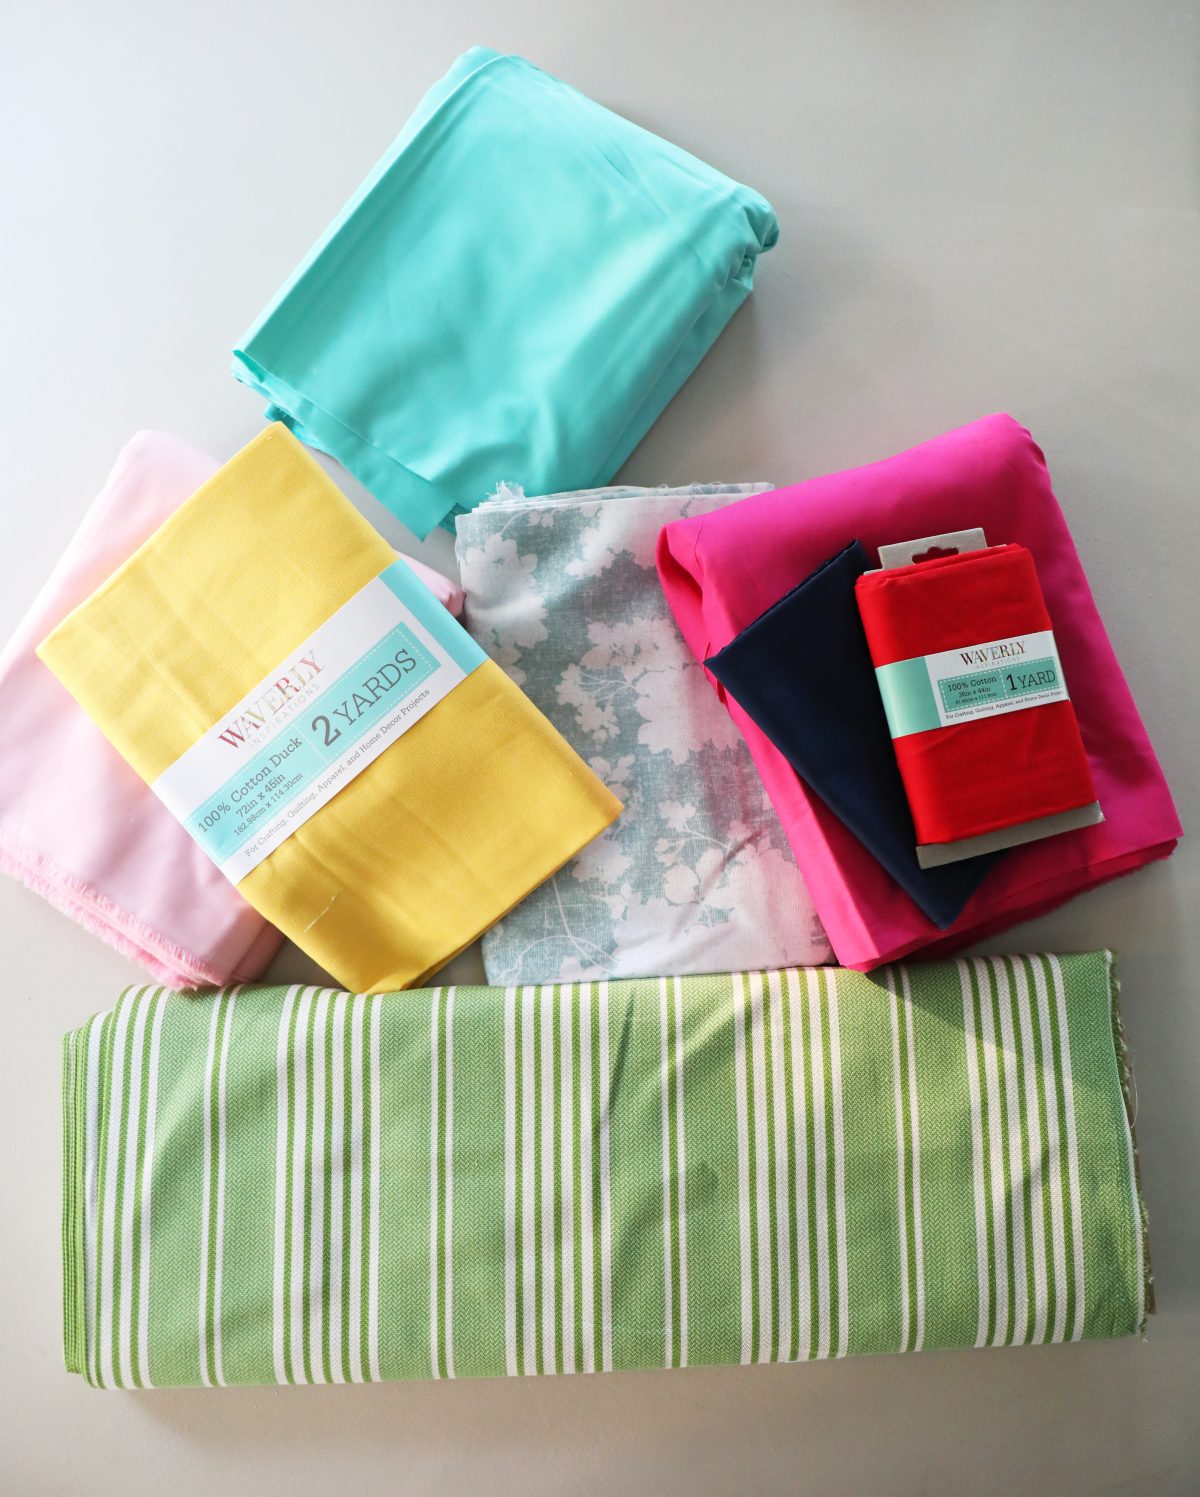
I had a few more shades, and probably over-prepared for this art, since I’d never taken it on before. You could probably get away with a few rolls of it, and then lots of the smaller packages that they sell in the 2 yard and 1 yard quantities, depending on the size of your art if you need diverse shading. For the record, I’m not sad about over-preparing, since I already have another project up my sleeve for all things Christmas!
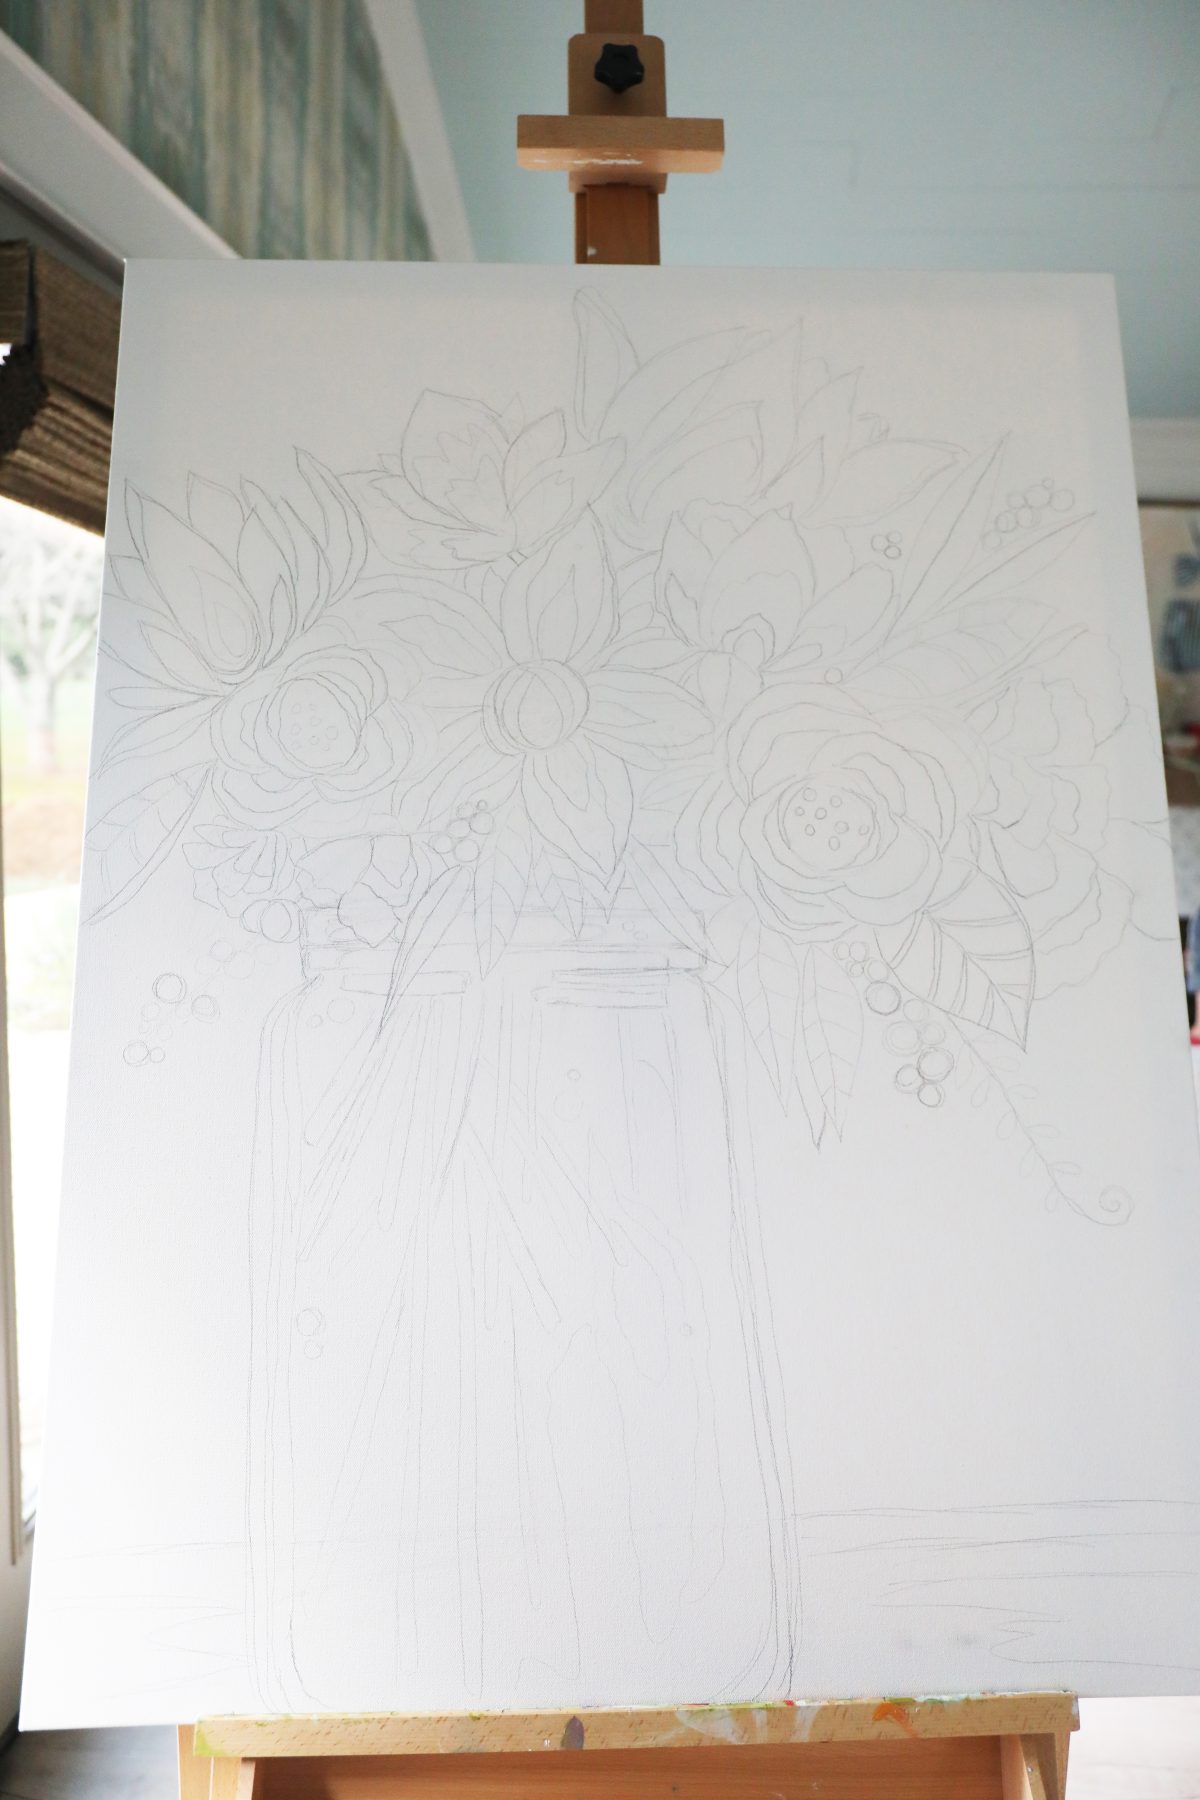
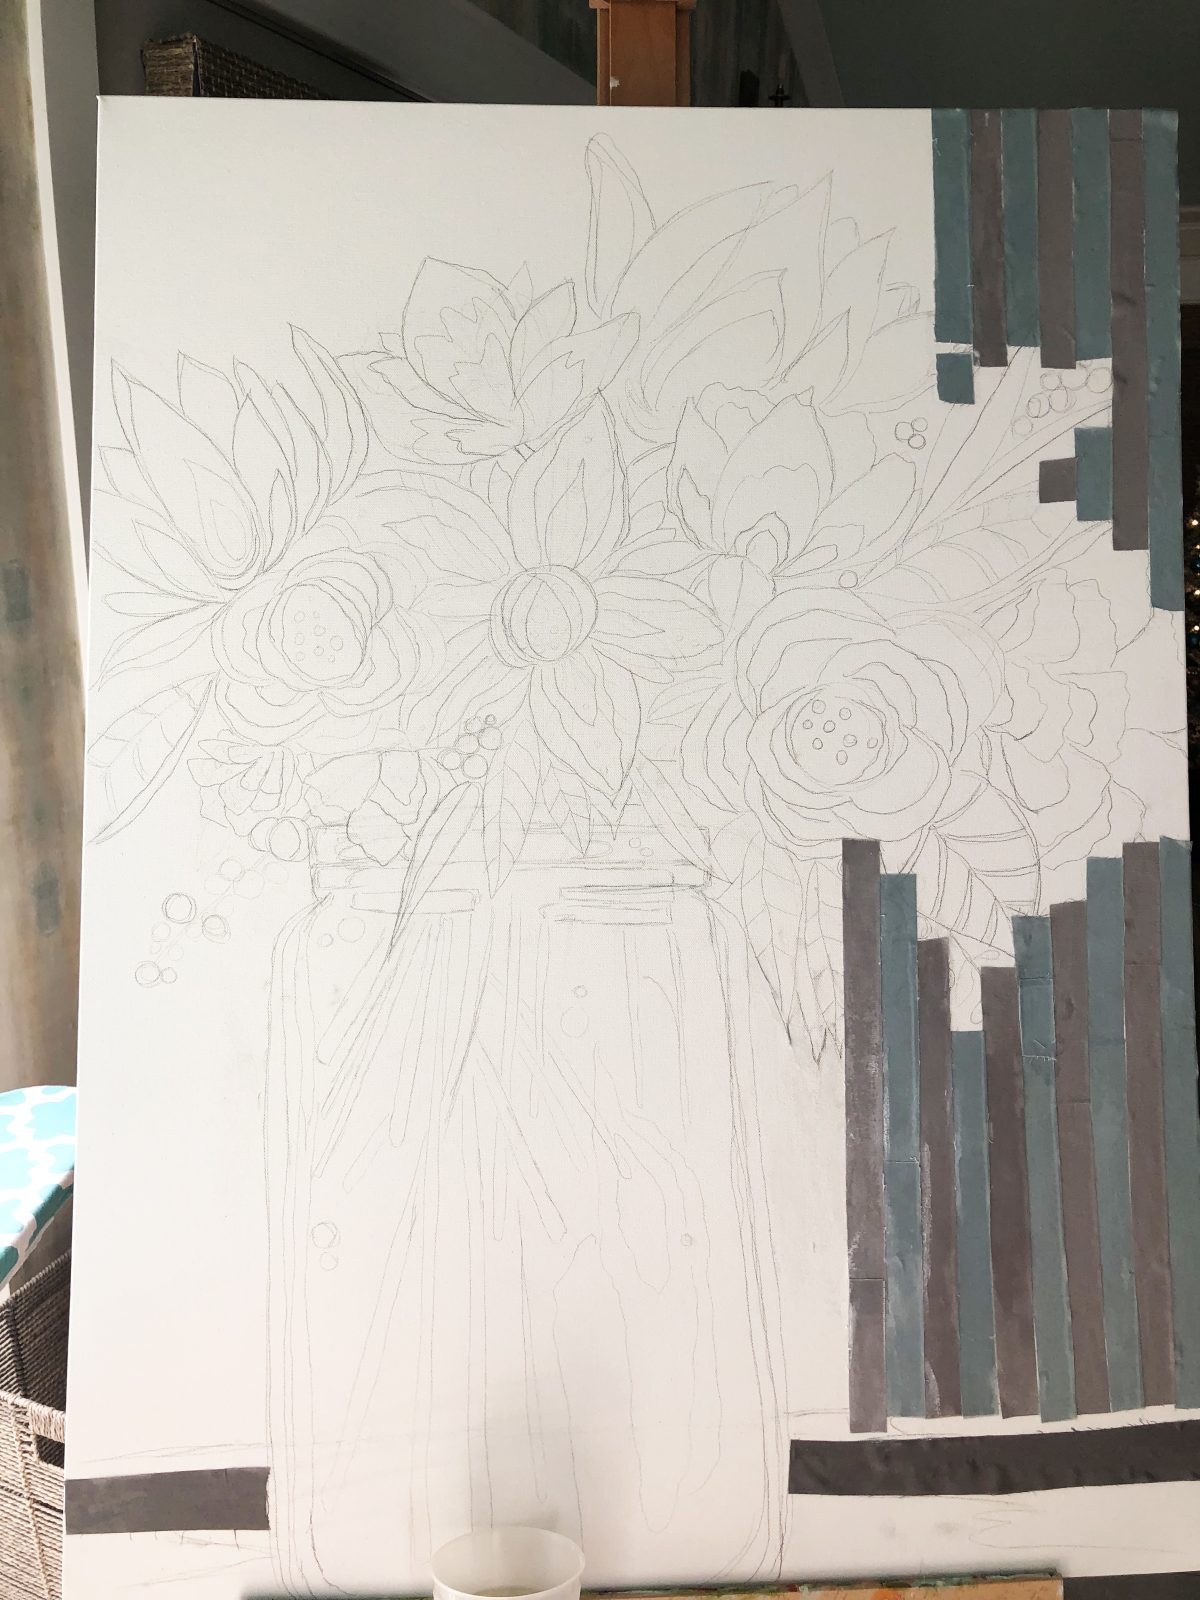
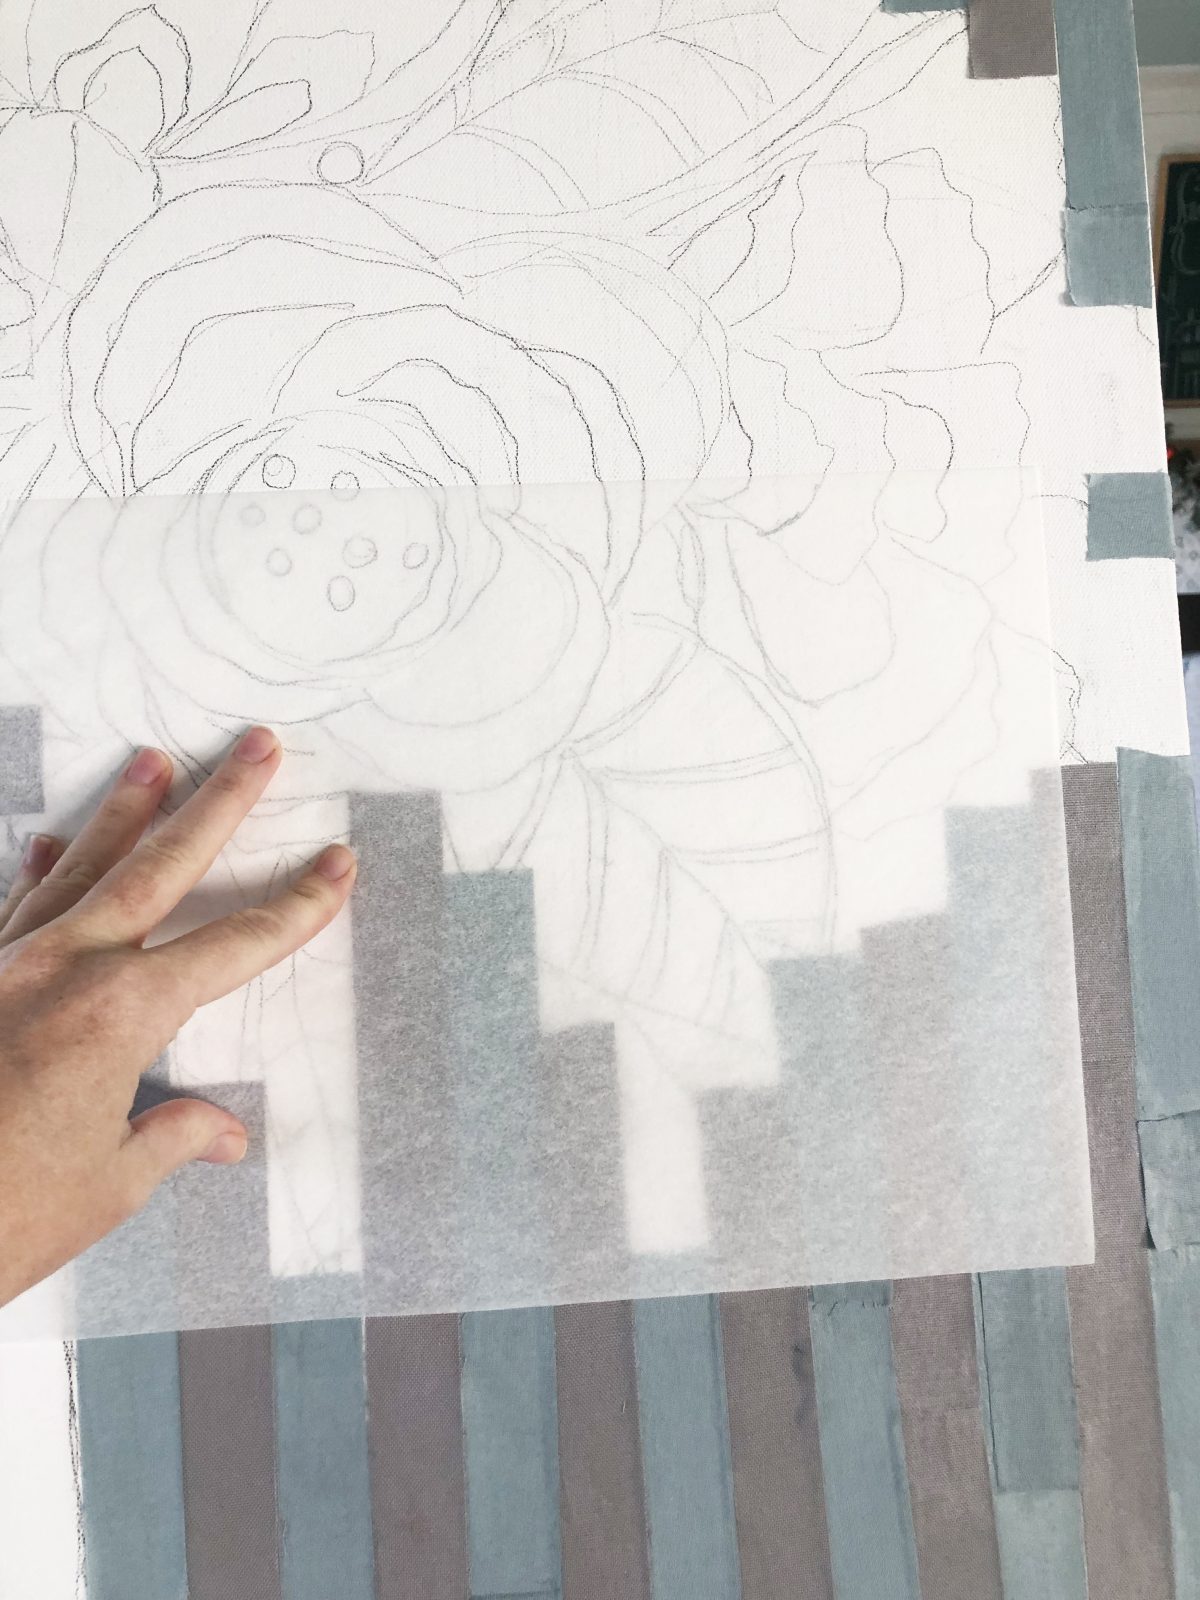
1. How to Make Fabric Art with Waverly Fabrics: Establish Your Design on the Canvas
With paintings, you can be a little flexible once you’ve got the basic idea for the over all design.
This approach, however, is a little bit of a “paint by number application” but with fabric, so be mindful of how that will work. You can see where I diverged from the art a little bit in the finished product but if I did, it wasn’t far. It helps to have a guide when cutting out pieces of fabric since it’s more of a precise process. So decide on your design first and foremost, and work from there, to keep the project manageable.
Side note: If you’re brand new to pieces like this, and aren’t accustomed to paintings, I would also like to add a little side bar of start small for practice. Maybe even a series of multiple small pieces. It may help to get acquainted with the materials if you start smaller to have more control over the process.
2. How to Make Fabric Art with Waverly Fabrics: Work Back to Front.
That sounds easier than it actually is. With painting, I’m accustomed to jumping around the canvas as I deem fit. But It was actually helpful to work from the background to the foreground, because that meant less repositioning of shapes as I went. That didn’t mean it was totally avoidable {cue me, ripping up and repositioning anyway} but it helps to have a solid plan before moving forward on the order to do things.
• Waverly Inspirations has plenty of beautiful striped patterns to choose from. But I knew I wanted a subdued background with these stripes, to establish a nice backdrop in my art. There was also something fun about hand cutting and layering each one, that helped establish the feel of the piece.
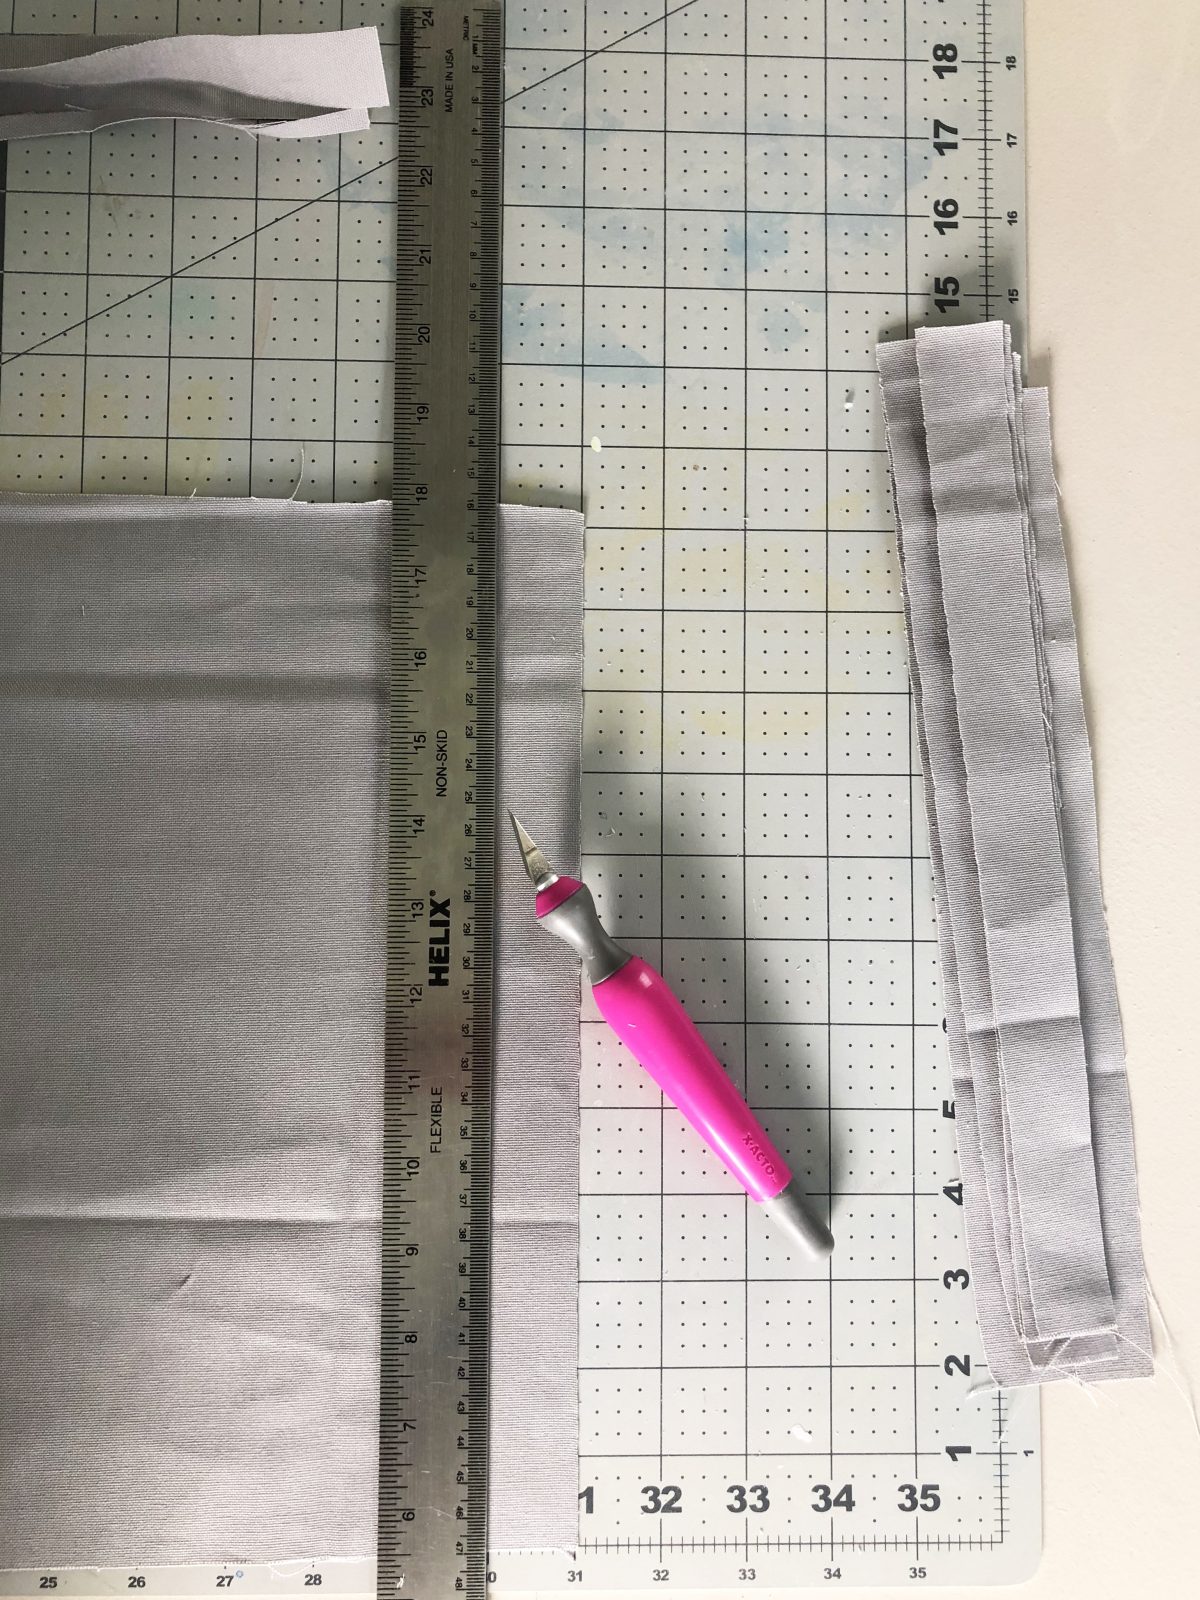
• This is where the self healing mat comes in handy, because it helps keep lines straight when cutting. While I did a lot of the petals with the pair of scissors I had, I did a lot of the straight line cuts with a simple ruler + X-Acto combo as I went, too.
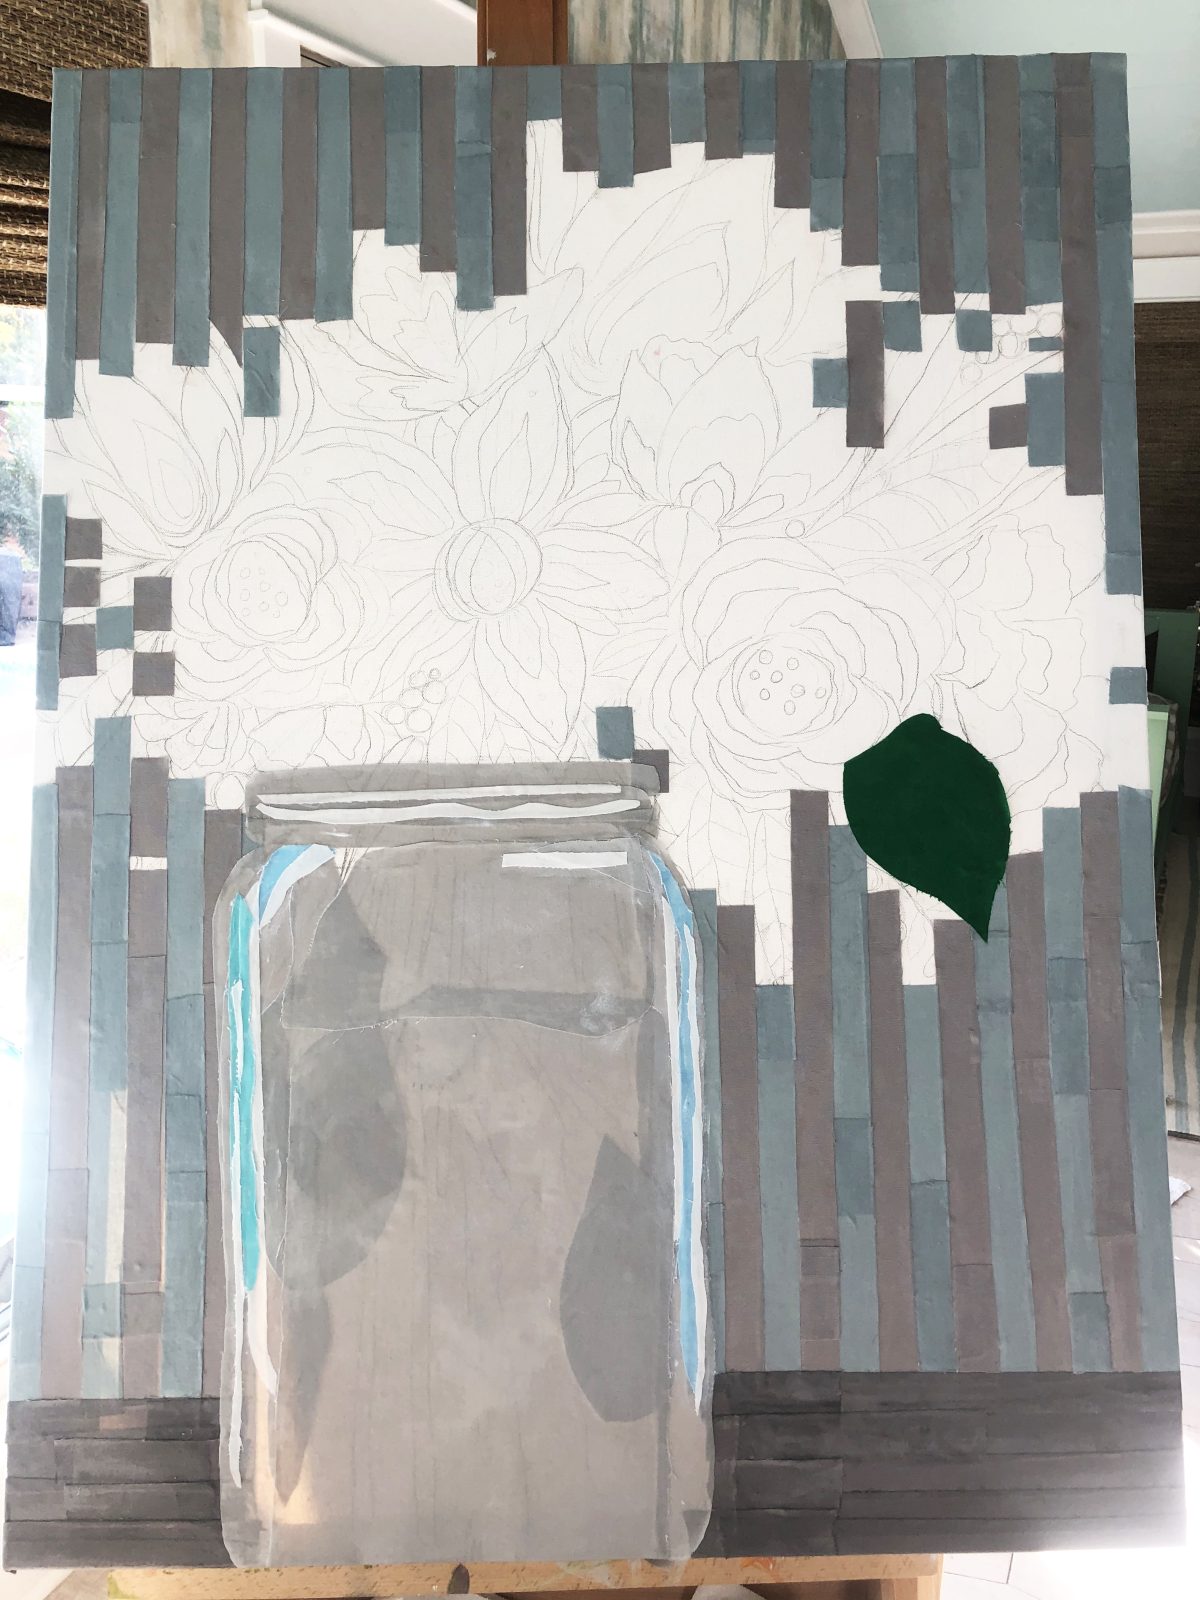
Filling it in as I went, I established the background + bottom part of the piece. When those were done {mostly – I definitely went back for touch ups + gaps} I was ready to add the next big piece of the puzzle… which was this big vase/jar that the flowers were sitting in.
Remember, it doesn’t have to be perfect. In fact, I think there’s something really fun about the blatant imperfection of it all.
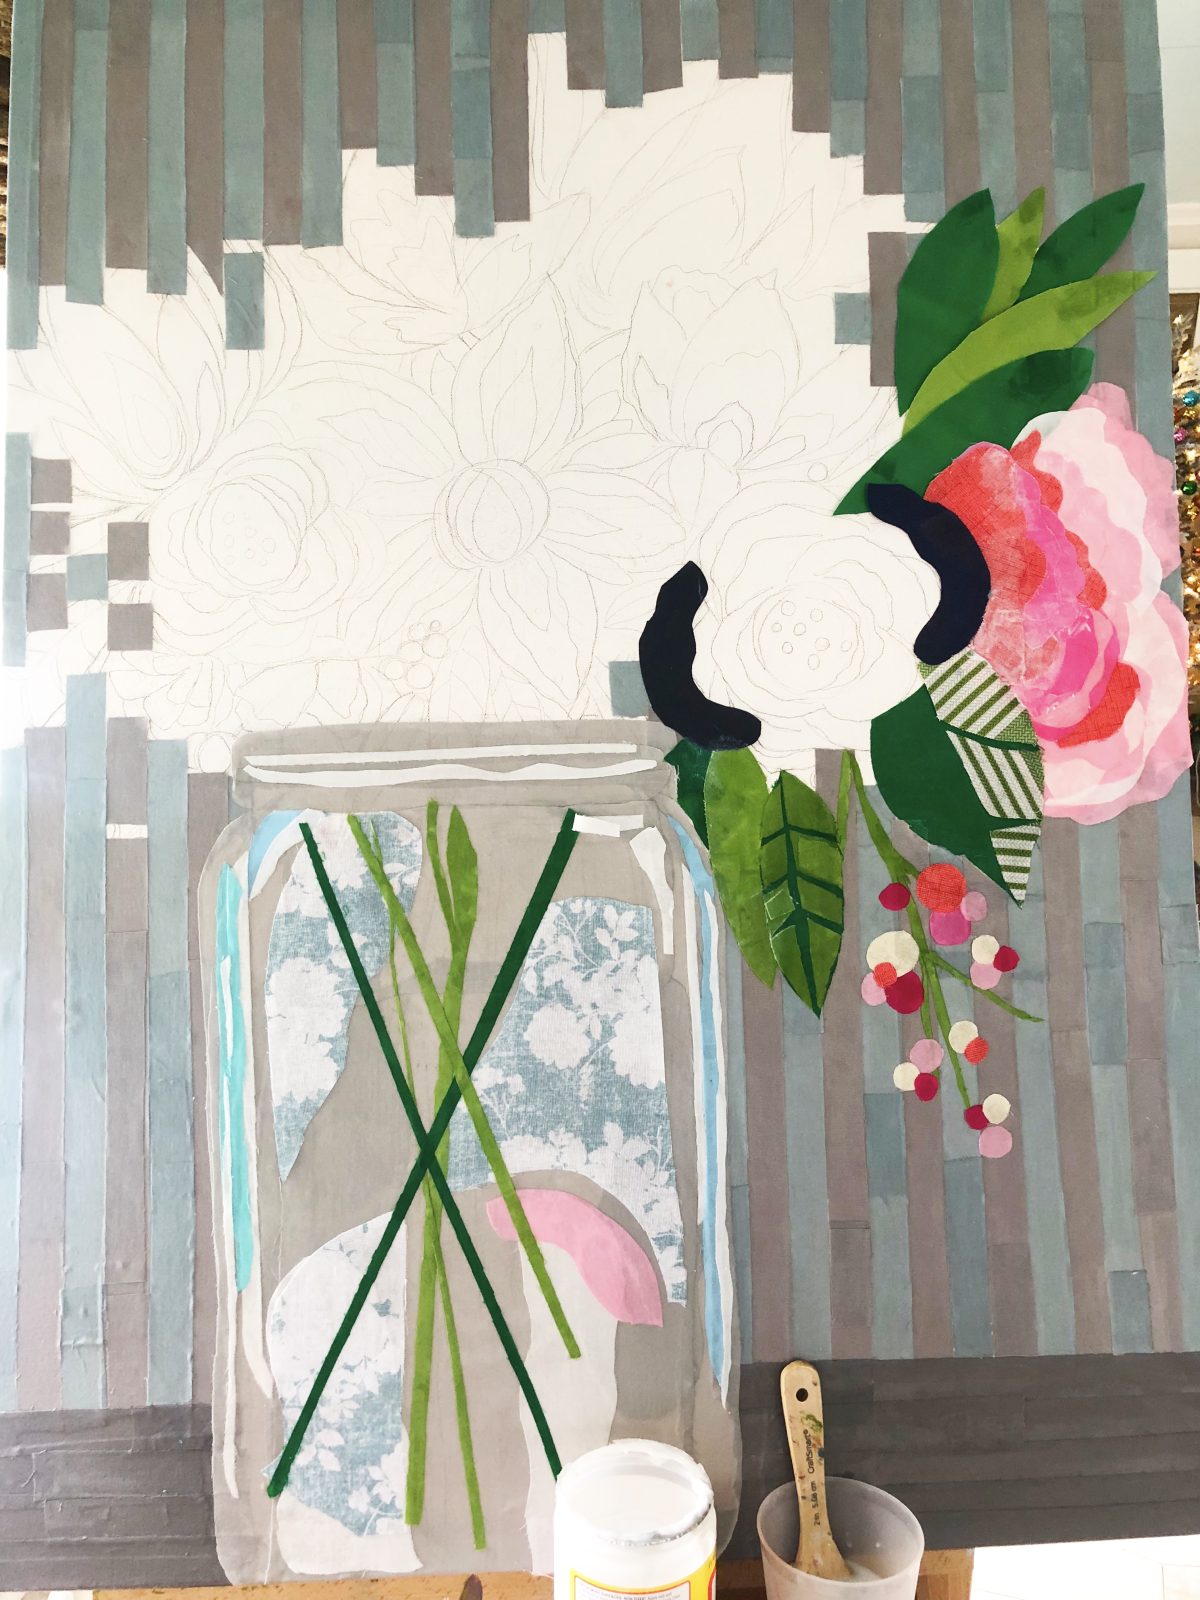
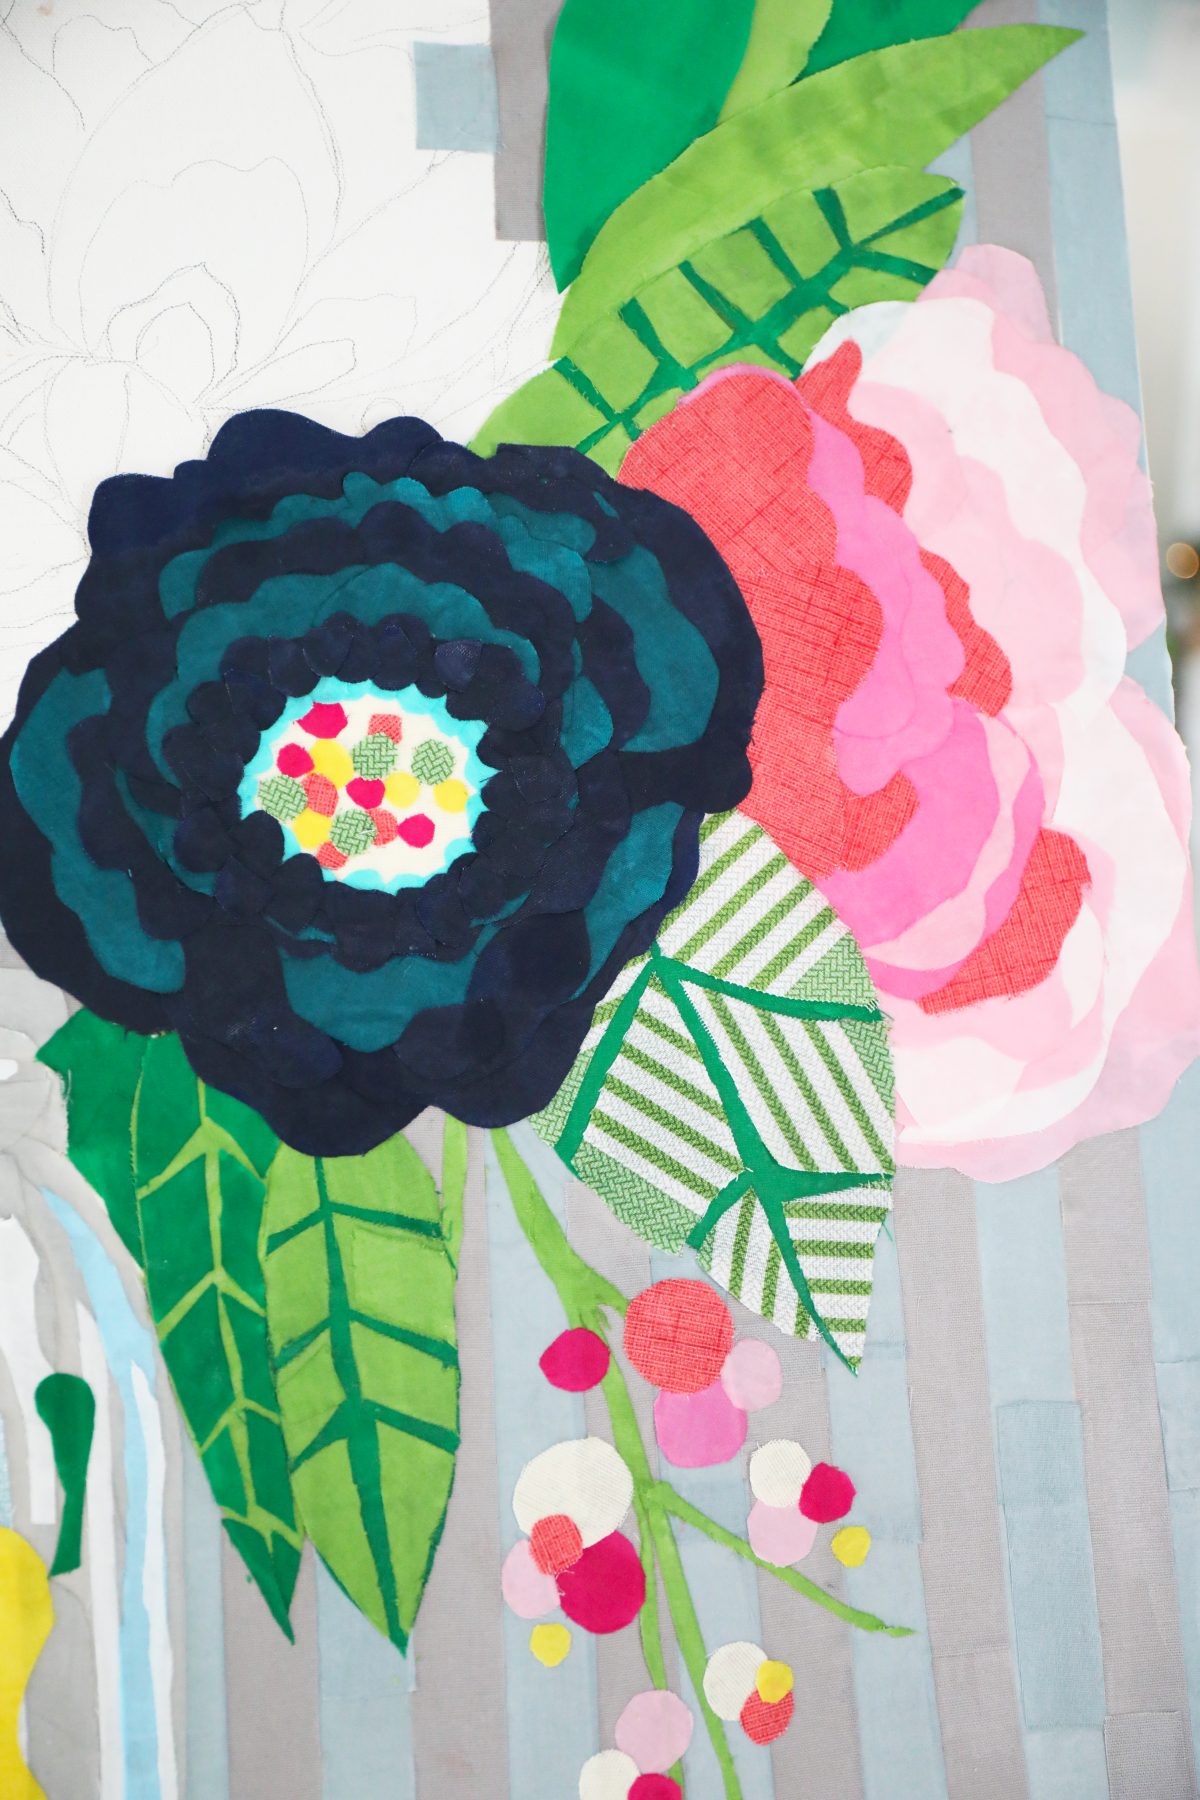
3. How to Make Fabric Art with Waverly Fabrics: Work in Layers
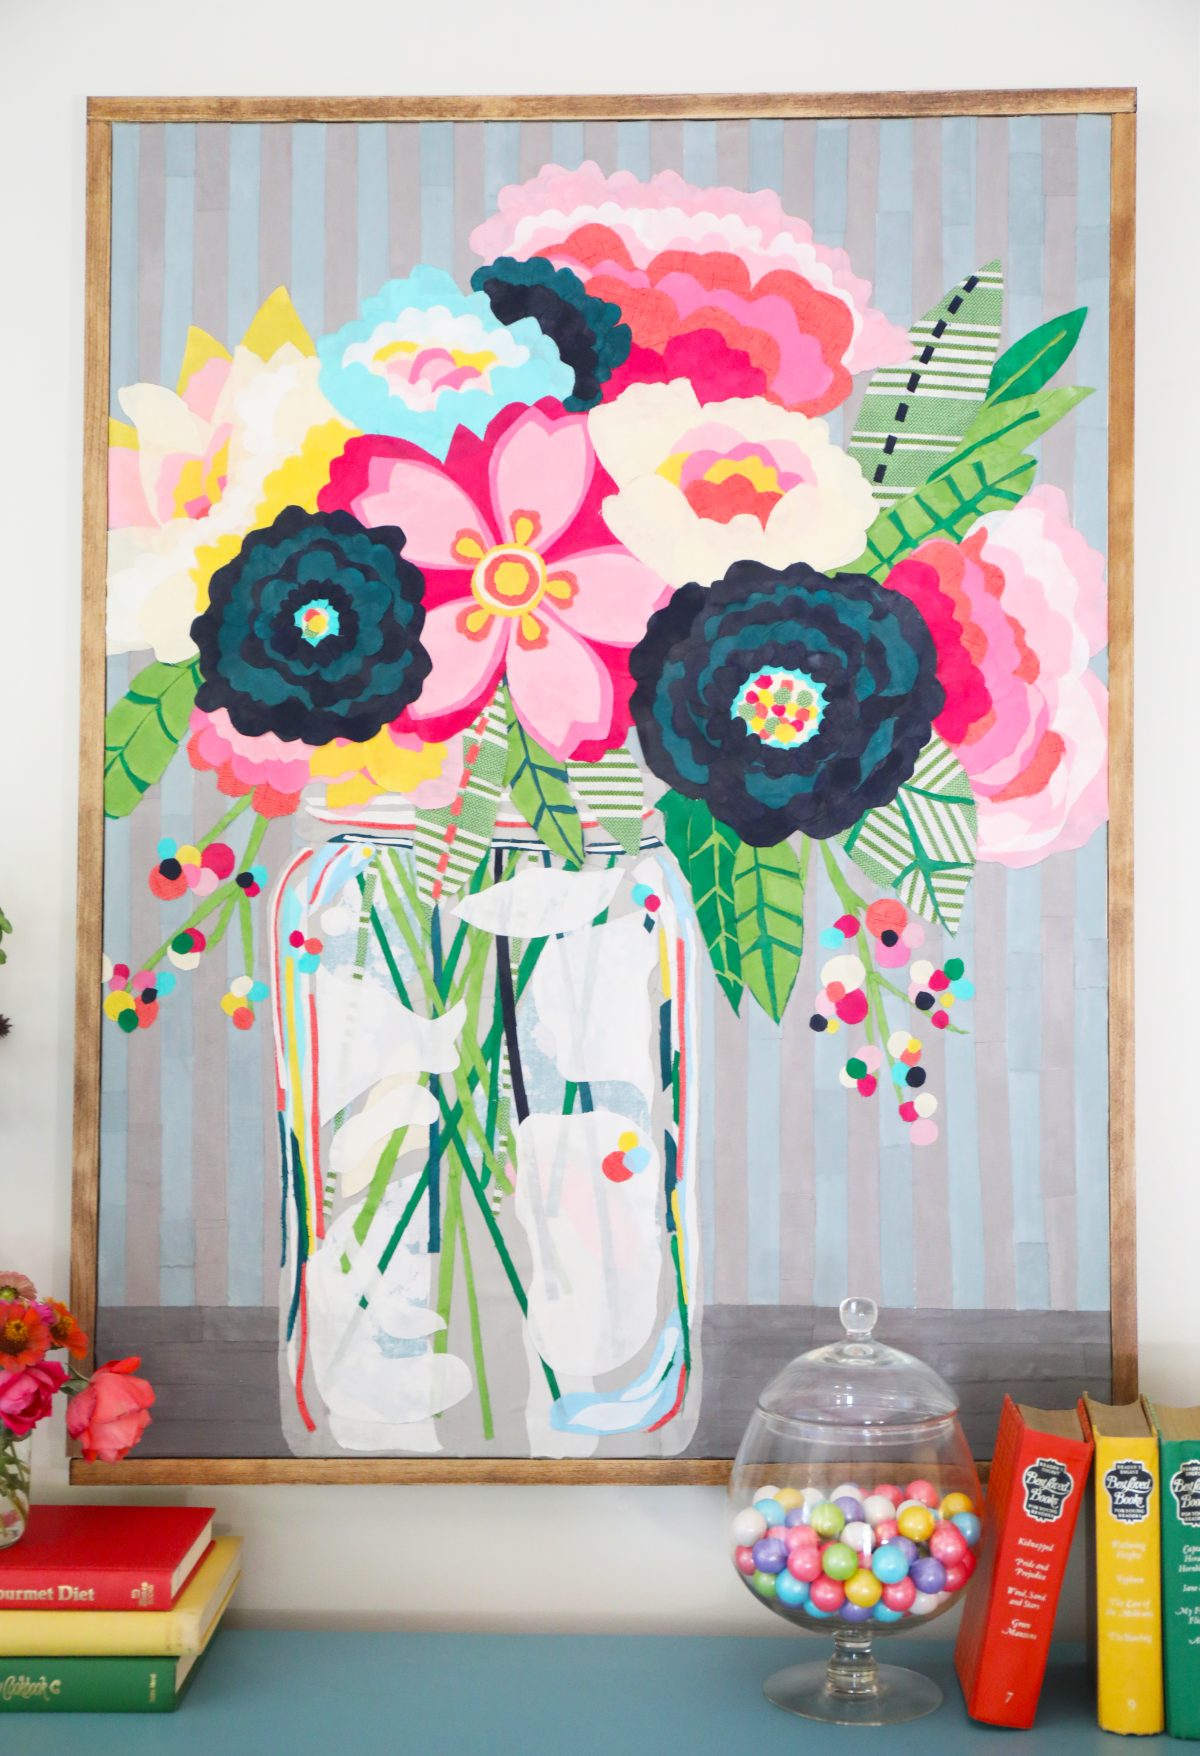
To give it that quirky-intentional feel, the main point of all this is layers. It helped to think of each surface as having a different feel to it, based on the material it’s made of, in real life.
For instance, the surface that the jar is sitting on, can have a flat quality to it, made of horizontal lines in a darker tone. The jar itself will have more layers, because not only is it holding stems, but there’s a quality to glass that is reflective and multi-dimensional. The flowers themselves will definitely have layers of their own, because here they are a prime example of something that is literally composed of such. It helps to be diverse with the fabrics and generous in working with them when composing a fun little piece of art.
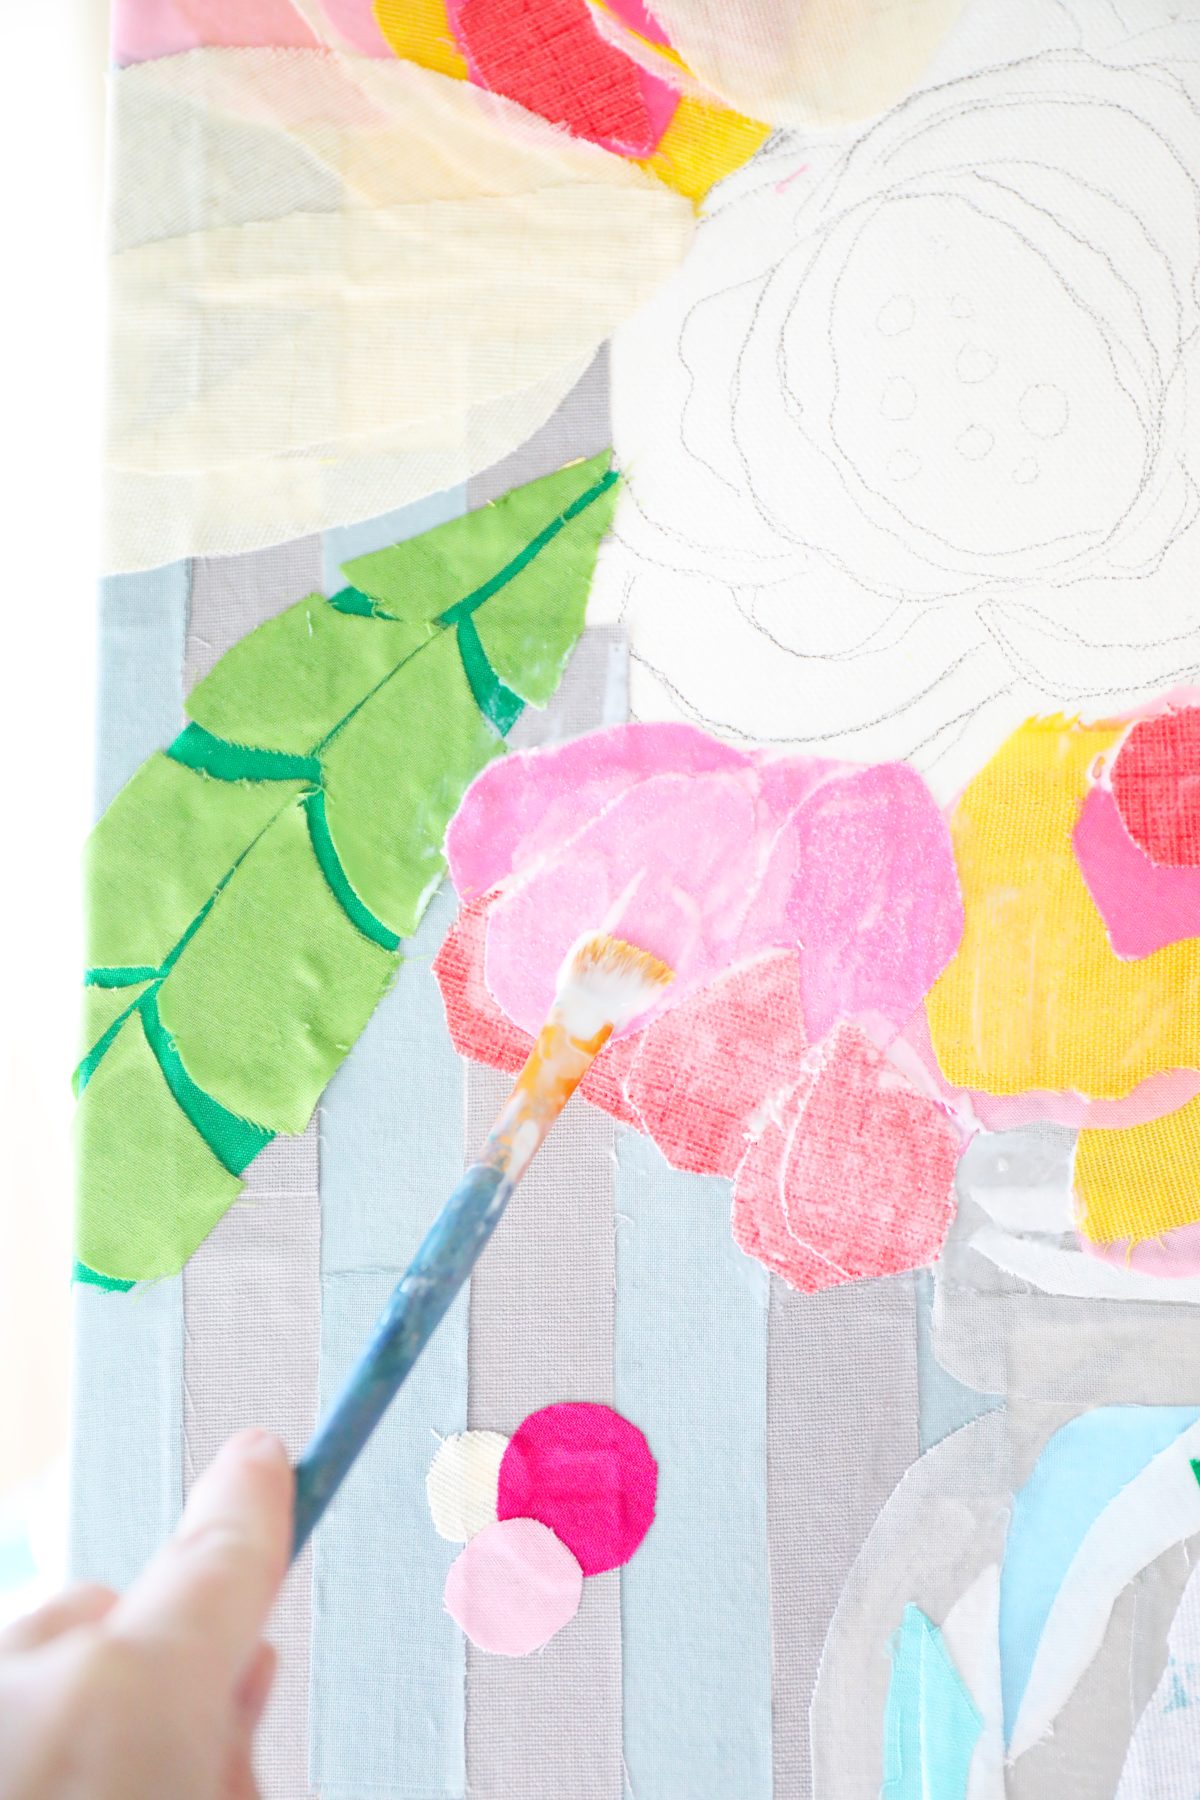
re: placing the layers: make sure that you work with both water and Mod Podge together, as it it helps to smooth any wrinkles in the fabric, and hold it in place, whilst applying the glue. And it doesn’t have to be a perfectly smooth fit… you can definitely see in some places where the fabric was thicker or too layered to lay completely flat. Again, I think this lends more to the charm of it all.
4. How to Make Fabric Art with Waverly Fabrics: Tracing Paper is your Friend
Once the simple backdrop was established, it could be easy to fight with the fabrics until they fit.
A nice shortcut to that, is placing a piece of tracing paper over the established drawing, and tracing it again. Then place it on your self-healing mat + fabric of choice, and cut. From there, you’ll have a precise fit while you continue to {mostly} work from back to front.
Here’s a step by step example of how I actually worked with the tracing paper.
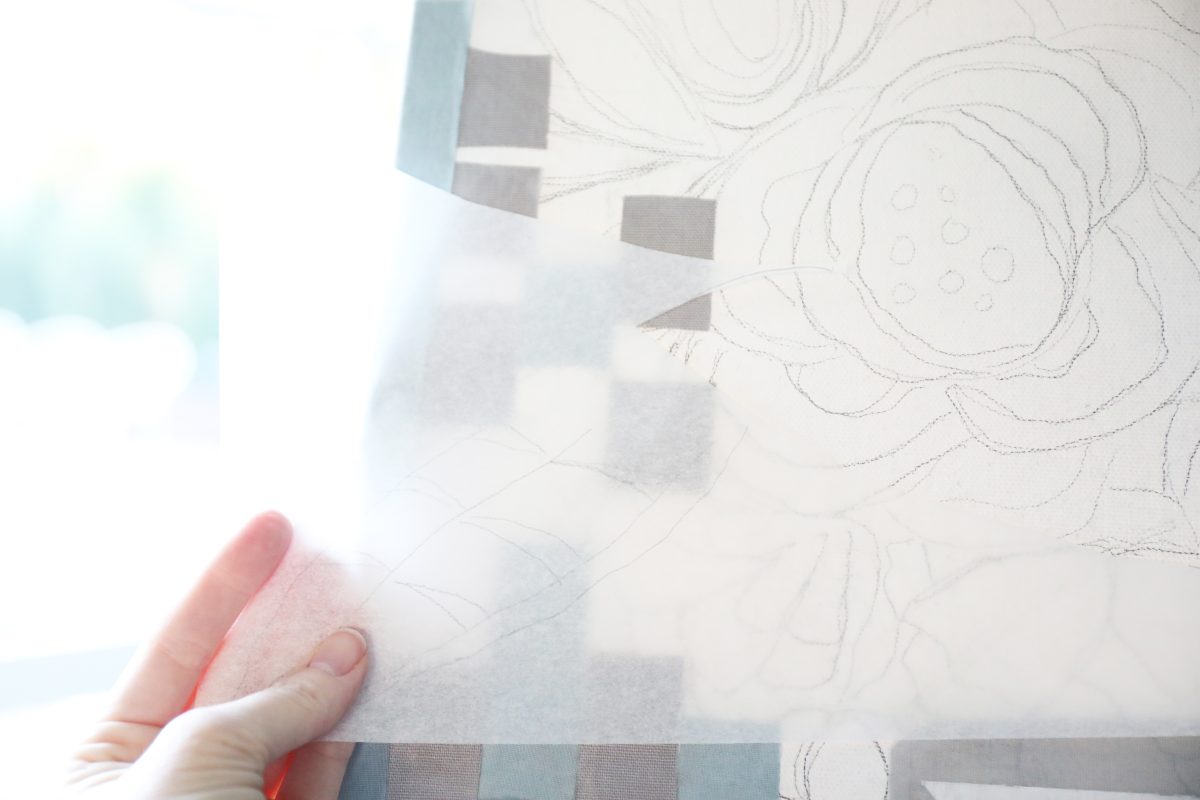
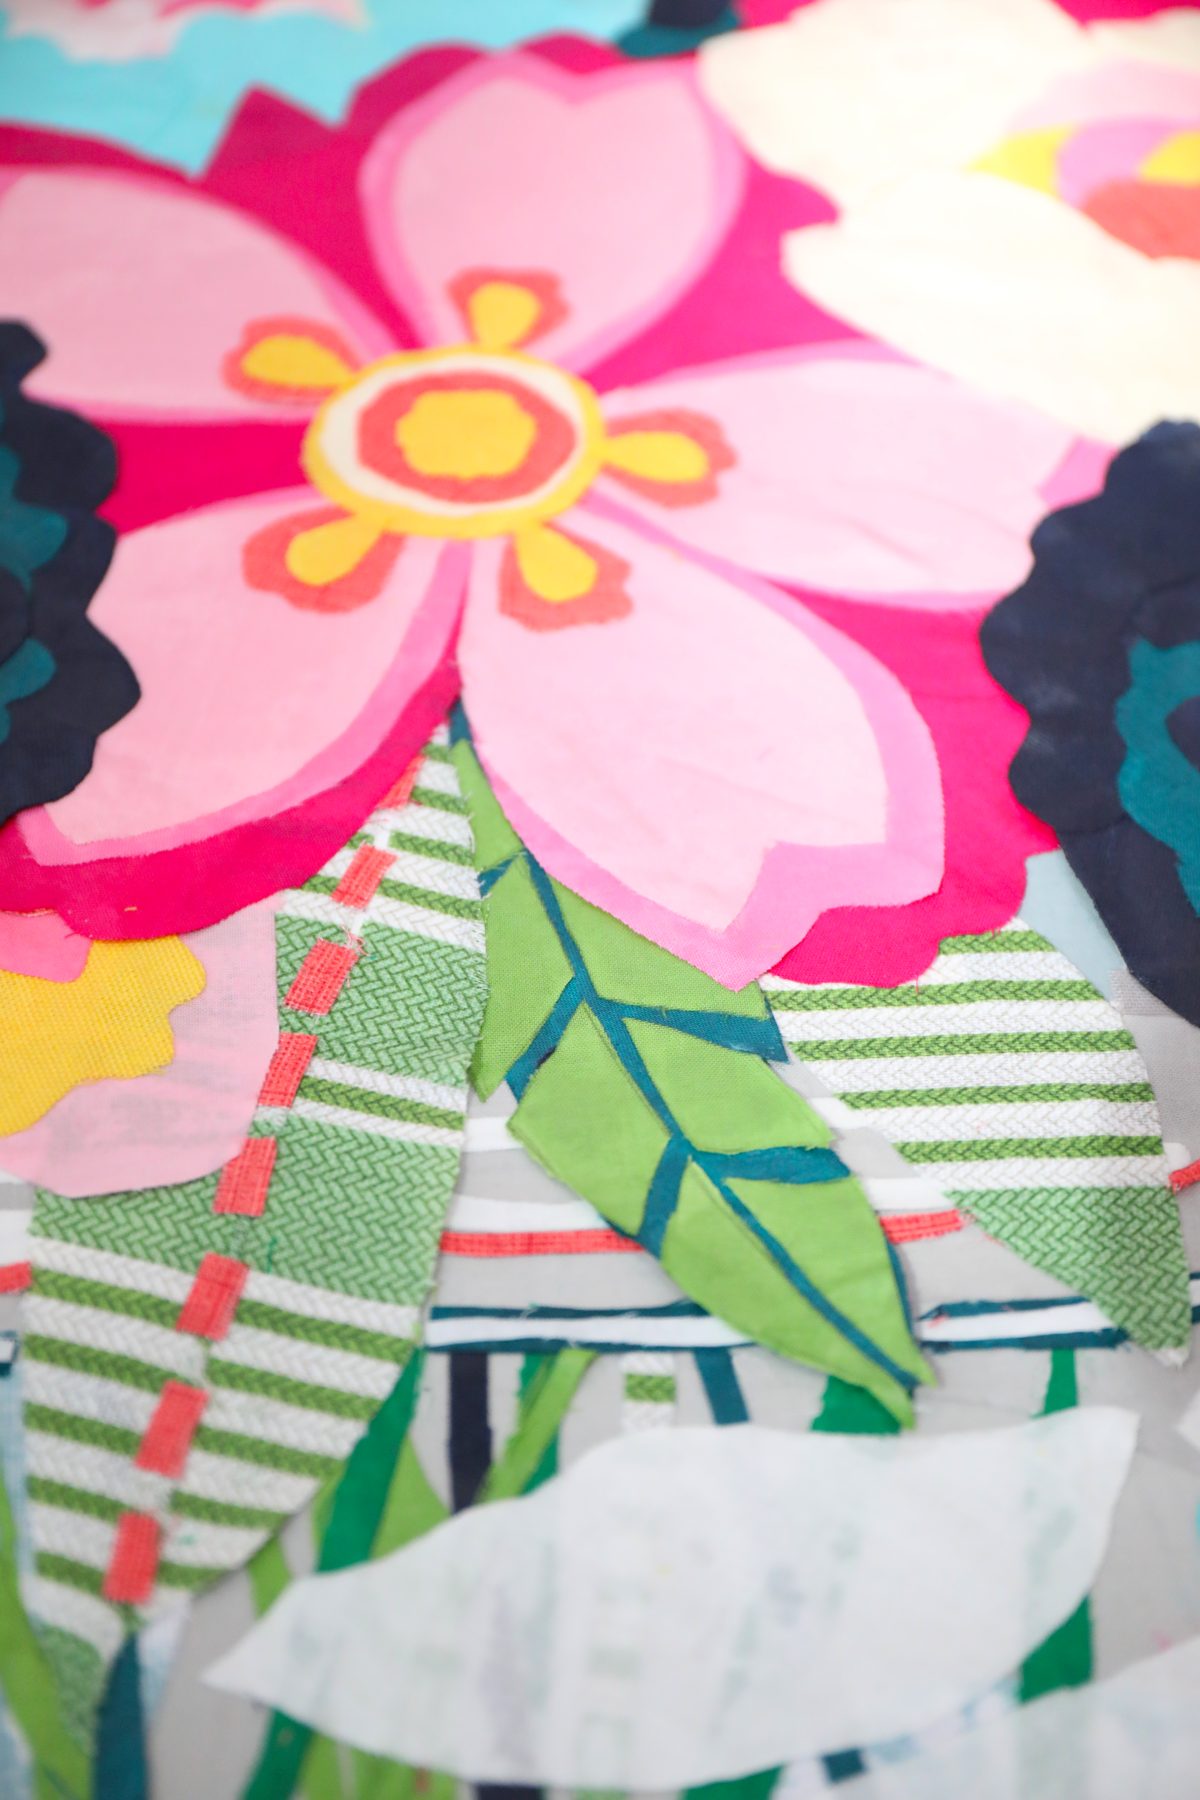
It came in handy in particular with leaves, since they were layered together.
I had a base piece at the underneath part in a darker color, and then added lighter colors + patterns on top to add interest.

Cut petals and add as you go on top, for a great finished feel.
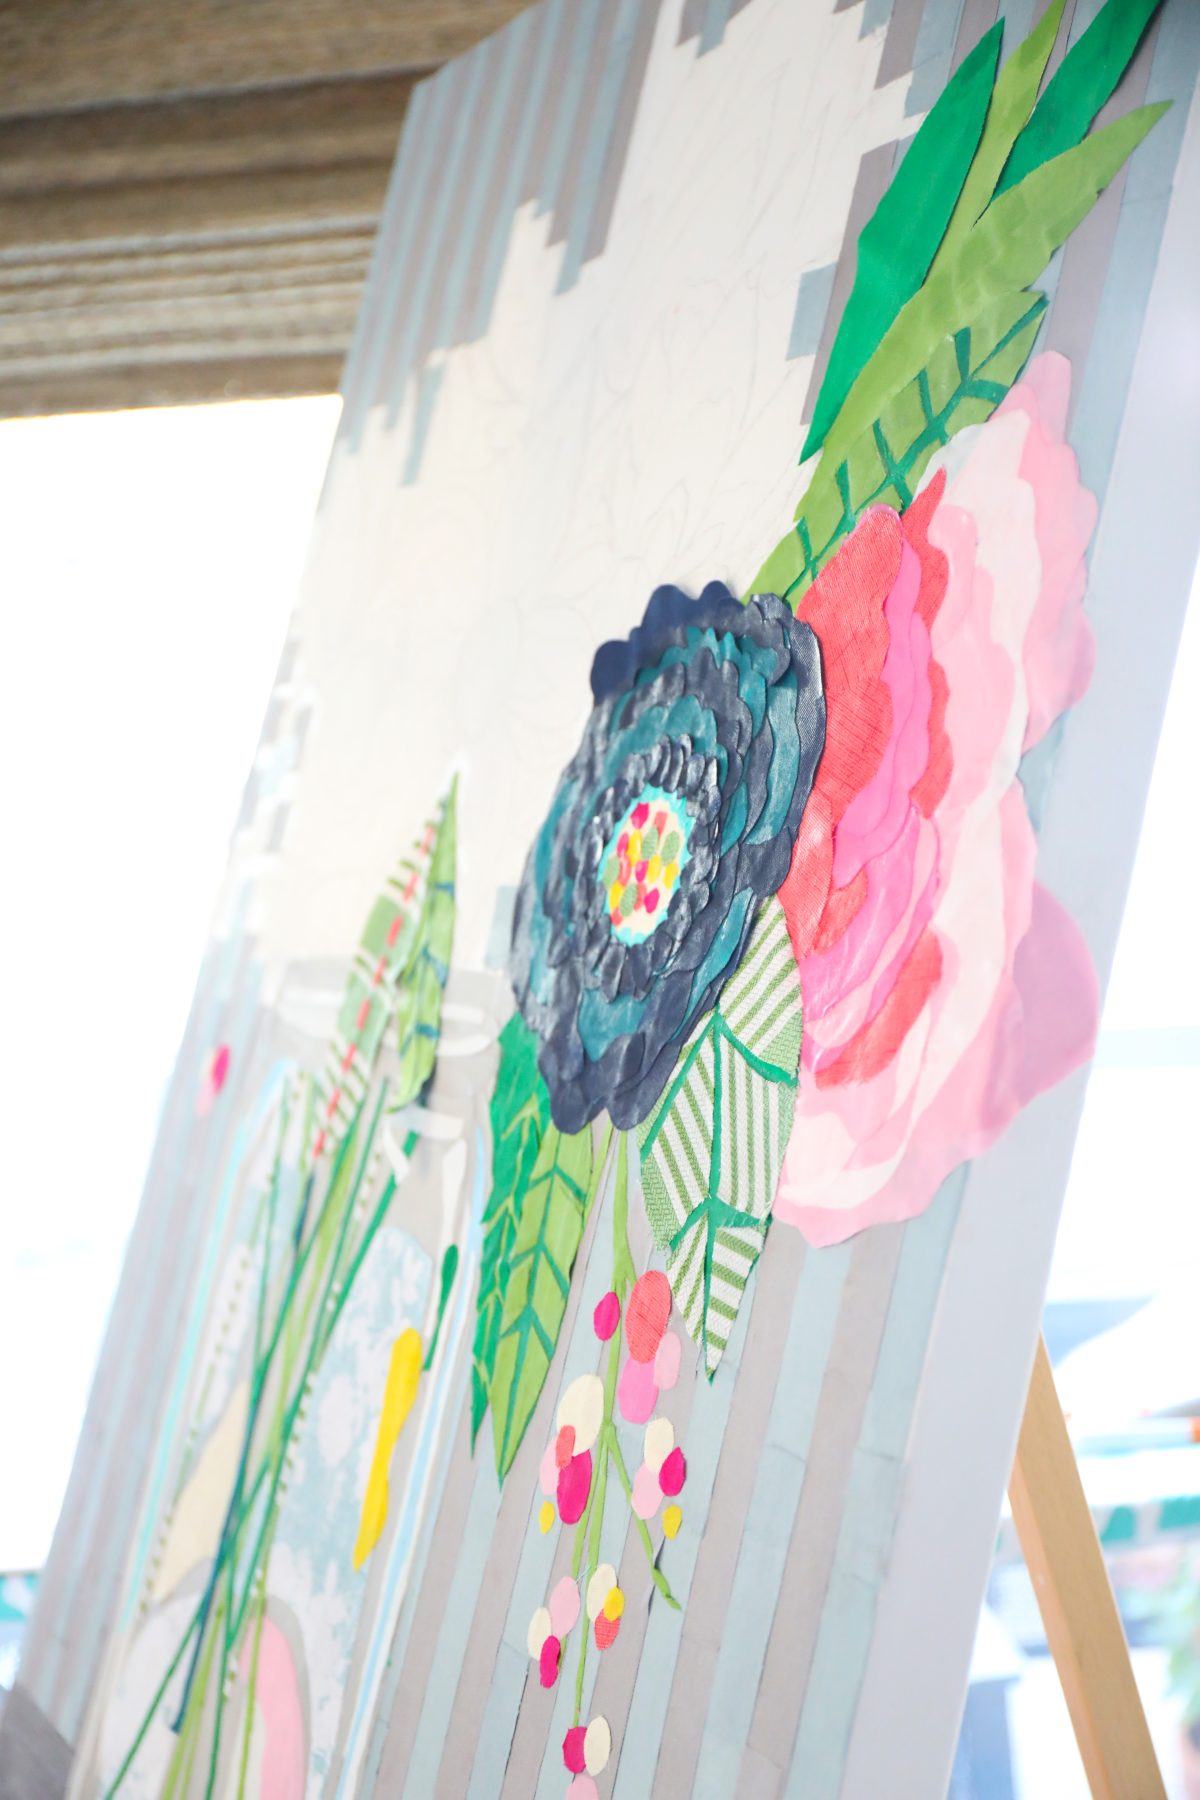
5. How to Make Fabric Art with Waverly Fabrics: Bring in Patterns for a Dimensional + Quirky feel
While it was fun to work with solids on this one, I also thought that some of Waverly Inspiration Fabric’s actual patterned fabrics were important in small touches, too. Depending on the piece at hand, this is a great way to mix them all in to create your own masterpiece. So think of different ways you can combine their amazing designs to make it work for you!
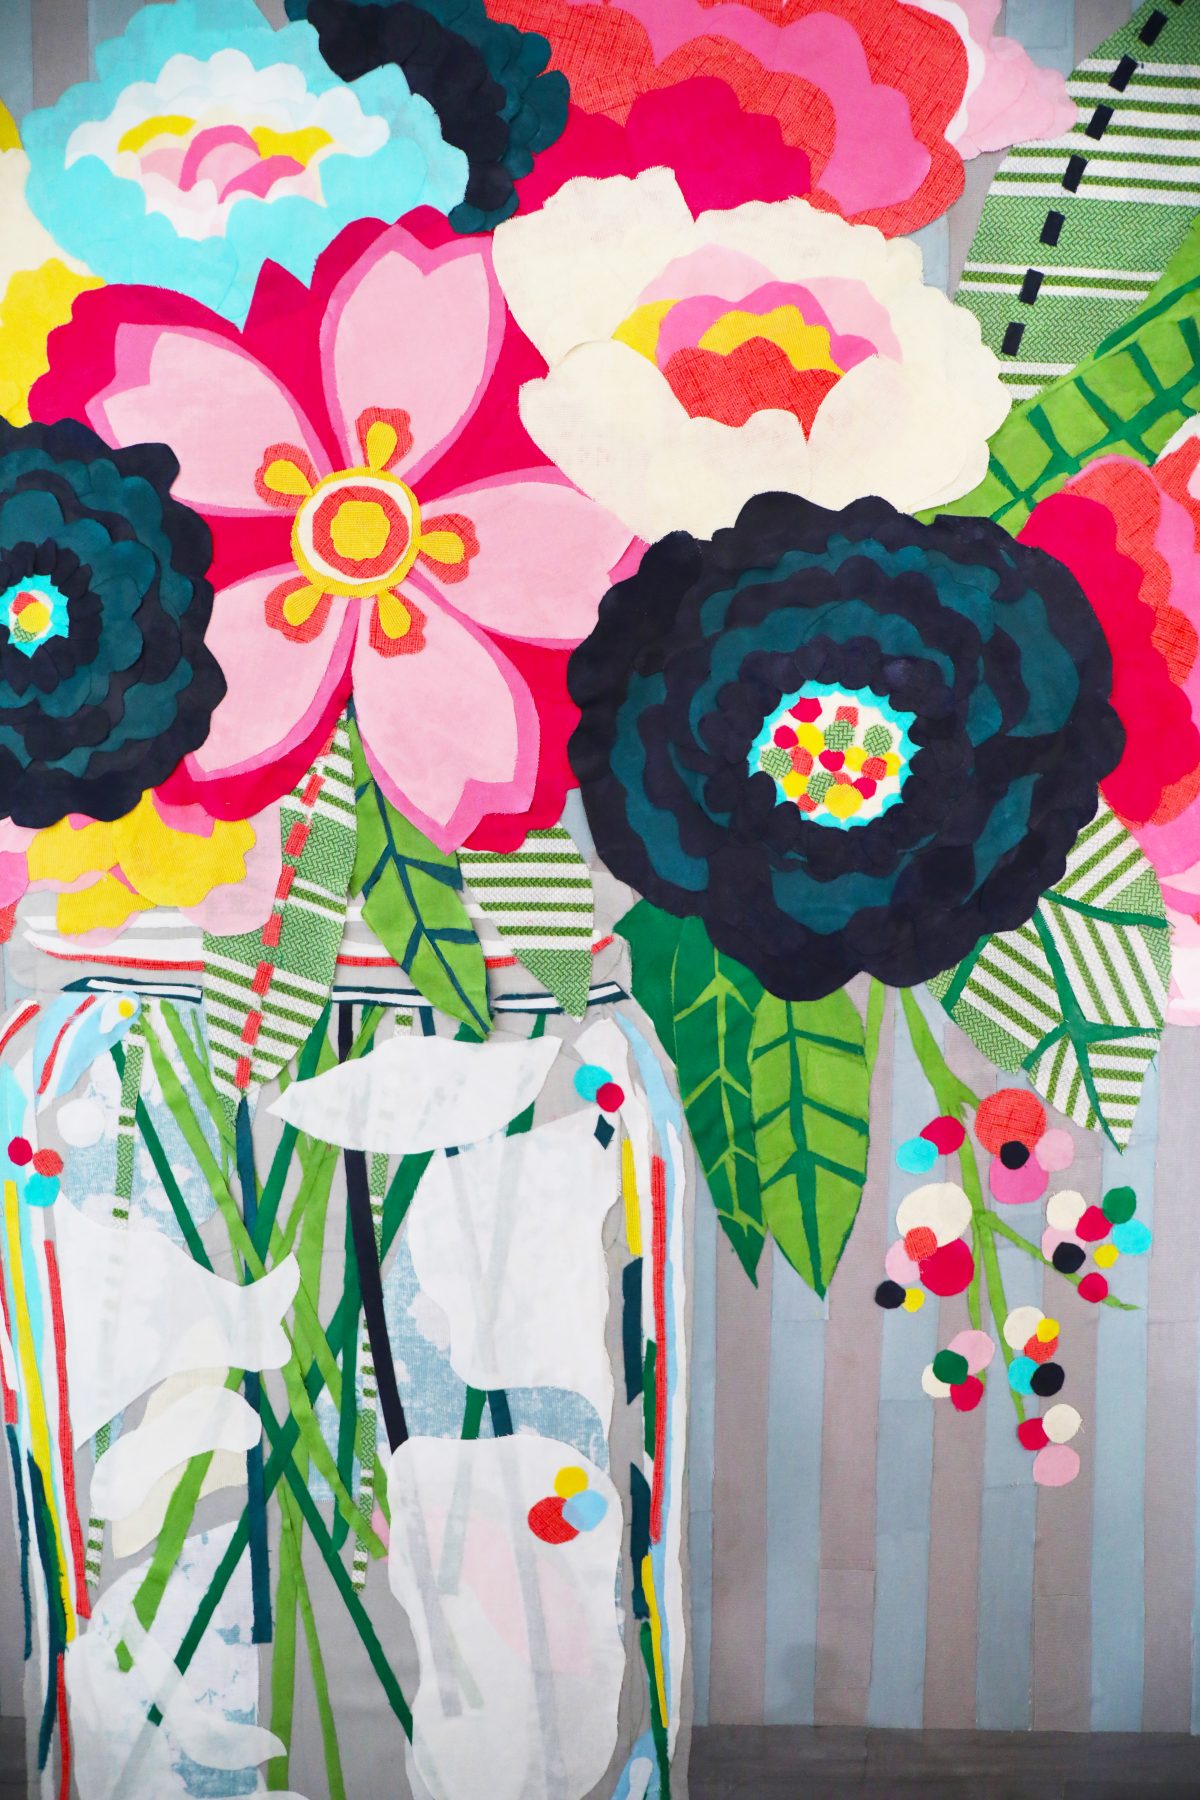
We just adore the way all these fabulously layered patterns came together for the final piece!

6. How to Make Fabric Art with Waverly Fabrics: Distribute + Diversify Your Color
Think of a painting or piece of art like a balancing act. Distributing color in unique ways through repetition, is a really great way to complete your piece. It also helps to establish depth and variance by bringing in deeper tones.
So in reflections of the glass, for instance, you might see that coral pop. Just like you also spy it in the flowers and berries. It’s important to echo certain elements + have fun with the way you use your colors within the piece to make it feel diverse and intentional.
7. How to Make Fabric Art with Waverly Fabrics: Finish it Off + Have Fun!
Don’t forget to have fun + take your time! We had a blast creating this piece, and finishing it off with a pretty handmade frame for a polished feel. These are so easy to make, they really bring the final piece to life.
This is a great season to create something fun for your own home, or a friend or family member for the holidays. The possibilities are kind of endless, and Waverly Inspirations Fabrics helps bring those beautiful ideas to life!
As always, if you create a fun art piece with their beautiful fabrics, be sure to tell us. We’d love to see!
Have an inspired day!
 {We partnered with and are sponsored by our good friends at Waverly Fabrics for this post. For more info on our branded content please visit our disclosure page.}


Absolutely gorgeous! I have seen some lovely watercolor quilts like this. You are an artist.
Thank you so much! Yes! I was definitely inspired by the amazing quilters out there and what they come up with. You’re too kind.
Nice content with a great sense of art.