
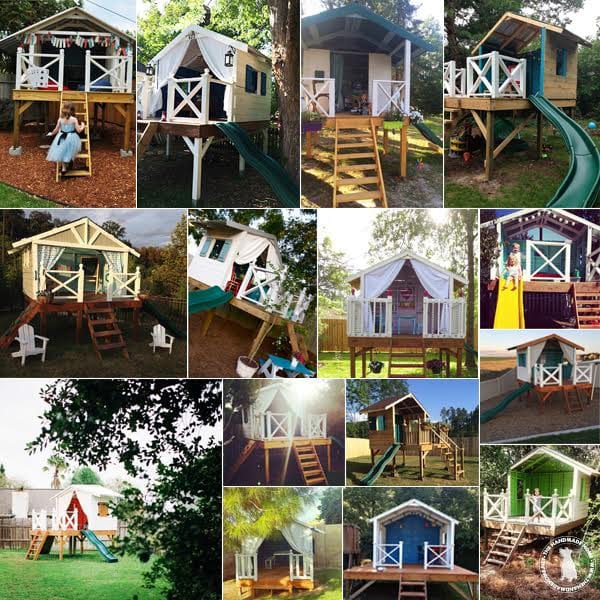
handmade hideaway 2.0 – framing and roofing
If you’re following along and building the new Hideaway, rest assured the end is in sight.
But if you haven’t read the posts before this one, go check them out, because it would be weird to build the roof framing first. You can find the reveal here, along with how to build the foundation, starting the framing, adding the railing, framing the roof and adding the siding, and painting here.
You should have everything framed and all the siding in place by now, so it’s time to move on to the attaching the actual roof.

{This post is brought to you in partnership with Tuftex panels. We were thrilled to use their product on this build. For more information on our disclosure policy, click here.}
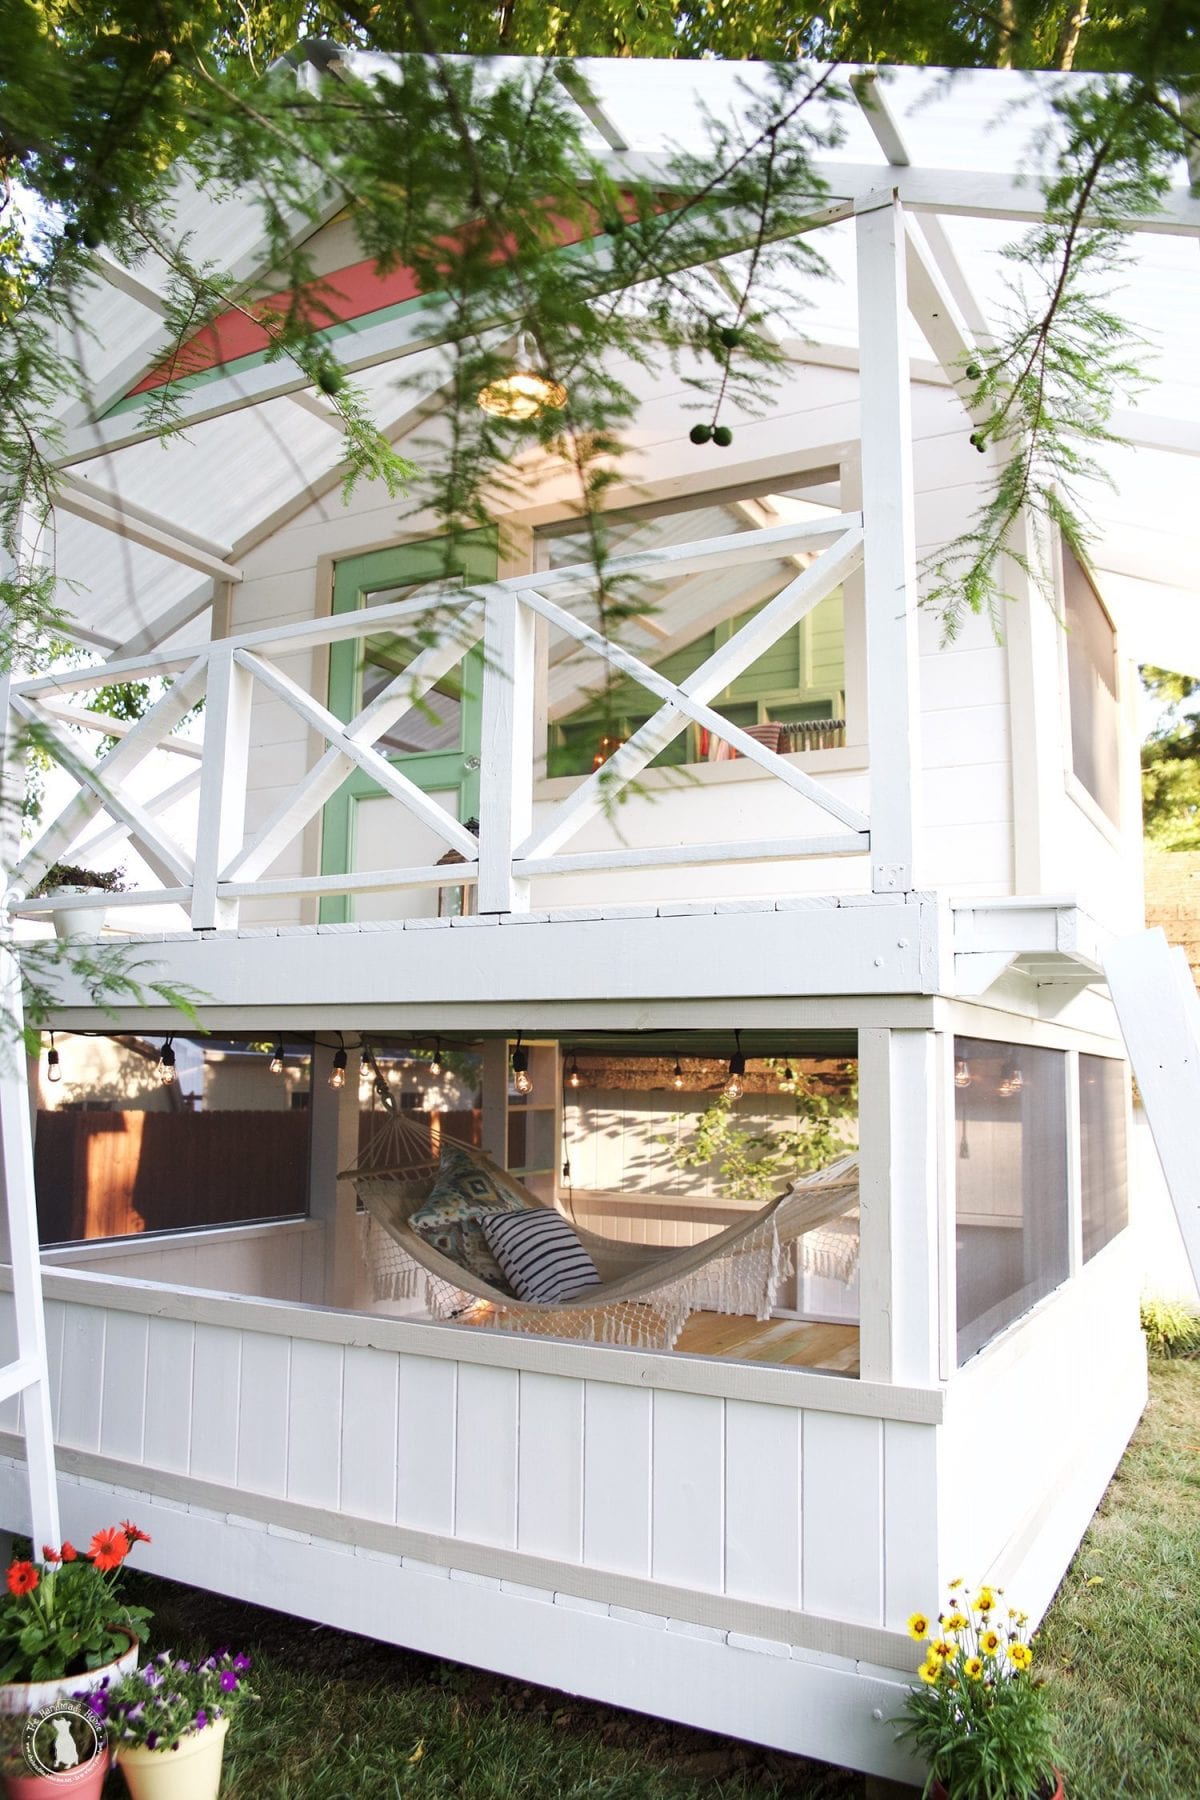
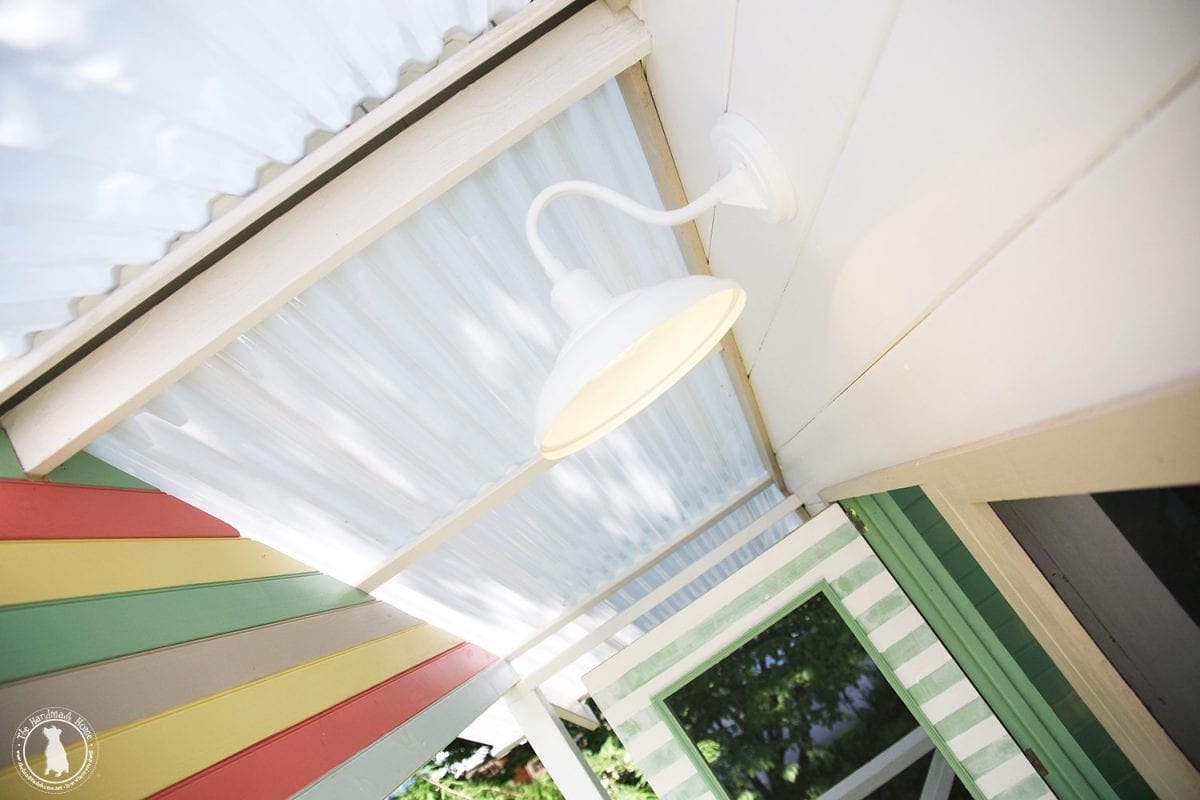
If you remember from our last hideaway, we choose to use a metal roof. This time, we wanted something a little different for the new version.
We wanted something that was easier to work with, lighter, and would allow more light into the hideaway. With the peak of this roof hitting almost 17 feet, we wanted something that would be easier to install.
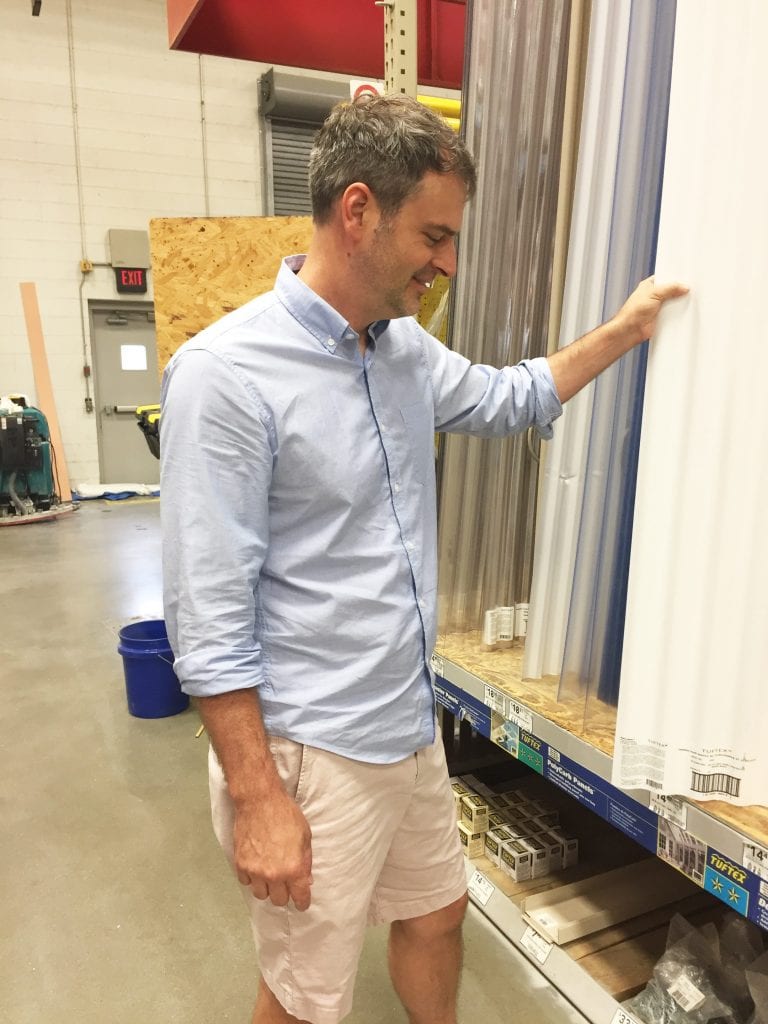
So after ruling a few out, the next viable option was polycarbonate roofing. It landed within all our criteria. Light and easy to work with, it allows plenty of sunlight in, and is cost efficient. We found a product we loved in Tuftex panels. We knew we could access this product at Lowe’s pretty easily, which is great because we didn’t want to have to wait for something to be in stock.
Sometimes, this is the story of our lives.
{I was possibly a little over-excited to find these readily available and Ashley decided to document my said excitement. It’s how we roll.}
Tools you’ll need:
• drill
• impact driver
• miter saw
• tape measure
• tin snips
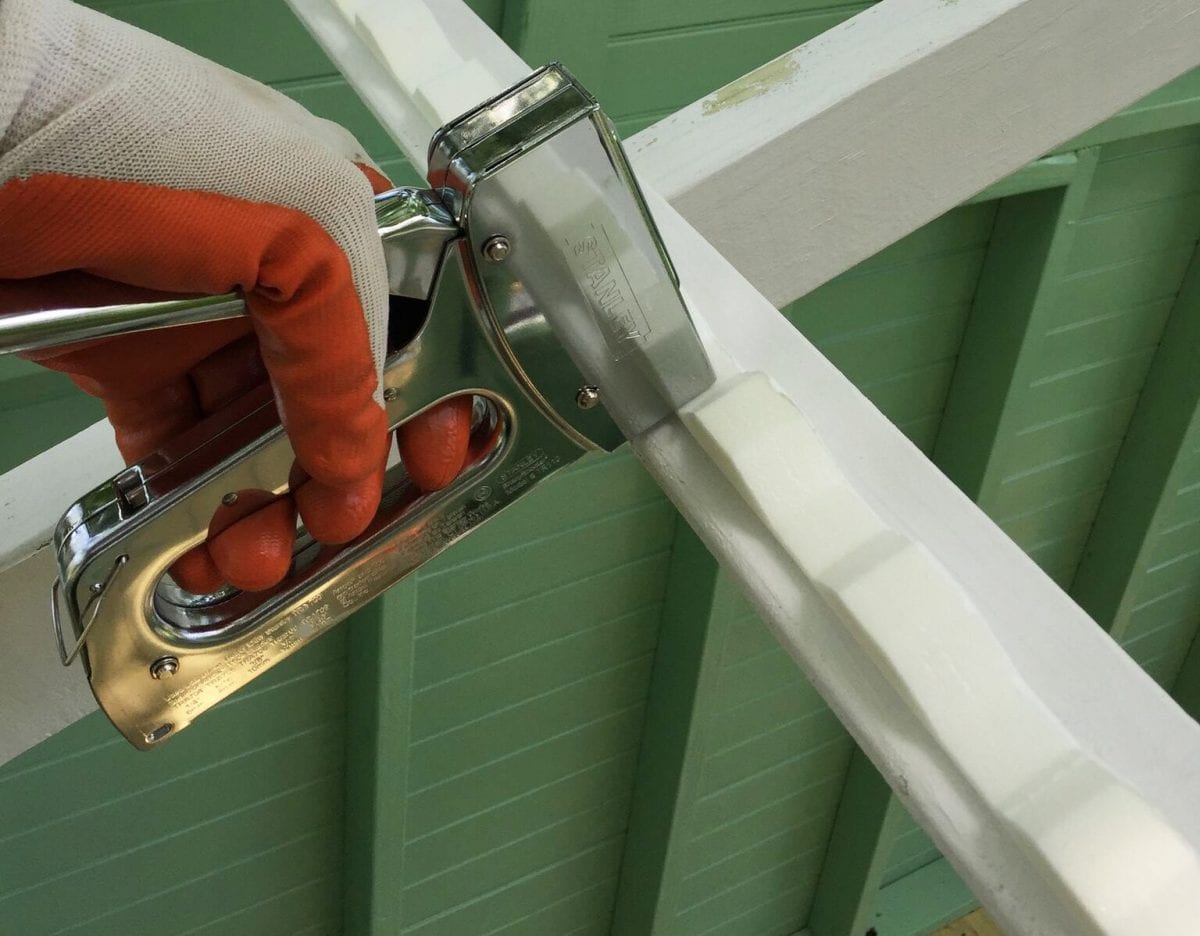
• staples and gun
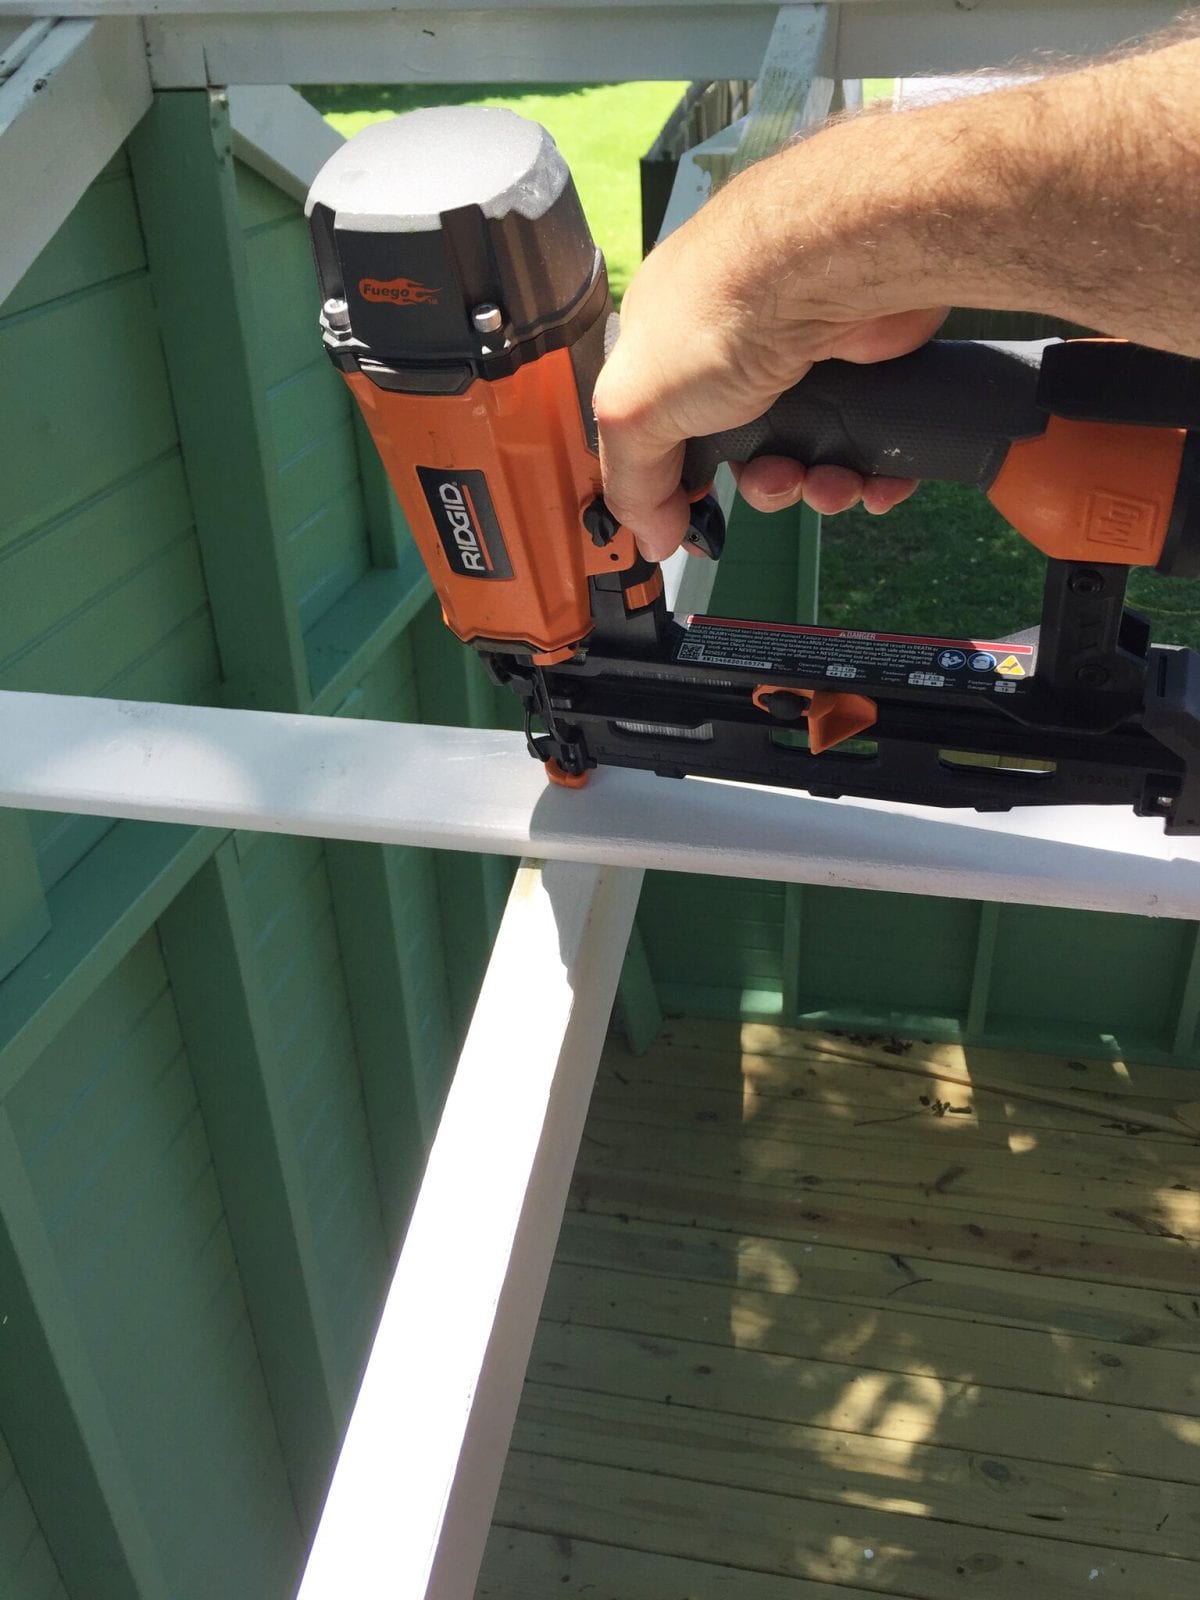
• finish nailer and nail gun
•ladder
Supplies you’ll need:
• (10) Tuftex polycarbonate panels
• (2) 10ft metal ridge caps
• (16) 1 x 3 x 8 furring strips
• (4) 2 x 4 x 8
• box of 1 1/4 exterior wood screws
• (3) boxes of 2 inch metal roofing screws
• (1) box of 3 inch metal roof screws
• (10) packs of Tuftex 5-Pack Cross Link Polyethylene Solid Roof Panel Closure Strips
Before adding your panels you want to do three things in preparation:
First, We added two more rafters on each side. You’ll use the same angle as when you were adding them originally, but this time, there is no birds mouth and the rafter will end at the siding. We knew we needed the support, but didn’t want the extra rafter on the outside. You can add these rafters when you’re doing the others originally, if you don’t care to hide them.
Second, add some collar ties to the rafters. These are simply 2 x 4’s cut down to size, that literally tie the inner rafters together. It helps with stability. You can use scraps you have left over.
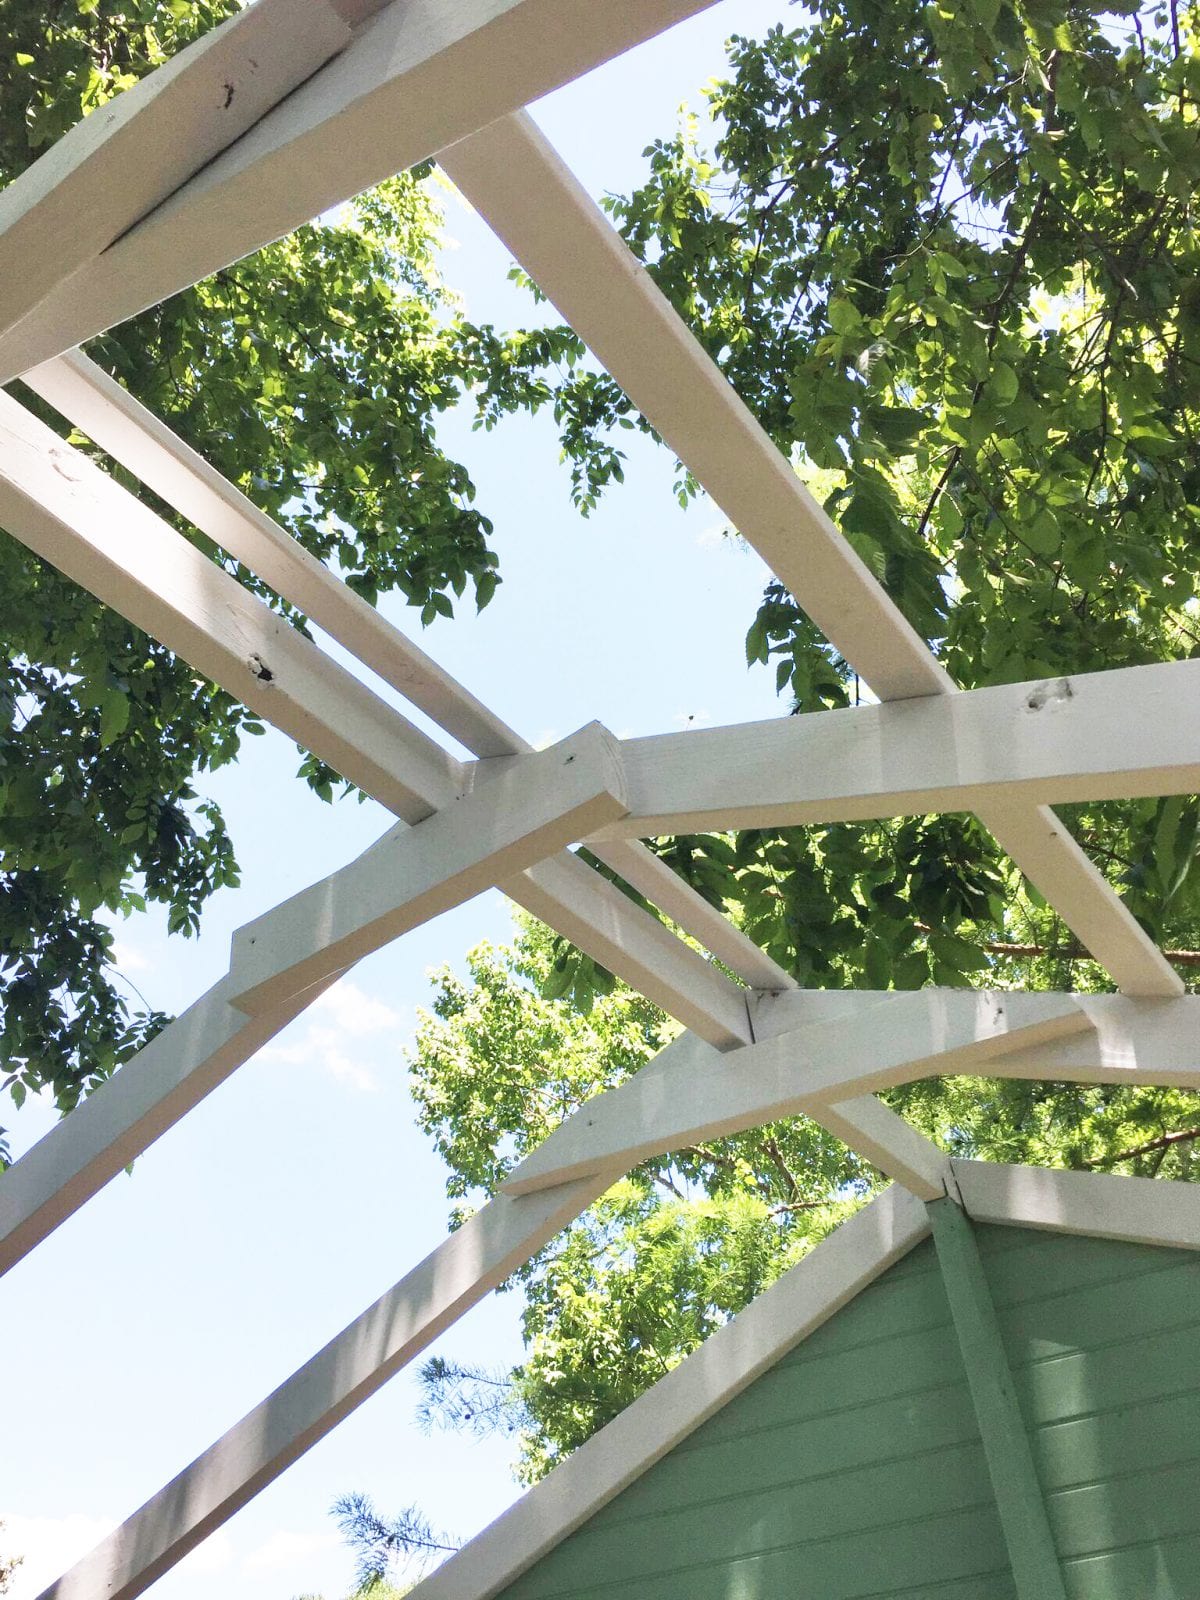
Third, you’ll need to cut your furring strips down and attach them to the rafters, this is what you will attach the panels to.
{Note we painted all these pieces on the ground before we put them up.}

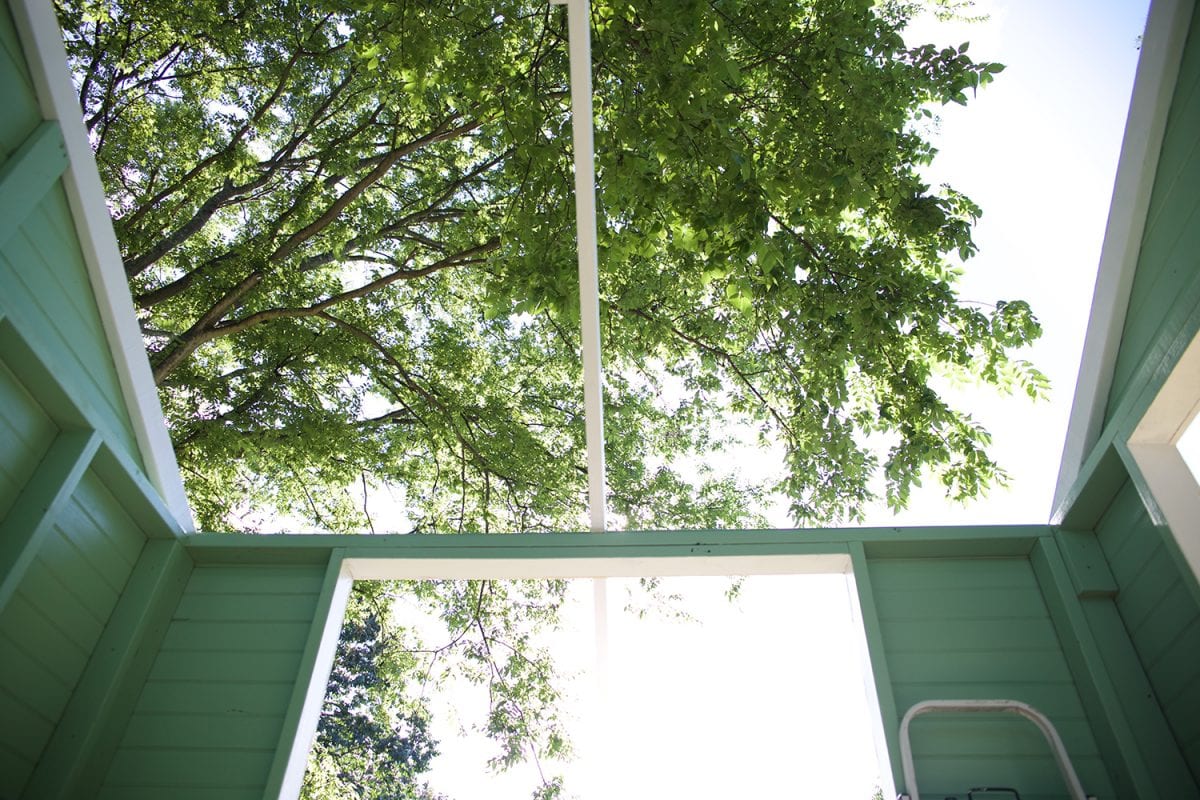
Before you attach the panels to the wood, you’ll want to attach some closure strips to help secure the panels and keep them from bending. They are also great for helping keep bugs out of the ridge cap.
To attach these, you can simply use a staple gun. Start at one end and work towards the other. Take care to make sure they are in a straight line down each furring board, not only each individual verticle row, but from one row to the next horizontal row.
This will ensure that the panels lay straight.
Once you have them on both sides, you can begin attaching the Tuftex panels.
If you’re building something high off the ground, you really have to think through the process of gaining access to the last few panels. It can be a bit of a circus act. If you’re working low to the ground, it’s fairly easy.
We suggest picking one side and one end to start on. We also think it wise to pick the end you judge as the most difficult to reach from the ground.
Line up the first panel vertically and horizontally. Then you’ll want to place a screw in each rafter, on each row. Make sure you don’t over-drive the screw, but just tighten it to the panels.
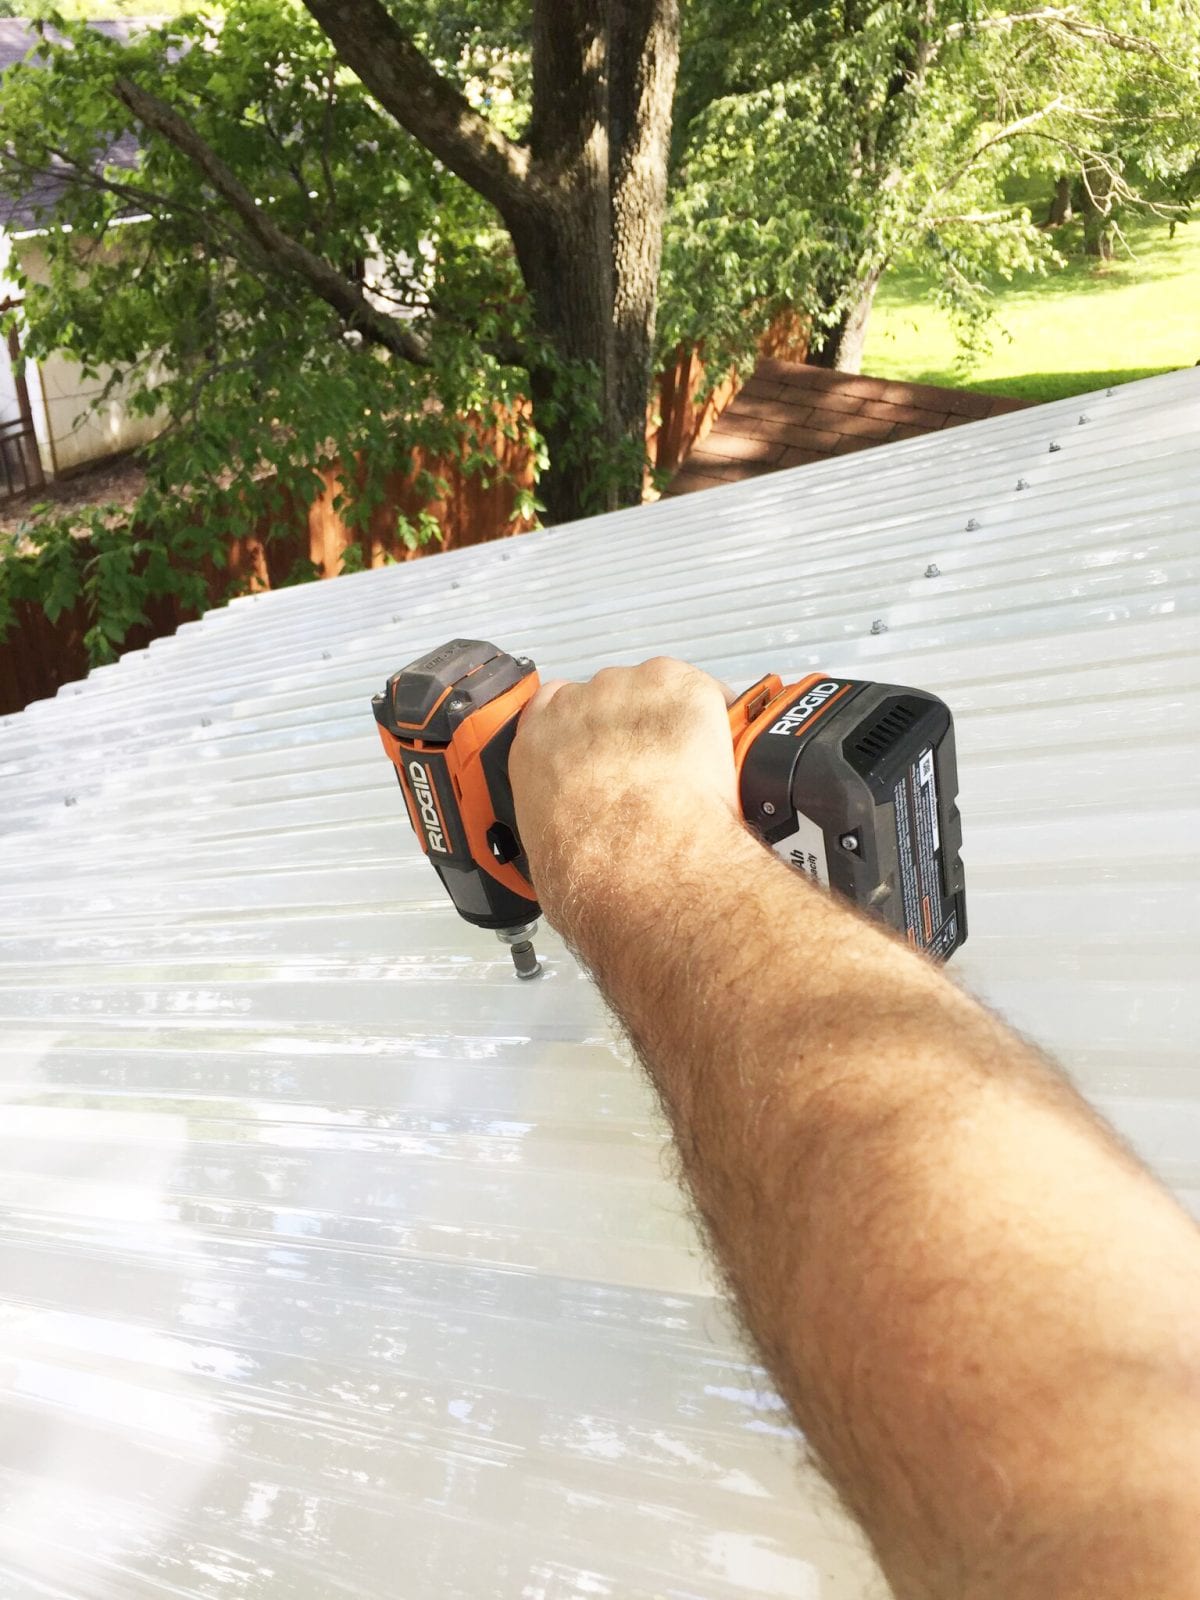
Once you have the first panel straight and secure, you’ll simply lay the second panel next to it, making sure to overlap at least one row of the ridges. The overlapping will ensure that water stays out and that wind doesn’t damage the product.
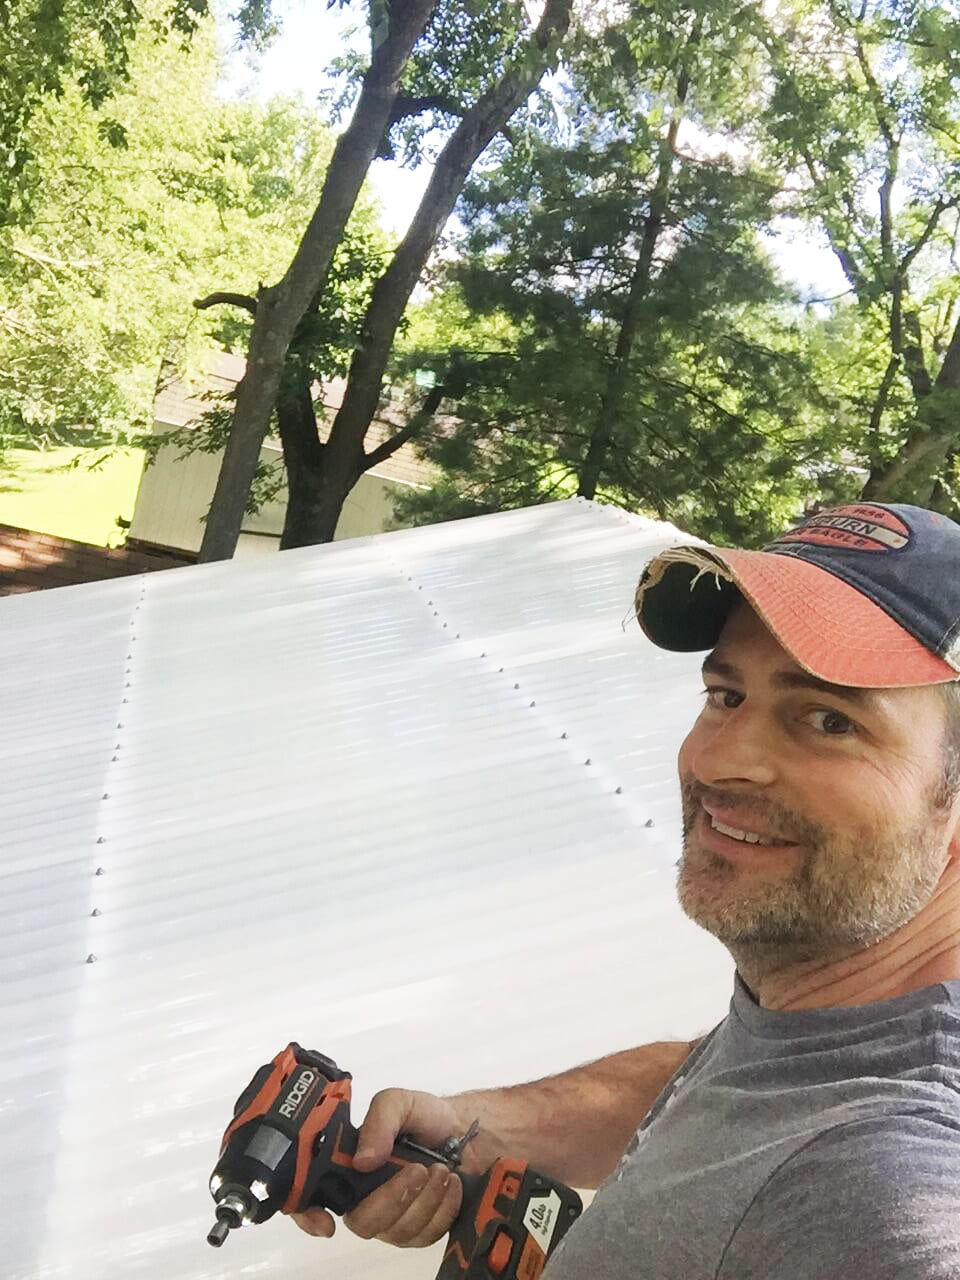
Work your way down one side, installing each panel the same way, and overlapping the panels all the way. Make sure to keep the top and bottom of the panels lined up, and of course stop for a selfie to document everything for social media.
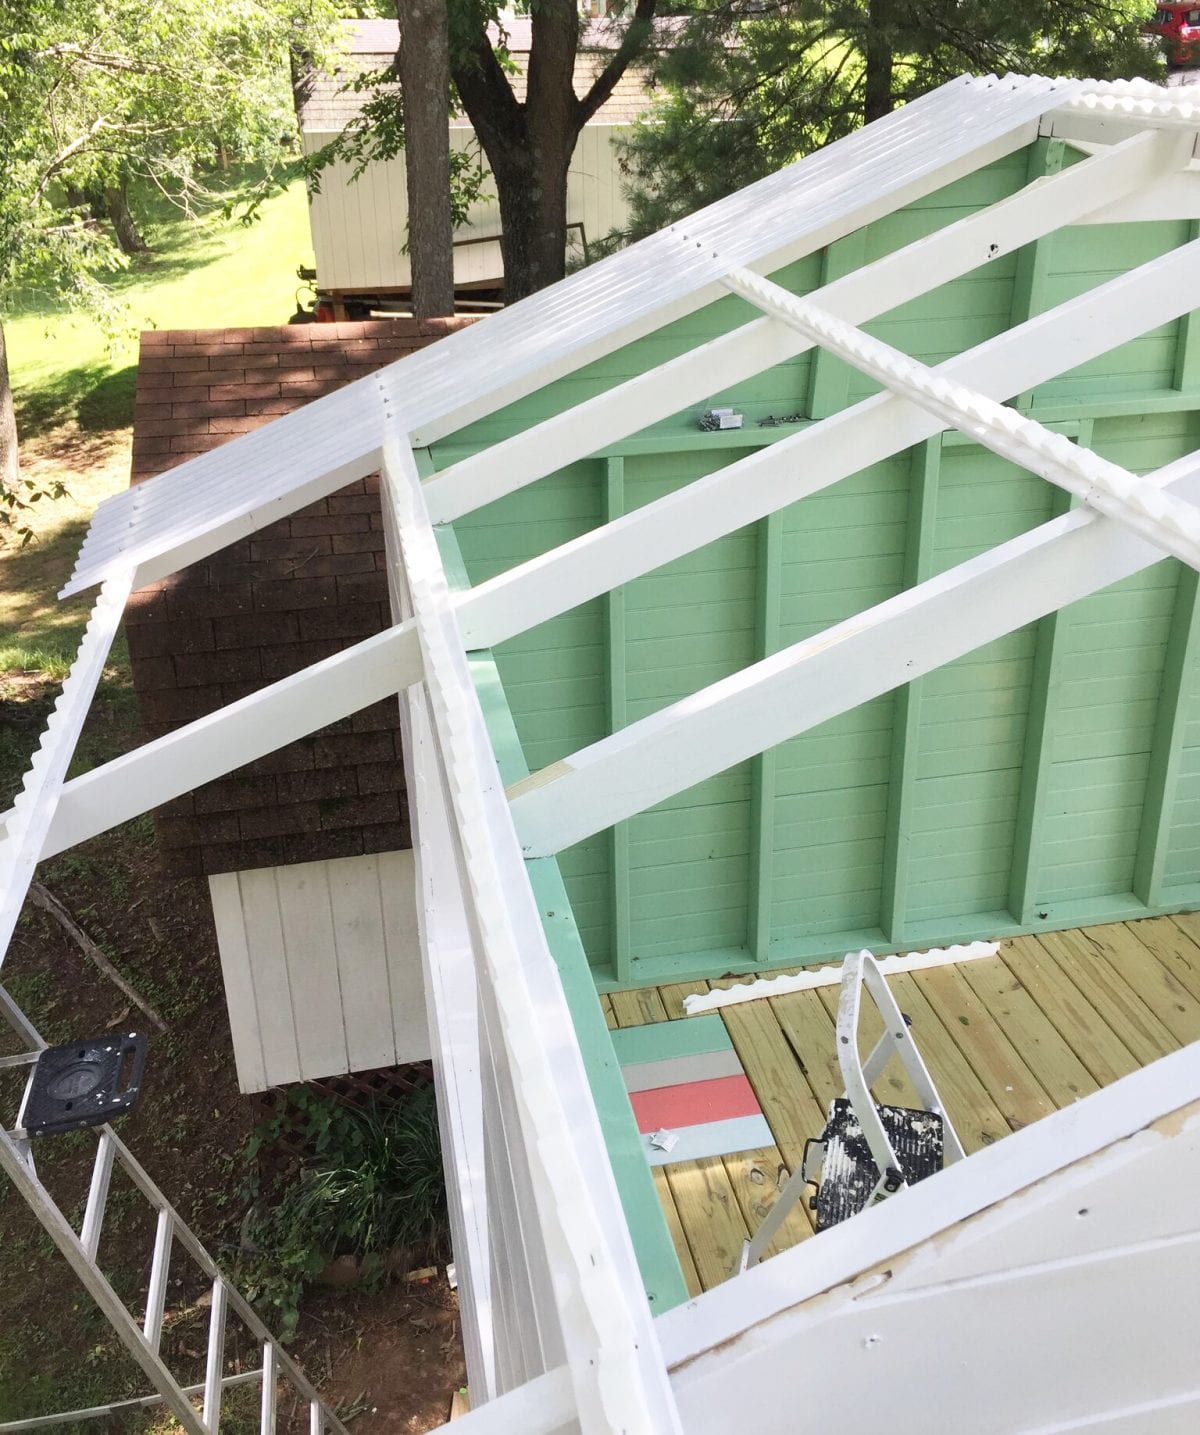
Now for the fun part, working the other side and adding the ridge cap.
Normally, you would simply attach the other side and then come back with the ridge cap, or you’d put enough supports in that you could stand on the rafters and work your way down. However, since we were working 17 feet off the ground and our design didn’t call for a lot of rafters, we needed to get creative.
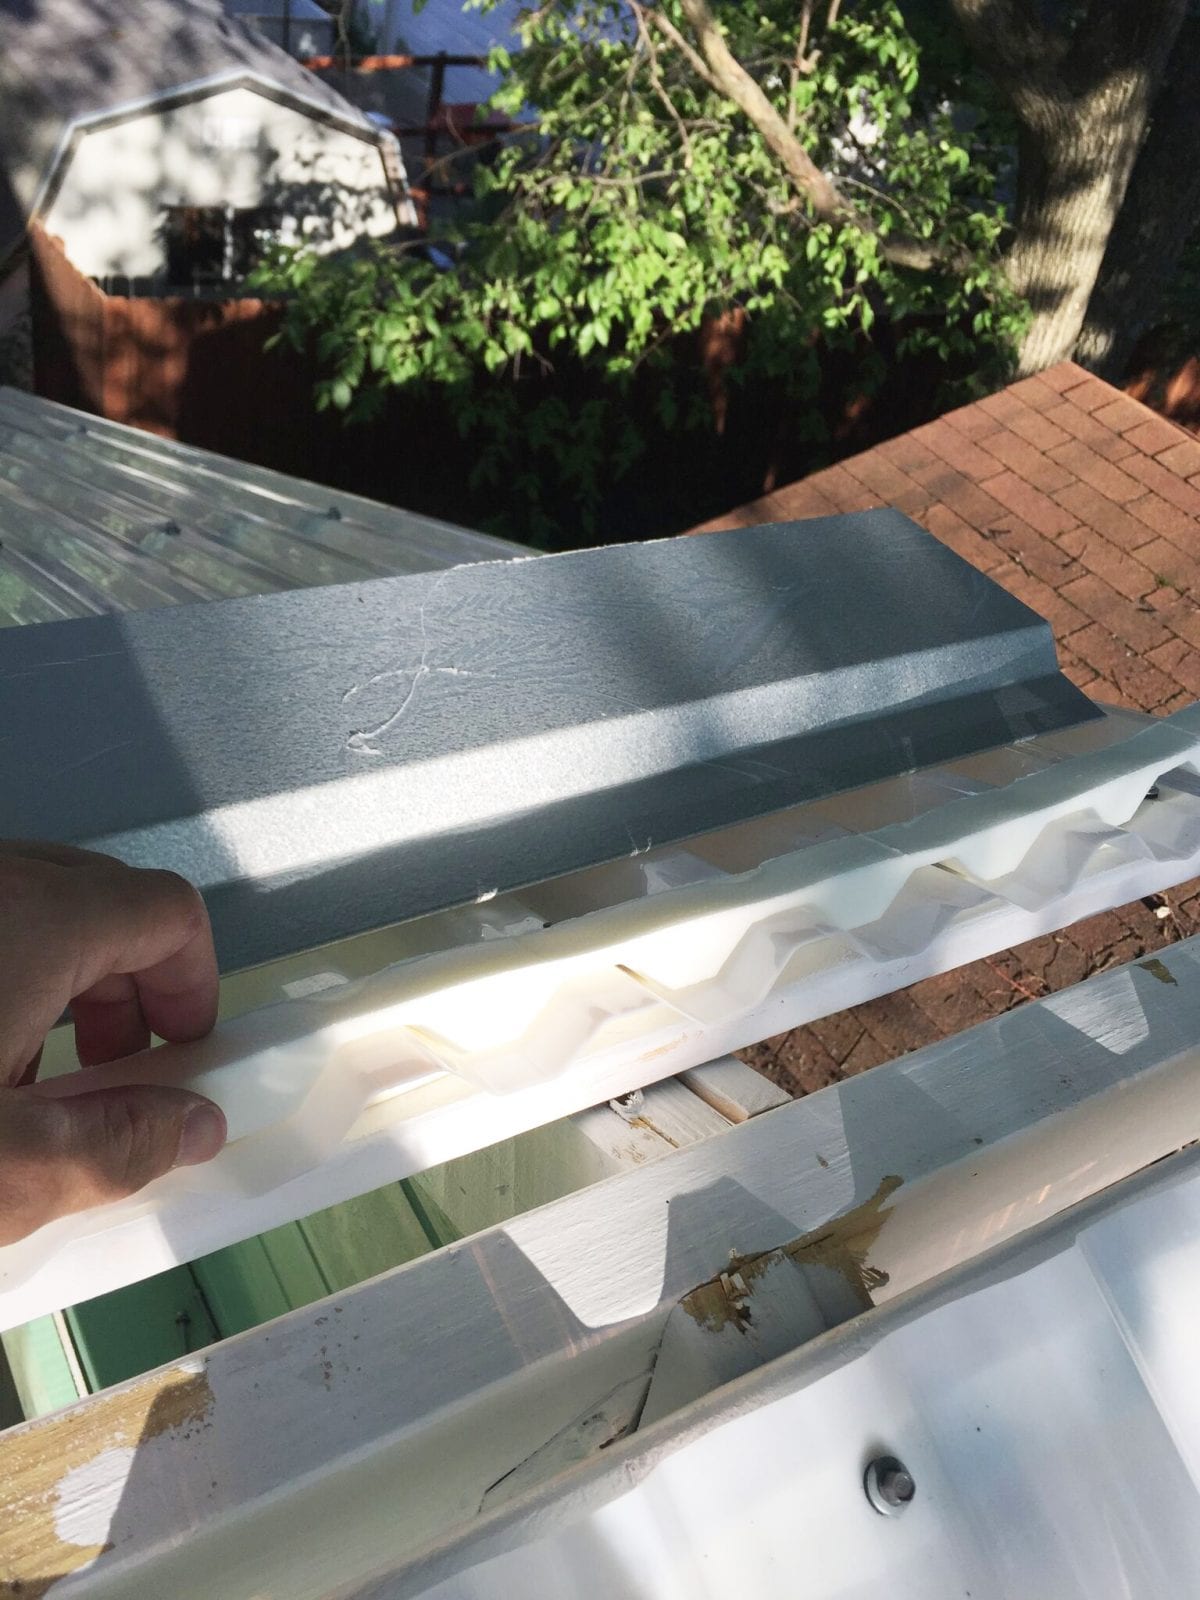
We started on the opposite side attaching the Tuftex panels the exact same way. However, this time after attaching two panels, we also began attaching the ridge cap.
You’ll use another closure strip to seal up the ridge, and slowly work your way back to the front of the hideaway. The main difference is that here you’ll want to use the 3-inch roofing screws.
When you get to the end of one ridge cap, make sure to overlap the new one by at least 12 inches to ensure no water leakage. Also, make sure to cut the ridge cap to size before you begin attaching it.
The porch of the hideaway is where it gets a little tricky.
You should be able to get to the next to last panel while still on the porch, though admittedly, long arms do help.
Once you get to the last panel you’ll need to approach the roof from the outside with an extension ladder to screw the panel and the ridge cap in place.
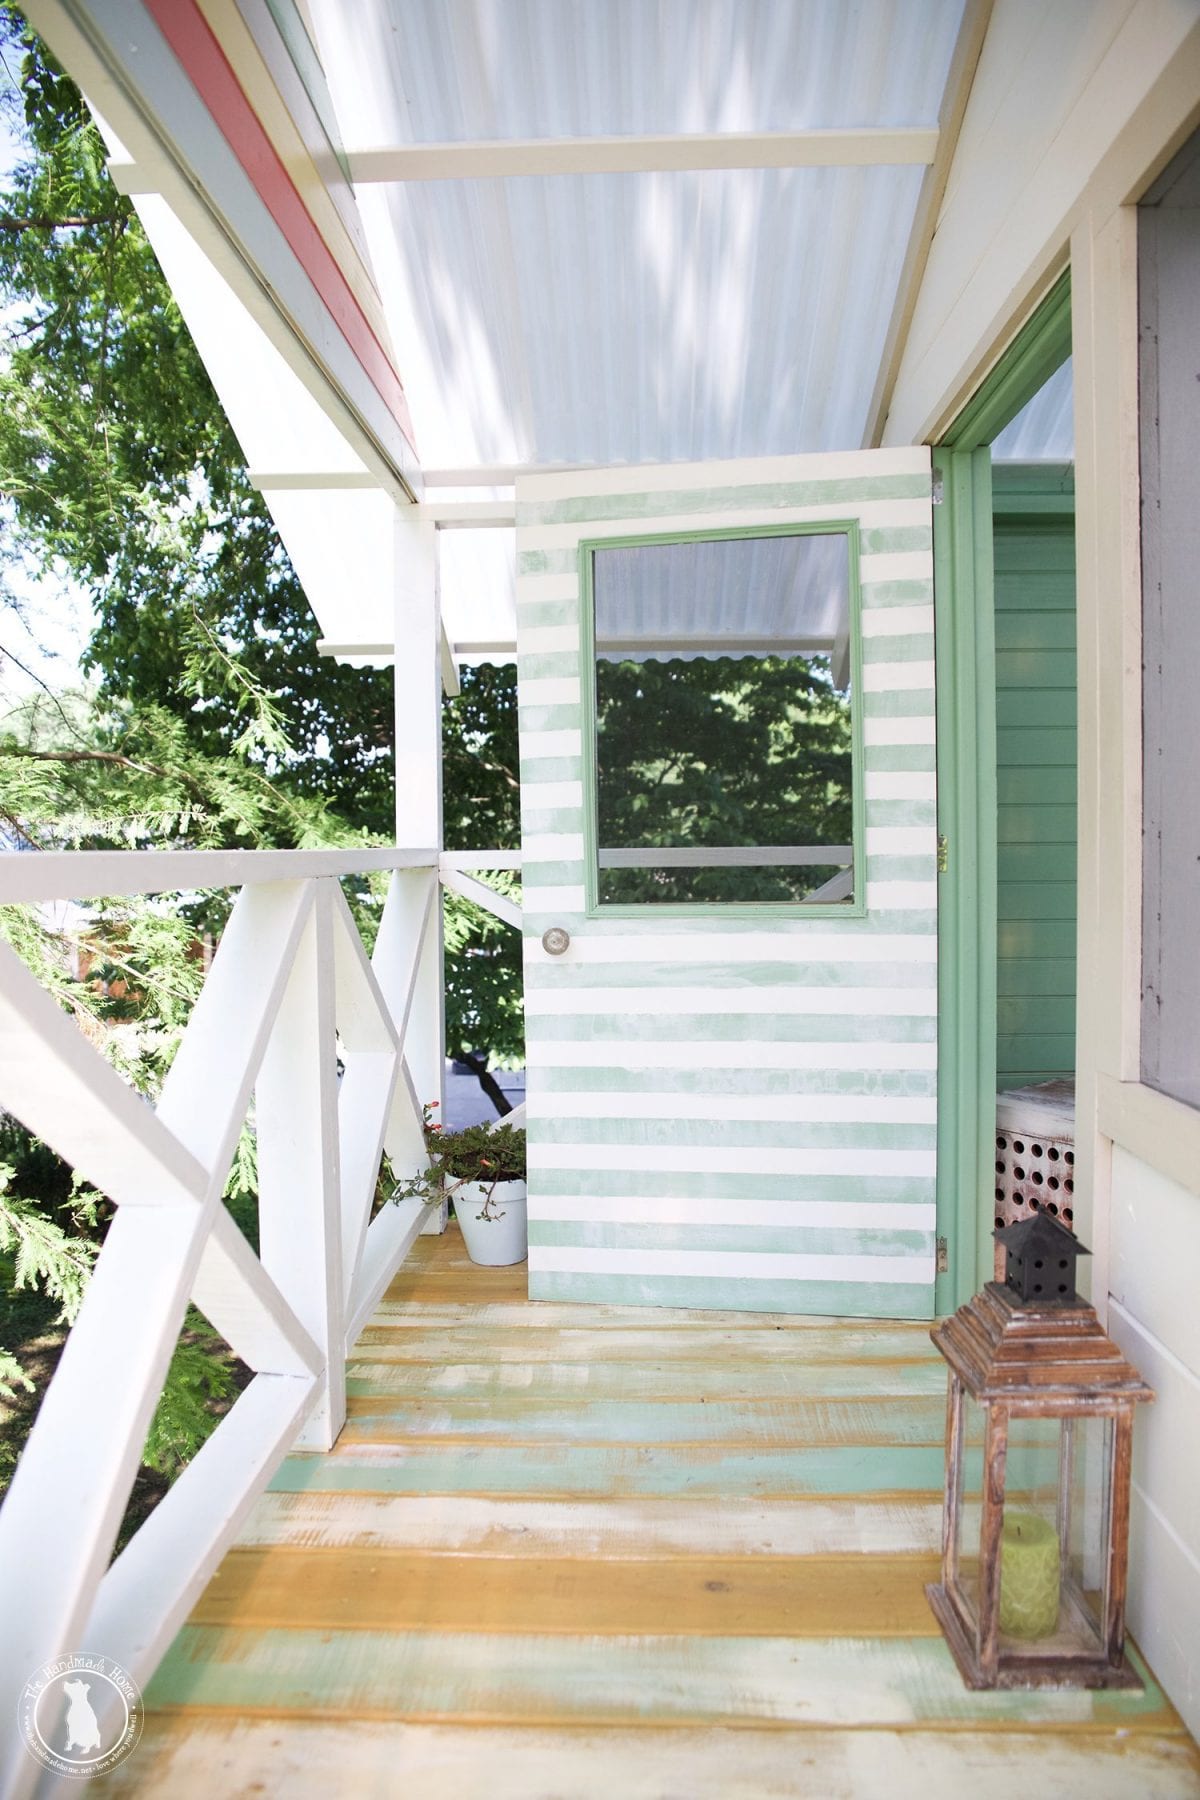
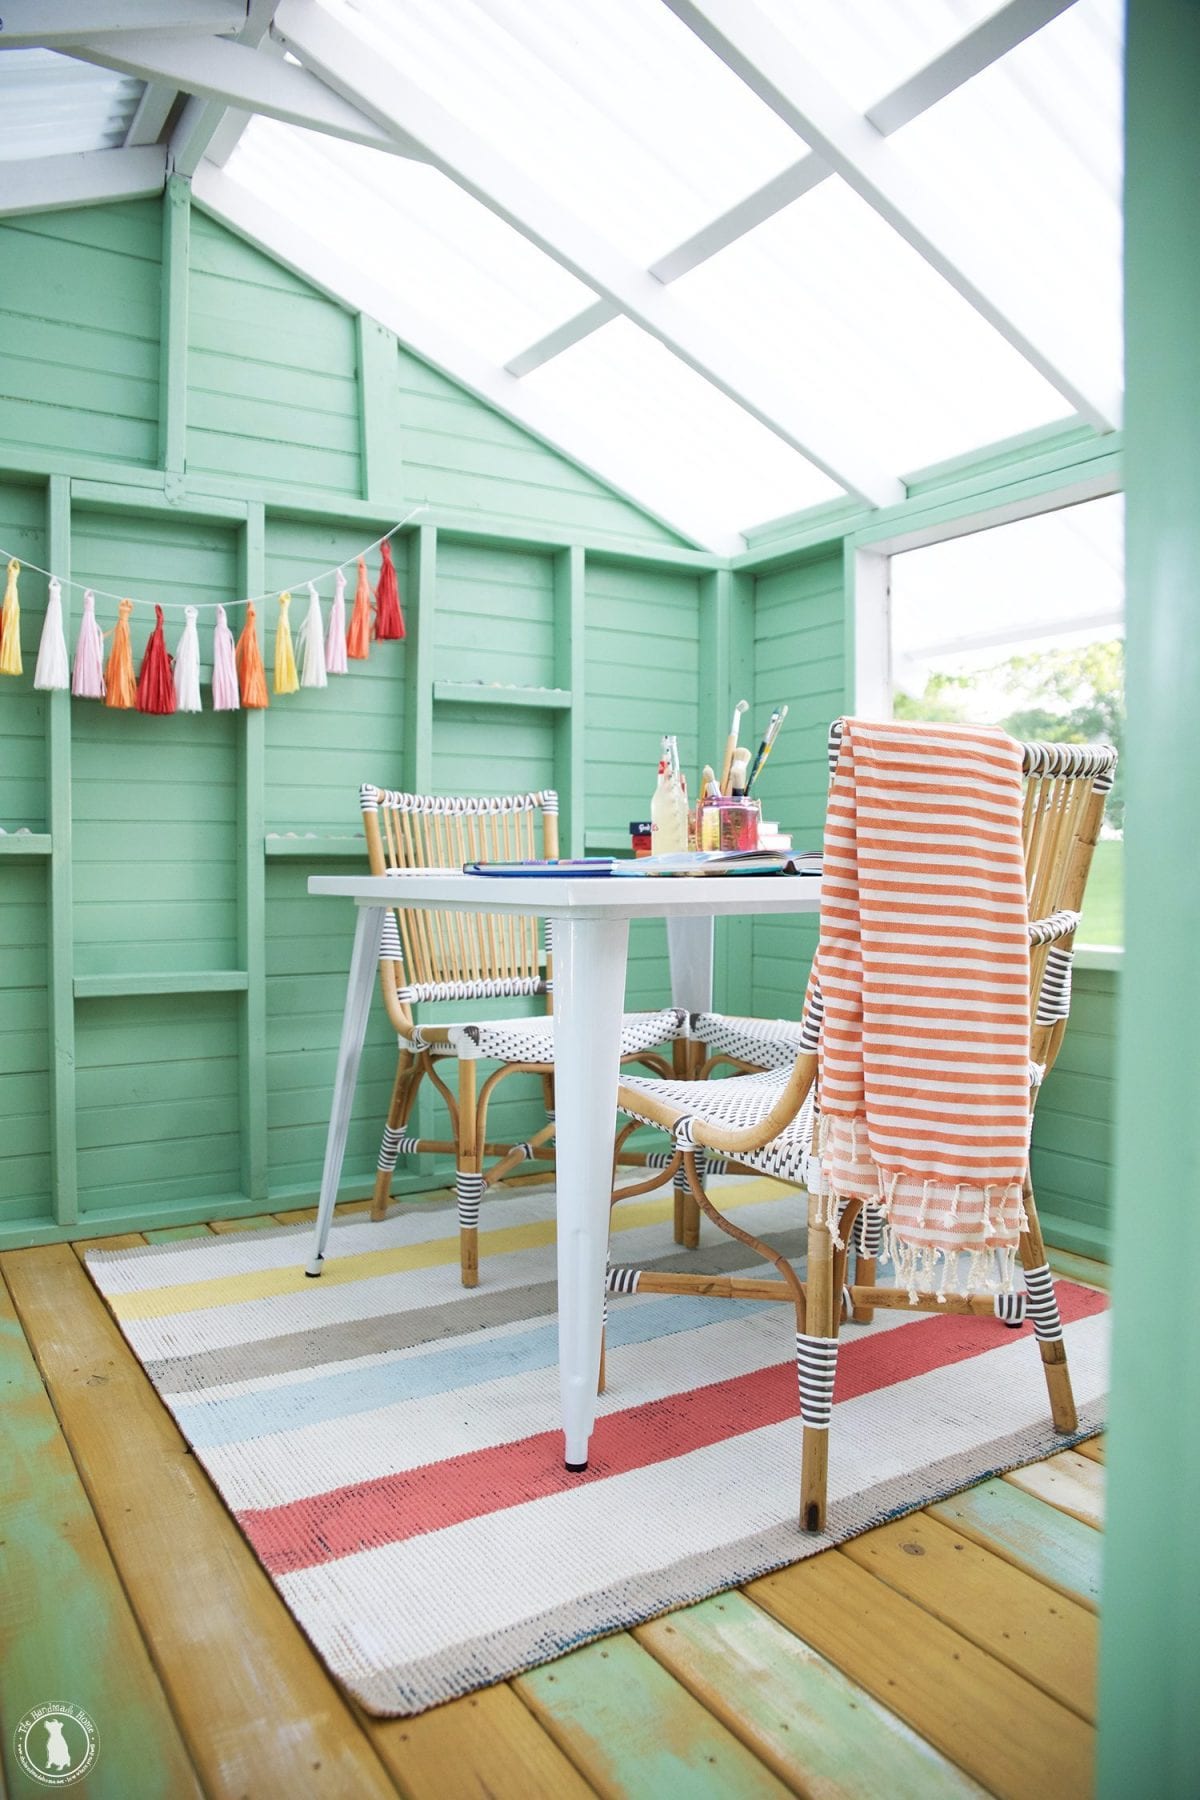
Adding the Tuftex panels really begins to bring the build together and allows us to move on next to the lower deck screening, and screening in the upper windows.
To see this entire series, be sure to check it out here …and as always, our fabulous reader creations, here!
Have an inspired day!


Wow – what an amazing job ya’ll did! Your kids will enjoy this for many, many years; it’s just gorgeous
Oh my gosh this is gorgeous! I love the white roof letting in all that light – amazing!
Hi! Do you think this rafter plan would be strong enough to support the weight of a shingled roof? #hoaprobs
Thanks!