
how to make a dollhouse bedroom

Hey Guys! We’re back today with more of The Dollhouse Diaries! It’s been a while, but we’ve been breaking down the floors, sharing how we did each element in Emerson’s little dollhouse, one by one. {To see the rest of the series, be sure to check it out here!}
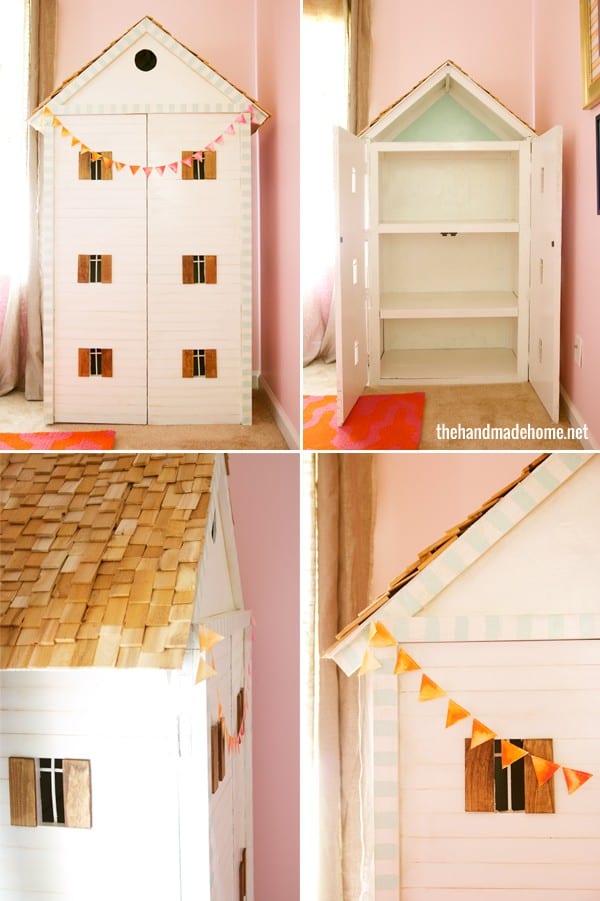
It’s been so much fun to put together a DIY version of a dollhouse…
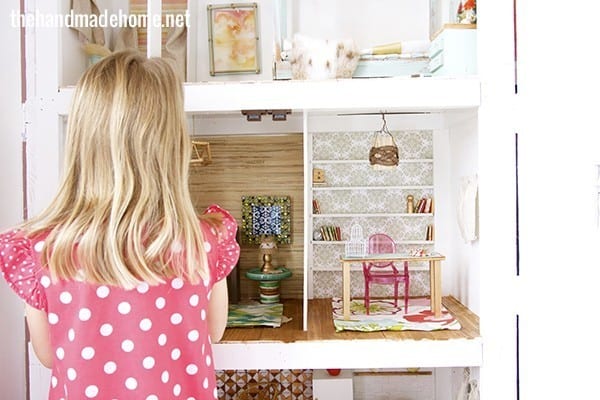
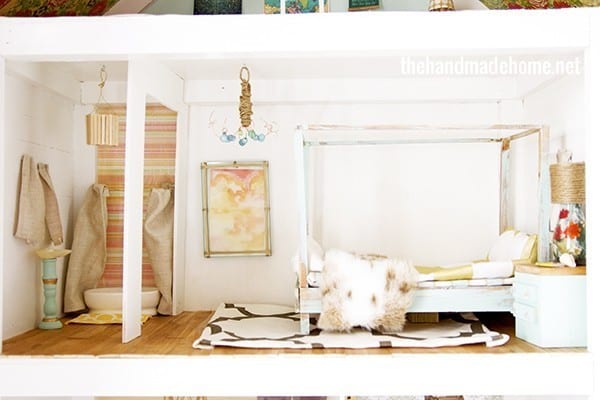
And we’re back today talking about Barbie and Ken’s Master bedroom.
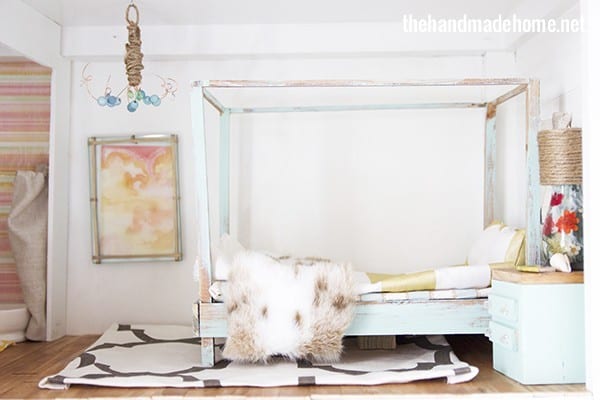
First up: The chandy. It’s basically another version of the kitchen chandelier, with different beads.
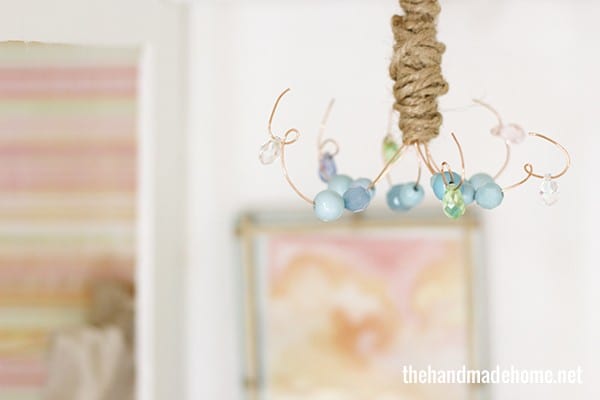
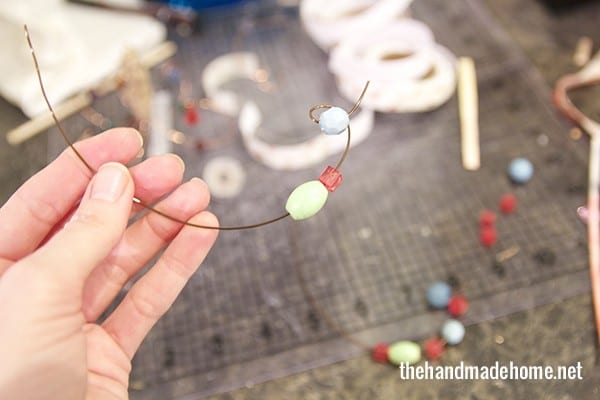
We simply took some jewelry wire, and shaping them into separate sections like this, loaded up some beads. Then we wrapped it up with some twine and hot glue to make the overall shape. We left a loop at the top to hang with a small hook.
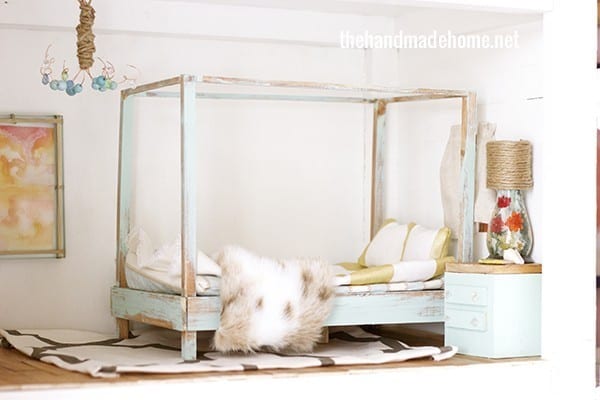
The bed was one of my favorite elements, because everything we found online or in stores was either super plastic or super pricey. So we decided to DIY our own, and it was more of what we pictured, anyway.
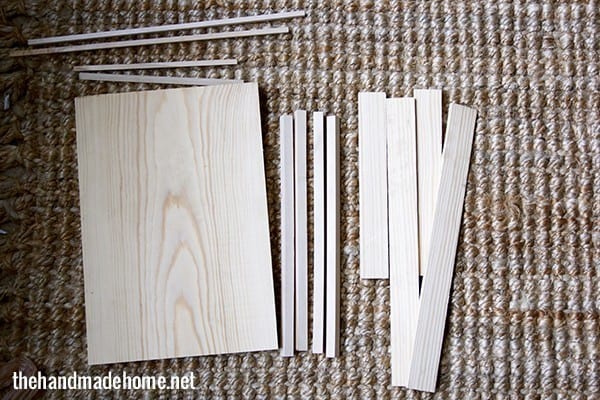
Here are the cuts you need as well as how to put it together. (We cut everything from scrap wood laying around.)
• 9 x 13 block, ours came out of a 1 x12. (This will serve as your mattress)
• (1) 1 3/4 x 2 1/2 block (This will be your center stabilizer.)
• (4) 1/2 x 1/2 by 12 inch long pieces. (These will serve as you post.) We ripped this out of a piece of MDF scrap using a table saw.
• A piece of wood ripped down to 1/4 inch think by 1 1/2 inches wide. Cut (2) pieces at 9 1/2 inches (these are your head and food board and (2) 14 inches(these are your side rails)
• (2) 1/2 x 1/2 inch piece at 8 inches. (Buffer between your mattress and your foot and headboard.)
• 1/4 x 1/4 inch piece (2) at 8 1/4 inches (end canopy rails) and (2) at 13 1/4 pieces (side canopy rails).
Using Hot glue and a little wood glue;
• Glue the stabilizer to the center of the mattress • Glue the side board to the mattress.
• Glue the (4) posts to the mattress and side boards. • Glue the end and foot boards to the post/mattress and side boards. • Glue the buffer pieces in between the mattress and foot and headboards. • Glue the canopy pieces in-between the (4) posts.
Then we topped it off with stain, and a dry brushed blue. I kind of want a big version of this for our real life bedroom… stay tuned!
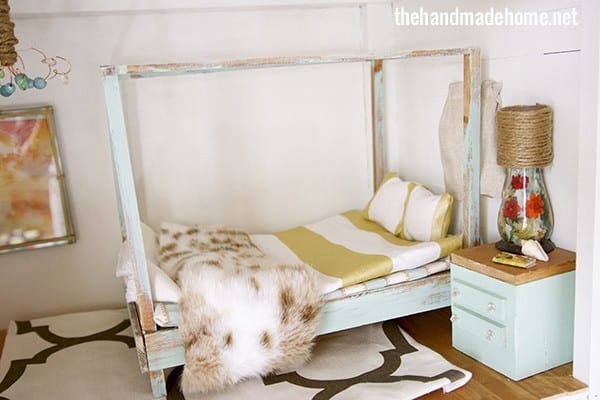
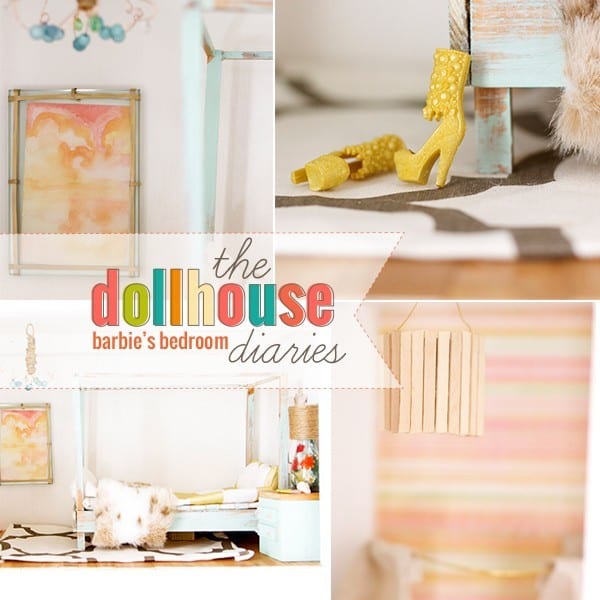
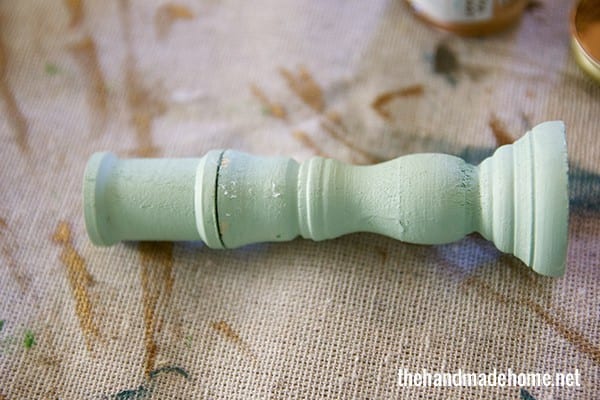
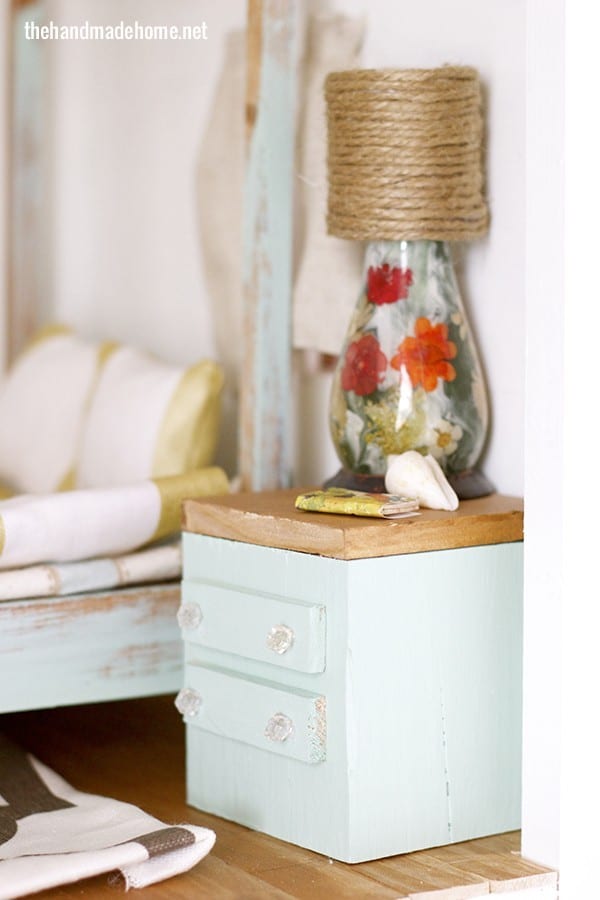
The lamp you see here is an old candle holder, with a piece of toilet paper tube on top. Wrapped in twine. Tada! Insta lamp.
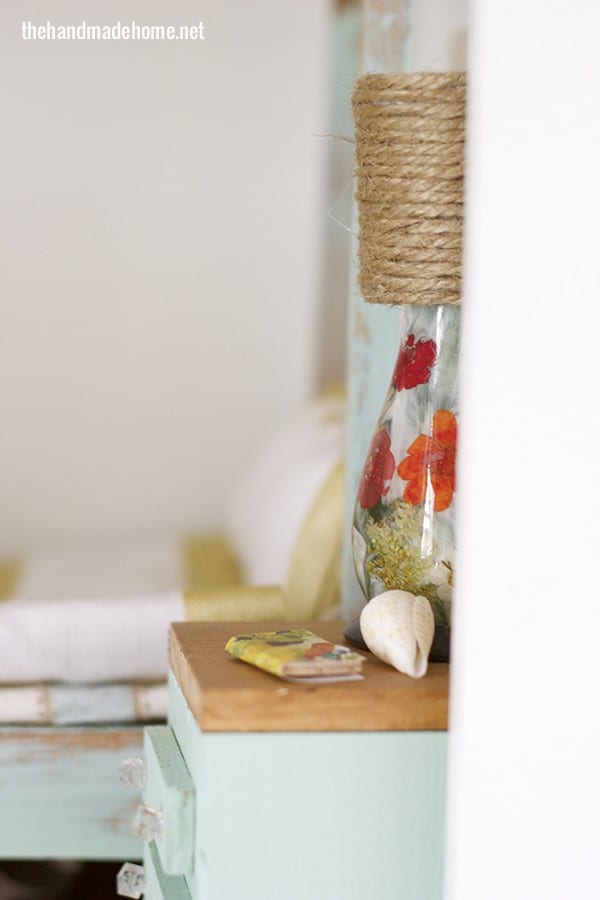
And the little side table is a block of cut wood with balsa wood on top for “drawers” and a stained piece of wood on top. We simply topped it off with little beads for hardware.
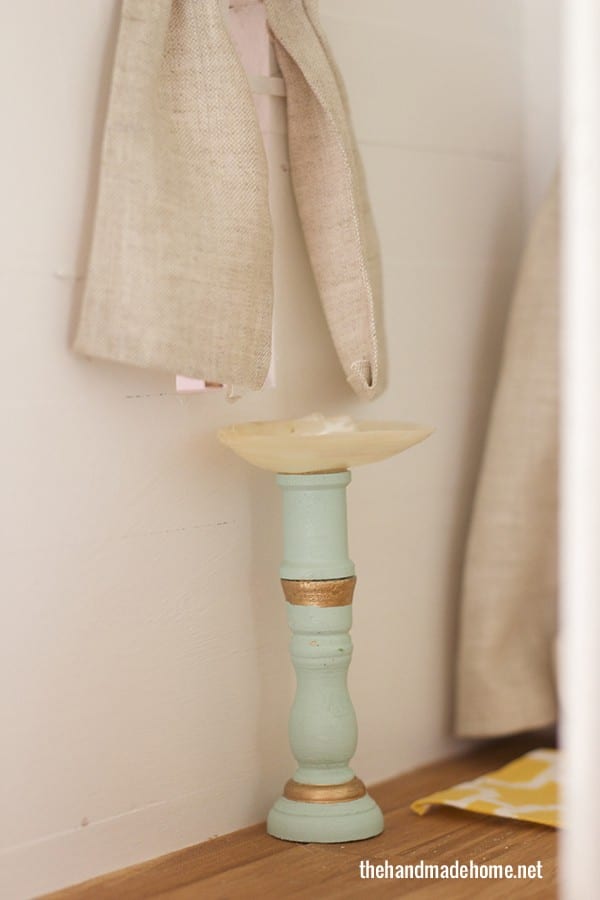
For the bathroom, we ordered a soap dish for a few dollars off of Amazon for the tub. The wall paper is some scrapbook paper we used with mod podge.
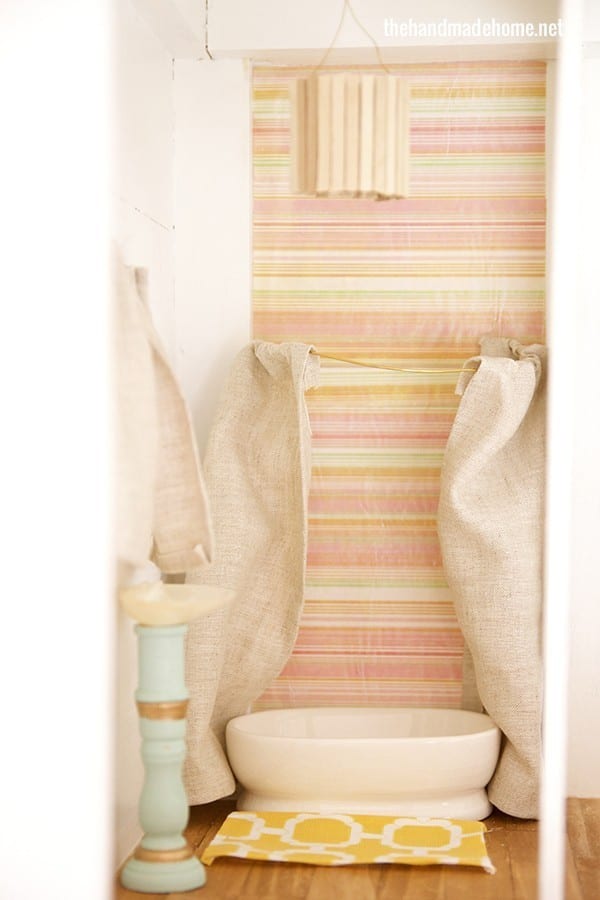
The bathmat you see is just another piece of fabric, glued under for that rug look. The sink is an old shell I had in my craft drawer, with a piece of wood I grabbed at the craft section of our hobby store. I topped it off with an old wooden spool, painted it, and glued the shell to the top.
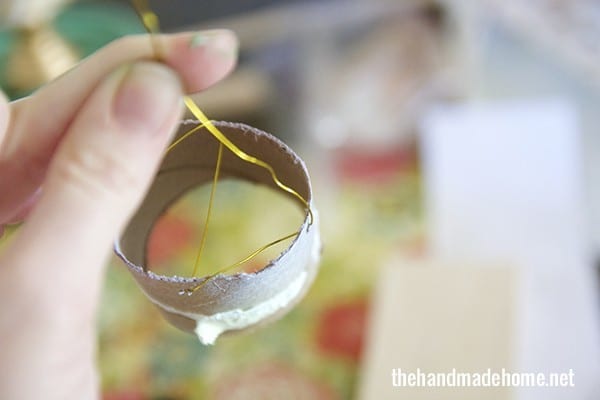
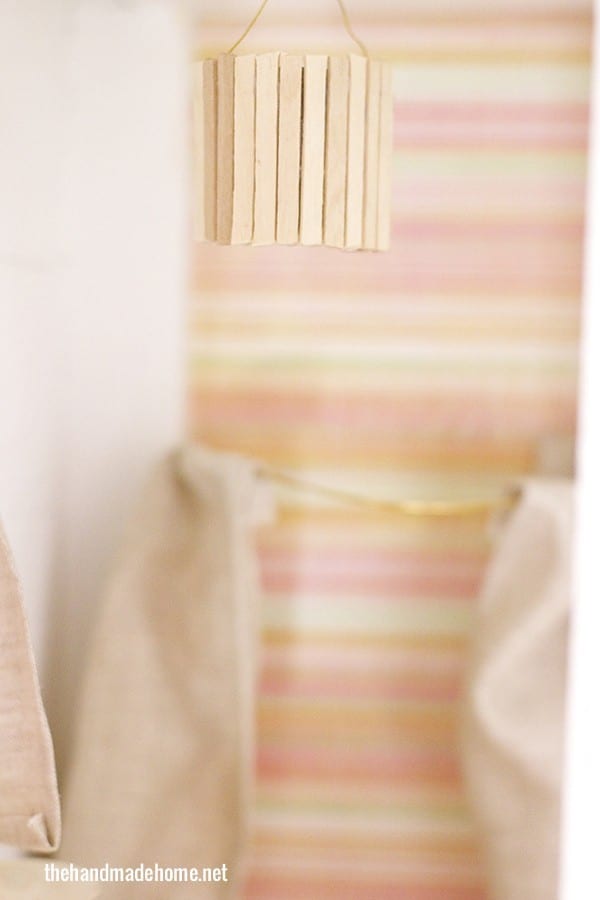
This light was just a toilet paper roll cut down with wire added through the center.
I then topped it off with some wood we already had from our windows when we originally built the dollhouse. I simply added them with glue, and cut with my scissors to the right length as we went.
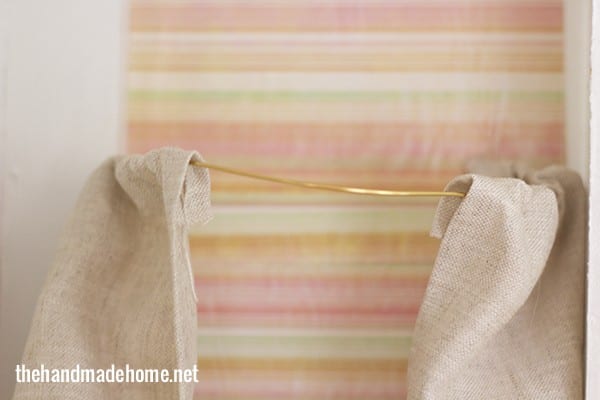
The “shower curtains” were used the same way we did the curtains in the rest of the dollhouse, just at a longer length, and looped around a piece of wire which was literally glued to the wall. And we had a shower of Barbie proportions. I think technically their heads pop over the top, but that’s just how these old houses are sometimes. A little unpredictable. ;}
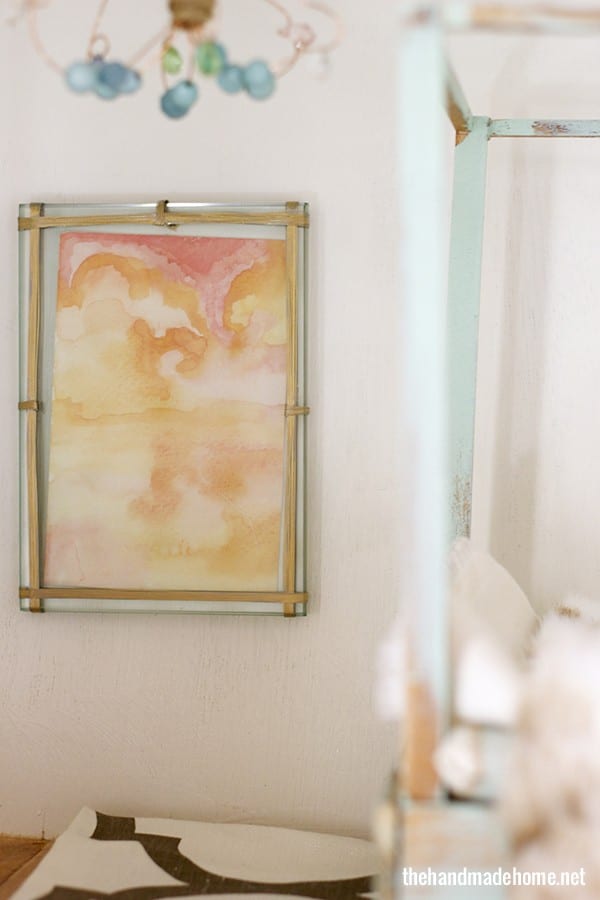
The art that Ken painted for Barbie, is really an old frame with a quick “abstract” watercolor thrown in.
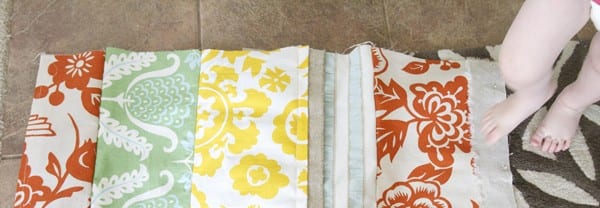
We topped off the fun bed with some left over fabric fragments we had already from past projects. I sewed a few pillows, and layered a few pieces, topping them off with faux fur. And now I want that exact bedding in my own room.
It was super fun to diy this little house, and take an approach like we would with our own home. I guess the possibilities are kind of endless when you think beyond the norm… no matter what size. ;}
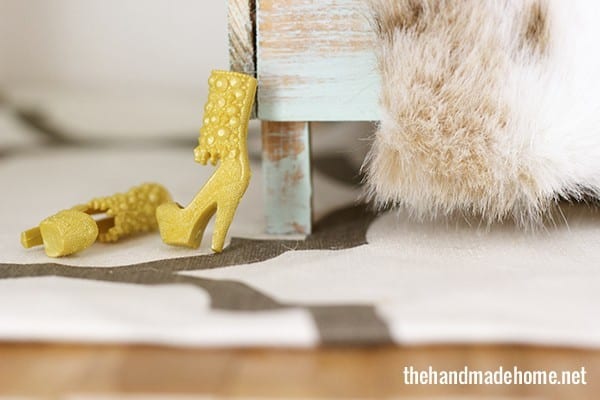
In other news, I want these bejeweled shoes. So I can wear them to Walmart an awesome restaurant and end up on someone’s Instagram… probably after I break my ankles. because that’s how I roll.
Kidding not kidding.
We’ve had lots of fun. Have an inspired day, y’all!


Love love love this dollhouse! Your photos never get old. Thank you for the how to of this bed. I think we’re trying it this weekend so this was perfect timing! 🙂
Just lovely! I want those shoes too. I laughed out loud at the last bit!
Hi! Love, love love! I actually made my daughter a bed gorgeous bed & closet for her doll!
Please check it out, I’m sure it would be handmade home approved!
http://designtendencies.blogspot.ca/2014/02/diy-dolls-bed-super-easy-for-1st-sewing.html
Thanks! Bianca
Awesome Bianca! Thank you for sharing that! ;}
This is so sweet! My nana just got this behemoth of a dollhouse for my kiddies and this really cheap, not cute furniture that I was not happy with. I have been scouring the interwebz for cool diy furniture to surprise my daughter on her birthday!