
how to make an easter egg tree {diy sun catchers}
If you’re anything like us, you’re ready for spring. Since it’s nowhere to be found any time soon, we decided to bring it to our home anyway.

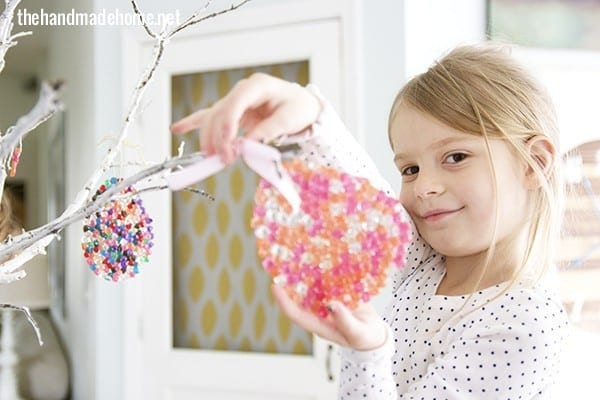
It’s the perfect, simple little rainy day activity: one your kids will absolutely love.

If you remember our OZ post from last summer, this is just another version of that. So you can do them in simple circles, or form them into shapes like this tutorial. The possibilities of fun are kind of endless…
I basically broke this out to keep them occupied one grumpy afternoon… and it worked wonders.
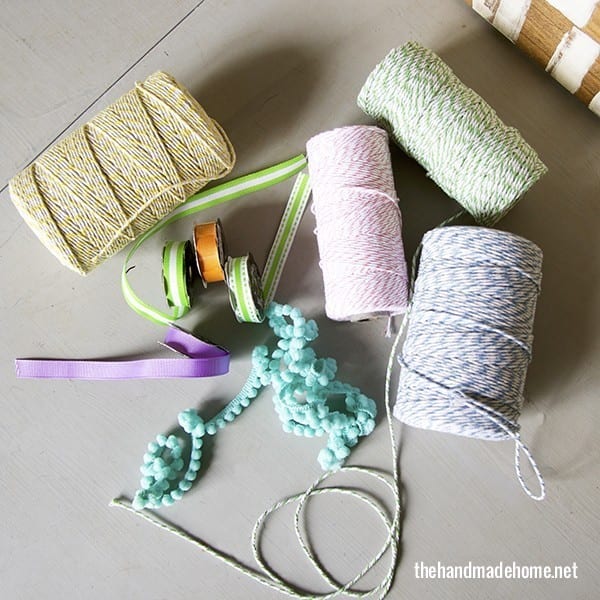
Here’s what you’ll need:
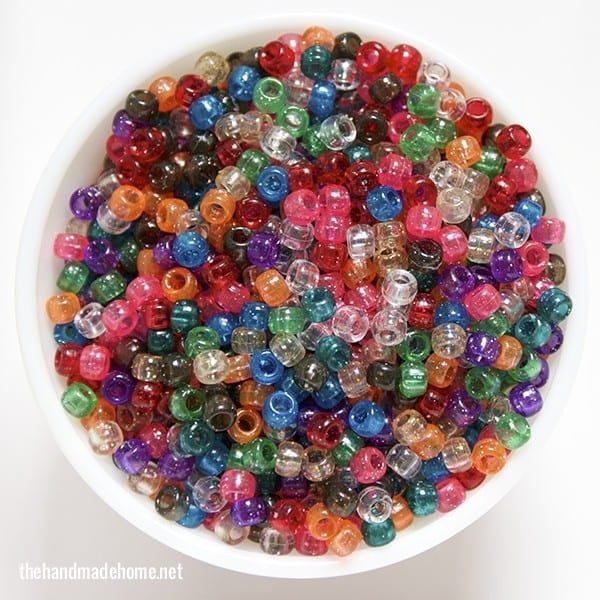
Some version of these plastic beads. You can find them at any crafting store. These had some glitter in them for extra sparkle. I buy them by the bags because this project is kind of addictive.
One round glass pyrex dish. {A few, if you have more than one child and they don’t want to take turns.}
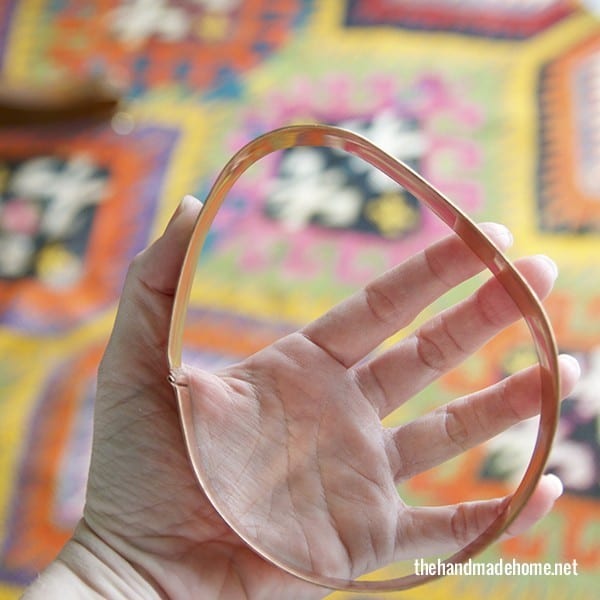
Any cookie cutter (we went with this one in lieu of the upcoming holiday) in metal. These will be placed in the oven, so plastic will not work.
1 toothpick, and twine of your choice. {And some oven mitts + scissors if you want to get super technical.}
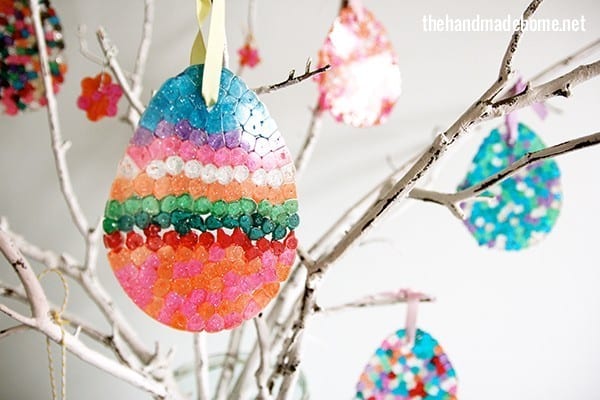
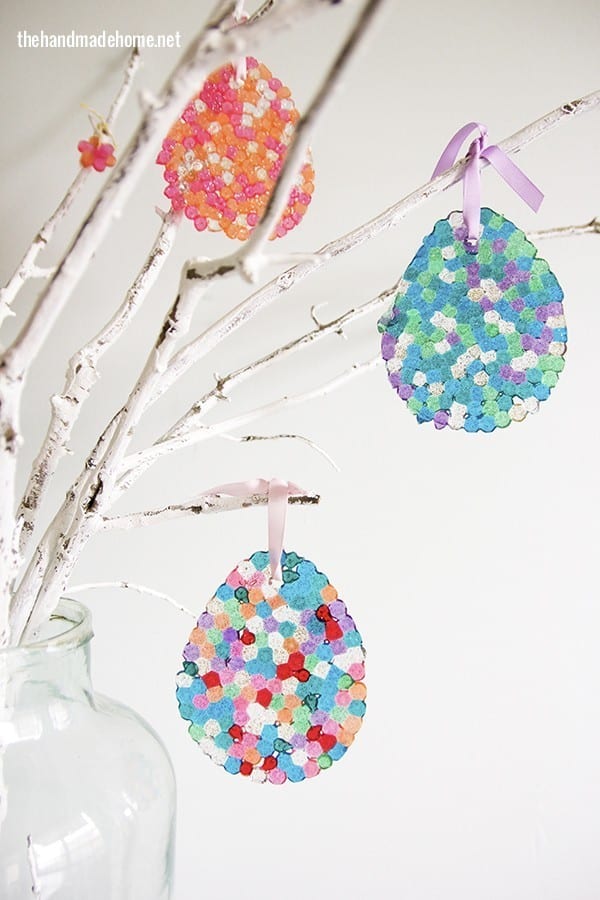
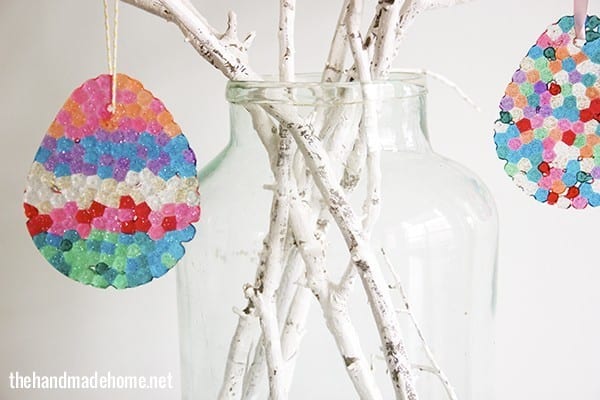
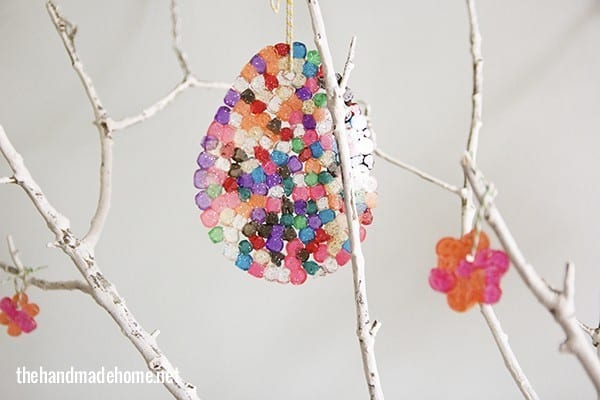
These look great and are so pretty in their windows, but we used ours on some painted branches left over from Christmas to make a “tree”.
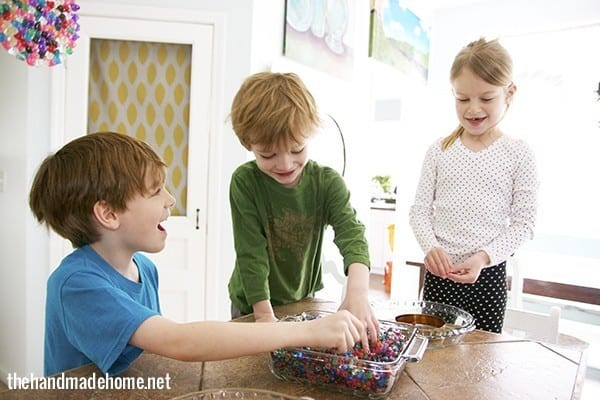
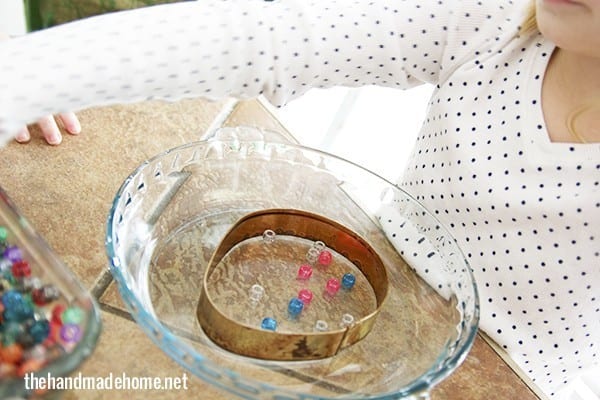
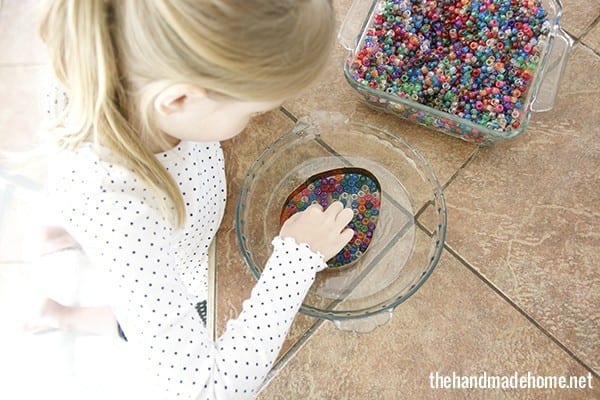
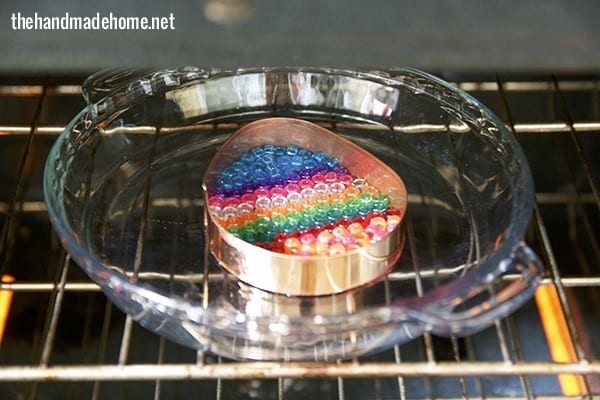
Preheat your oven to 400 degrees. Then take your beads {with whatever cookie cutter you use} and place it flat in the center of the glass container.
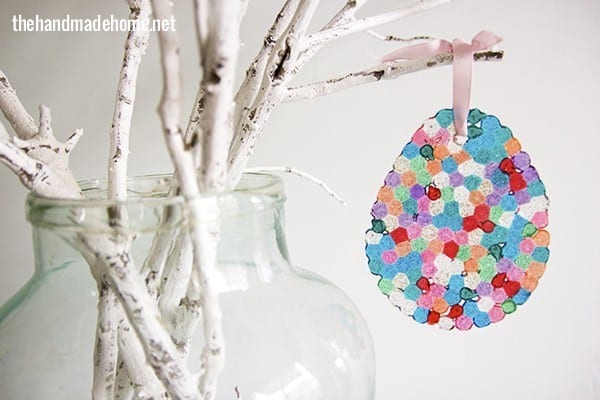
Take whatever assortment you want and place them on the inside of your cookie cutter. We tried stripes, layers, and then just a fun free for all. Make sure that all of the beads are touching each other.
Note: The cookie cutter just holds the beads into place while they melt, thus the metal requirement. Cooking spray is optional but I didn’t really notice a difference with or without as we made these.
Set your little creation to melt for 15 – 25 minutes, depending on how your oven cooks. You’ll get a nice melted-plastic smell, so don’t worry. Keeping an eye on them, pull them out when most of the beads are sticking together.
Watch those little fingers with hot dishes – I always set them on the counter and out of reach from curious little hands while they cool. Immediately after pulling them out of the oven, use your toothpick to make a little hole in the top of your shape. This is where your hanging twine will go!
As the beads cool (and sometimes this can take up to fifteen minutes) you’ll hear a cracking sound, while the plastic pulls away from the glass dish. When they’re cool enough, simply wedge the shape out of the cookie cutter, and tada! You’re finished.

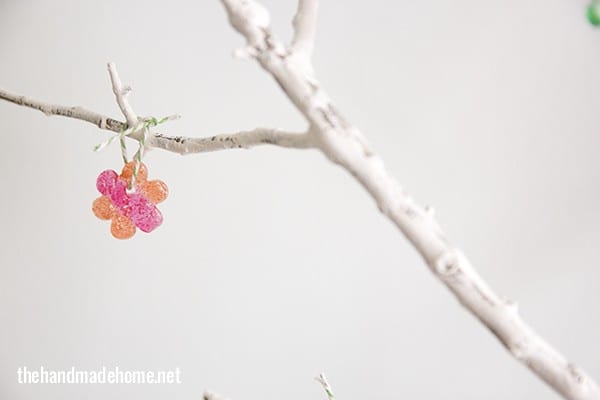
We even mixed in a few fondant cutters (found in the baking aisle of any craft store) for an extra shot of spring fun!
Tip: The smaller shapes make it harder for the beads to fill in perfectly, so when I pulled those out, I ended up dragging some of the melted plastic from the beads to the edges with the toothpick to make sure they filled it in right. It might help to try that if some of your beads turn out wonky.


Before the day was over, we were making glow in the dark versions, and little necklace pendants for Emmy.
It’s addicting! I they really love this little craft. You can make a ton of different things – it certainly doesn’t have to be with easter eggs.
Simply hang in a place where they will catch the light… and enjoy!
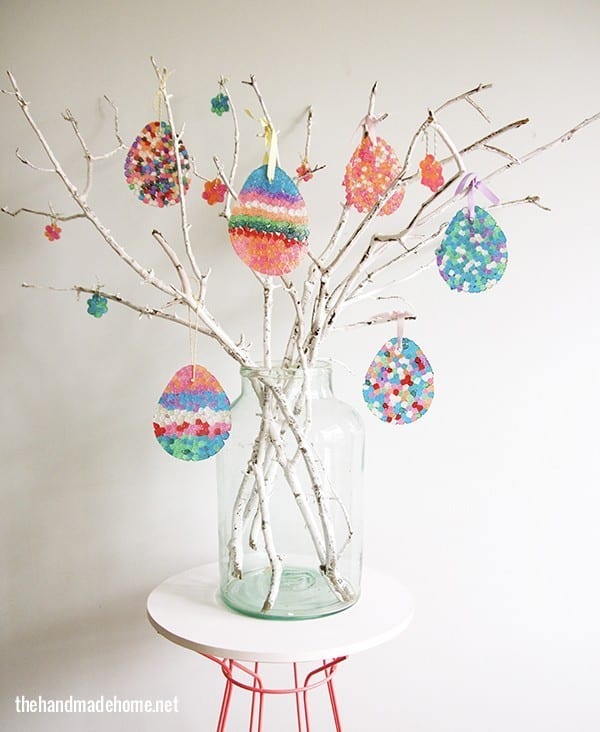
Let us know if you try this little project. It’s definitely one of our rainy day faves. We might be breaking out some car shapes, tomorrow! {Fingers crossed that mommy can rustle up some more metal cookie cutters}.


Love this! We tried the melted beads for Valentine’s Day and had lots of fun. I love the idea of using a big egg shape rather than the little ones.
love these!
I LOVE this! Can’t wait to try this with my little guy! I just picked up some bunny shaped ones from Target that come in a few different sizes. I’d love to find an Easter egg shaped one too!!! 🙂 Thanks for the idea!
I love these! Two quick questions: does the Pyrex stain (basically can I use it again as a cooking dish) and are they durable enough to hang outside?
Hey Jennifer! The pyrex does not stain. I say skip the pam, because it will take a few runs through your dishwasher or scrubbing to get it off, and it’s really not necessary. Also, they’re fine to hang outside, but if they blow off of something and hit concrete, they may break. But they’re pretty durable otherwise. ;}
Thank you for replying!
I tested it out yesterday, but was wondering how you made the hole for hanging? I feel like it will break in half if I tried pushing a needle through it. Thanks! 🙂
Hey Sarah! I explained it above, so I hope I was clear – when you pull it out of the oven, be sure you pull back some of the plastic back to make your own little hole while it’s still hot and you can move it. It works every time like a charm. I hope that helps! ;}
What type of tree twigs are these please?
Hi! They’re from a pecan tree, but I painted them.