
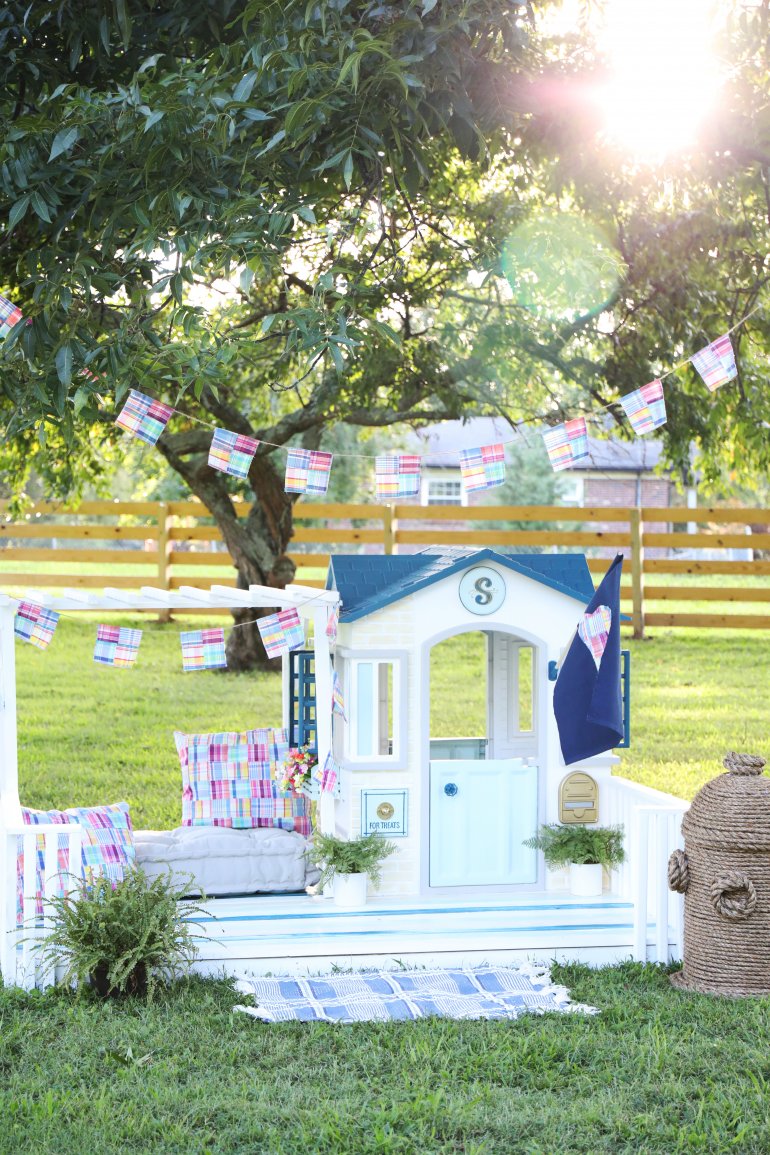
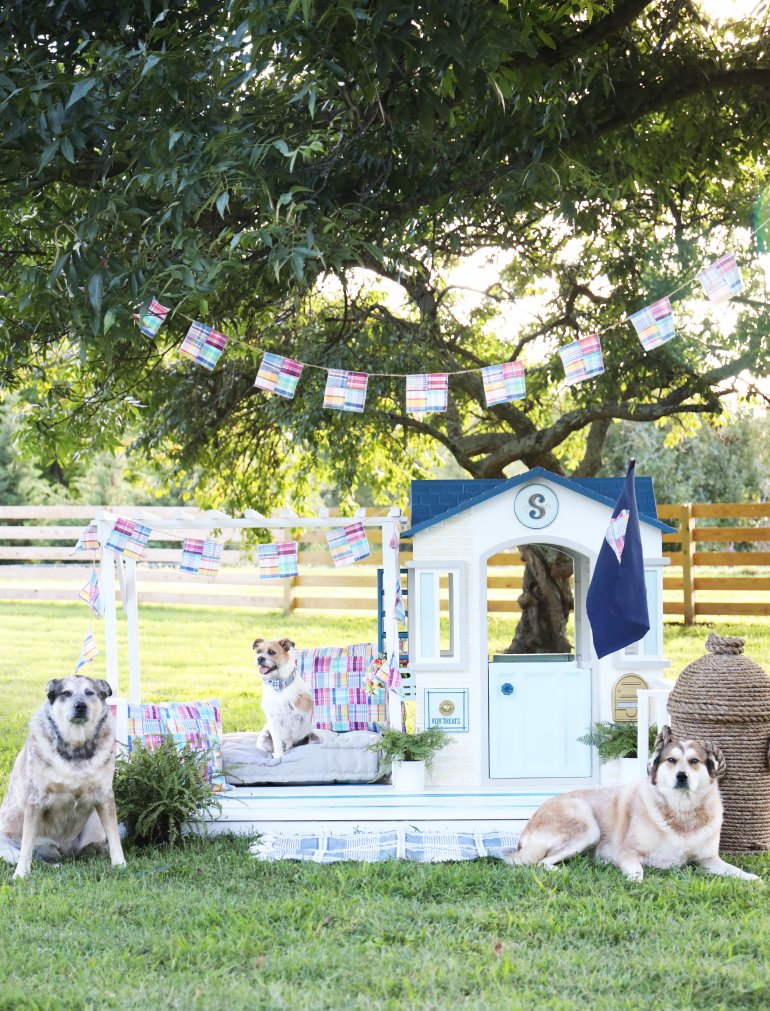
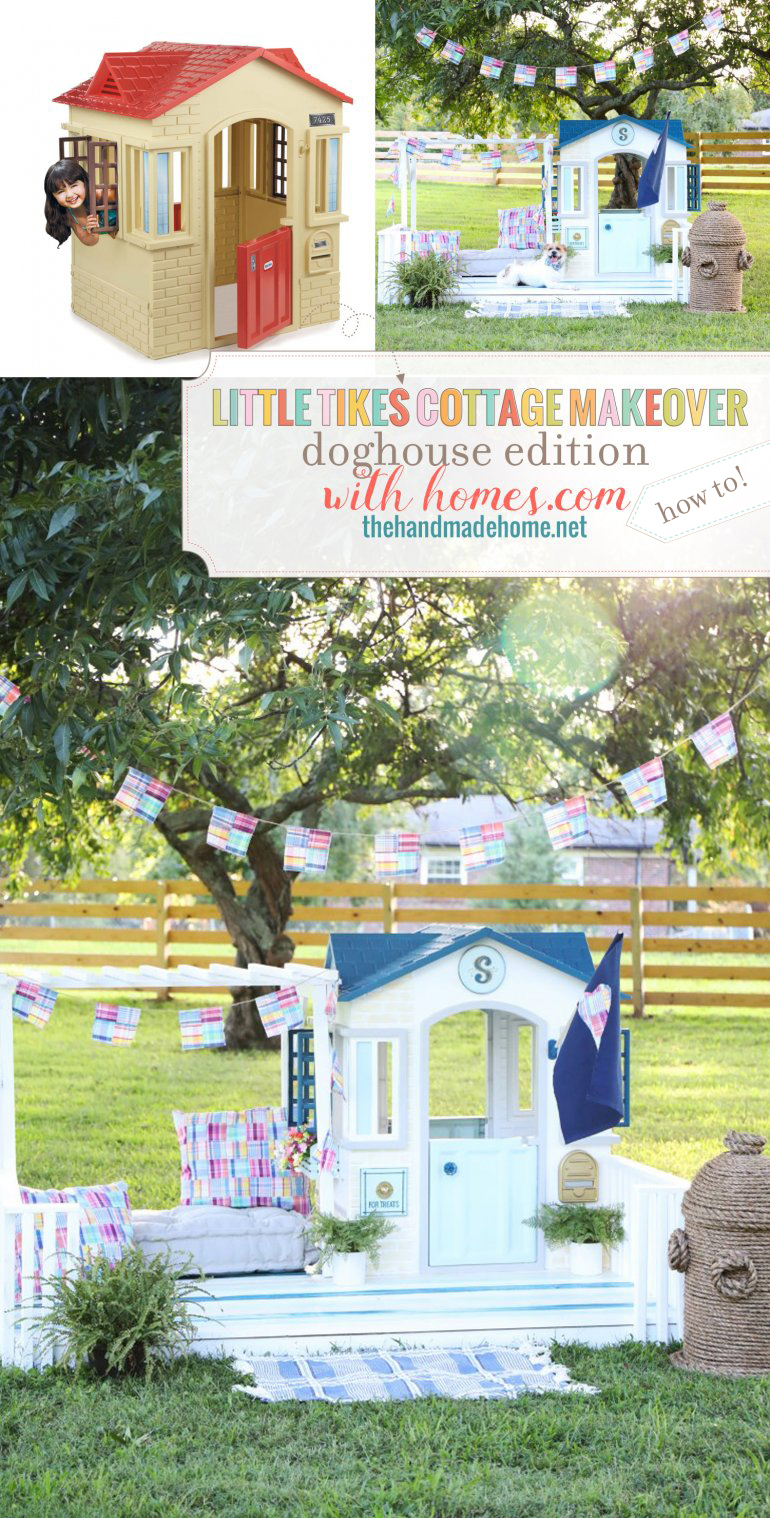
how to makeover a little tikes playhouse {and a handmade fire hydrant}
Do you guys remember our sweet little tikes doghouse makeover from last week? We were thrilled to show you the reveal, and today we’re sharing some really fun details on how we pulled it all off!
It was a little bit of a challenge in last month’s crazy weather, but it was such a fun project!
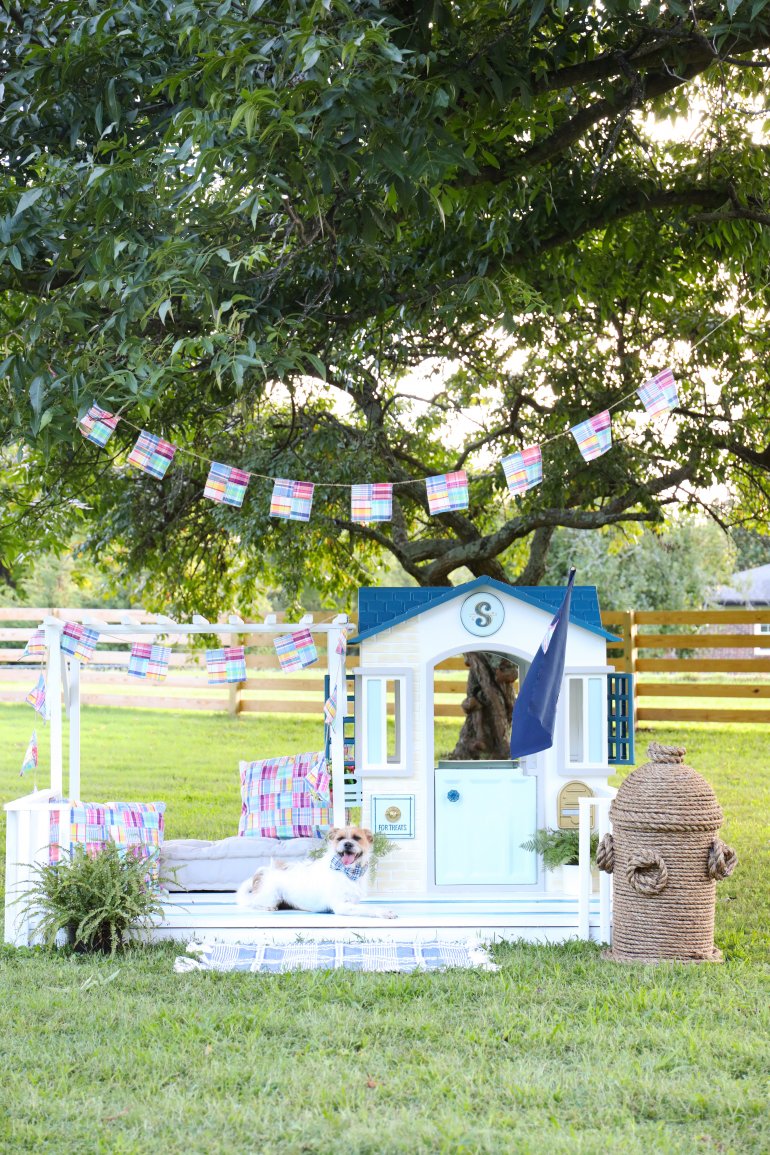
![]()
Painting:
The key to giving this a makeover, is spray paint. We couldn’t recommend the less humidity the better, but it helped that we started with a fabulous primer from Sherwin Williams. It coated it all and established a nice base to use all those fun colors. It also cut our time in half, because it handled all the paint so well.
Then it was time to add the paint. White paint covered the main part of the house, and then the other shades where we wanted those, too. {Don’t forget the little pieces that come with the playhouse, to put it together- like screws and roof shingle covers. It helps to paint those, so that it’s easier to put together later.}
Let’s take a look at those Sherwin Williams colors!
• Waterscape: for the stripes, door, monogram + part of the window
• Connor’s Lakefront: Such a beautiful blue for the roof + all the accent colors you see, like the spigot knob, stripes + windows
• Convivial Yellow: the brick and stripes
• Extra White: for that beautiful base color – which is also the color of our own house.
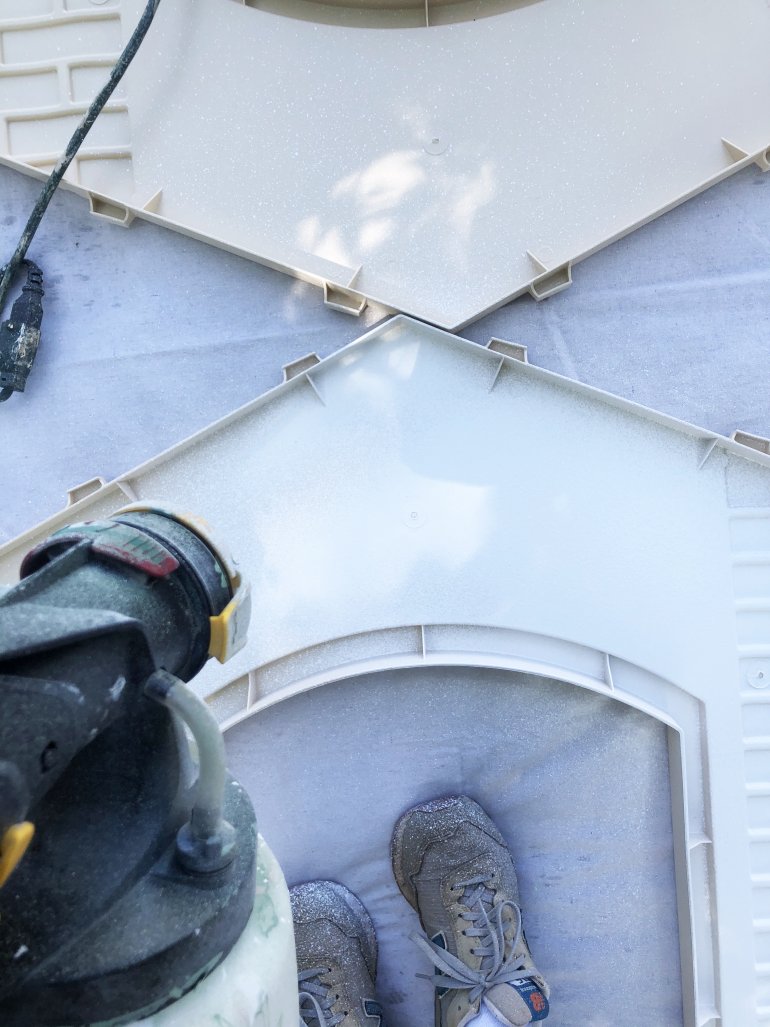
So as mentioned above, first with primer, then when it was dry, it was time to paint!
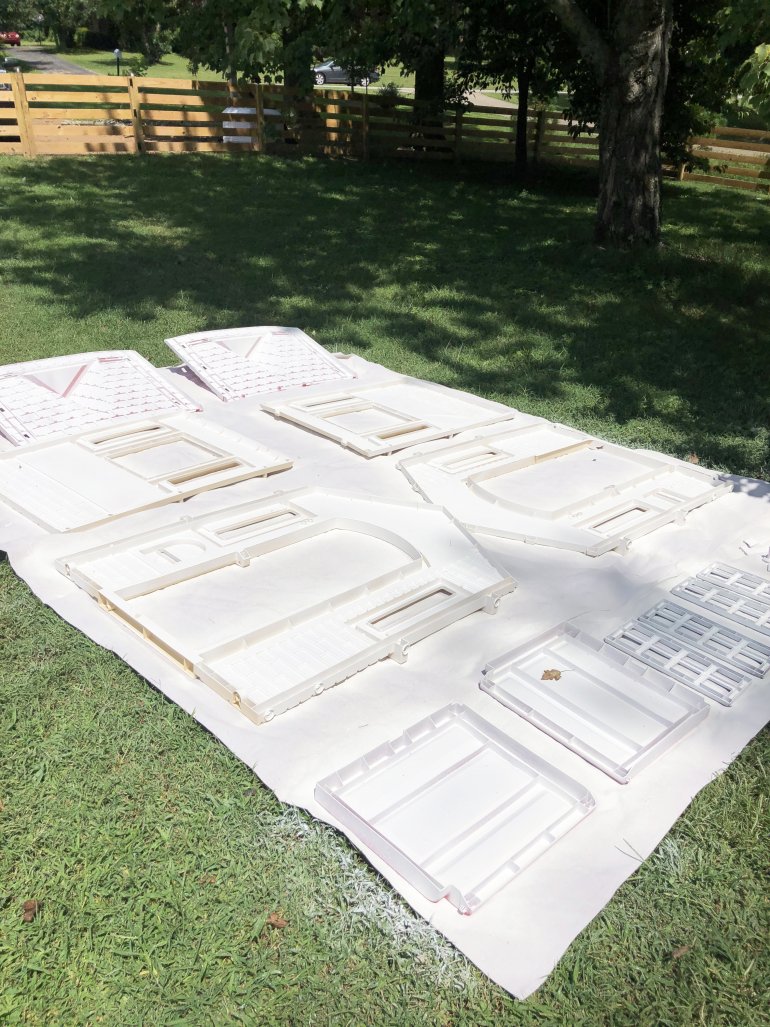
The best way to do this, is by spraying. It helps eliminate all those unwanted brushstrokes.
Not-so-pro-tip for those little pieces mentioned above: we placed them in floral foam to help keep them steady when spraying with the sprayer.

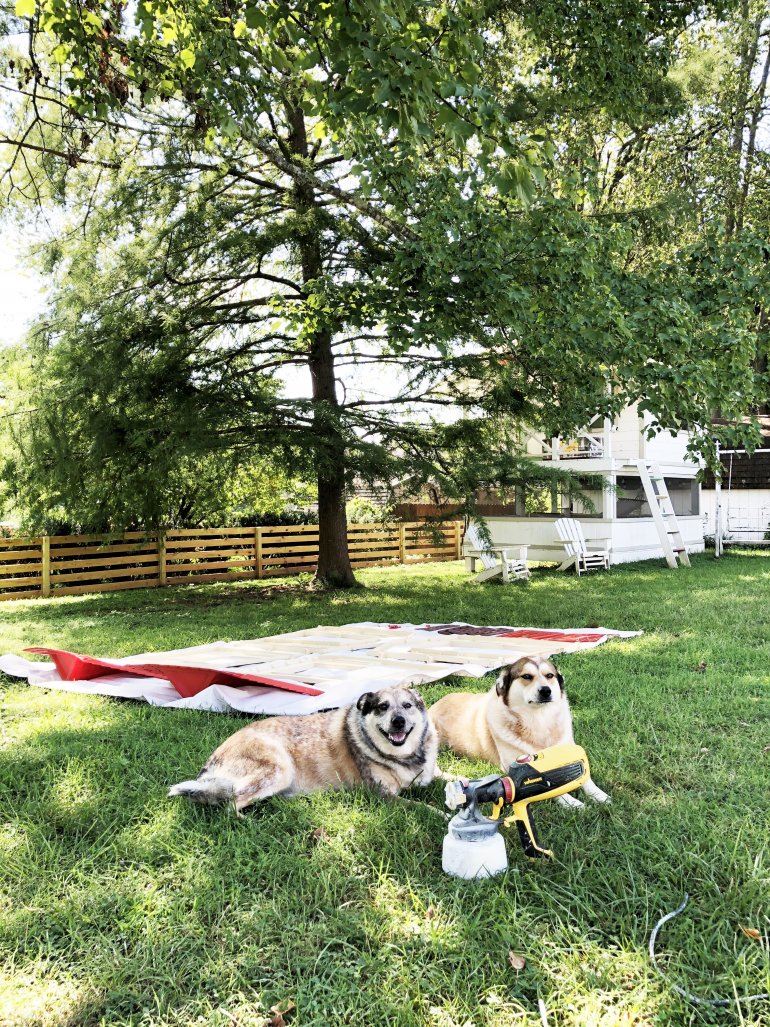
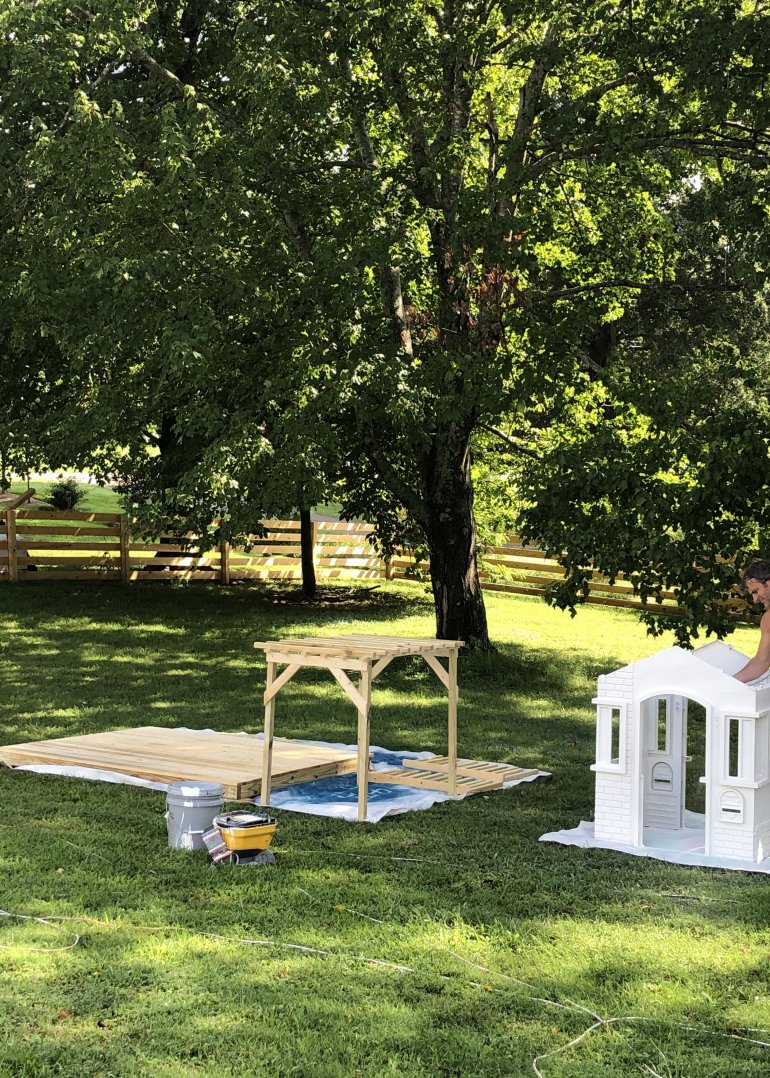
Building: Then, for the extras.
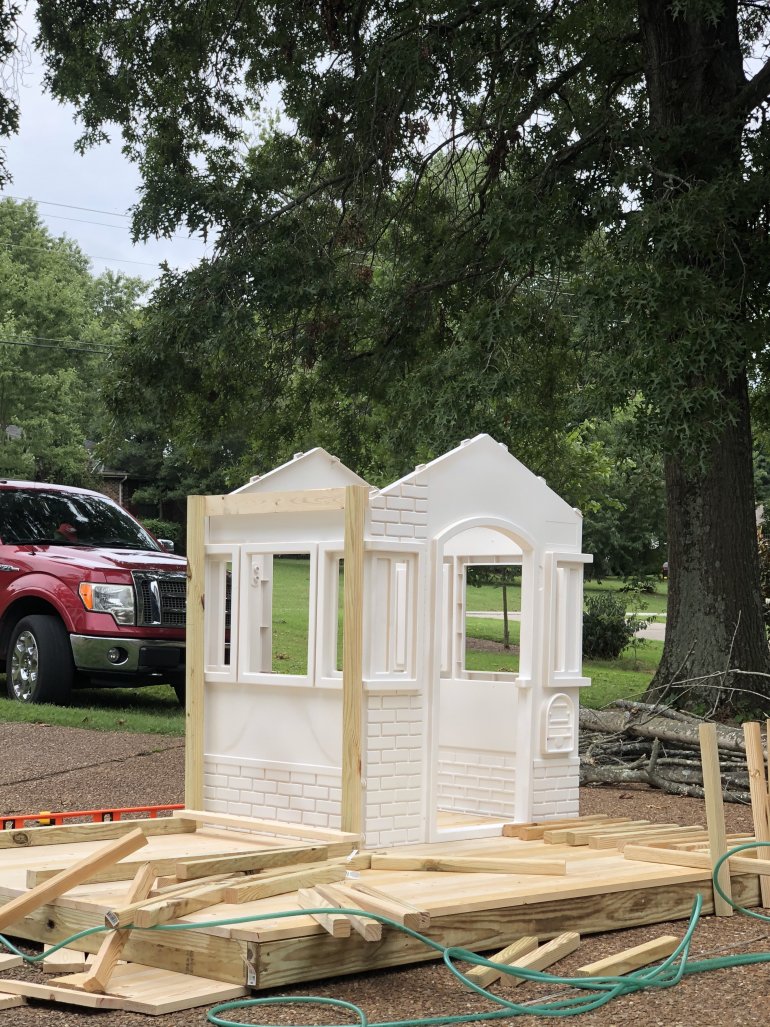
We started by building a base for the playhouse.
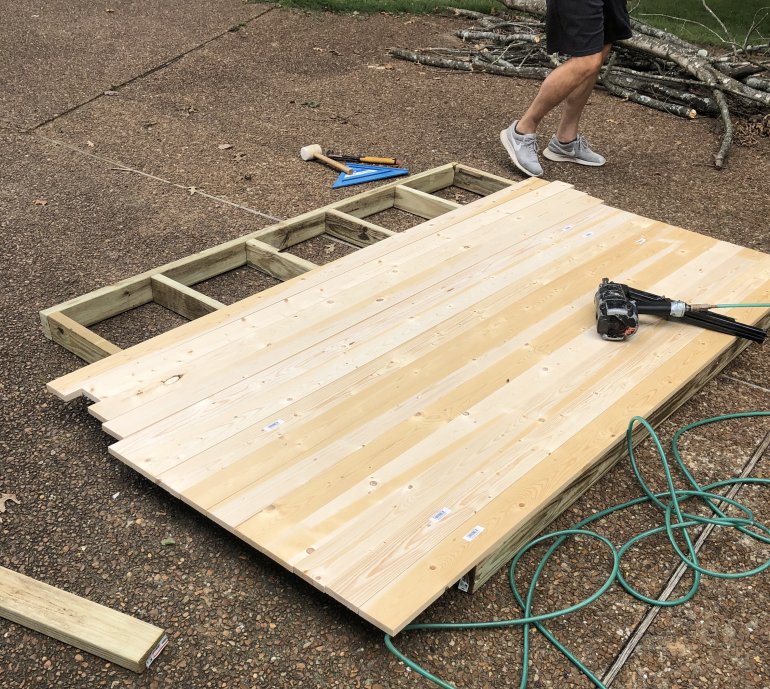
This base was a tiny deck on which everything else was added. It helped to position the playhouse assembled and primed, on top of the little deck, to decide exactly how large we needed to go. The deck itself is made out of 2 x 4’s and 1 x 4’s so it stayed nice and small next to the house. We didn’t want it to feel overly built with pieces that were too large.
This helped us figure out proportionally, what would work.
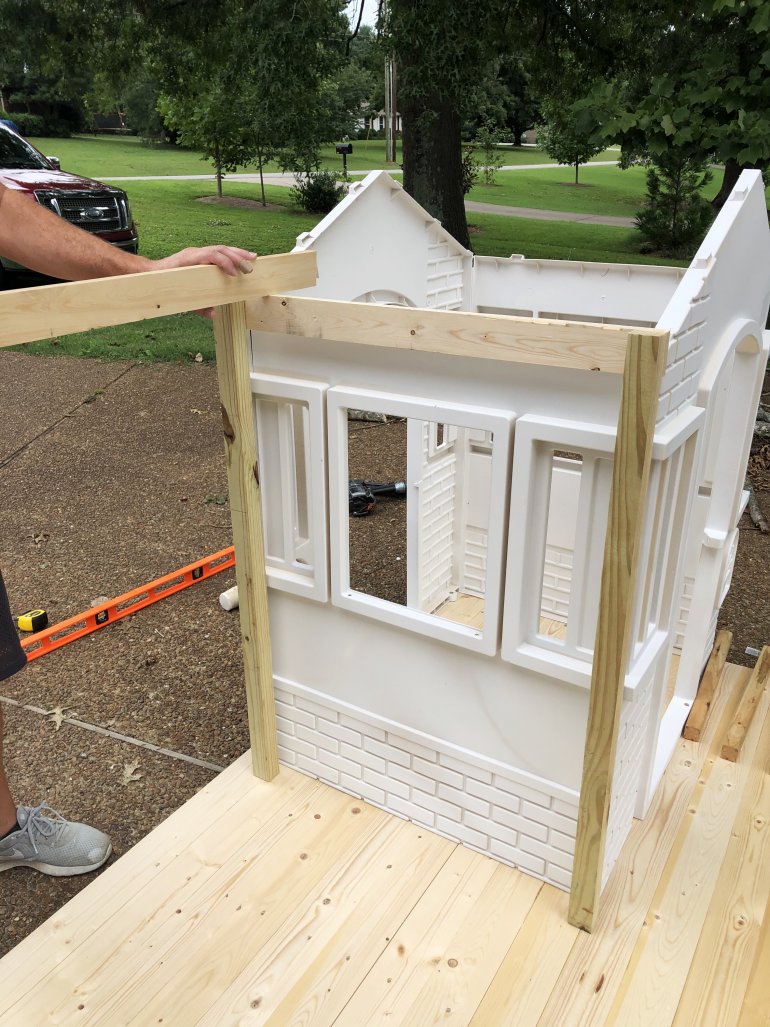
Then we made a little pergola separately. It was built from 2 x 4’s that we split, along with 1x 4’s for support and finally the deck railing which we cut to size. This kept it smaller in stature for all things doggo. It just all went nicely.
Then we painted all the wooden pieces separately, before finally putting them all together. This also made it easier to transfer to Smoosh’s actual home when it was complete.
Details:
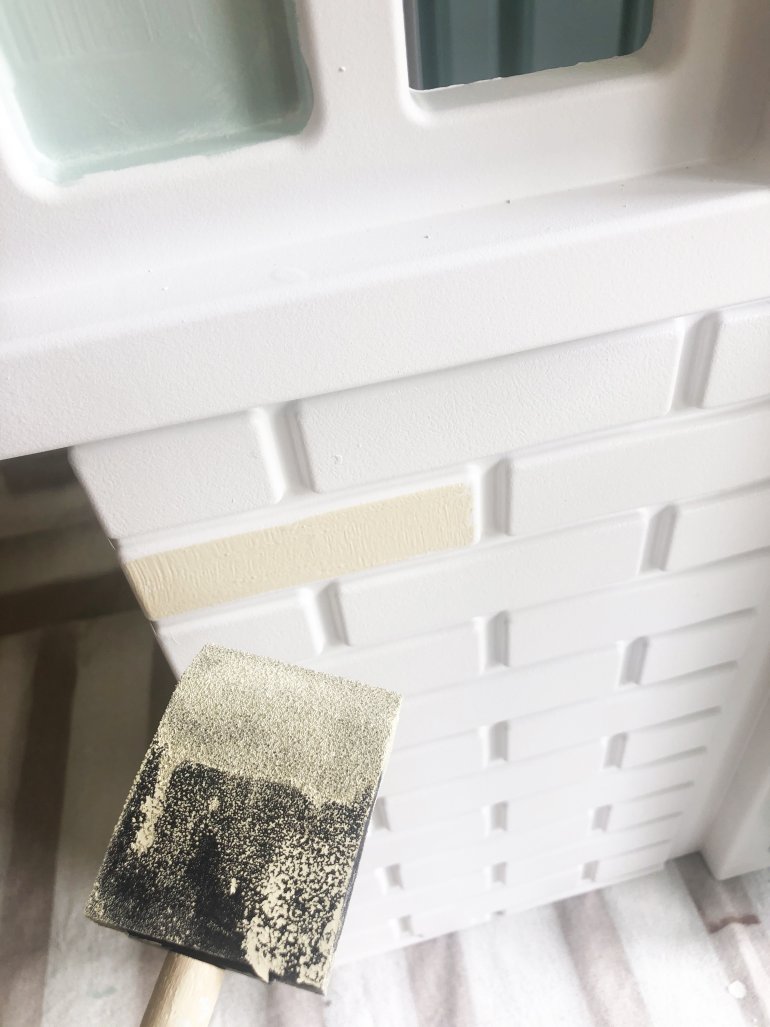
When that was dry, it was time for the fun part.
We brought it inside due to inclimate weather, and took our time in the air conditioning, hand brushing all the details. Next, we added some really fun features like accent colors {some of those were hand painted} along with the little spigot doorknob and really fun doorbell. We also added a soft yellow with the sponge brush for more of that “brick” look.
Accessories:
You may have also spied Smoosh’s little monogram. this was made with simple craft wood pieces, hand painted by me, and glued to the top.

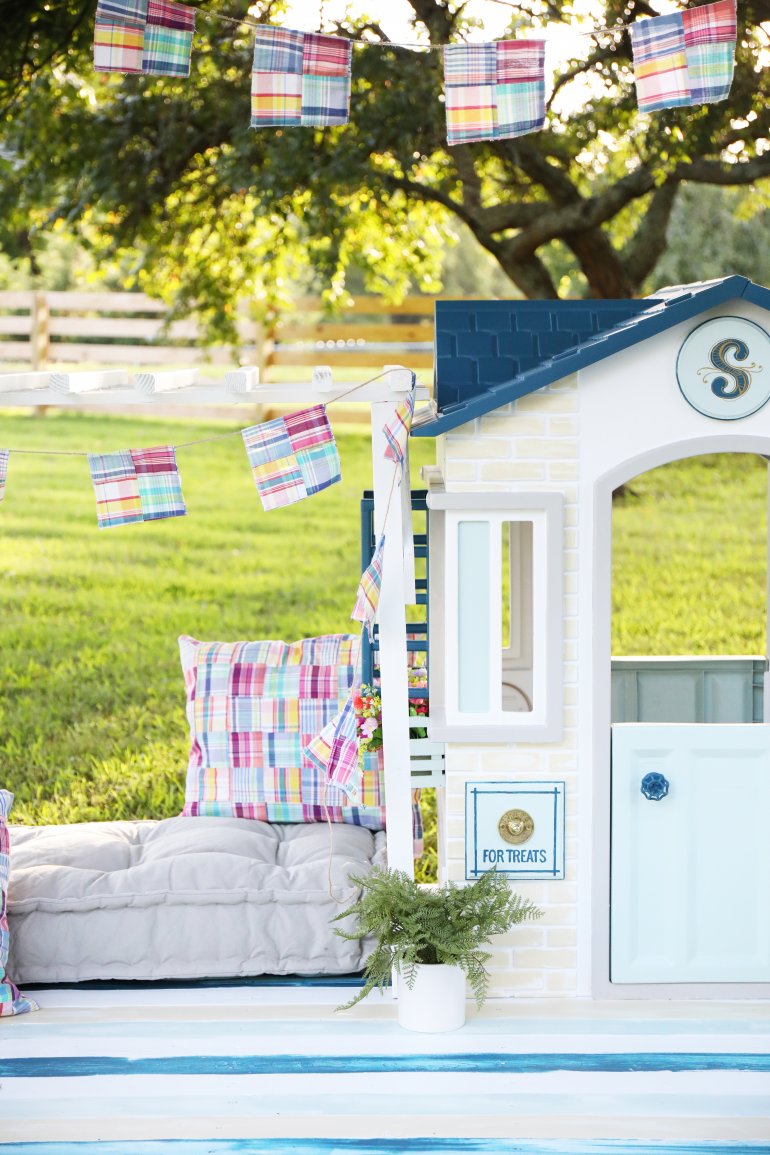
This doorbell button was found on Amazon, and we actually meant to use it for our own house, but we decided not to in lieu of something else. So we ended up attaching it to another piece of craft wood, and simply painting all around it for added fun.
![]()
We also added this little flower box for another fun burst of color.
Smoosh has a hooman sister that we think will really appreciate that element.
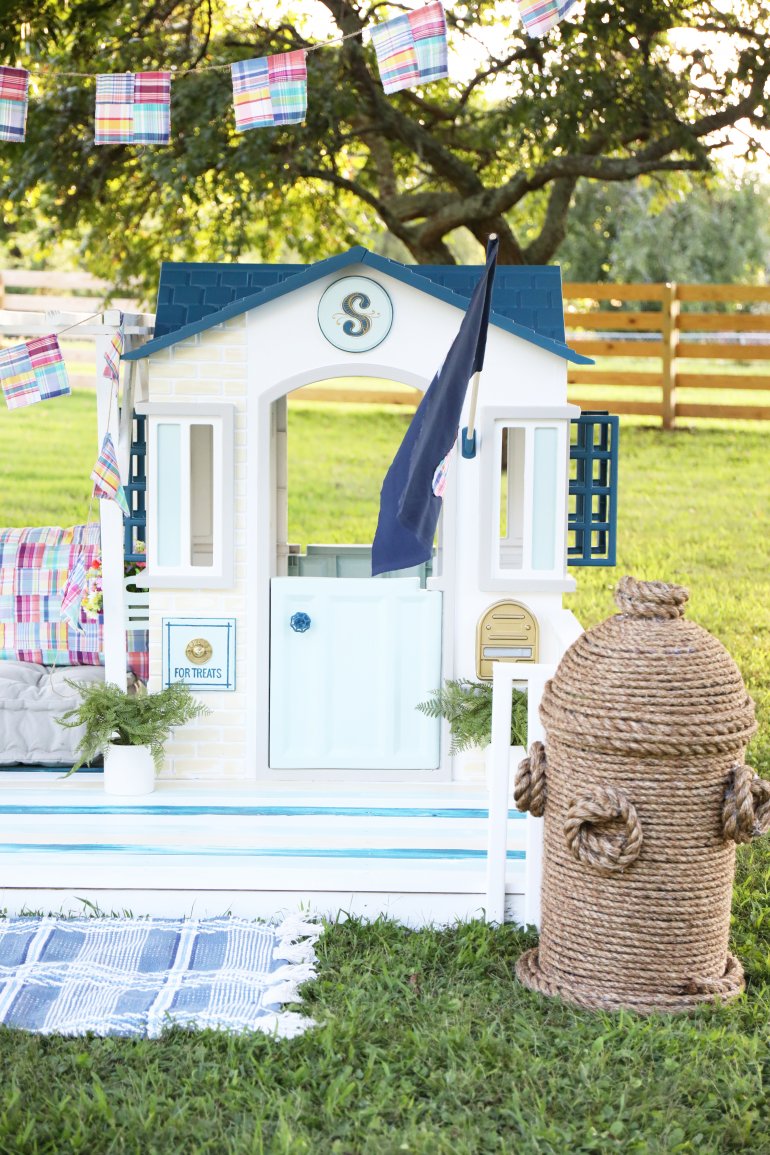
Fire hydrant:
Three requirements for this project were a bone shape of some kind, a fire hydrant, and storage.
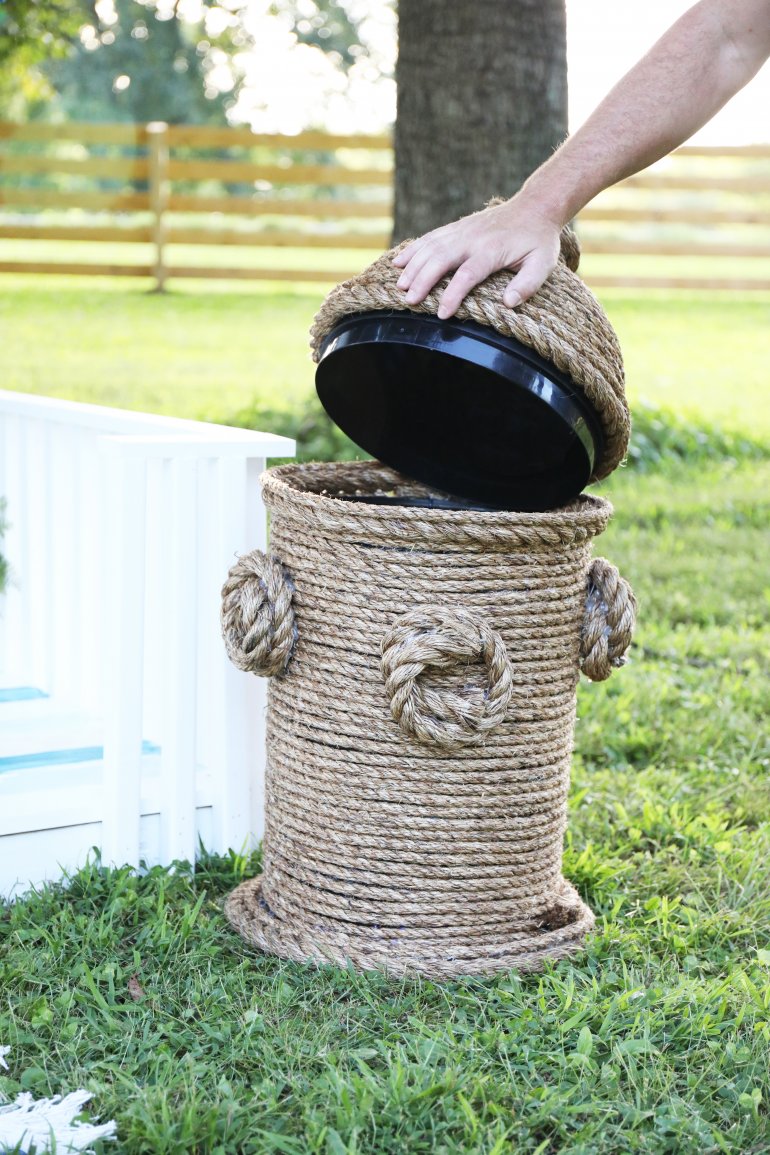
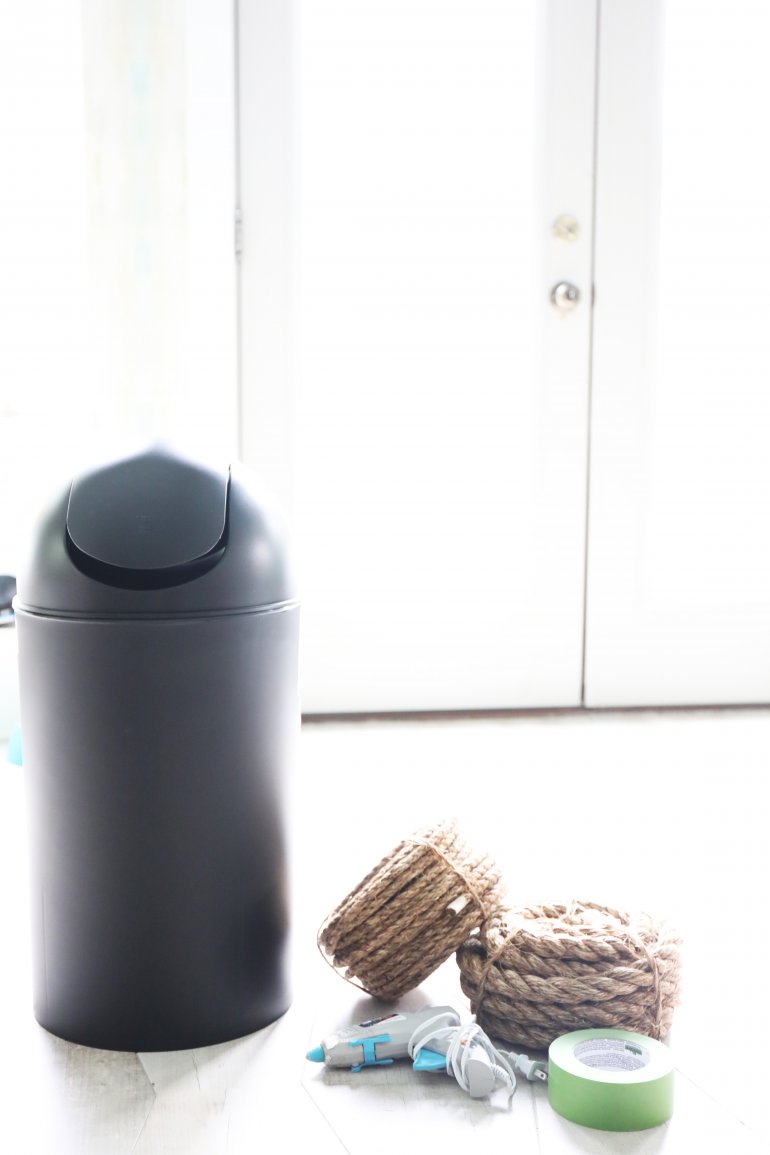
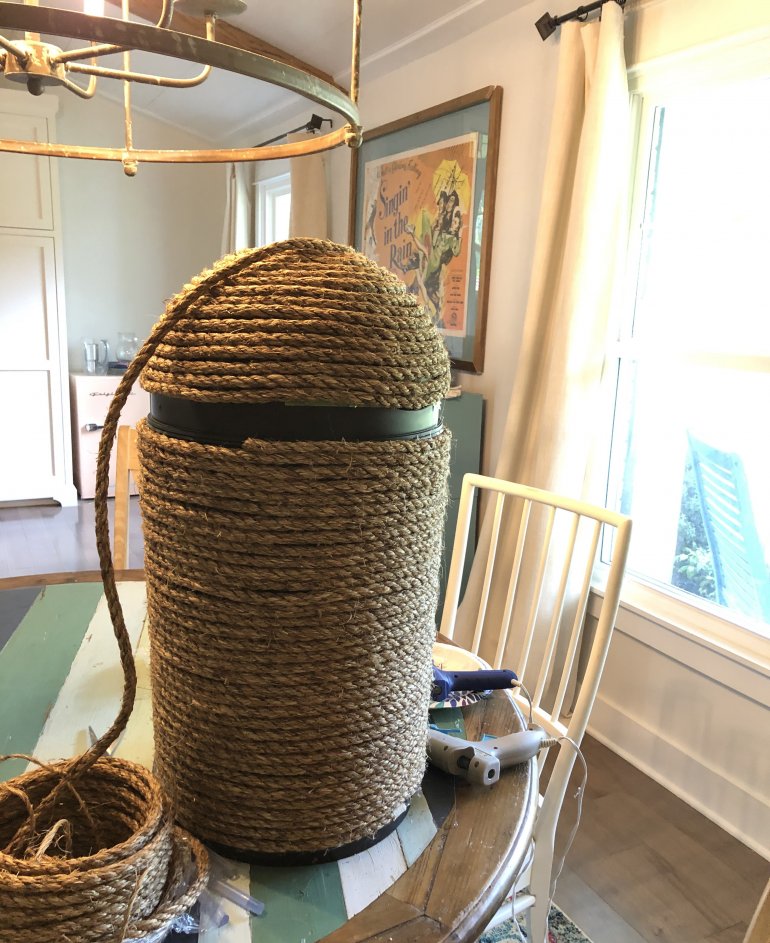
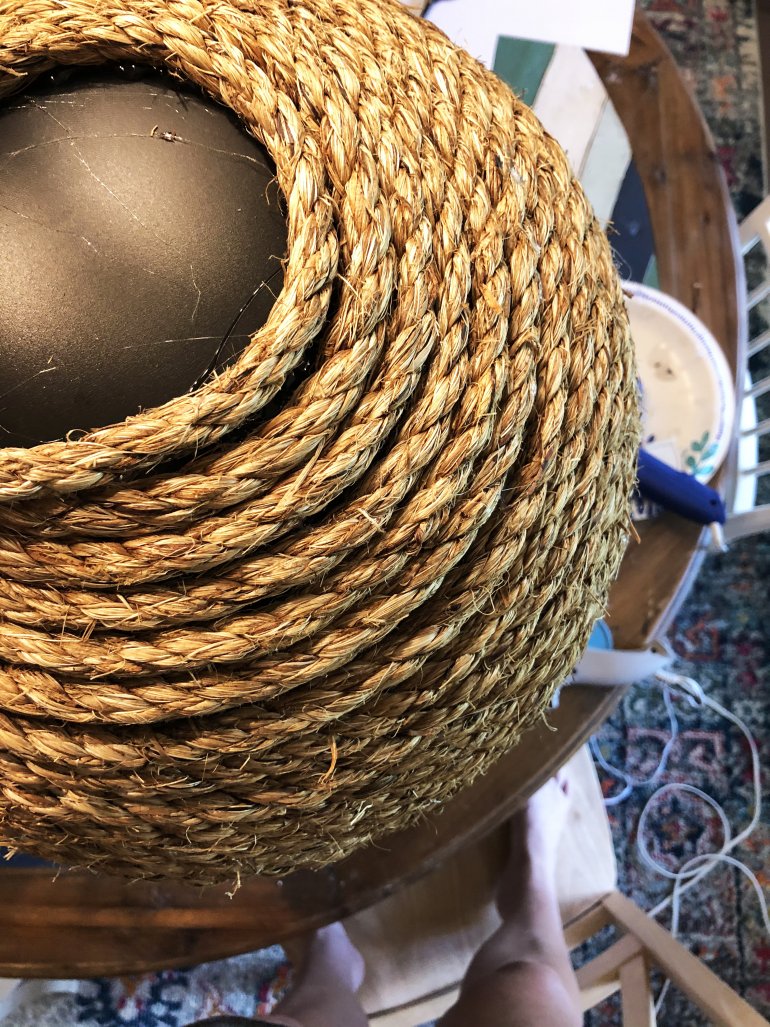
My favorite piece that we included, is this little handmade water hydrant, that also doubles for storage. It’s simply a garbage can, wrapped in rope. You can still remove the top, to place anything inside.
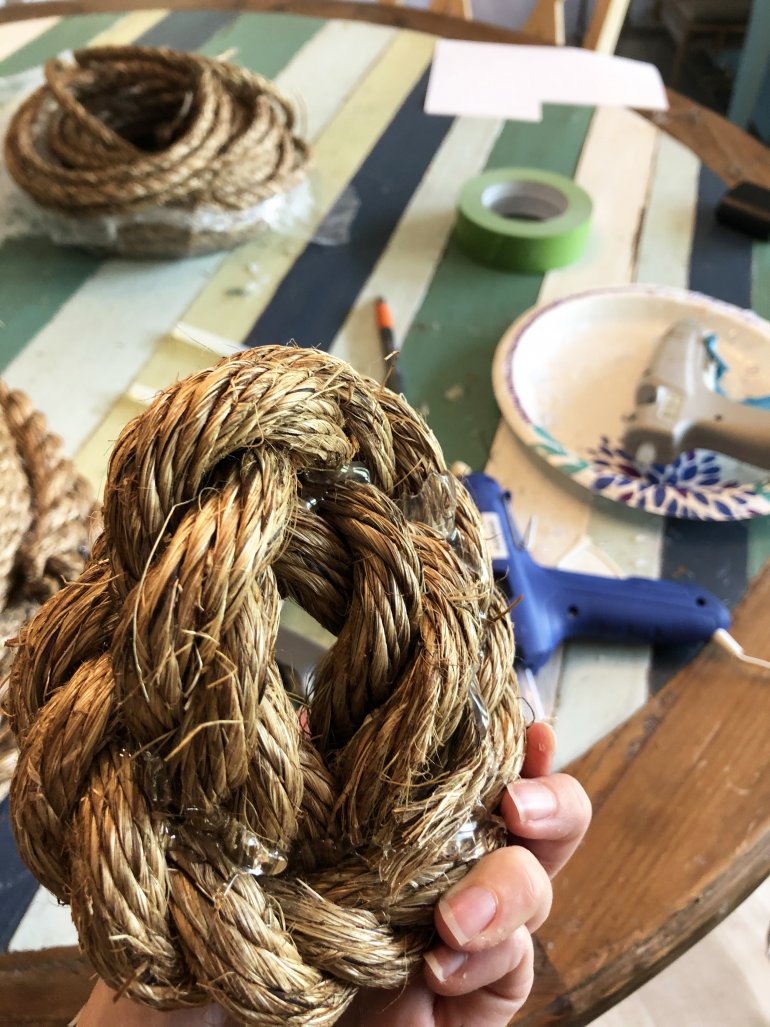
It was a little time consuming, but a perfect little project to do at home when watching Gilmore Girls at night. We simply purchased two different sizes of rope and a medium sized dome-topped trash can. Then we added rope with hot glue all the way around, with the thinner rope, and accent sizes with the thicker rope.
Here’s what you’ll need to make your own:
• trashcan
• rope {two different sizes} – 1/2 inch round + 1 inch
• hot glue
• Frogtape® {helps secure the flap up top}
I used the smaller sized rope for the main body, and the larger one for the larger accents of the fire hydrant.
I simply wrapped carefully as I went, using the glue gun to secure everything.
I made larger “knots” with the rope in the larger sizes, and placed it on the edges for pieces of the fire hydrant.

And it was ready to go!
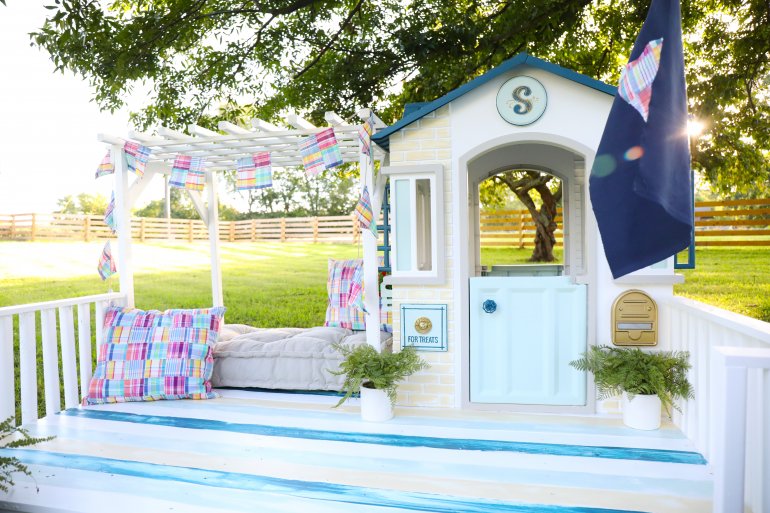
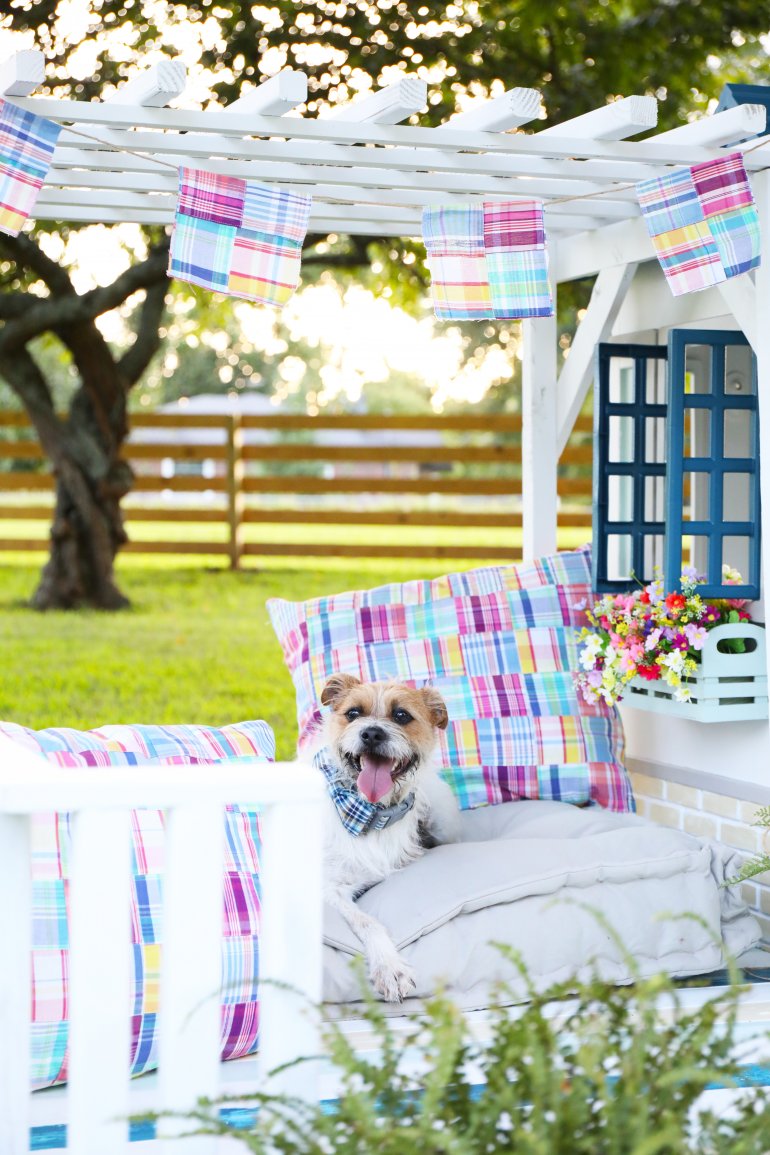
Accents:
Then we brought in simple accents like these little cushions and fun bunting, which really made it cozy. This little house just feels like a constant celebration of Smoosh. And Smoosh is more than happy to be here, you can tell by his big smiles.
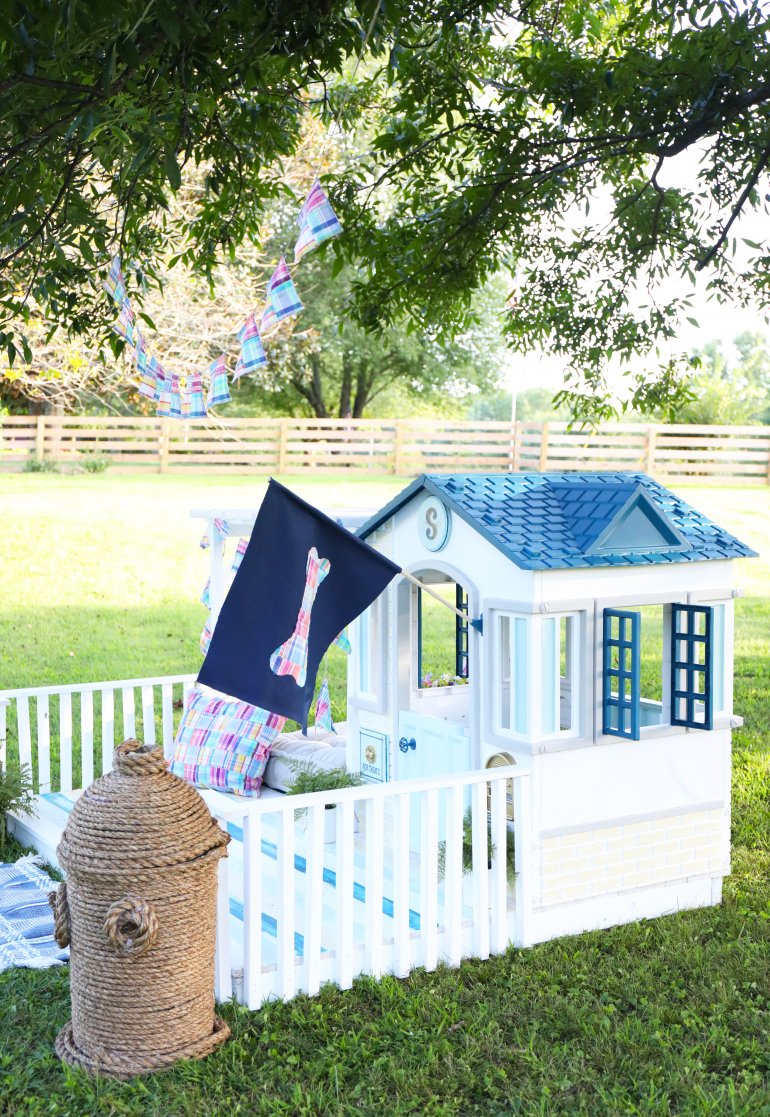
He truly loves his space! Thank you so much for stopping by today and checking out a few of the how-to’s our little tikes cottage playhouse transformation!
We love anything for our furbabies and a good cause.
Have an inspired day!


WOW, this incredibly unique diy little tike makeover BLEW ME AWAY!!! Your ideas & TALENTS never seize to amaze me! Thanks for sharing this & ALL your transformations.
Thank you so much for your sweet comment! I’ve had a really long day and this just means a lot. ;}
Hi!! Can you tell us where the accent pillows came from or the fabric? It’s precious!! Thank you!!
hey! I believe fabric.com – sorry I can’t be more help! They were some I snatched up on sale.;} Just search for Robert Kaufman – Yarn Dyed Nantucket Patchwork Summer Cotton Fabric
Amazing space!! Does Smoosh sleep inside when it rains?!?
This is beyond creative and just makes your soul feel good to look at!
Smoosh is definitey an inside dog so this was just for fun! Thank you – it was a fun little project.
I was wondering where you got the striped top for the deck from and what it is made of.
Hi! It’s outlined in the post above – we built the deck and then hand painted it with all the paint colors listed. We hope this helps!