Hey guys! We’re back today… with one of the basics.
I’ve written a lot about sewing on our site, and I’ve always referred to myself as the reluctant seamstress. I’ve covered a little on sewing projects in the past… like … a diy patchwork pillow


But when I covered a post this summer, I realized I never explained the very basics. Some of you may be wanting to try. I’ve been there. In the throes of drama with the seam ripper totally intimidated by the idea of a bobbin and a piece of fabric I just may ruin. Forever.
The pressure.
Sewing for your home is one of the easiest, cheapest ways to get custom looks for a fraction of what it would cost somewhere else. You’re suddenly the ‘middle man’ to creating amazing pieces for your own home, and it’s so fulfilling once you’ve tackled it. The best place to start? A basic pillow.
You just may need a small push off that cliff to join me in sewing machine crazy town. So today, I’ve broken it down step by step, to share the basics of sewing a pillow.
Because once you sew a pillow, you can do anything.
Okay. Maybe you won’t be making smocked heirloom dresses from vintage Venetian lace, but it covers the basics. So here we go!
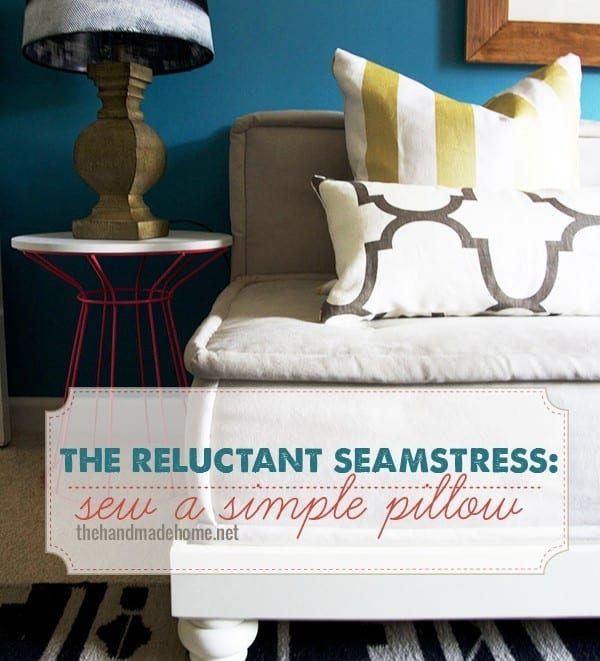
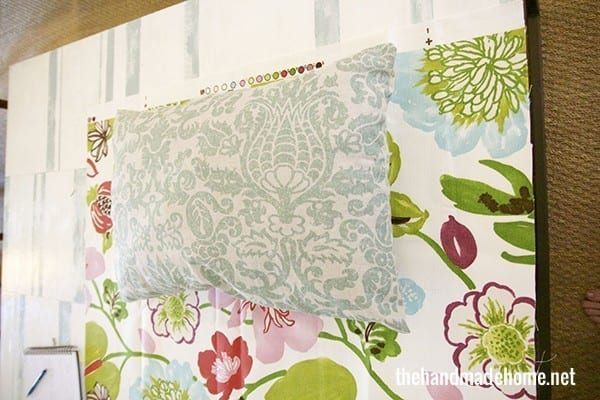
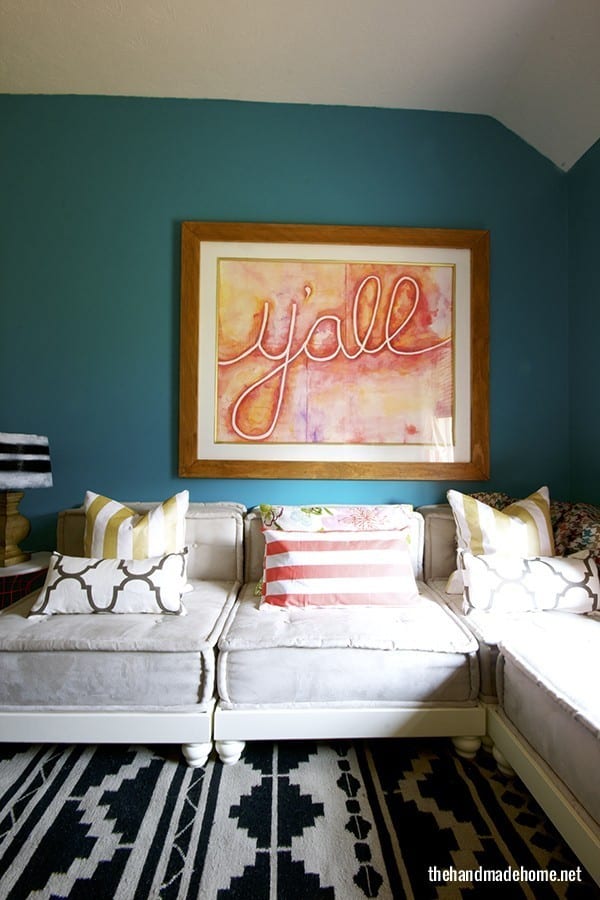
We tackled a few new pillows for our playroom this fall.

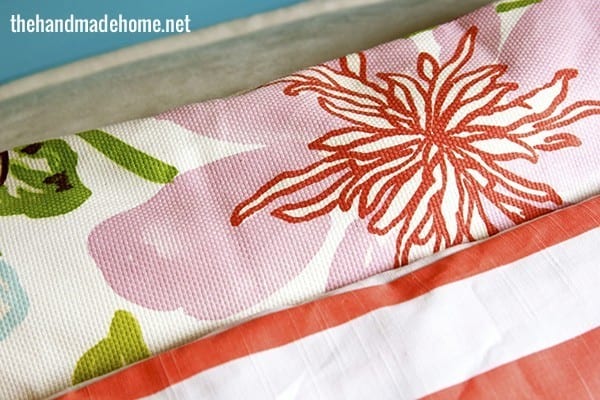
{Our fabrics for the pillows + window treatments were generously provided to us by Online Fabric Store. Clockwise from left to right: Oatmeal Irish Linen, Portfolio Sparkle Gold Fabric (my absolute fave – squeee!) Portfolio Riad Clove Fabric, Premier Prints Striped Salmon Slub Fabric + Braemore Gorgeous Petal Fabric We also used a few of their amazing pillow forms which were perfect for the project.}
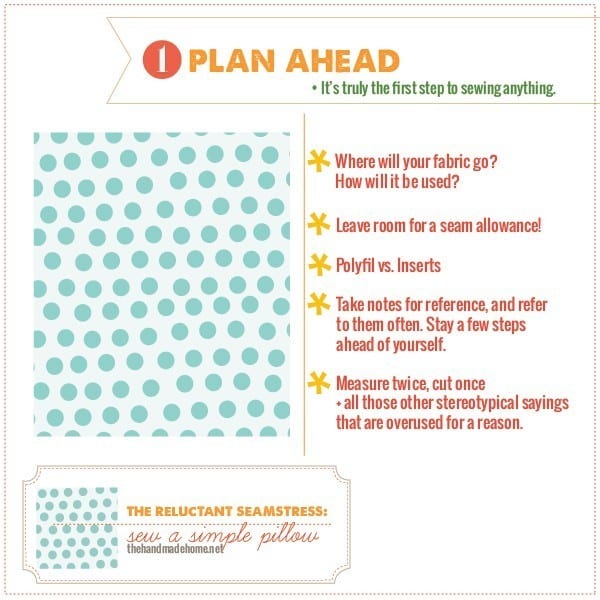
First things first: Half of sewing, is being prepared.
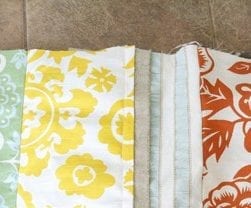
• Think about what is going where, and plan for it. I’m a visual person. So if you’re anything like me when you’re shopping for fabrics online, pin it. Drag them all onto your desktop. Measure the space. Think about how much you will use all together, so you don’t overbuy (guilty). {Measuring fabric for me, is a lot like measuring pasta. You want a little extra in case you want more, but I always end up dumping the entire thing into the boiler. Thus the self imposed title of fabric hoarder.} So think through it. You won’t regret it.
• I always found pillow forms intimidating. For me, it meant that you had to get your yardage and sizes just right when cutting. But over time I realized I was afraid for absolutely no reason at all. I’ve embraced the forms and never looked back in Poly-Fil land. It’s just something to consider. Having an existing form to cut around can make it super easy.
• Seam allowance: Don’t forget at least an inch for your seam allowance on the overall size. I would honestly suggest more if it makes you feel better.
• Why am I mentioning all this? Not to freak you out. It’s because if you like to think through things, its worth it to write it all down with little measurements so you don’t forget what you were planning for by the time your fabric arrives. {I’ve done that, too.}
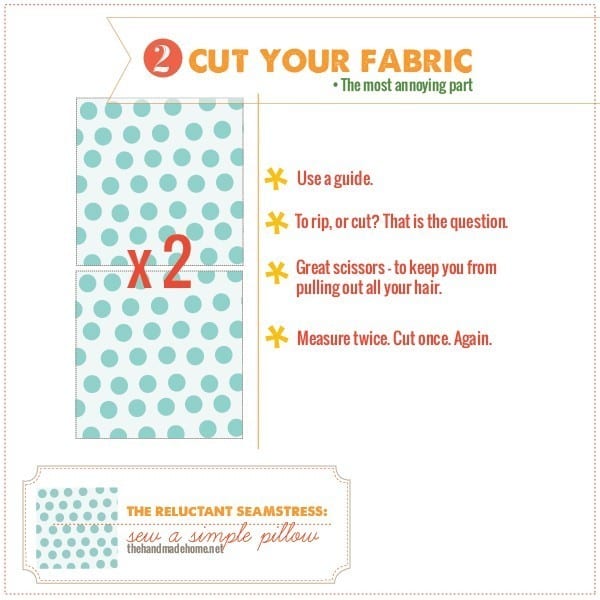
• Cutting. It’s the hardest part. But I always find a literal line somewhere (I use the tile on my floor or the grooves of my coffee table + I have friends who use their dining room table) and once I’m done measuring, go for it. It helps to have a guide, especially if your fabric is some crazy organic shape and there’s nothing to follow on it.
• Some people recommend a simple cut, and then tearing. I have to say this is an awesome idea, but not all fabrics tear. So try it out with a test piece first. It all depends on what kind of fabric you’re working with. {Fabrics like linen blends + canvas-like fabrics + broadcloth tend to work great with this set up… thick woven fabrics = not so much.}
• Get a great pair of scissors. These shall be the holy scissors and thou shalt not use them to cut anything but your fabrics. Take them and hide them immediately. I even hear rotary cutters are nice. This still intimidates me. It’s all about what works for you.
• Double check your measurements… you won’t regret it. Over time, this part gets easier, and it’s instinctual. But even now, I check. Trust me. Double triple check those measurements.
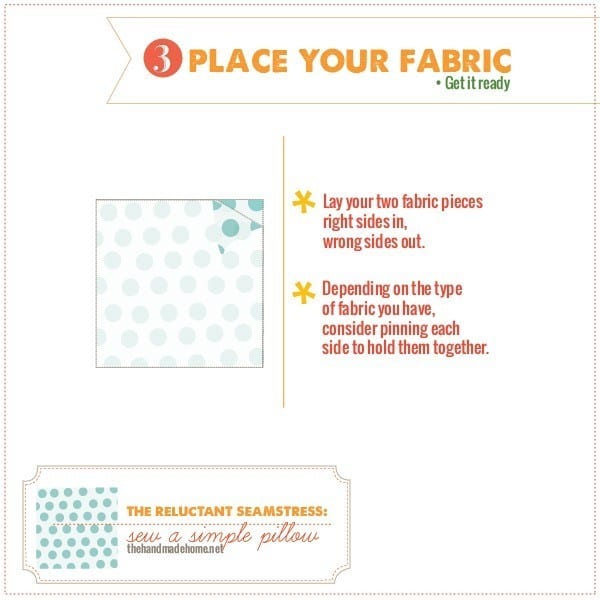
• Lay your two cut pieces of fabric right sides in (the sides you want exposed, and on the outside of the finished piece) wrong sides out.
• Pin them together, and get your sewing machine ready. If you can figure out how to thread your bobbin (which is a subject matter all its own) you’re golden in the land of new conquered projects.
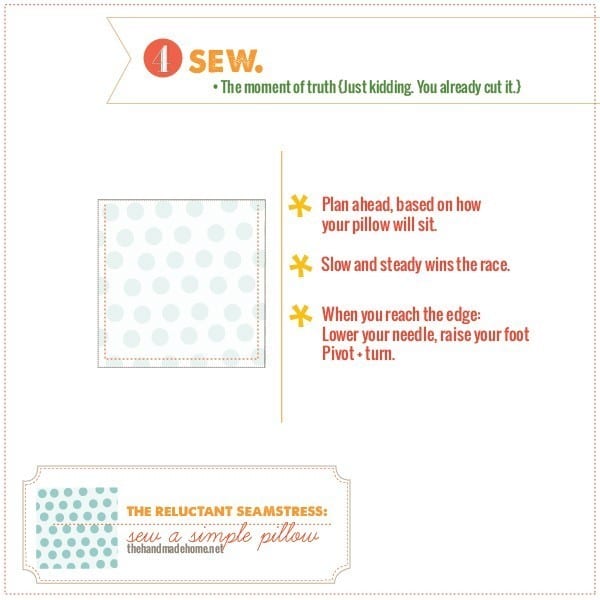
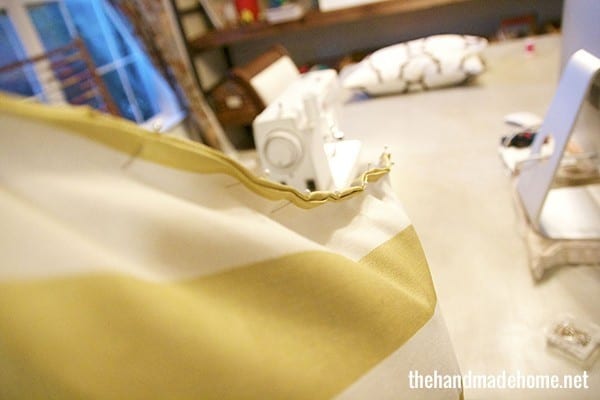
• Based on where you start with the sewing machine, should be based heavily on how your pillow will be placed when it’s finished. So if the pattern is affected by this, think about it. What am I talking about? That final seam. You’ll leave one side open to stuff, and then close. This will be the most difficult side to close, and sometimes, looks a little different with a top stitch. So, make plans for that, and then no matter how ugly it looks (like, if you use faux fur and then have to use hem tape on that last part because it will break your machine if you sew the top stitch with folds – that totally didn’t happen to me and hem tape is your secretweaponbestfriend) your pillow can sit on it when finished. I promise no one will come to your house and look at your seams. No biggie.
Benefit to using Poly-Fil: you can keep going with that final seam until you have just enough room to stuff and close + it’s cheap. Benefit to using pillow forms: You pay for what you get, and while you may have to leave one entire side open for sewing that final seam, at least it won’t go flat after two weeks.
• Take your time. If you start to get tired, frustrated, or you’re feeling a bit slashy with the seam rippers, you can always step away.
• Every time you sew an edge, you can completely free your piece from the machine, or you can stop at the corner, lower your needle + lift your foot. Then pivot your fabric underneath the needle to continue on the next straight line.
Side note: I always throw it into reverse first, and reinforce that edge seam for about one second, then return with it in forward before moving on to the next section to sew. It always helps to reinforce.
Side note 2: I use a line guide to help me keep my lines straight, but a piece of tape at one part will help as well, with keeping all your seams the same if they overlap the machine’s visible guides.
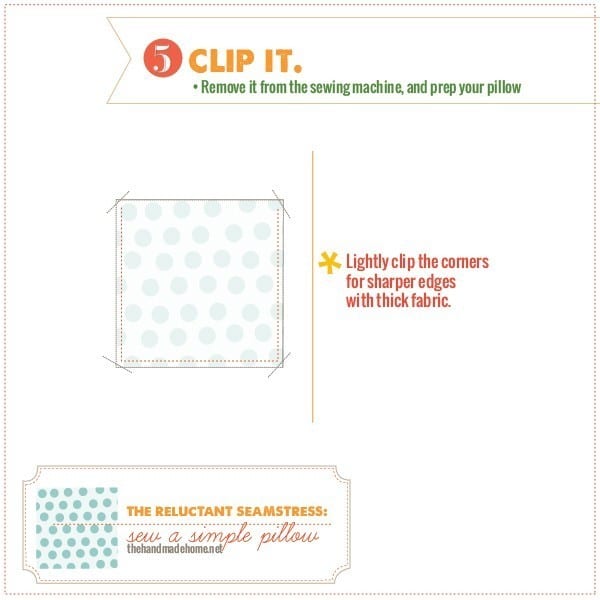
• When you’re finito, here’s a little tip that my mother in law (see: wise seasoned seamstress) shared with me: if you’re working with a thick fabric, gently clip your corners off before turning your pillow back to right side out. Just at the very outside edge. It will help your corners peek all the way through from the other side.
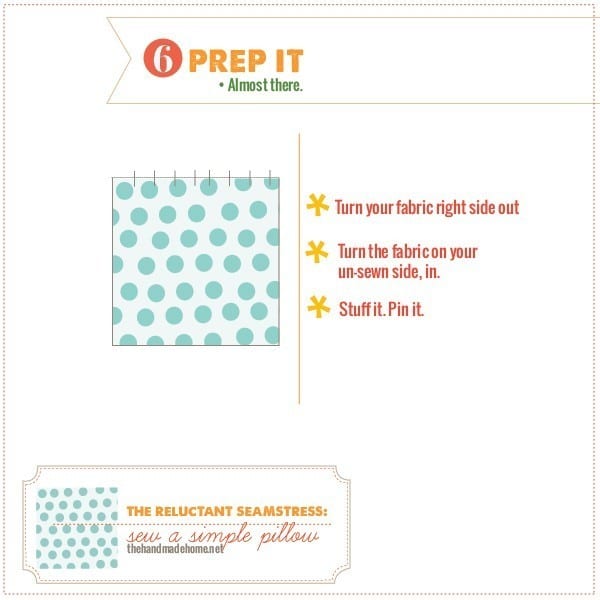
• Turn your fabric right side out. It may help to (gently) poke at the corners with your scissors.
• Stuff it with your filler of choice.
• Turn your edges, with the un-sewn edge in, and pin it into place
• Finish it off with your hand, or a top stitch.
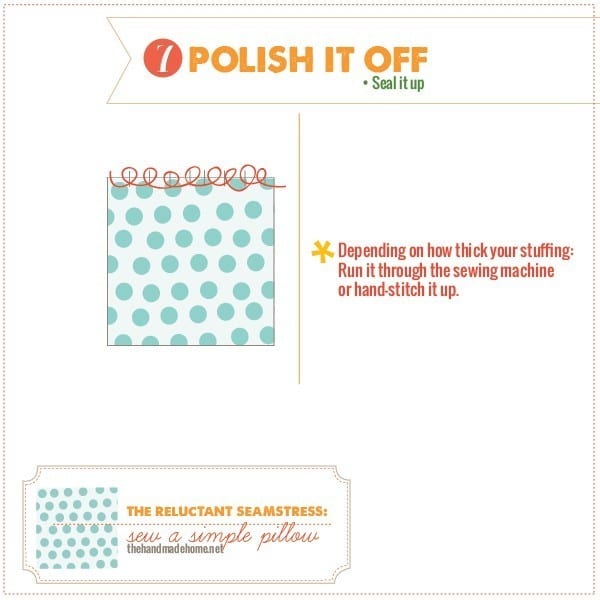
Tada! Y’all. You have a pillow.
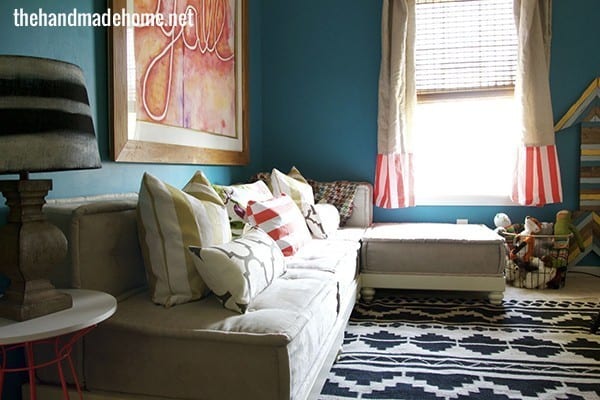
This is how we make all of our basic pillows around our home, and keep it fresh and updated with little fresh snippets of fabric.
Let me know if you have any questions… Practicing is the easiest way to learn how!
And stay tuned because there’s a super fun giveaway from Online Fabric Store coming up this week! Have an inspired day, y’all!

Psssst… if you liked this, you may like these:


And Kristin’s fabulous brilliant post breaking it down, here.
Double Pssst:
Don’t forget day 3 of the holiday house walk for über inspiration, here!


it’s so great you shared this 😉 Reluctant seamstress could be my middle name! xo Kristin
Perfect! I’ve been wanting to try this but I’ve definitely been reluctant. Thank you!
Great step by step! As another tip for corners, when you recommend gently poking the corner with scissors, I use a chopstick! It is pointy enough to give you a sharp corner, but blunt enough that you have no need to worry about poking through the fabric with your scissors.
This is an awesome guide! I am a (very) reluctant seamstress…I actually feel like maybe I can do this? Right now I just make pillows out of placemats, but maybe it’s time to branch out? 🙂 You always have the best design for your guides- this is so easy to understand!
Thank you for sharing this! I just started sewing again. I started as a child when my Mom bought me a pink mini sewing machine and I would make doll clothes. For some reason I stopped sewing but now I’m at it again. I just have to work on getting those seams perfectly straight.
I just recovered my cat’s bed that I upcycled and made her a little pillow for it that matches. I remember from sewing classes back in the day to stitch it exactly as you recommended . . . when at the corner, pivot the corners and clip for a crisp look. It turned out okay (the cover) but the pillow is perfect!
Awesome! SO glad you can use a little of this! ;}