
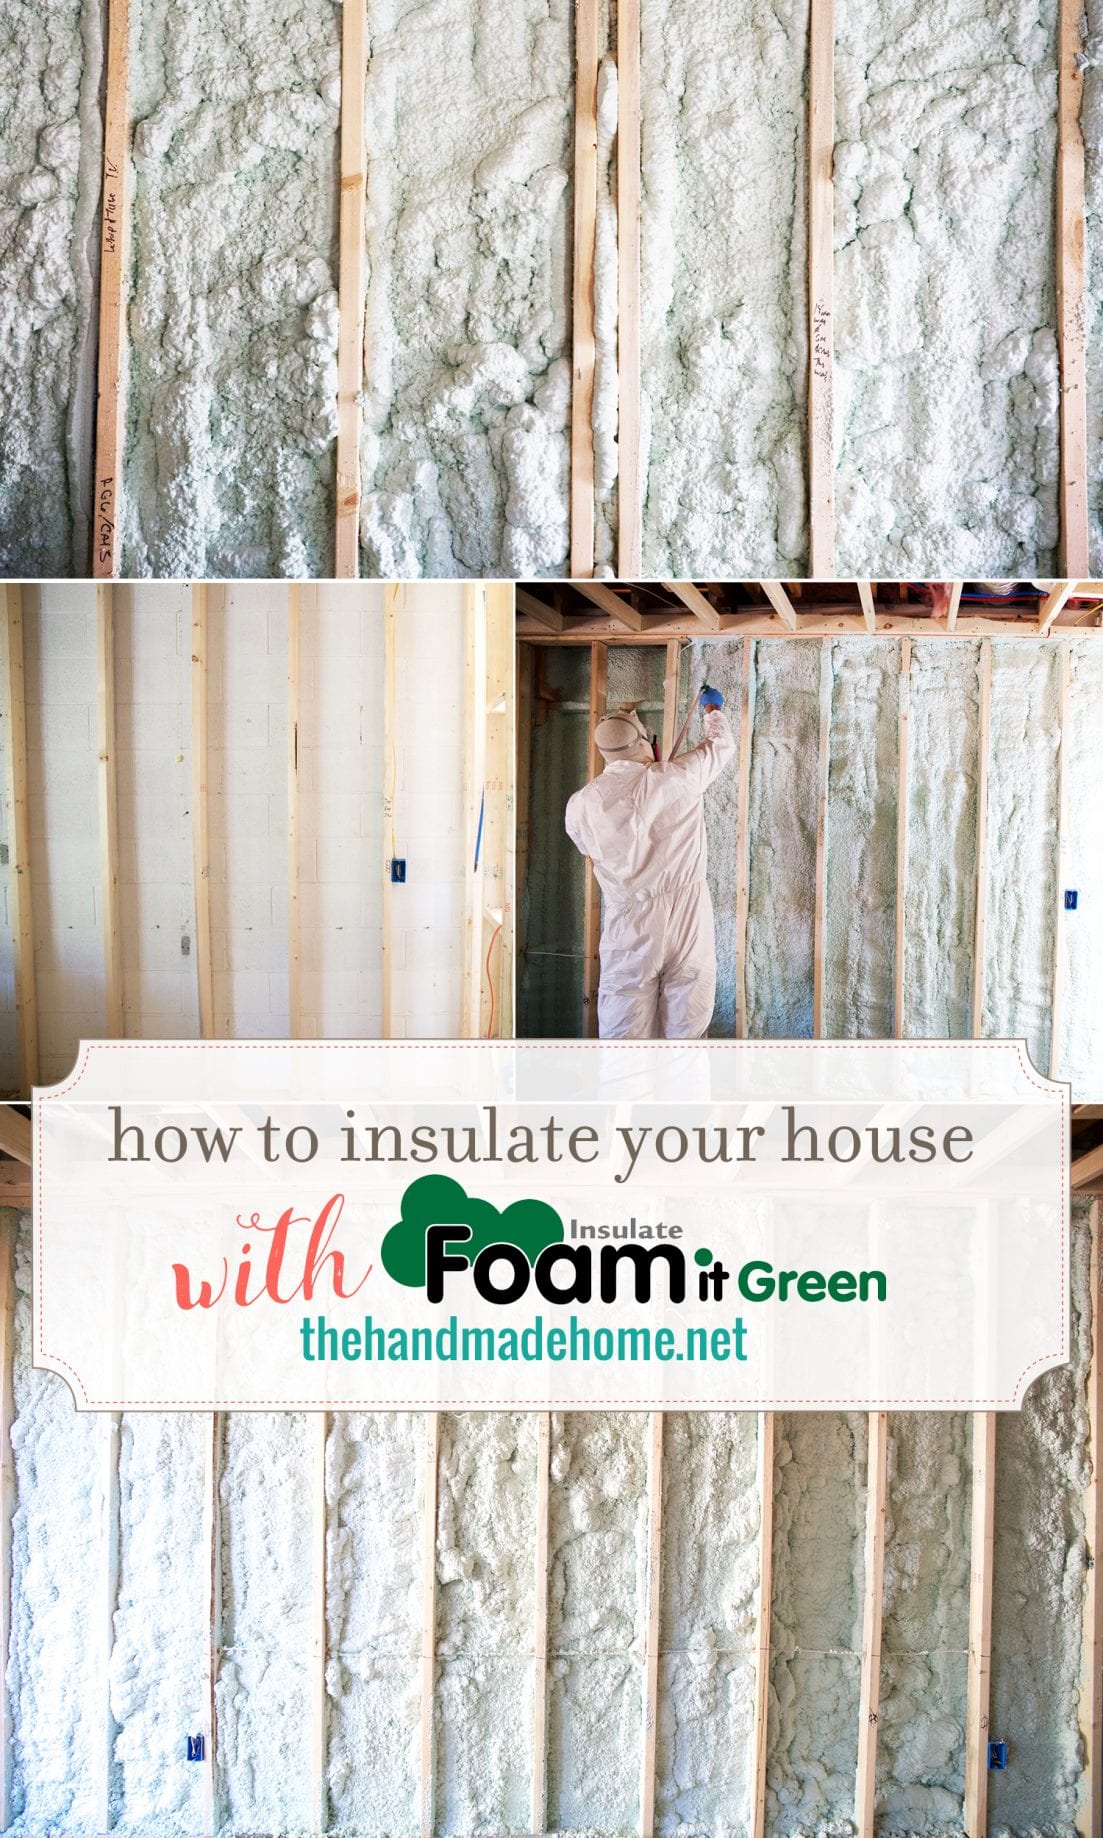
how to use spray insulation
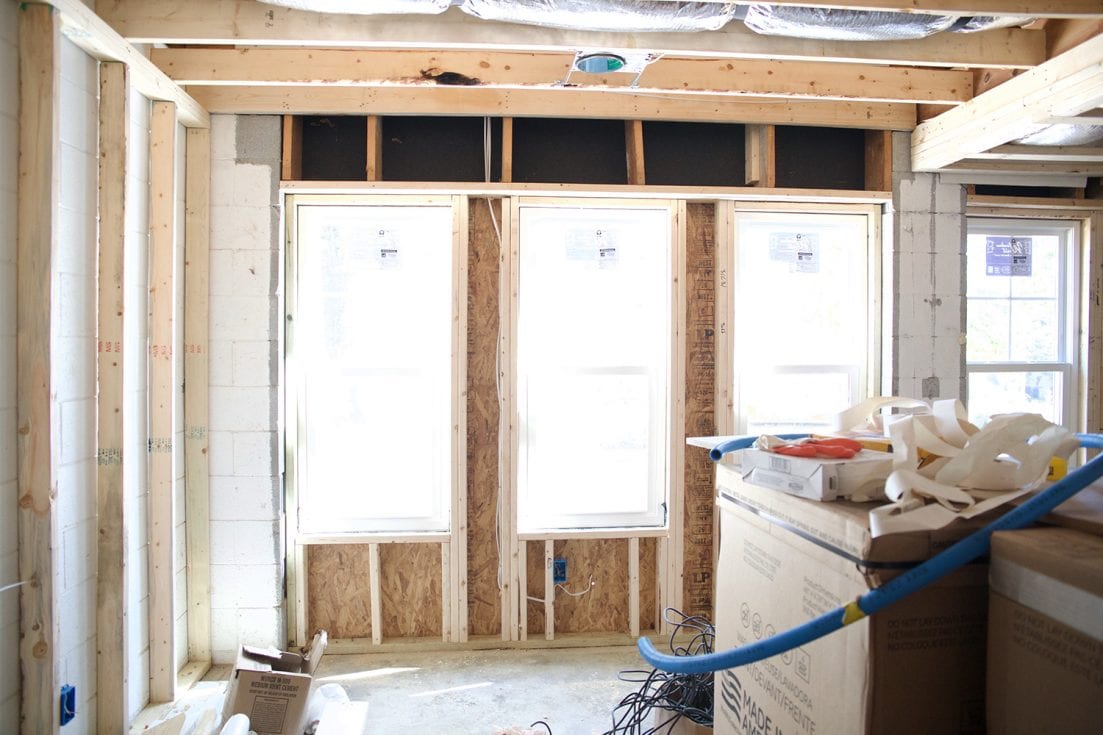
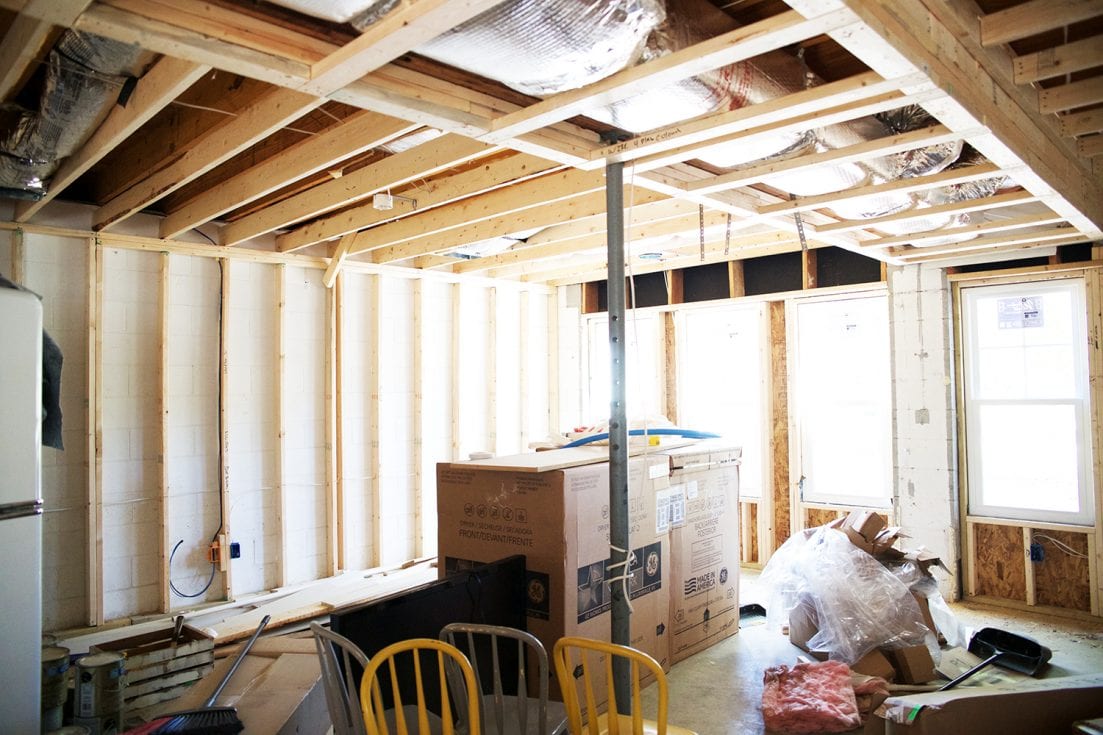
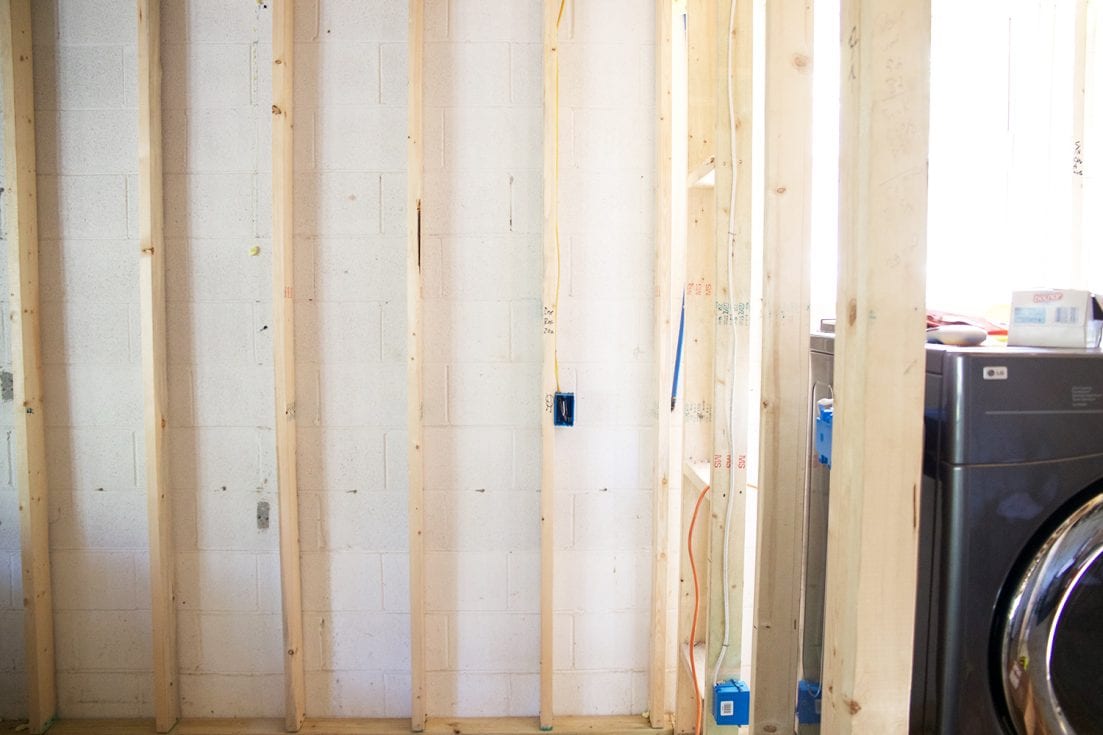
And today, we’re back to all things basement progress and here to show you how to use spray insulation. As you can see below in our tutorial section {for those of you who aren’t too keen on video} we were framed out and ready to go with this basement rehab! We’re getting closer!
How To Use Spray Insulation
It was time for all things insulation, and then drywall. We’re super excited about the progress we’ve made today, and wanted to share a little bit of the actual insulation part. And that means it’s time for our latest addition. So without further ado, how to use spray insulation!
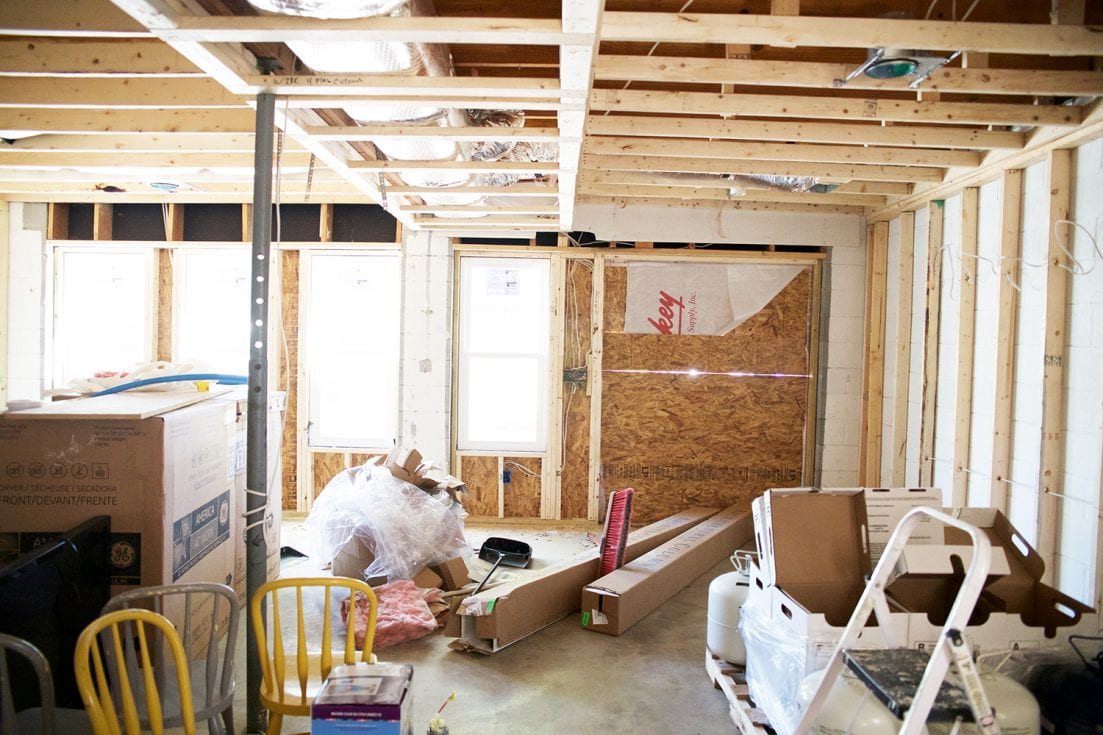
We framed the basement and ran our electrical, and once codes gave us the green light, it was time to insulate.
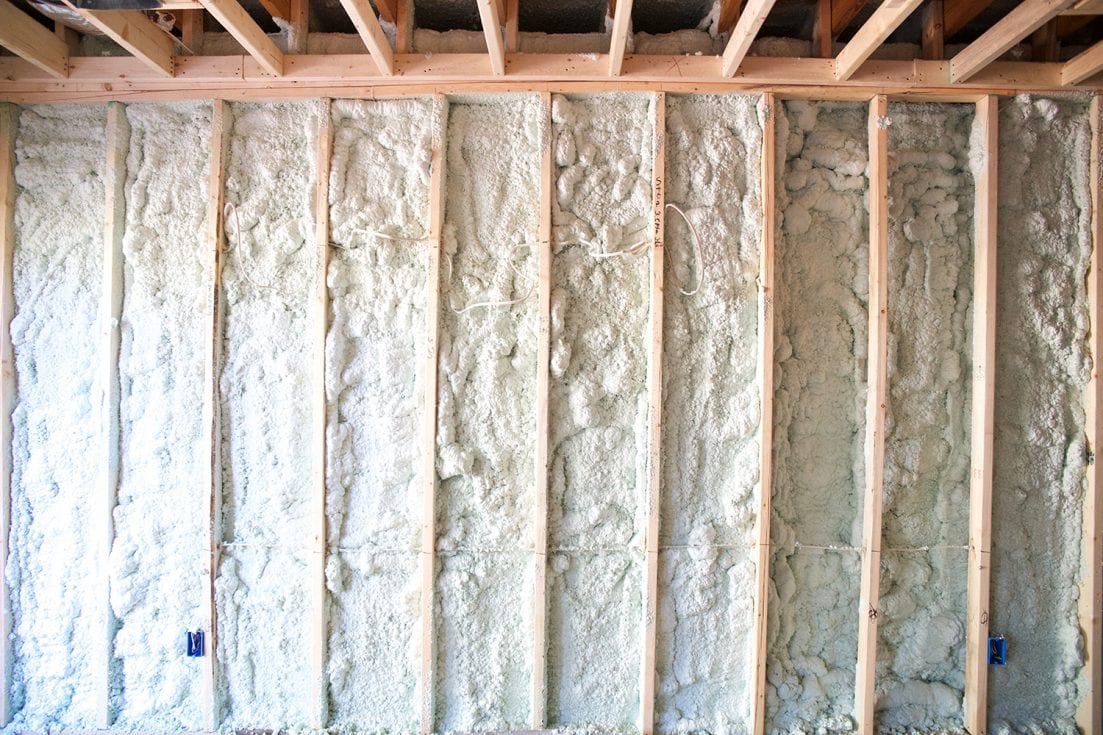
You really have a couple of main choices when insulating: traditional rolled insulation, or foam.
While both will work, in our experience, the foam has far more benefits than traditional insulation. For starters, it seals cracks, and if that was the only benefit, it’d still be worth it. But it’s also mold resistant, won’t sag, and let’s not talk about not having to cut it to size.
Really, we could go on and on about the benefits of foam, but in the end, the one number that matters is that it will save money on your heating and cooling bill. #winning
(This post is in partnership with Foam it Green all opinions expressed in our post are our own.)
The process is super simple and we decided to tackle it ourselves {you know, with the whole save where you can on the renovation part}. We teamed up with Foam it Green, mainly because they have a super cool name and we’re suckers for creativity, plus their product rocks and we’d heard amazing things about their insulation.
So really, it’s a trifecta and you’re the winner!
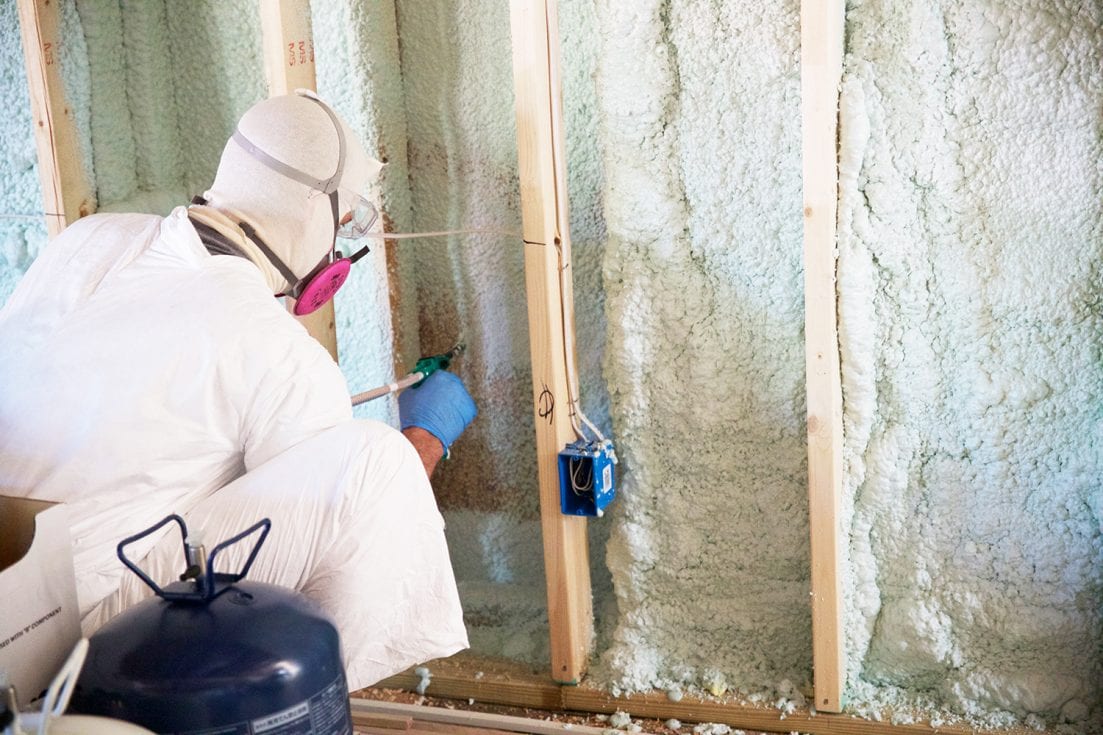
Safety First – How To Use Spray Insulation
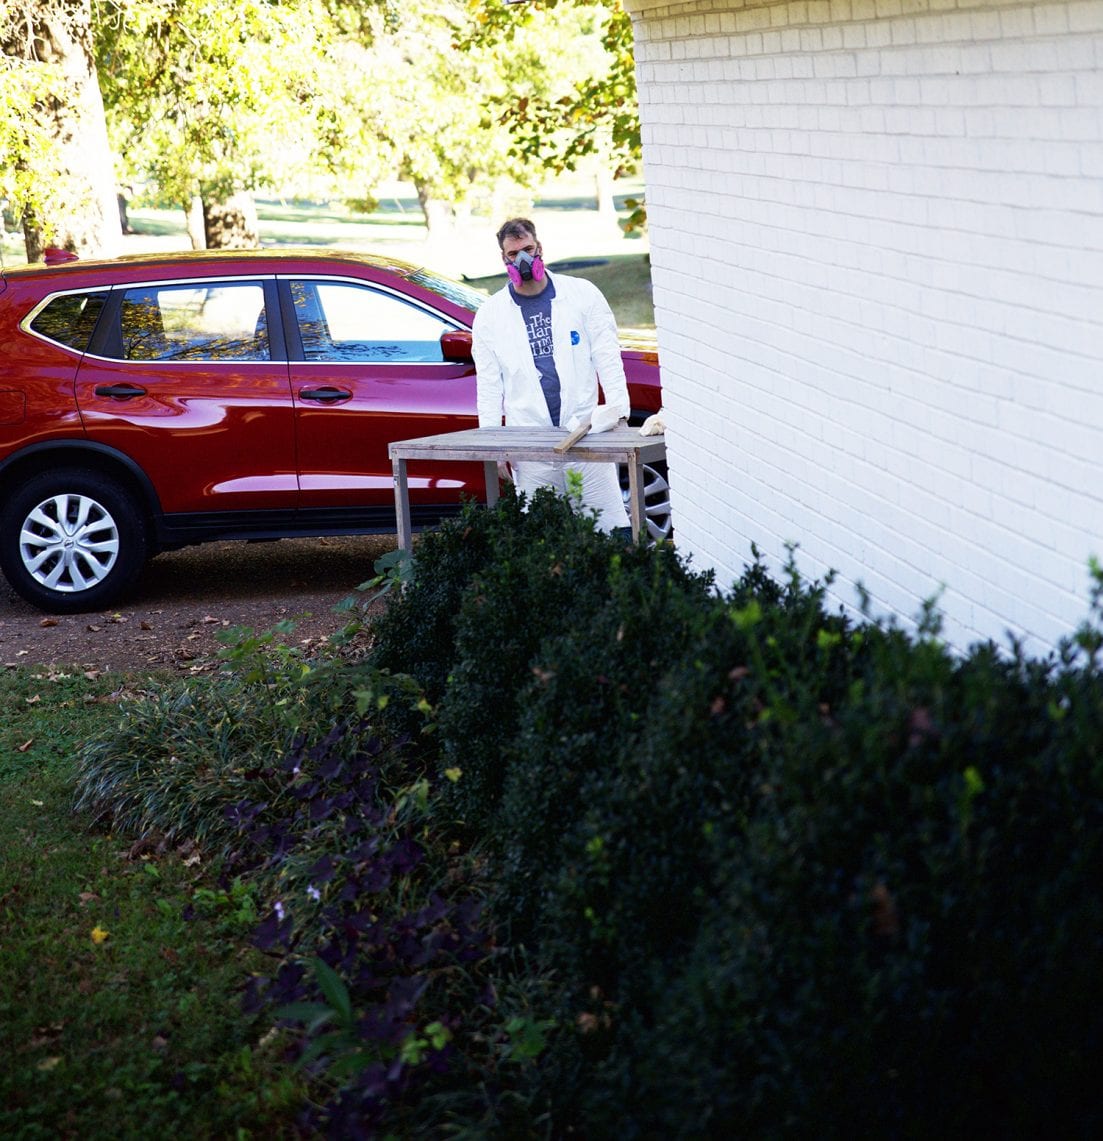
No that’s not my Halloween costume, though I thought about it. Really, you have to get serious about your protection when doing any construction- this isn’t the 40’s. So we recommend a mask that’s mold and lead resistant, gloves, goggles, full painters coverall and we even wear a hood.
Not only is this for your health, but to help keep you clean of any overspray.
The process is super simple and you can check out our video, or any of theirs for visual instructions.
They even have all the process, step by step.
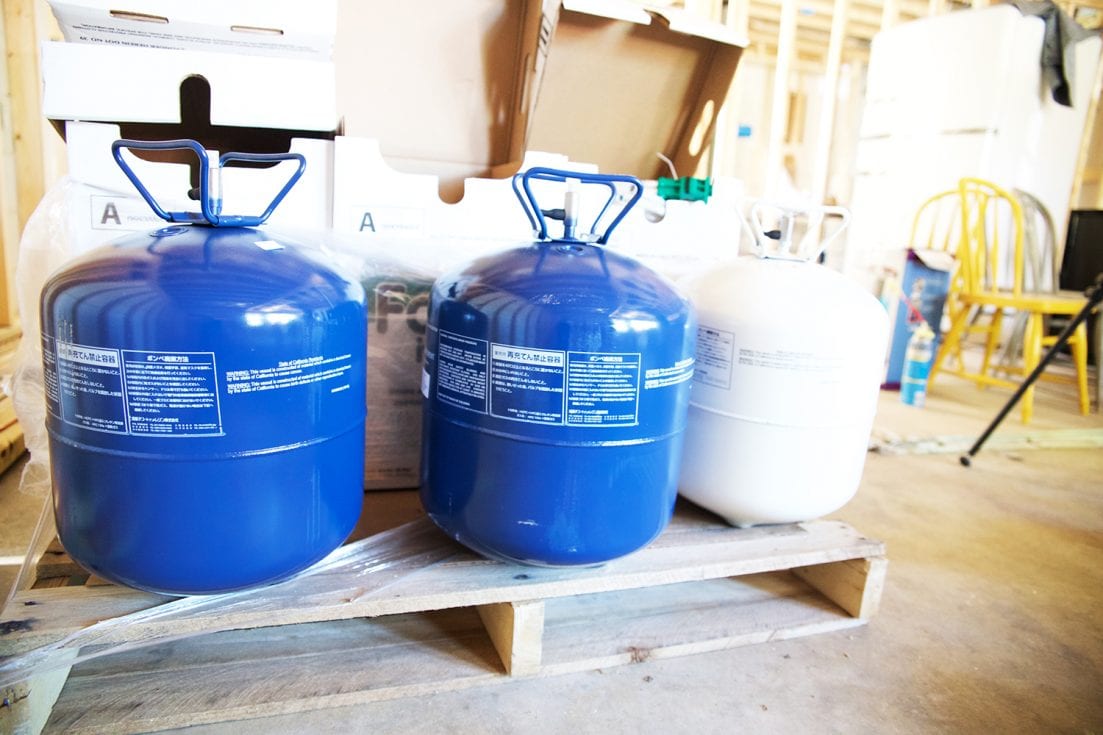
Once you’re geared up, you’ll want to hook the tanks up according to the instructions. Then you’ll test the system and you’re off to work!
A Couple Things To Remember – How To Use Spray Insulation:
Pay attention to those edges. You’ll want to start by running a bead of foam next to the 2 x 4’s to make sure the foam expands behind them.
Once you hit the edges, you can begin spraying the inside just like you would spray paint it. Don’t worry about putting down a thick spray the first run, just enough to cover the wood. The foam will expand and then you can hit it with a second, and even third pass. It takes the foam about 1o minutes or less to dry.
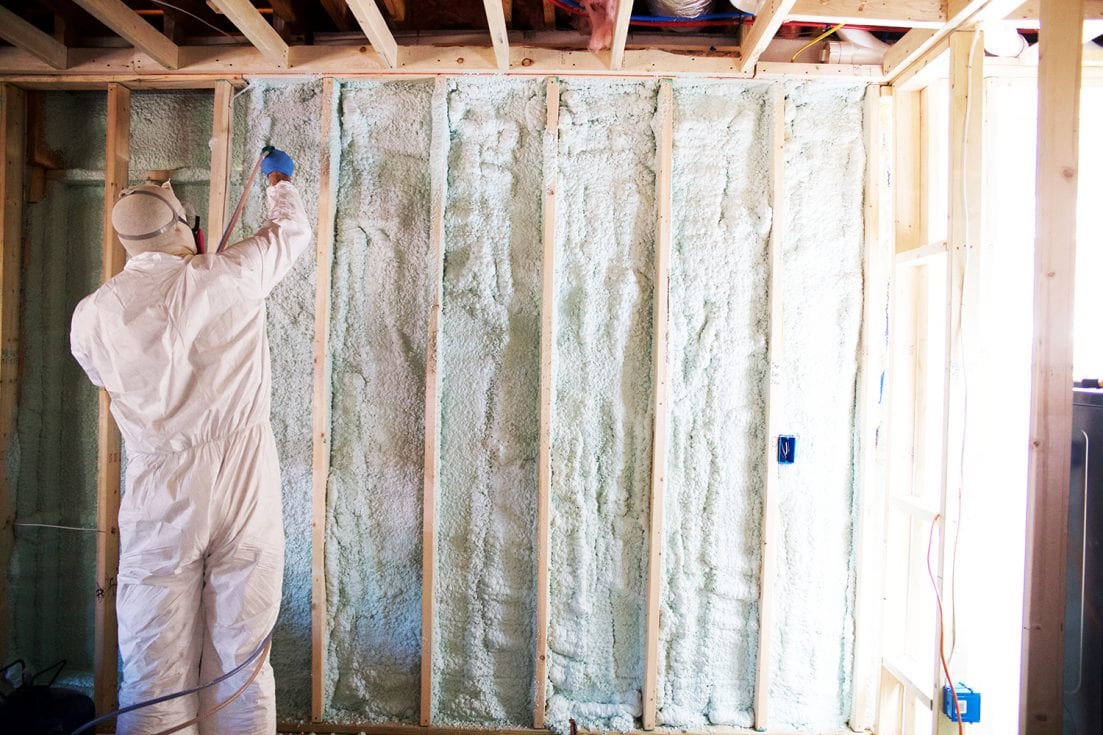
Then it’s off to the races on the rest of the walls. It really is simple and actually, pretty relaxing.

We loved the fact that you don’t have to cut insulation for a small space – what a time and game changer! We could easily seal the window and door framing.
We made a second and third pass with the foam and you’d never know it was once a nasty basement wall once we were finished.
And we were ready for drywall!
It’s an easy peasy way to insulate your home, and we loved doing it!
We’d love to hear about your insulation project! – How to use Spray Insulation
Have you guys tried any of your own insulation? We’d love to hear your experiences!
As always, let us know if you have any questions. Have an inspired day!

You have such incredible knowledge to share with others. Regards for spreading it. Please keep supporting us by giving the Spray Foam Contractor.