
make a simple centerpiece – a great gift
‘Tis the season for mother’s day, teacher appreciation, and hostess gifts. Or even a little something for yourself since you probably can’t breathe right now {because of all the things} if you’re anything like us. Side note: I want to punch the person in the face who decided that they should line up mother’s day with the end of school. Anyone else? Just me? (Which is what sparked the idea to talk about how to make a simple centerpiece.)
So today, we wanted to share a simple little project that makes the sweetest of flowers look oh so delightful! One of our very favorite things to do in the summer months, is give our friends flowers from our garden. If you’ve been reading for a while, you may remember that we adore bright and colorful zinnias in our back yard. And what we love the most, is giving them away. It’s not quite zinnia season yet, so even the sweet little homegrown/grocery store combo will do. Combined with this thoughtful handmade gift, it’s a great little gift for someone special. Or yourself.
So we thought we’d share!
This project is so easy, it’s kind of embarrassing. But we love simple ideas and thought it was worth the share.
Make a simple centerpiece – what you’ll need:
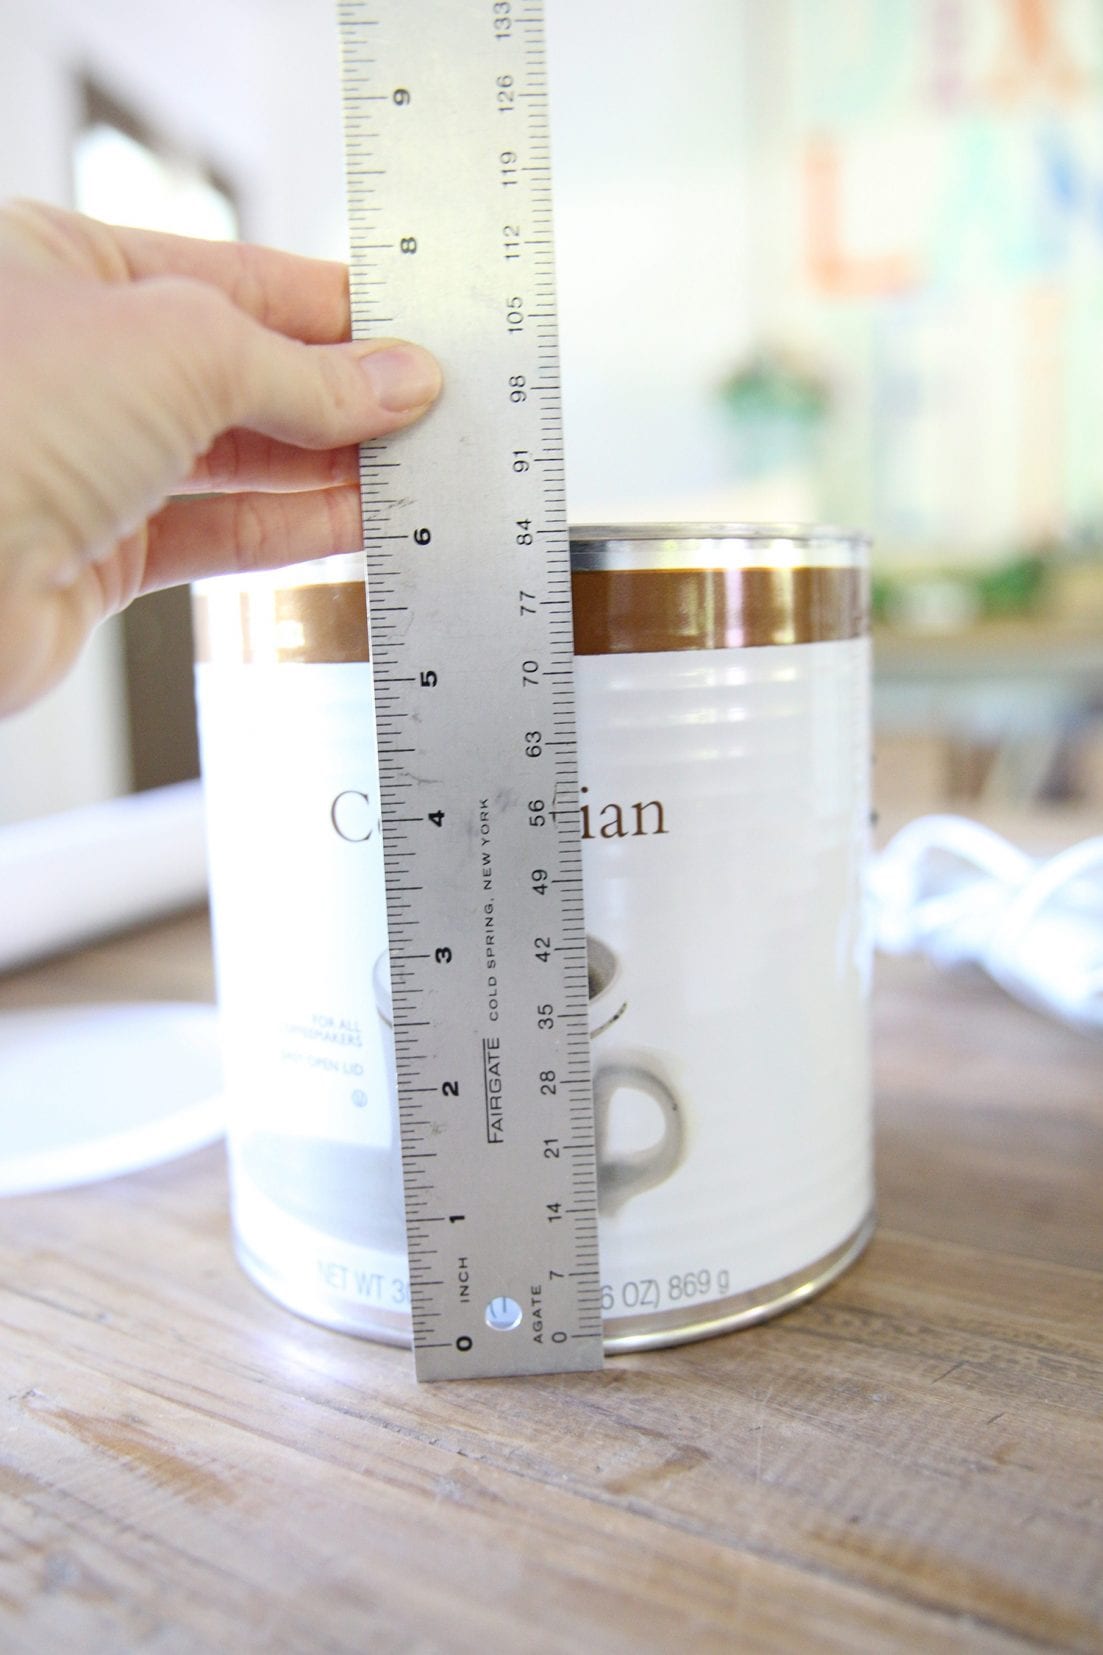
• a giant coffee tin – this one is the biggest we could find at the local grocery at 30.6 ounces. Because coffee. And because it’s waterproof.
• balsa wood
• paint + paintbrush
• x-acto knife + cutting mat
• hot glue gun
• twine

The beauty of working with balsa wood, is that all you need is a little knife to cut whatever you want, to size. So this is a great project for someone who doesn’t exactly want to break out the power tools, but feels like being a little crafty.
True story: I built a small church out of balsa wood for an assignment via sculpture class in college. Jamin actually helped. Little did we know that it was a taste of our future in some weird, metaphorical way. Little did we know that super glue doesn’t really work that well when attaching the flying buttresses at 1 am, the morning of the due date of said project. I swear I had tiny splintered pieces of balsa wood stuck to my clothes and fingers for the next six months. You live, you learn. Good times.
Make a simple centerpiece – getting started
Measure your coffee tin to determine the height of your balsa wood, since it will wrap around your coffee tin. We actually went 1/4 of an inch over with each piece, just so that we had a little bit of an overlap.
Using your ruler, slice your balsa wood at the length you’ve decided, and prep it to wrap around the canister!

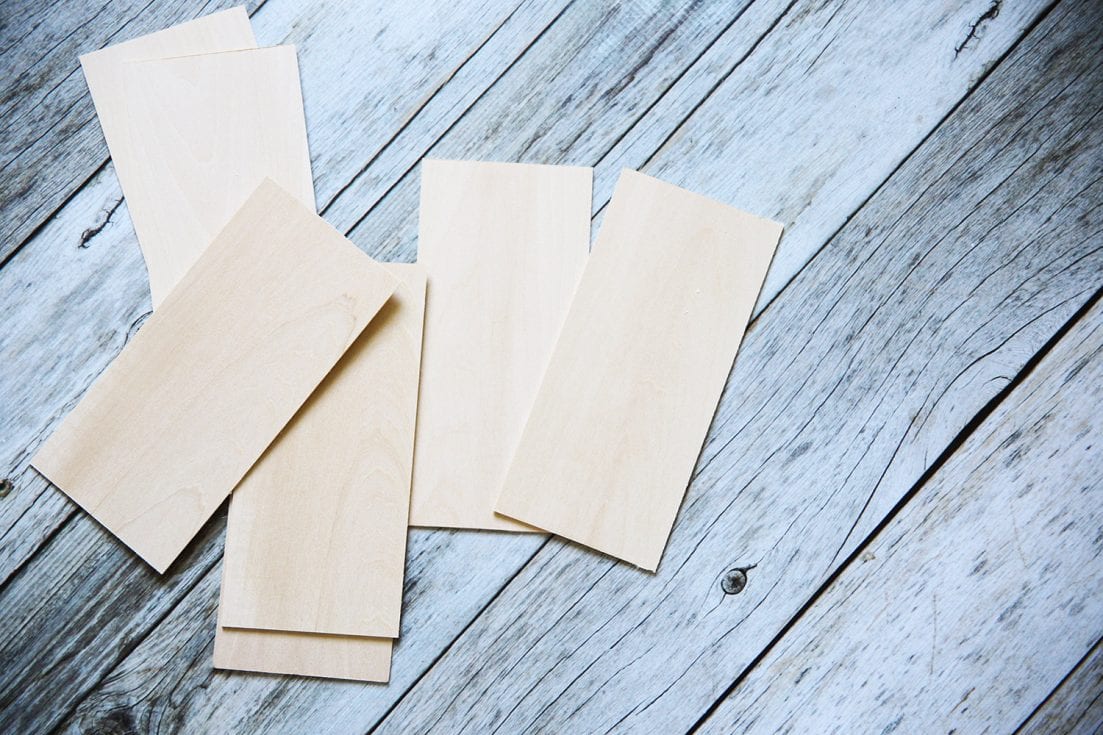
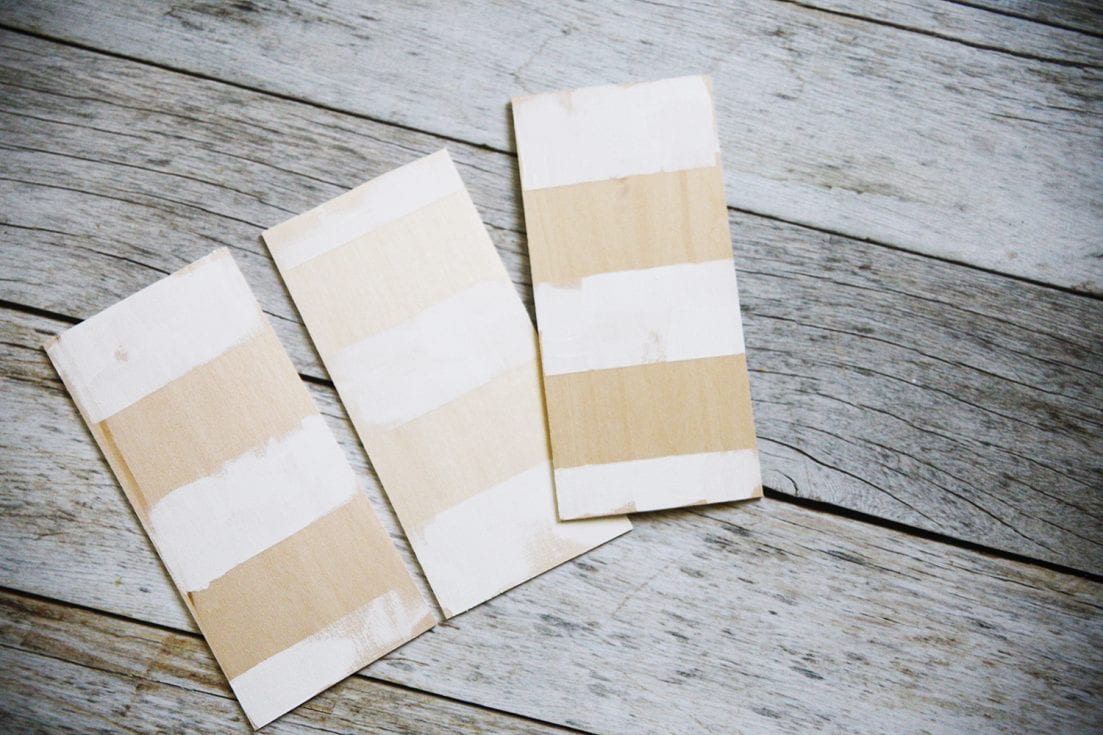
Once it’s cut, you’re ready to paint.
Eyeballing our canister, it took about seven slices of wood, edge to edge.
Make a simple centerpiece – using FrogTape
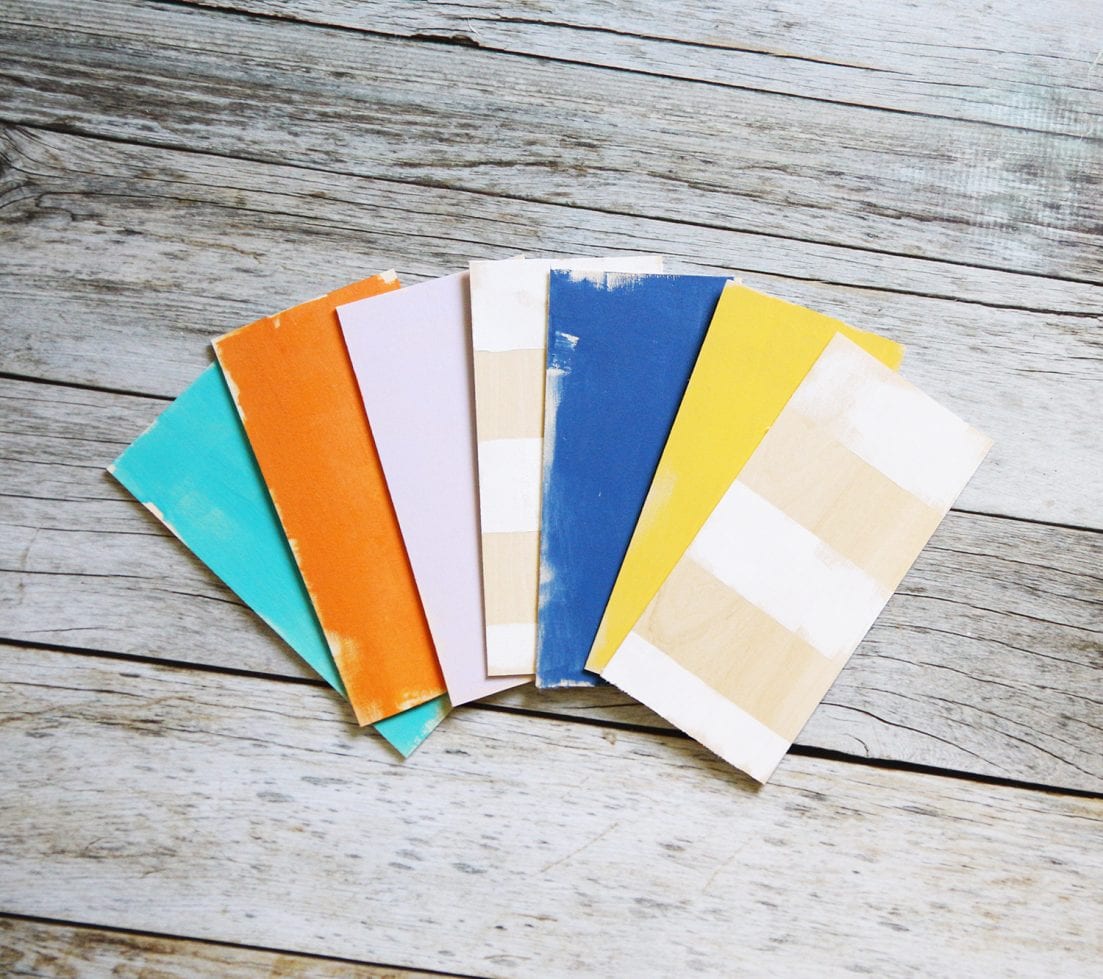
You can make a simple centerpiece in any color that you want, but in the end, I opted for stripes with FrogTape ® for a simplified look.
Read: I didn’t like what I created, and ripped some off to start over again. Good times again.
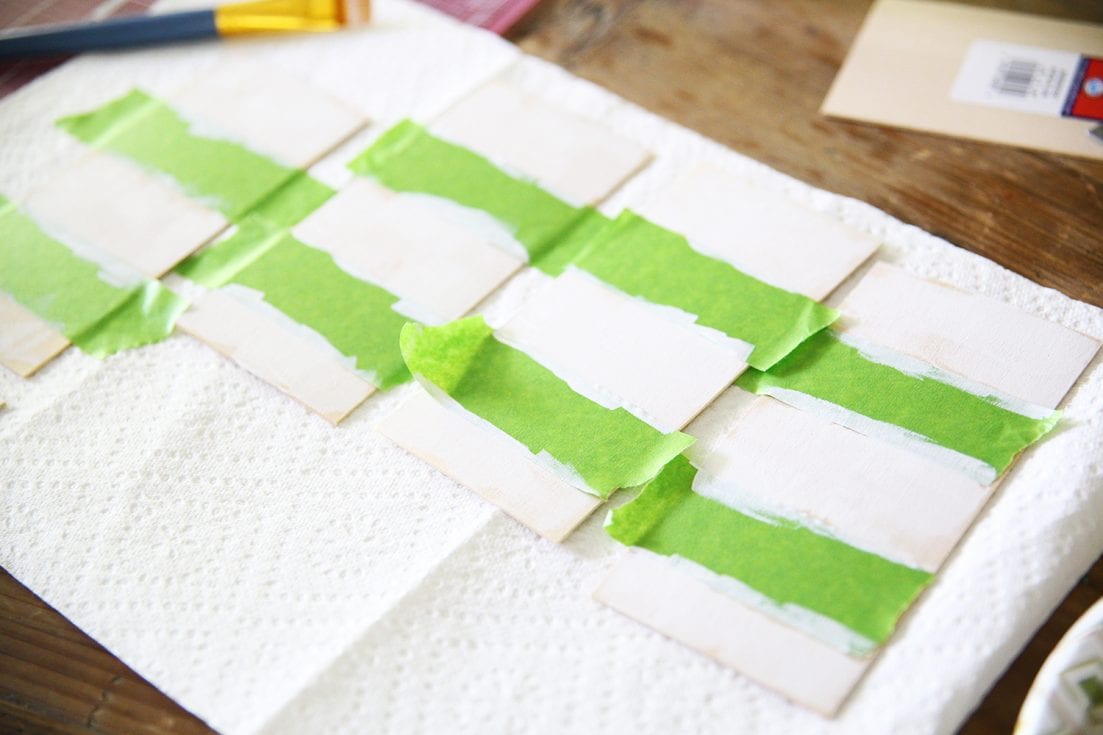
We simply laid our pieces down, and using the leapfrog method, {literally leapfrogging our tape over one another to give us lines} we established some stripes.
And we were ready to roll!
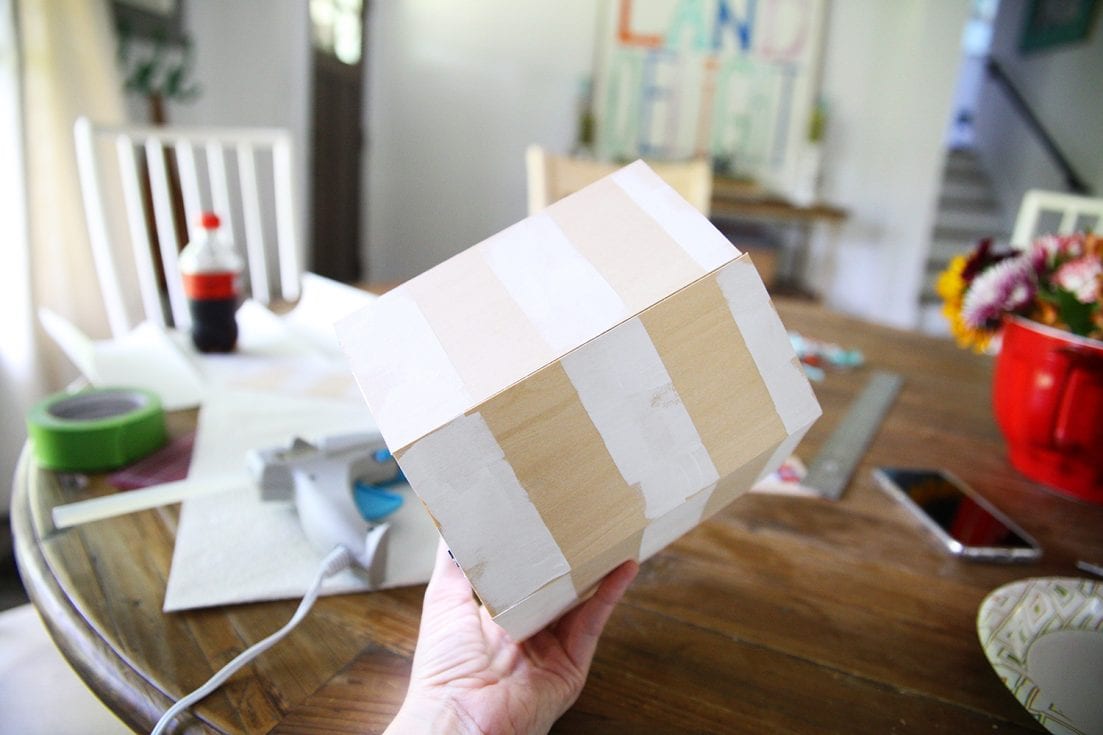
Heat up your glue gun, and apply them by gluing them to your canister. {We removed the packaging on the outside}.

One by one, we glued them on, and we were ready to go!
We made sure they were flush on the bottom, and there were slight variations on the top. Which were fine, because the flowers hide that.
Yes, I am drinking a coke in the background. Shhhh dontjudgemeimtryingtocutbackonafternooncoffee.
Such a fun little project for an easy effect!
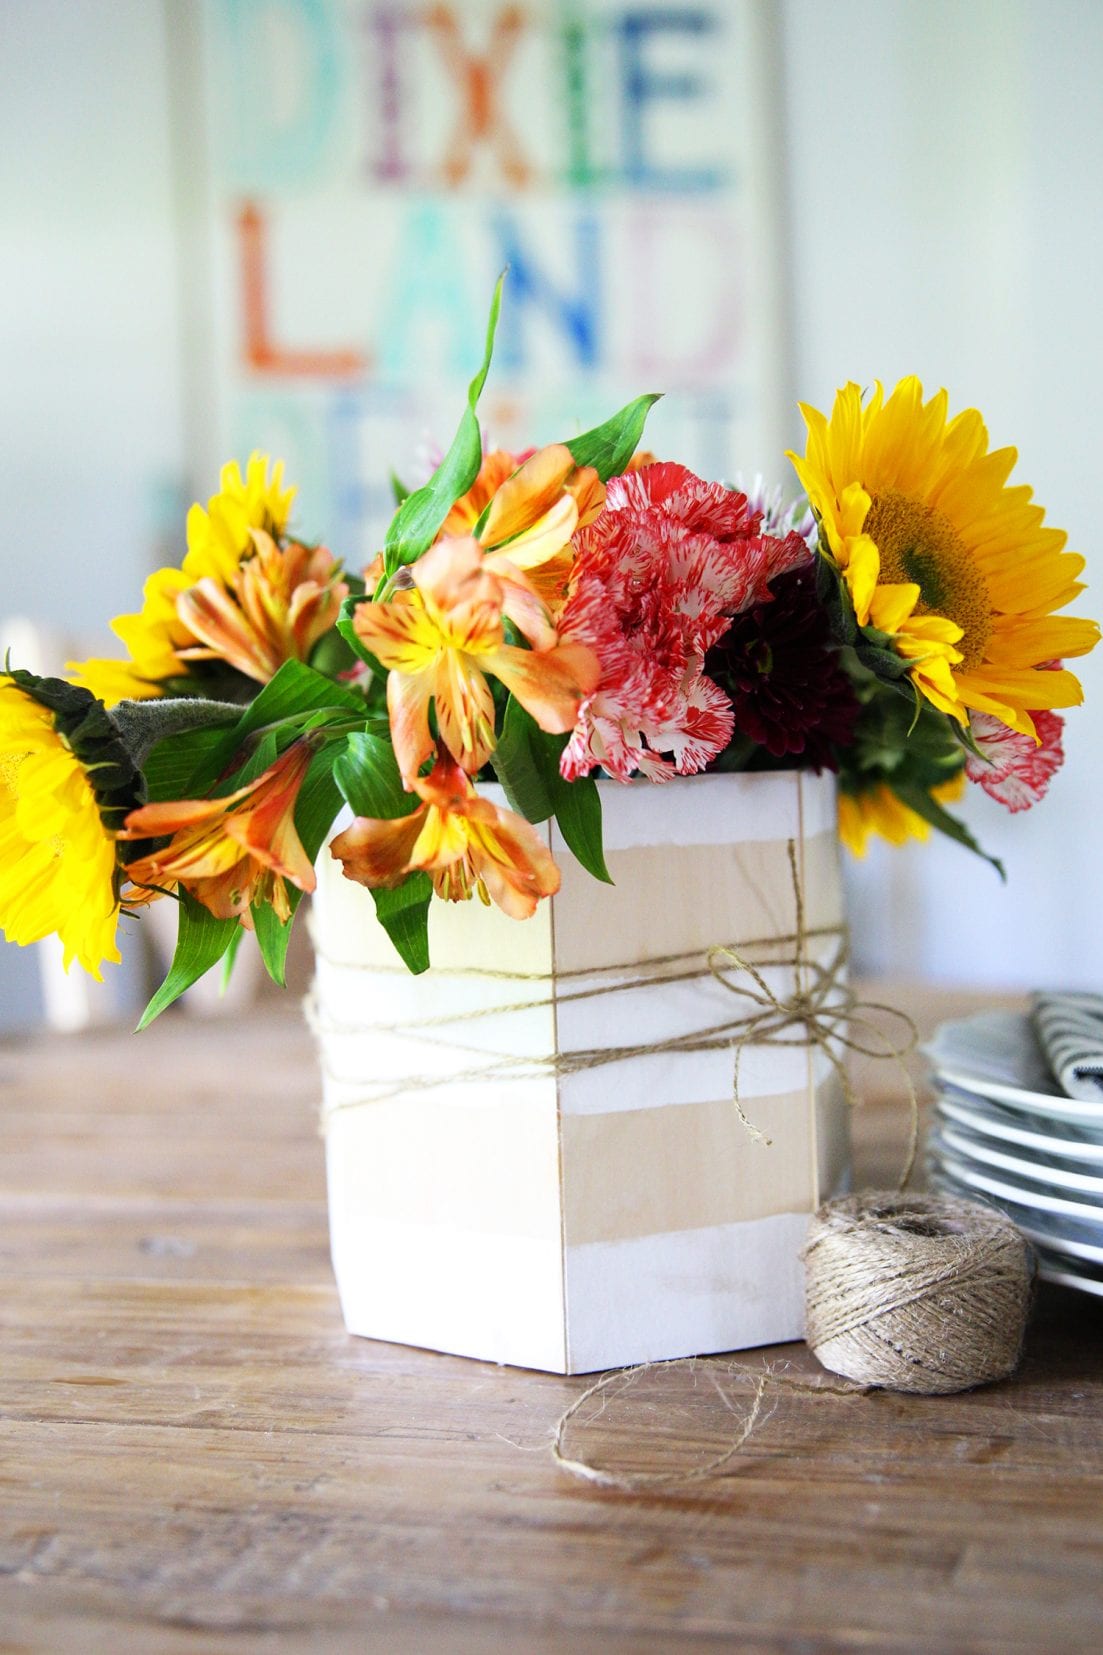
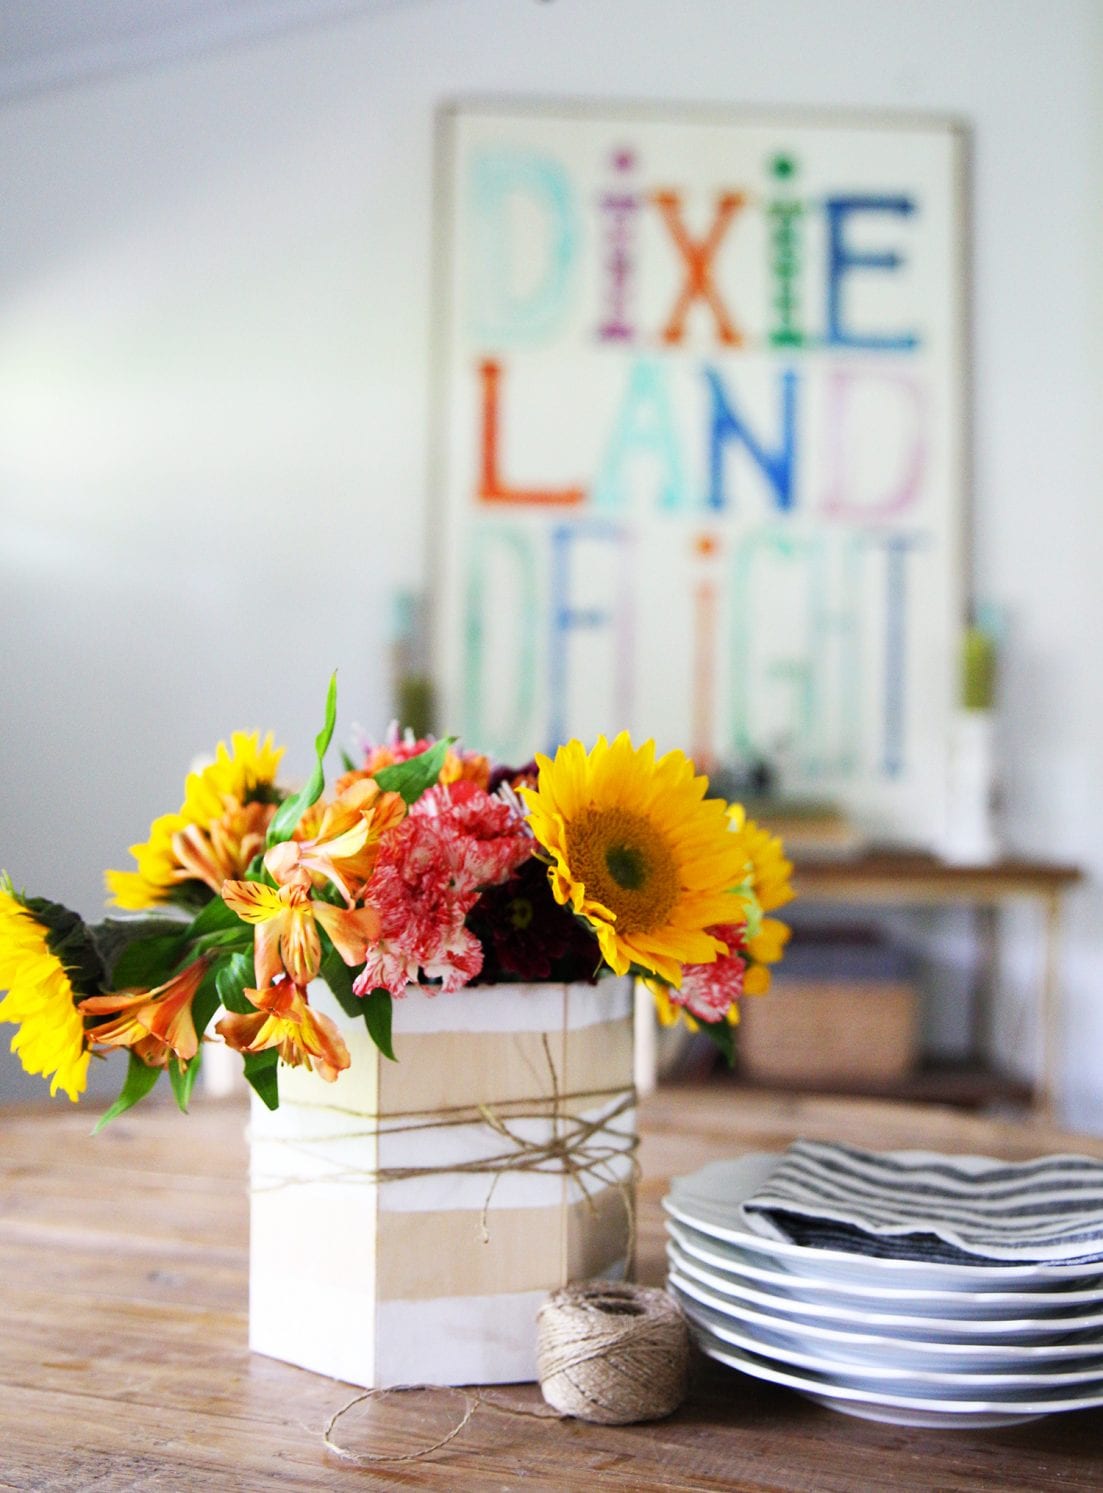
We added flowers and water, and that was all we needed to make a simple centerpiece!
This would make a fun centerpiece for any table, a great hostess piece, or more!
People will ask you if you’re a wizard, because you made balsa wood hold water. And then you can tell them you’re better than a wizard because you read the handmade home.
You could even attach a gift card to give it something else, or leave it as is for a sweet gift.
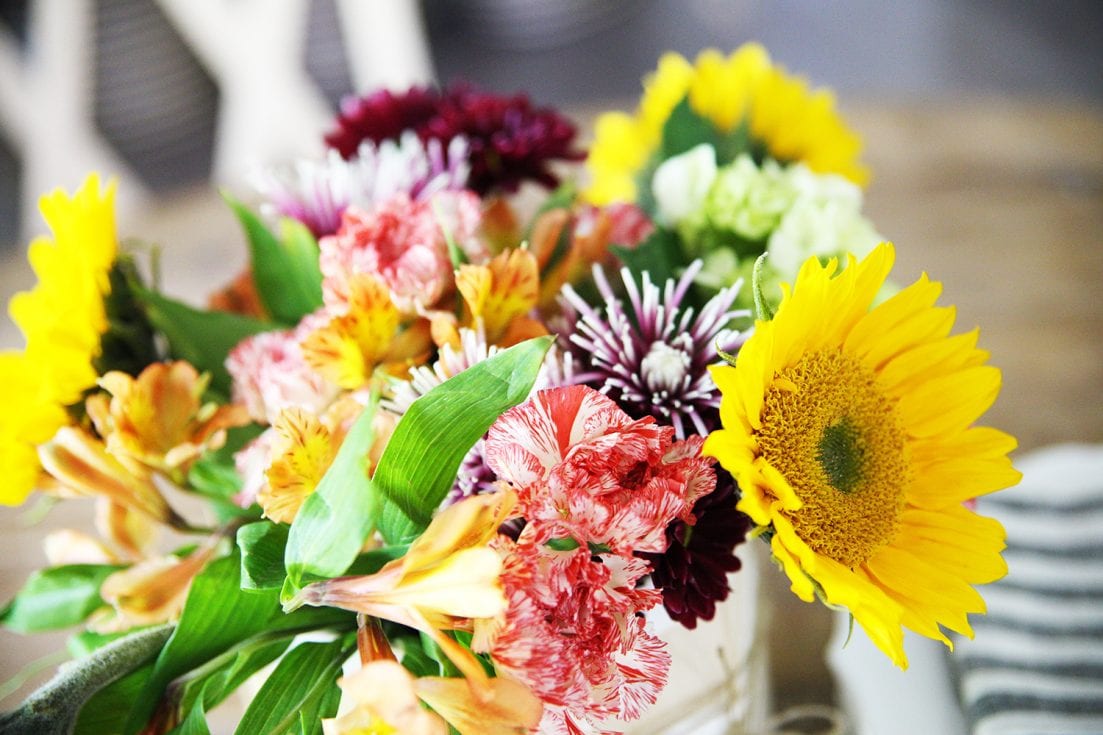
Nothing beats fresh flowers in a great, handmade container! We even added twine around the bottom to make room for a card, if needed.
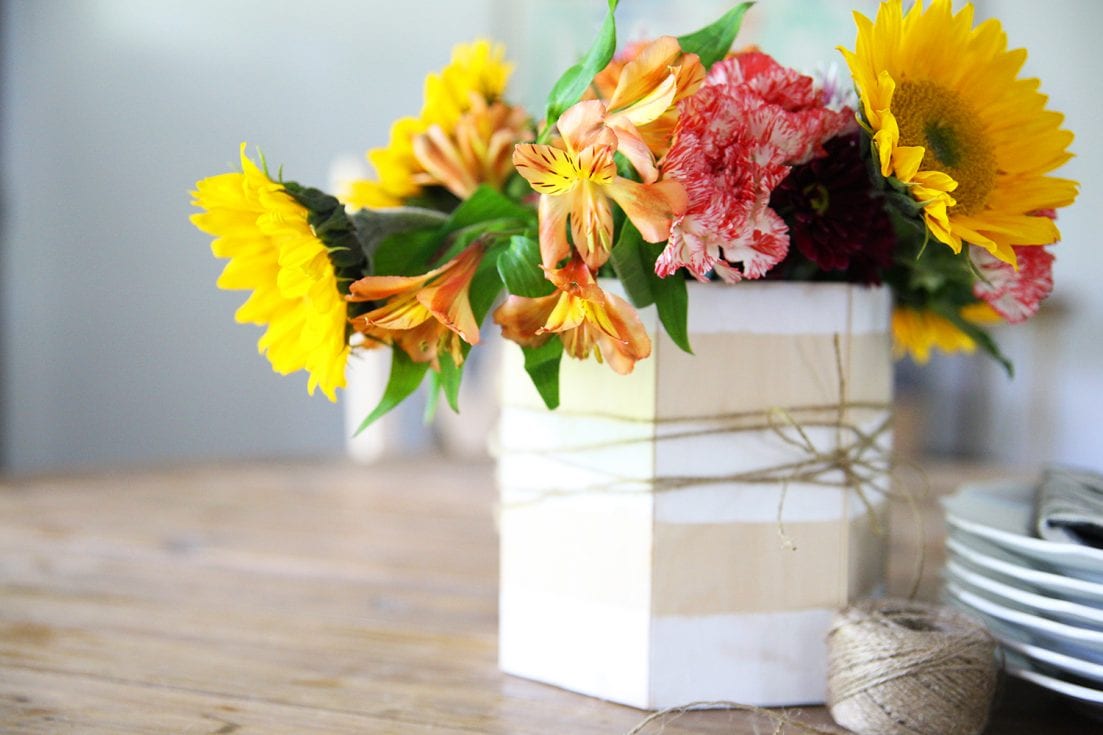
And that’s it! Tada!
Simple and easy and one of a kind.
As always, let us know if you decide to make one, or if you have any questions!
Have an inspired day!
:: This post contains affiliate links. Please read our full disclosure pertaining to partnerships here ::


What a gorgeous little bouquet! Love your ideas.
This is so pretty! Handmade gifts really are from the heart, and such a pleasure to receive. I’m not terribly good at DIY or flower arranging, but this looks really do-able and fun. I’m featuring this post at the Hearth and Soul Link Party this week. Thank you so much for sharing it!
Thanks so much, April! You are too sweet