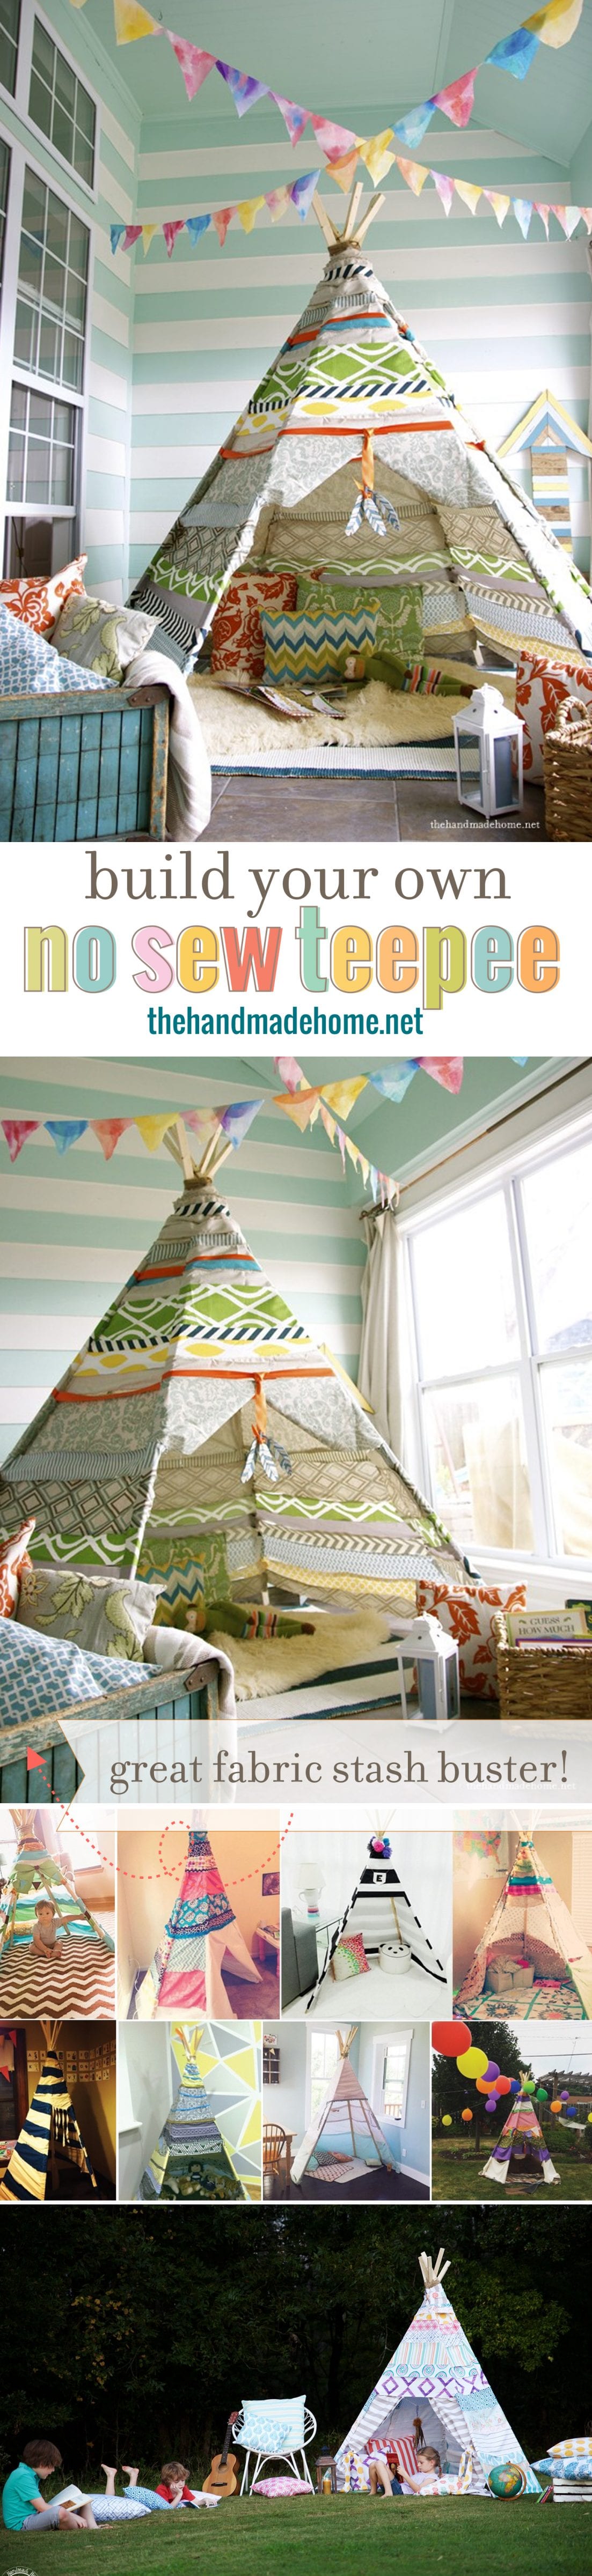
When we first shared our version of a no sew teepee a few years ago, we had no idea that it would be one of our all time most read posts. We were just doing something fun for our kids to pass the time in the slow winter months and I was not about to tackle anything so big and complicated with a sewing machine.
I guess good things can come from being obstinate. ;}
So of course now that our big launch is nearing for the handmade home studio in just a few days, {NOVEMBER 2ND!} we had to revamp one of our favorite projects again… but this time with some of our own fabrics.
Because ’tis the season for all things teepees, and it’s not every day that you launch something so fun.
 We had a blast creating this one, and the kids loved the shoot. We thought well… why not share the teepee how to again? Because just in case ya missed it…
 And today I thought it would be fun to revisit that first post!
So without further ado… how to make our no sew teepee!
Hello lovely friends! We’re back today with a super fun project we were wanting to whip up this week. With our veranda now empty, we’re enjoying the extra space for play.
 I’ve wanted a teepee for about, oh, seven years now. (PS. did you know tipi, tepee + teepee are all acceptable? The things you learn when writing a blawgh.)
I first spied one in the mall before I got the nerve to try things on my own, and the price tag was not pretty. ($$$ x 4!) Then I wanted to make one, but the sewing part always freaked me out a little. You know, triangles and preciseness, and giant poles falling on your children and eight hour projects amongst other various whatnots. I’m getting the hang of sewing, but I was looking for an easier approach.
 So I decided on a no-sew tactic.
 We wanted to beat the winter blues, give the kids a little something fun for Valentine’s Day, and the best part?
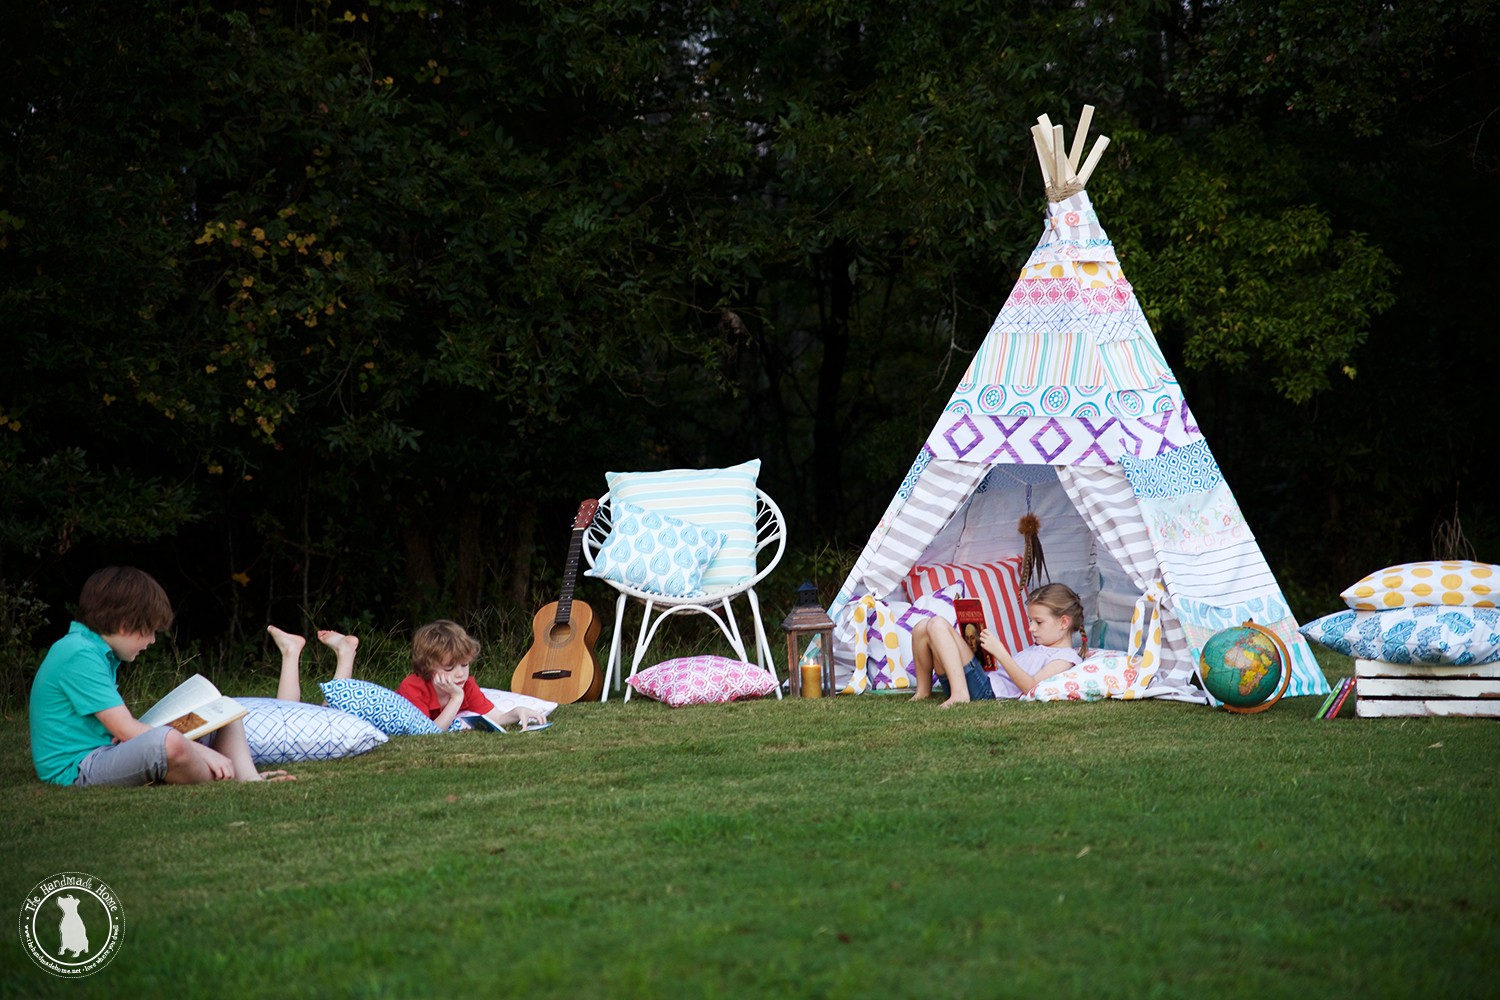
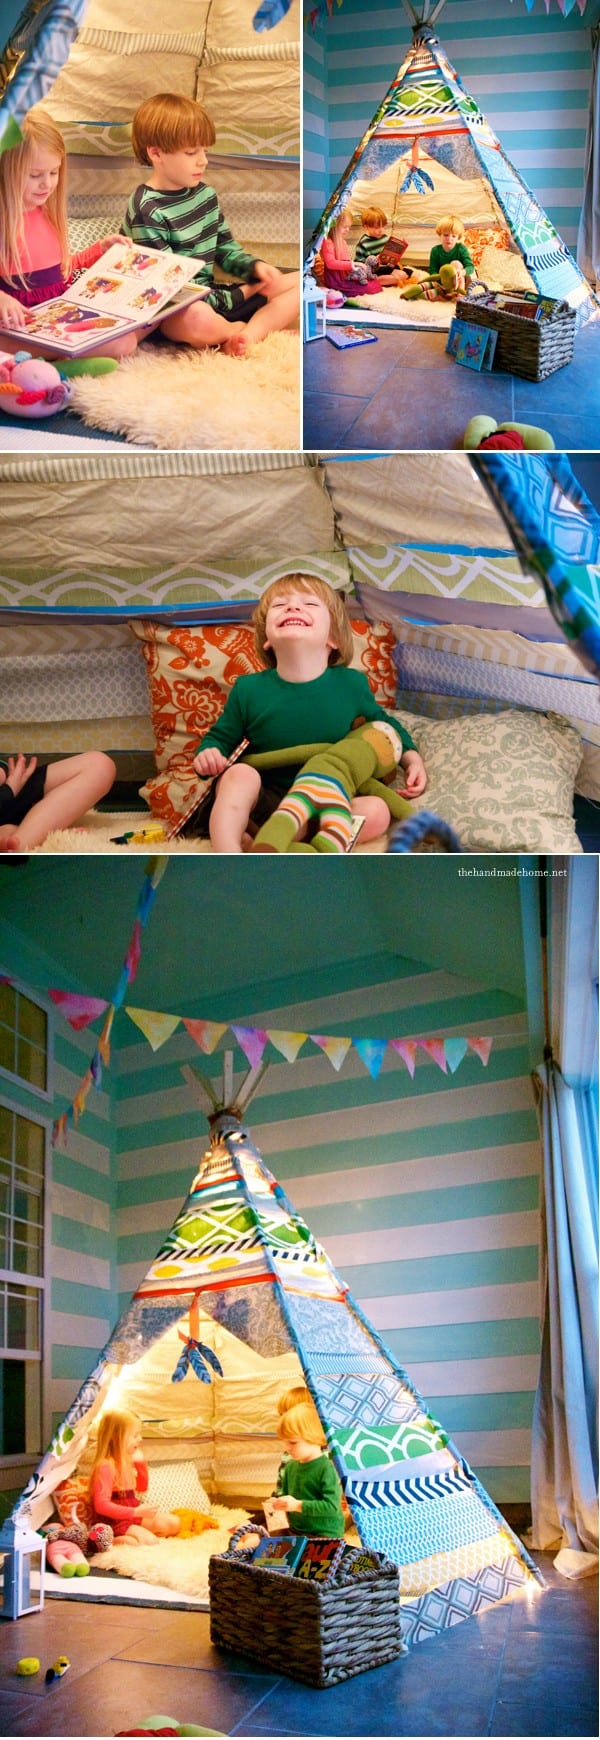
 It’s the official reading teepee. Aiden made a bee-line for the new fort this morning. I’m just excited to see him so excited…
Want to know how we did it?
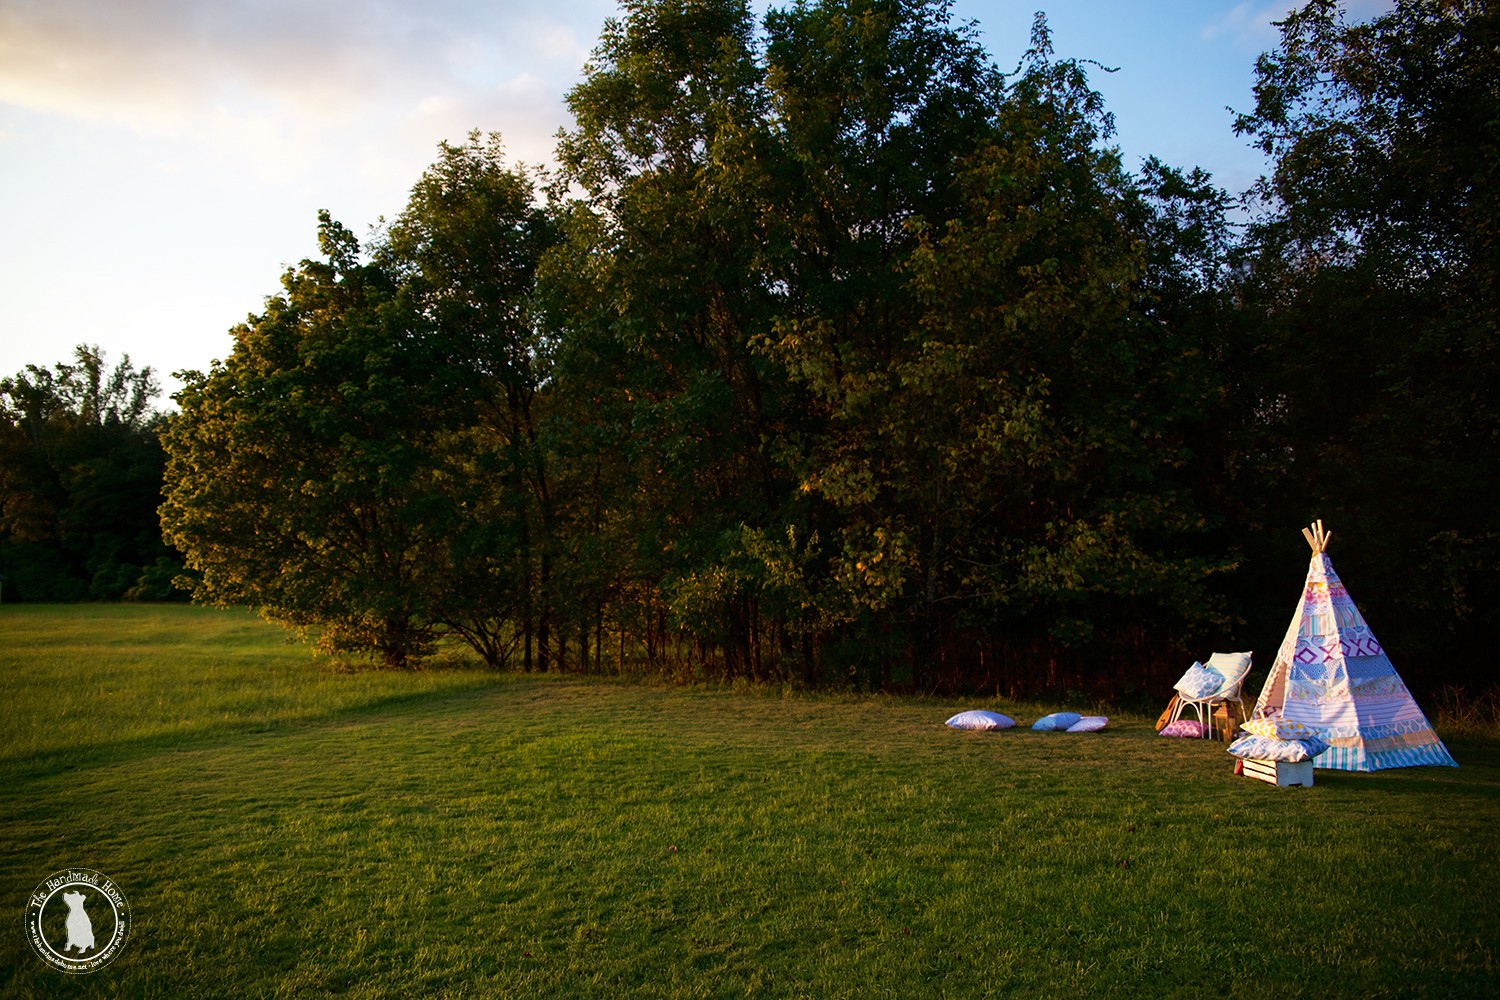
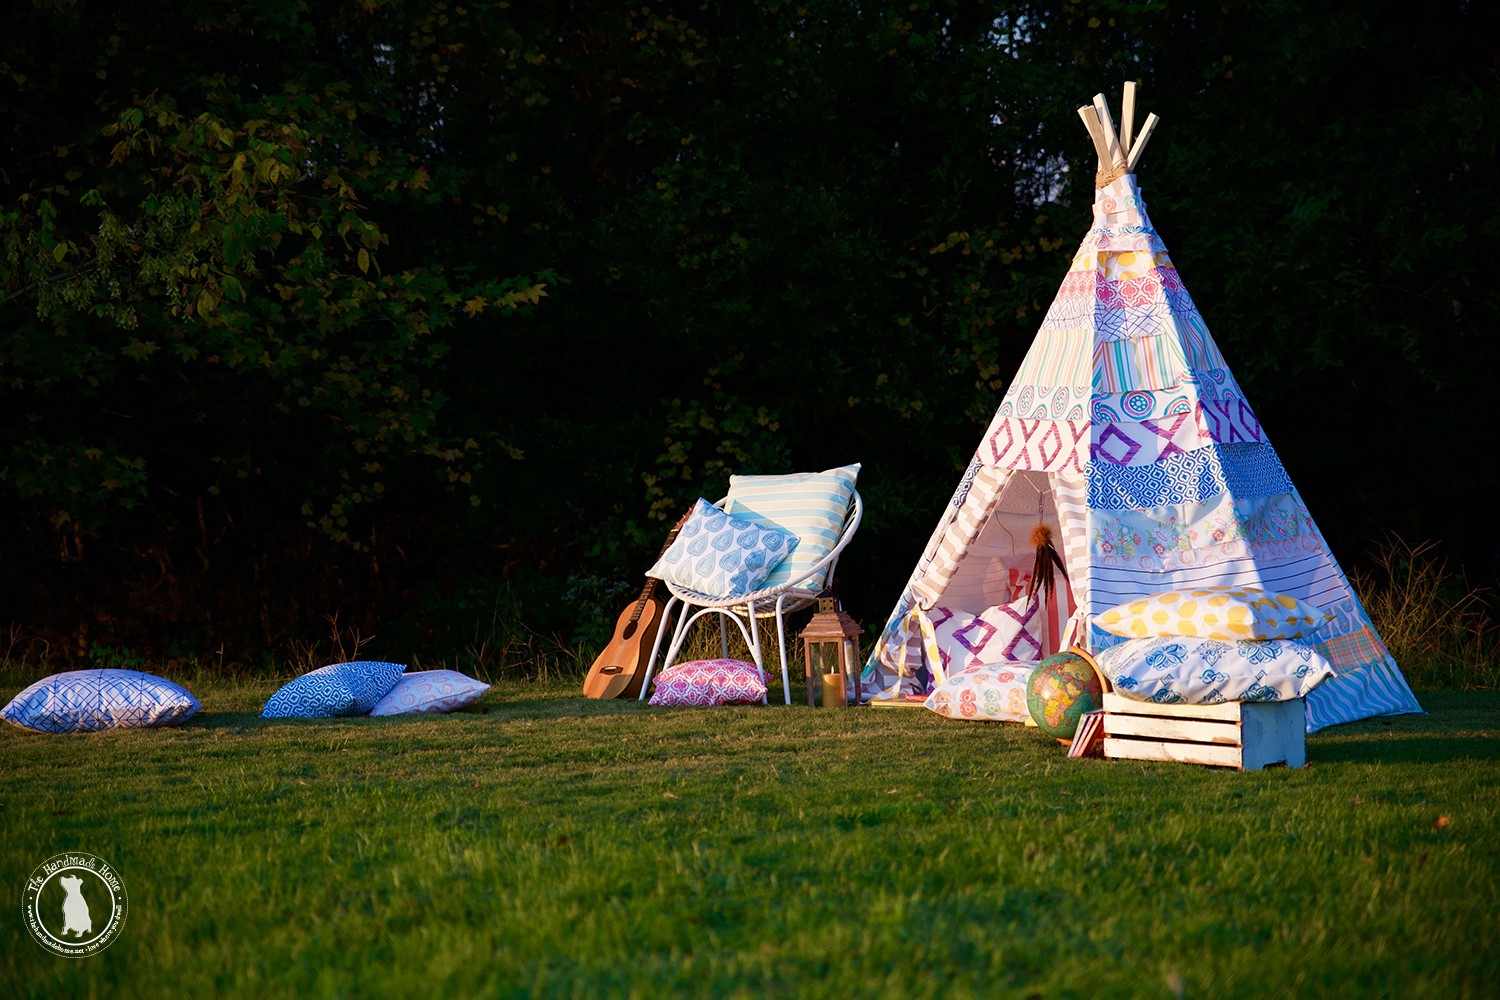
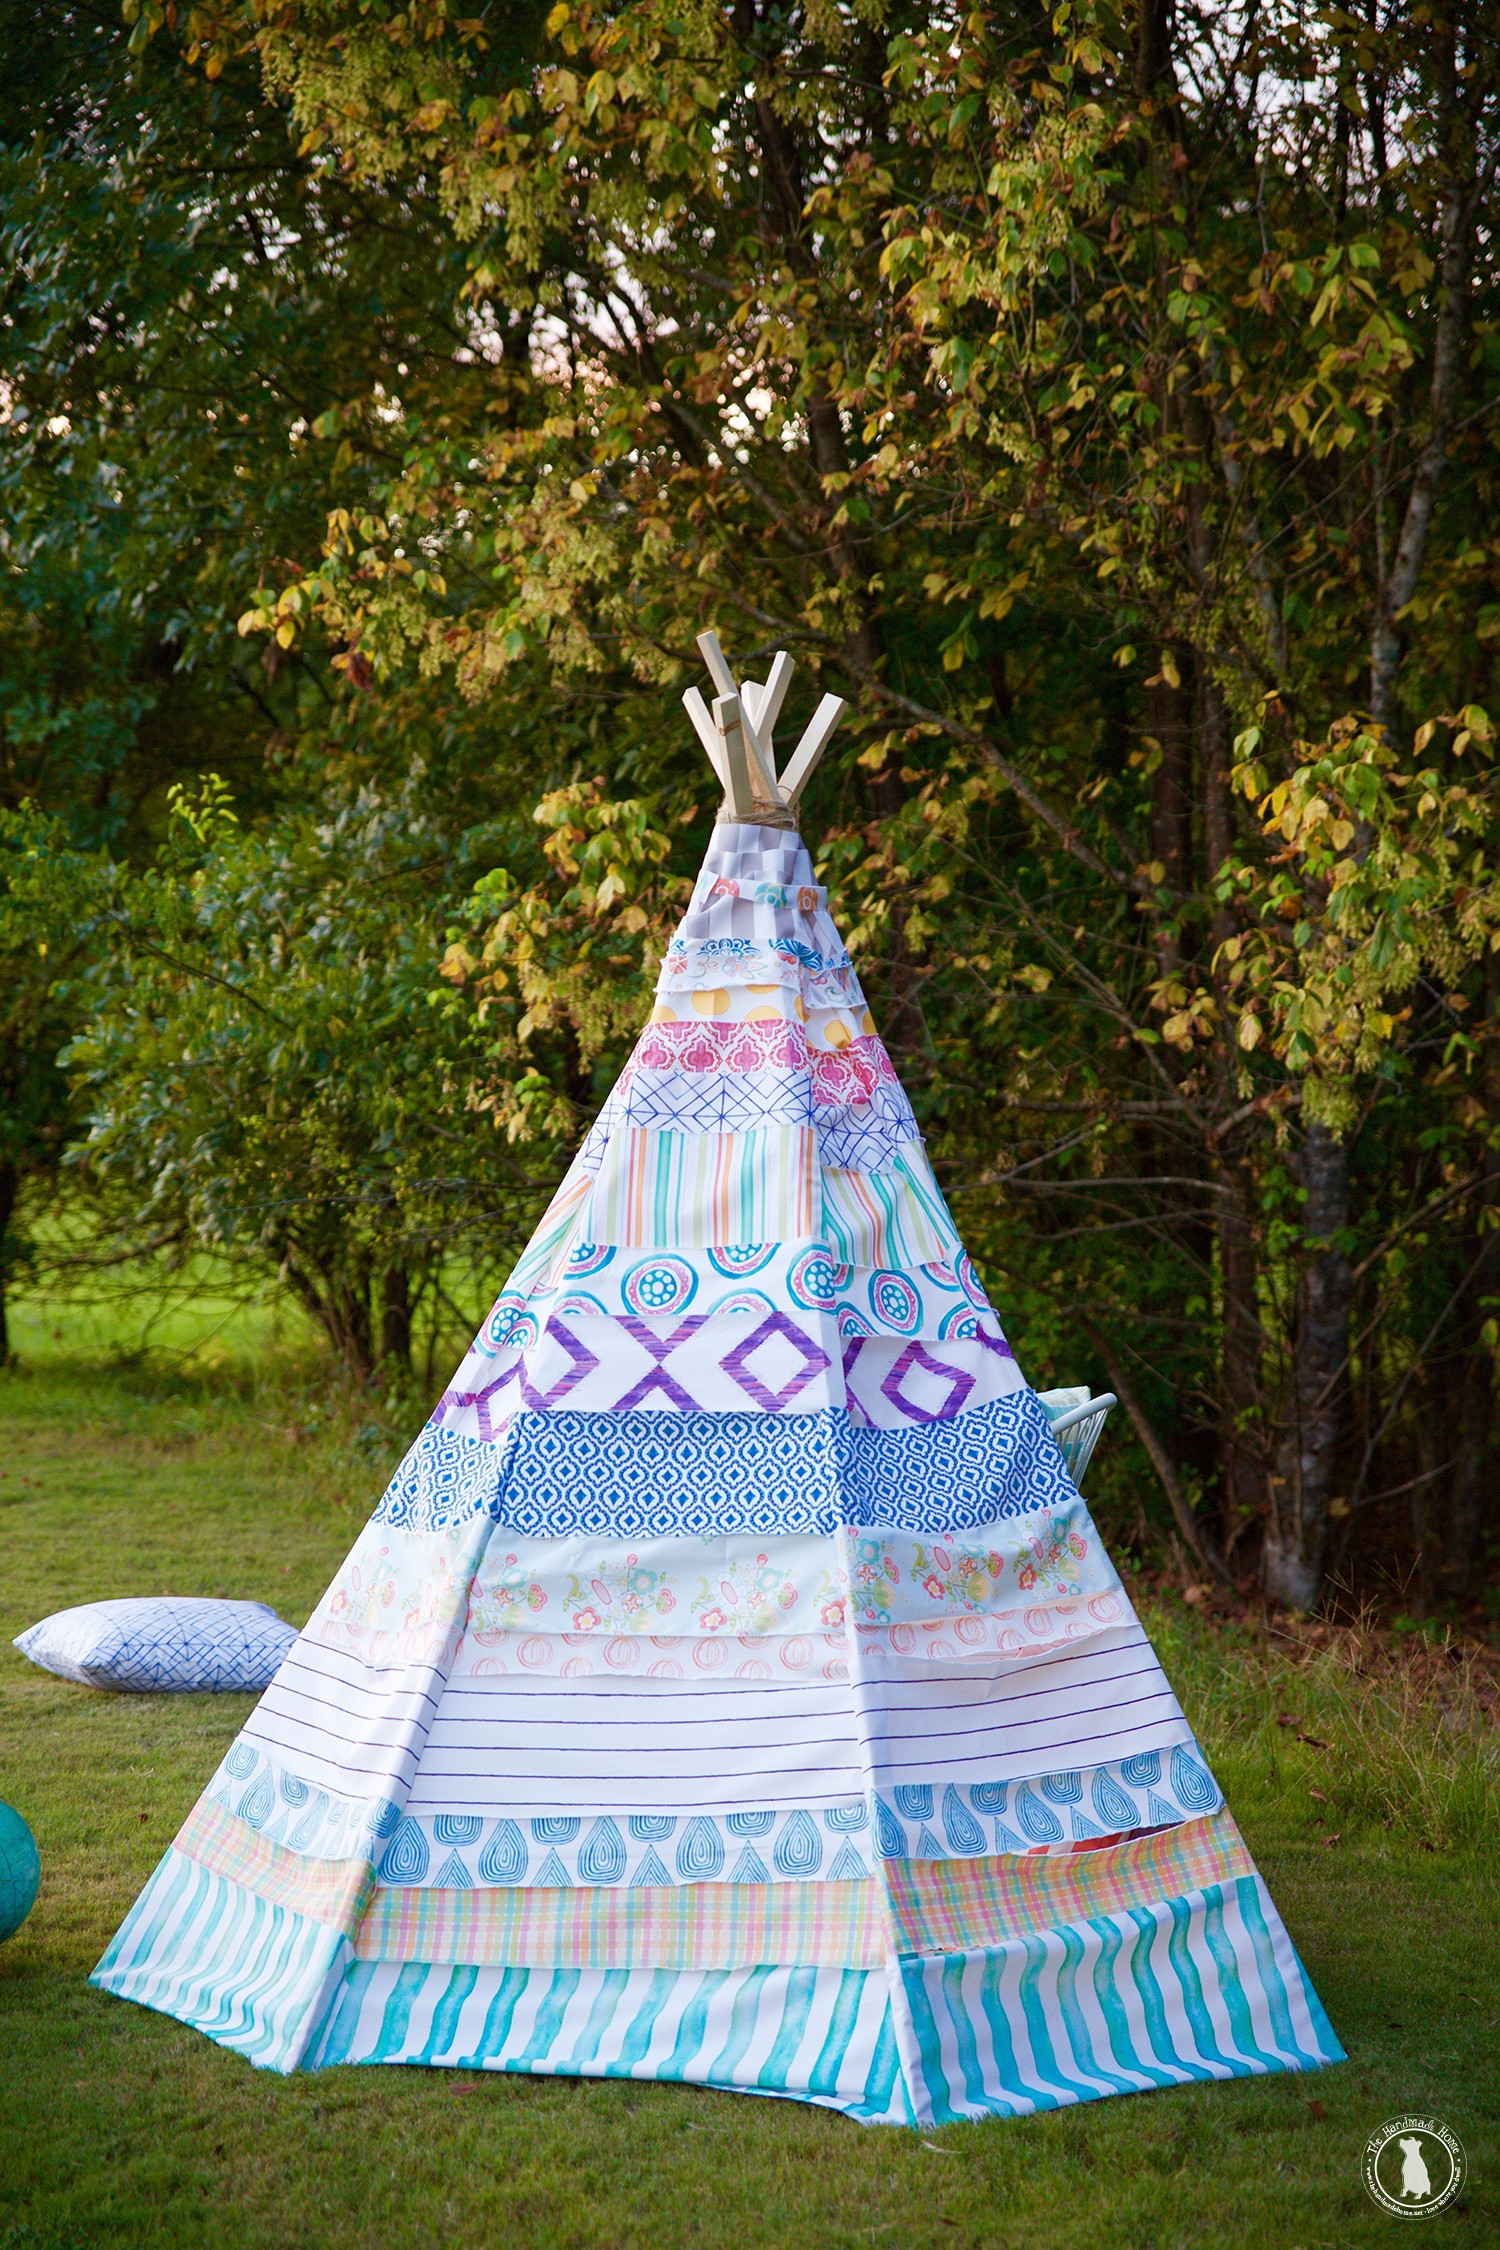
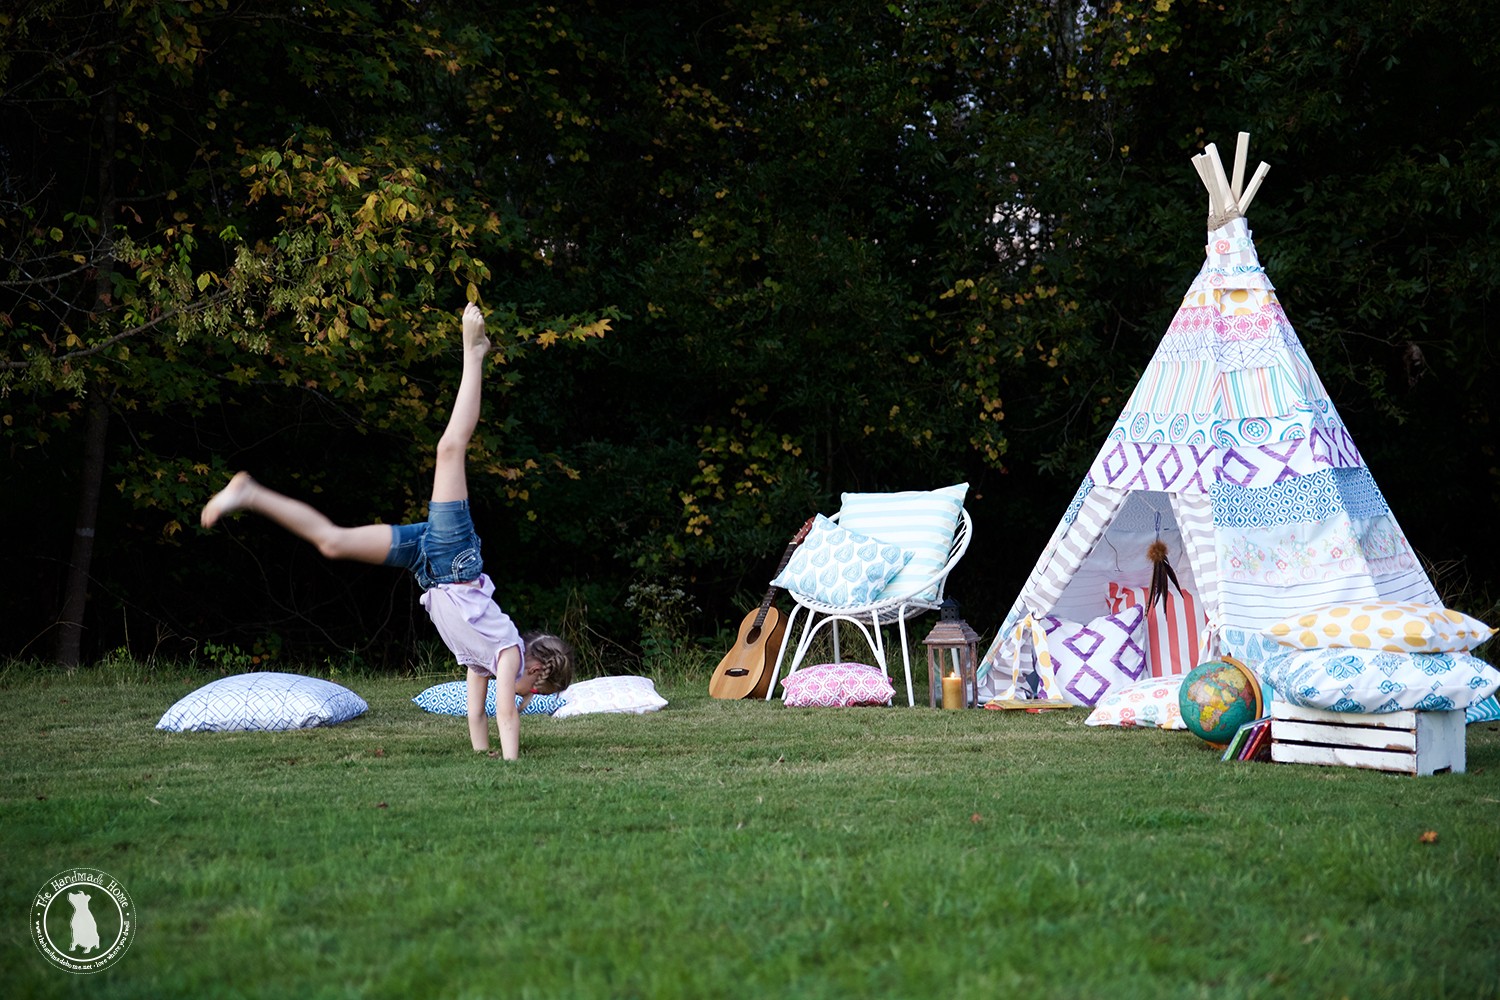
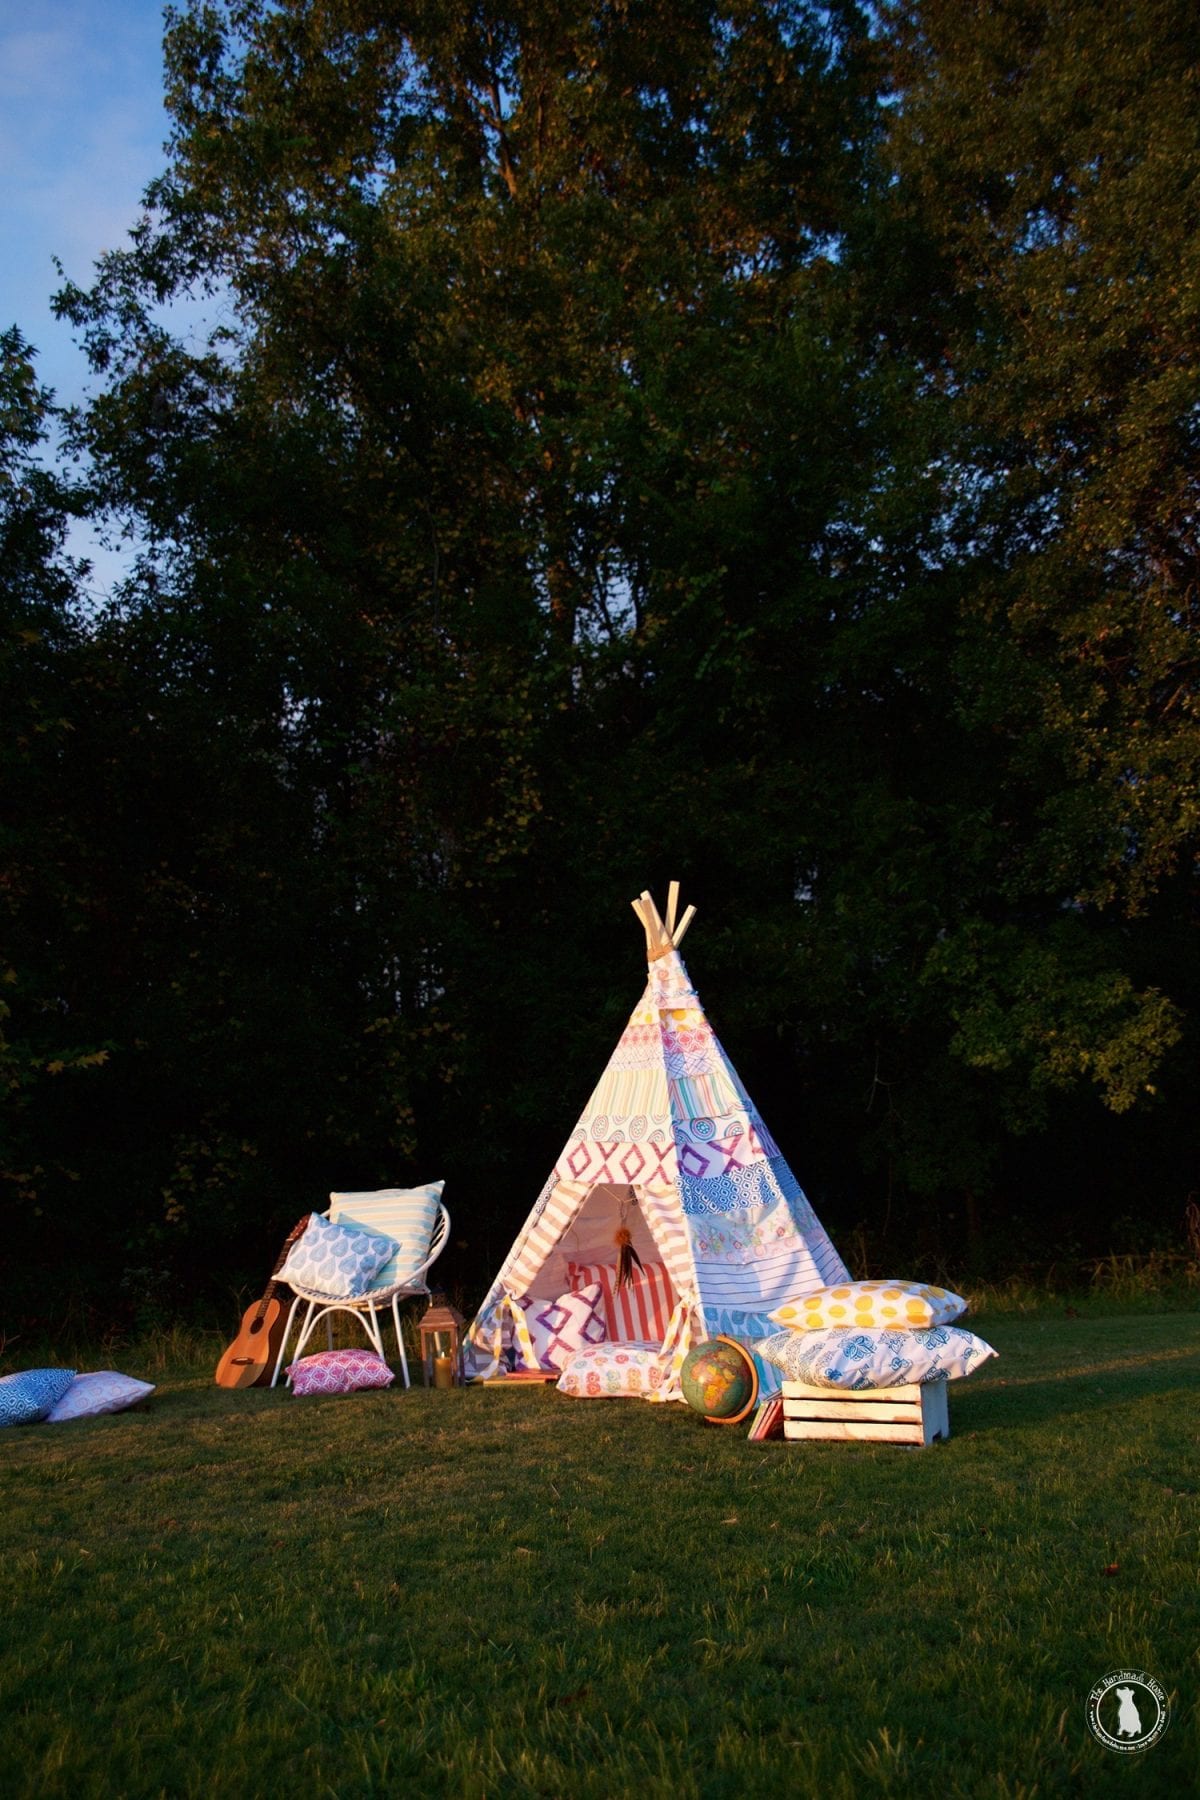
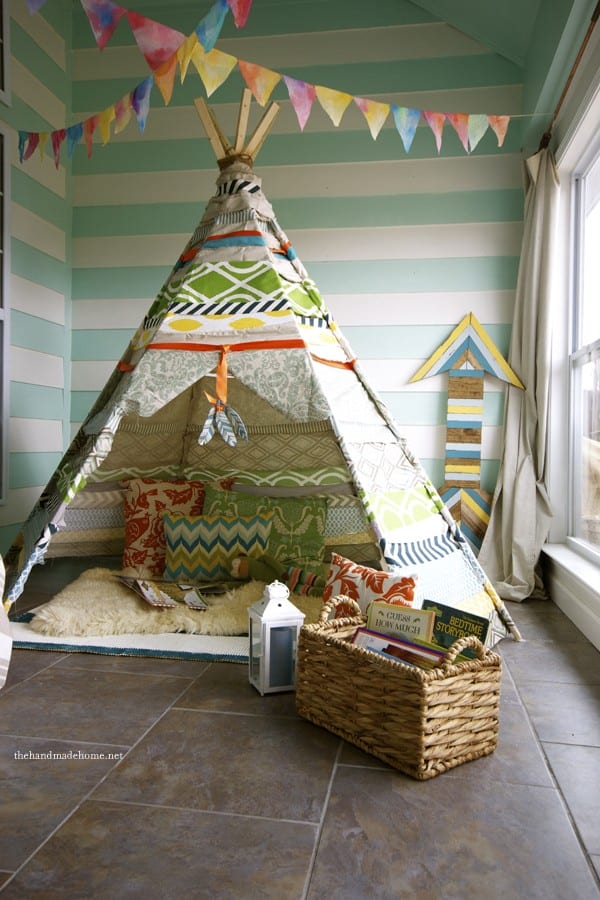
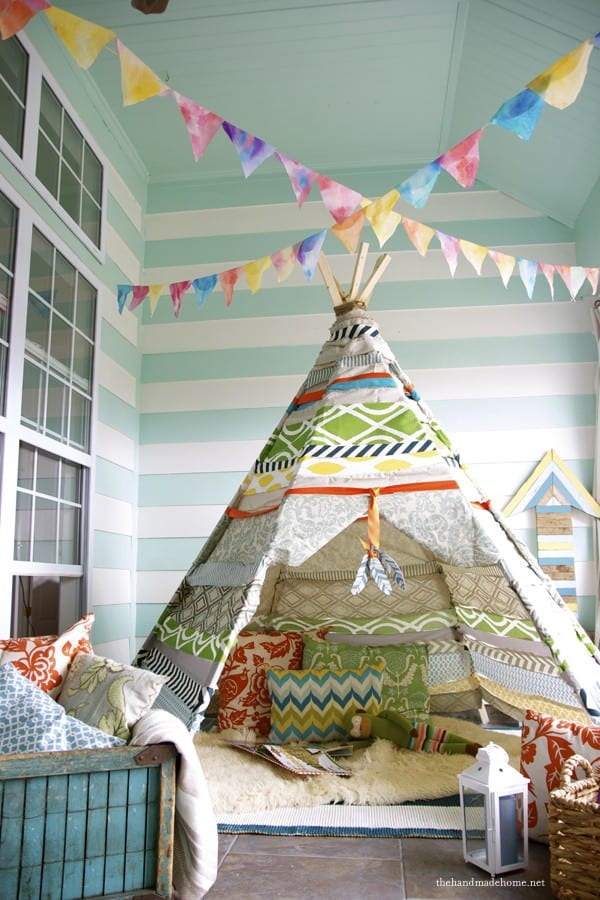
Our final product measures about seven and a half feet tall by 6 feet wide. We wanted something large enough to hold all three kiddos, without taking over our entire house. This little hut can stand on it’s own all winter, and when we’re finito, we’ll simply fold it up and stash it away. (See: under our bed.)
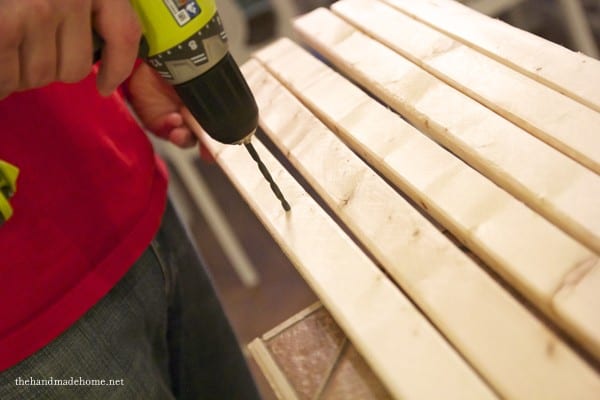 We purchased six 1 x 2 x 8’s at our local store. On each piece of wood, we measured 1 foot down and in the center, drilled a hole using a RYOBI cordless drill. This is for the jute that will hold it all together.
I wish I had a photo of us putting it together, but it really wasn’t that complicated. You’ll definitely need an extra set of arms, but we just gradually positioned the poles, and as we added each one, strung them all through with jute until they felt right for a teepee shape. When we were finished, we wrapped it around until it was secure.
Because this tee pee is currently residing on the tile of our veranda, we used some hot glue to stabilize the bottoms on the floor. When we’re finished, we’ll just pop it up.

It’s not perfect, so let go of the notion and don’t let it drive you crazy if you decide to tackle this one. It’s fun and that’s all that matters.
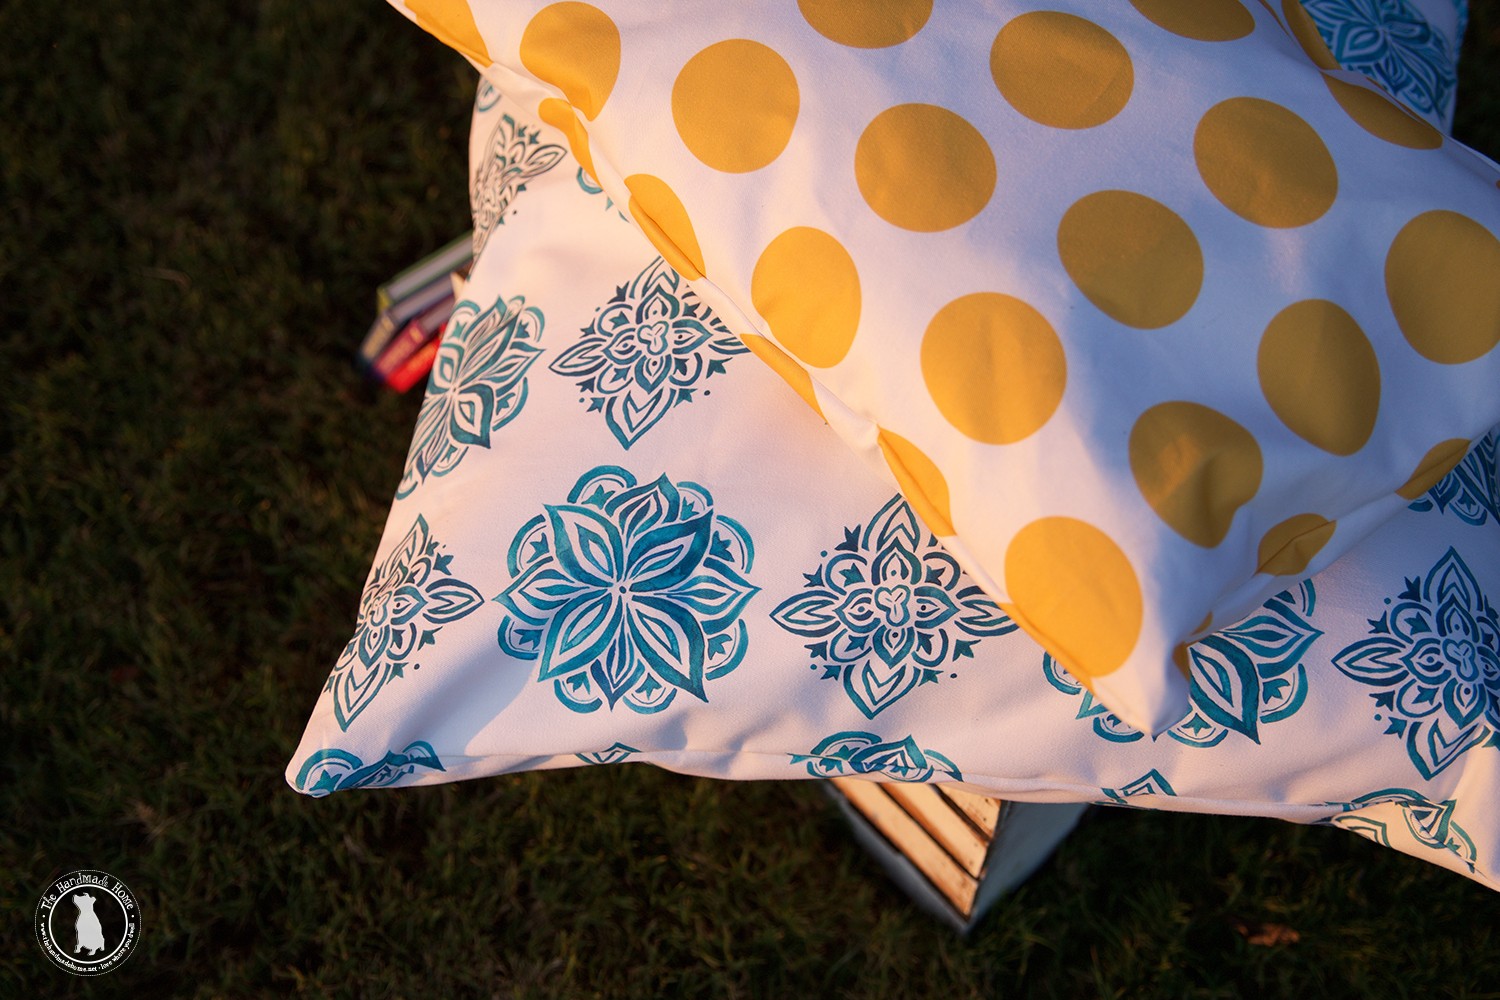
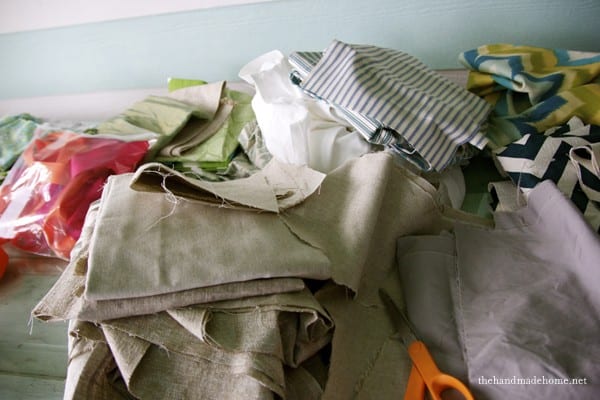 The second best part to this whole insane little creation? The total cost for us with this teepee, was a whopping seven dollars. Why? Because we only paid for the wood. I decided to use this project as a fabric buster… Apparently I’m a little bit of a fabric hoarder in denial. I measure fabric for products like I do spaghetti and I’m all, what? It’s not three yards in a foot? Then I have enough fabric to cover a small village (or build a few teepees) and it sits in my cabinets for three years. Alas. Sigh. Digression.
Consider this a little project to get your purge on. I even purchased two large drop cloths from the hardware store (which we will now be returning) but you could slice one up, and supplement with patterned fabrics in between.
I actually knocked this out in a day, and once you get into the groove of it, there’s a learning curve. I recommend it as a weekend project if you want to take your time. (If you’re anything like me, once you’ve started you don’t want your kids dive bombing all your fabric or singeing off their hair in the glue gun, so you just want to finish.)
I wanted something fun and frilly since you can see it from all corners of the house, but a second alternative would be to take a simple drop cloth, drape it over and pinch it in place with a giant clip. I’ve seen those floating around the interwebs as well.
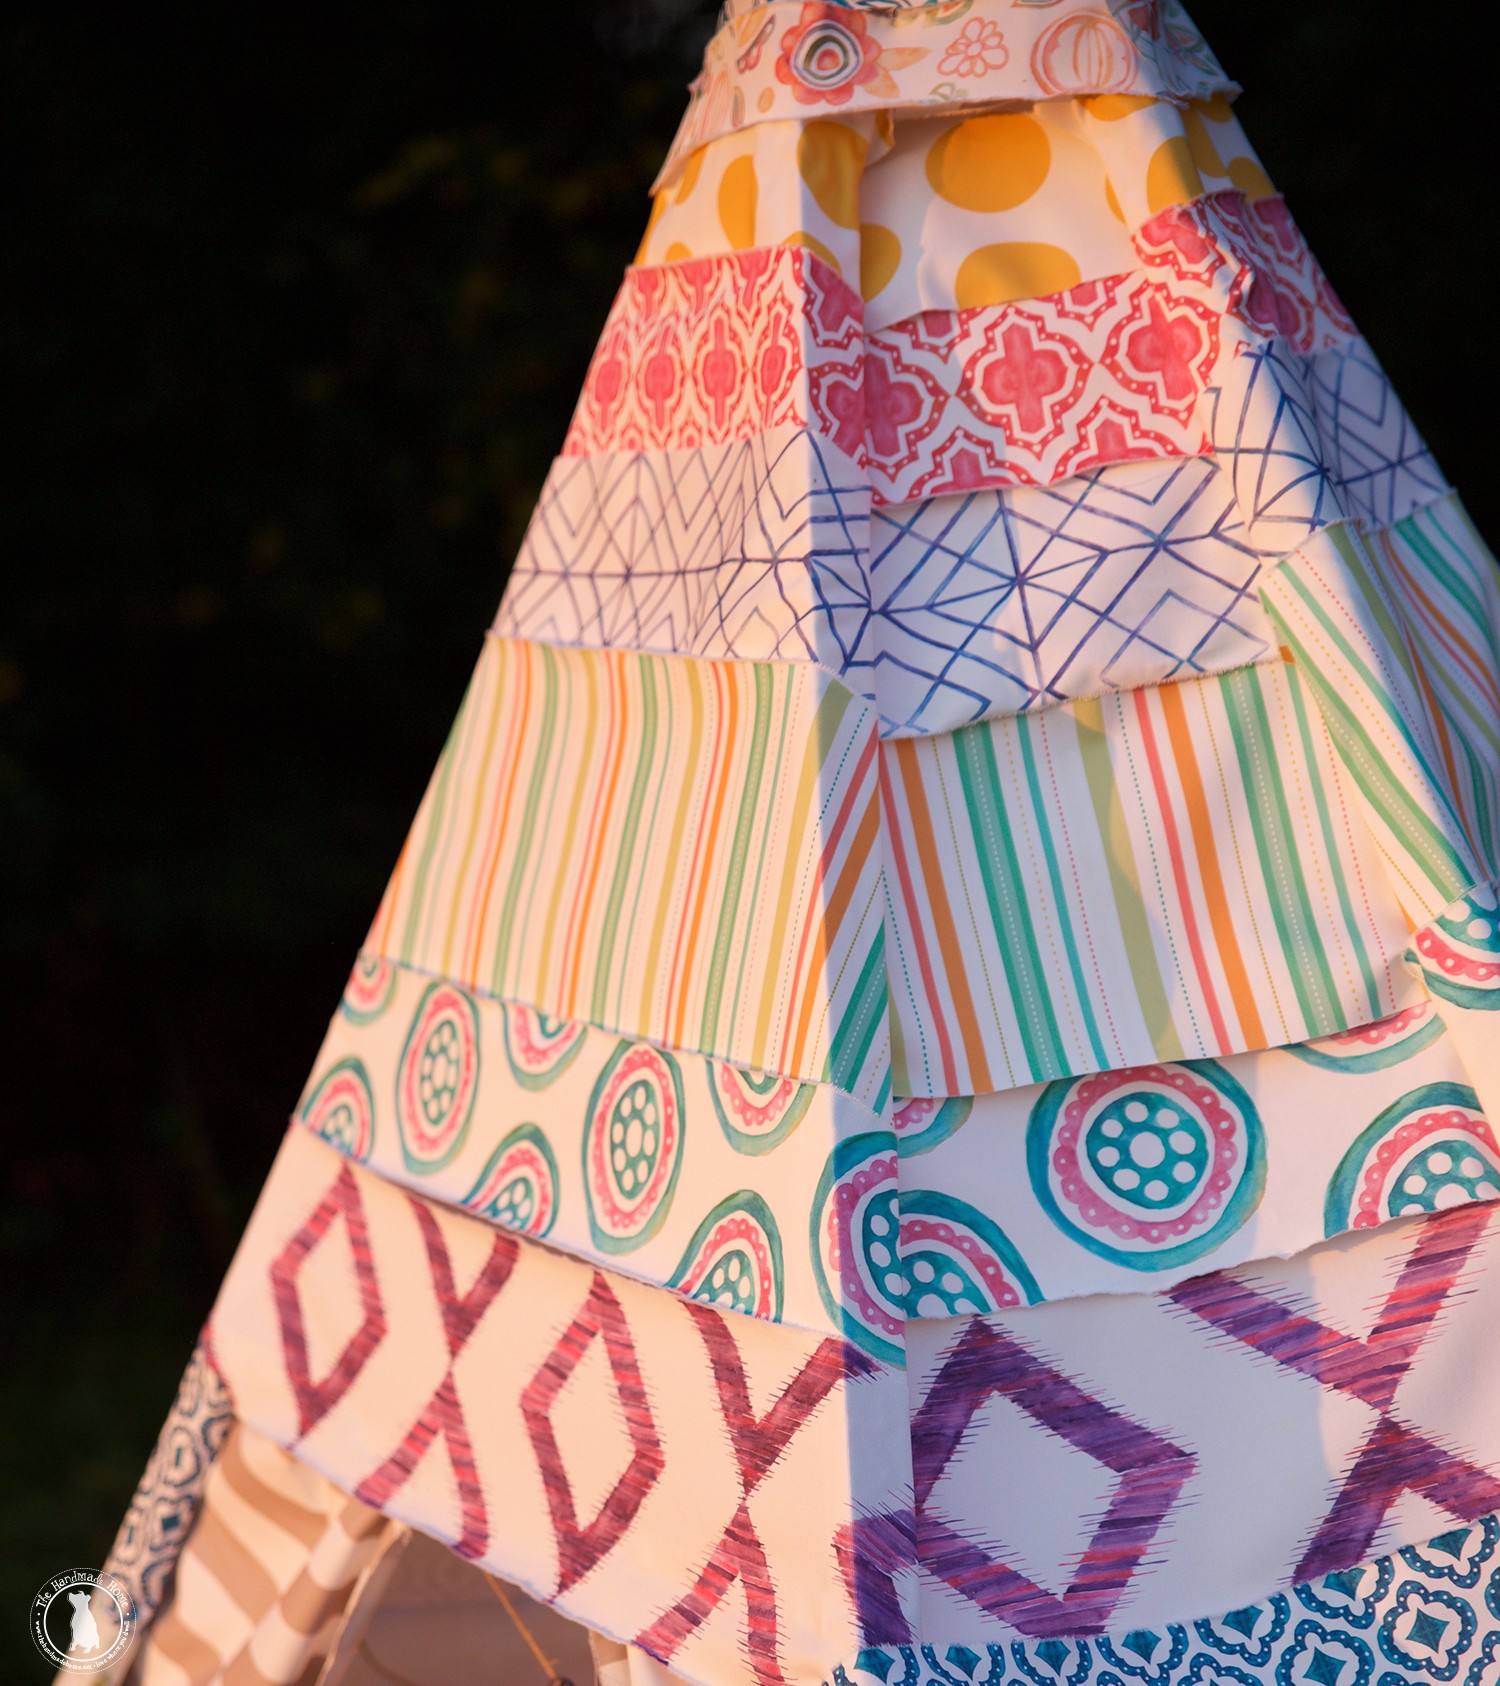
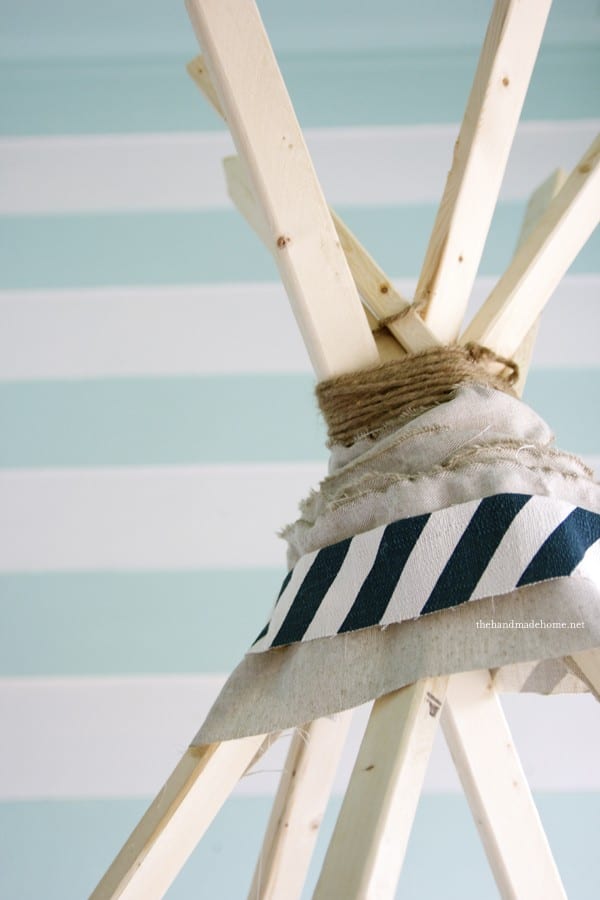 So I eyeballed it and starting at the top, cut my fabric into strips. I simply mimicked the rope action above, because the top part was a bit jumbled and complicated. I layered a few pieces, and secured them with glue. Tada! The top of my teepee. (Tipi. Tepee.)
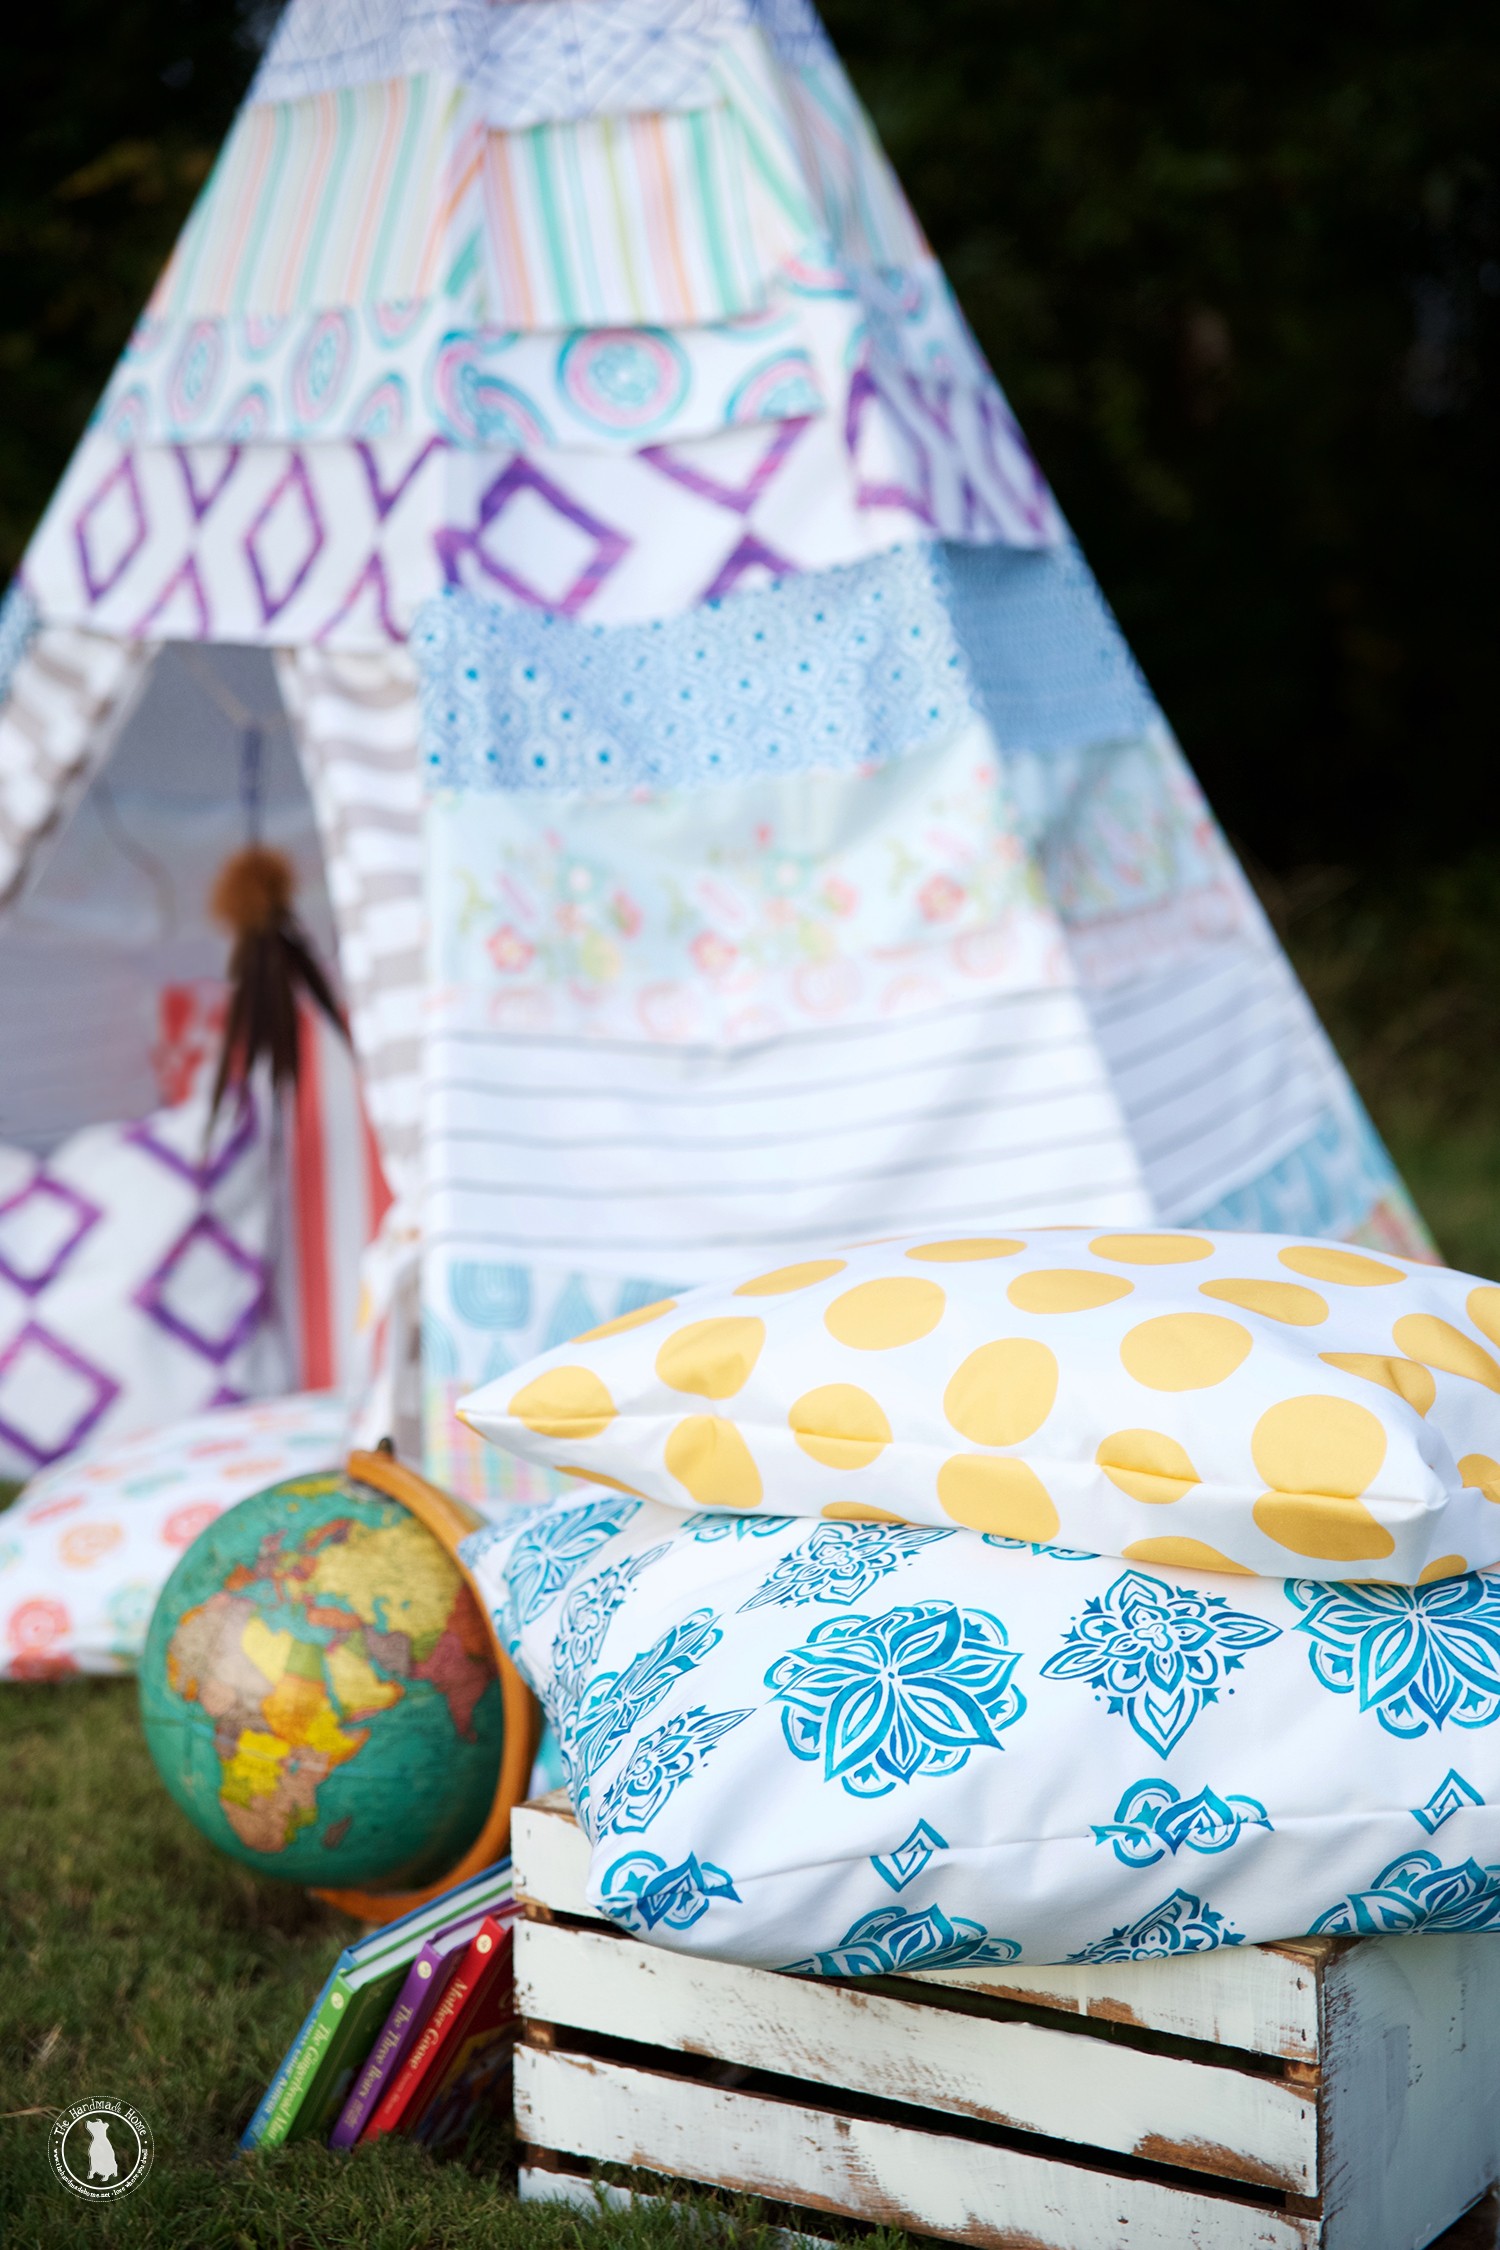
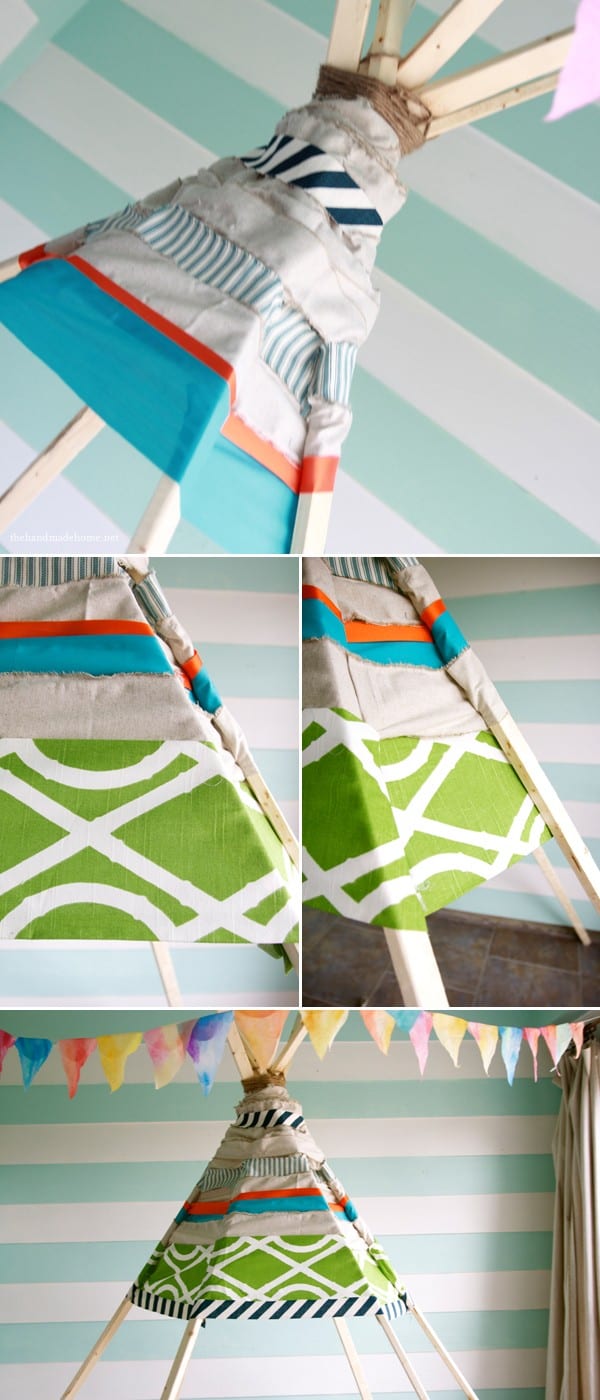
Once I was about half a foot down, I began a system of ‘weaving’ the fabric through the poles. Since I was choosing from my fabric stash, I would eyeball to make sure I had enough, and cut to length. The pattern went over, under, over, under. When one section was under, I made sure the next section tucked around the pole, so that it was hidden. I just made sure to hot glue as I went, and hide the wood.
 A few more hints:
• It doesn’t really matter how you do it, as long as you establish consistency. I found myself touching it up as I went. You can go back and tuck and glue and fold, until it looks right.
• Because this style is really made up of pieces of fabric, it will have a ‘ribbony look’. Read: gaps. I went back on the inside, and tacked the pieces together with hot glue. The kids said they like the ‘ribbon’, because they can peep through and see who’s coming. Eventually the hot glue will come loose, but it’s low maintenance and easy to repair.
• Put your glue gun on low, so a. you won’t singe the skin off your finger and curse the day you were born b. when you’re pressing said glued pieces together, it doesn’t take that long to dry.
• When you’re dealing with fatter pieces of fabric (see how I alternated my layers?) the angles with joining them from pole to pole will be a little more noticeable than with a skinny piece. Make sure they (the fat pieces of fabric) stretch all the way across from top to bottom, before securing with glue. There were a few sections I pulled down and had a redo. Thus the glue gun. Glue guns make everything okay.
• Make sure you save your biggest pieces of fabric for the bottom… the gaps get larger (and the pieces get longer) as you go.
• I took the front section as low as I wanted it to go, and then cut a slit nearly through the center for that ‘teepee look’. You can finish yours off however, but I figured nice and open means they’re less likely to pull it down in a torrent of spazdom.
My children are known for their torrents of spazdom. I have no idea where they get it. ;}
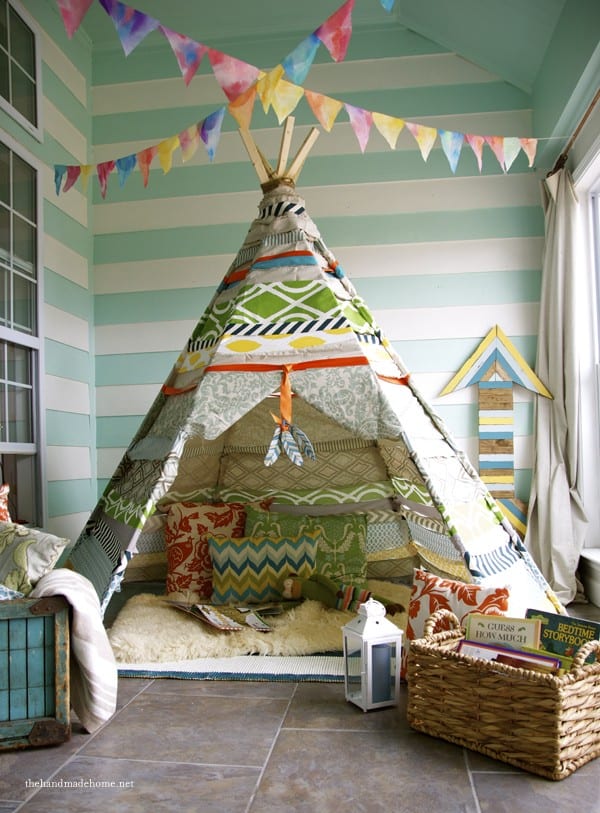
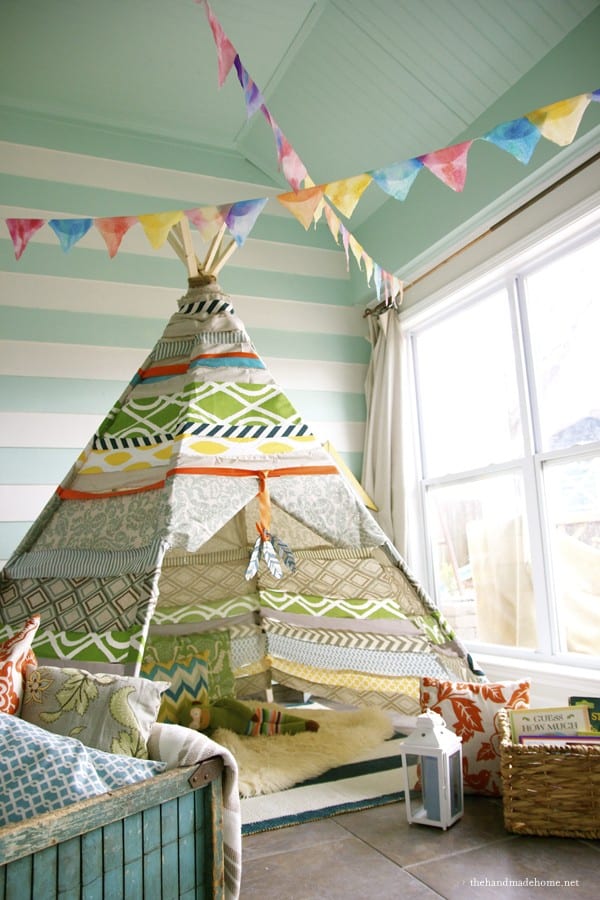
You may have noticed… I just didn’t have the heart to pull down our bunting from Emmy’s watercolor party. They’re like a shot of happy on rainy days. And those little feathers are from our thanksgiving place setting.
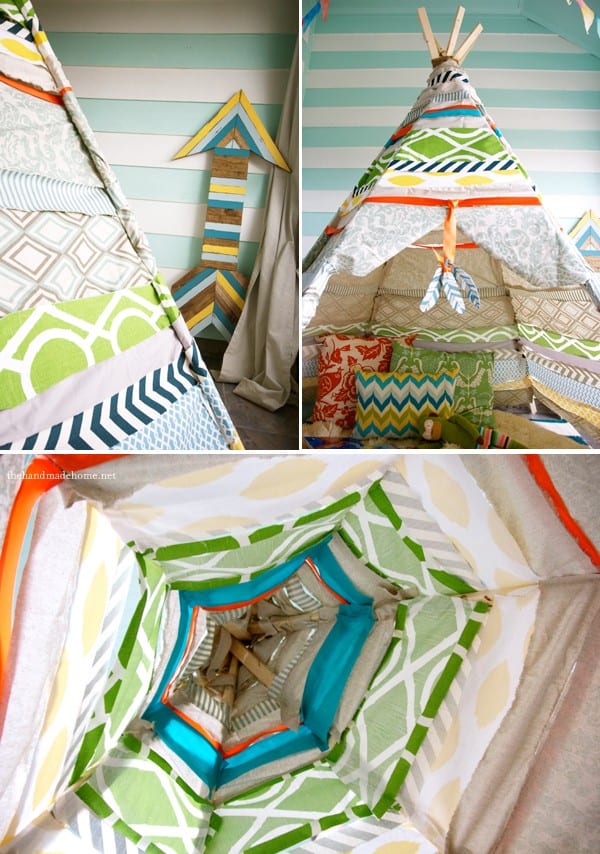 That arrow is a project from our book. Probably my absolute favorite. Get the step by step to that arrow and a few versions of it, here!
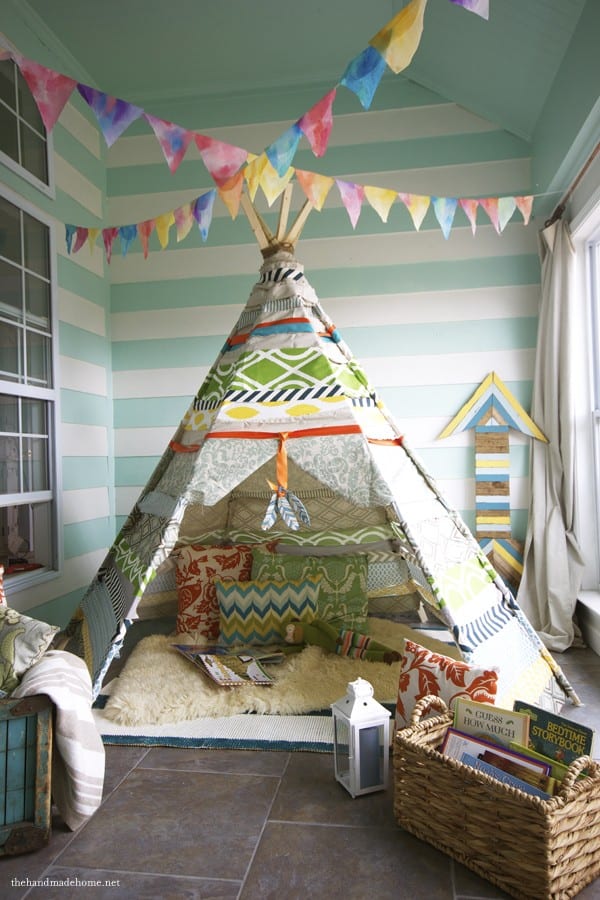
It’s bright and colorful, but I figured they’re only young once. May as well have fun! We threw some christmas lights in the top, and I have to say, it scored six thumbs up.
Here’s to doing something fun for your kids… and getting rid of that ridiculous fabric stash all at the same time!
____________
Ahhhh they were so little! It’s crazy how fast time flies, right?
We still love our no sew teepees, they’re classic and fun and never get old! We hope you’ll tune in NOVEMBER 2nd for our big launch! Fabrics, art prints, wallpaper, housewares, books apparel, paper gods and even some of our very favorite found pieces. All produced by us that you can’t find anywhere else!
So if you like our blog, or anything you find here… consider this upcoming version the high-def, funky-pair-of-shoes best friend that you love to dream up inspiring ideas with. A little bit of us, straight from our home to yours. We can’t wait!
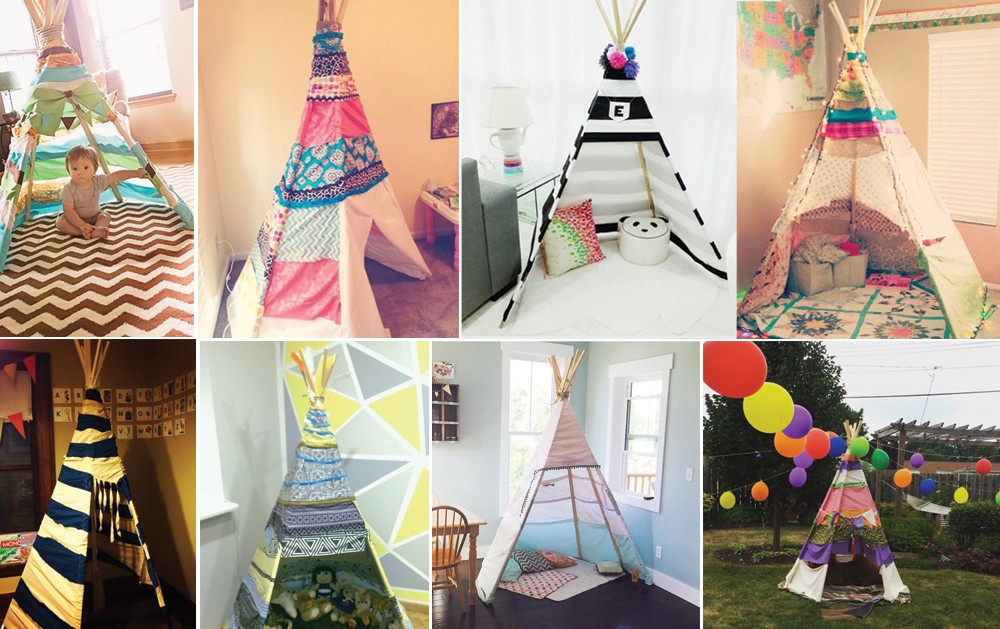
PSSSTTTTT… wanna see more teepees? Just like our #handmadehideaway feed, awesome readers are sharing their creations! Just be sure to tag it #nosewteepee – we’d love to see your versions and feature you!
Have an inspired day, y’all!


Last summer at a garage sale I bought my niece tent sticks already made that had no cover for $10 (for her boys). I’m sending her this post so she can finish it, thanks
What are the footprint dimensions of the teepee? Thanks!
It all depends on how you angle your wood, but ours is right around 6 feet. You can make it as wide or as skinny as you want to. SO it is pretty flexible for your space. I hope that helps.
It sure does, Jamin! Thank you for your quick response. Dreaming up a fun Christmas present for our children. Thank you for your great blog. And congratulations on your new launch!
Brilliant