I’m super excited about the first installment in a new little series with the fabulous Layla of The Lettered Cottage. If you haven’t been there yet today, be sure to start your reading over at their place-you’re going to love her take on it all. And be sure to participate in their how-to’s day linky partay!
Quick backstory: When Layla and I discovered that we lived near each other {within a whopping twenty minutes} it was like this little treasure nearby of great fun that I was previously living under a rock and completely unaware of. {I know right?} Some of you are slapping me right now, wondering what else I was doing with my time instead of reading their blog. Silly Ashley. No. Seriously. With someone as passionate about so many of the same things…with a penchant for flea marketing and obsession for DIY and vintage…the level of fun-ness possibilities. are. endless.
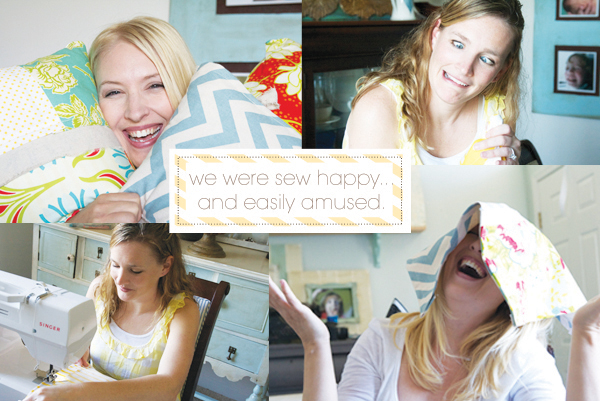
I adore this awesome chick, so needless to say, we had a blast a few days ago on our first official Pillopalooza adventure.
As you probably saw the big reveal over at her blog, if you’d like to make your own, I’ve included a little “tutorial” for you guys, below.
Um, yeah. That’s kind of sketch. Why do I have “tutorial” in quotes? Because I by no means think I know anything about sewing. I refer to myself as the self-taught NON seamstress. And if this reformed anti-stitchinista can figure it out…anyone can.
On the other hand, if you are likened to the former me, and have no intention of ever sewing in your lifetime, and prefer to keep it that way, feel free to check back with us on Thursday, because we’ll be giving this little guy away.
He’s got a lot of personality and needs to go to a super fun home!
Are you game? Let’s get started, shall we?
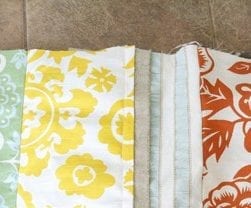
side note: our pillows ended up being a bit of a hybrid mix from the things that both of us chose…with fabrics from Hobby Lobby and Fabric.com. (sources: yellow stripe, polkadot, chevron, and floral {via heather bailey} linen duck= hobby lobby.)
How we started: I literally dumped my mountains of my fabrics on the floor and we played mix and match with my little collection. Why am I telling you this? Because sometimes the most unexpected combinations can come from the un-purposeful. I’m kind of a self professed, reformed from denial, fabric hoarder, so it was fun to go through scraps and pieces to see what we might need…Once we (kindof) decided, we bunched them together into a mock patchwork to see how their proportions looked.
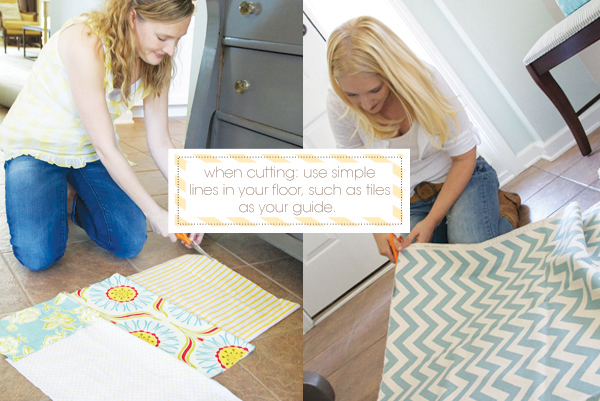
I totally cheat and use my tile as a cutting guide, because straight lines give me hives. But once you’ve decided on your dimensions, it’s time to lay out that fabric and cut.
A word regarding dimensions: These will be based on a. what you want and b. what your filler will be. For Layla’s pillow, we used a pillow form. For mine, we used poly fill. There are pros and cons to both. But for novice seamstresses, {me} measuring can get a little tricky with patchwork pillows.
To help with that, we chose one all encompassing piece of fabric, and used it as the main panel. Consider this top piece, your anchor piece. It will be the largest of all, and make the general shape of a square. To it, we attached the smaller patches. For these pillows, the main fabrics were: the chevron and yellow stripe. And from there, we attached the others. We made sure to keep this fabric the largest, and underneath it all. You don’t have to do it this way. But for these pillows, and for these gals, it helped.
ALWAYS leave a few inches of give for hem when measuring {I’d rather have too much than not enough}
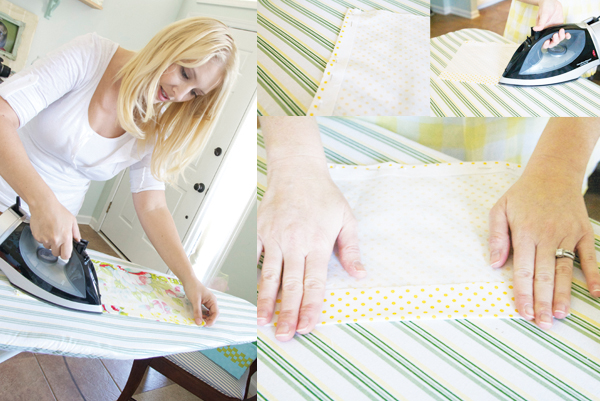
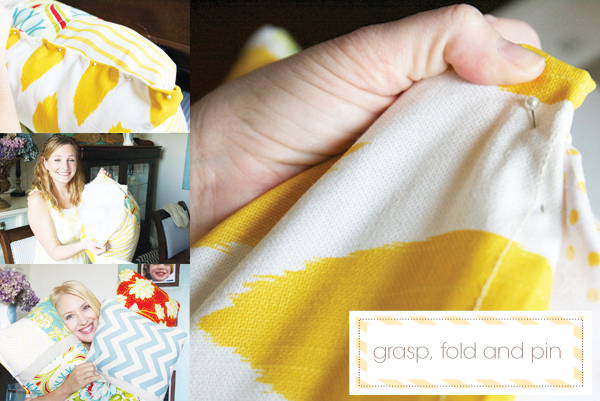
Once all your pieces are cut, lay them out again. Then one by one, take each patch and iron each side, with the right side (your print side) facing down. Use pins to keep them there, until you’re ready to hem.
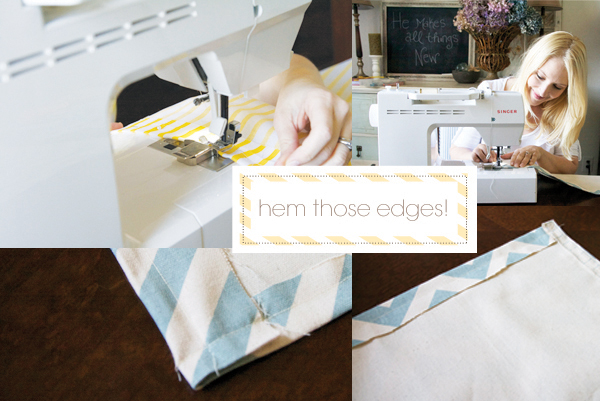
Now hem all the edges. From the smaller patchworks, to the larger anchor panel, and the back panel. Make sure you’re keeping the front and back the same size by measuring. When you’re finished, lay them all out again, to see how they’re looking. All the squares are still separate. They’re just hemmed into neat little shapes, like miniature place mats.
A side note on back panels: consider choosing a coordinating fabric, that has personality all on it’s own. That way it serves as a piece you can easily flip, when you grow tired of the front and want a different look.

{backs of the two pillows.}
Just remember to be flexible with your mad sewing skillz and rock on with your bad seamstress self.
You’re halfway there.
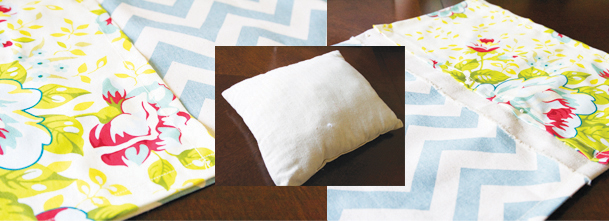
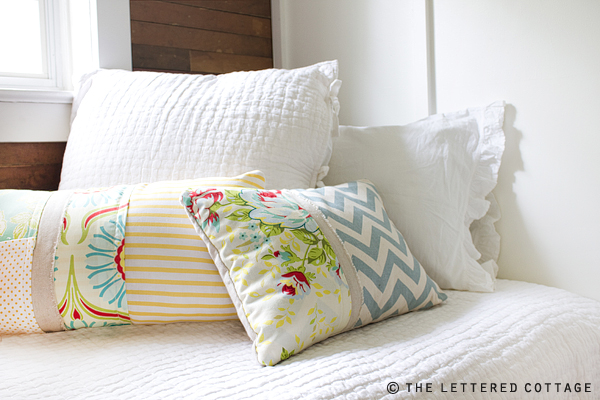
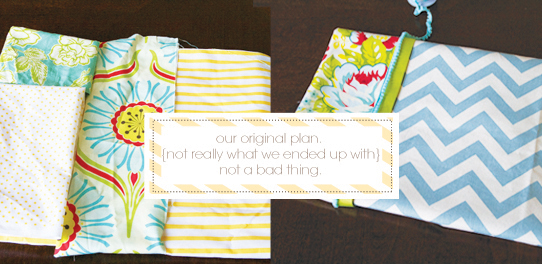
See Layla’s pillow here? We kind of changed our original plan, by throwing in a piece of the back fabric to go with the floral and chevron, instead of the original trim idea. We loved the frayed edge and the instant anthropologie vibe it gave.
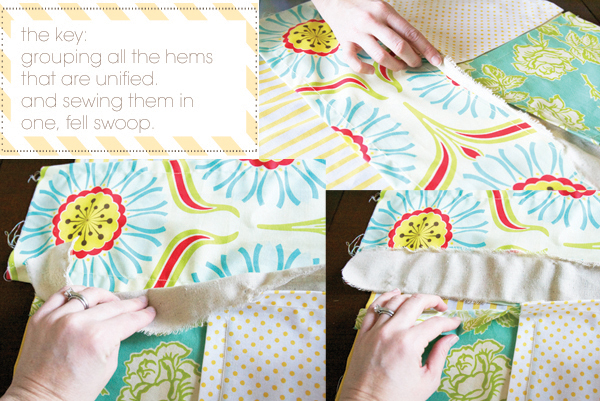
See the far right photo? That’s an example of how we joined all the layers together. Each pillow will be a little different, but we joined the three fabrics together at their one common hemline. Then, we hemmed again, joining the other, already established hemlines to finish off that top piece. It was a basic stitch in the ditch, across the top, to minimize additional lines. And it’s like a lazy form of quilting to join them all together. Through process of elimination, based on the shapes and proportions you choose, figure out which side should be sewn in which order, to avoid puckering.
She had a pillow form we were trying to fit it to, (center) and we decided it would be really snug, which turned into a happy accident-more of that below…
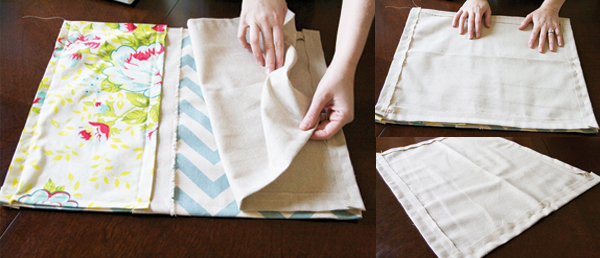
Now you’re ready to join your two sides together into a pillow! Your top piece should now be the same size as your bottom piece, both simple pieces, with their hemmed edges complete. Turn them both, right sides together, and wrong sides out, as shown.
Pin the edges, and run all but one edge through your sewing machine.
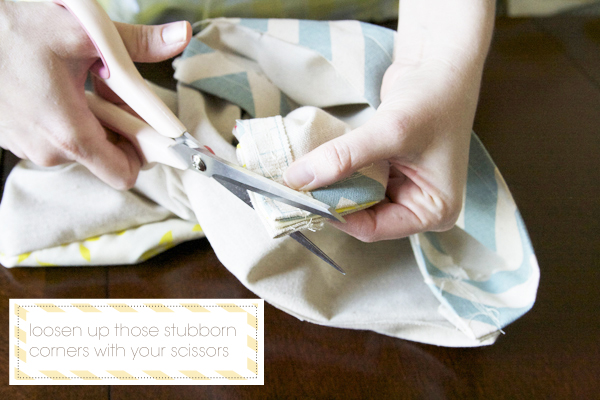
For this one, because we had a pillow filler, we simply did all but one side. When we pulled it right side out, because of the layers of fabric, we had a little trouble with the corners. A simple trick my saavy seamstress of a mother in law taught me: loosen up those corners by trimming off a little with your scissors. Be careful to avoid the hemlines, but cut off the excess around it, to allow more give, so it can be pulled through.
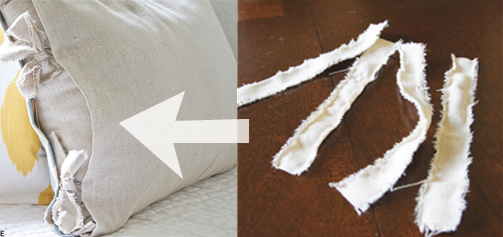
In the end, a happy accident occurred, when we decided to carry those frayed edges one step further: we cut two sets of two, and applied them on the inside seams of the already sewn pillow, so that we could use them as ties. I simply turned the pillow back inside out, and attached them to their already existing hem line. One run through the sewing machine, and they gave the pillow a whole new look.
How serendipitous that the inside matched the outside. A fun touch for a one of a kind pillow.
Sewing is literally a process of carefully thinking everything through in your head, before you go for it, so you won’t be ripping seams later. It doesn’t have to be hard, but it can be terribly intimidating. The more you grip, the less you rip. {It’s a dorky rhyme I use to remind myself}
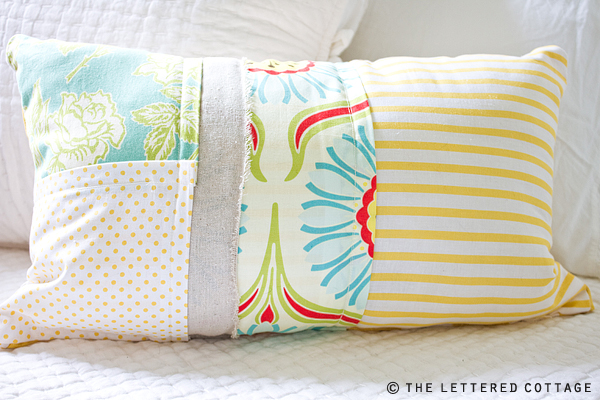
This is just another version of the first, where I searched for a common area to join as many pieces of fabric together as possible. In this design, {we added a frayed edge as well} and made them all overlap. Pinned to secure, we then gingerly ran it through the sewing machine. The other edges were already hemmed, so at this point, it was another stitch in the ditch effort, through the process of elimination, to see which order made the most sense, while we joined all of it together on the top side.
Just a side note: Not all of our seams matched precisely, and as a result, we achieved a rustic, funky vibe with fun patterns and colors.
We repeated the steps mentioned above, after the patchwork front was finished. We turned the right sides inward, facing each other, and finished off the already-hemmed edges to complete our second pillow.
For this pillow, we used polyfill. So there was no precise measuring necessary. But just another example of how you never get to stop paying attention: we pinned the entire bottom edge. That step could have been made much easier, if we had sewn at least 3/4 of the bottom edge, leaving a small hole for stuffing. Then, once stuffed, run it through your machine to complete the seam. It looks fine, but it could have been easier.

And there you have it. Give yourself a HUGE pat on the back, and go eat that chocolate cake you just earned. You just made a {funky cool awesome} patchwork pillow! A rewarding project to try with friends…let us know if you try it! We’d seriously LOVE to know!
Stop back by Thursday to win this one above!

LOVE IT- Simply adorable! Thanks for sharing this post – I linked on from Layla's site and I'm glad i did! Your pillows turned out beautiful -like ones right out of a gorgeous catalog! I hope to touch back with your blog to learn more crafty ways to make beautiful things =) Thanks again for sharing!
Great post!!!
Thanks again for having me over. And feeding me. And letting me use your bedroom to make phone calls in.
😉
I L.O.V.E. those pillows and the way you mixed the complimentary fabrics. Too cute.
These are so cute! and fresh! (saw them on FB) Thanks for the idea!
What good fun! Love the material combos- thanks for sharing the fabric info! Now to really try to figure out what in the world all your sewing mumbo jumbo means… 😉
OK, I need to make a few of these. I just ordered a grab bag of some vintage fabrics and I have some pillows I can recover. Thank you for the adorable ideas!
Wow! I am absolutely in love with these pillows you and Layla made. Obviously I missed out on the giveaway :(, but I am VERY interested in these pillows. If you make more that look like or look similar to the 2 posted here, I would purchase them from you! Would you let me know? Thank you.
Lisa
cnlisa at hotmail dot com
These pillows are so fun and funky! Perfect for Spring!
Could you give me some color palette cheat sources. I have a dark green sofa to work with and would like to update it/make it work for my 20 year old daughter’s college apartment by making the right pillows. I love these pillows you made but need some help picking just the right fabrics. Any suggestions/sources?
Beautiful pillows patchwork !!! Love the fabric combination!!!
Oh my gosh, super cute pillows. I really want to try this out when I have the time. I linked to it on my blog. Now as for that chocolate cake, I’d need to go to the gym for two hours! But I bet it’d be worth it! LOL.