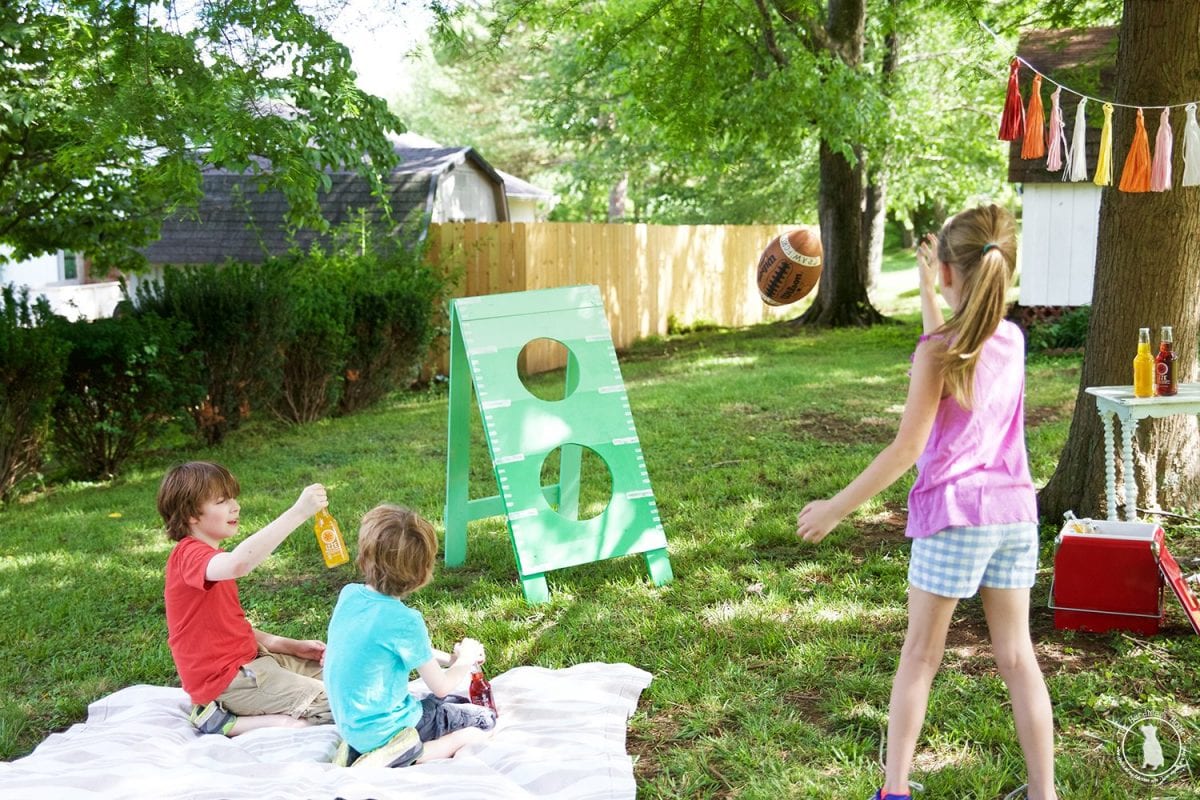
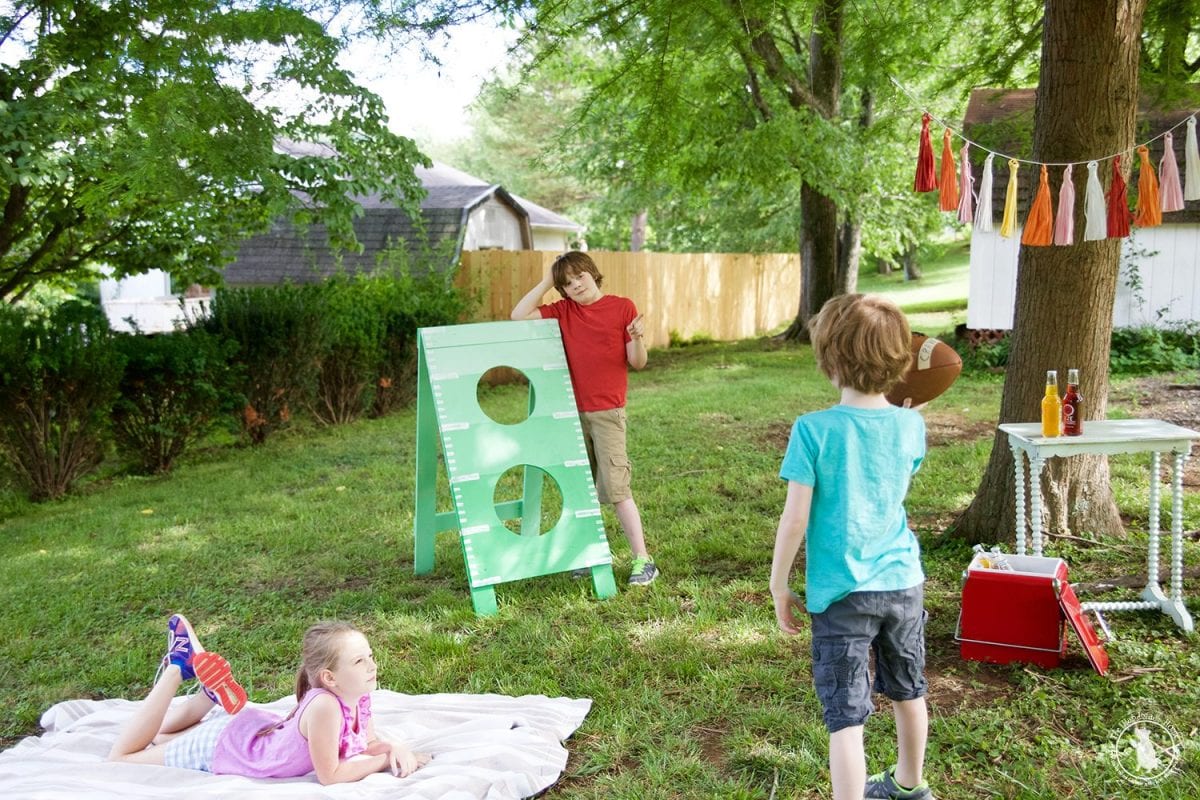
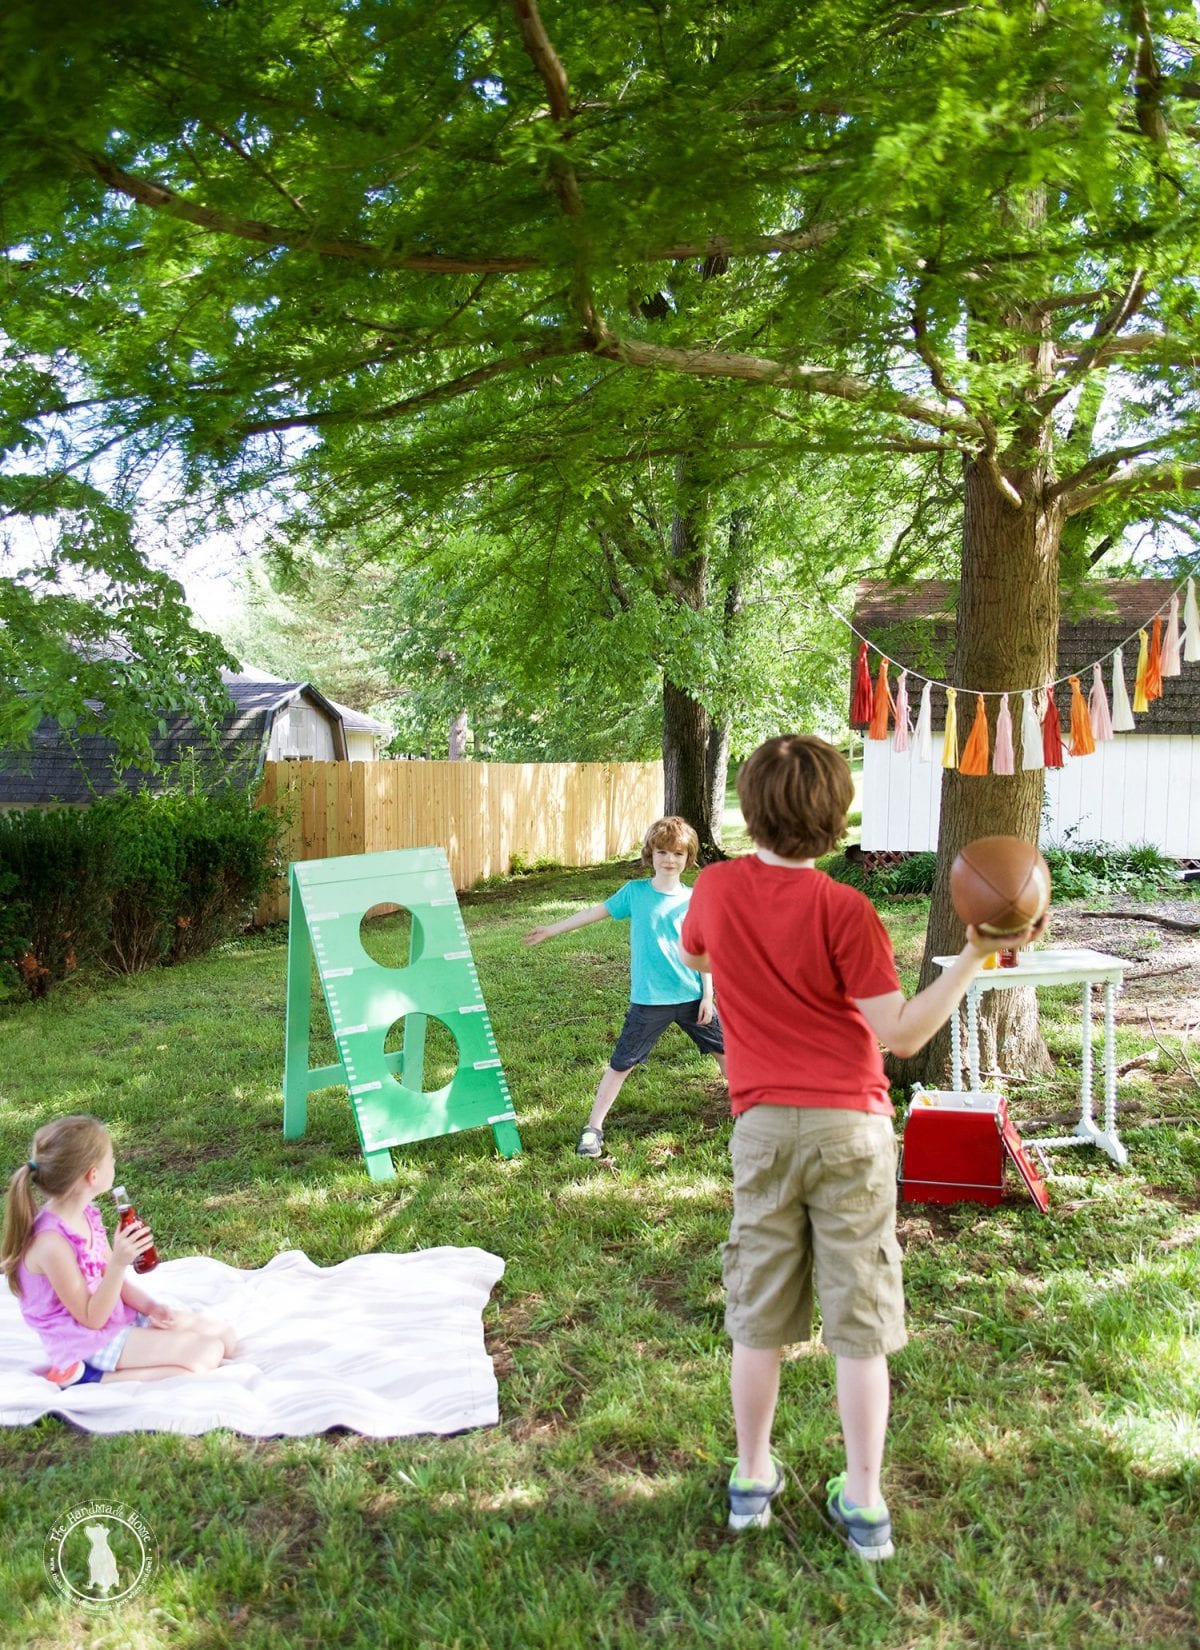
a football toss with home depot
As I’ve gotten older I’ve learned to accept that life is full of questions, and there are a lot of times you’re just completely unsure of the answer. Adulting is hard. I even find myself wondering if the choices we are making are right. For what it’s worth, if you’re questioning… you’re probably doing something right. Some of these are big questions: Education, parenting style, retirement, buying a house that needs some serious rehab… but who in their right mind would do that? {Insert sarcasm here in case you’re new to these parts on the rehab part.}
There are also some less life-changing, but equally important questions in life and one of those was answered the other day.
Emerson and I were riding to the store when out of nowhere she asked: ” Daddy, when does football season start? It’s my favorite time of year!” This girl can toss a ball and tumble with her brothers, and then turn right around and throw on a princess dress while having tea with her dolls while tackling her brothers some more. Right then, I knew I’ve done something right in the parenting department. At least by my standards.
Last week, we shared some of our favorite summer projects, and now we are back to share this simple build from the Home Depot workshop. The best part, is that we’re teaming up with a bunch of fun friends to share our own versions. You can check out their links below!
We absolutely love the Home Depot workshops. They’re full of fun builds for the kids and great how to’s for us adults. If you’ve never checked one out at you local Home Depot, you need to go sign up for one right now: Do not pass go, do not collect $200, go sign up. You can check out the upcoming classes in your area at this link. {Pssst: Leave a comment below and let us know what workshops you signed up for, we’d love to hear about what you are learning!}
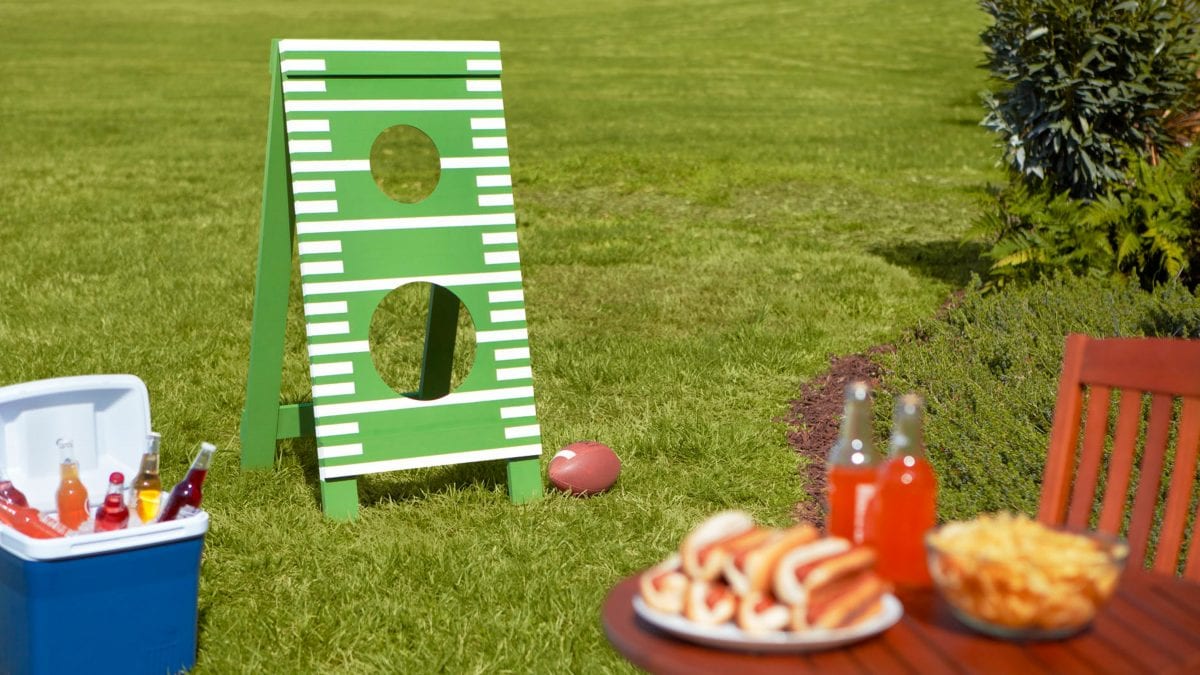
Today, we’re sharing this simple football toss build from Home Depot. It’s great for those afternoon parties or tailgates during football season and with a few simple tools, you can build it in under 30 minutes.
MATERIALS – Here’s what you’ll need:
• 1 – 1 ⁄ 2˝x 2˝x 4˝ Sanded Plywood Board • 2 – 1˝x 4˝x 12˝ Common Board • 2 Packs – Everbilt #10 x 11 ⁄ 4˝ Phillips Zinc-Plated Flat‐Head Wood Screw [8 per Pack] • 1 Pack – #10 x 3 ⁄ 4˝ Phillips Zinc-Plated Flat-Head Wood Screw [12 per Pack] • 1 Pack – Everbilt 21 ⁄ 2˝ Zinc-Plated Narrow Utility Hinges [2 Pack] • Paint or Stain • One Foot Length of String or Twine • One Small Nail of Any Type
TOOLS
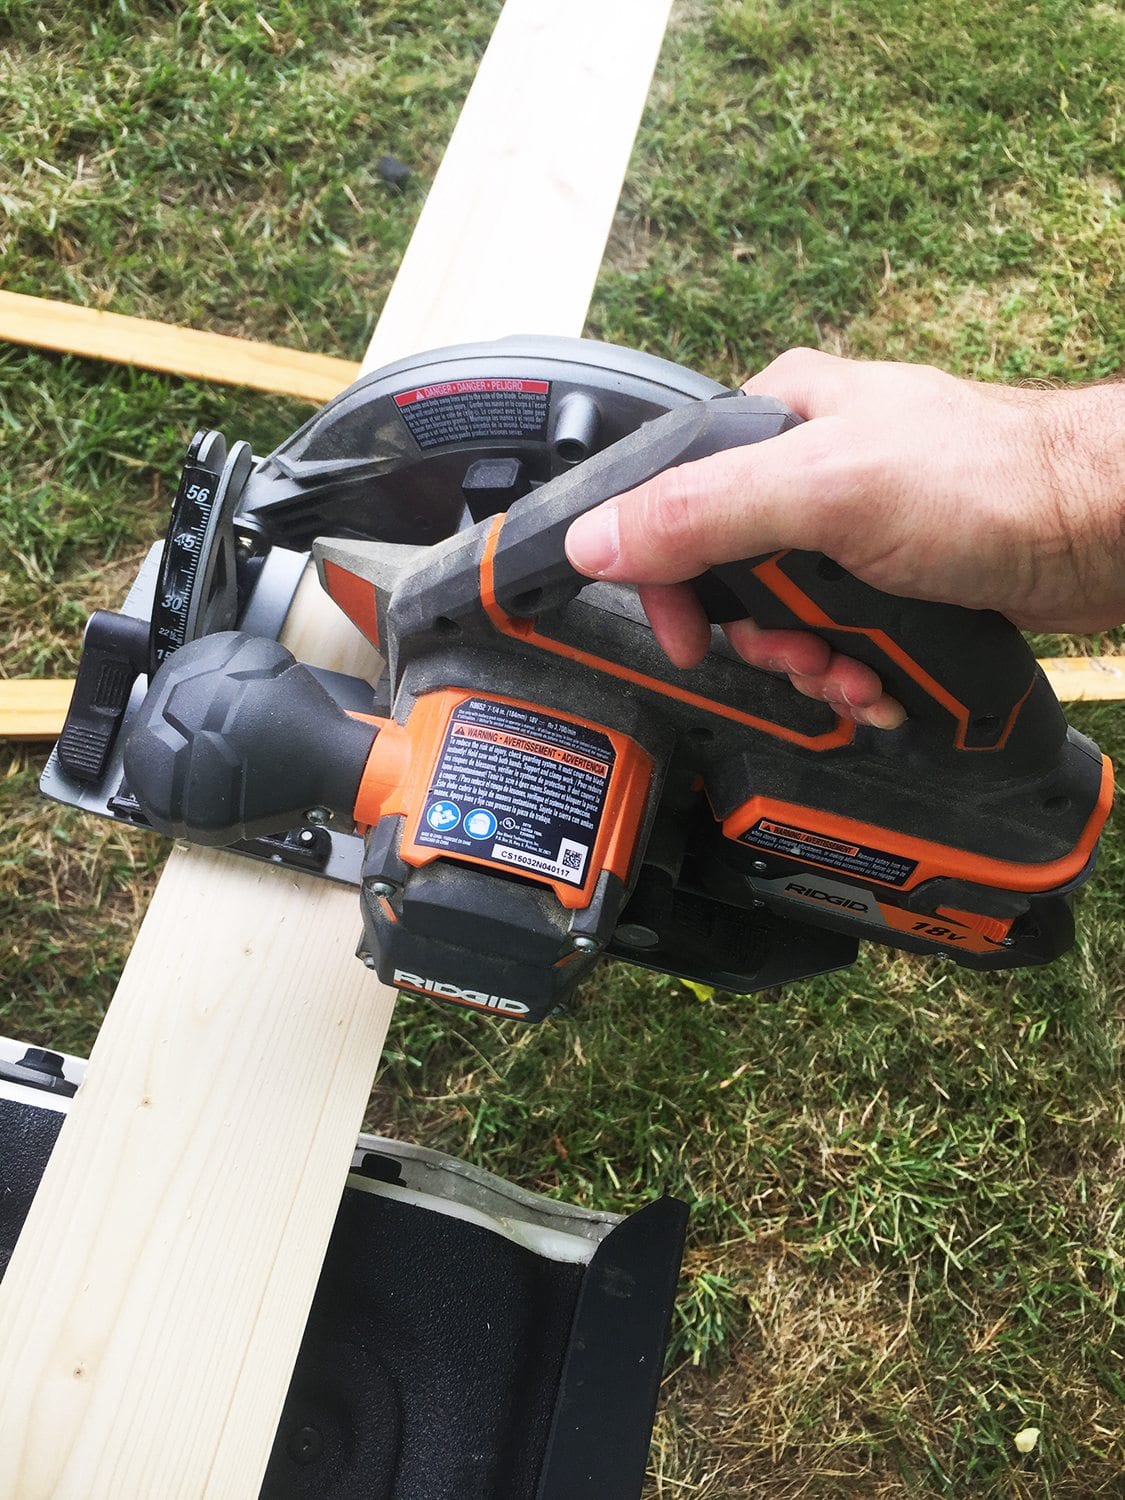
• Circular Saw • jig Saw • Drill • Drill Bits – 1 ⁄ 2˝ and 1 ⁄ 8˝ • Heavy Duty Stapler/Staples • Pair of Snips or Wire Cutter • Measuring Tape or Carpenters Square • Pencil • Safety Goggles
MEASURE AND CUT
Using the (2) 1˝x 4˝x 12 boards and the (1) 2 x 4 plywood board measure and cut:
• cut (4) 4 foot pieces from the 1 x 4’s
• cut (4) 2 foot pieces from the 1 x 4’s.
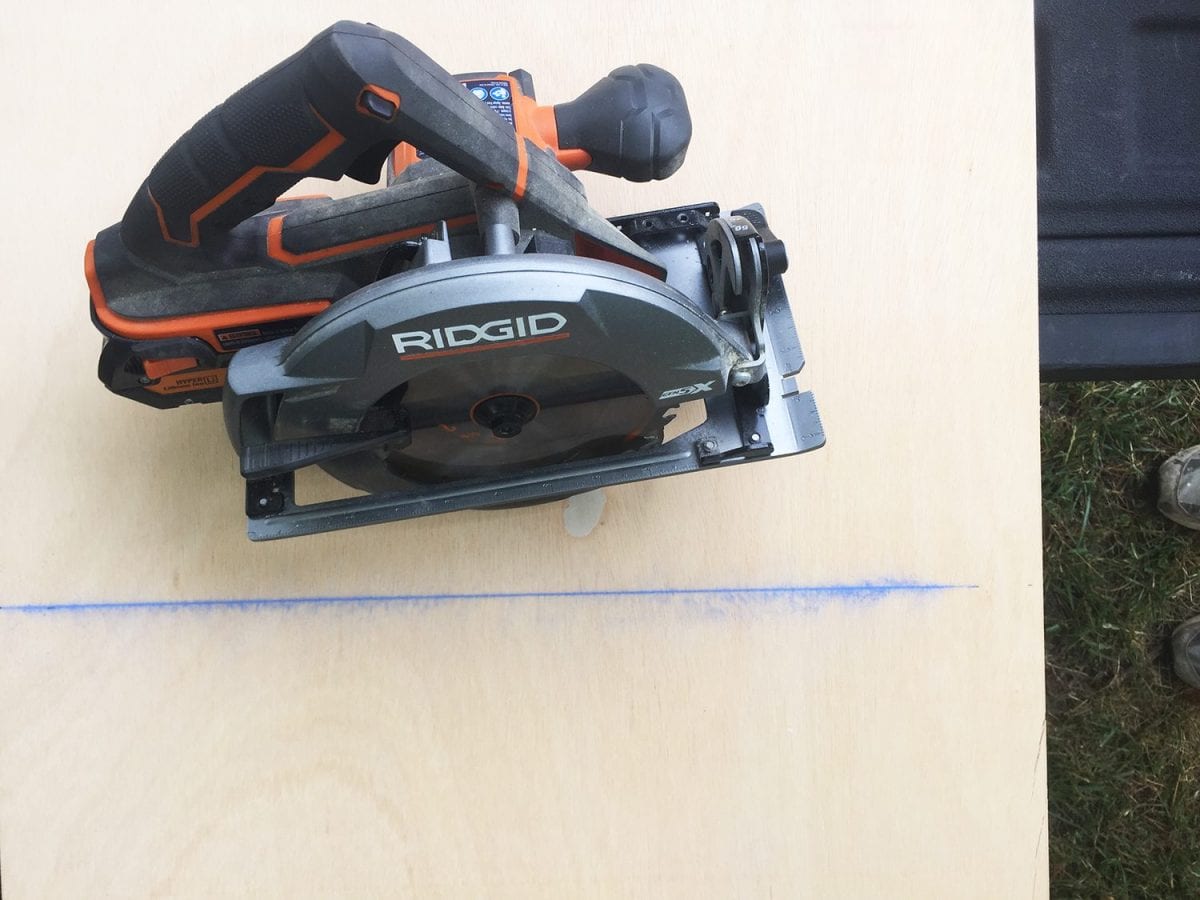
• cut the plywood down to 3 feet in length
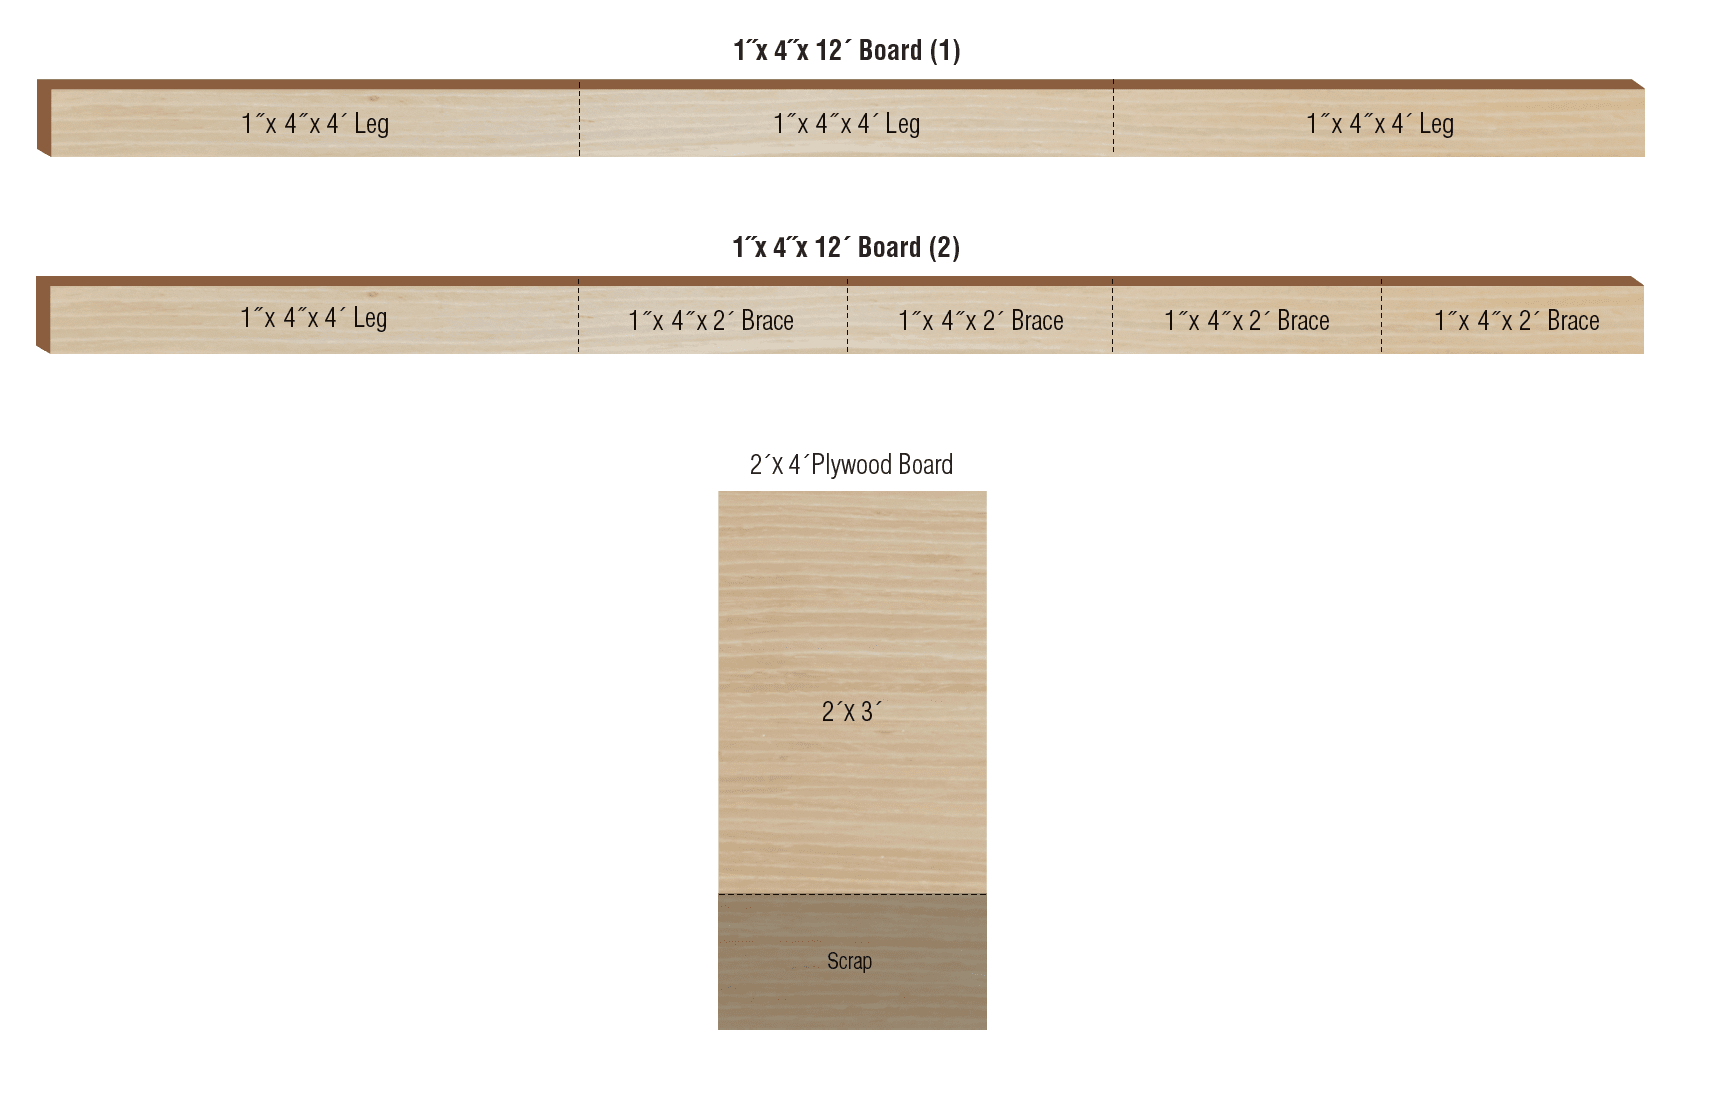
We used a chalk line to help with the cut on the plywood.
ASSEMBLE THE FRAME
Lay (2) of the legs flat, 2ft apart.
Next, lay (2) braces on top of the legs, one flush with the top of the legs, and one 3ft below the top. Using a drill and 11 ⁄ 4˝ screws, secure each brace.
Tip: Pre-drill a hole using a 1 ⁄ 8˝ drill bit before using the screws to avoid splitting the wood.
CREATE THE FRONT PANEL
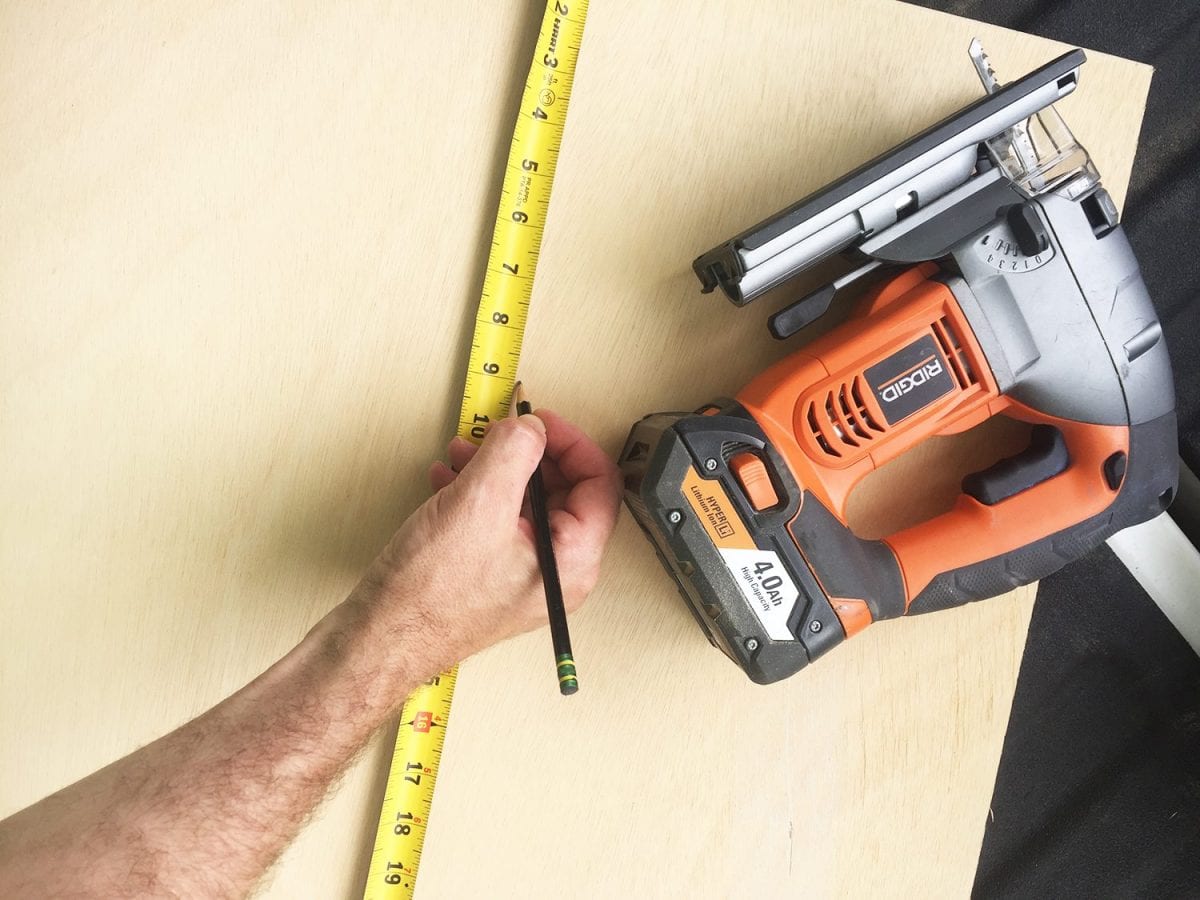
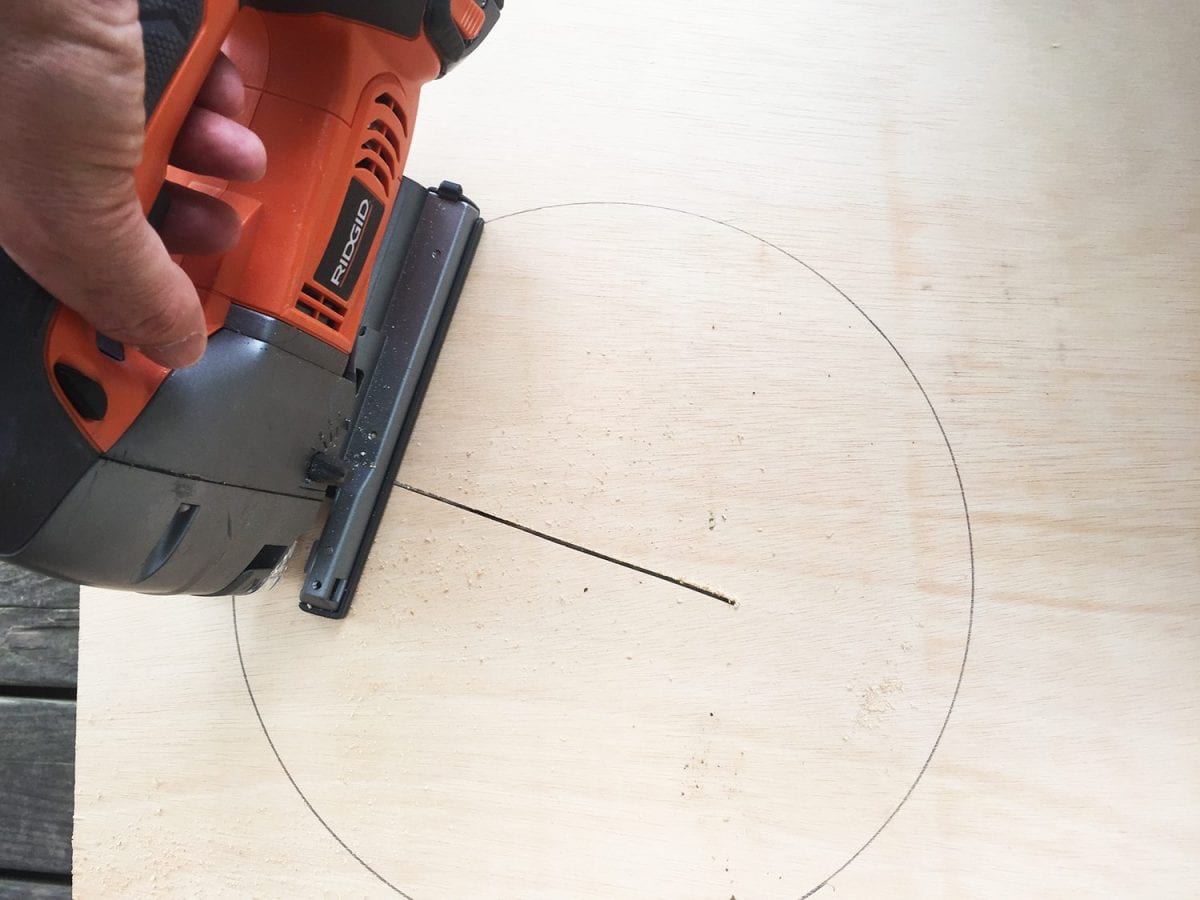
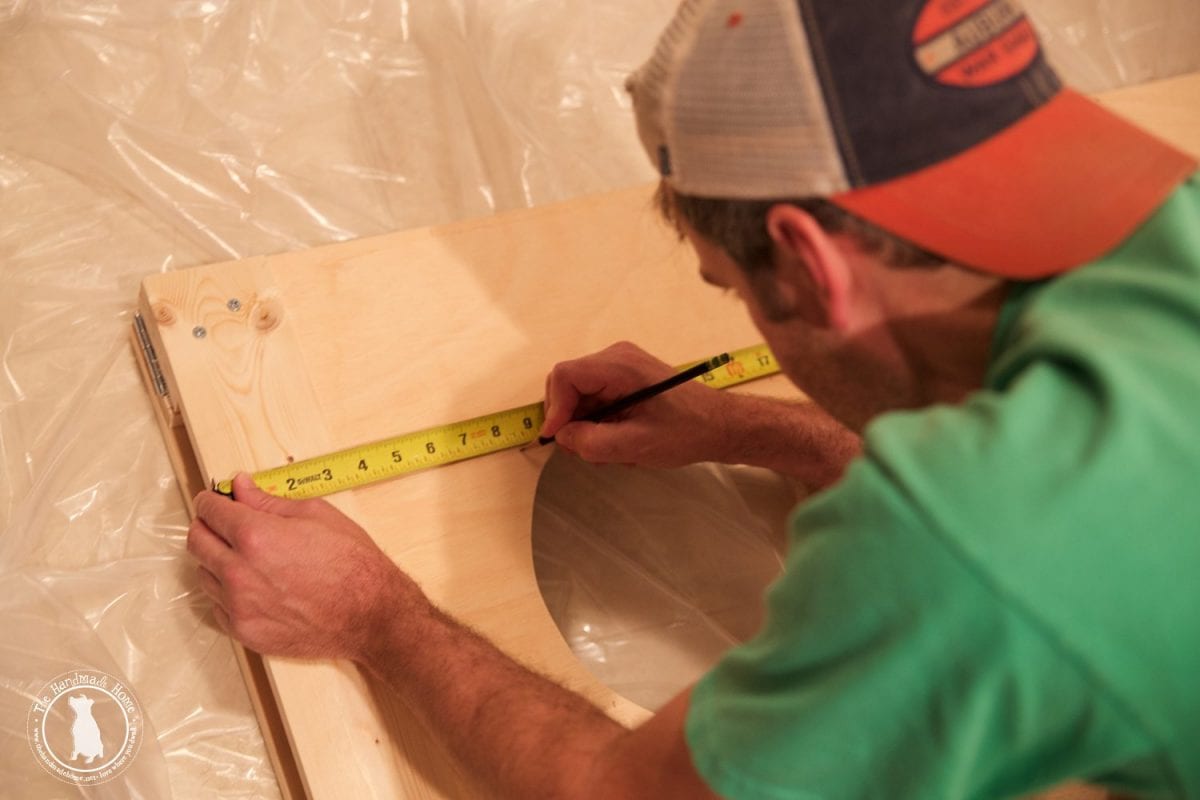
Looking at the plywood vertically, mark 9˝ from the top and 9˝ from the bottom.
Nail a nail into the centered bottom mark. Tie one end of a string around the nail head, and one end around the pencil ensuring the string is 6˝ from nail to pencil.
Next, draw a circle keeping the string tight. You should now have a 12˝ diameter circle.
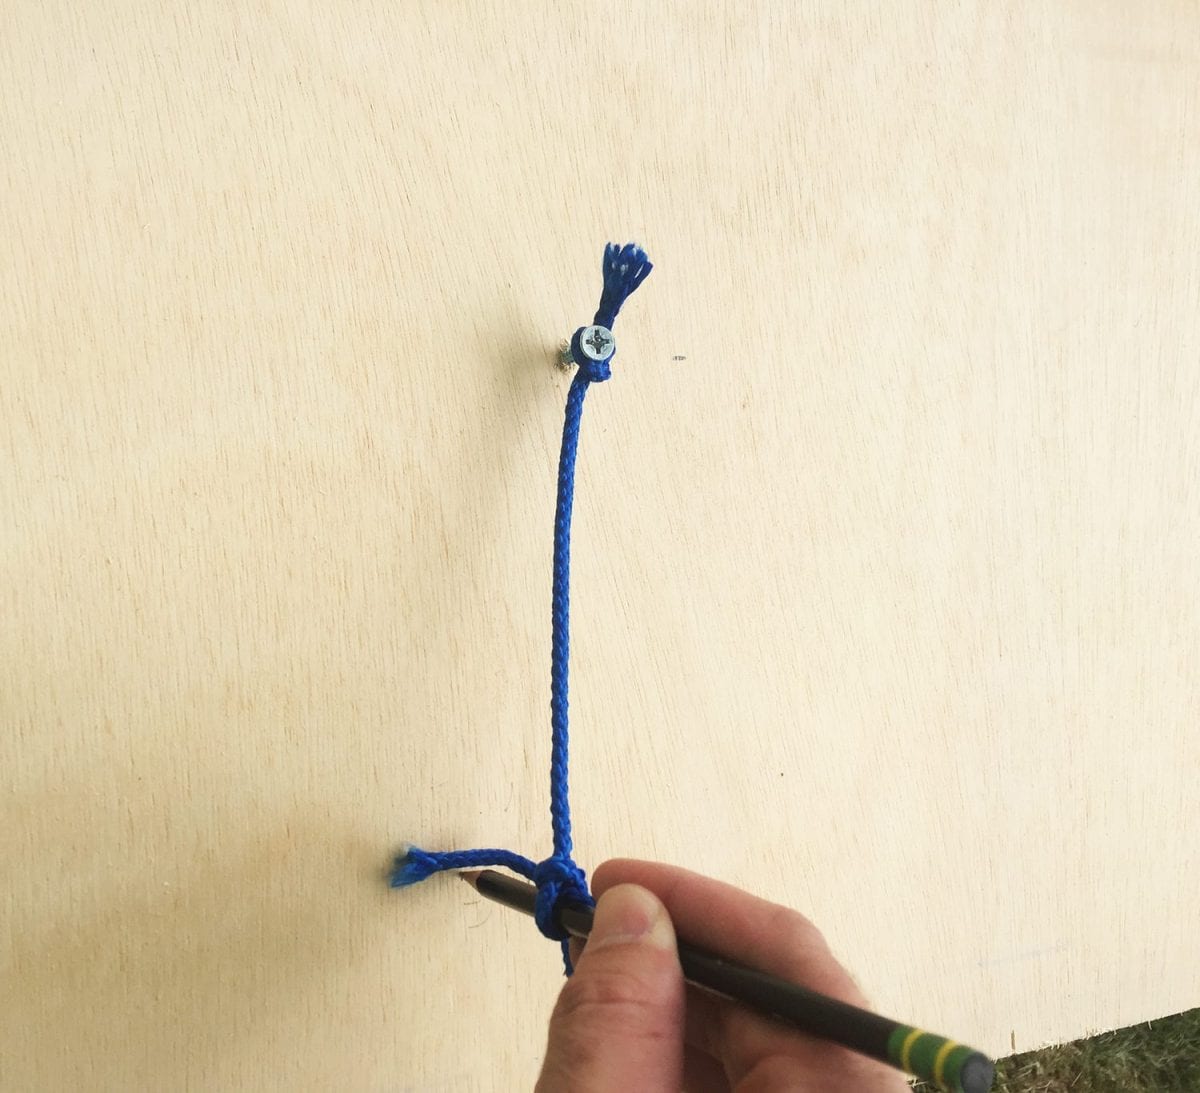
Using the centered top mark, nail a nail into the center mark, and tie a string around the nail head on one end and to a pencil on the other end, ensuring that the string when stretched from nail to pencil is 4˝. Draw circle. You should now have an 8˝ diameter circle.
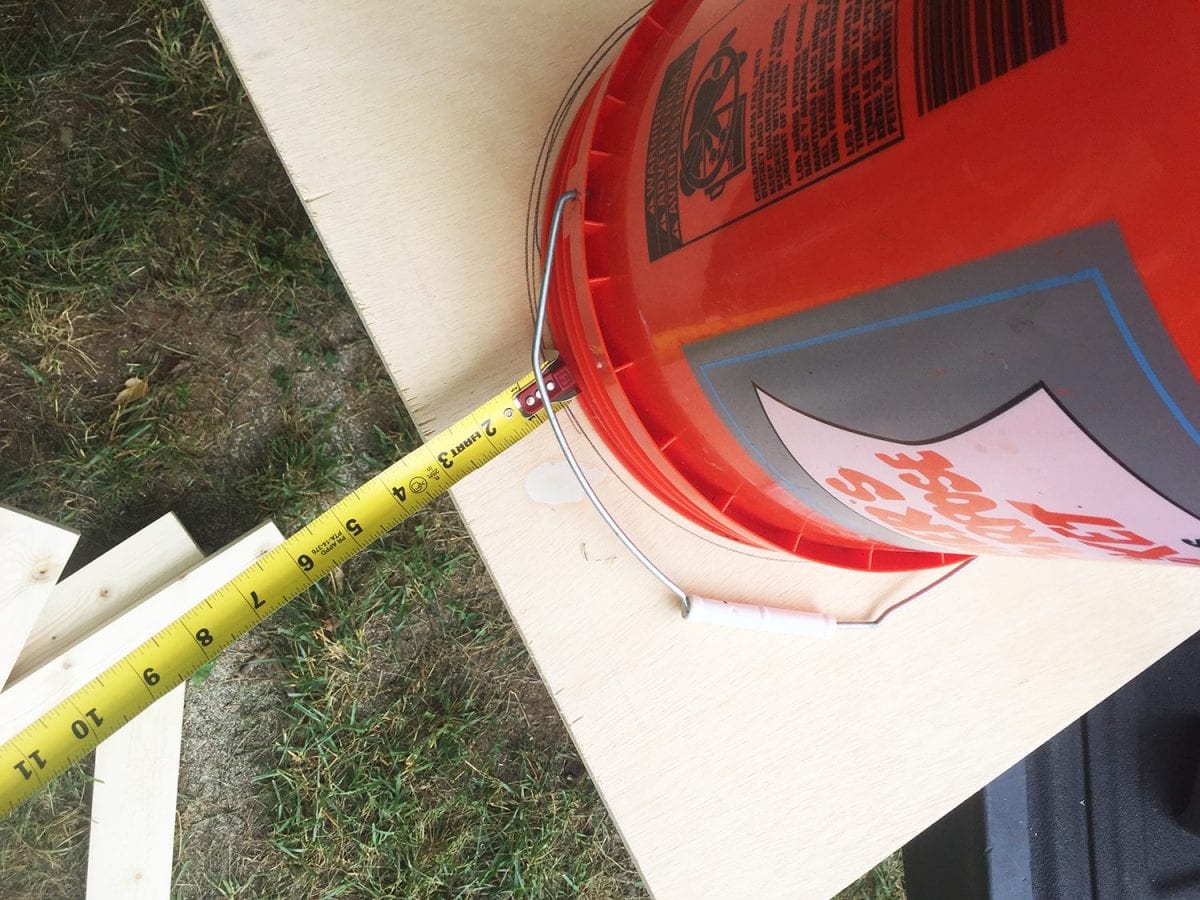
(Hint: we wanted both of our circles to be larger so we also did a version where we used the top and bottom of a bucket.)
Using a 1 ⁄ 2˝ drill bit, pre-drill one hole inside the edge of both circles. Using the jig saw, cut both circles out. You can also use a circular saw to make a cut in the center of the circle as well.
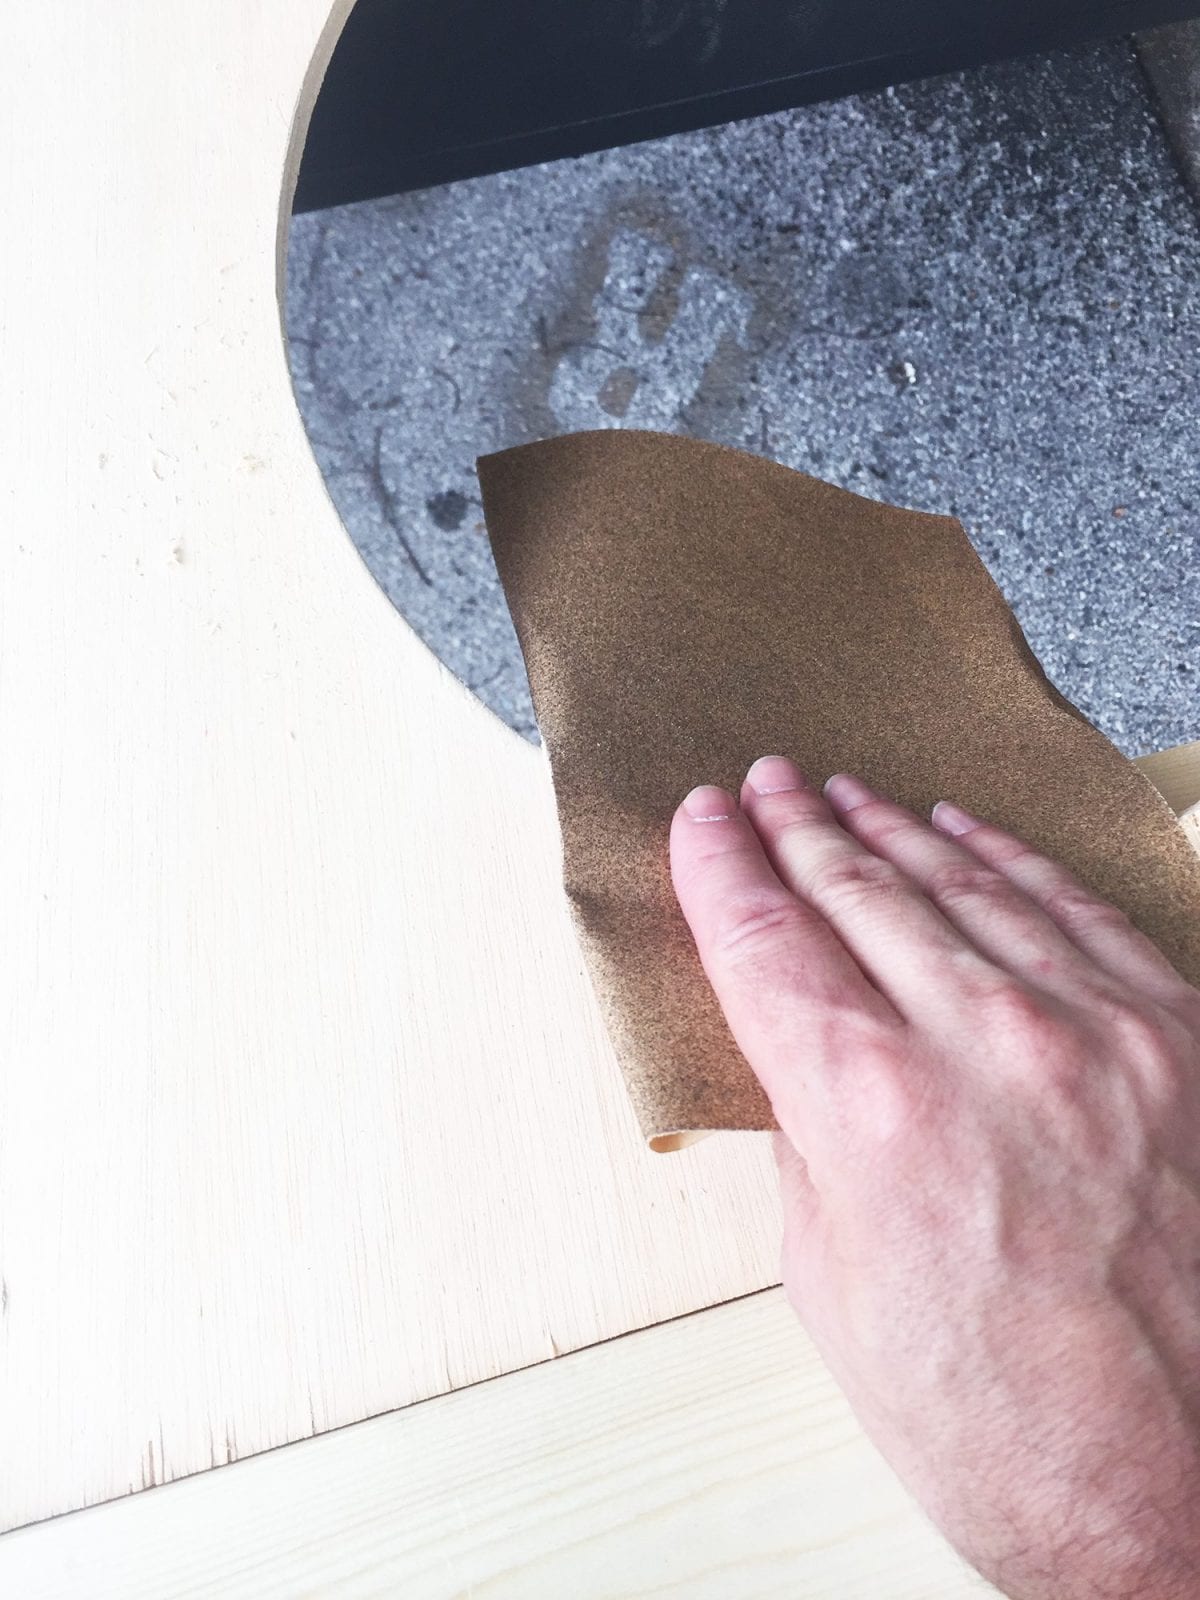
It’s a good idea to sand your cuts to prevent splinters and to give it a more finished look.
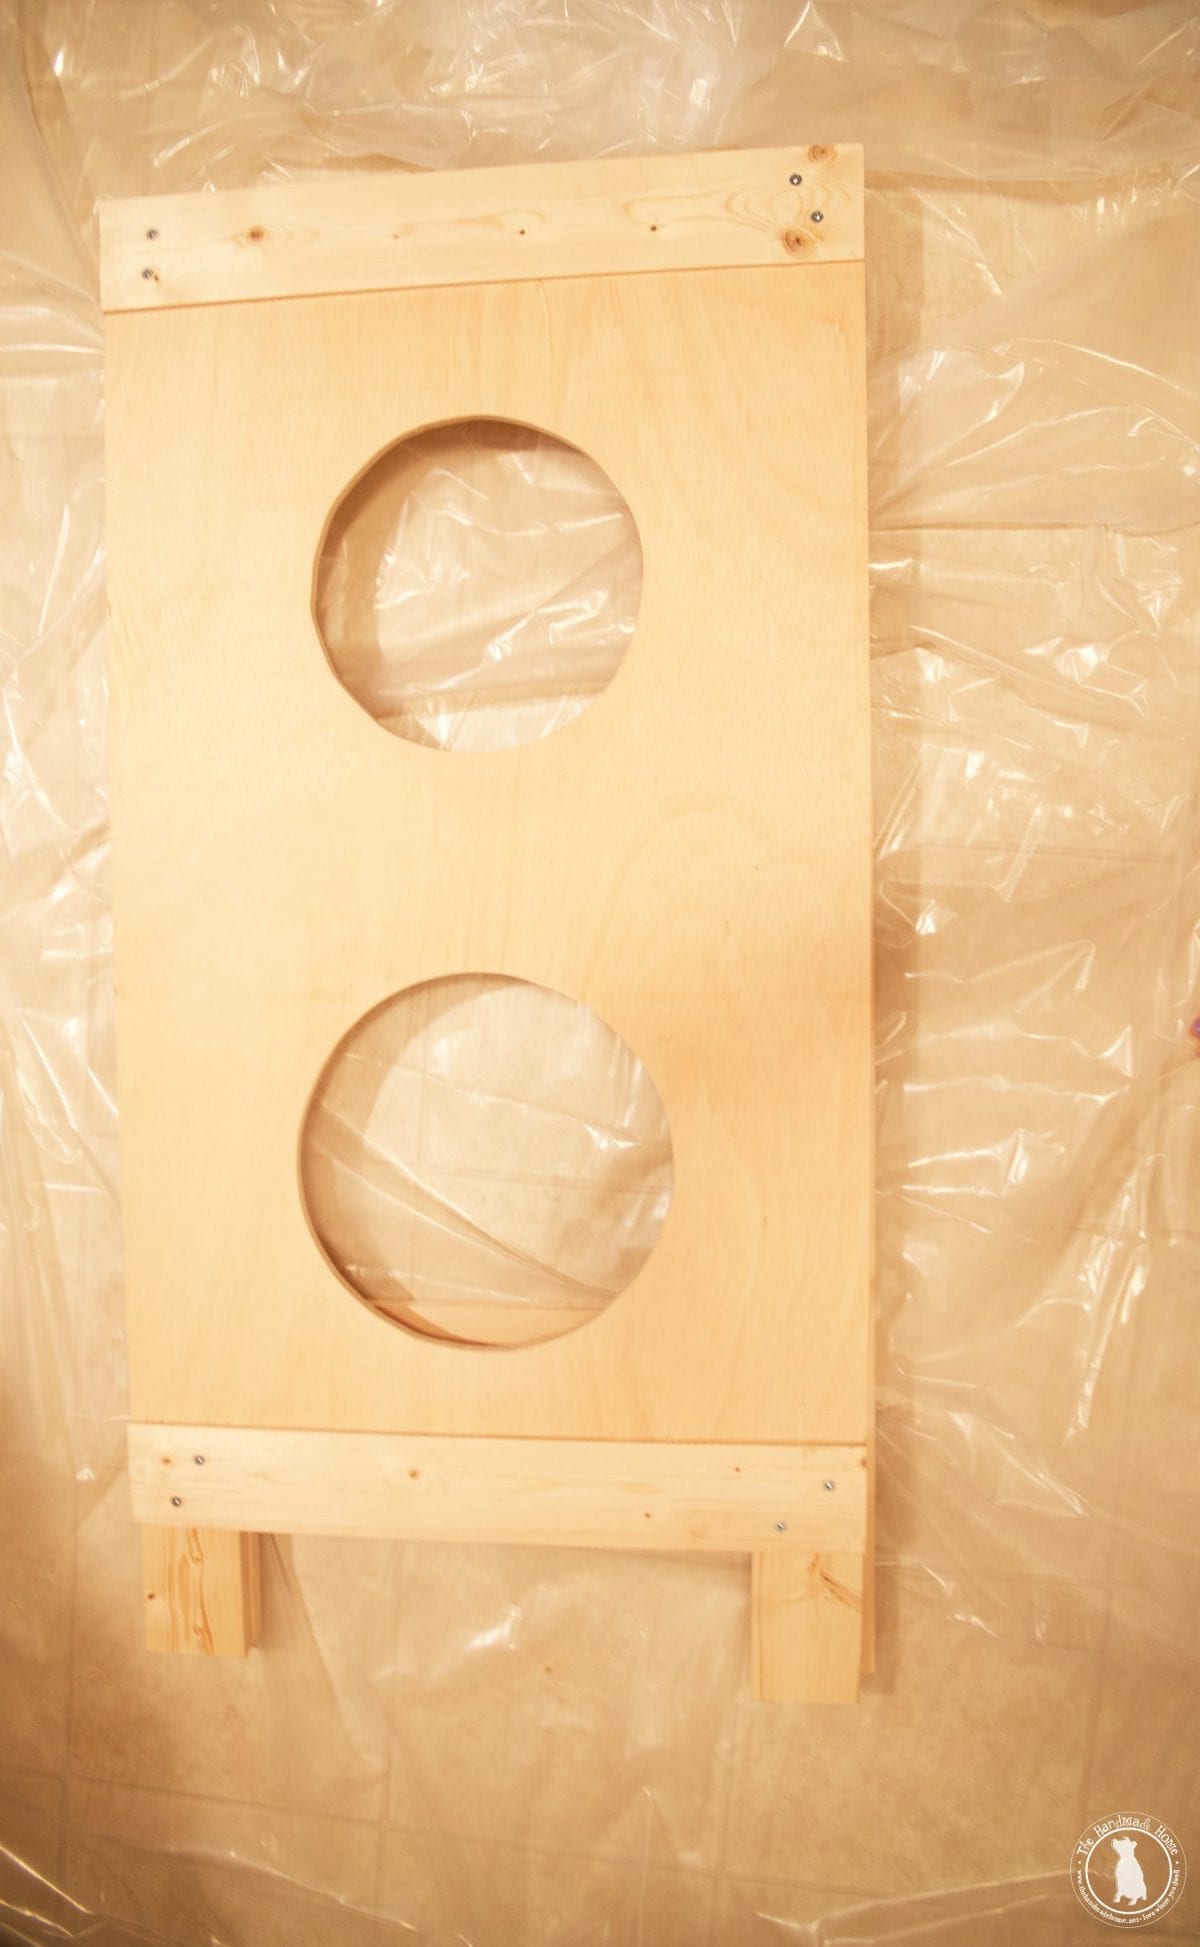
ATTACH THE FRONT PANEL
Take a built frame, and place the 2 x 3 front panel between the braces, making sure it lines up flush with the top of the legs. Using two 1 ⁄ 4˝ wood screws, attach the front panel to the frame.
Tip: Pre-drill a hole using a 1 ⁄ 8˝ drill bit.
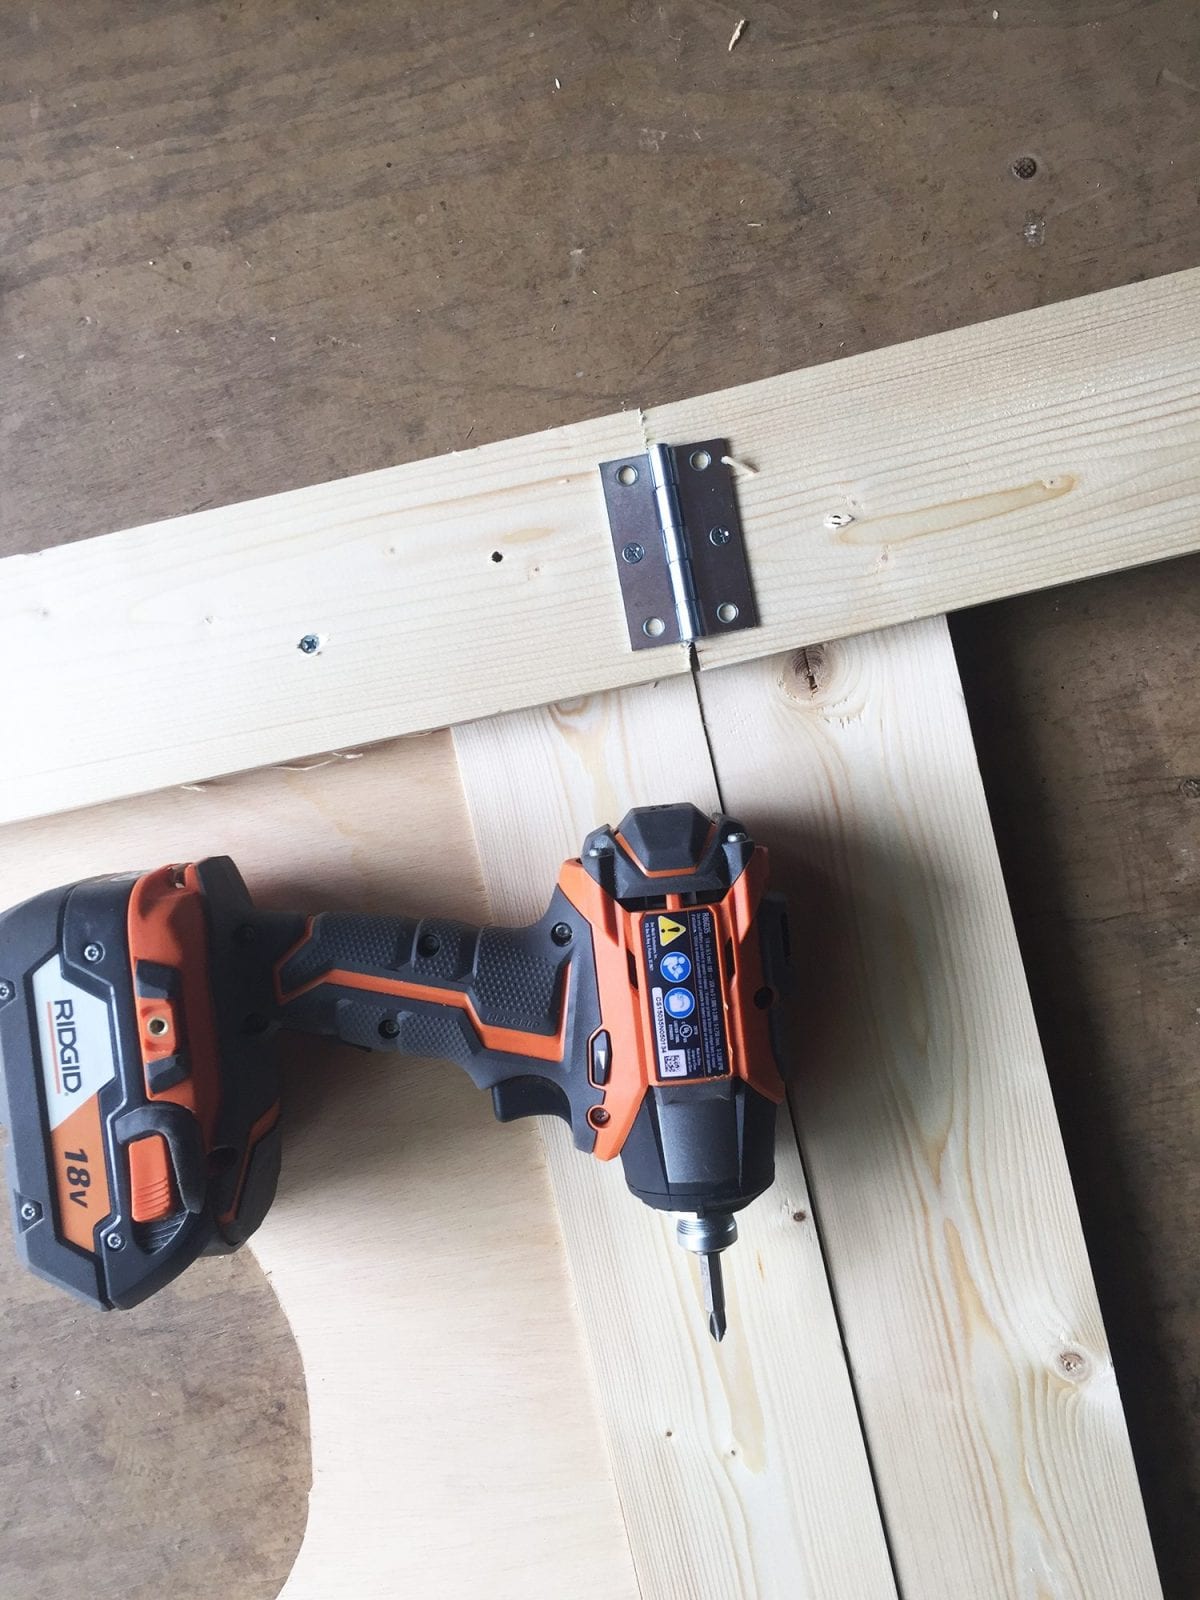
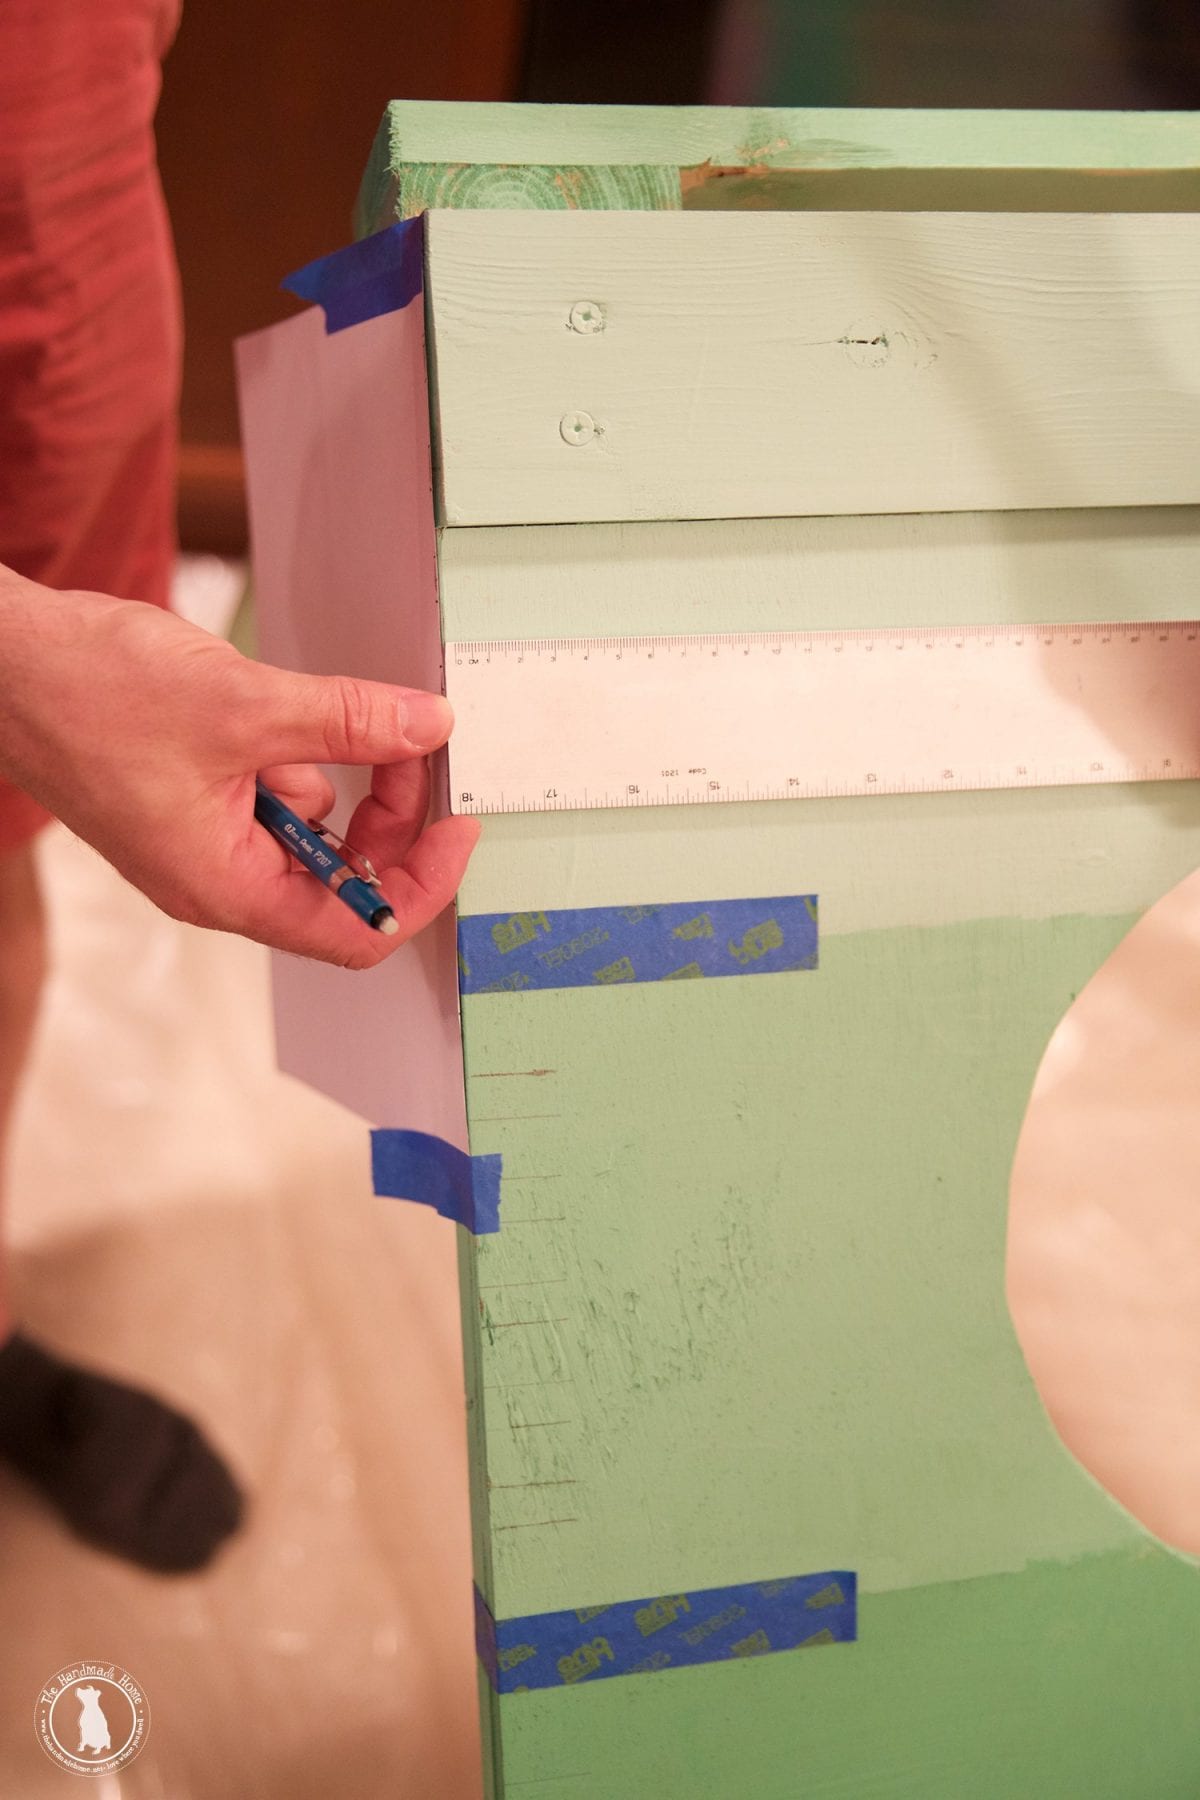
ATTACH HINGES
Lay both frames back to back with plywood and braces facing outward. Using a the drill, secure the hinges to the top side of each frame.
PAINT OR STAIN
Now according to Ashley, it’s time for the fun part. For our football toss, we decided to go with a bit of an ombre look. So lying it flat on the ground, we divided it into five equal parts.
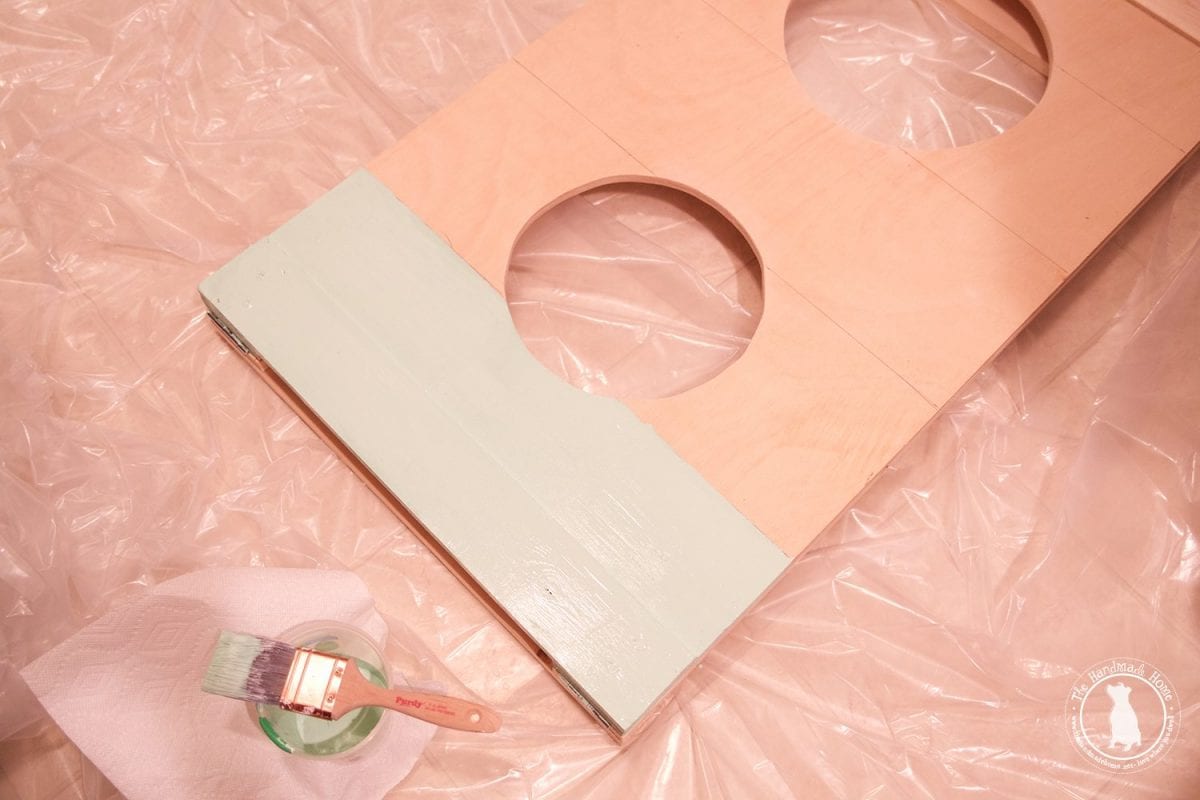
And taking a little bit of white paint we had on hand, we gradually added green.
Tip: Always add the darker color to white, not white to dark. You’ll waste a lot of paint that way.

We simply mixed in a small container, until each little blocked off area was just a step up from the last. The final fifth rectangle was the original green color. The top rectangle {the first} is the lightest.
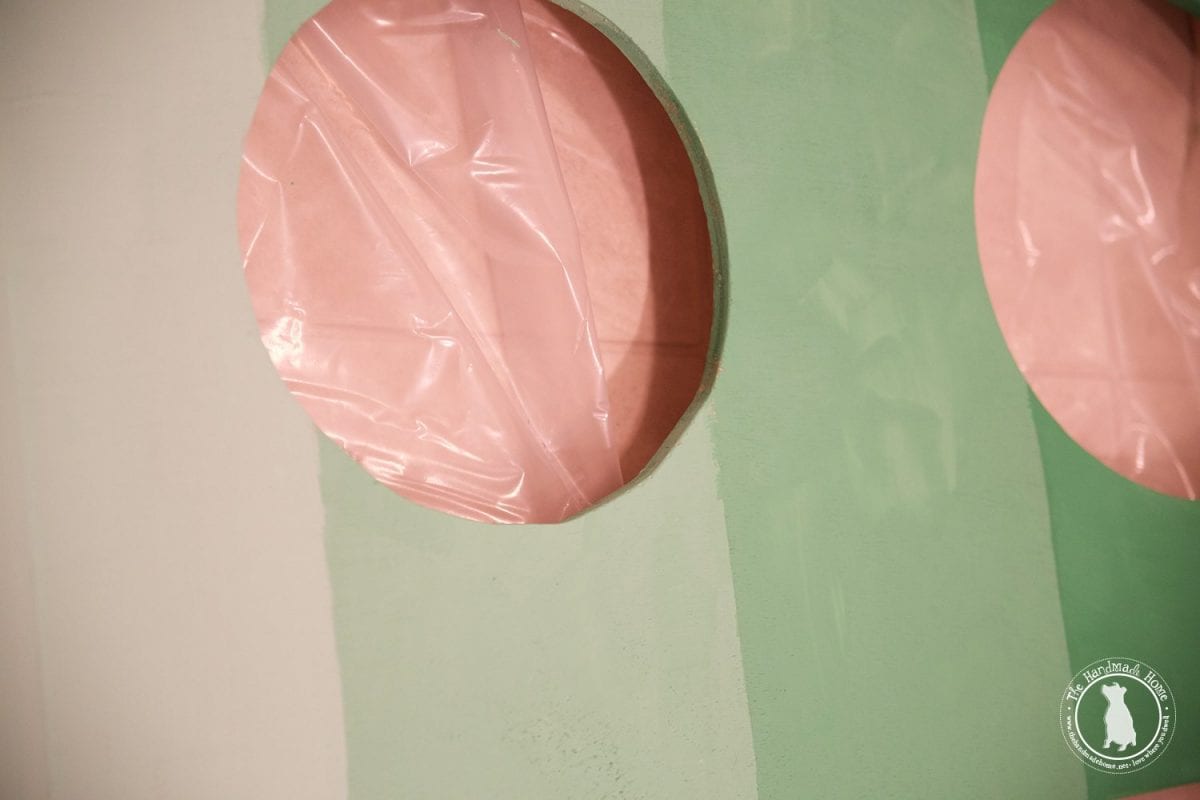
Tada! It’s a fun little look. Next up: The “yard lines”
Your artistic flair gives you a little space to “fudge” on this one, so you don’t have to obsess over being oh so accurate. But since each space was already divided into give equal parts, we decided that the longer lines would be right on each meeting spot for the next color. So we placed tape there, and decided on a length {I believe around three inches – you can totally eyeball this} Once it was where we thought we wanted it, we trimmed off the edge of the tape with an X-Acto blade for a straight edge. And gently traced around the tape for the outline that we’ll paint in a moment.
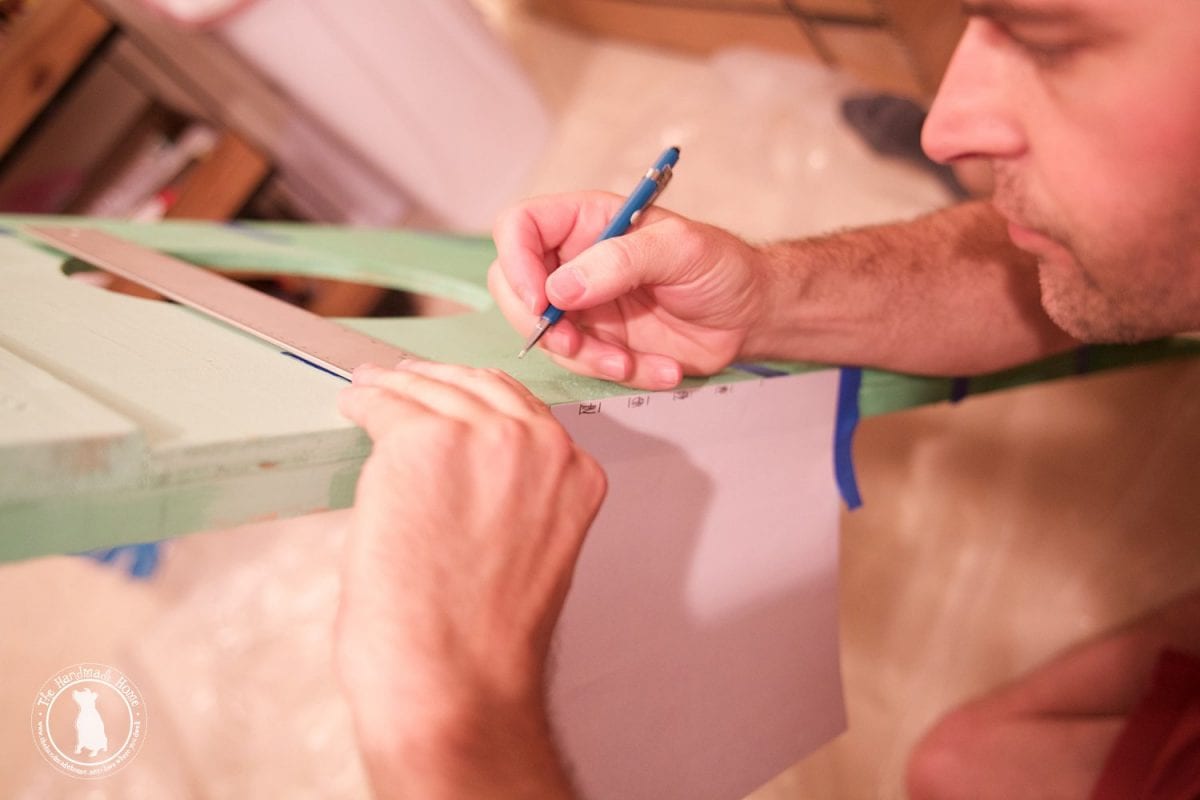
Next, simply use a template piece of paper, and hold it at the edge of your board to mark the smaller lines. We held the paper on the edge, and went down each side with a ruler to a pre-determined length, where we marked the smaller lines. So it gave us the guide you see above {and below} to paint in.
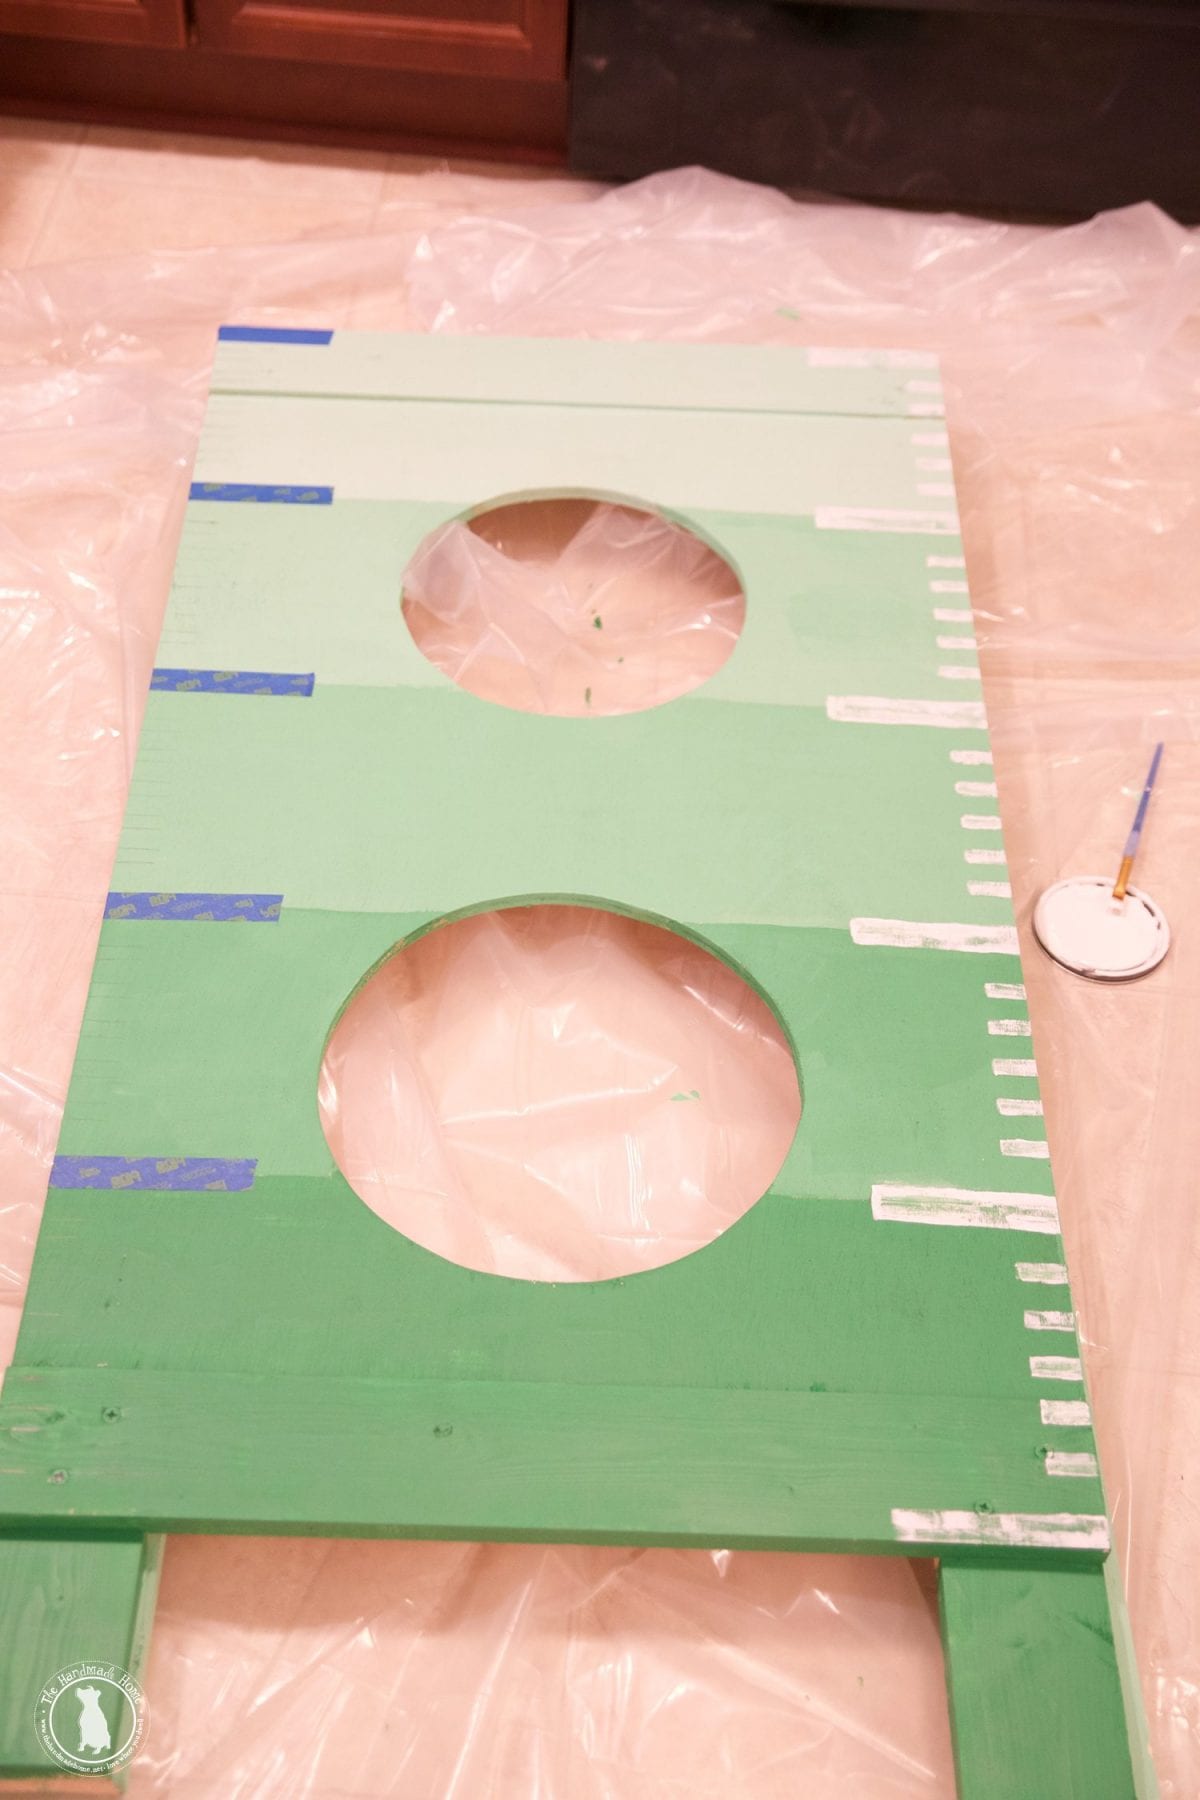
Using our white, we dry brushed each little stripe.
Tip: Go back while it’s that tacky-wet/dry stage with a paper towel, and wipe gently between each one to enhance the distressed feel. That way it looks like a fun, vintage game for that football kinda feel, and if your measurements are off {since there is a little pressure with the whole symmetrical thing} ya can’t really tell.
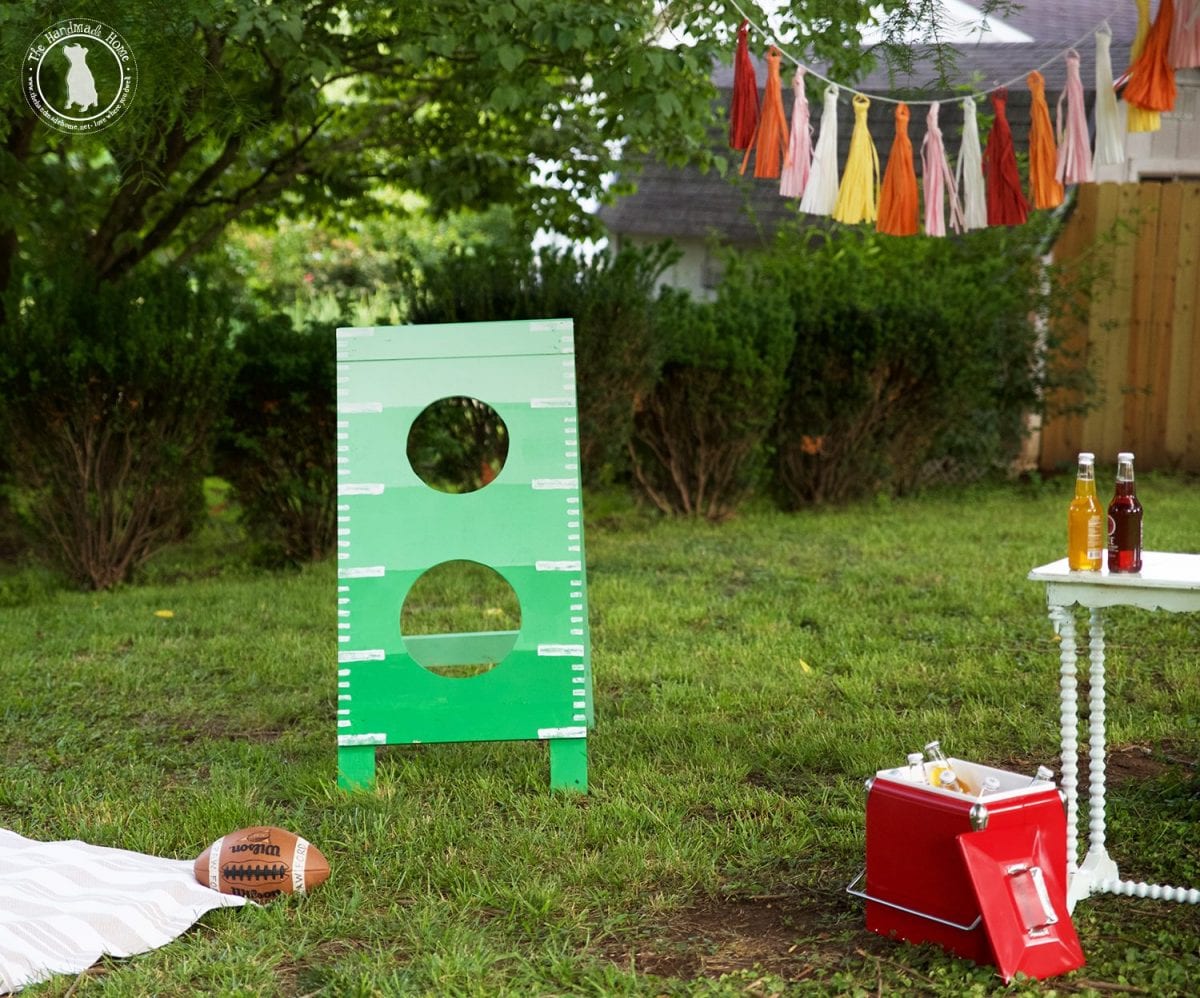
And there you have it. Our little football toss! Shout out to our sweet friends who let us borrow their football… hashtag all our stuff is in storage and I have to scale the chesterfield to reach the fridge so who knows where the football is. Wheeeeeeeeee!
Don’t forget to check out all the cool versions our friends made- the possibilities are endless!
• Confessions of a Serial Do It Yourself Blog