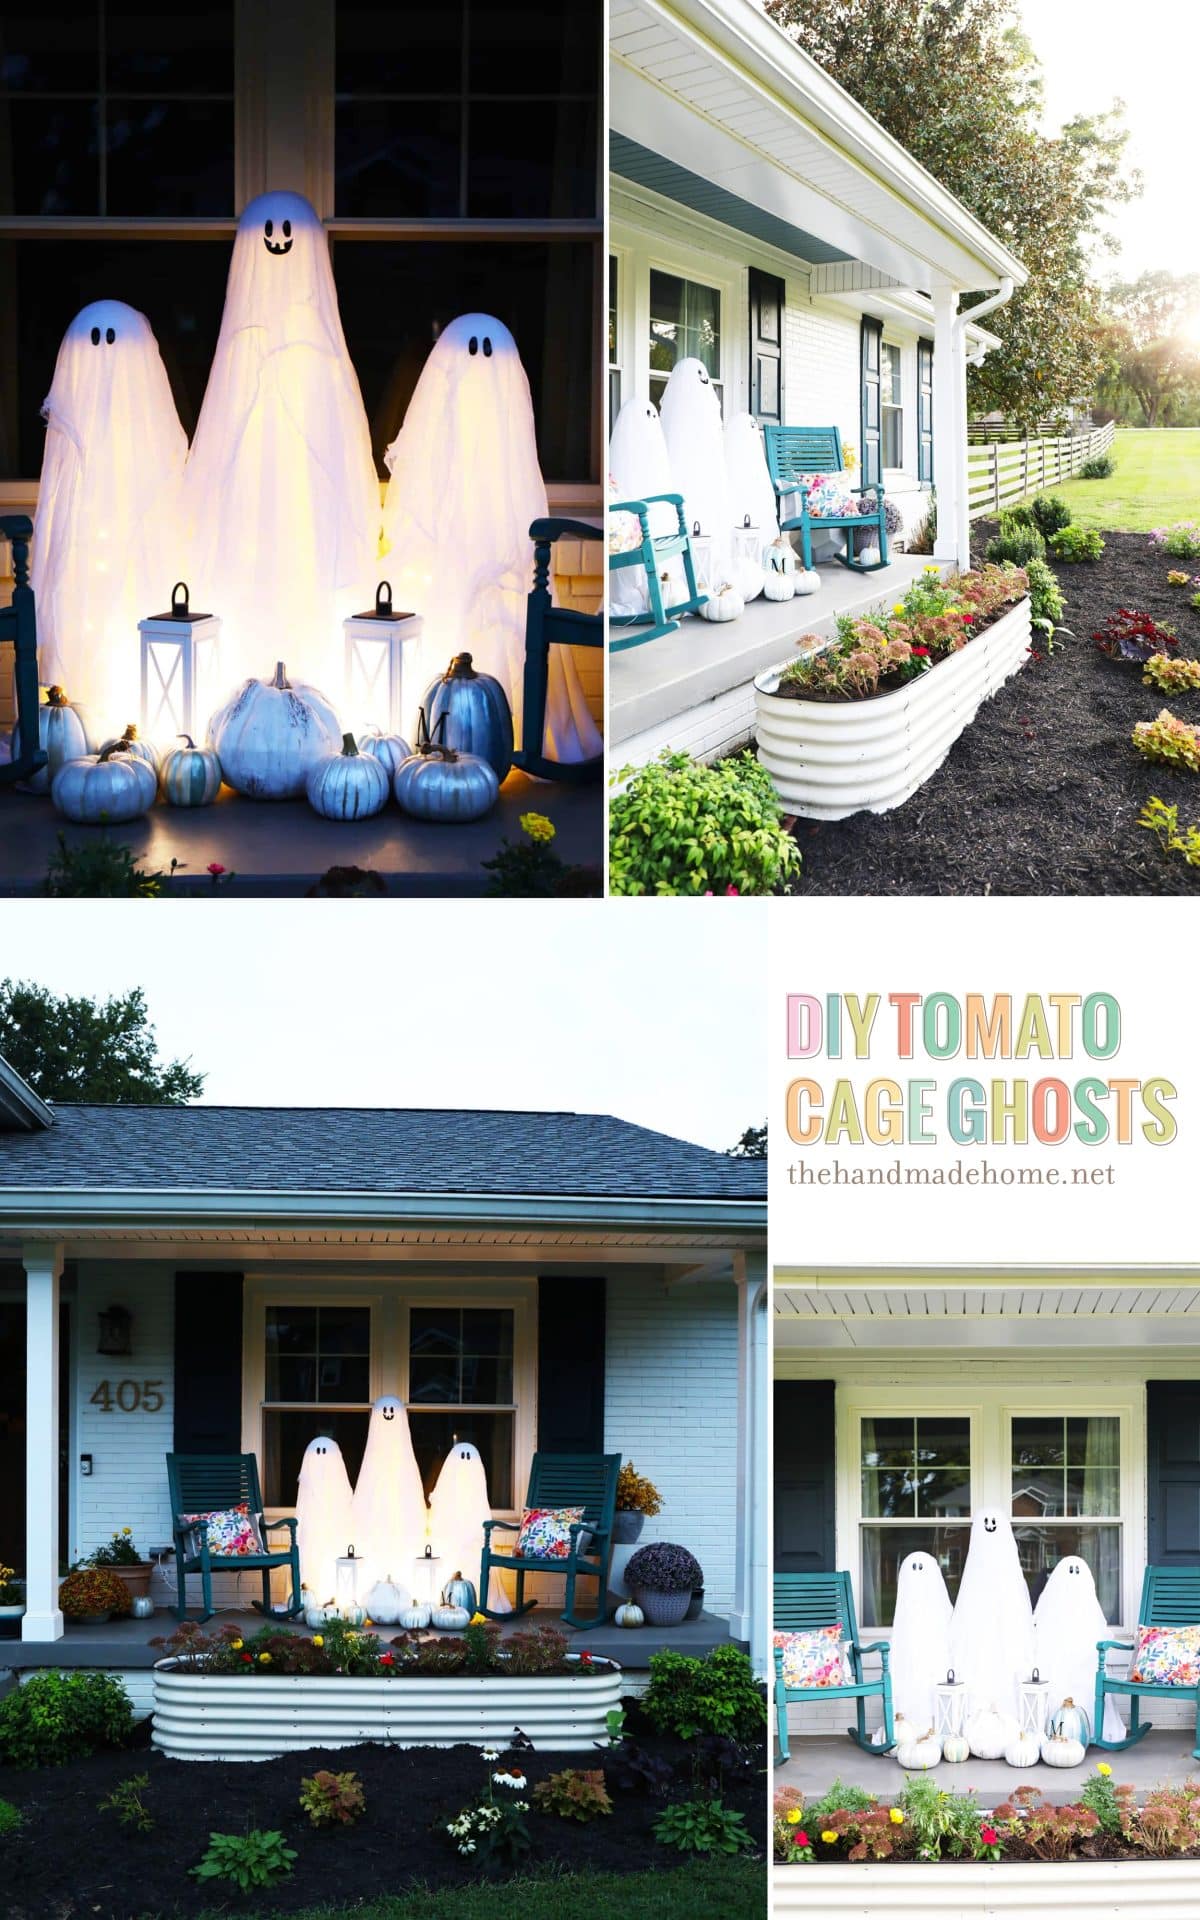
diy tomato cage ghosts
It’s been a minute since we’ve had an official post here since we’ve been busy with client work and we were out of town this weekend. We hope you caught our little reel on insta – it was a great visit with sweet memories. Mom and Dad are tired after ALL the college visits. It’s a crazy/fun time in our world right now. But on to the post… I had so much fun sharing our little front garden last week, but really wanted to get spooky for the upcoming season. Yes, I am still sweating outside, but why not? The kids have wanted to try this project forever, and since it’s been all over the interwebs, we decided to give it a go with our own version last weekend. Especially after seeing the prices of purchasing your own ghosts from those big box stores… It’s time to get {DIY} festive.
Side note because I had to share: While at the local garden center last week, I spied a double rainbow. Actually, the garden people did, and I ran outside to get a shot. Because double rainbows. Everything is just feeling so fresh and festive right now. We are feeling fall, and the remainders of summer. Basically, all the nice weather before winter hits. So I grabbed a few tomato cages because rainbows, and decided to make some ghosties for the front porch.

We cleared some pieces out of the way on the porch to make room for our new arrivals, and got to work. Here’s what you’ll need:
• tomato cages {grab these at your local garden center}
• something to anchor them with {bricks, rocks, etc.}
• large foam balls
• rubber bands {electrical tape will also do}
• twin sheets
• gauze {I like this for that ethereal feel}
• black vinyl – felt and paper would also work – sharpie / scissors / hot glue gun {optional}
• outdoor led lights
I snatched up three tomato cages at the local store, and decided to center them on the porch.
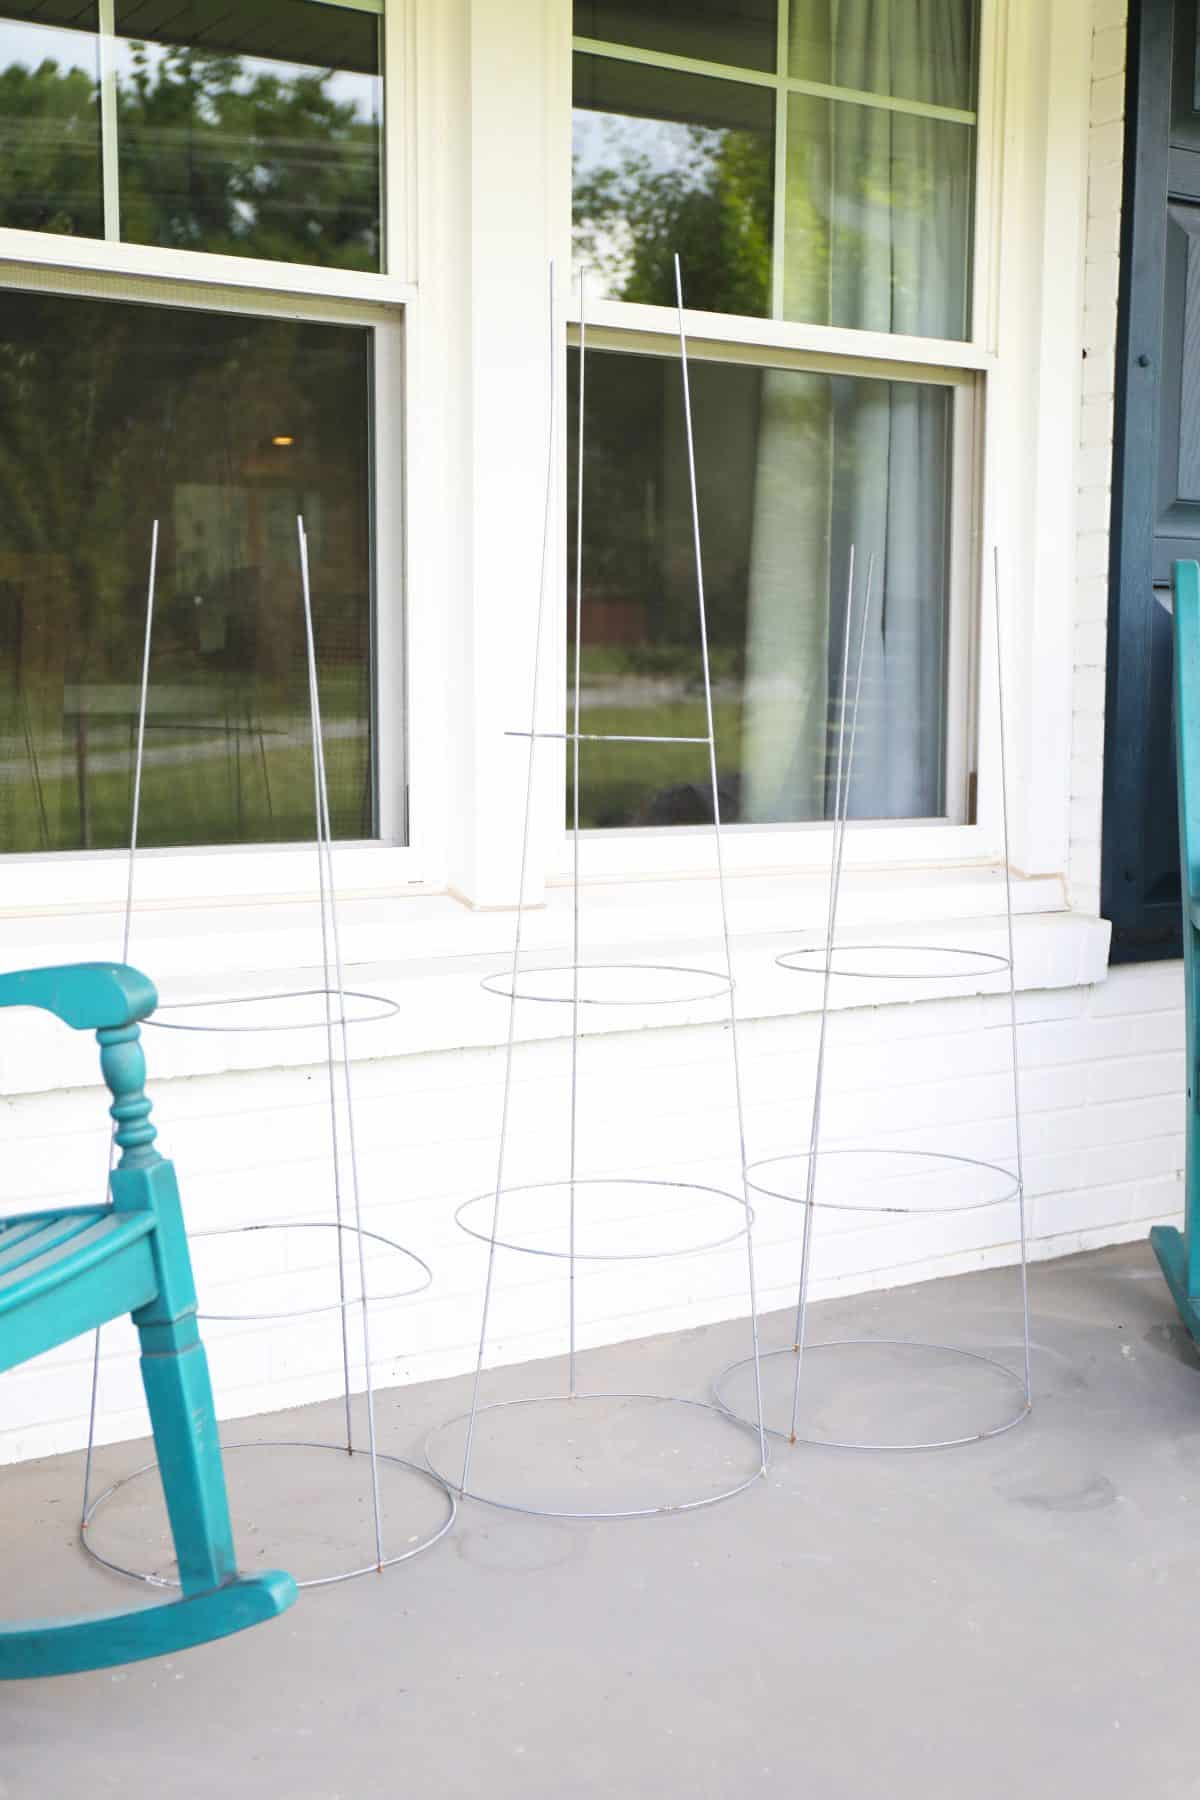
But first things first, because I know they’re a flyaway hazard {which would be tragically hilarious} we anchored them down with some extra bricks at the base.
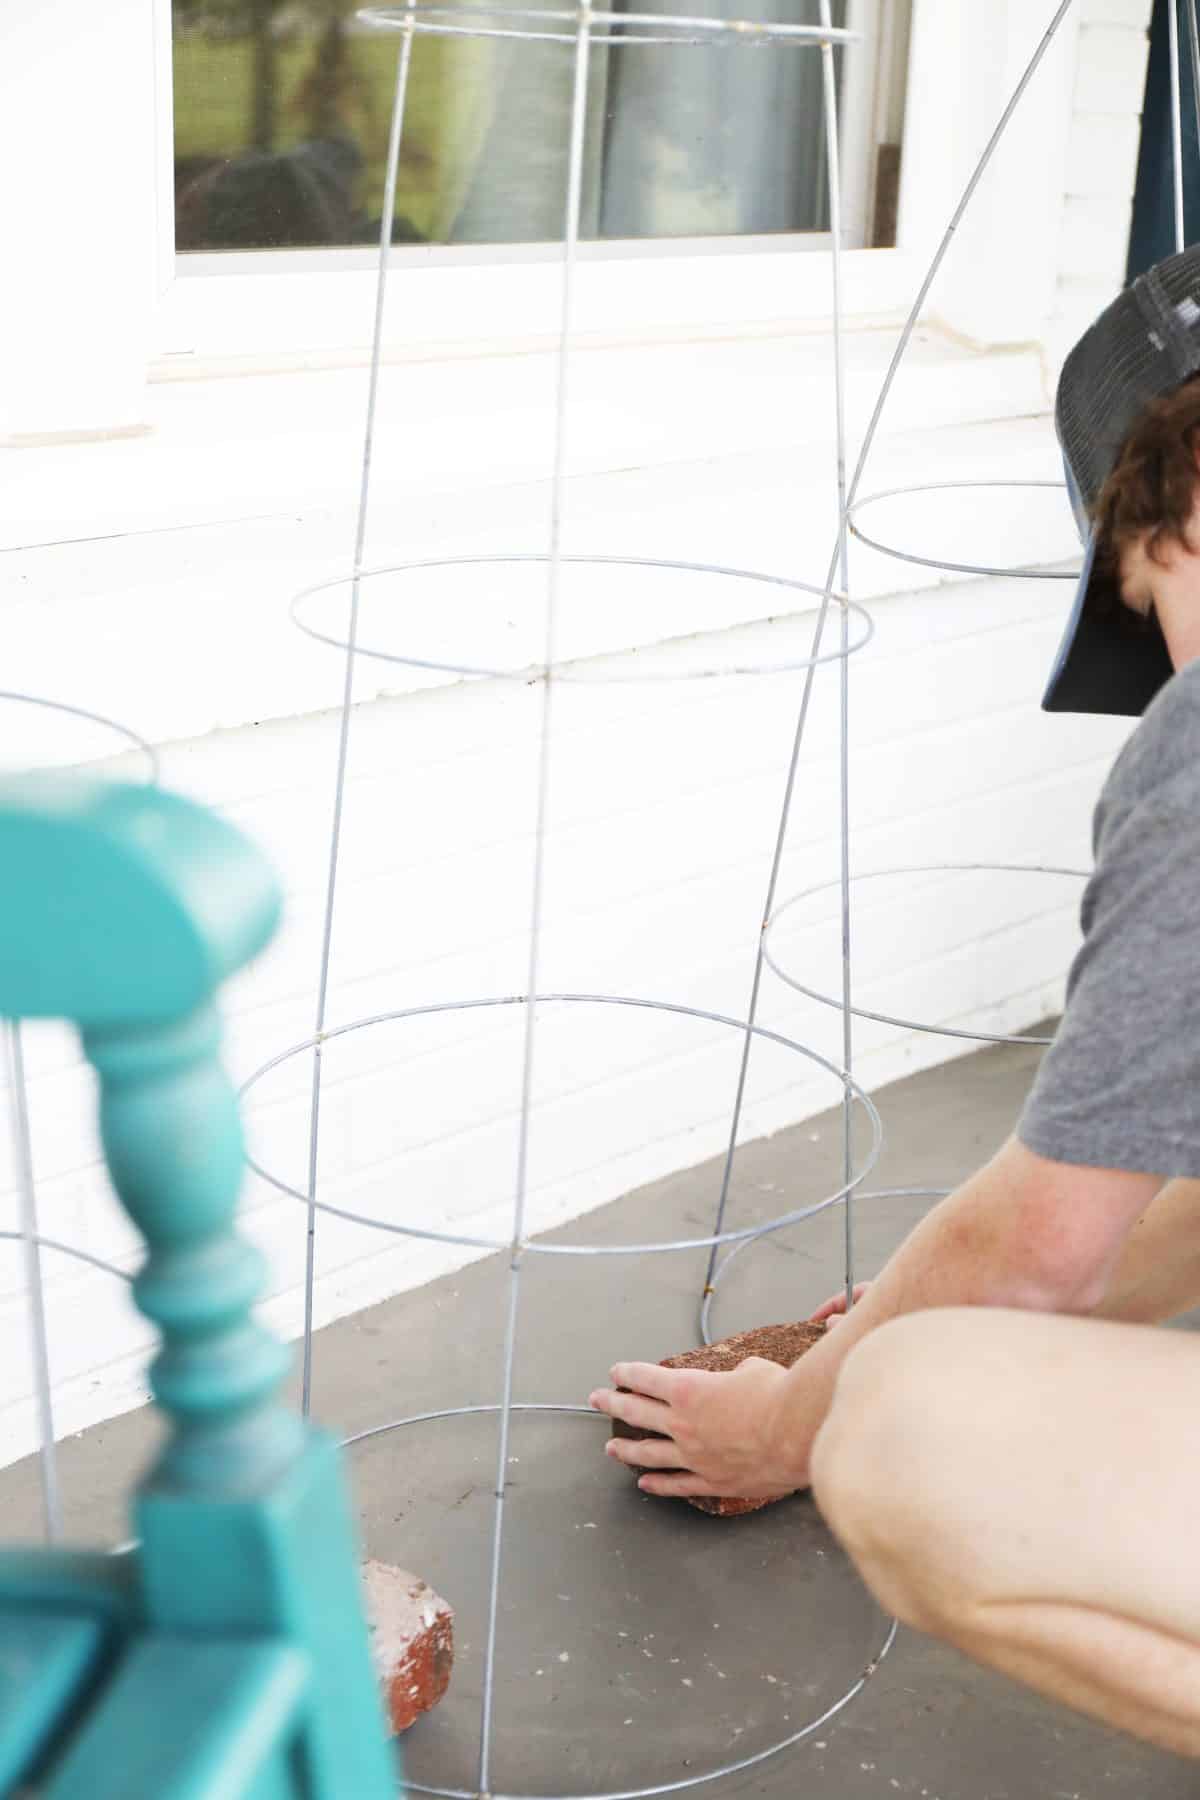
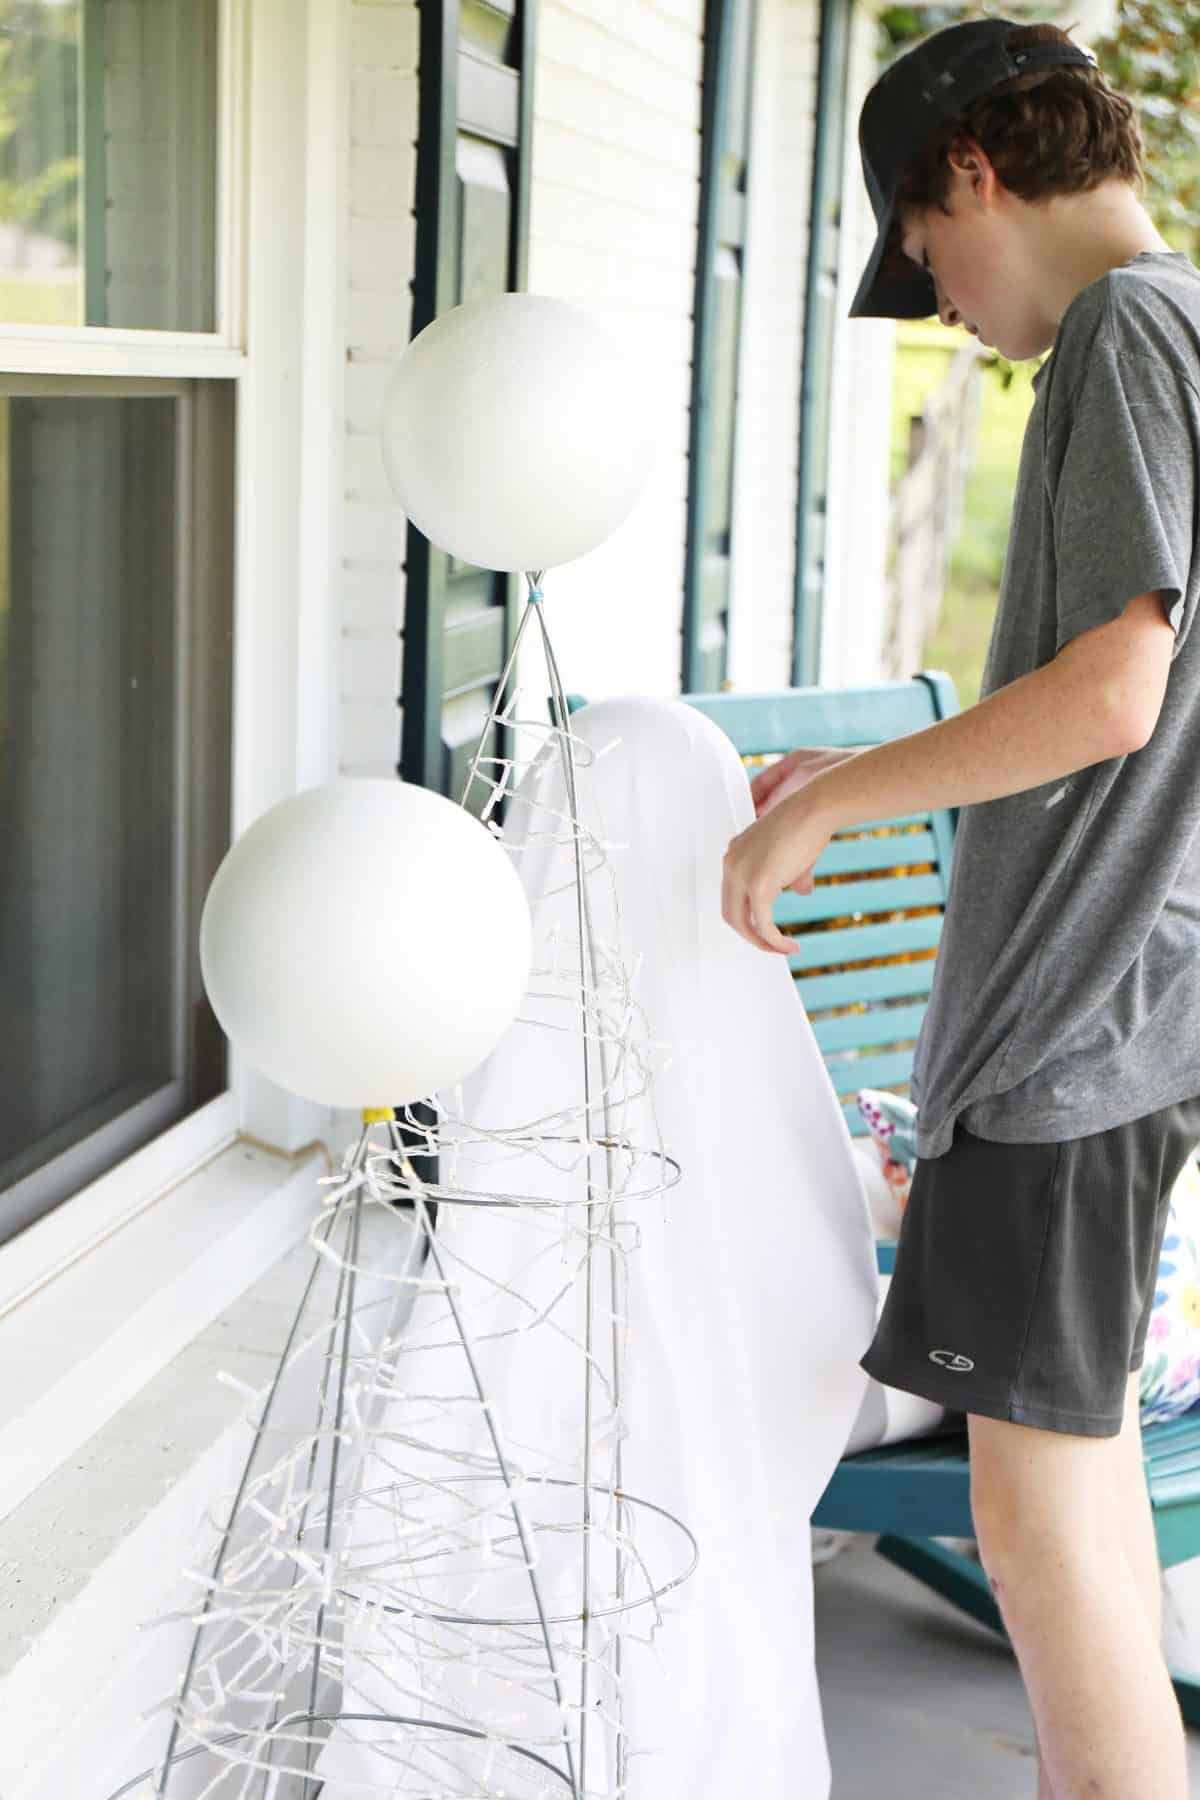
Ps. I had the most adorable helper for this one. He was so enthusiastic, and had his own ideas for the project which is what these sweet memories are made of.
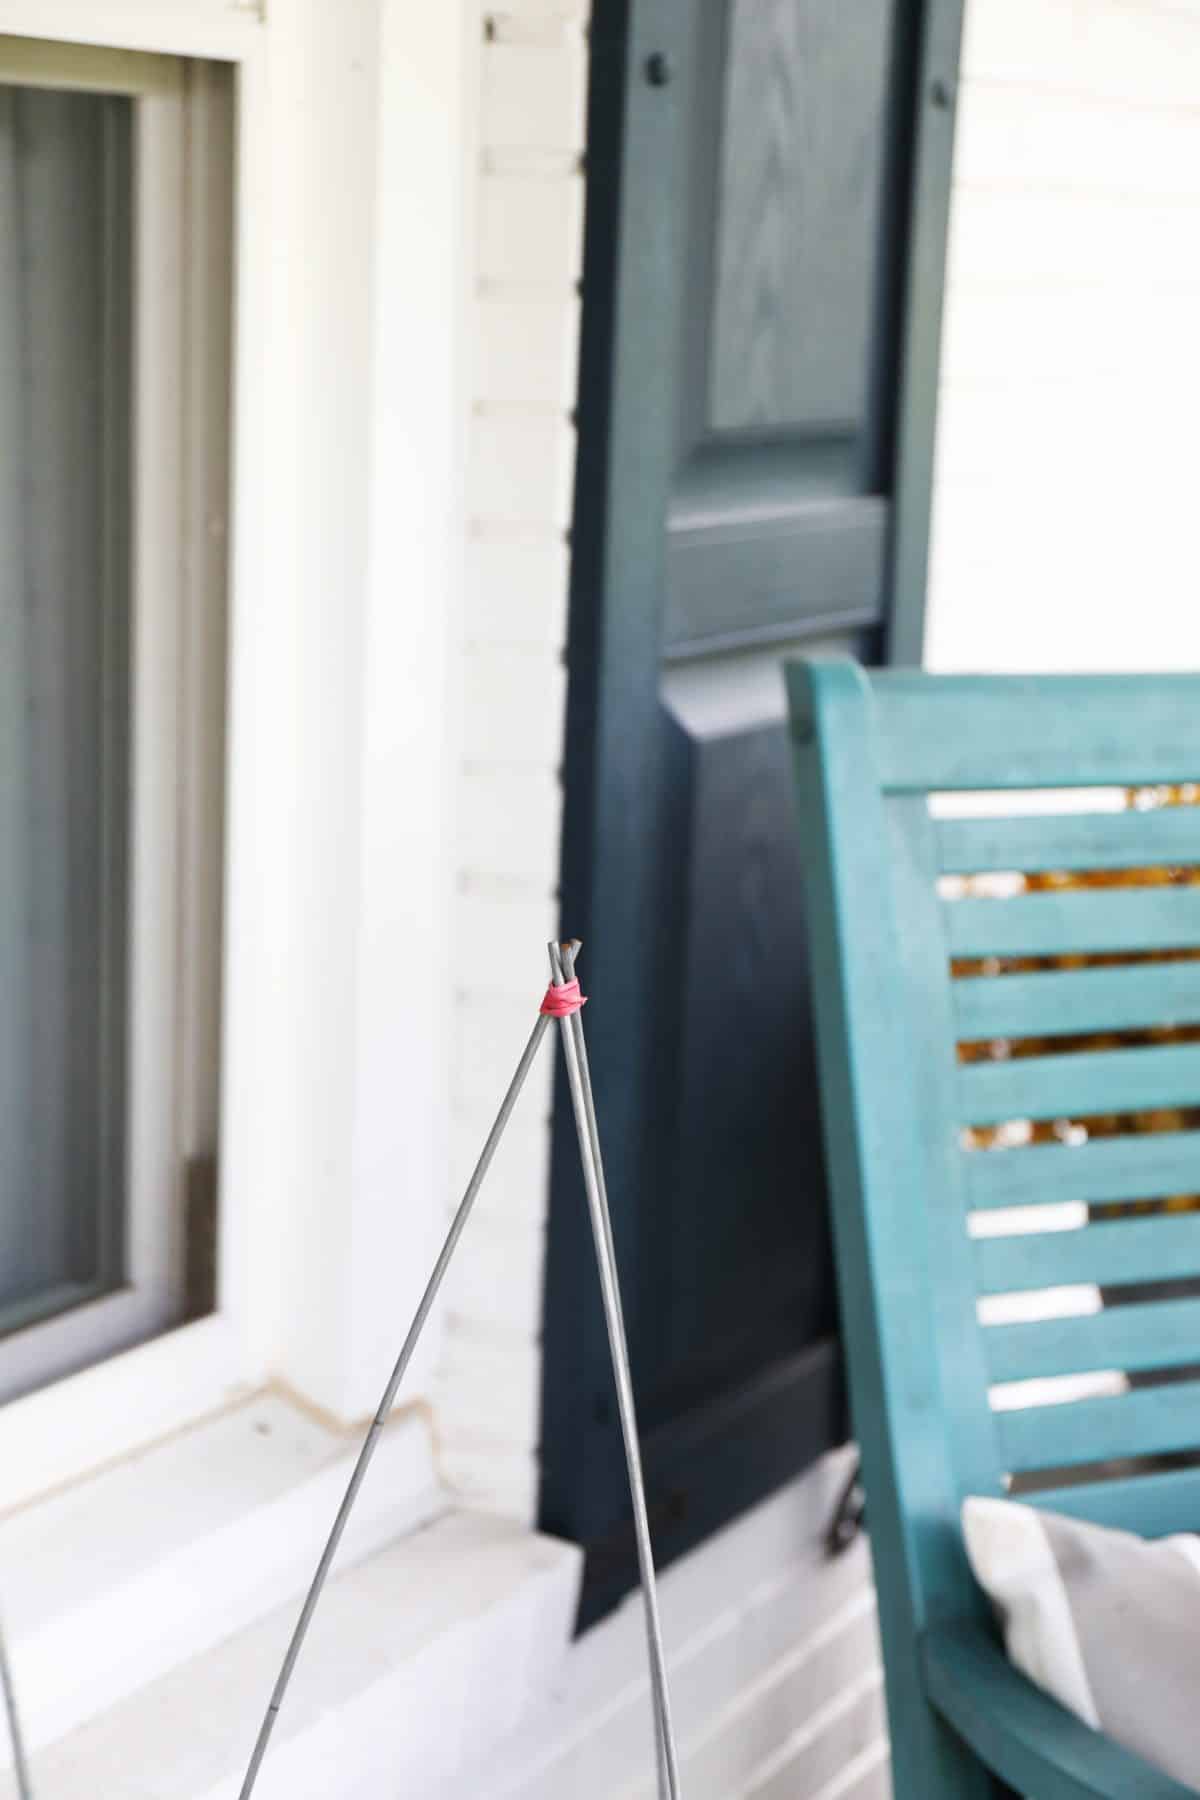
Next, we bound the top with rubber bands.
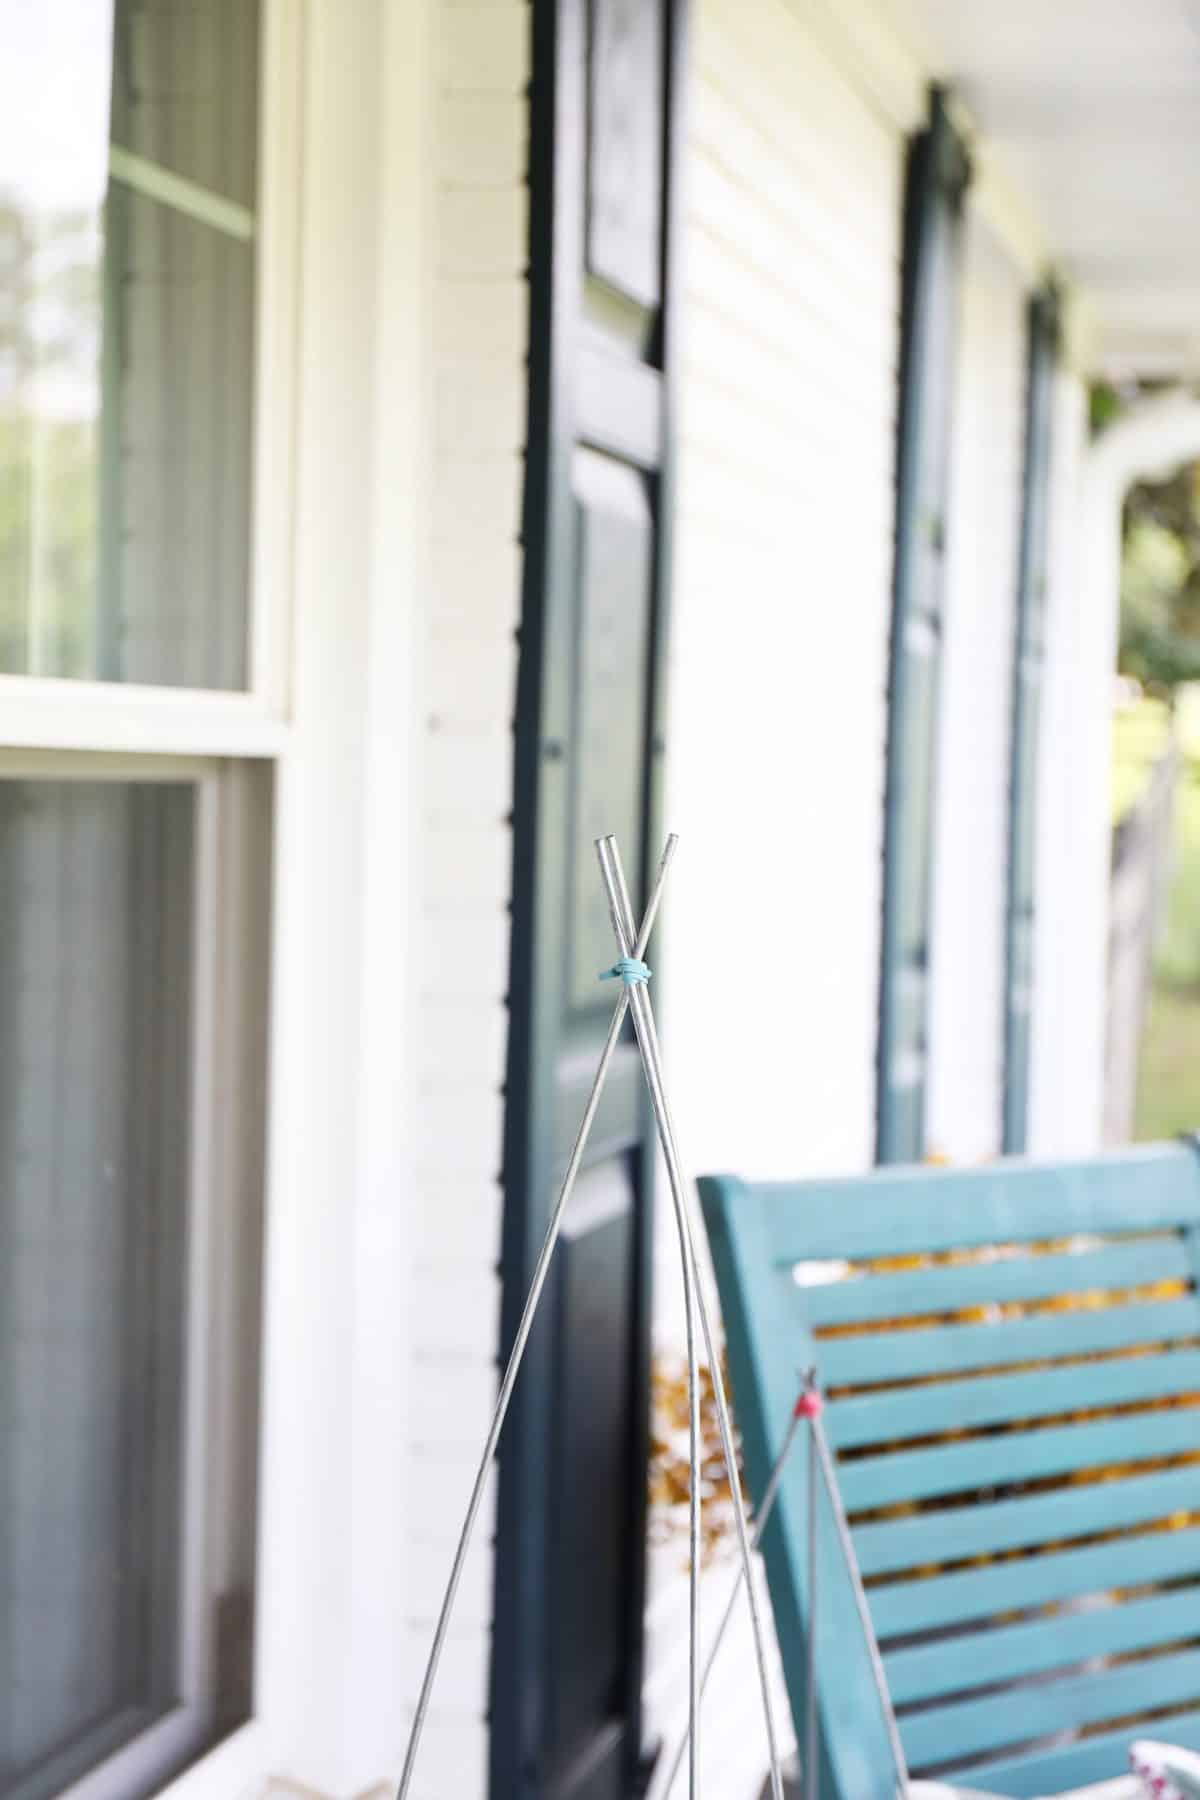
Please note the larger tip with the three prongs separated, doesn’t work so well, so be sure to move the tips together more, as shown below.
Take your styrofoam balls and stick them right on top.
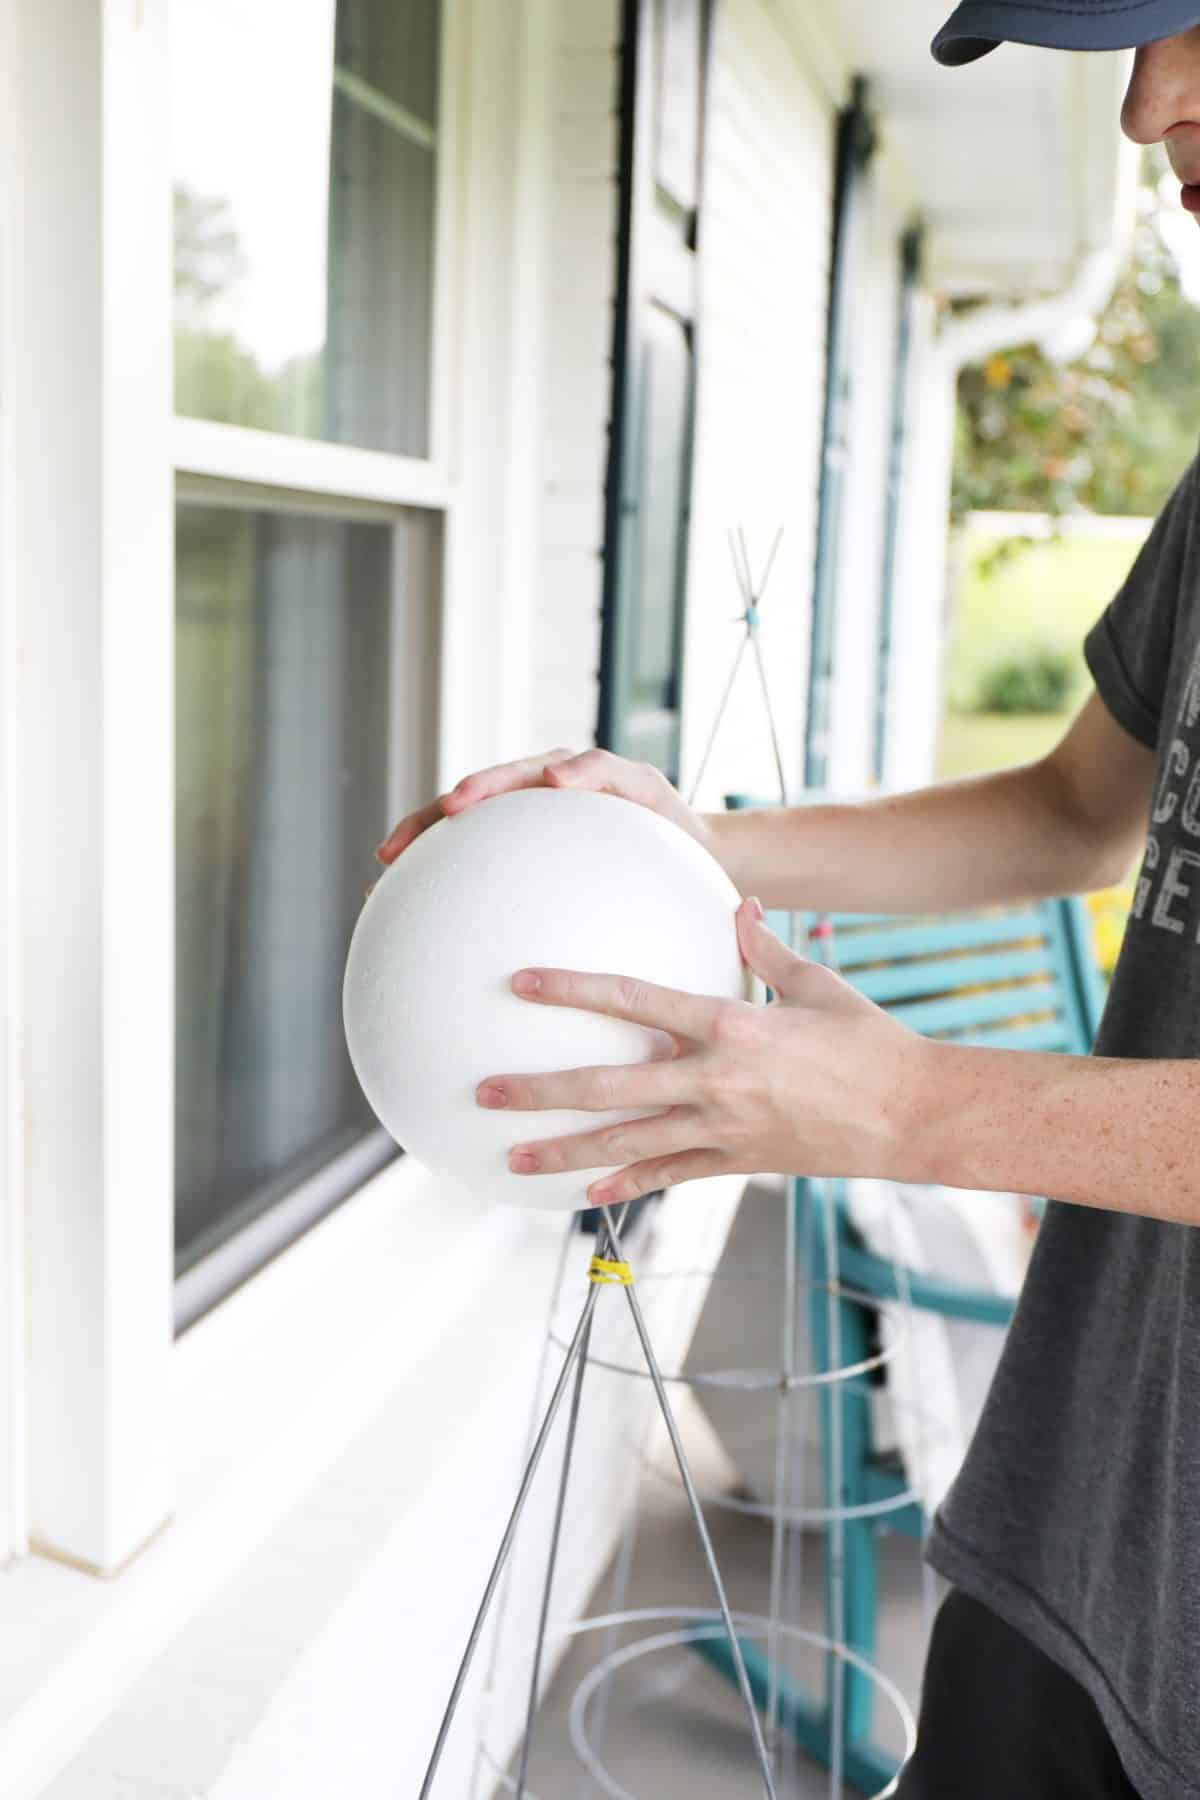
Make sure they’re secure.
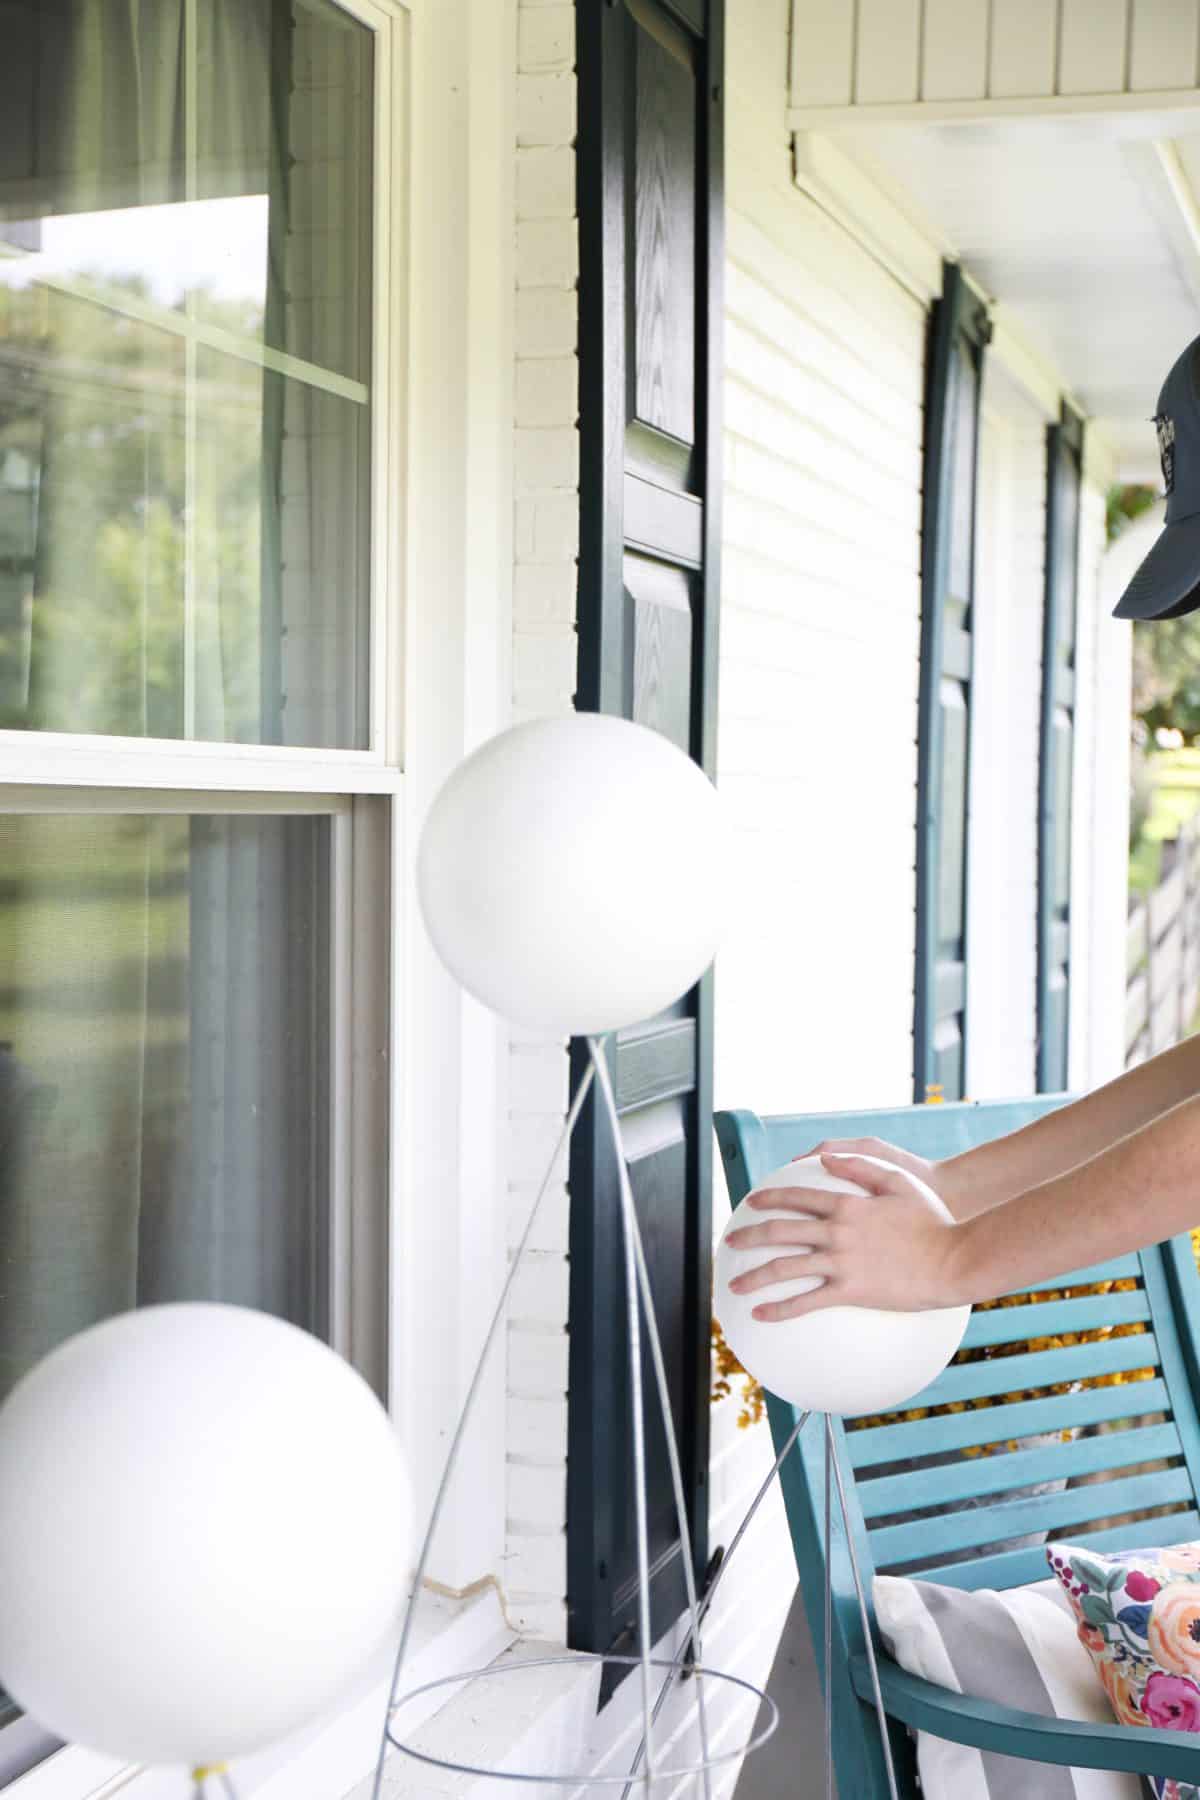
Then wrap with lights generously around each one.

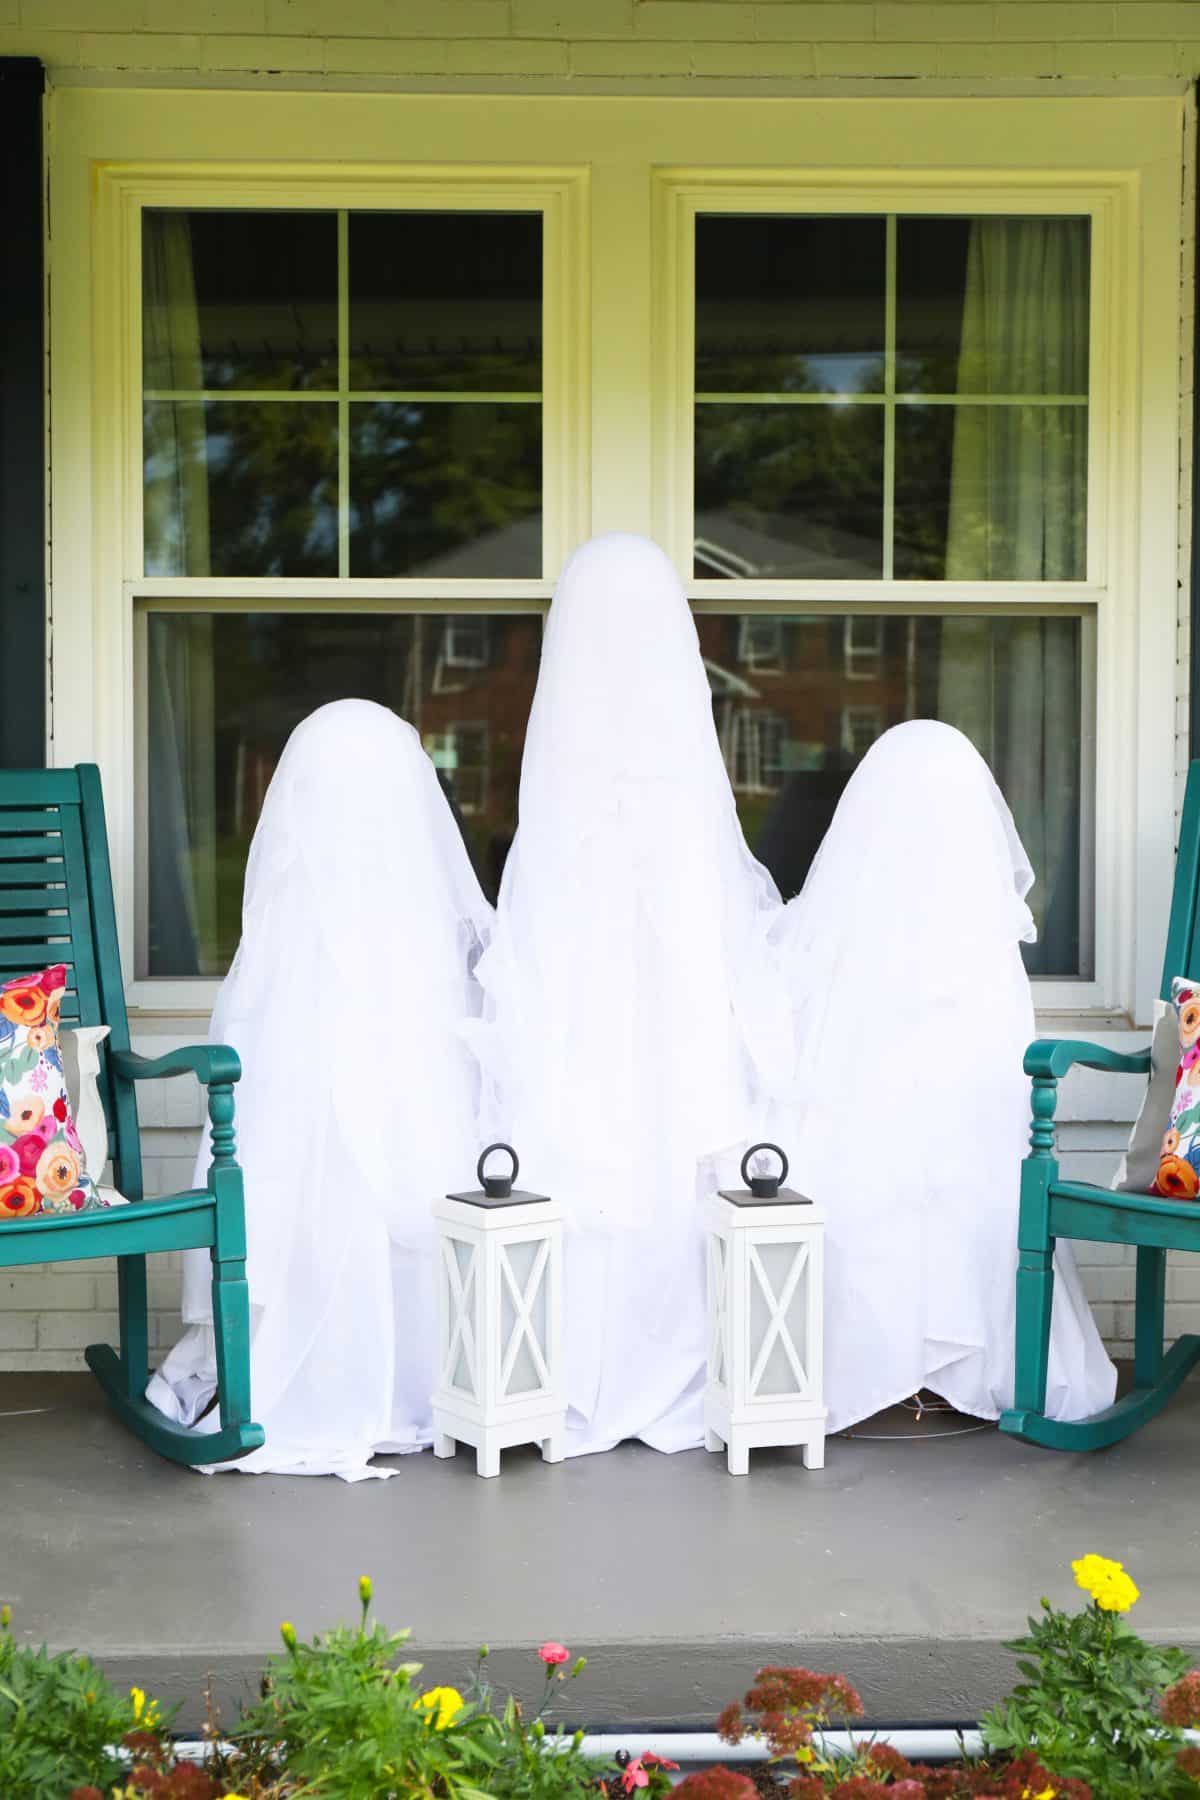
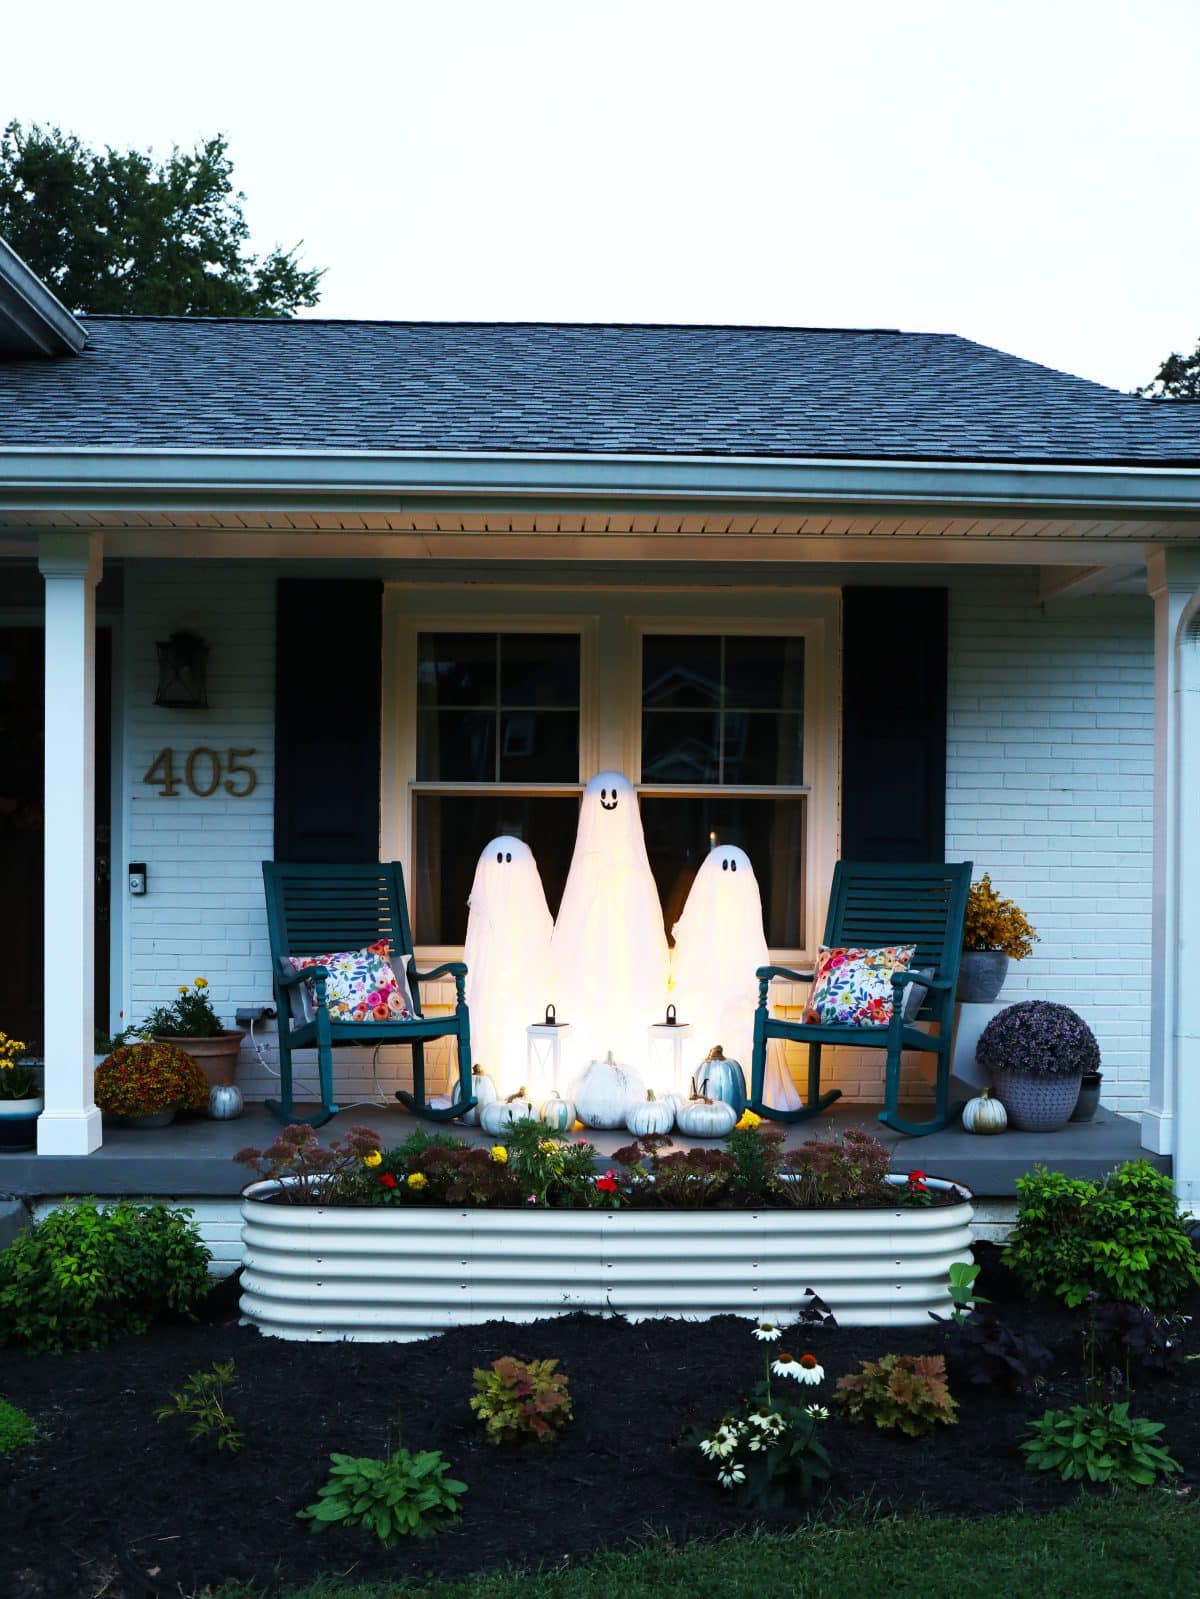
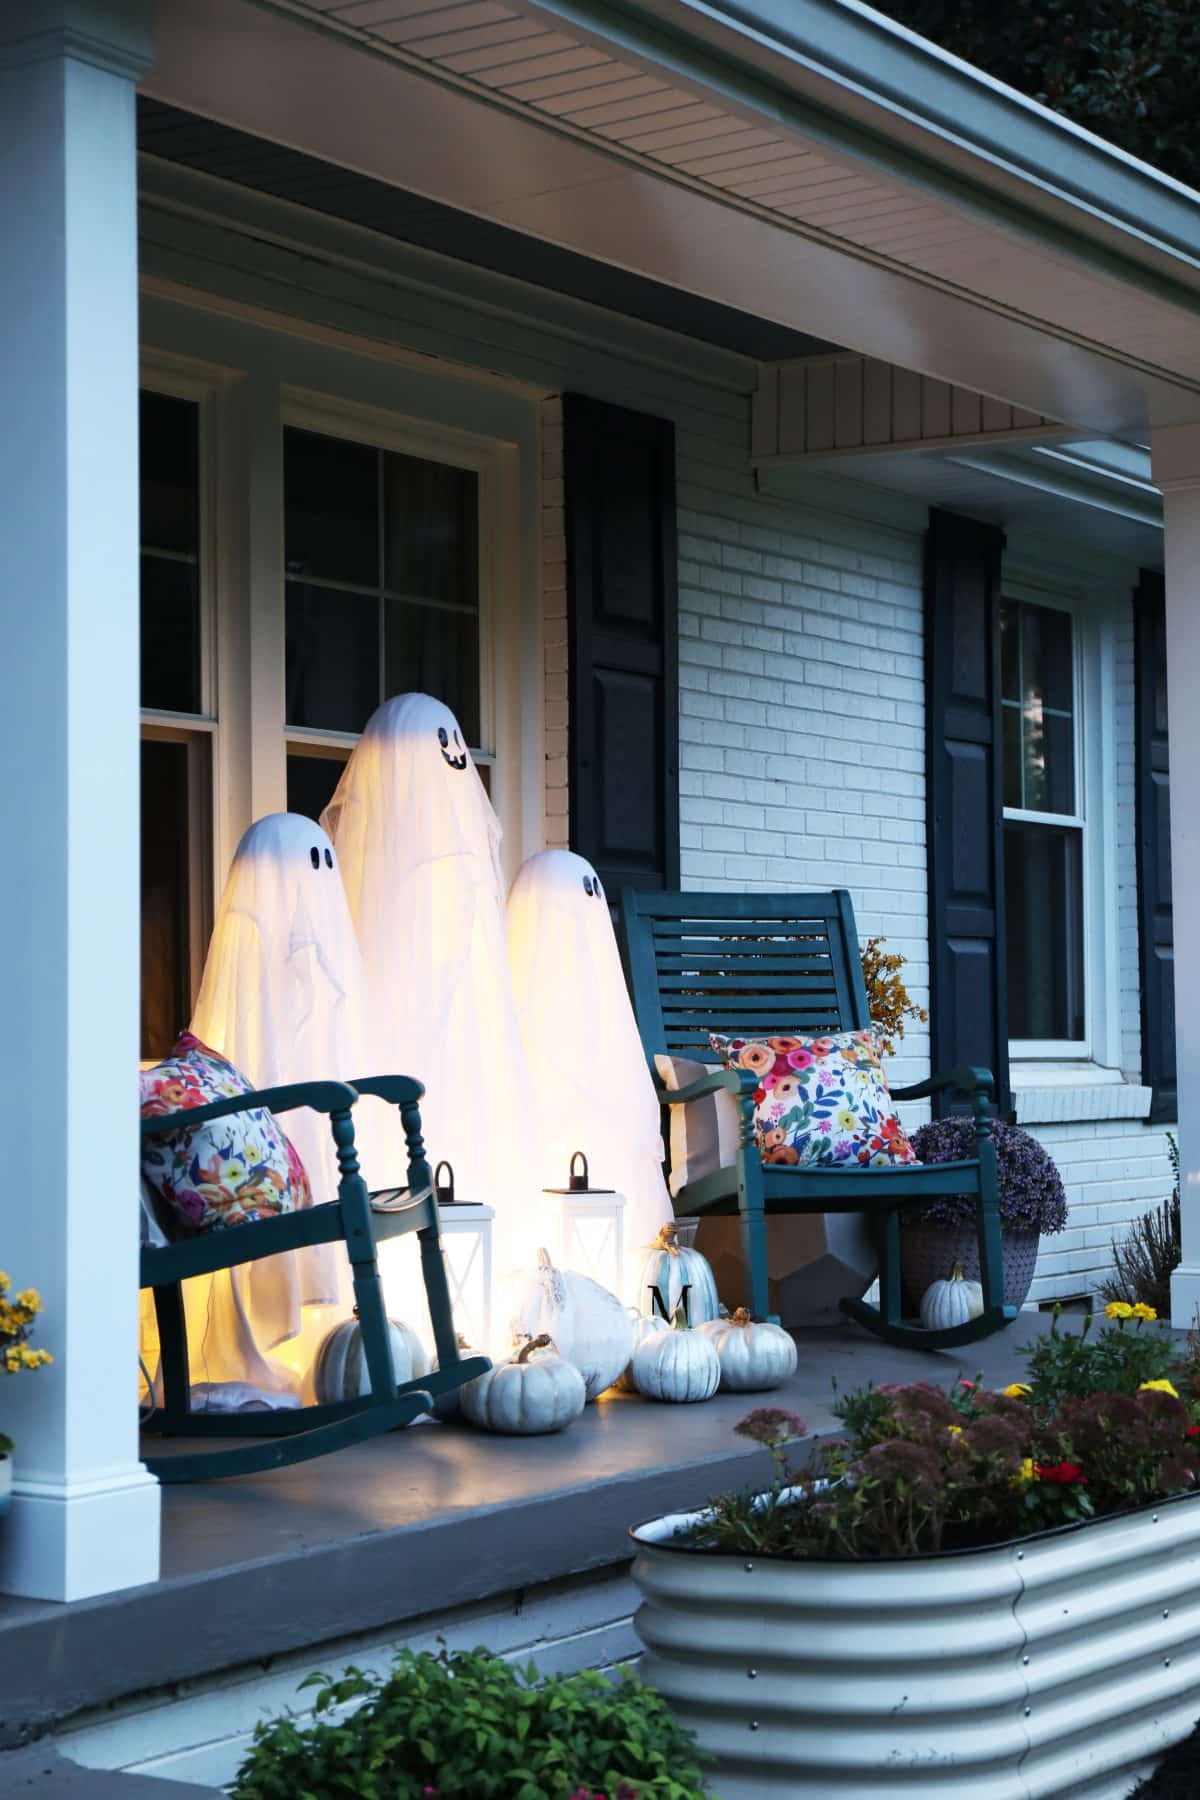
After that, place a sheet on each one.
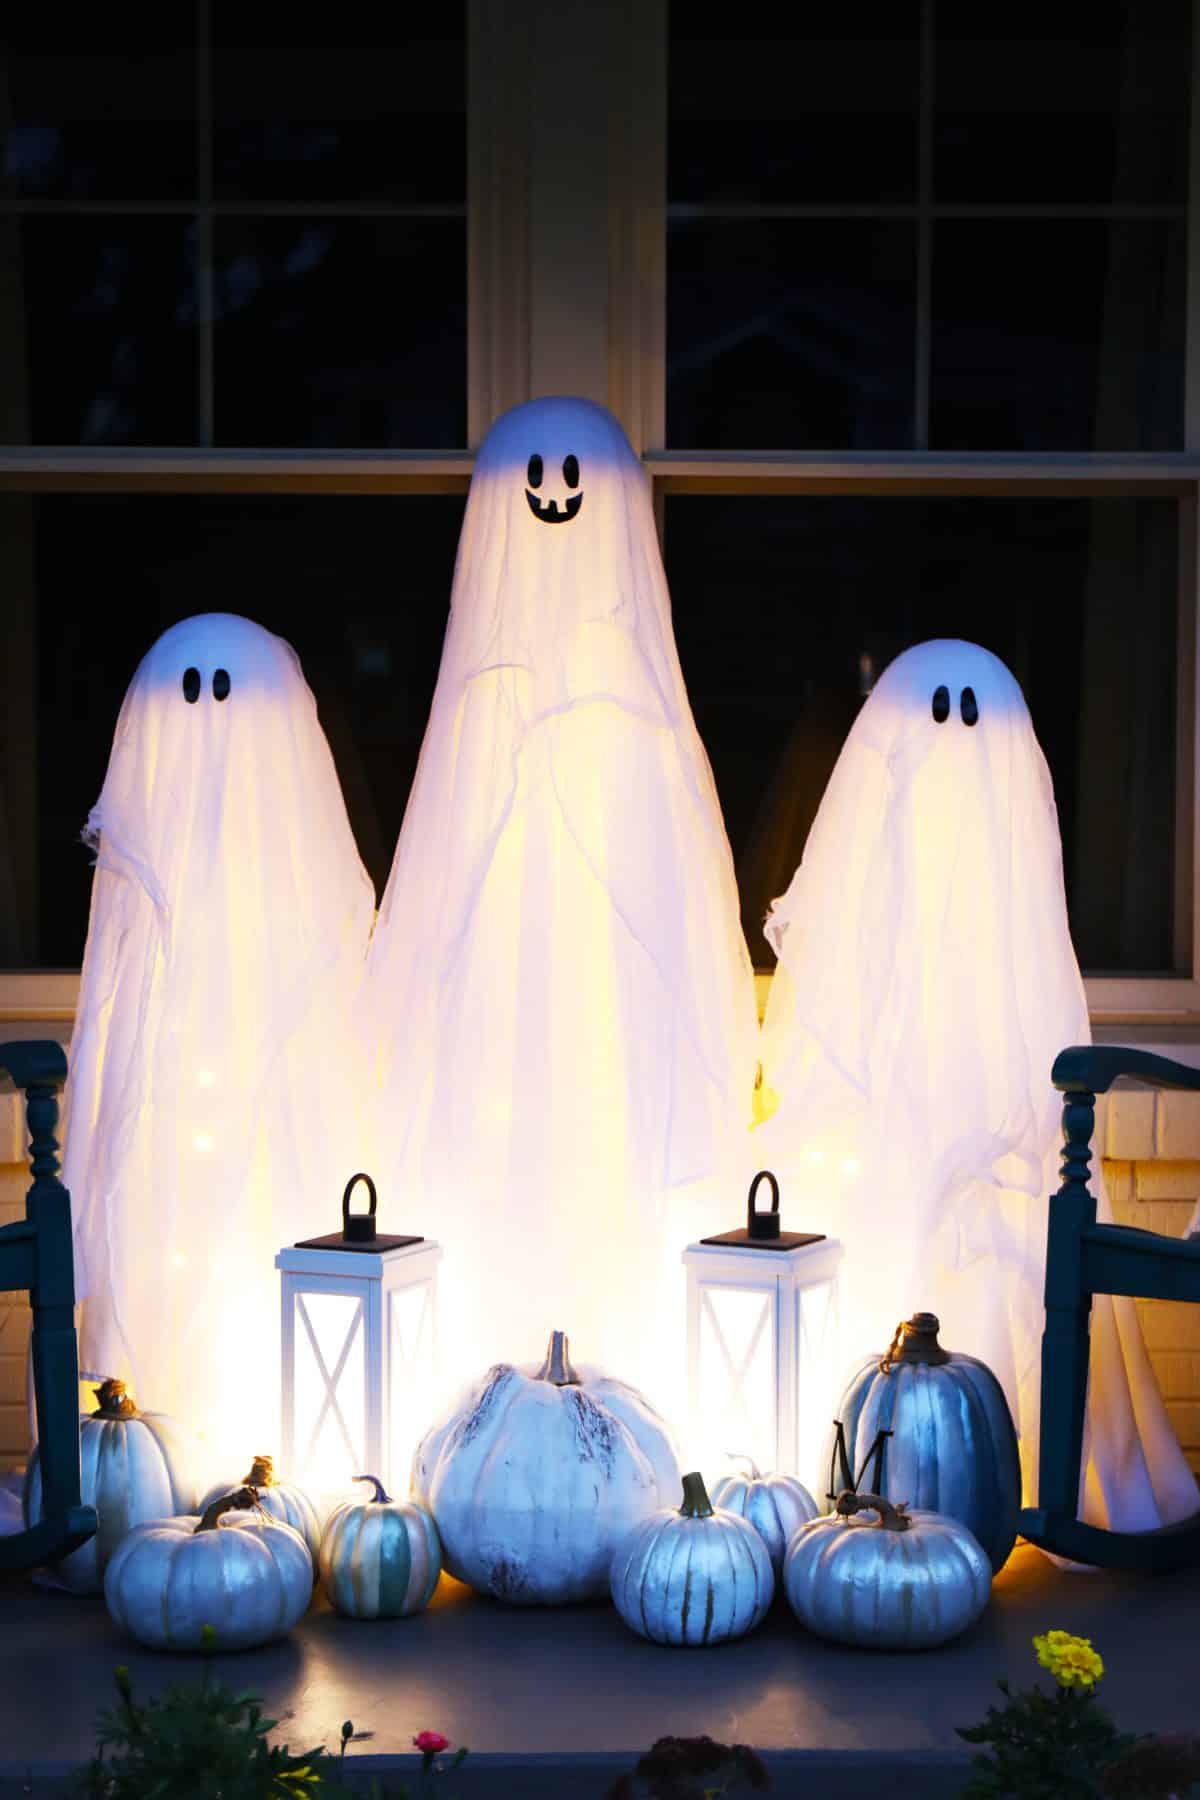
Tada! SO spooky.
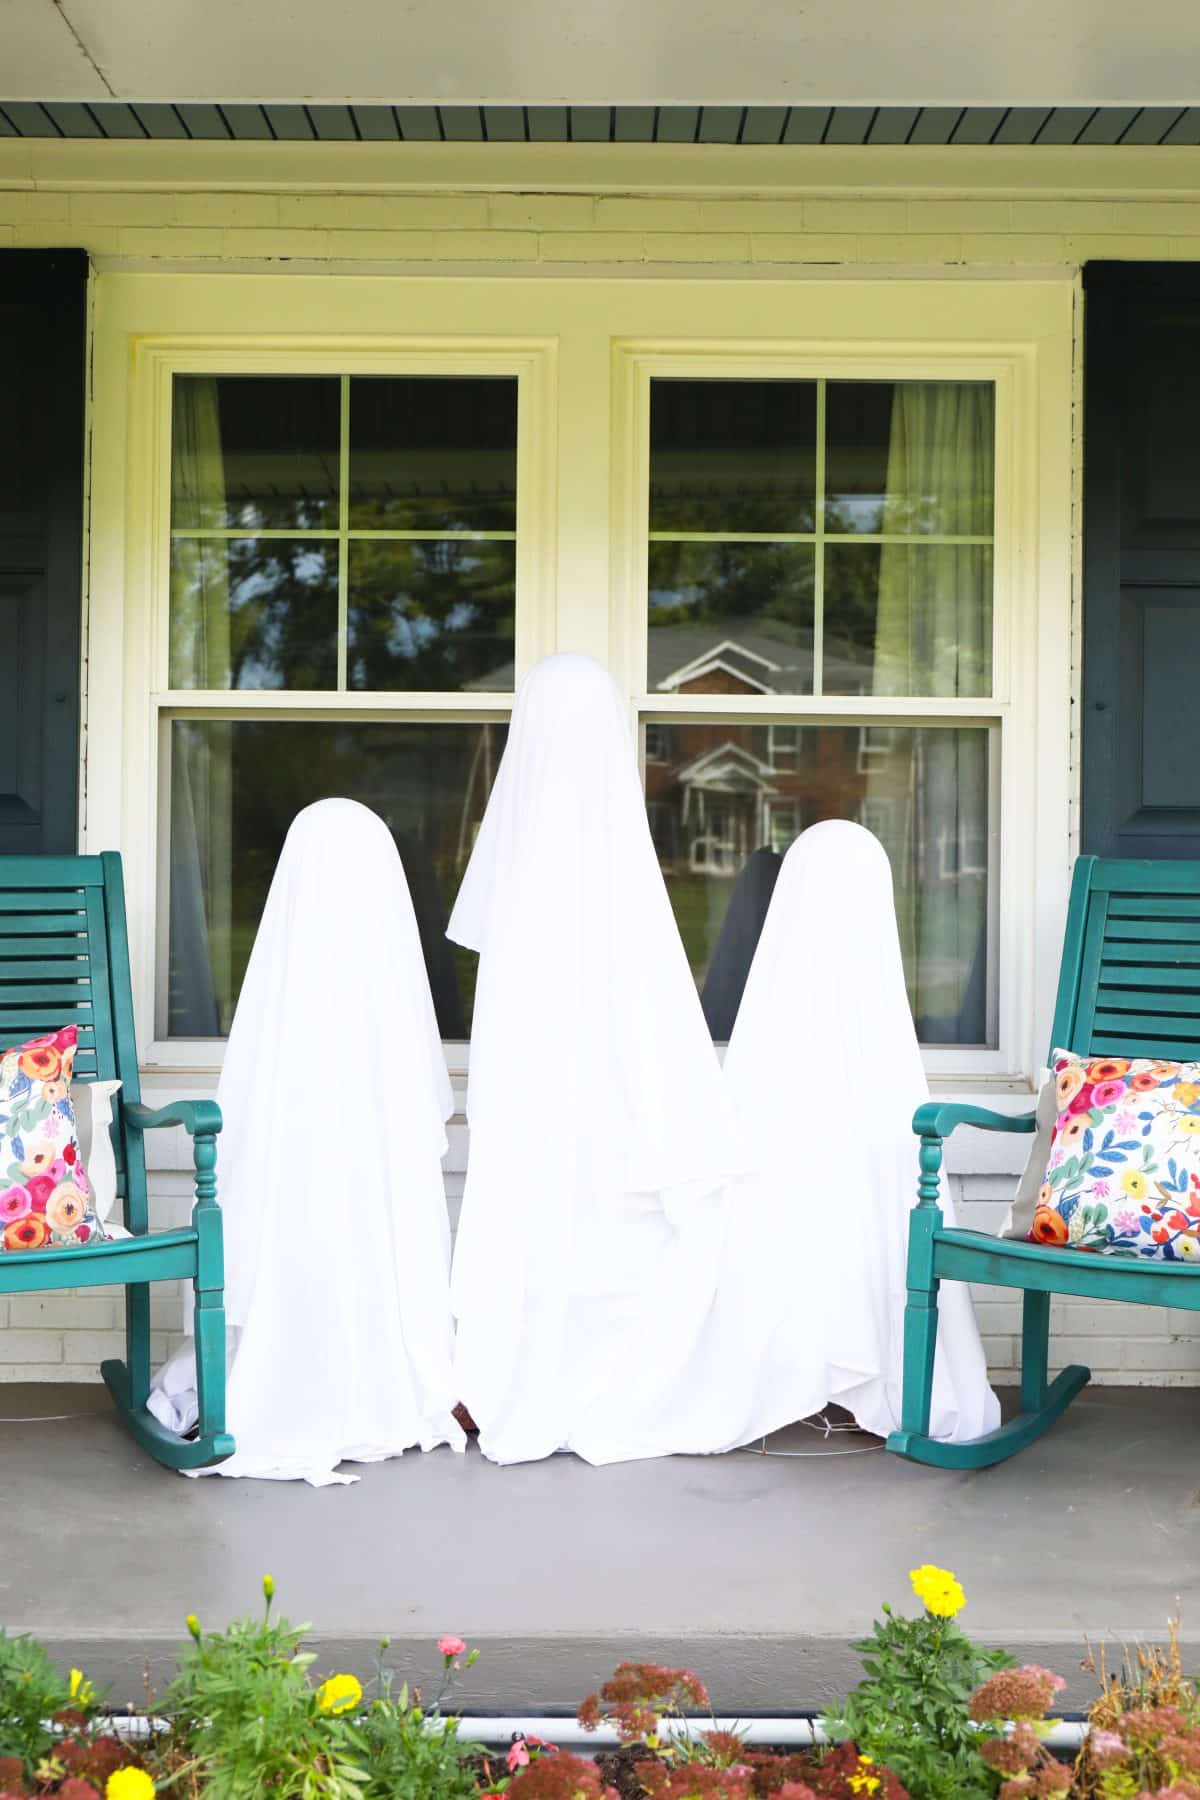
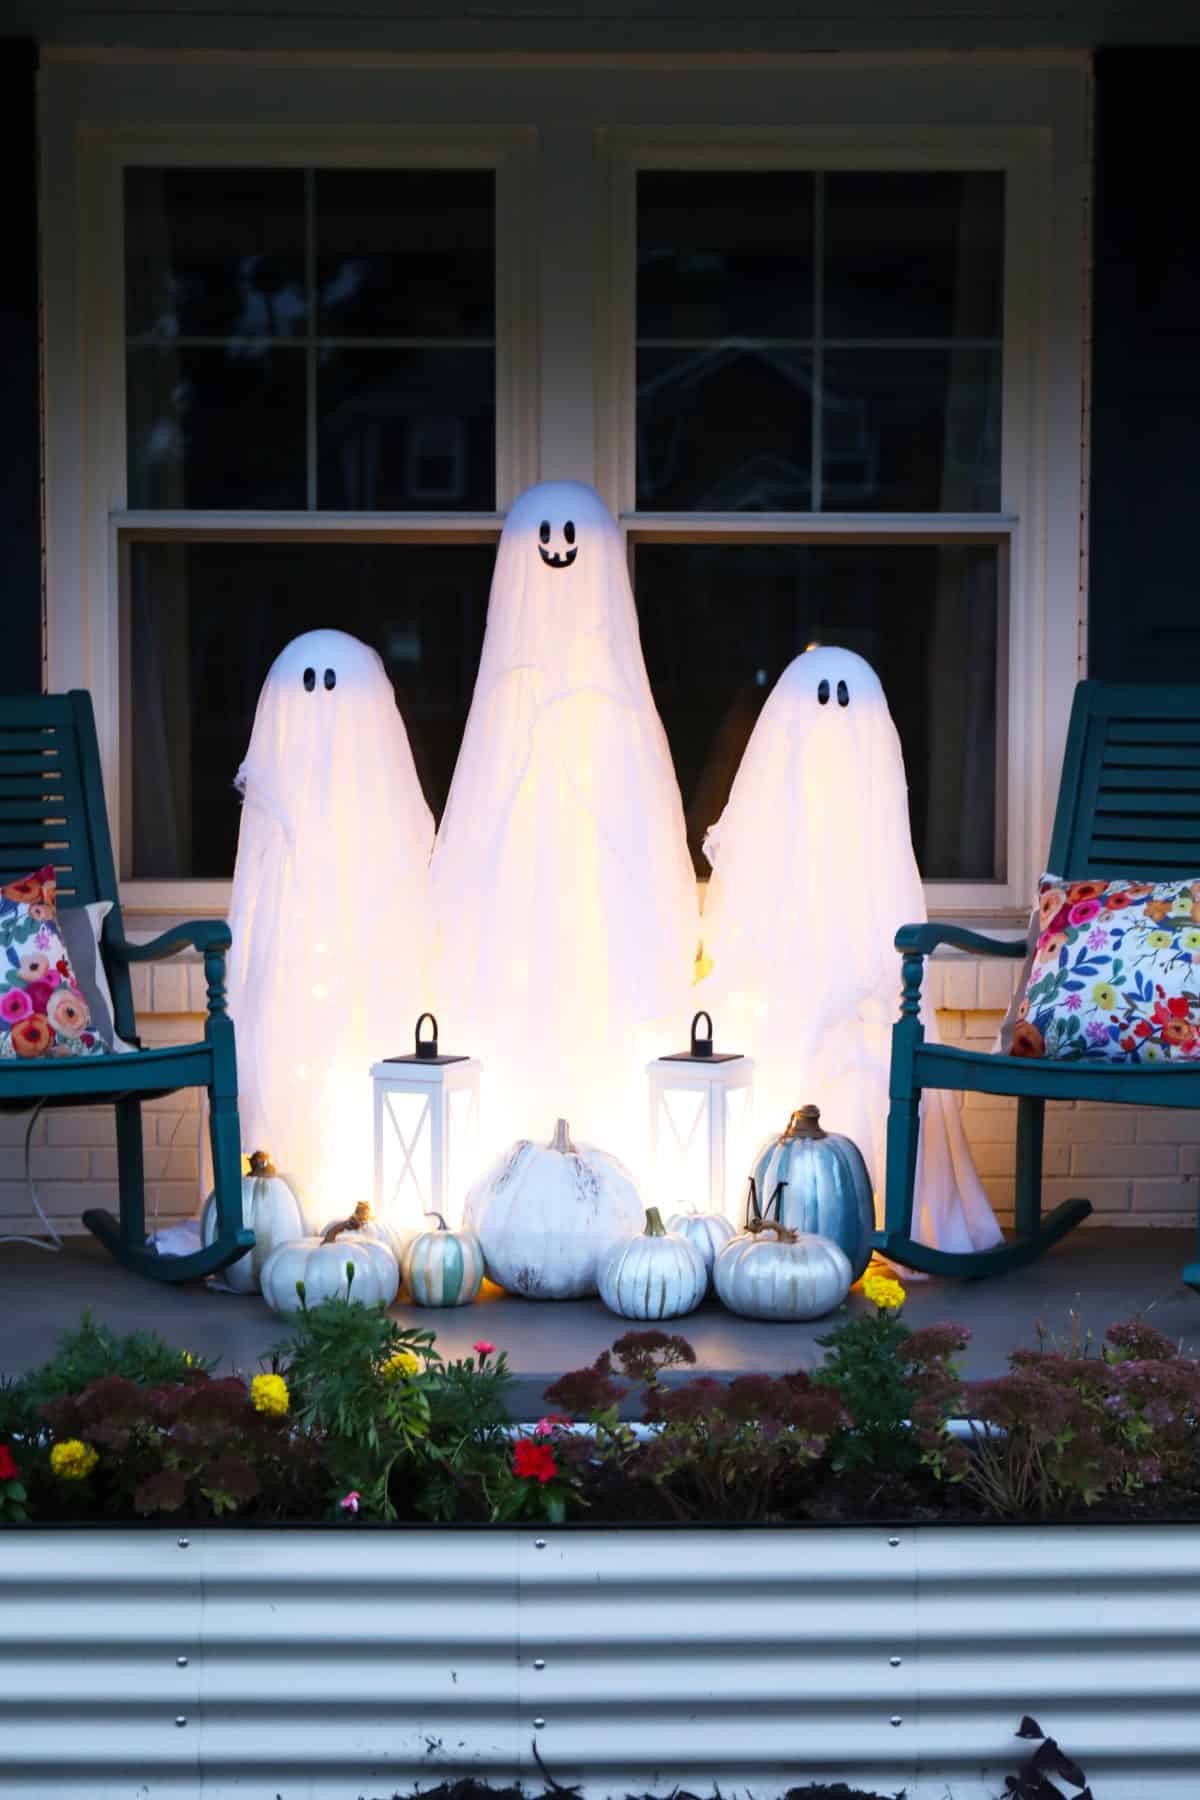
But wait because I decided to take it up a notch: I’d ordered two sheets of this gauze {linked above}, so I cut down the middle length-wise, and then in half. This gave me eight total pieces. I added two to the smaller ones, and four to the center. I think it definitely takes them up a notch.
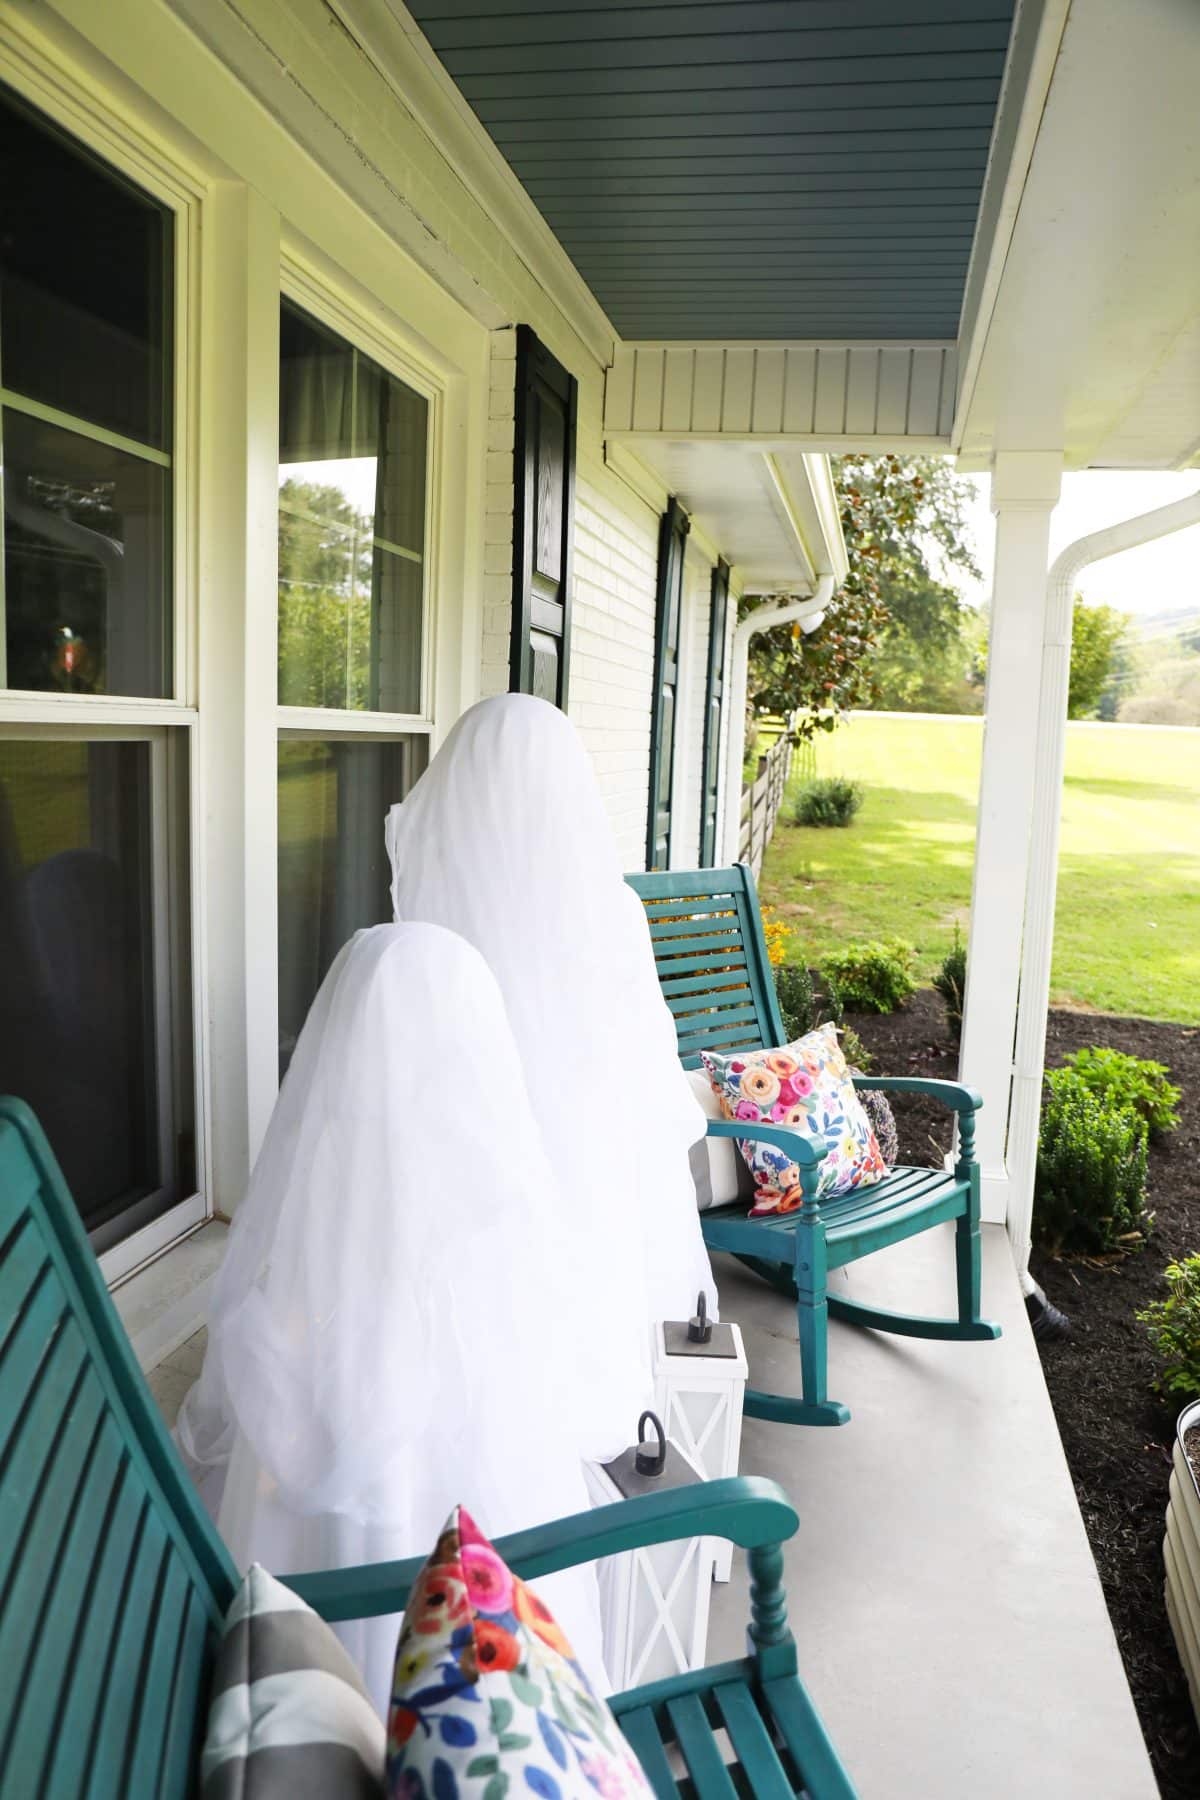
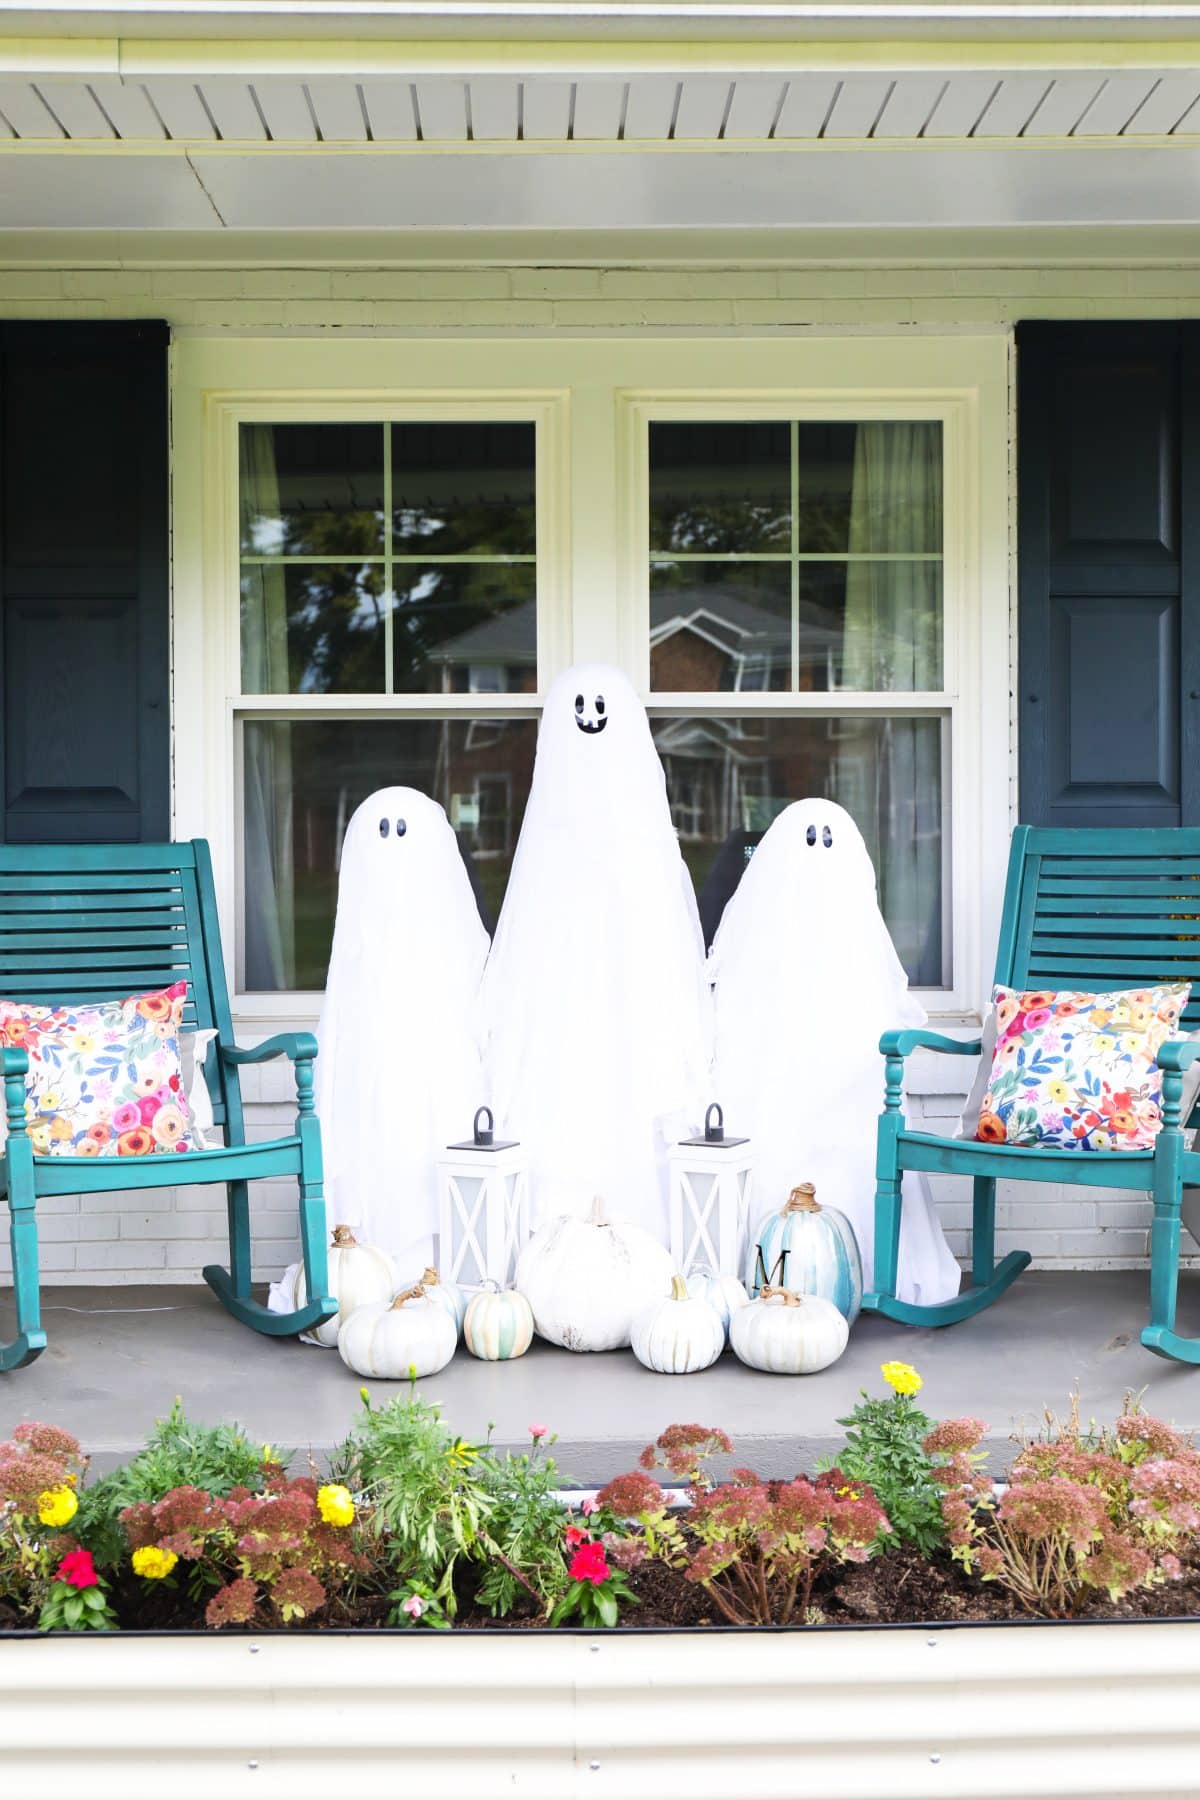
Loving this ethereal view, and you could honestly leave them faceless, if you wanted.
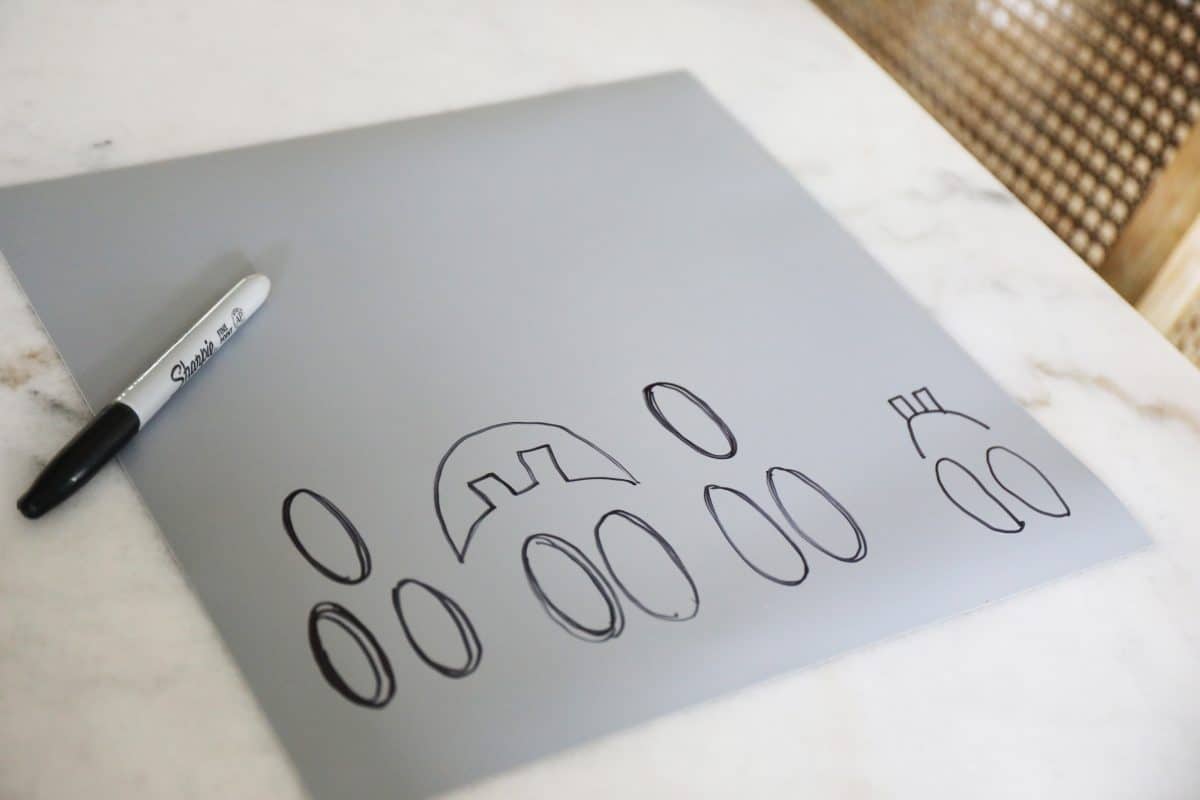
In the meantime, we drew on the back of a black vinyl sheet that I had. My youngest had the idea of giving one of the ghosts buckteeth. So once we discussed why negative space was necessary, buck teeth we did.
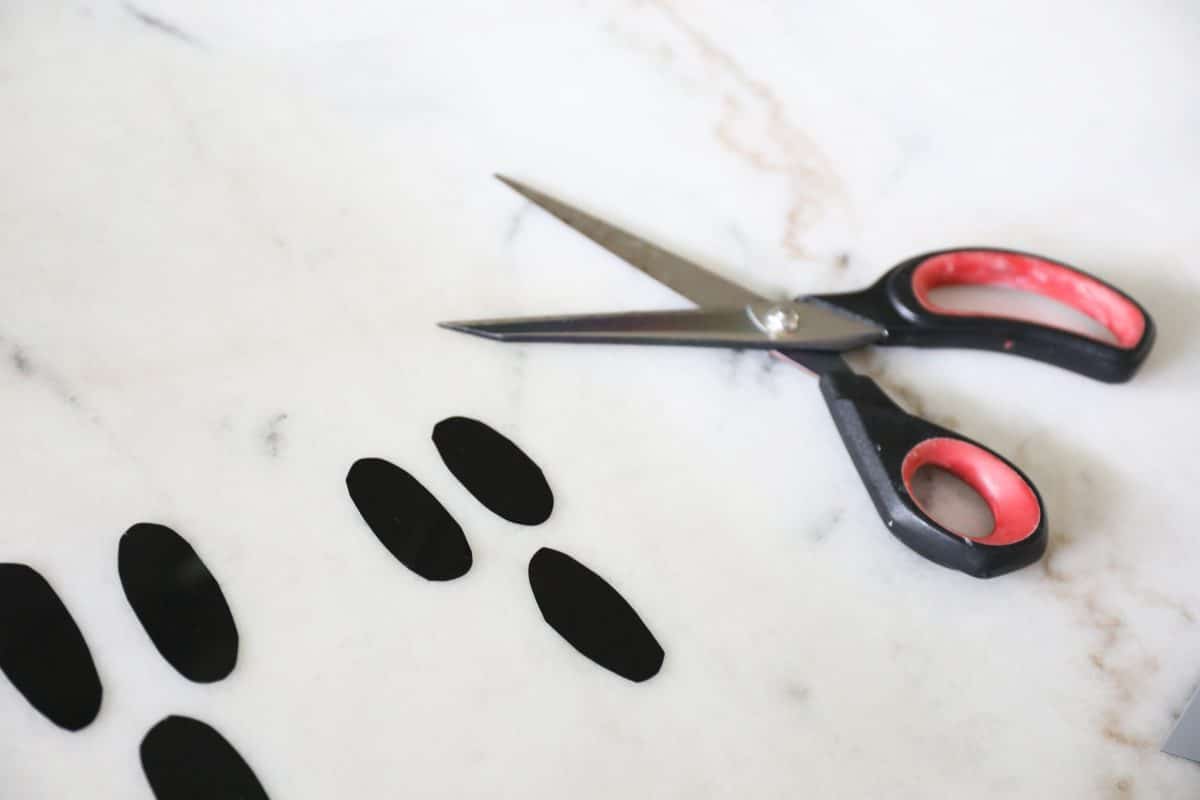
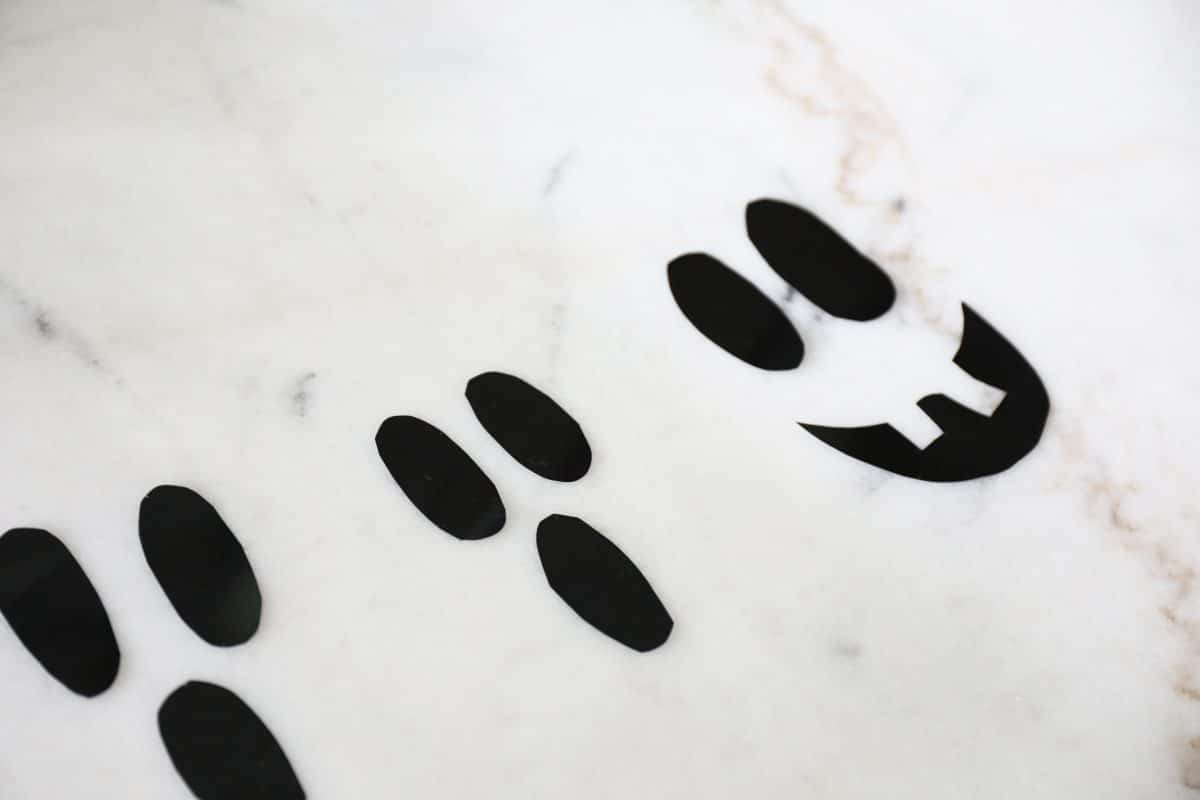
We cut out the pieces, and got ready to glue them on.
I decided to use a hot glue gun, because it will probably help keep the guaze + sheets together without flying away. Fingers crossed, but I figured a little extra help with sticking couldn’t hurt.
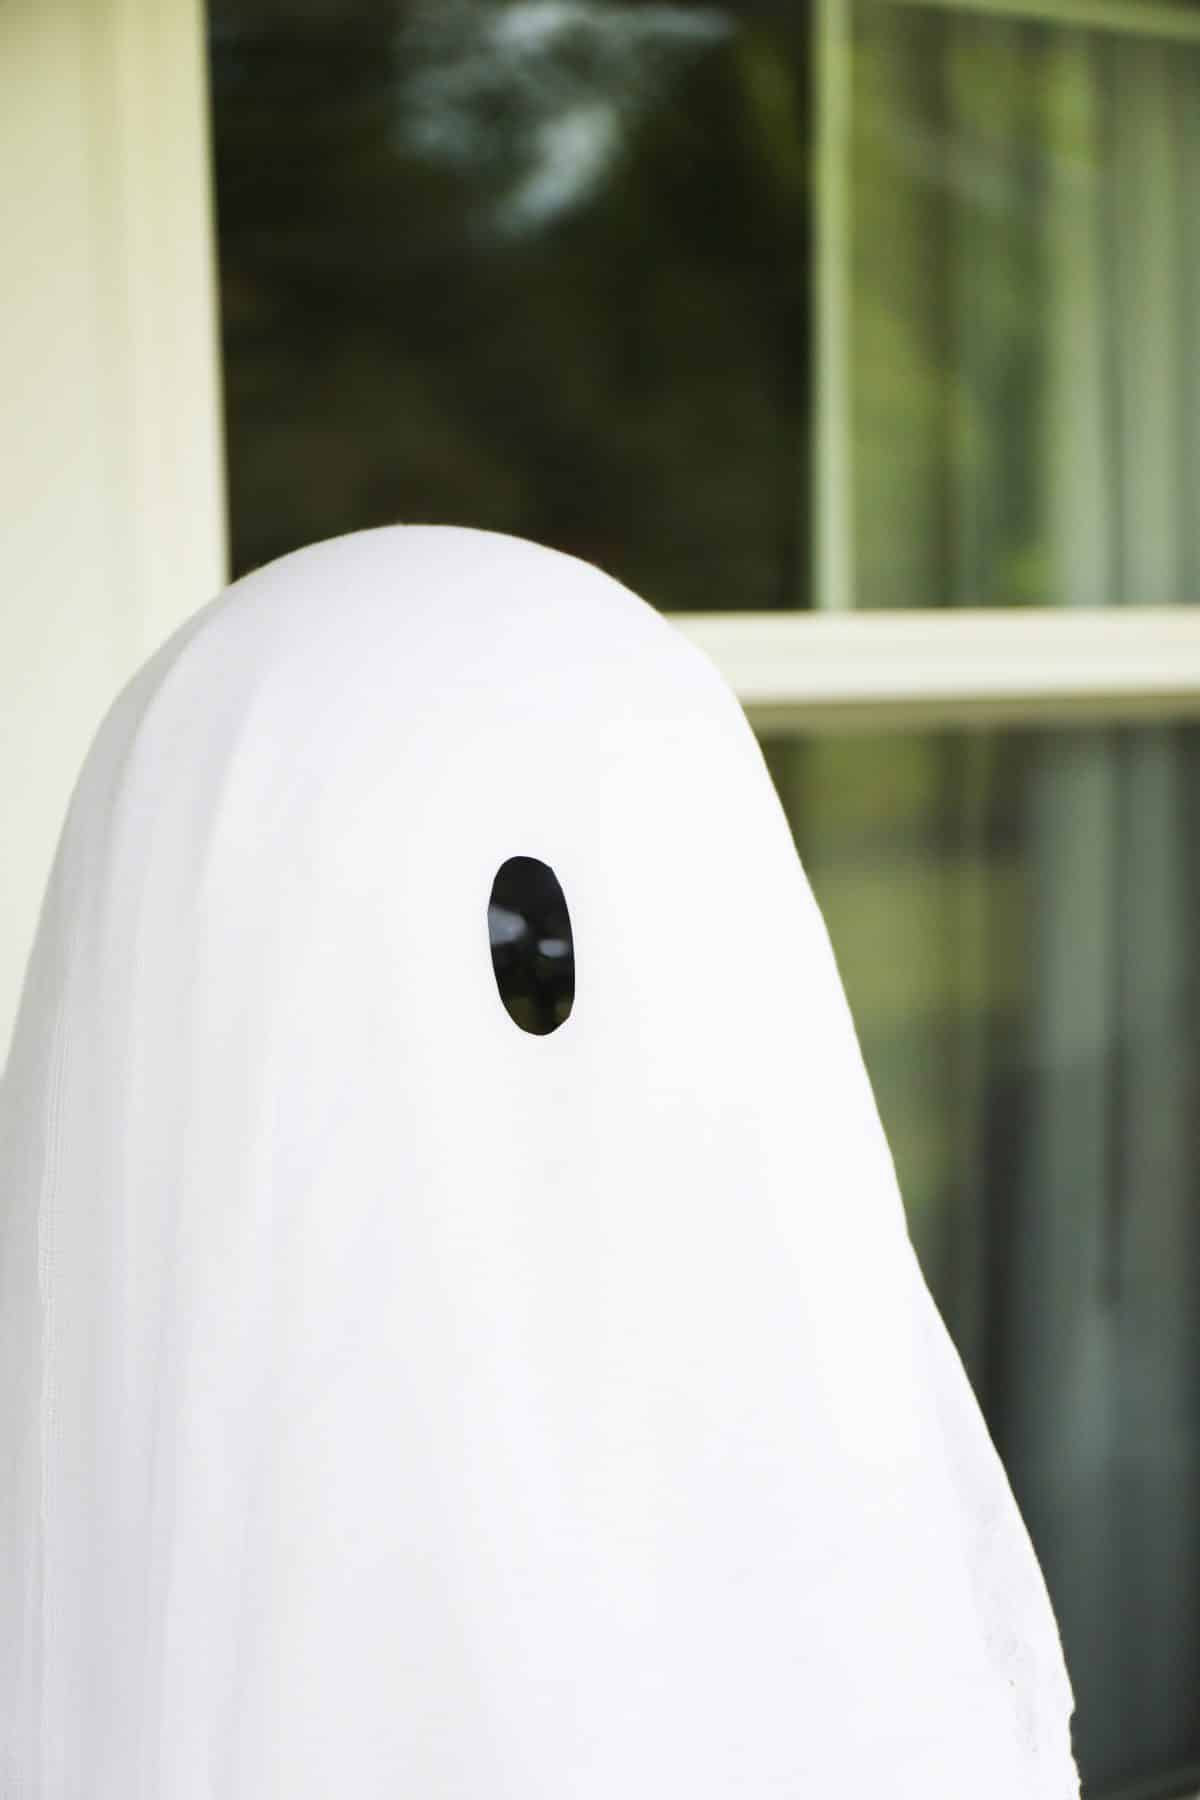
So we added the faces, and once the eyes were on the others, my kiddo said skip the mouths. So we did. SPOOOKY.
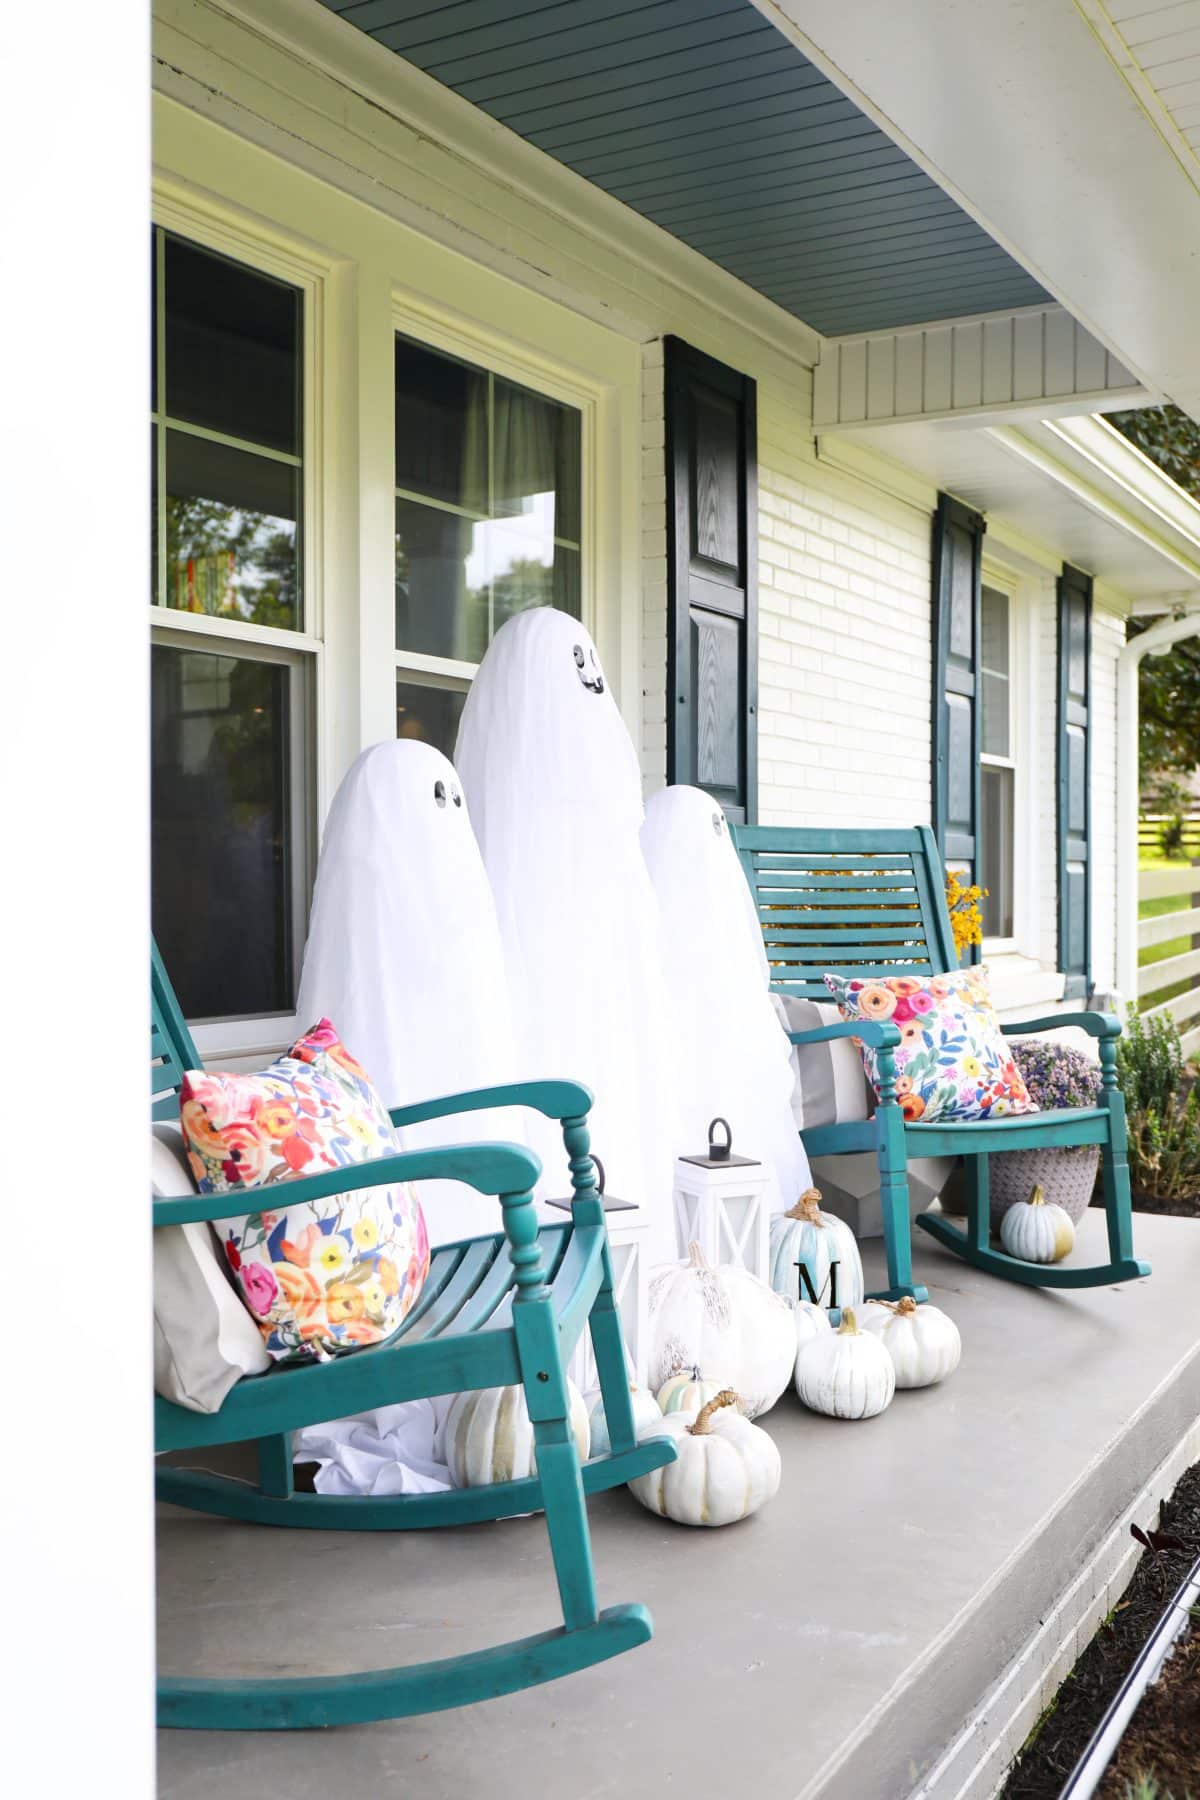
I love that he put his own little twist on them. He said that the middle ghost is named Marley, and the other two are both Bob. Get it? Yes, we are easily humored. So here’s a little glimpse in the day time…
And here they are at night!
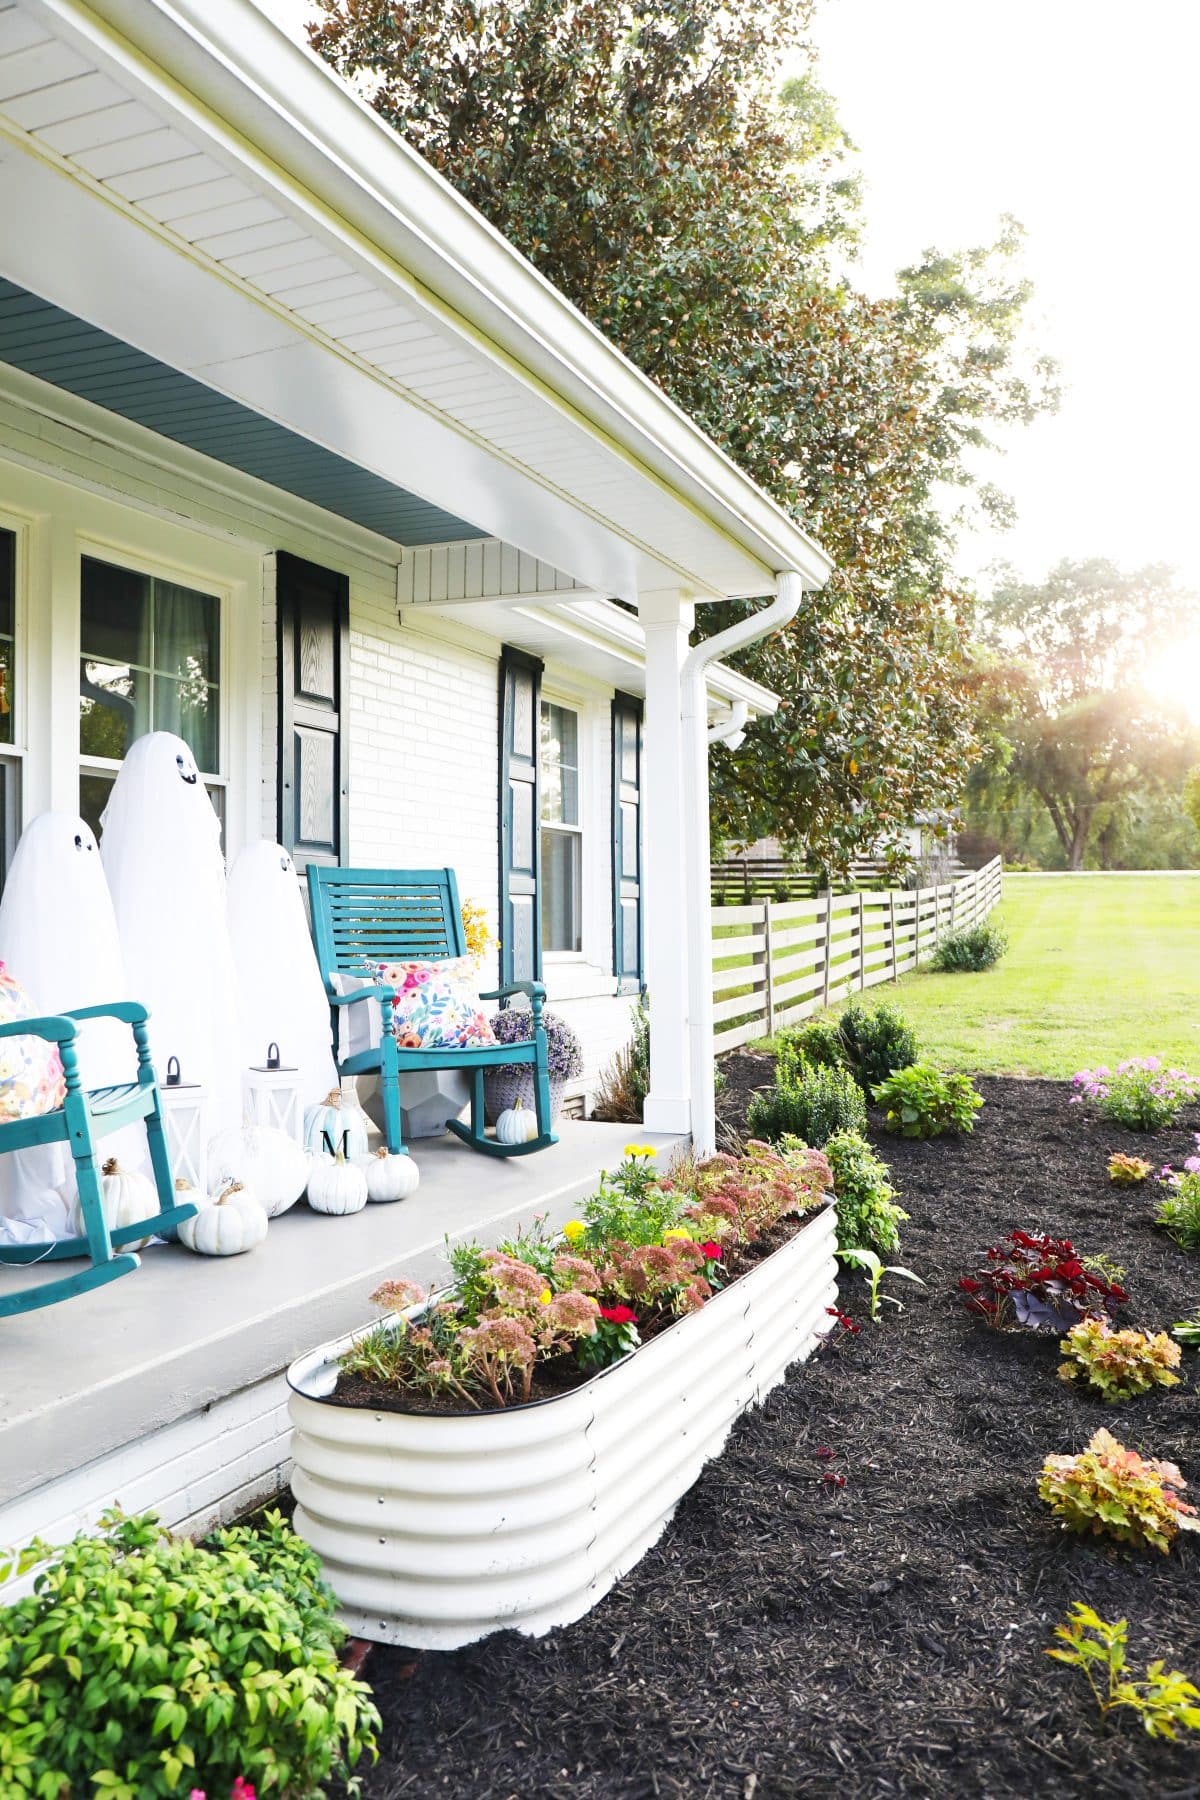
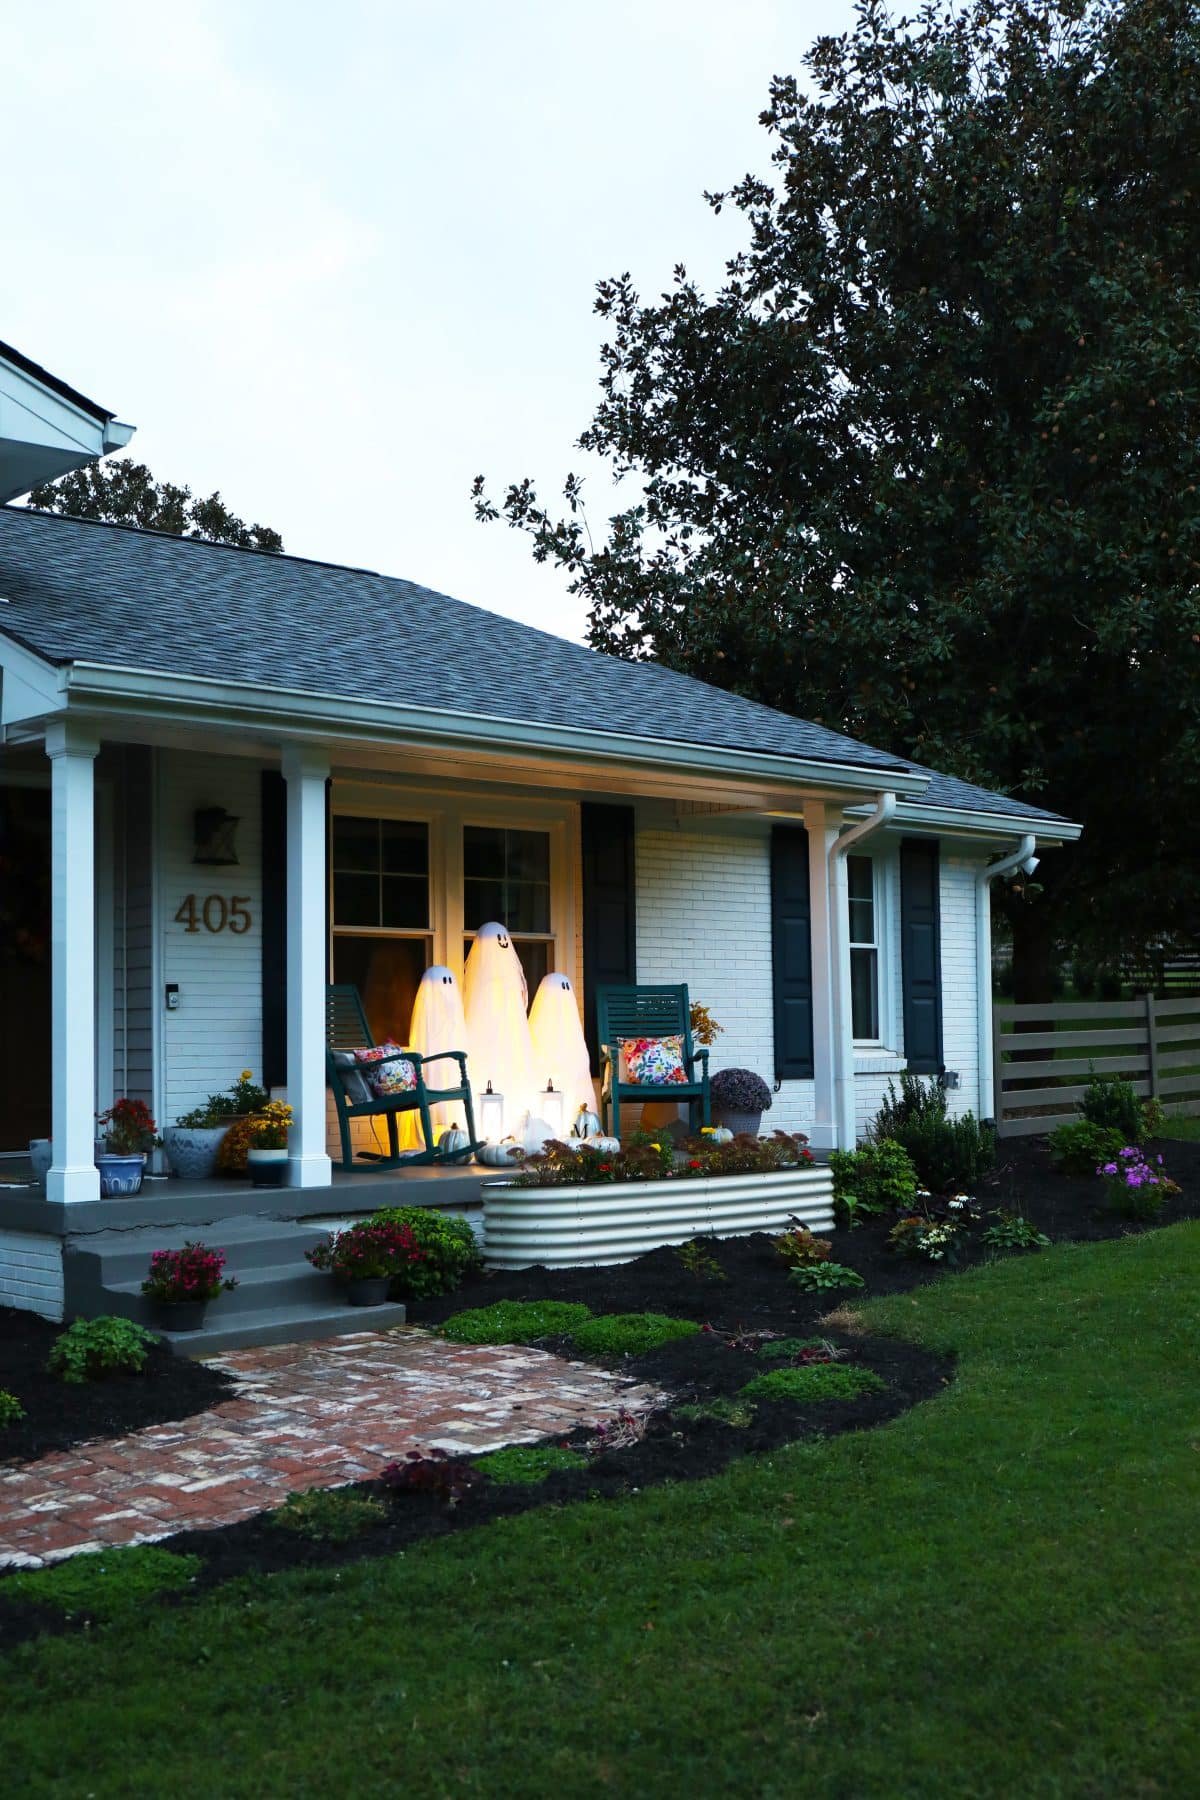
Such a fun little project to add to your porch. As always, let us know if you’ve made these. Have an inspired day!