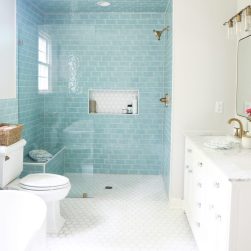
Now that our primary suite is finished, the floors are starting to come together and we’re almost back in our house {more on the floor situation this week}. It’s really the tiny little details that make a huge difference. This project is so small it’s kinda silly, but it’s often an overlooked area. Today I wanted to share easy bathroom storage.

We had this in our old house, and we always encourage clients to do the same with theirs.
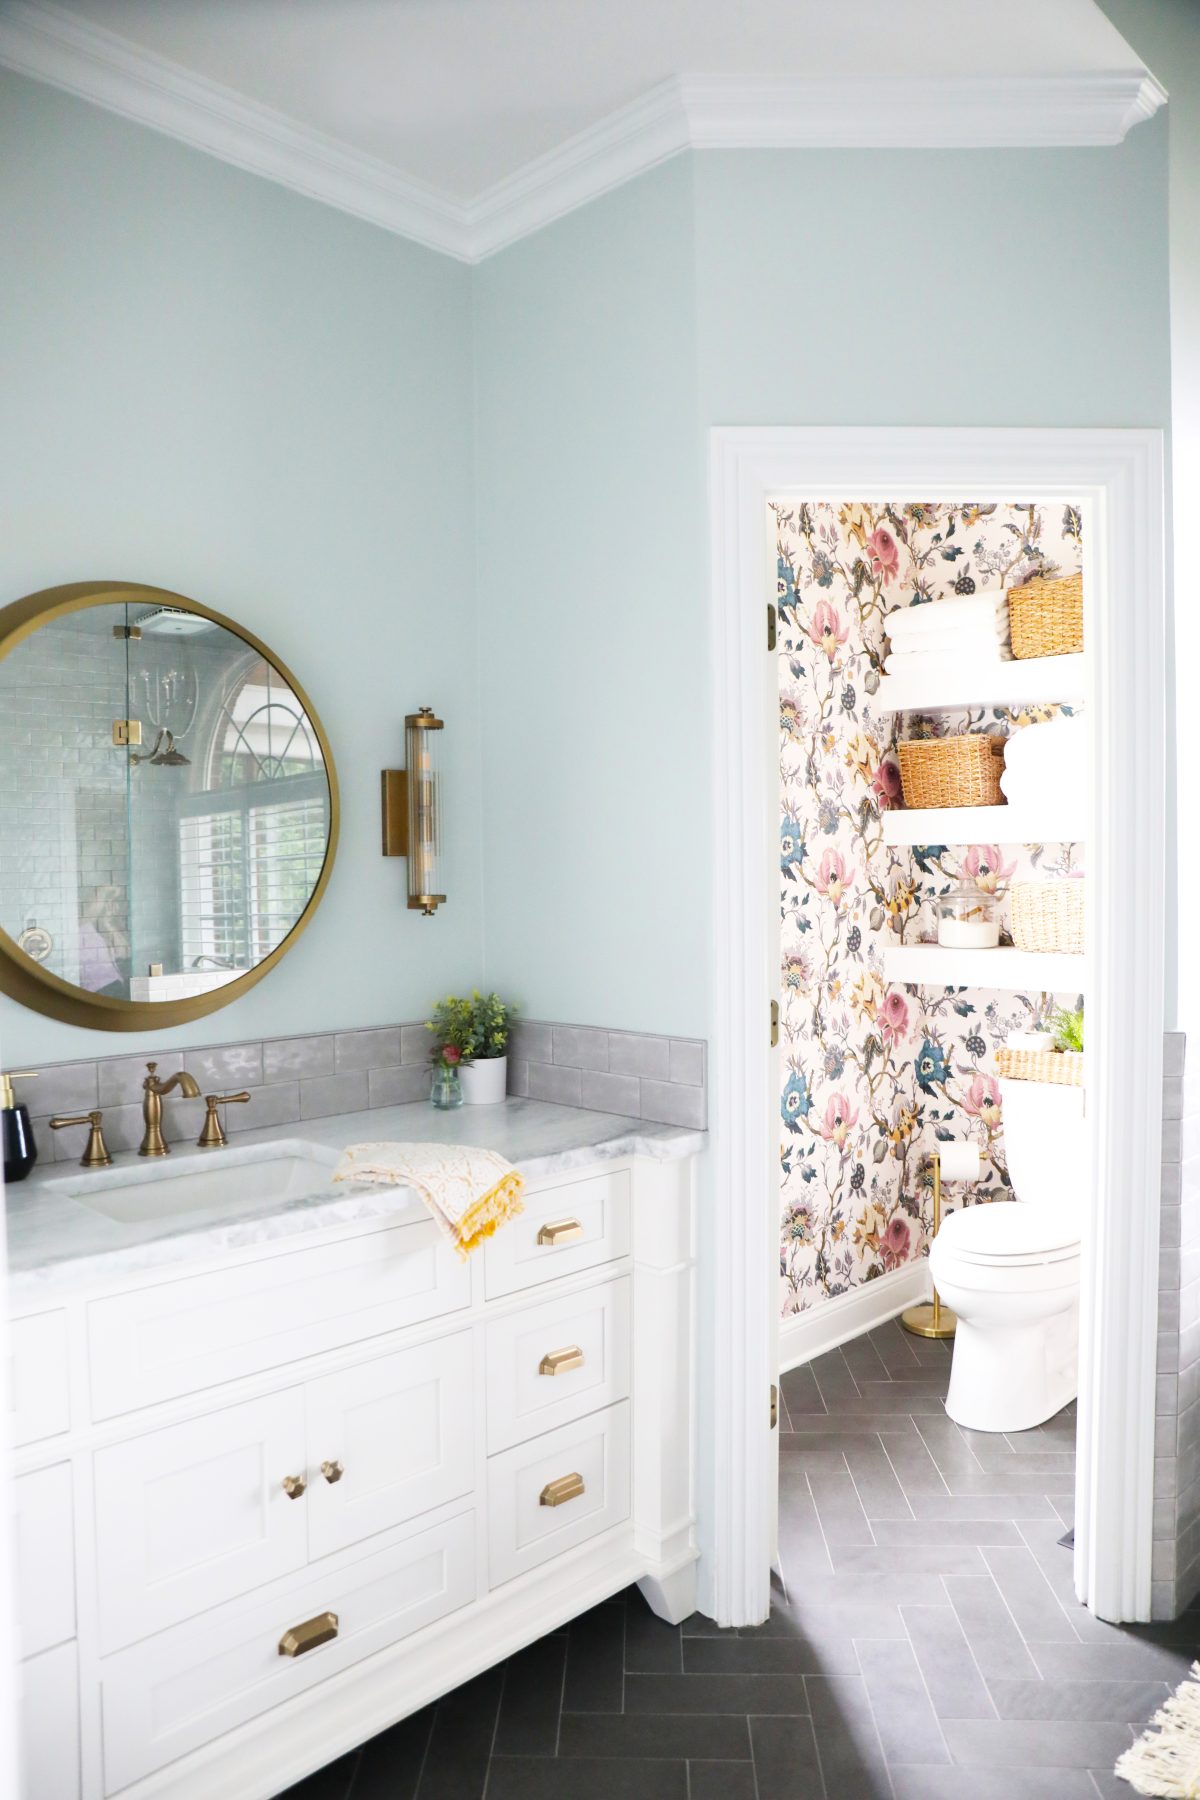
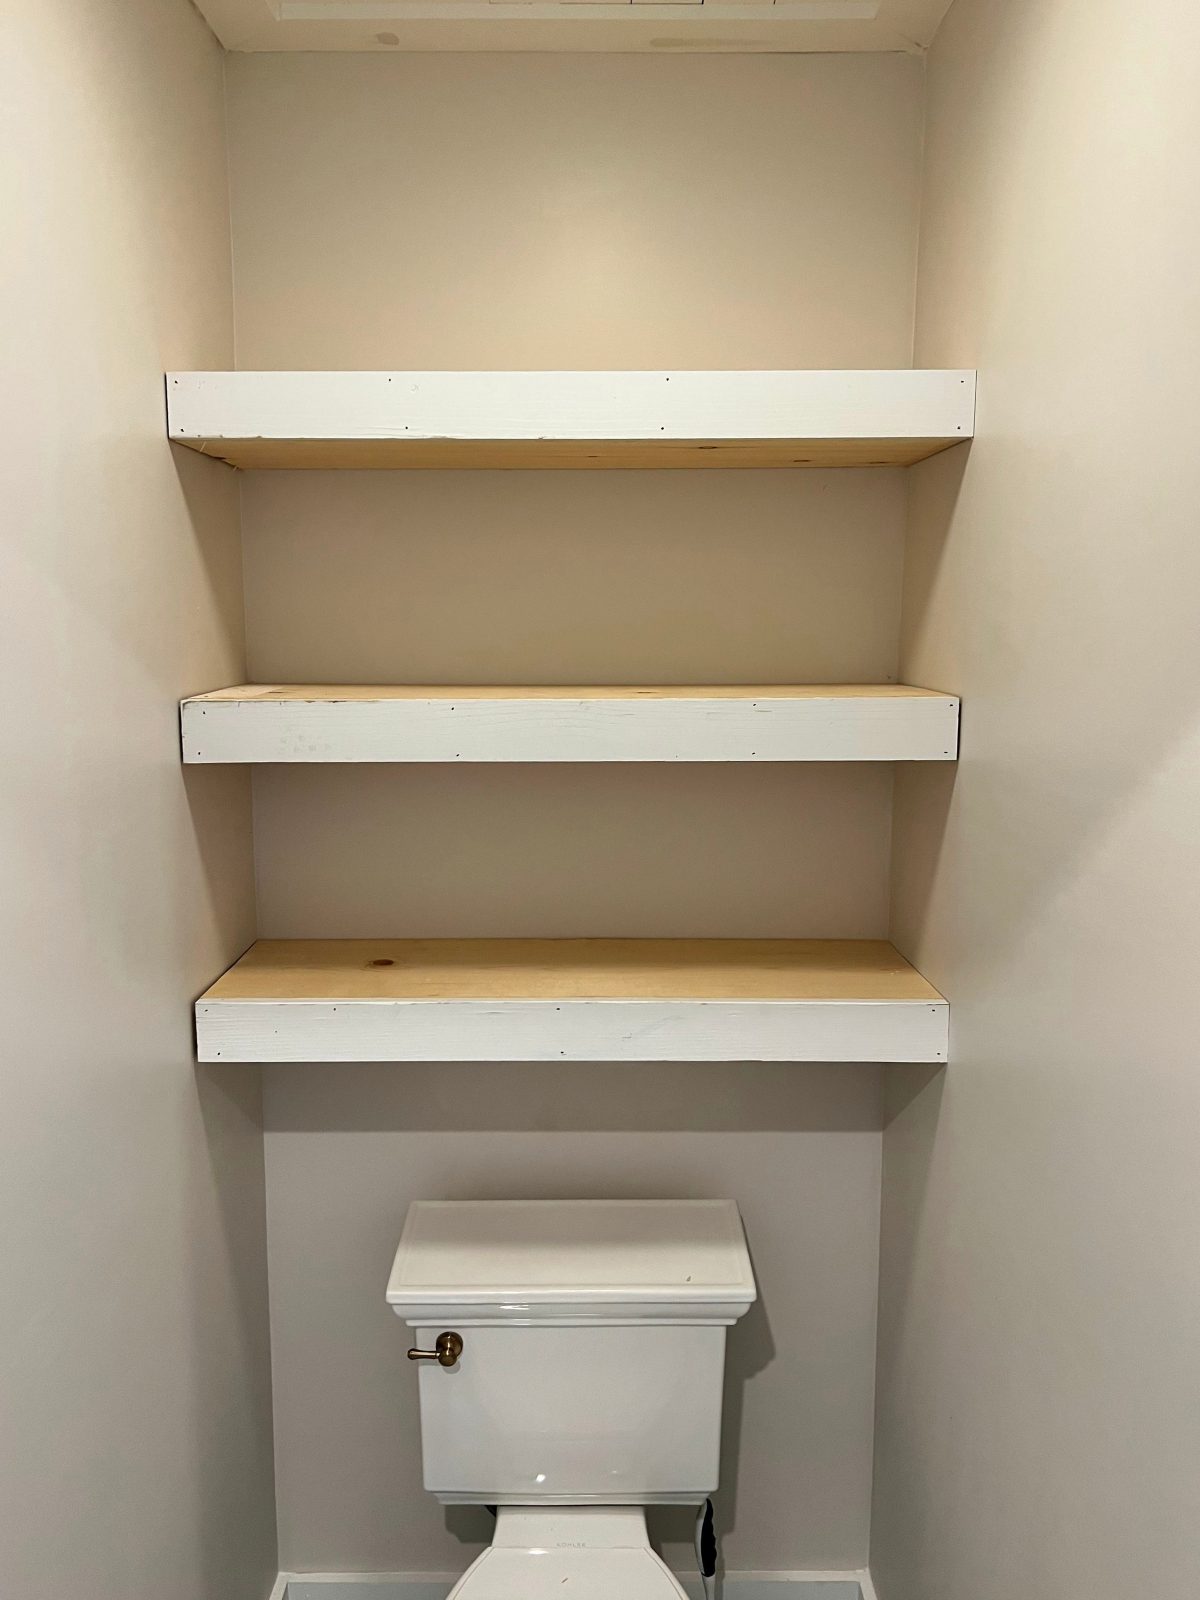
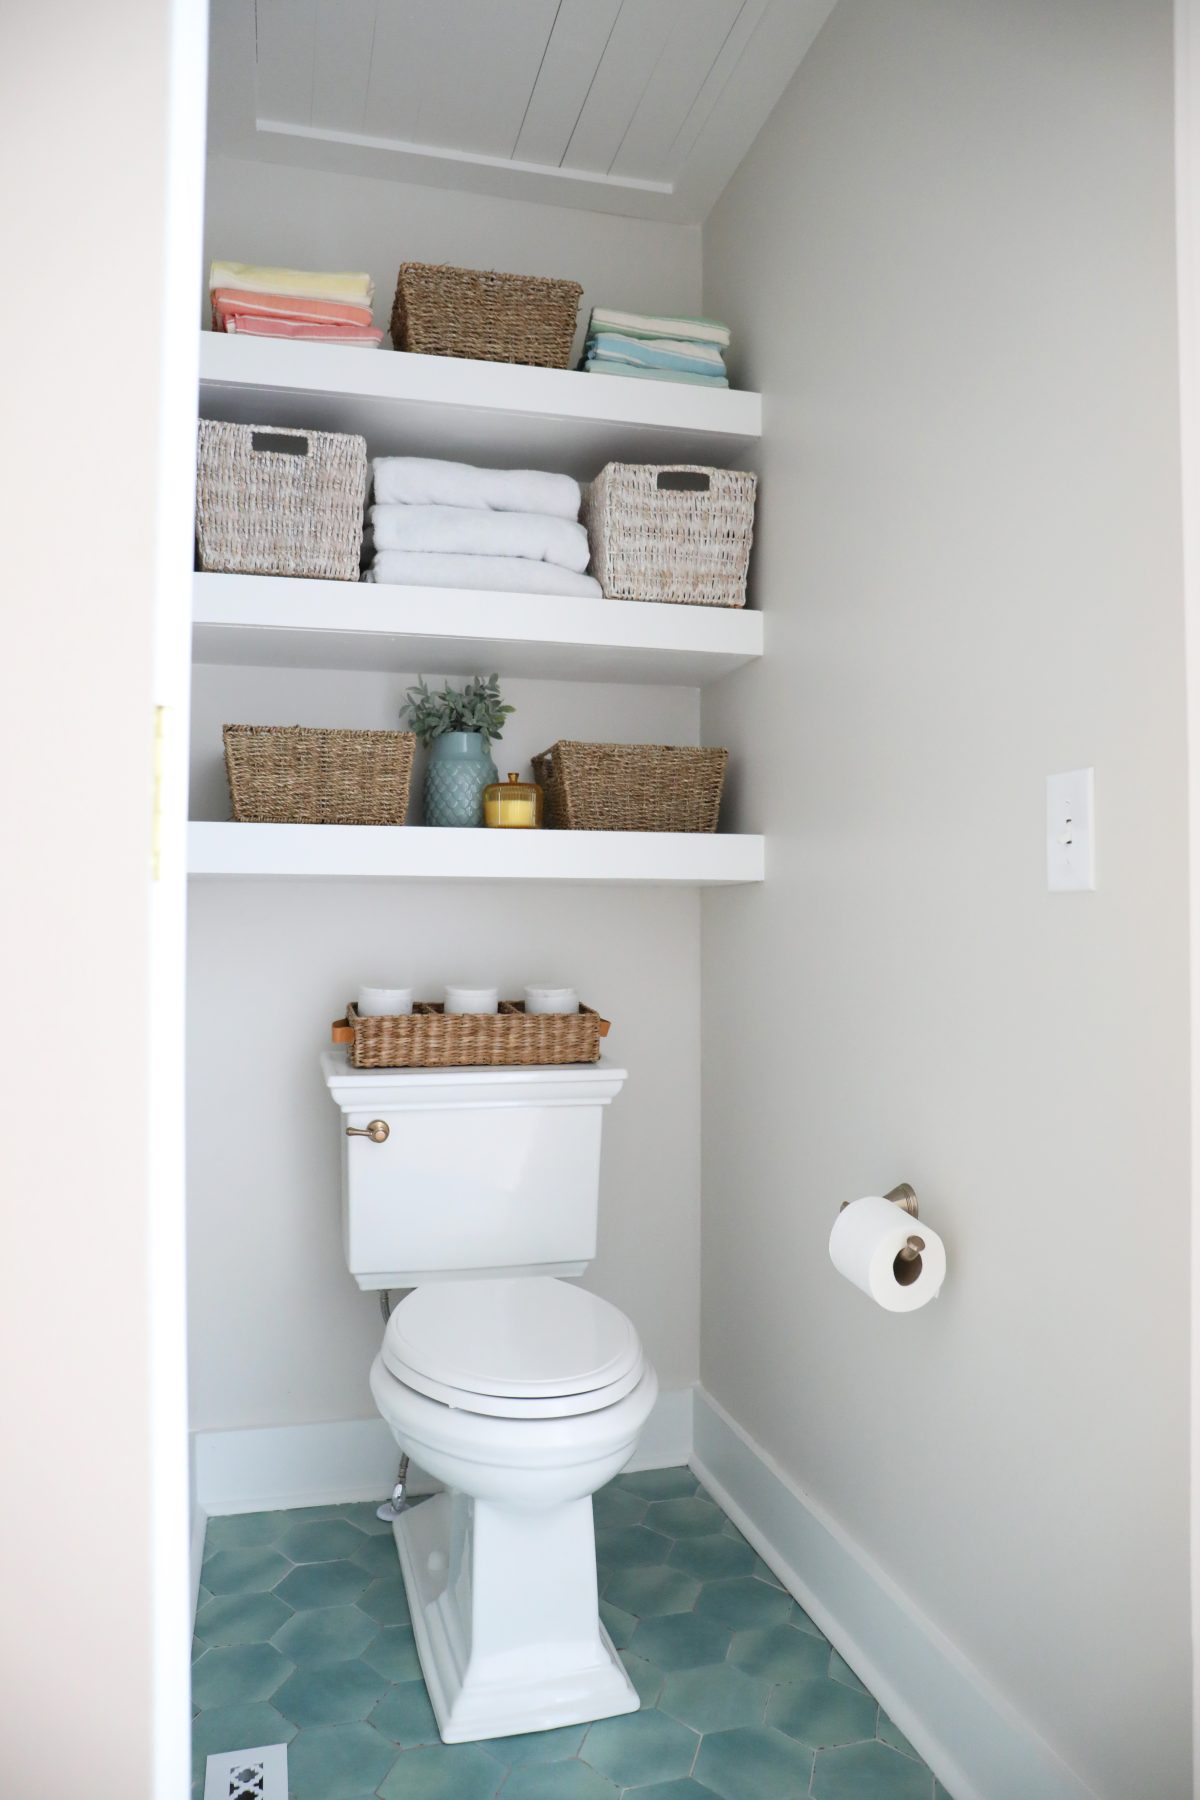
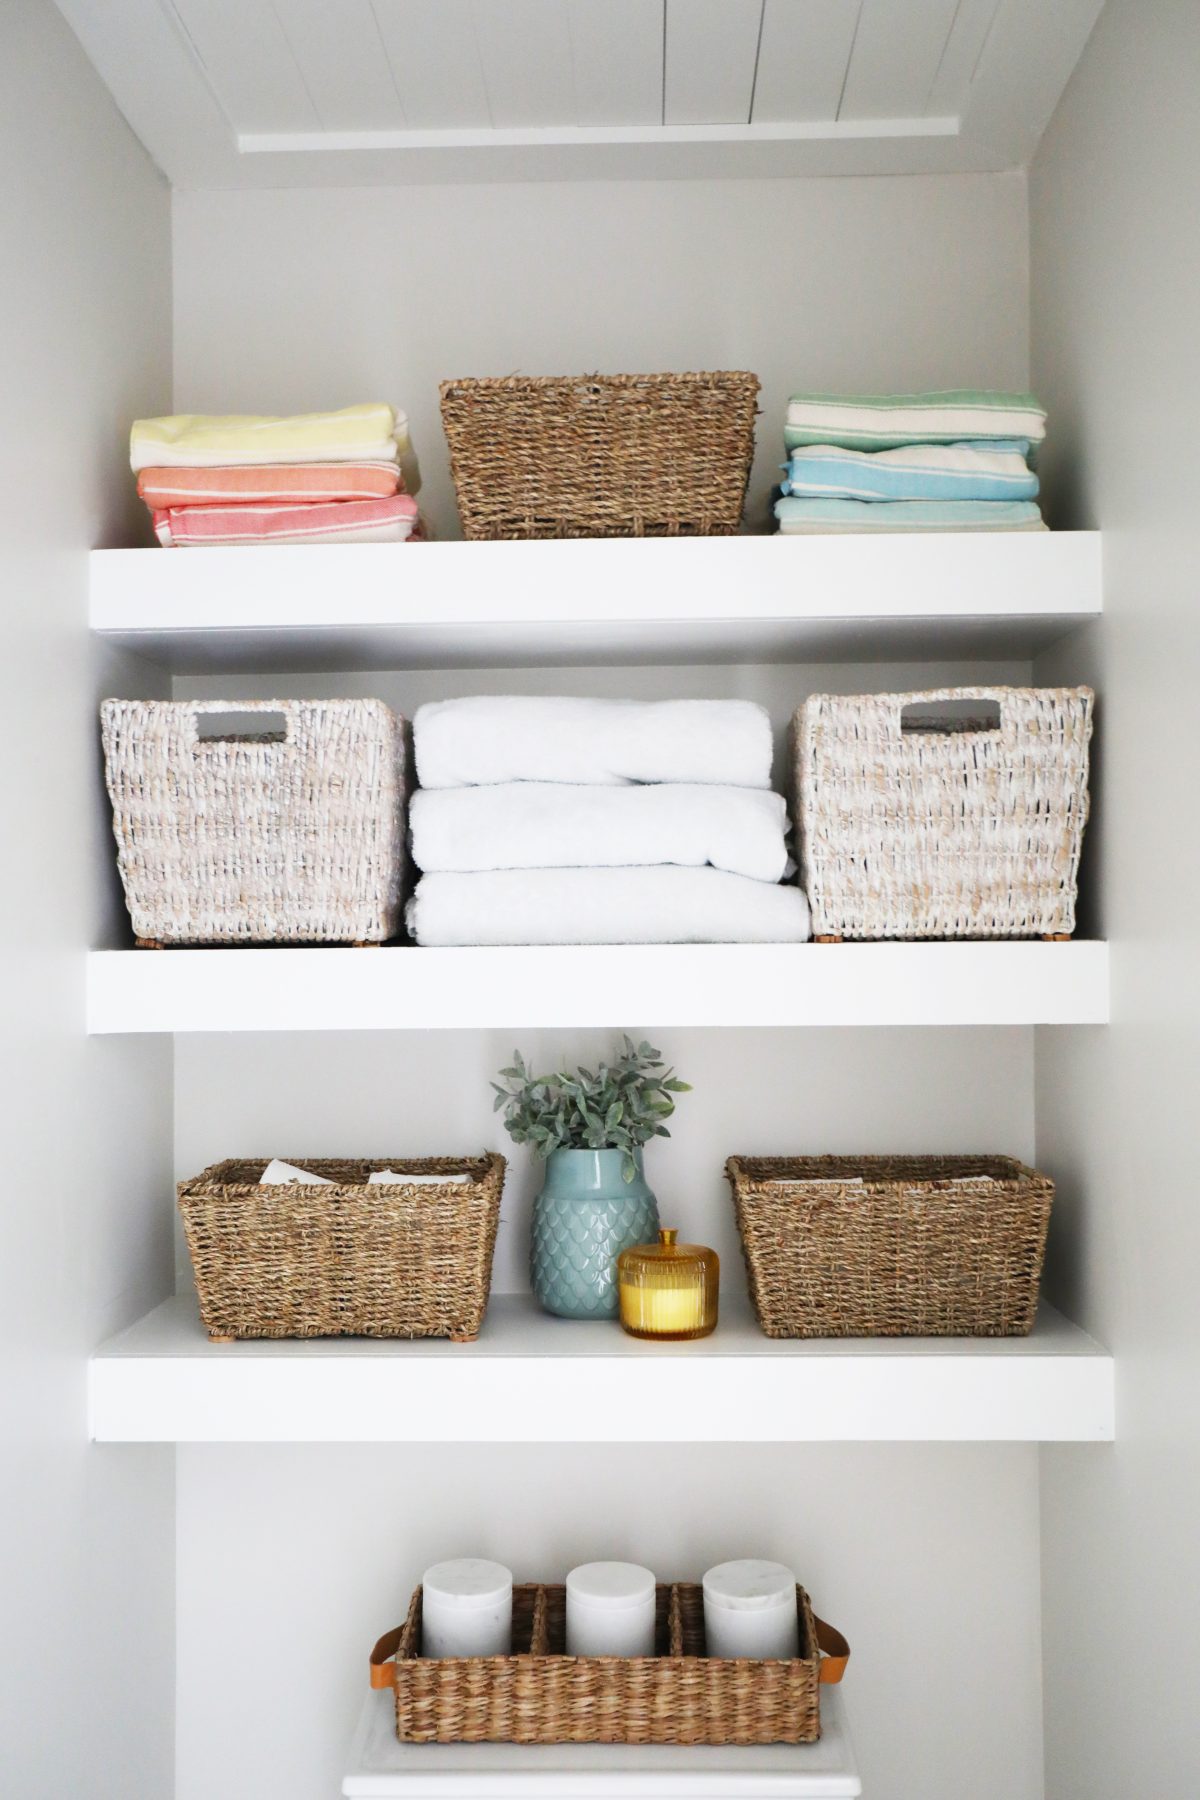
First of all, we’re thrilled to have a water closet area in our bath. {That sounds better than toilet room.} But the storage here just upped the ante!
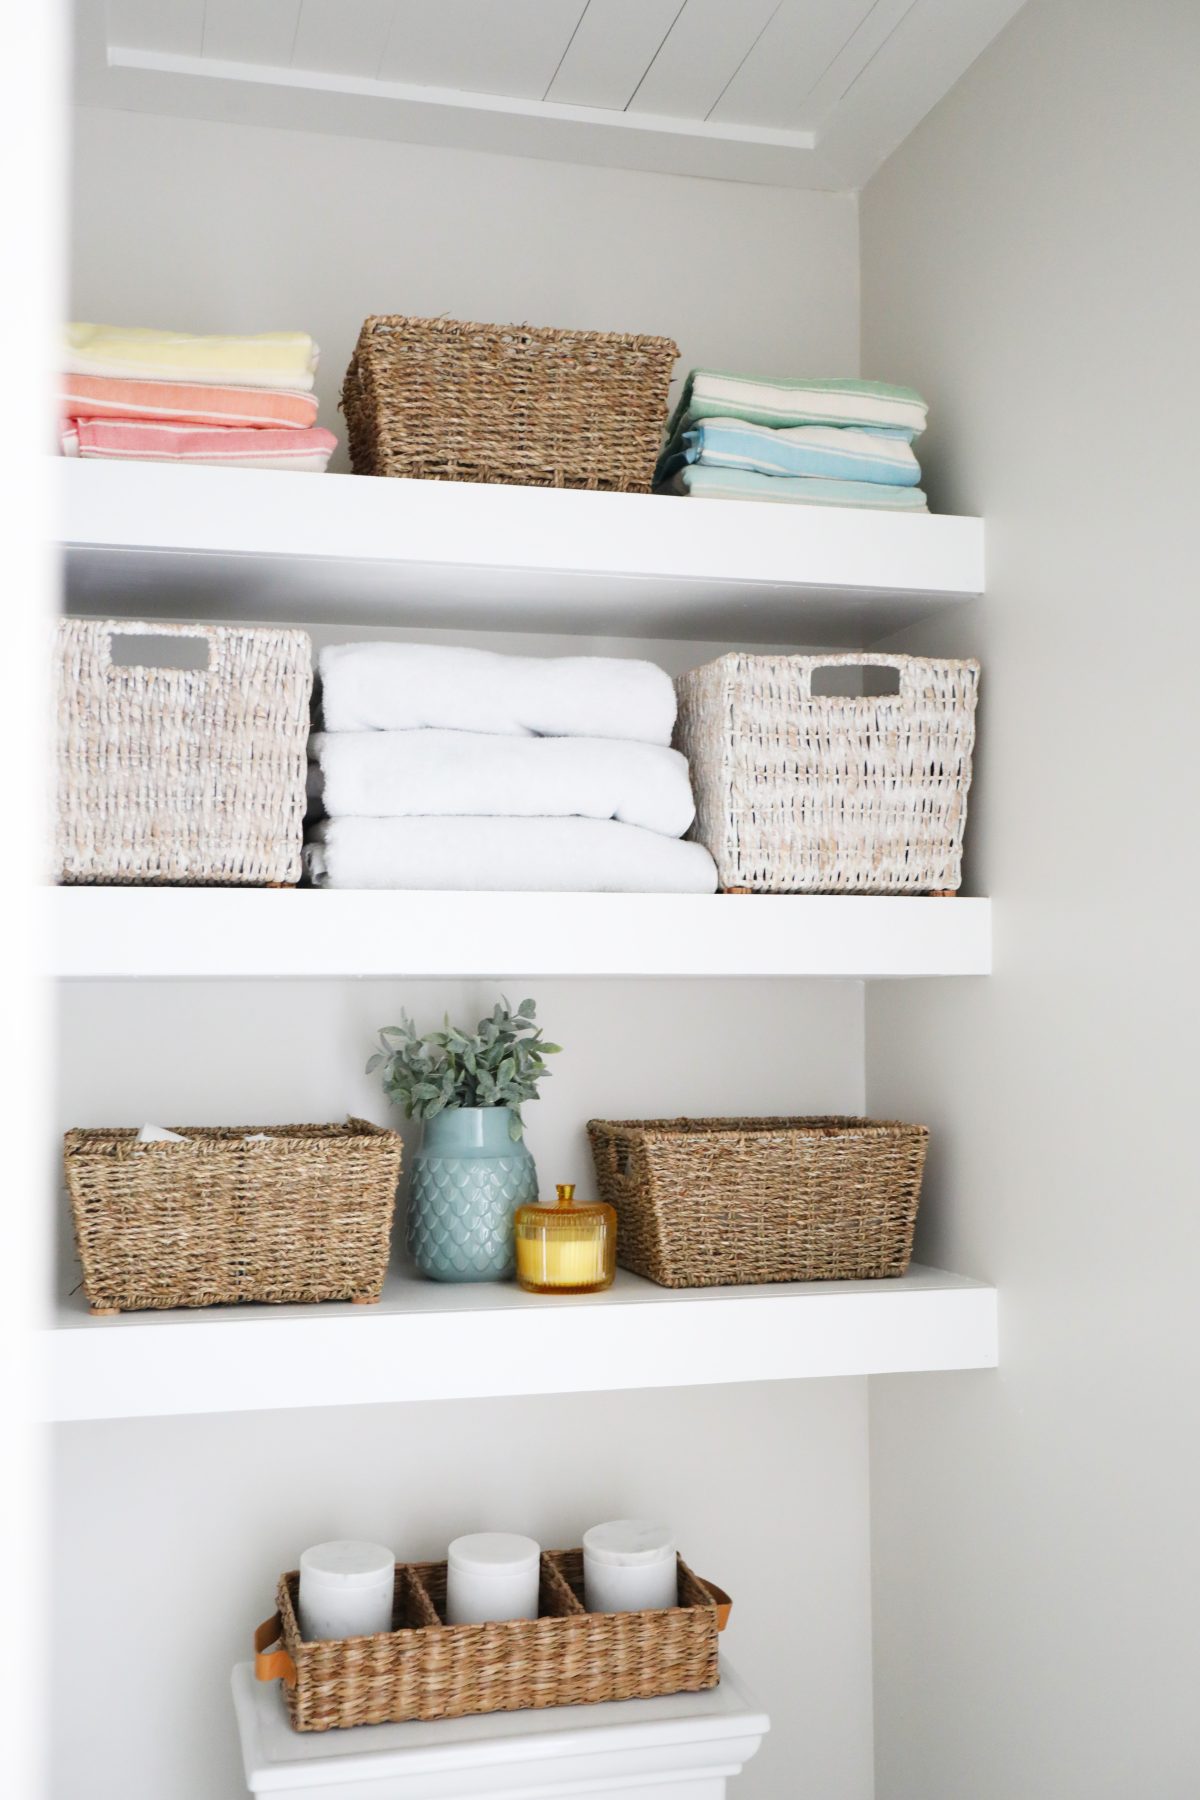
Wood is so expensive right now, we recycled these from the kids old beds. Yes, we were pretty proud of ourselves. The headboards are still in tact, but the little pieces we rigged to hold their mattresses needed to go. The simple things are always worth a share. How to build these simple bathroom shelves! In an area where valuable storage is sometimes forgotten.

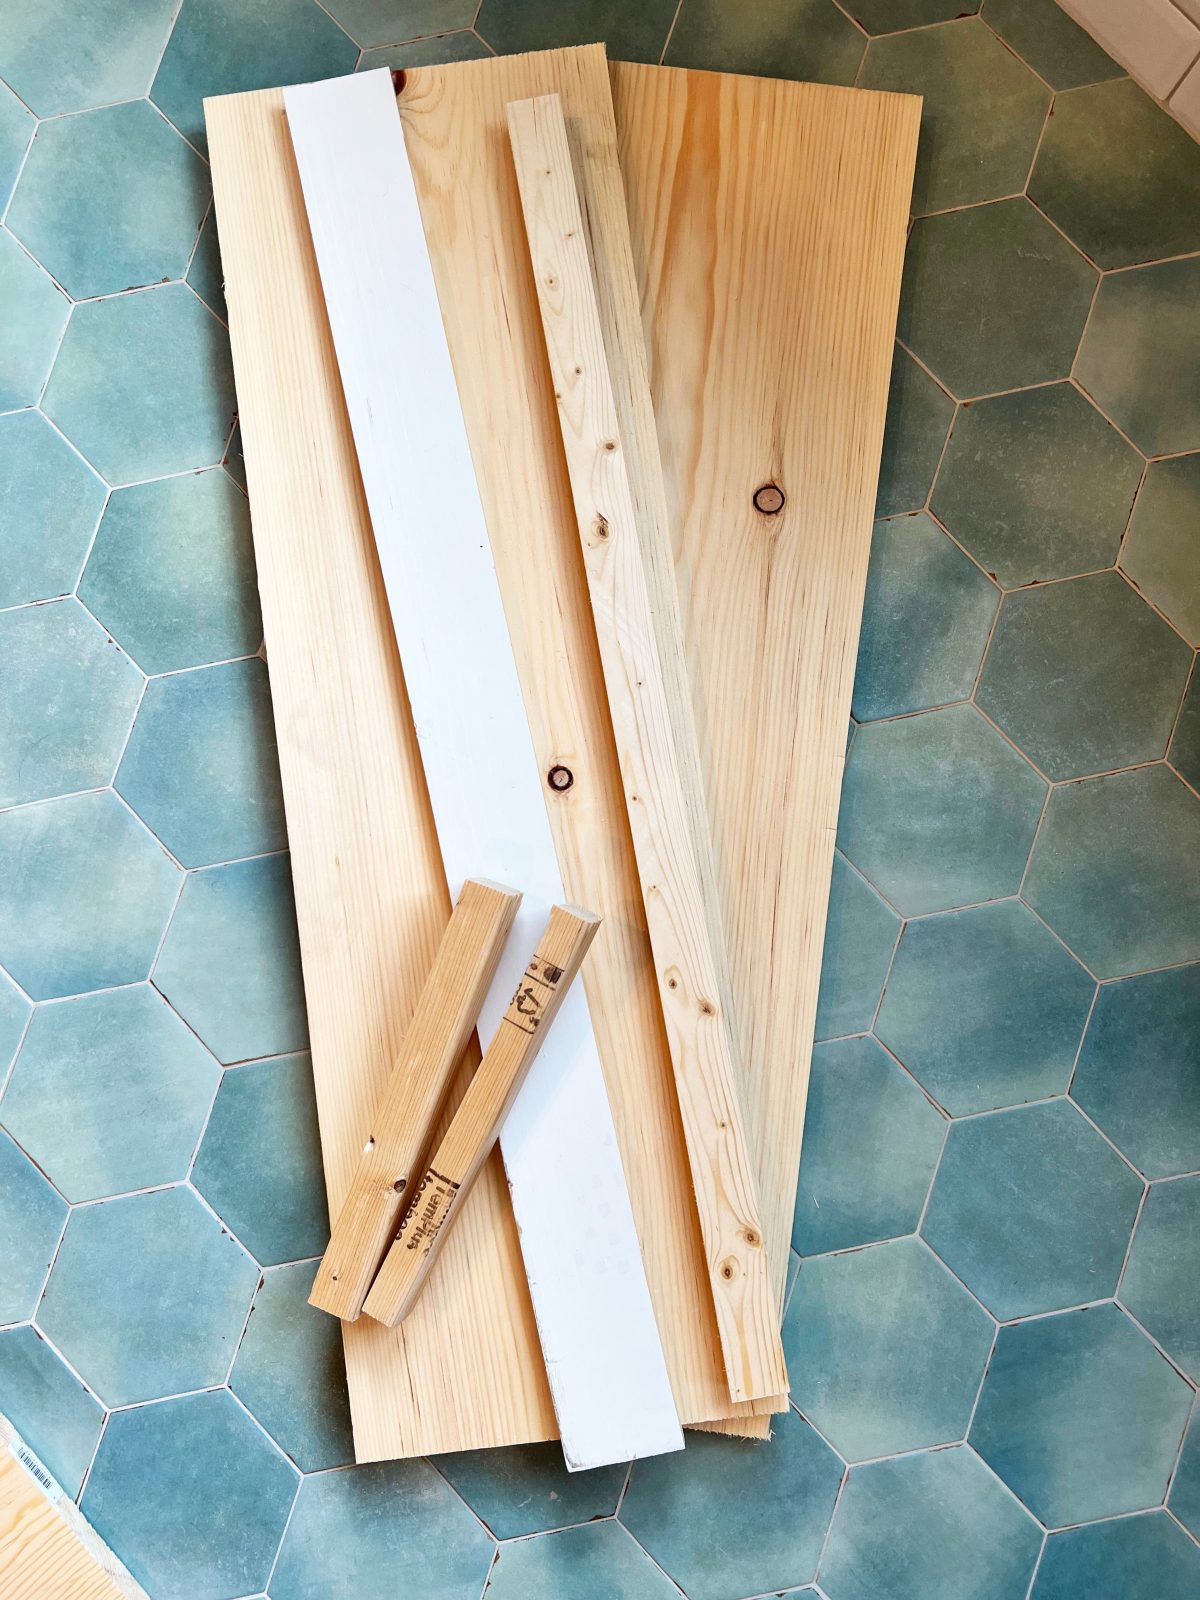
What you’ll need:
This is per shelf, and lengths will vary depending on the width of your shelf.
• 1 x 12 or 1 x 10 depending on the depth you want your shelves to be. We did 1 x12, but check to make sure your head won’t hit the shelves when sitting.
• 1 x 4
• 1 x 2
• Caulk
• Wall screws and anchors
• Level
• Frogtape®
• Nailer
To start, you’ll want to cut your 1 x 12 to the width of your shelf, you’ll need (2) 1 x 12 pieces.
Then rip your 1 x 4 down to 3″.
Next, cut a piece of your 1 x 2 to 1-1 /2″ less than the width of your shelf and (2) pieces the depth of your shelf.
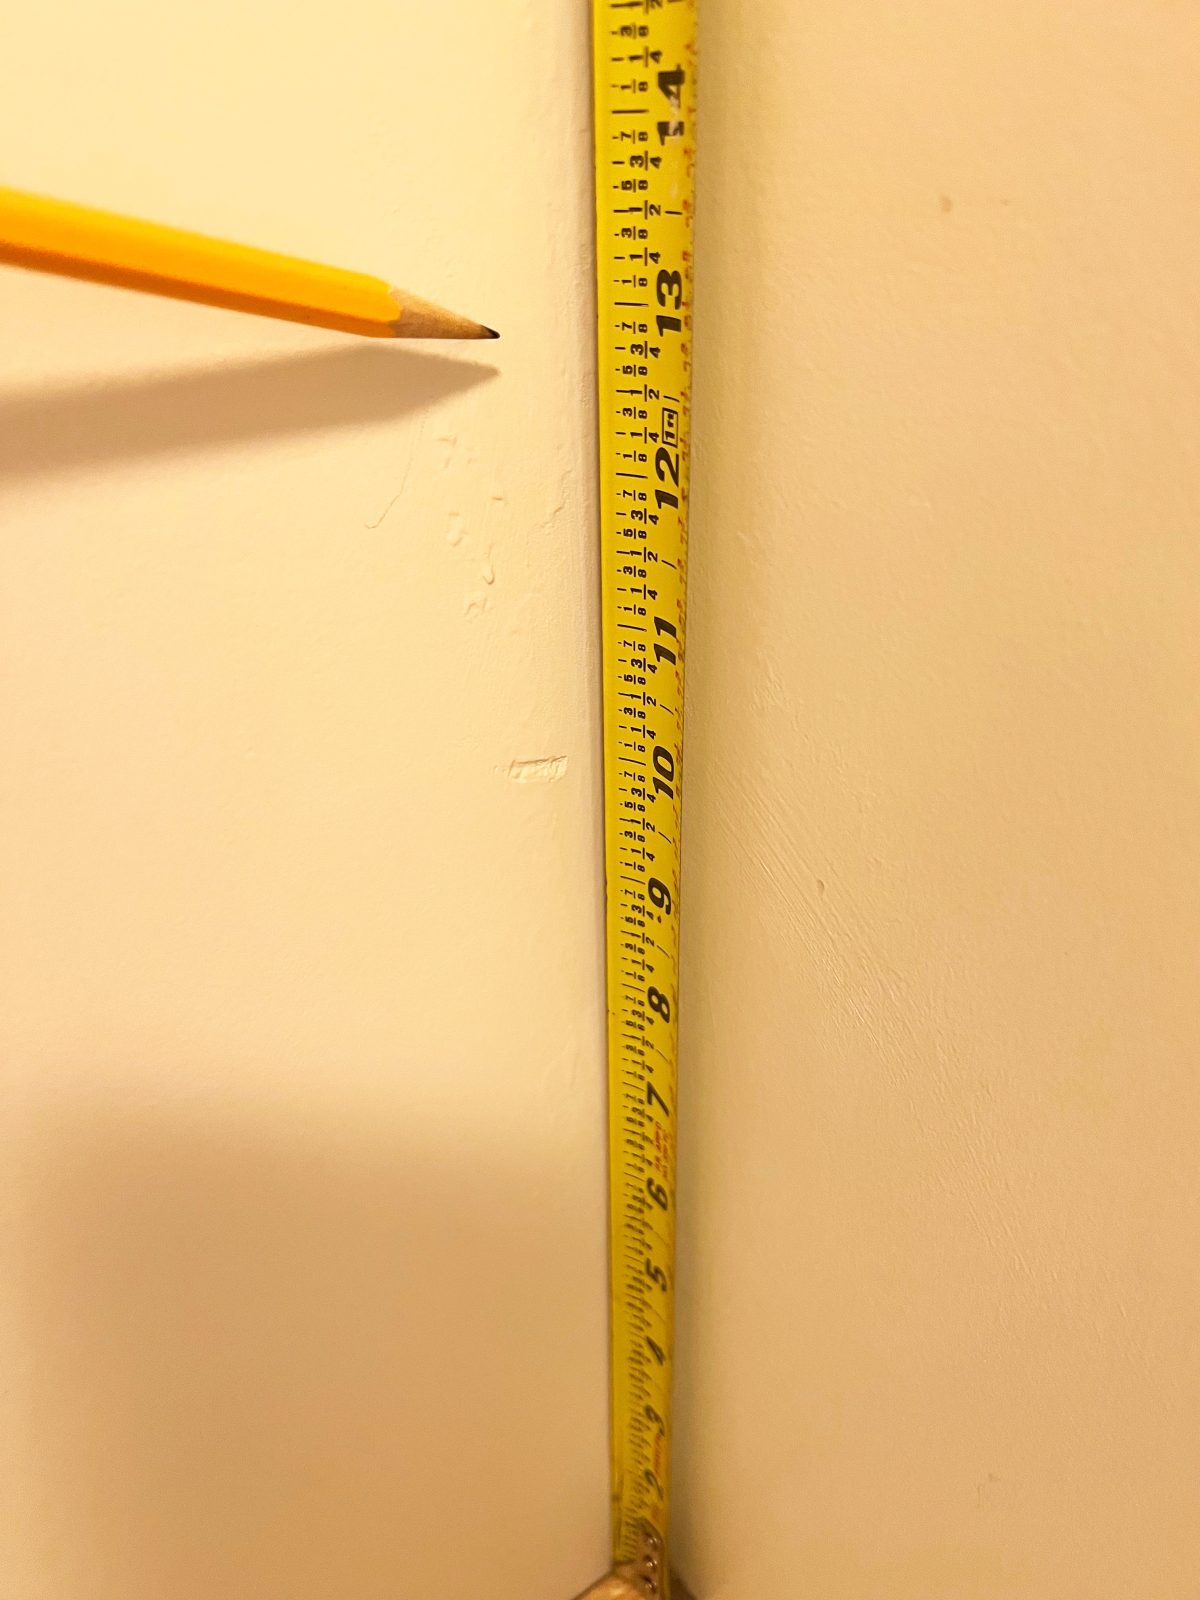
We placed 12 inches between each shelf, for plenty of space for stacking towels + baskets. So we started by marking 12 3/4 inches up from the toilet lid. The extra 3/4″ will be made up from the bottom 1 x 12.
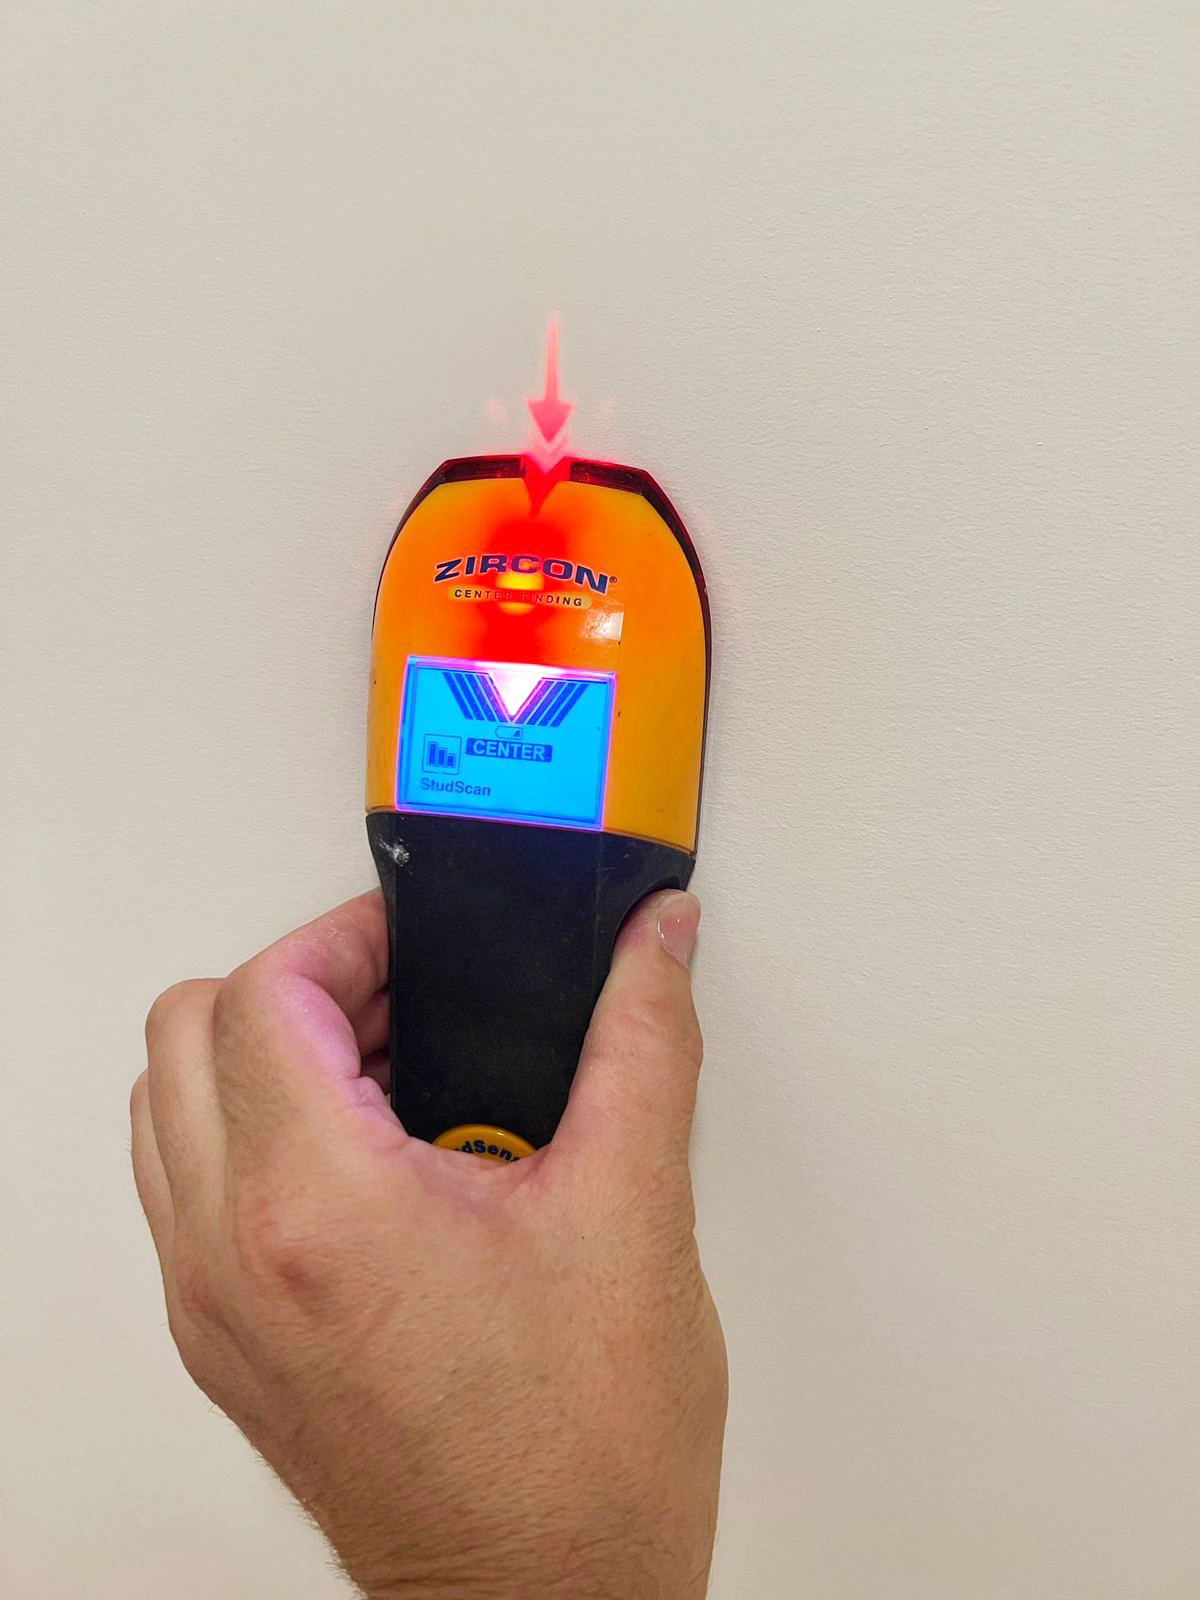 We also located any studs in the wall. If there were studs, we screwed straight to them. If there were not, we used wall anchors, but we subsituted a screw that was 3/4 inch longer to make up for the width of the 1 x 2 we would screw through.
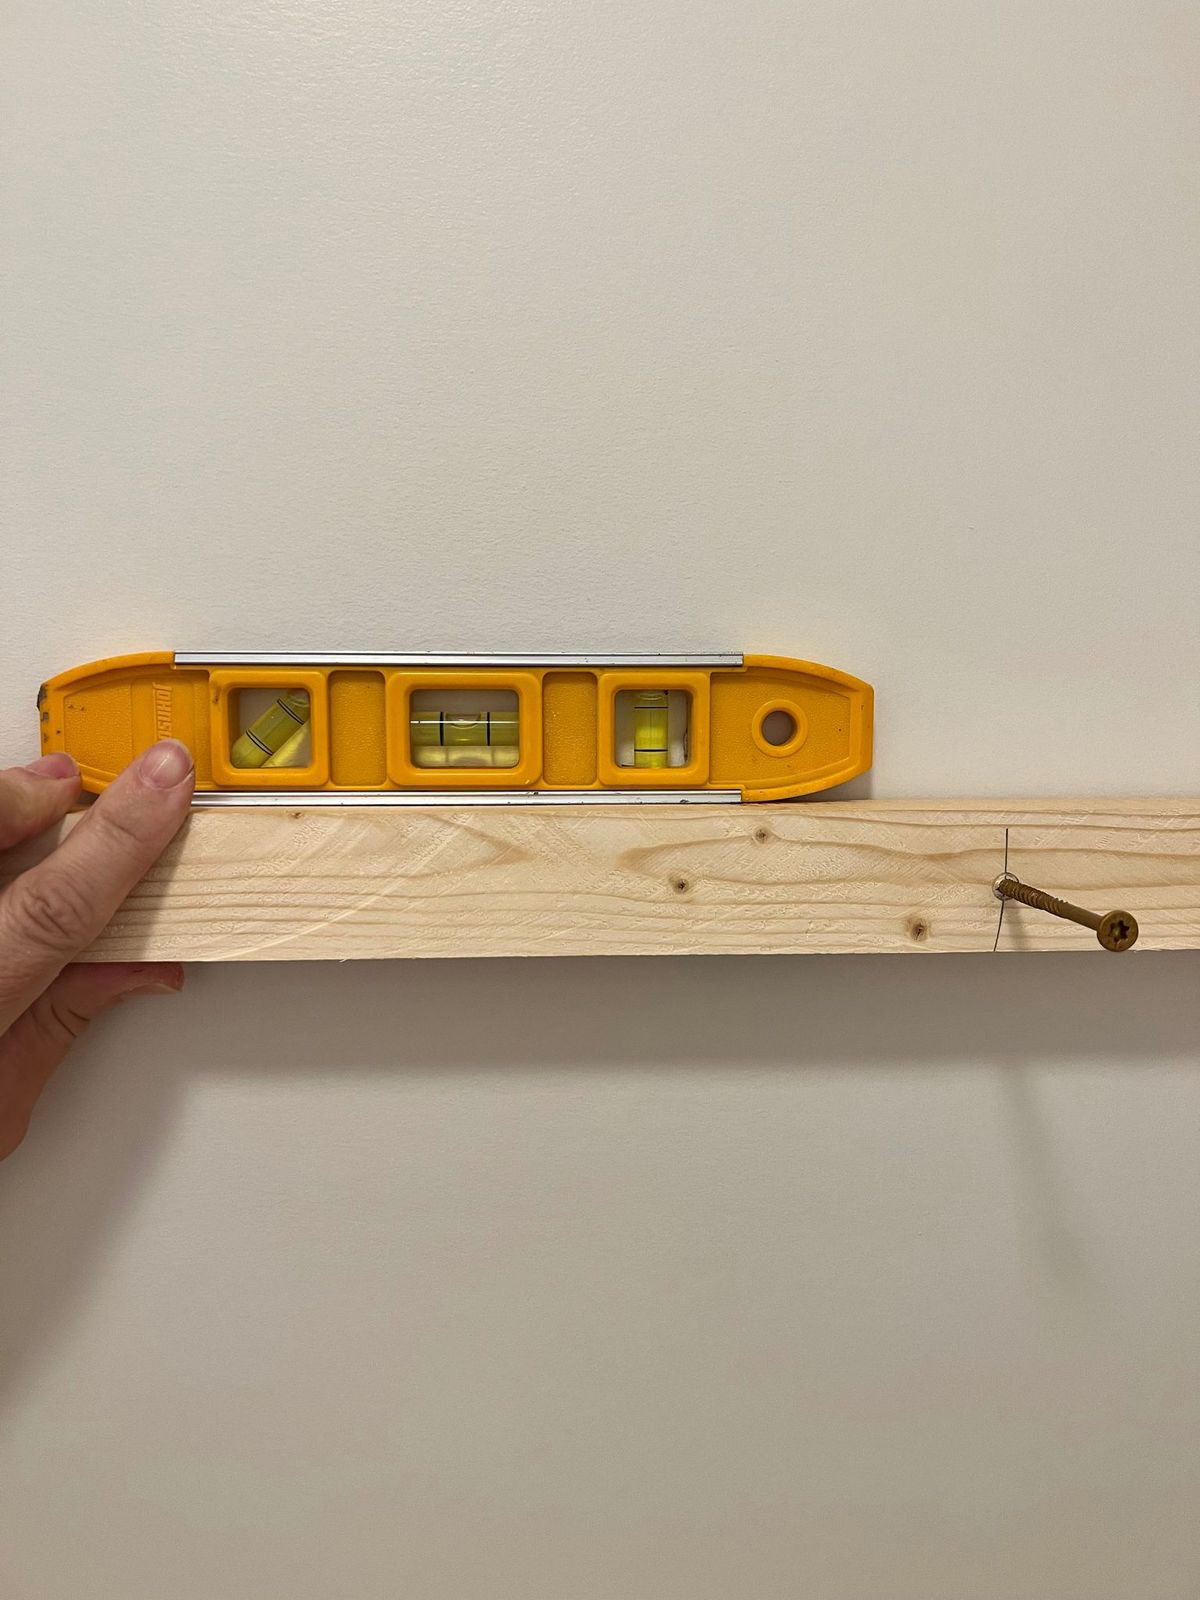
We leveled the wood and screwed in the (3) 1 x 2’s to the wall as our support. We lined the bottom up with the mark that was made at 12 3/4″ up from the toilet lid.
Once that was done, we used a finish nailer and nailed the top 1 x 12 to the support, then the bottom 1 x 12 on. This was followed by the front 1 x 4 ripped down to 3″.
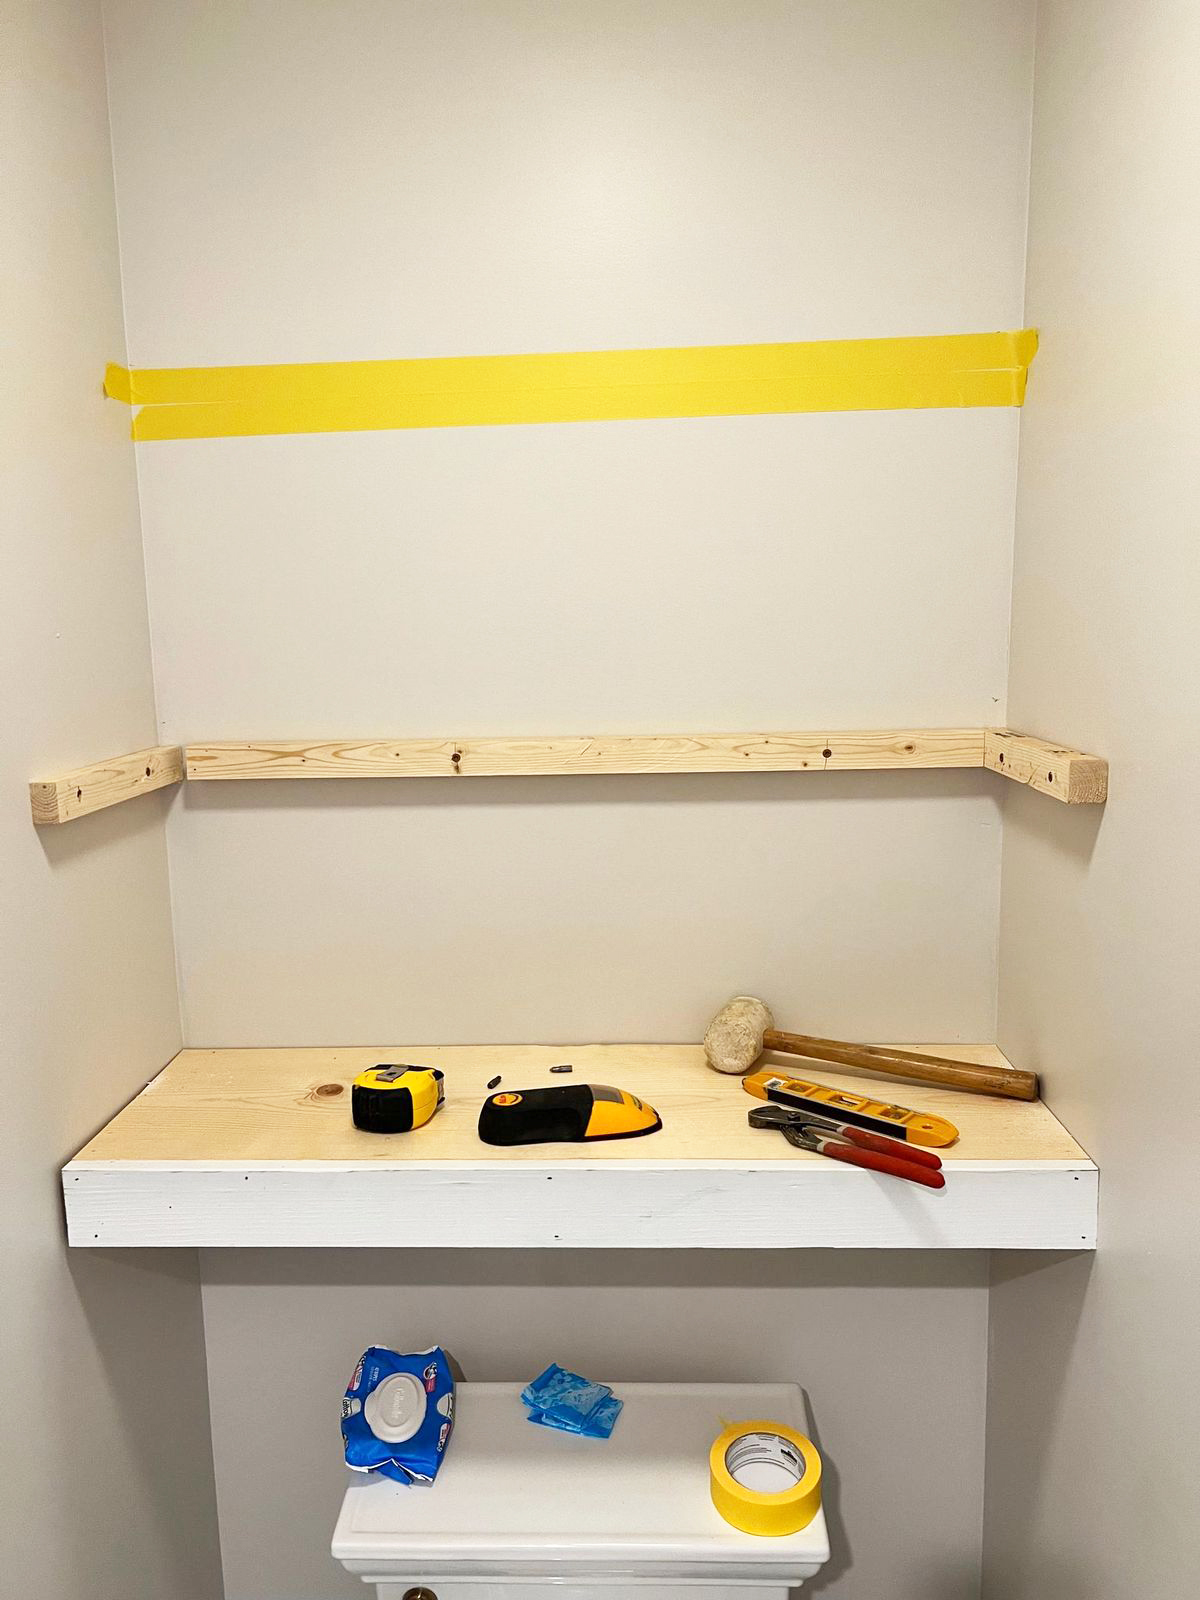
We simply repeated the steps from above, using Frogtape® to help us visualize the shelves+ spacing.
Then, we caulked the shelves and prepped for painting!
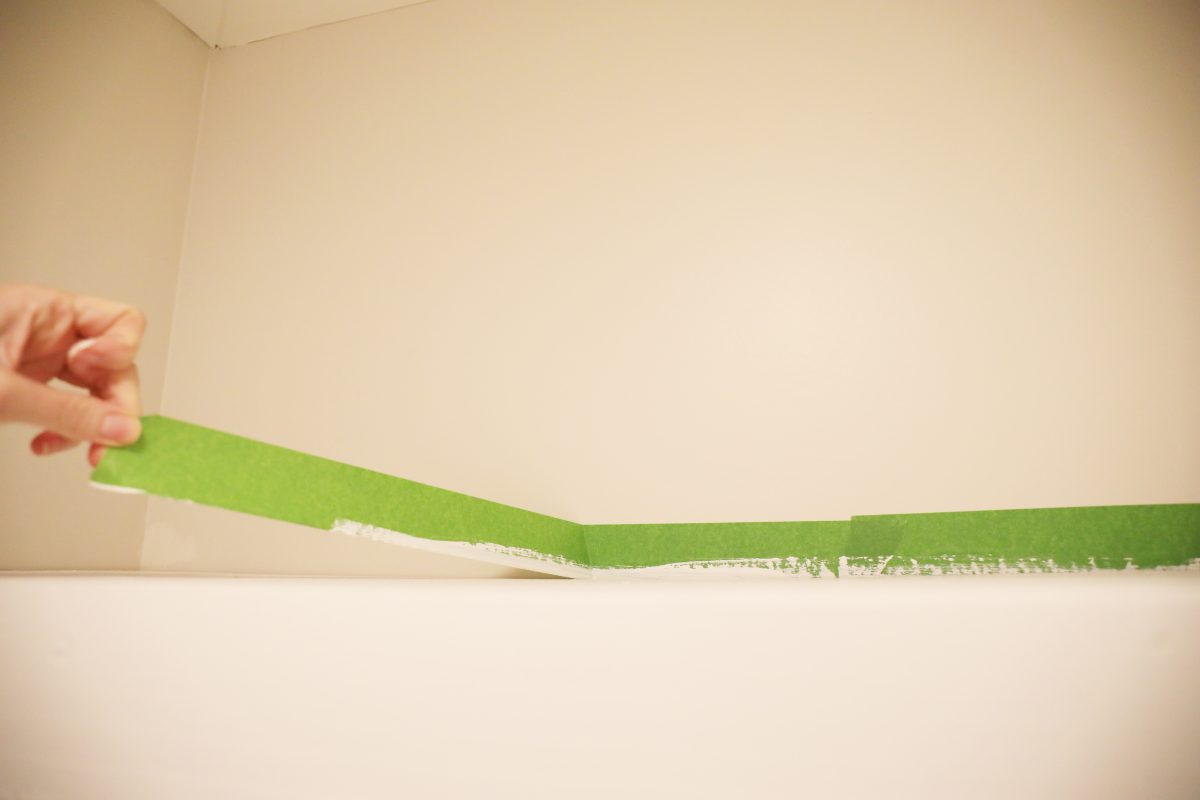
Of course our trusty go-to, FrogTape® is always an invaluable tool for painting.

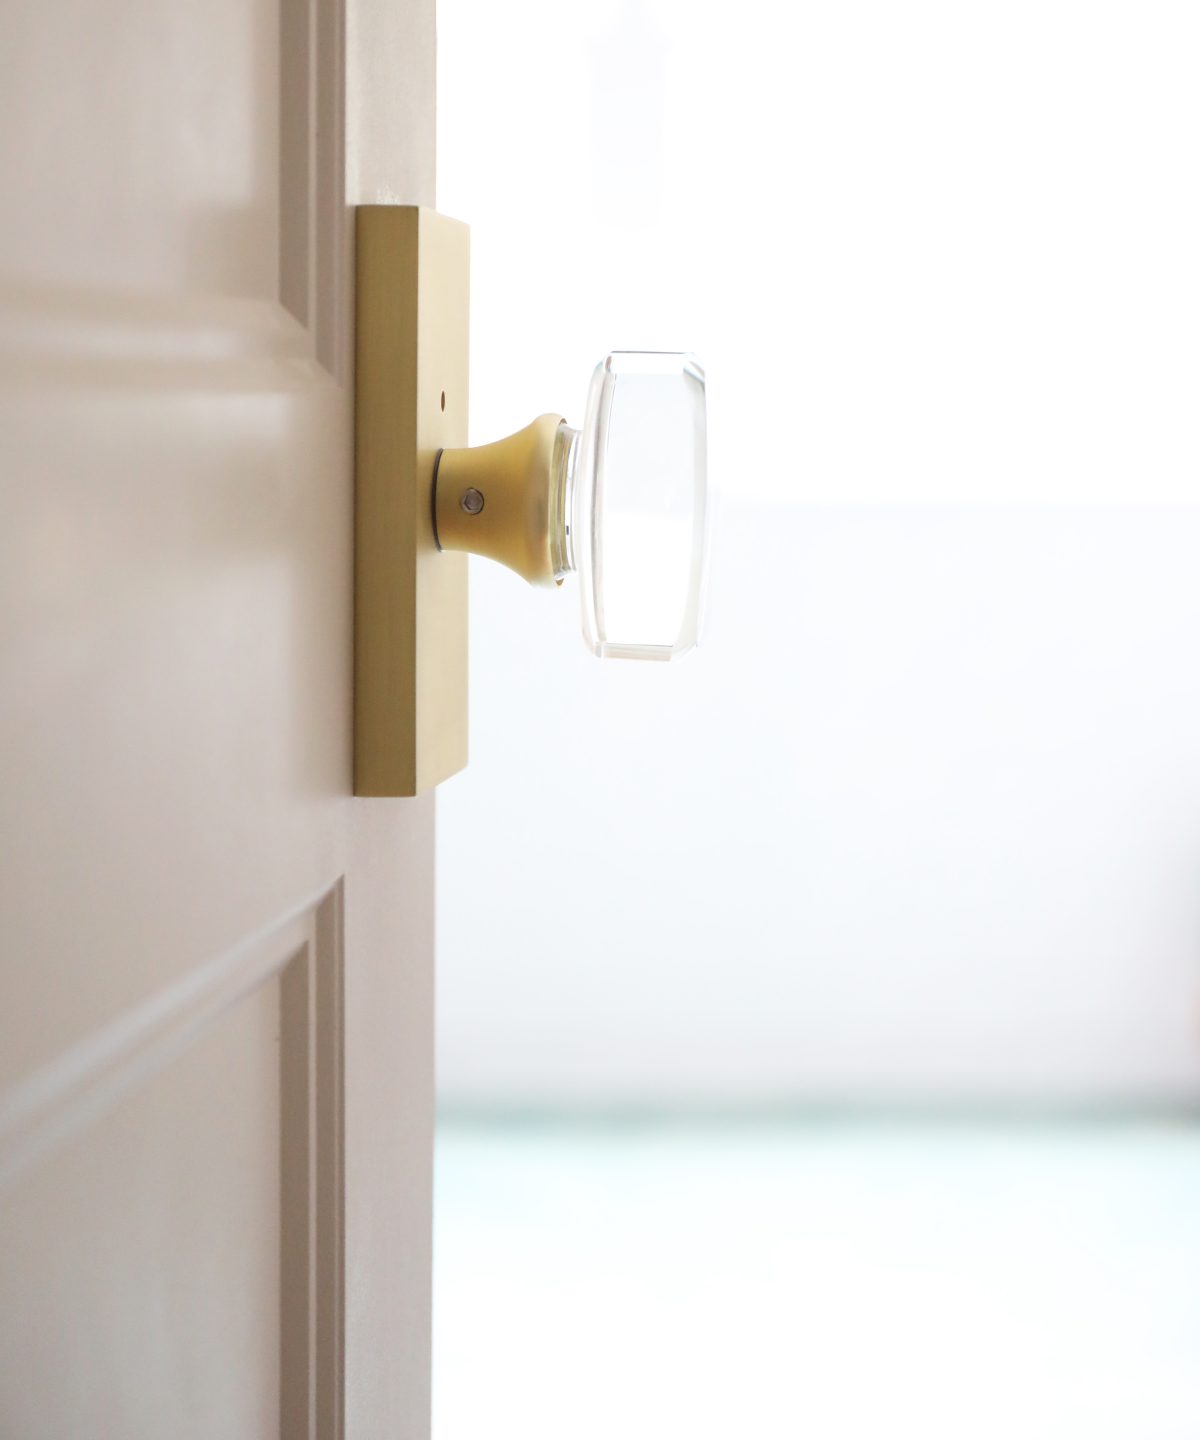
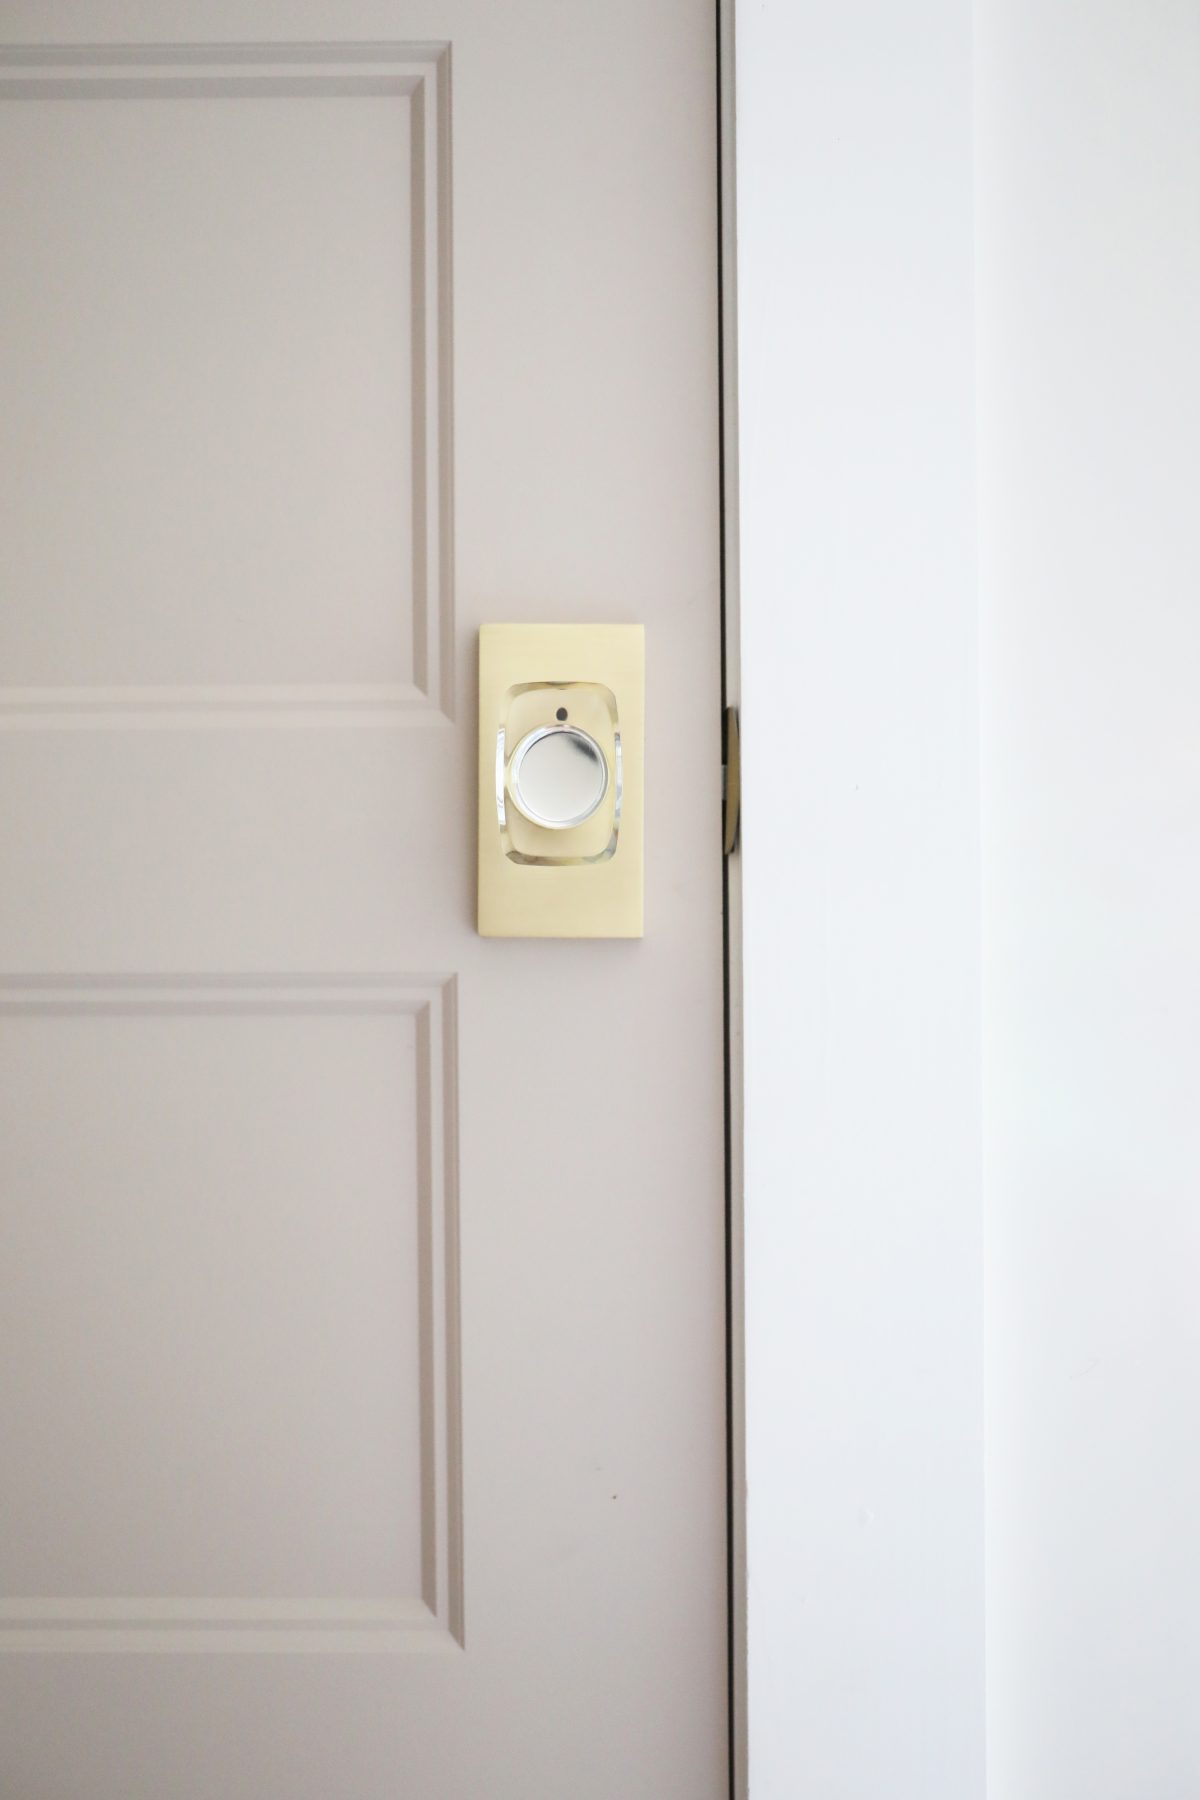
Like we said, it’s the little things. We loved adding this little doorknob to polish it all off when it comes to the door.
Isn’t it so cute? Honestly, we’re just pumped to finally have a door.

Have you ever built some simple shelves like this? We’d love to hear if you try this!
They’re so handy for practical storage in forgotten places.
Have an inspired day!


can you tell me what the measurements are of the toilet and the water closet room/floor space?