
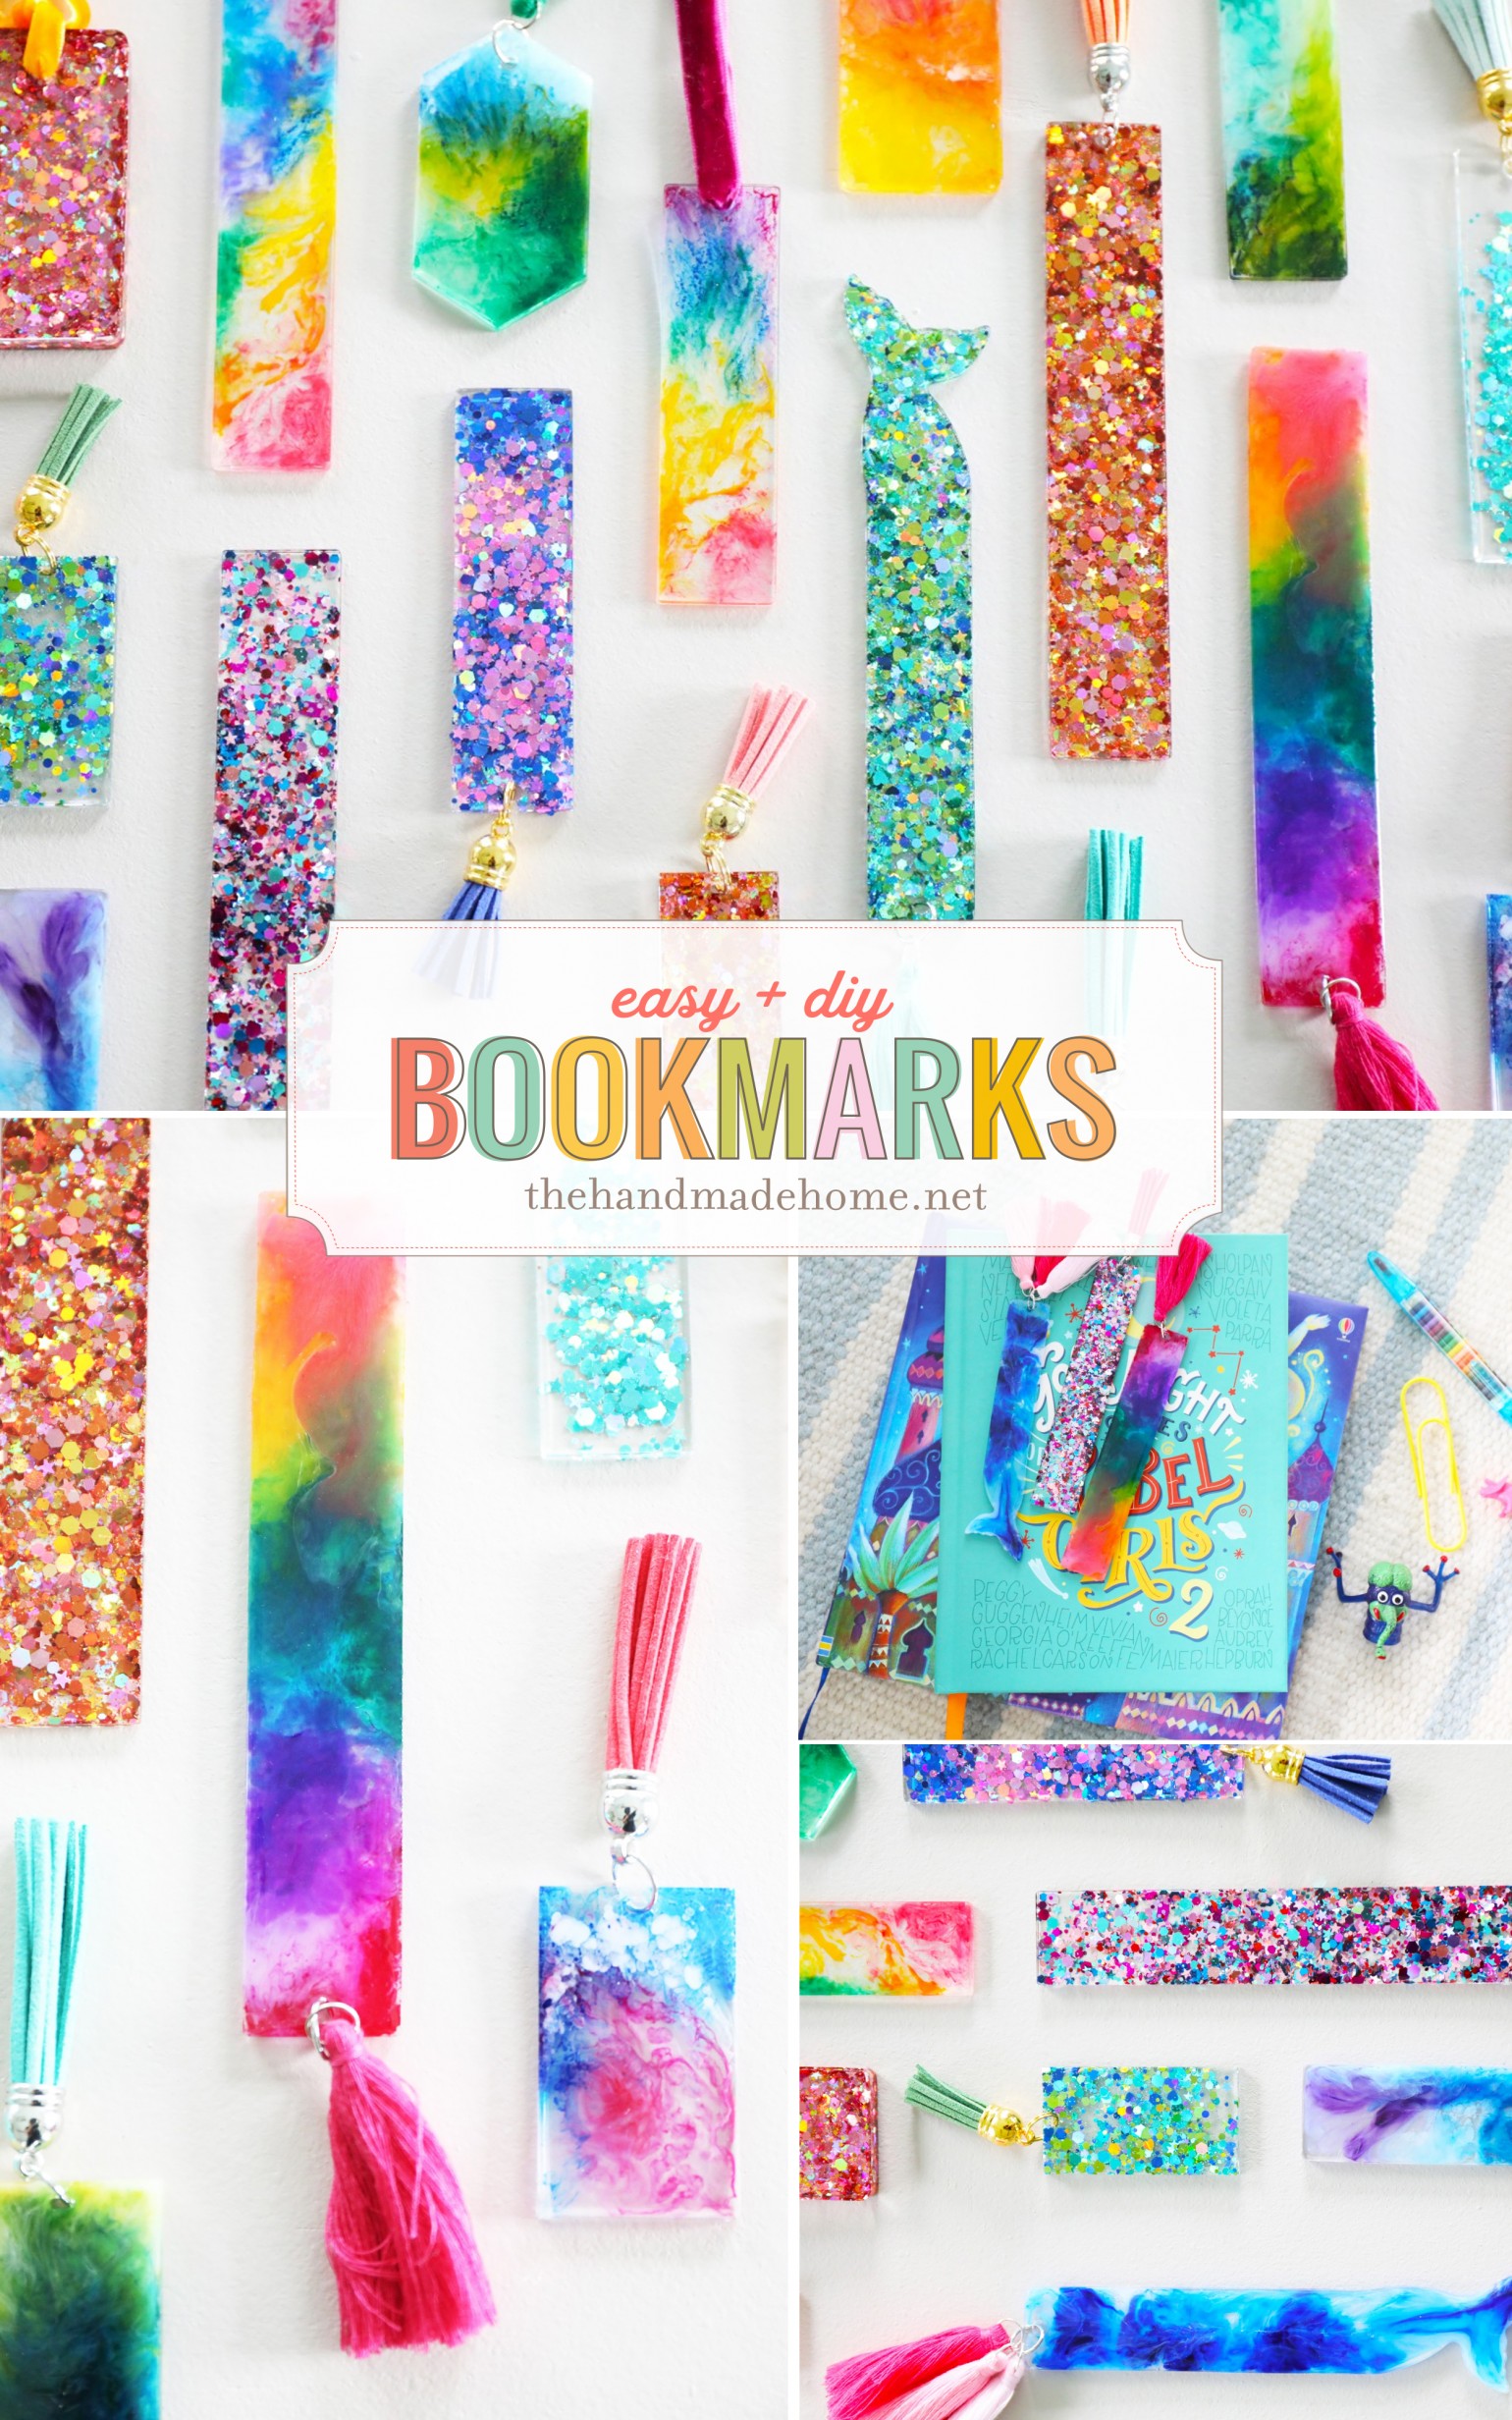
easy resin bookmarks
I crashed a little this Saturday, finishing off our Gilmore Girls marathon with my girl, and it was nice. I didn’t think we’d ever get through the Luke + Lorelai saga so I feel accomplished. And for the record, I’m still team Jess. Ew, Dean.
It’s that time of year when I’m really just ready to shut my brain off for a few days, and I feel like Saturday was a sneak peek into that. To wear my pajamas and watch movies with the fam and eat all the goodies. And then I’ll probably craft or paint and read a book because it makes me happy. I never sit still for long without diving back into something creative, for the sake of being creative. I think we all need a little down time when it’s okay to shut off the brain.
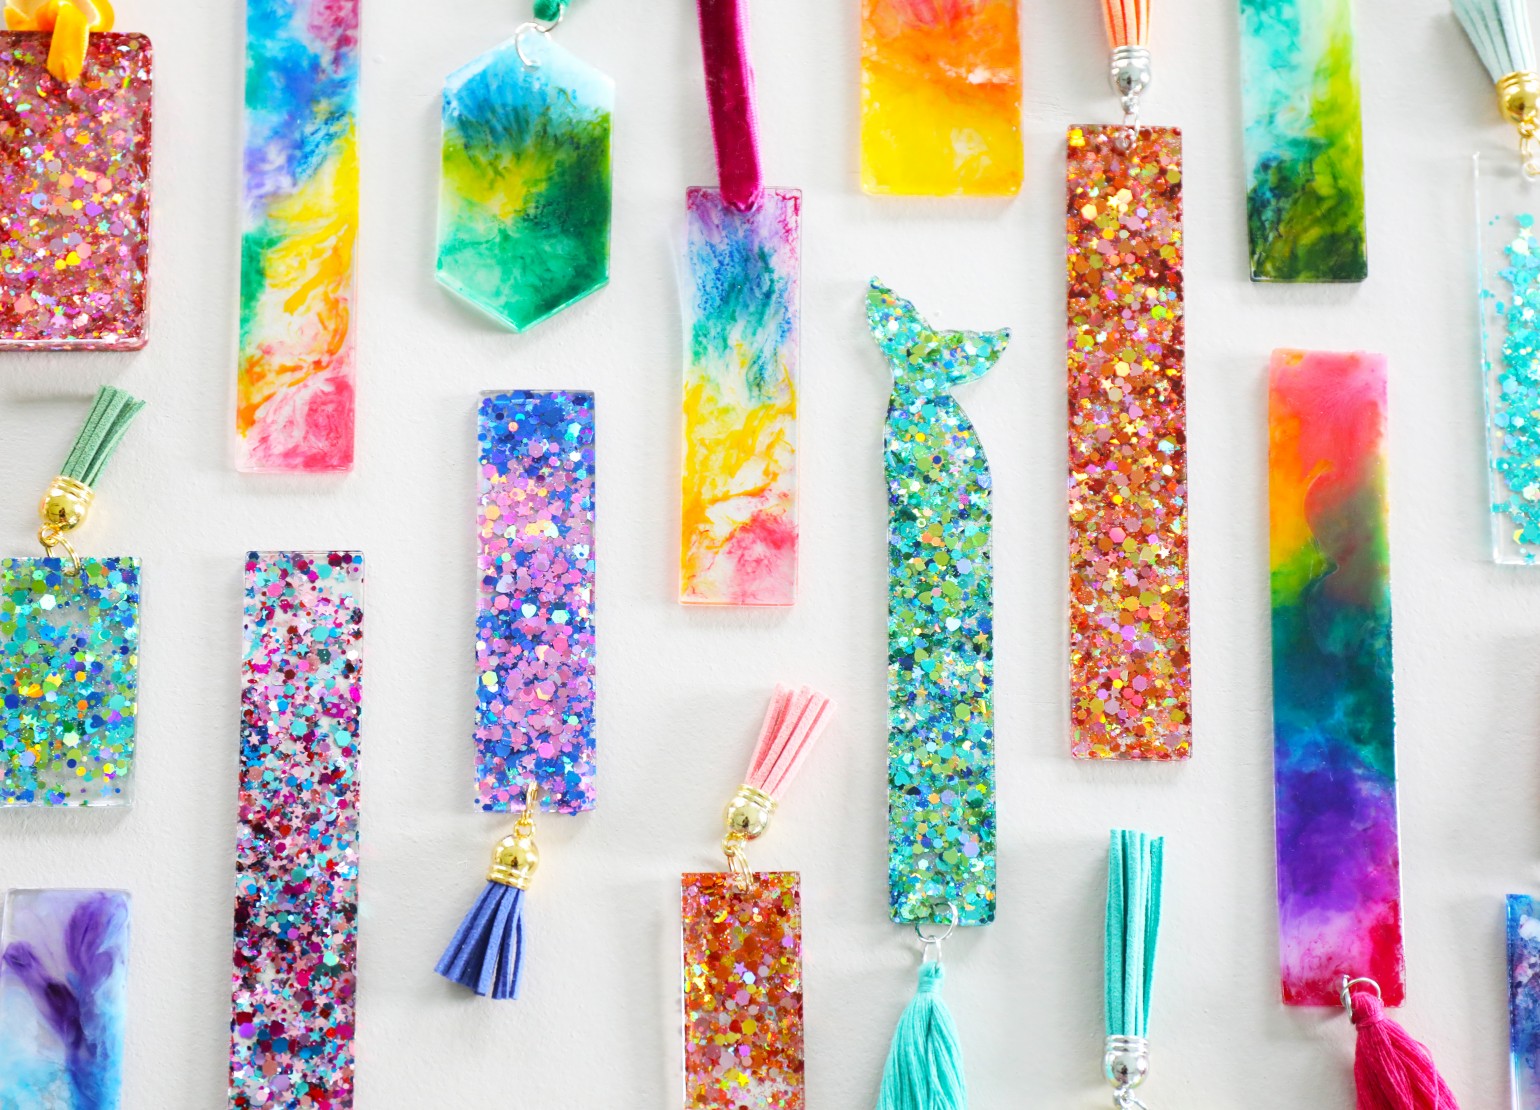
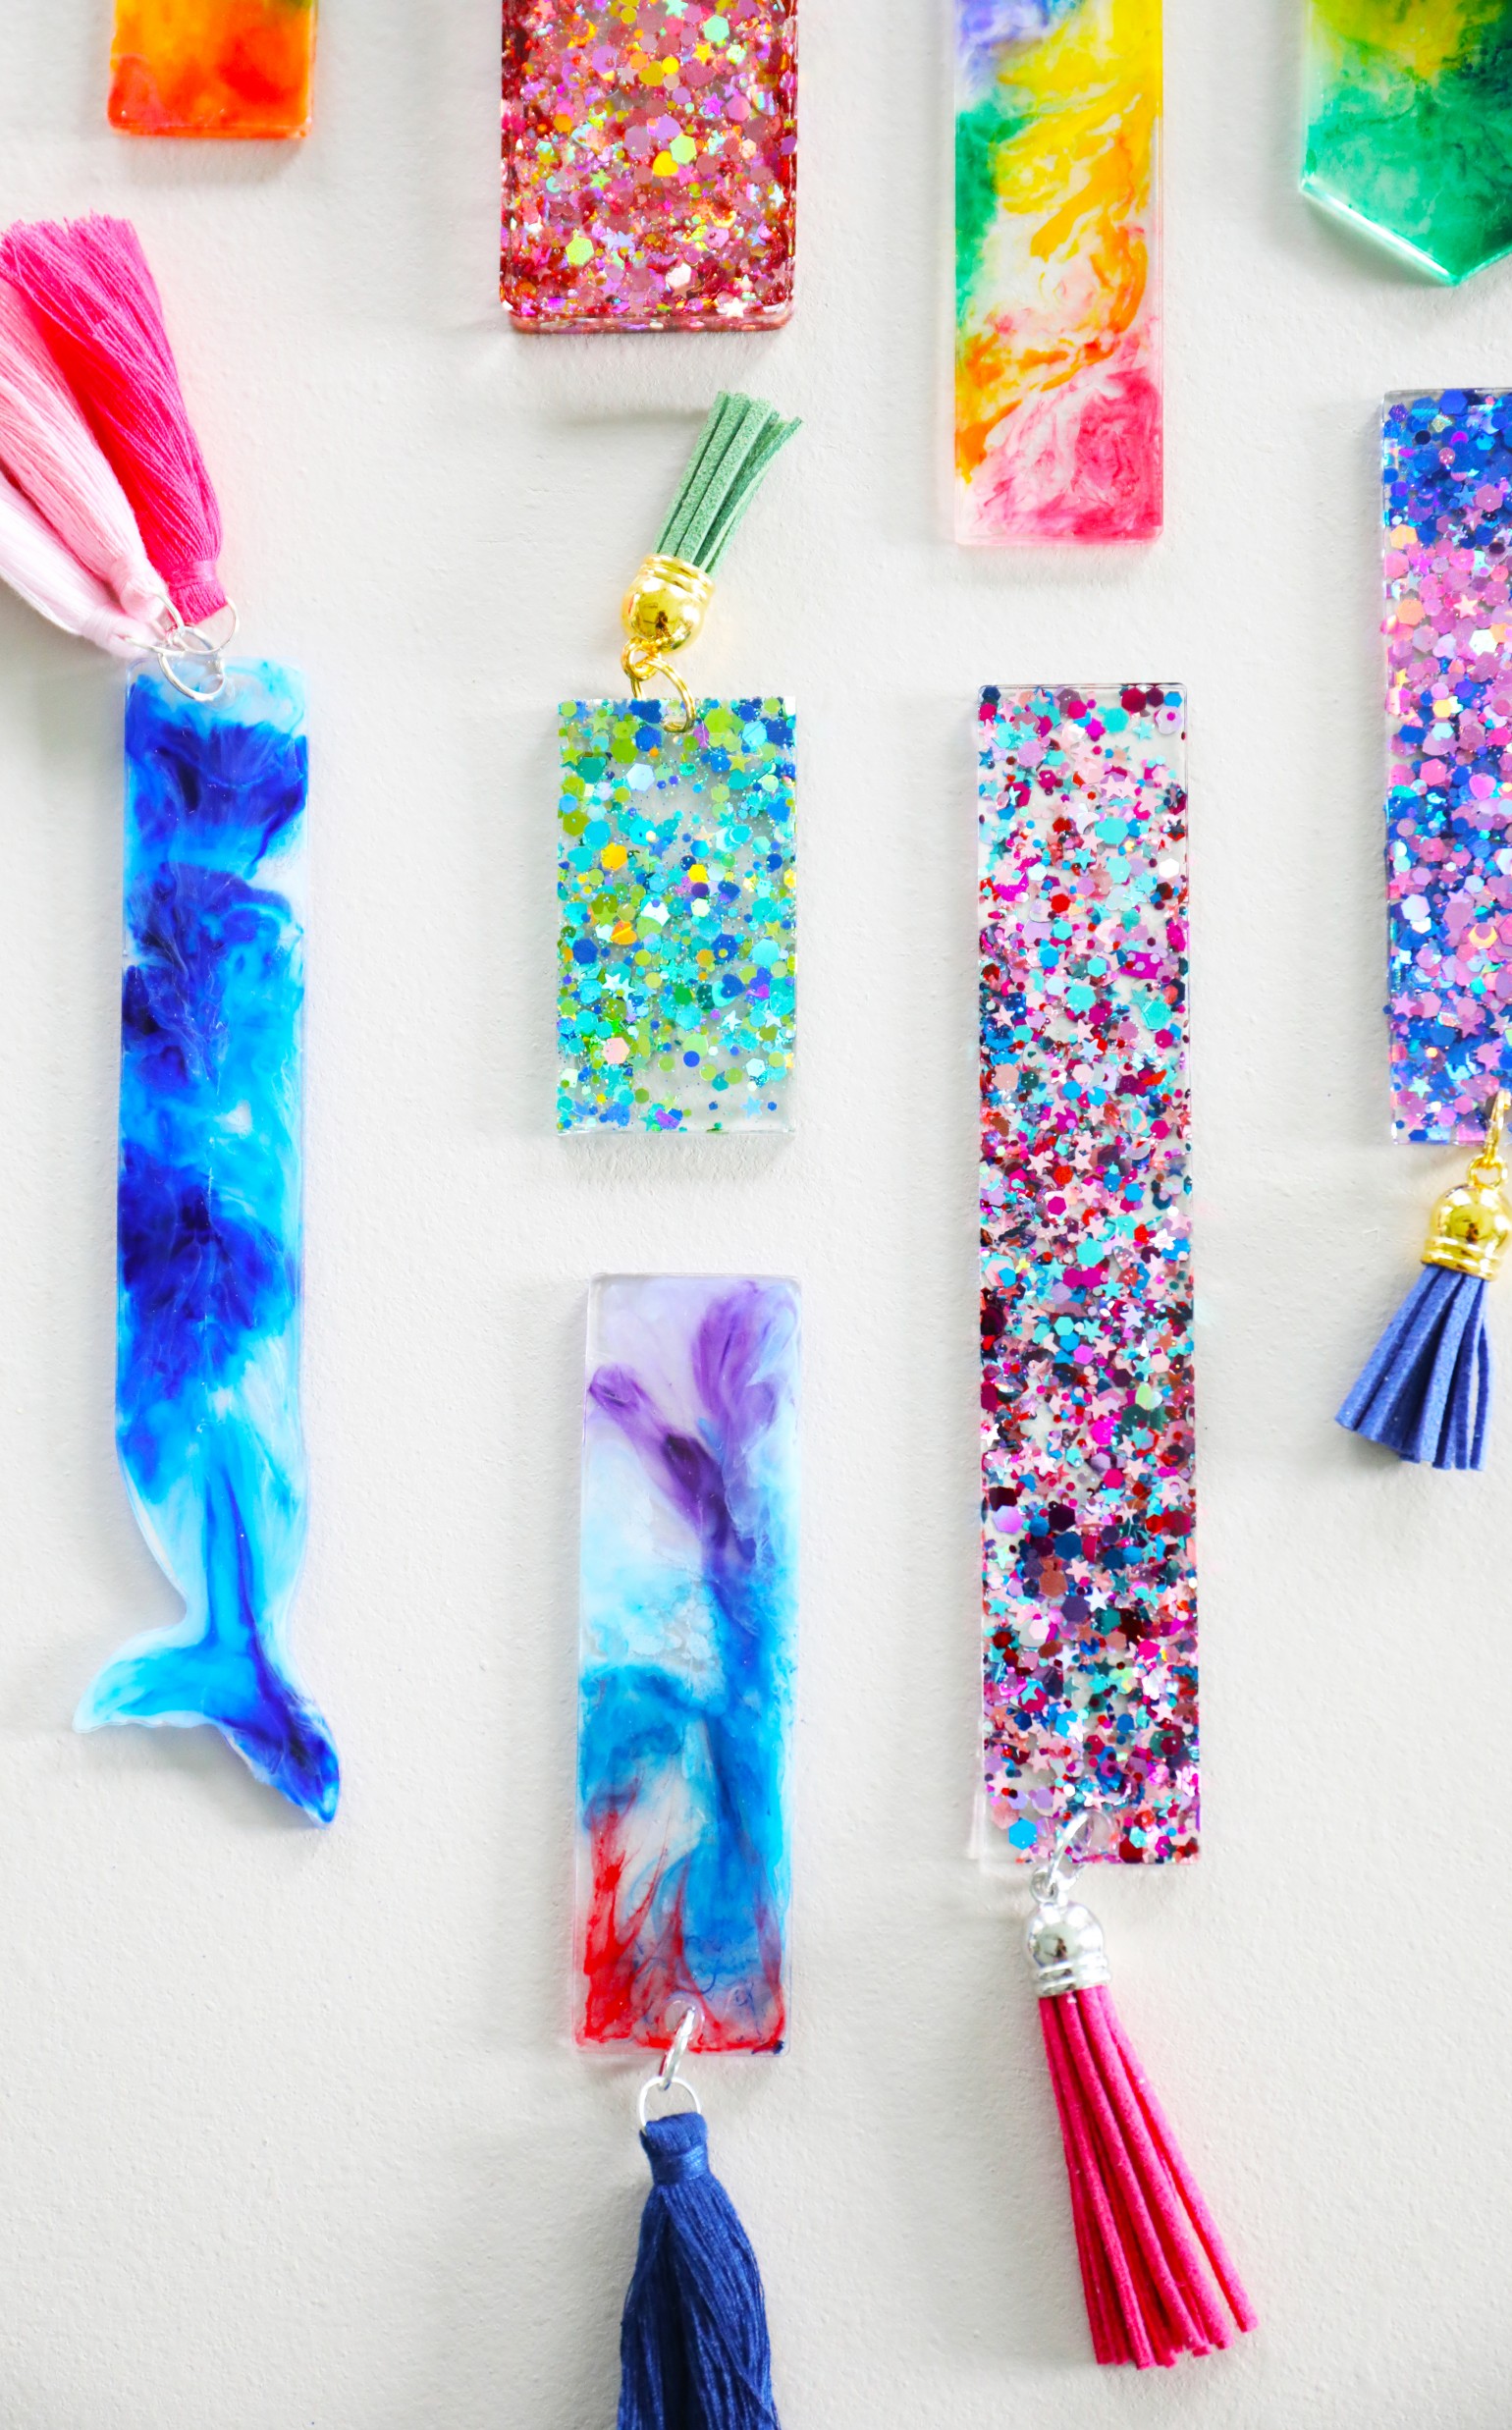
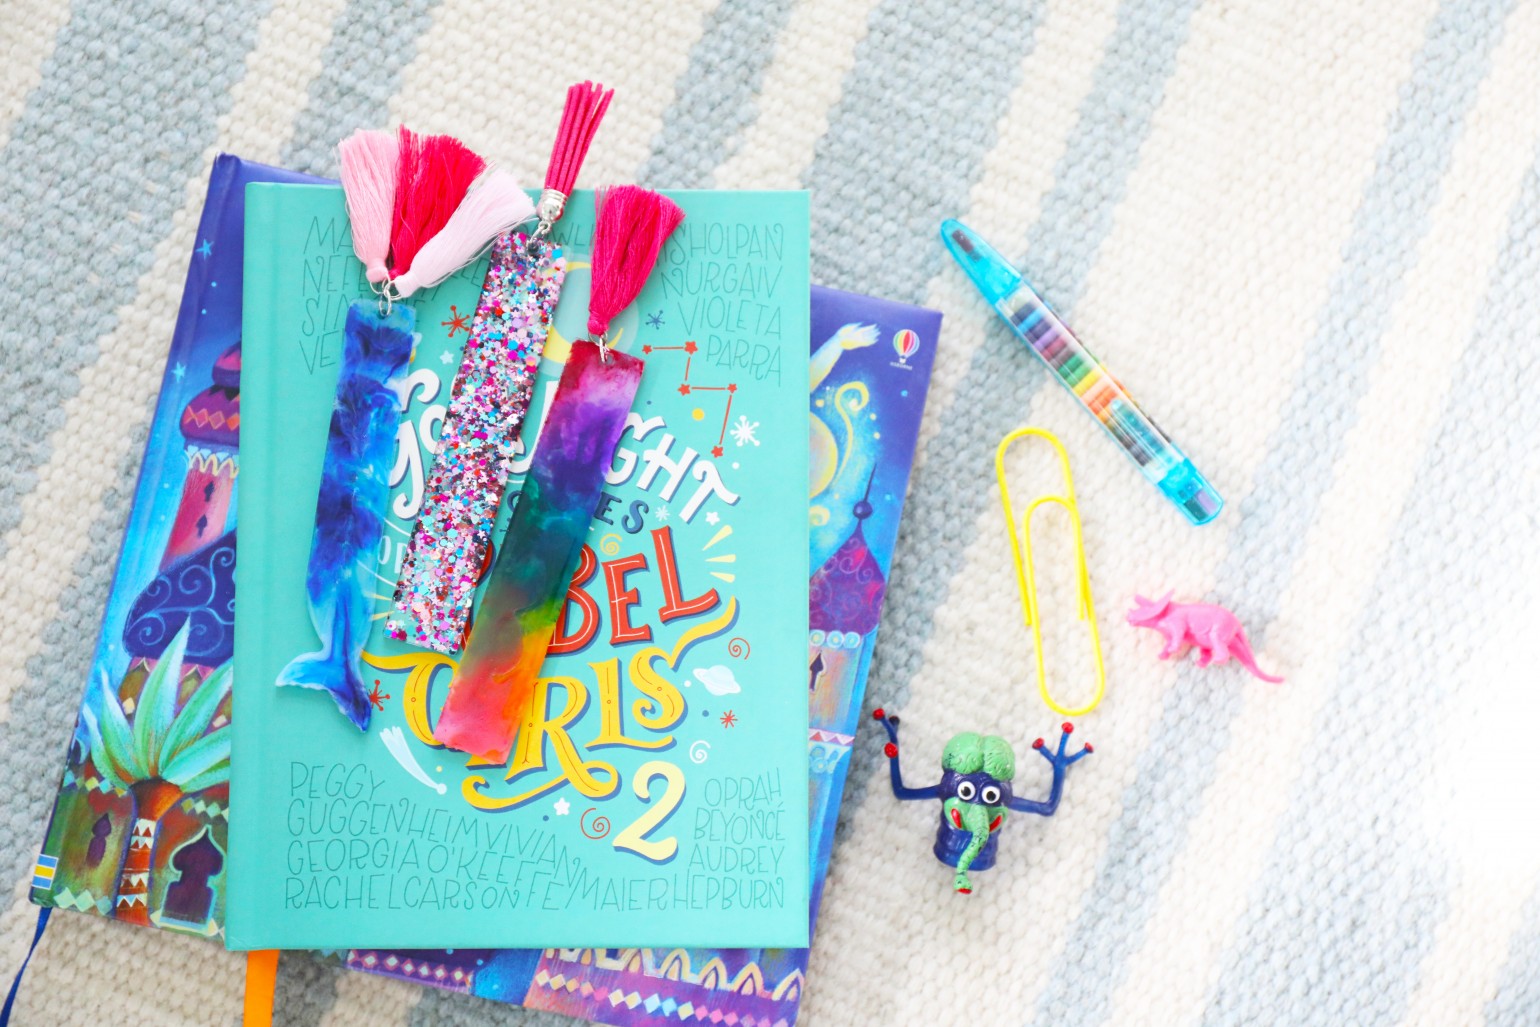
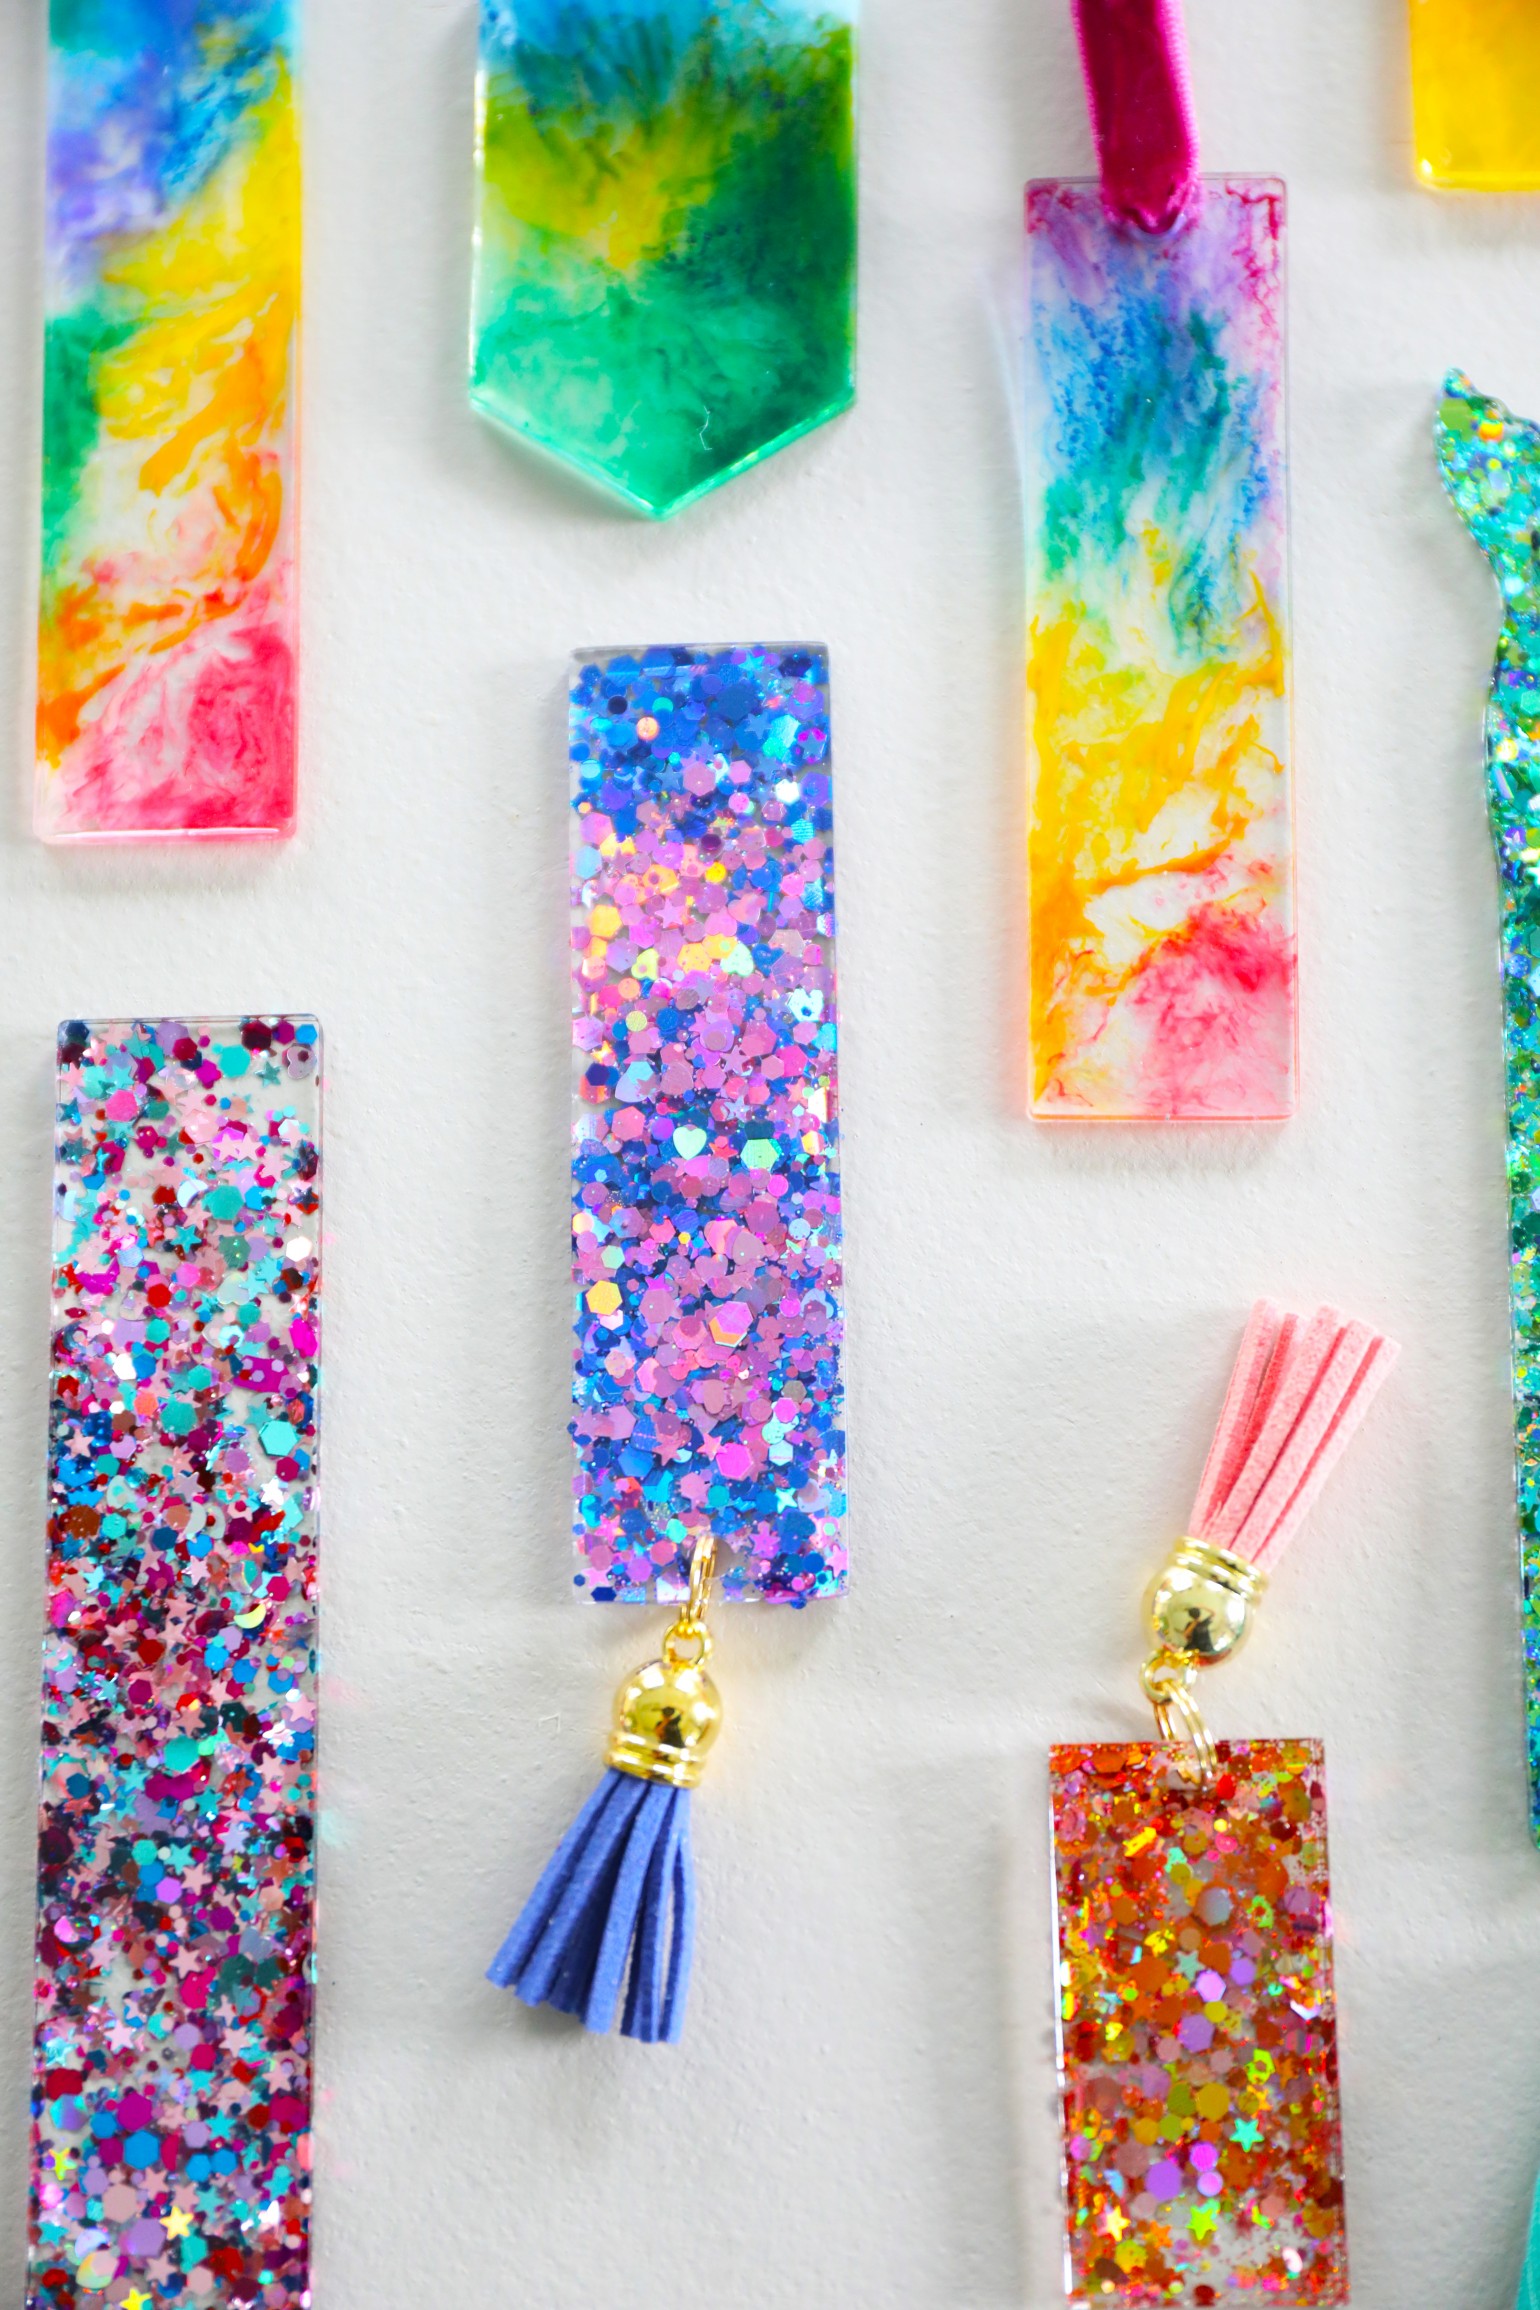
If you’re looking for sweet, easy to make handmade gifts, I’ve got you boo. This last week, I decided to make some fun colorful bookmarks as stocking stuffers and tiny gift toppers. Yes, I already made monogrammed book marks but maybe it’s just the world telling me I need to curl up with a good book and cup of coffee and not speak to anyone for a few days. Anyone else seeing a resounding theme here?
When the apocalypse hit, it gave me a chance to dabble in a new medium: resin. And I’ve been obsessed for a while. What I like about it, is that the supplies easily cross over, just changing up one or two items. Here are a few other projects we’ve tackled that you may also like:
• how to make resin jewelry
• monogrammed keychains
• make your own alphabet magnets
• easy diy earrings
• diy paper clips – a great companion to our planner!
• diy confetti coasters
• easy fall place cards {pssst… use them for Christmas, too!}
But these bookmarks are so easy to make and would make such a fun gift!
Here’s what you’ll need:
{Some of the links below are affiliate to support our borderline ridiculous resin addiction}
• resin kit – I like the easy cast because it comes with thorough instructions. I’ll cover more of that below.
• medicine cups for measuring {don’t use them again for medicine after you use them for this}
• stirrer stricks {toothpicks work fine here}
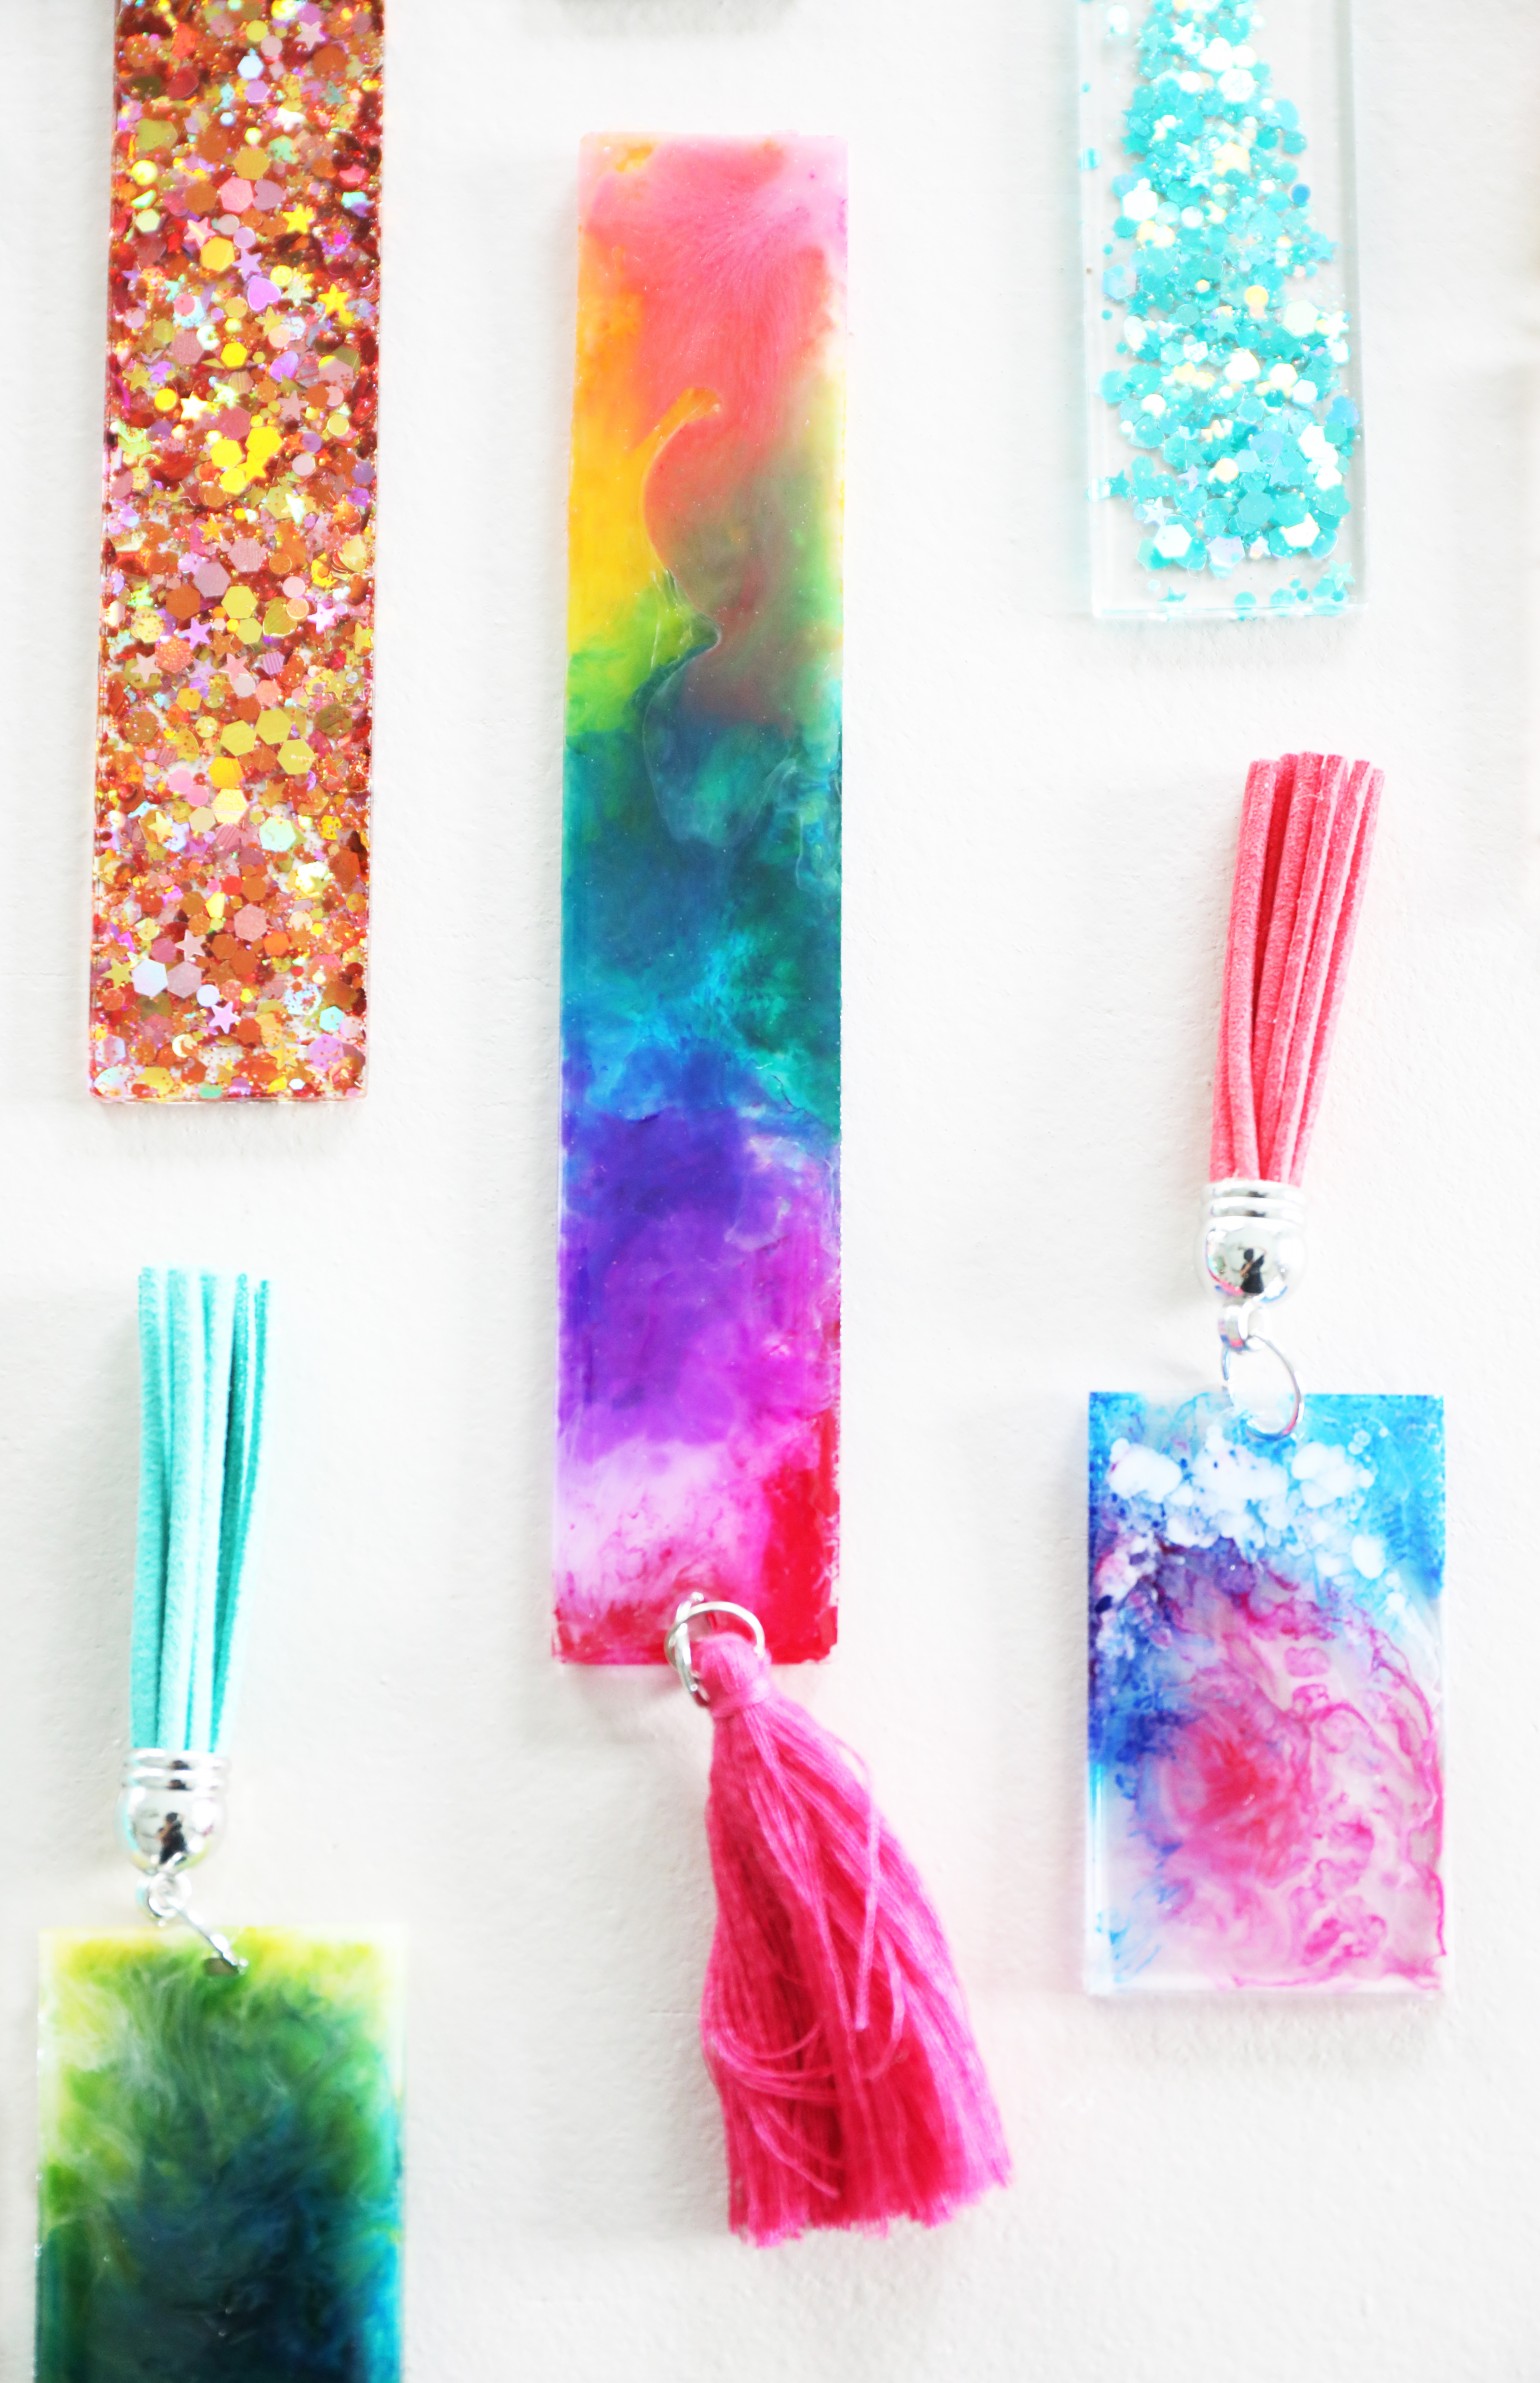
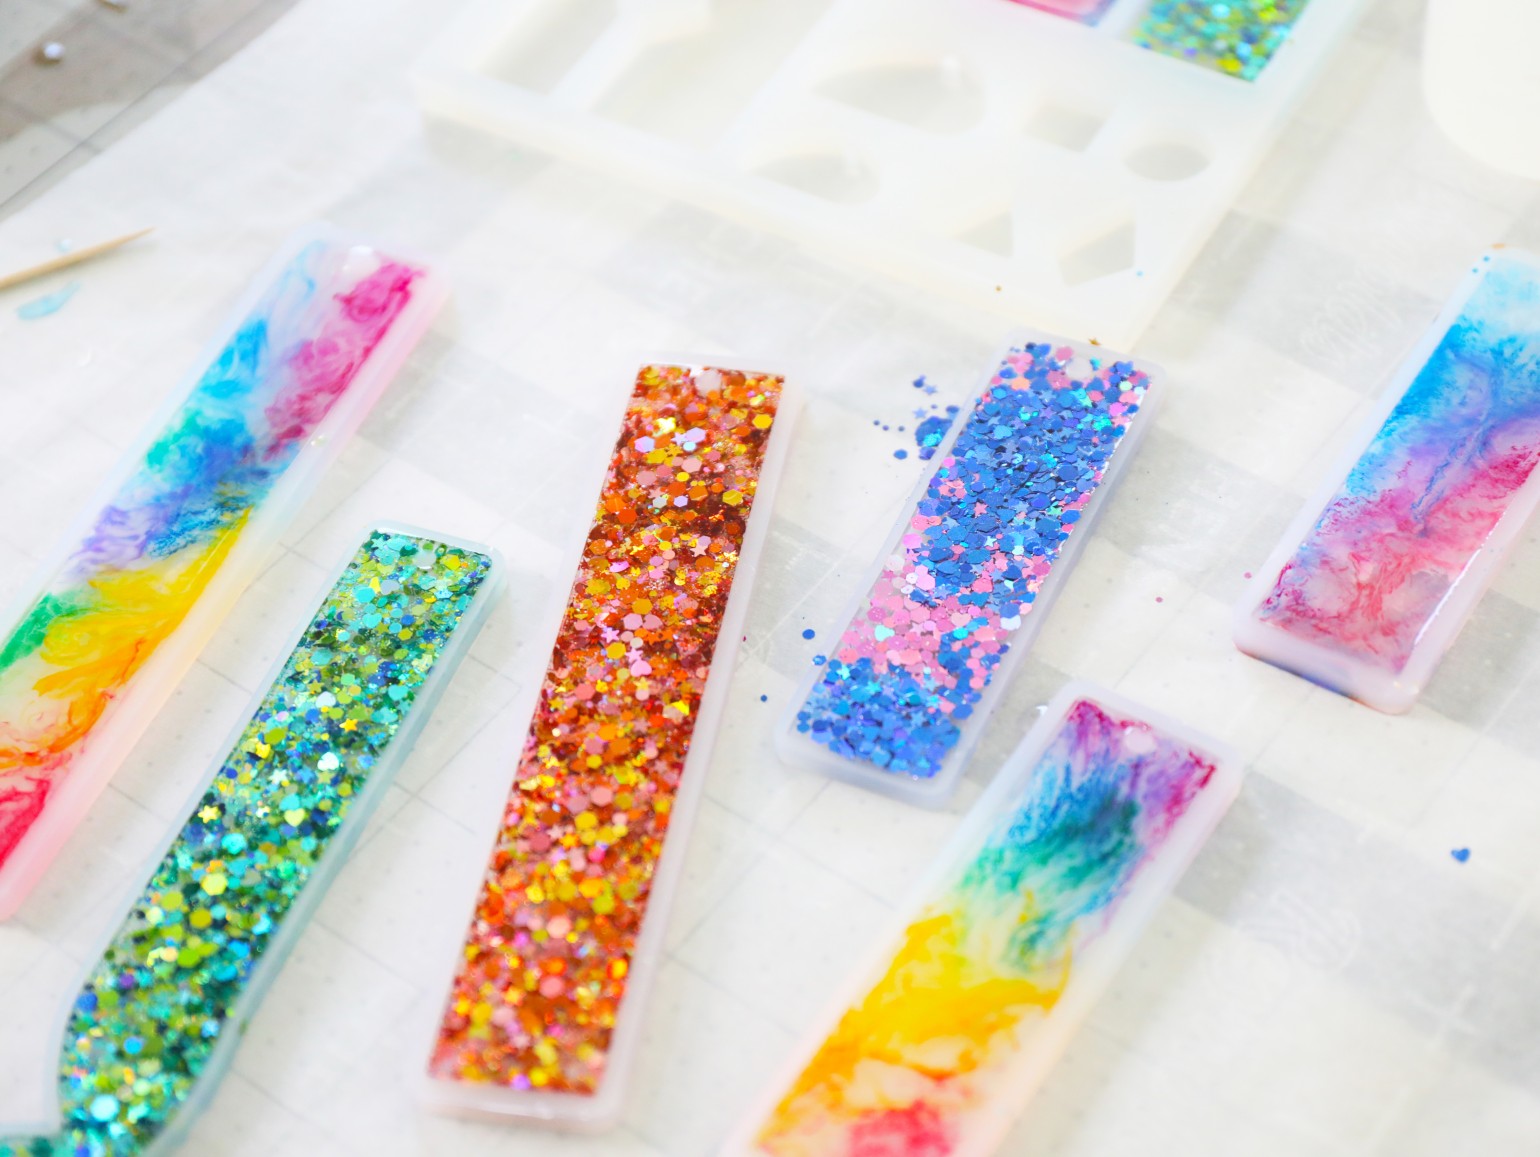
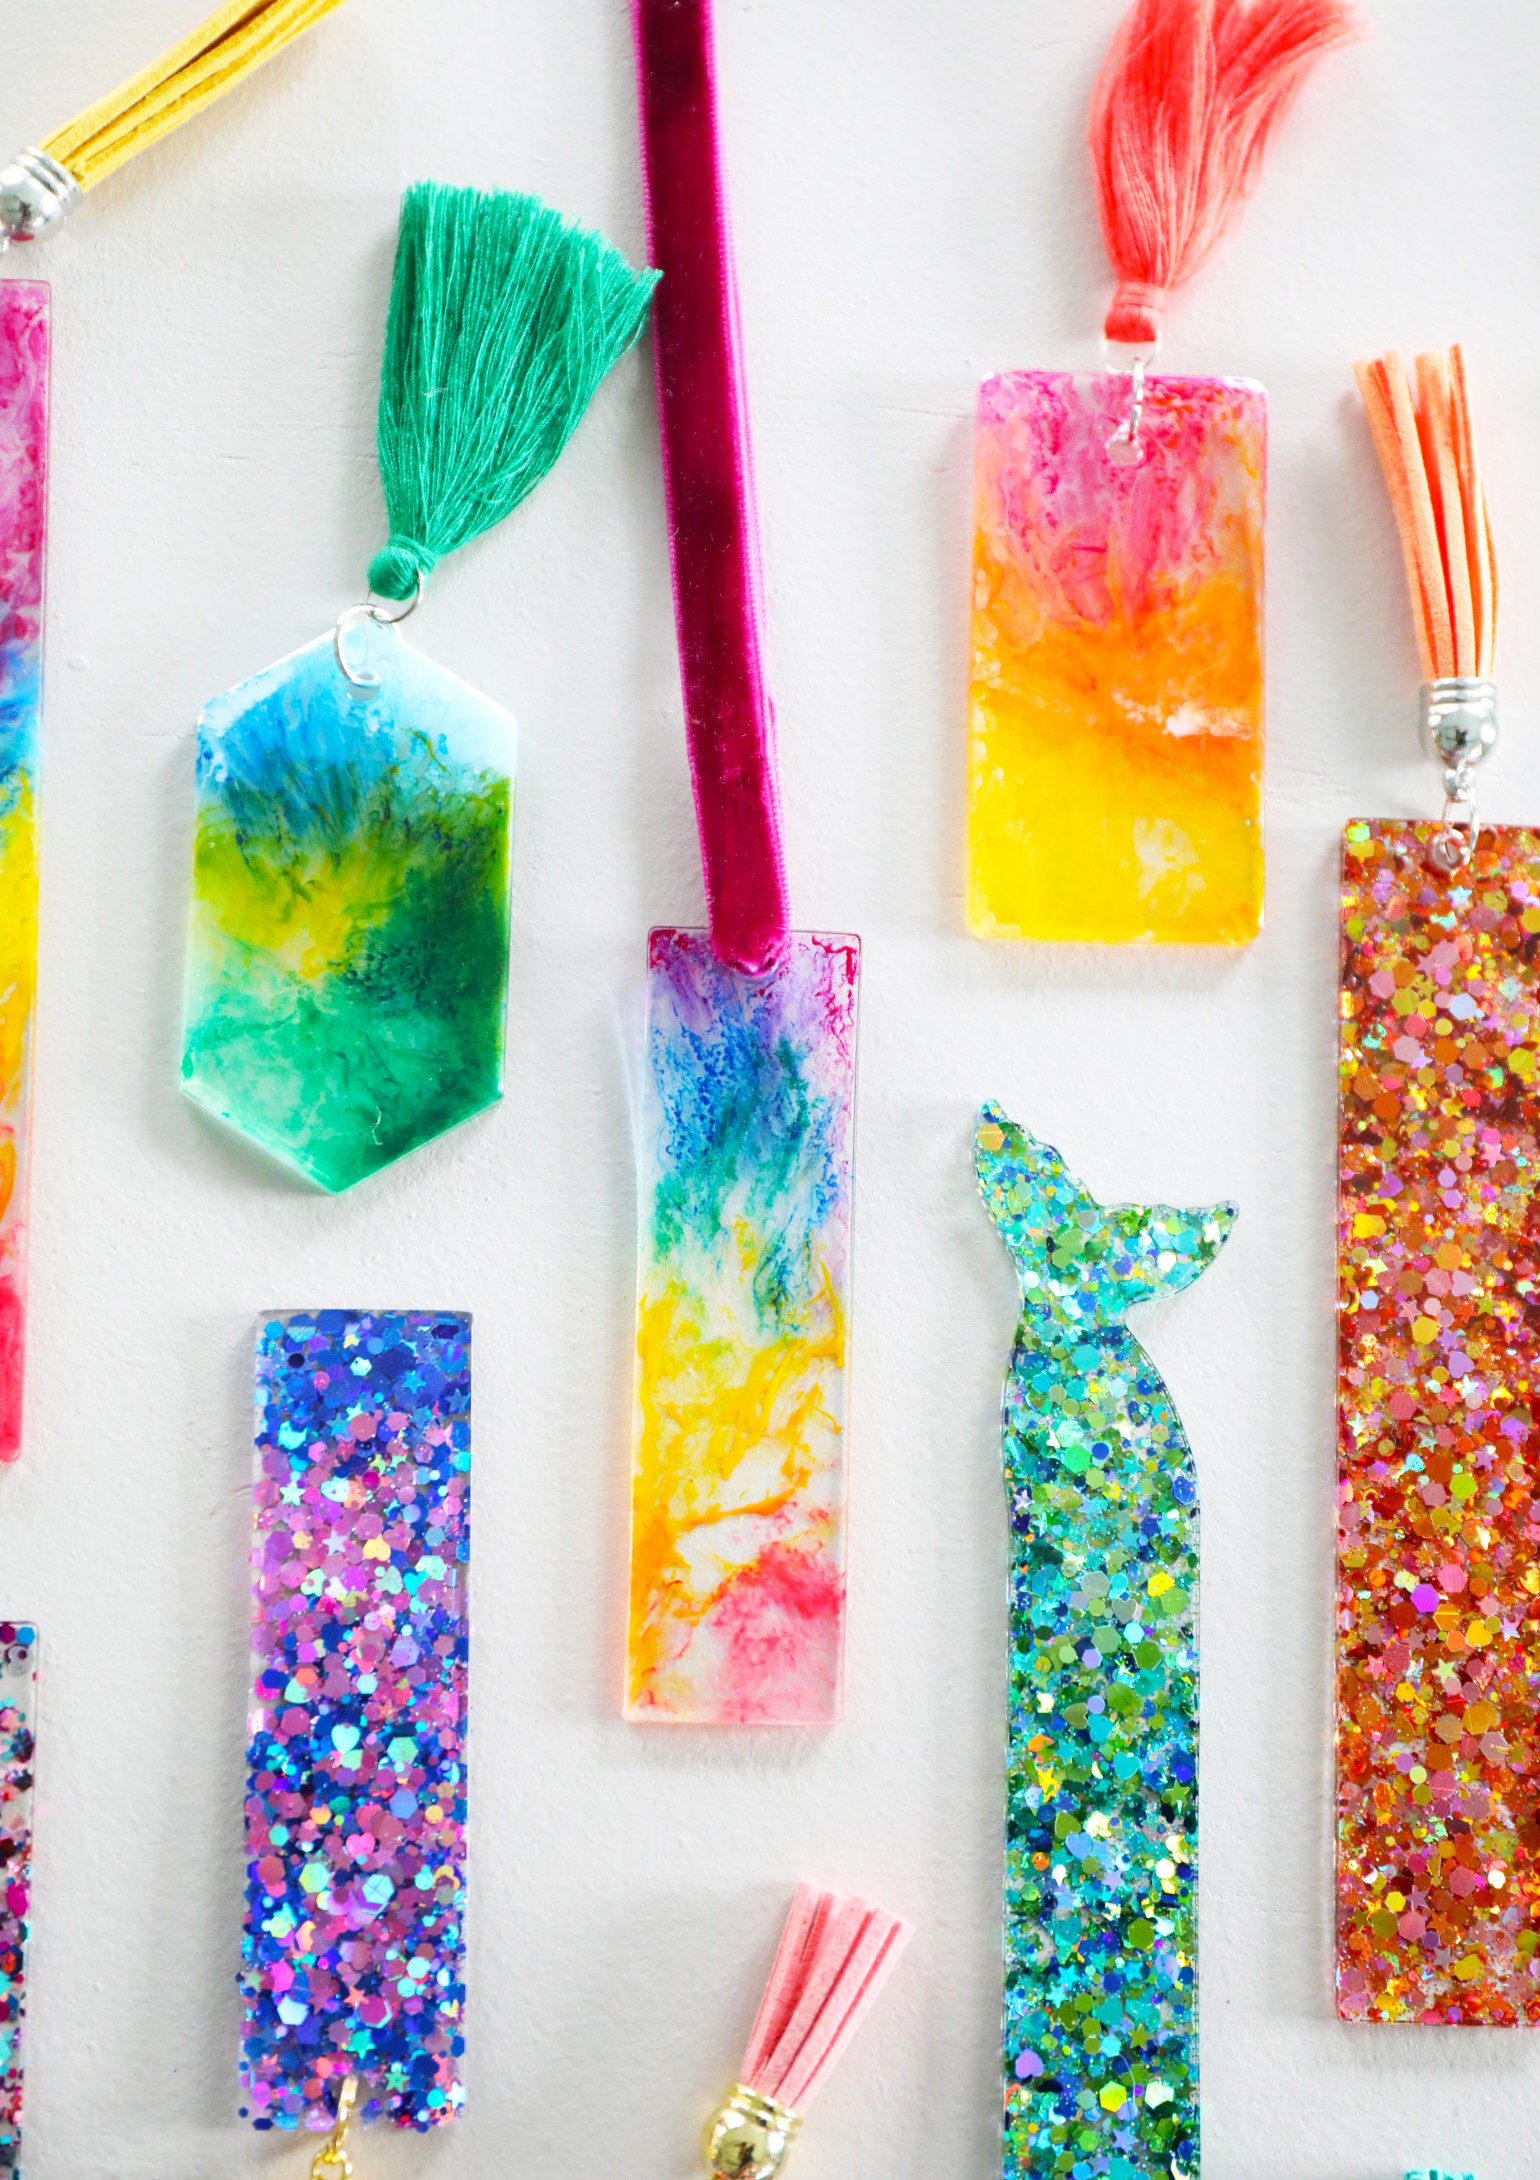
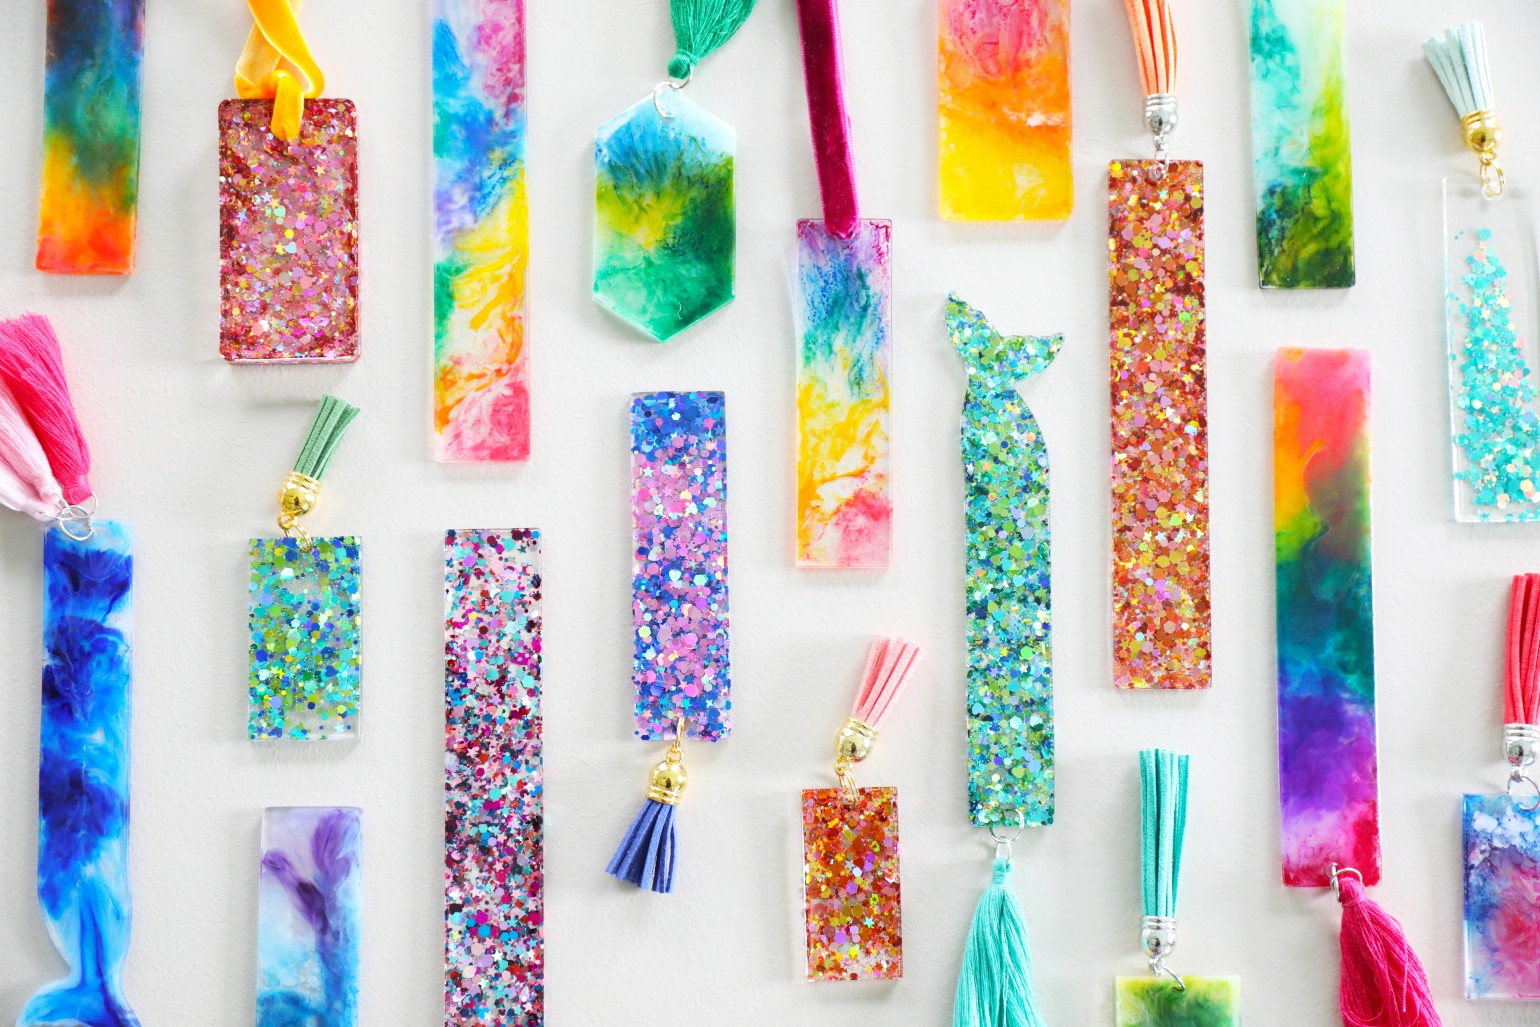
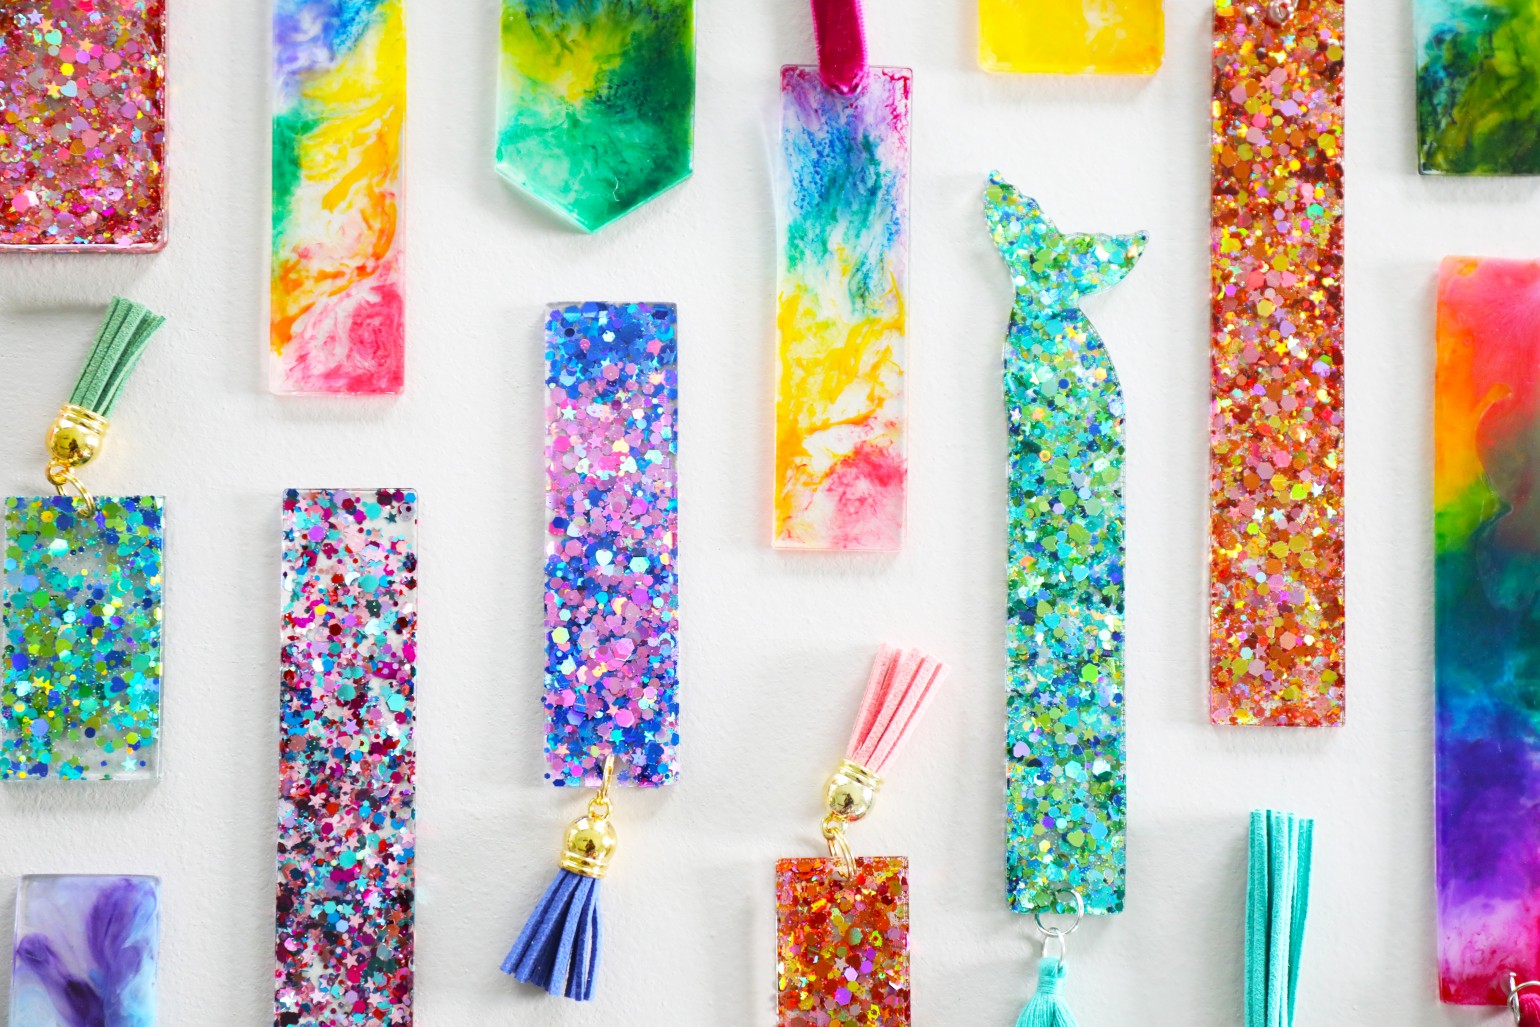
• fillers – these are so fun + glitter – we love all the colors here
• silicone bookmark mold – I also used some from here + here – leftovers from other projects
• wax paper or a protective surface – resin doesn’t clean up once it’s dried, so make sure you’re covered + gloves
• tassels – you can make your own but we like these here + here
• you can also use ribbon – I like this fun velvety kind here
• jump links for easier additions + small pliers for adding them
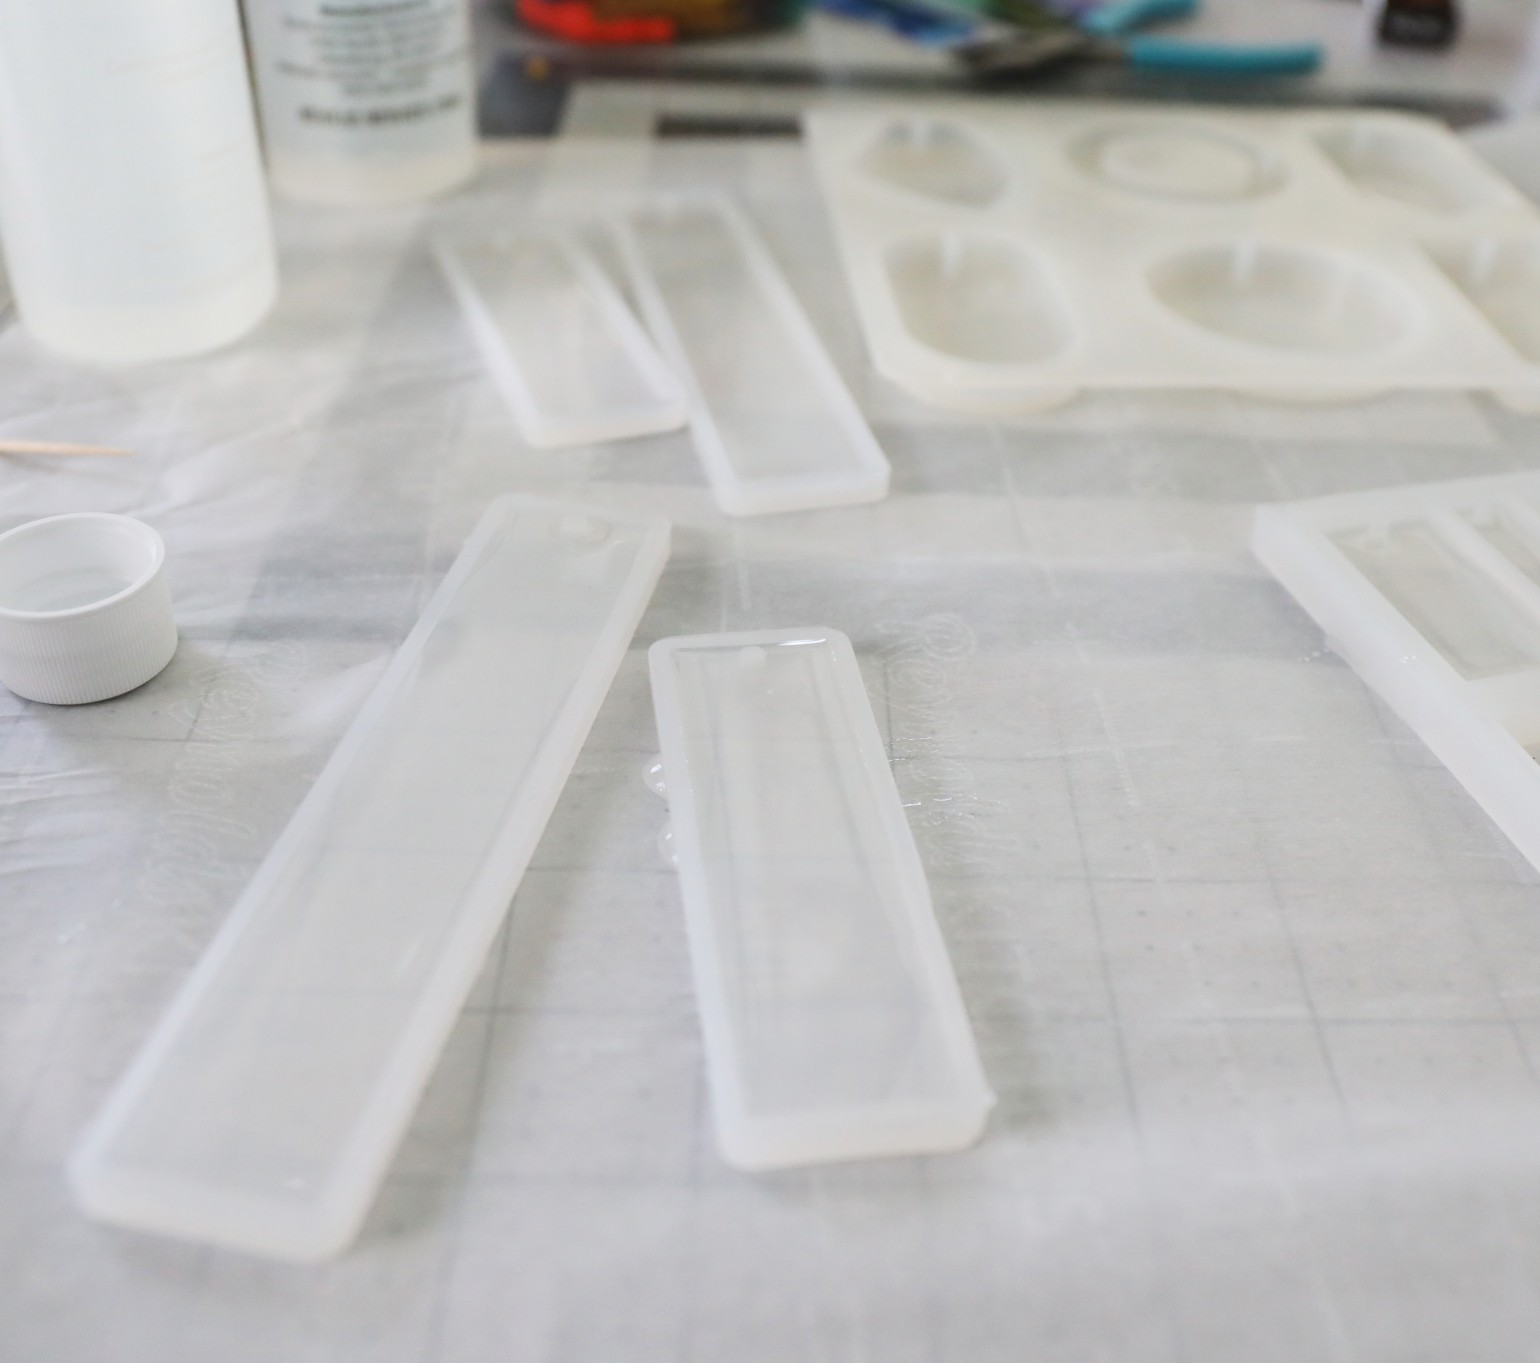
Work off a protective surface, and in an area that is well-ventilated. Also make sure it’s one that can be left that way to give the resin plenty of time to cure. This takes about 12-24 hours, give or take, so be flexible with wait time and the area being able to be left alone. {AKA the family dinner table is probably not a good option}
Measure out your resin according to the instructions.
Before I began, I read the directions about three times over, because it’s a very temperamental substance.
Note: I recommend test measuring it out beforehand with water, depending on how much you want to make. That way you know how much you need to measure out, no matter what you’re making.

What I learned:
• Use two different measuring cups to measure out your resin + hardener precisely. It’s a 1:1 ratio so make sure you have it right. I’m not kidding when I say this may include getting on the floor so that your head is level with the table and you can make sure your measurements are precise. Do what it takes and you’re good to go.
• If you don’t get the measurements right, you can have cloudy, sticky mixtures that never dry. So pay attention.
• Pour one into the other after you’ve measured, and stir in a figure 8 motion, with your stirrer. Work the sides, too.
• You’ll see it cloud up, which means the reaction is occuring.
• The instructions will be more precise, but stir for 2 minutes.
• Do not remove your stirrer, when stirring. This reduces air bubbles.
• After two minutes, pour it into another measuring cup, with a fresh stick. {I’ve started using plastic ones I can wipe down with a paper towel}
• Stir for 1 minute. The mixture should start to clear up.
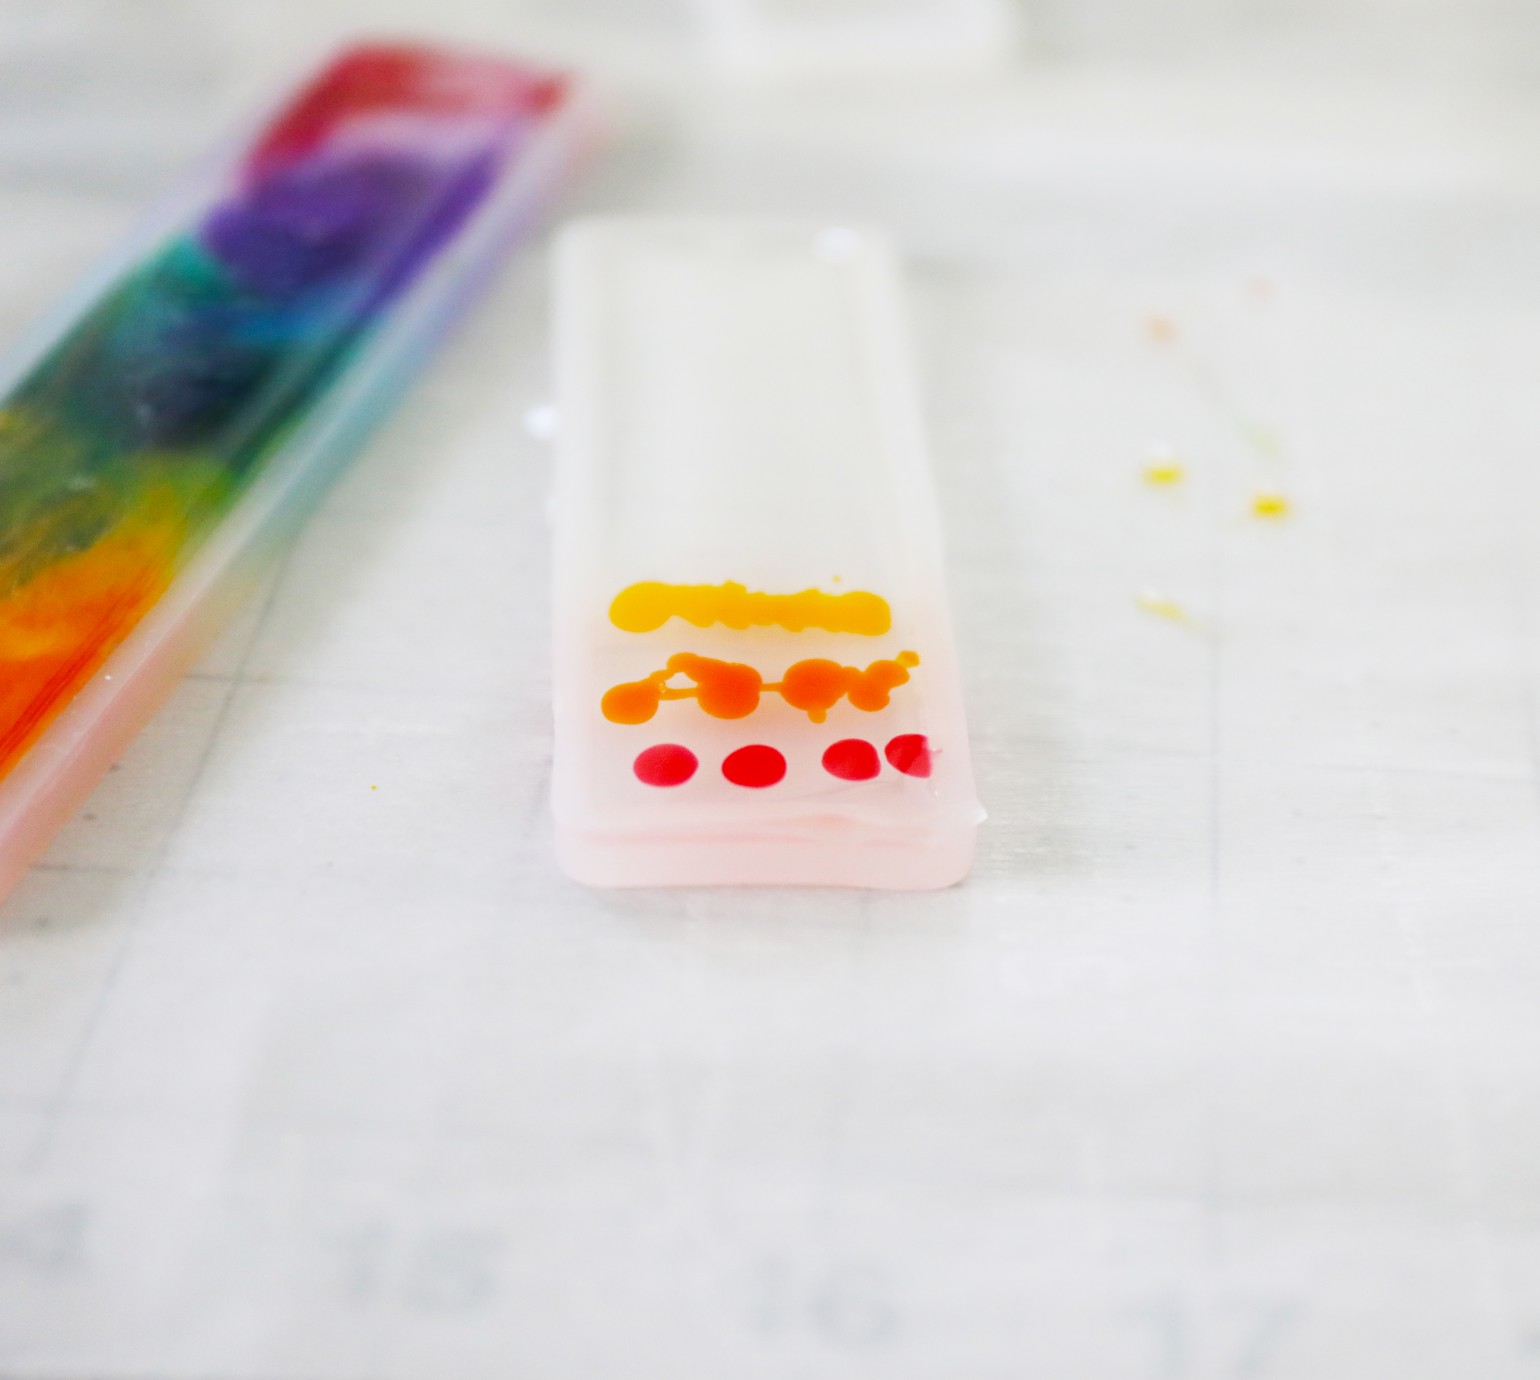
Note: If you want to do glitter, now is the time to add that to your mixture, before you pour. Just stir, and pour.
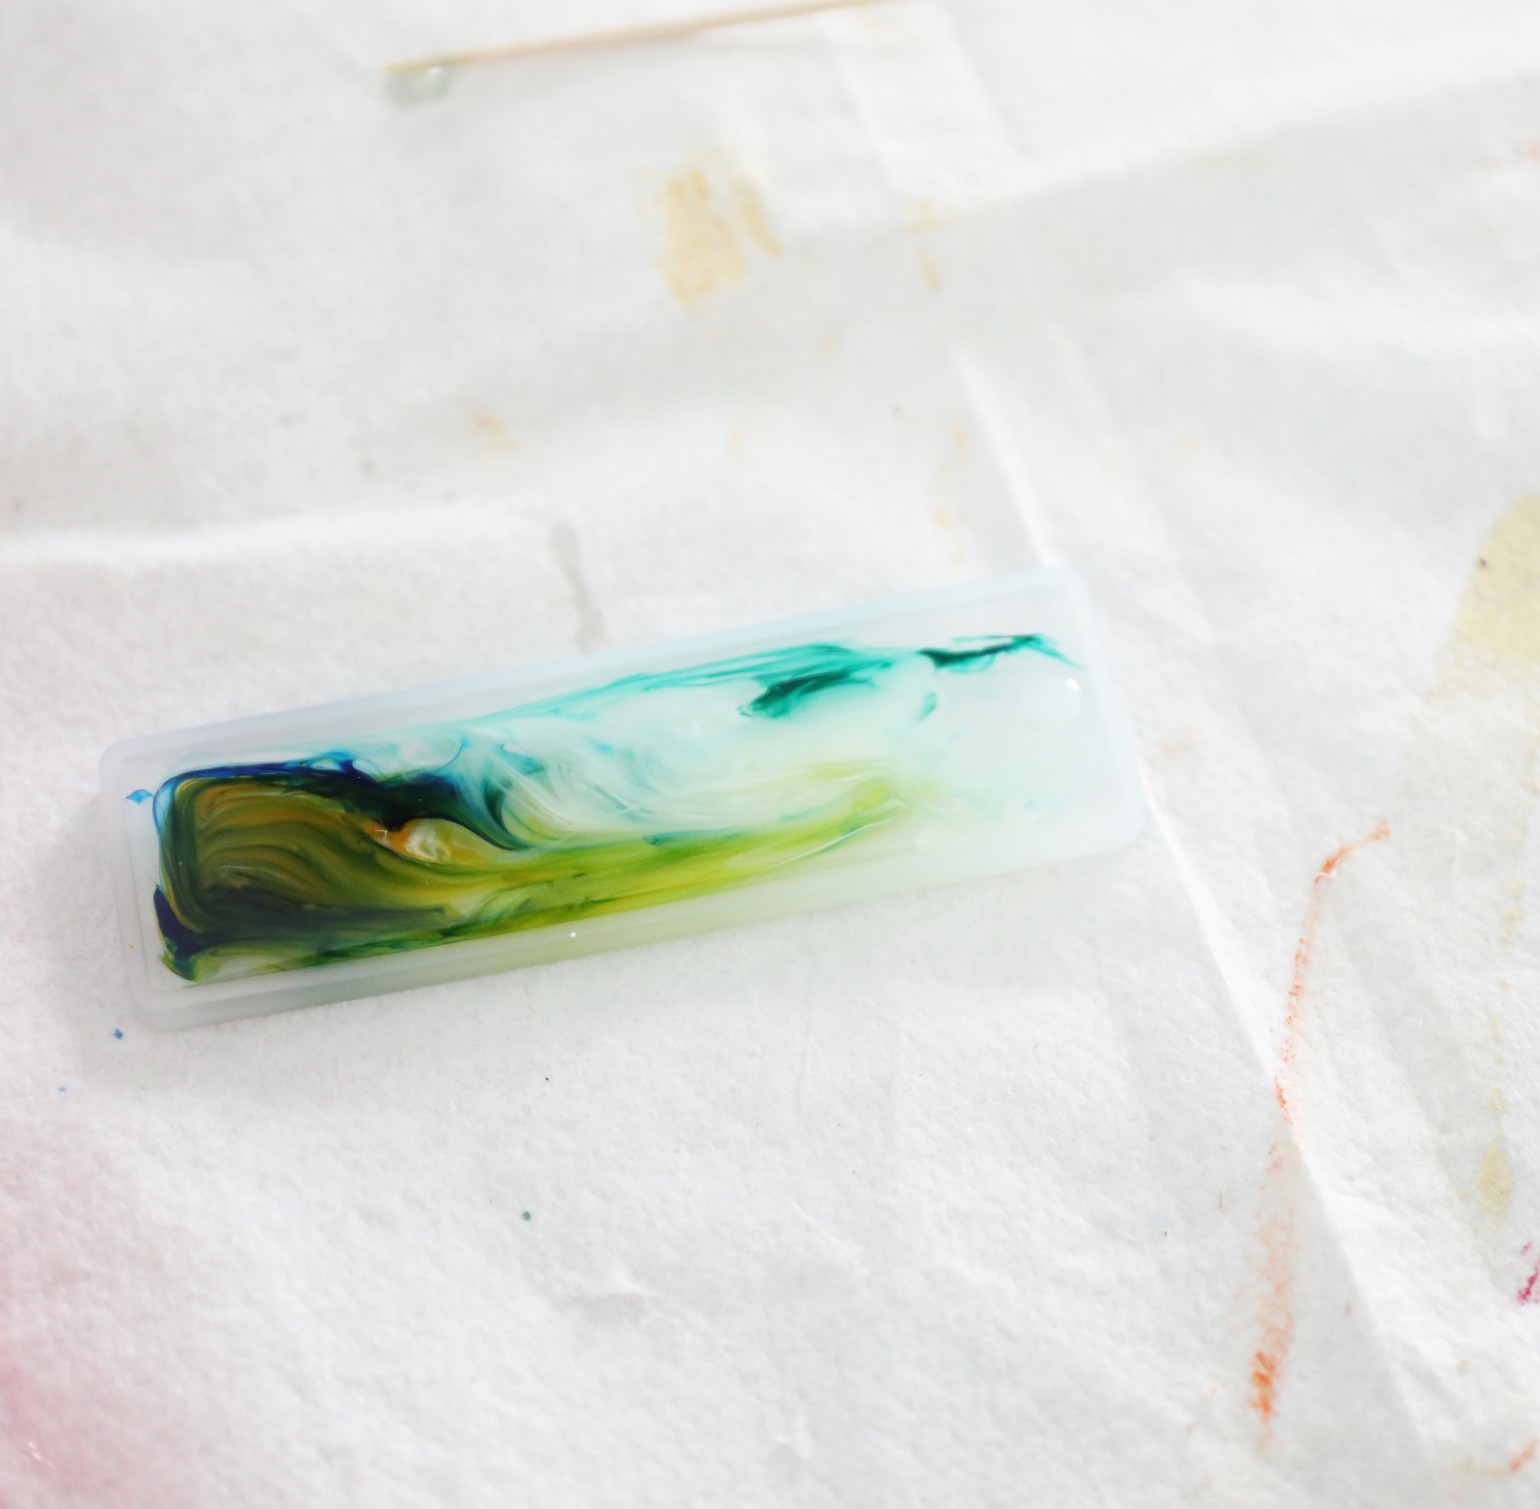
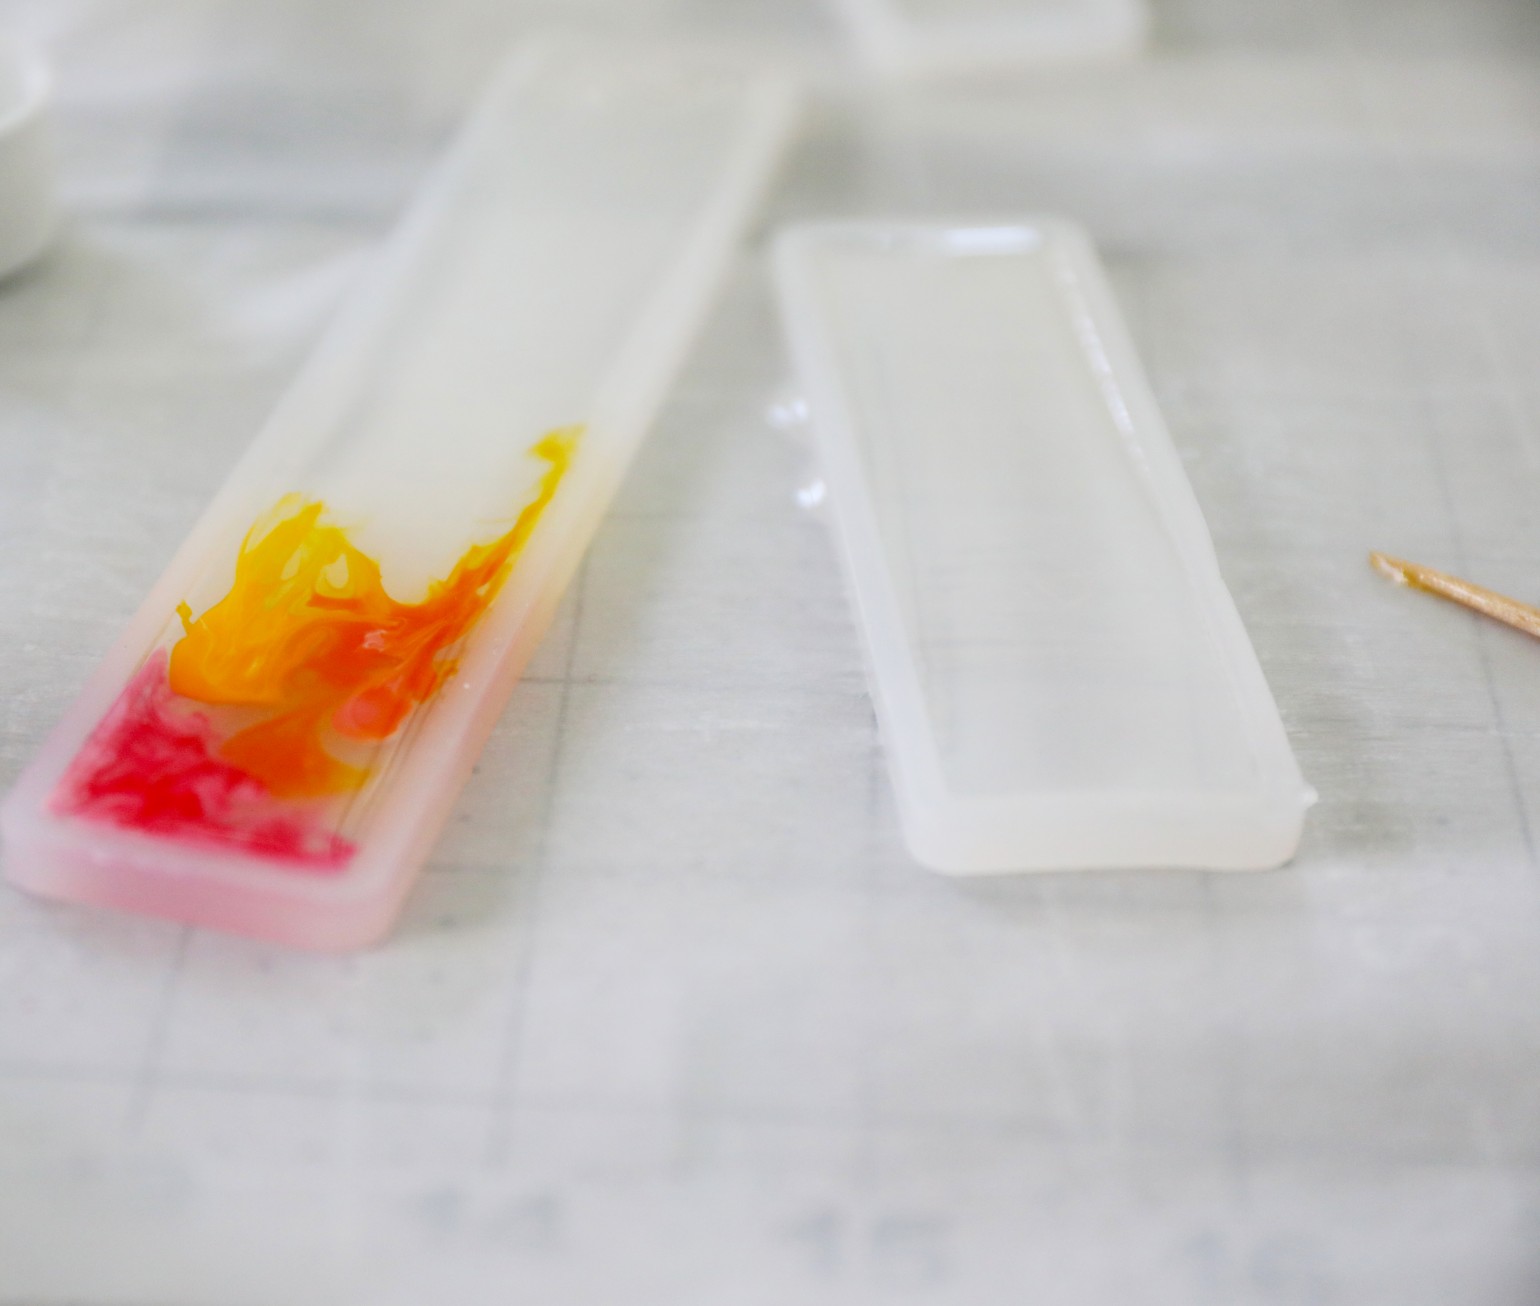
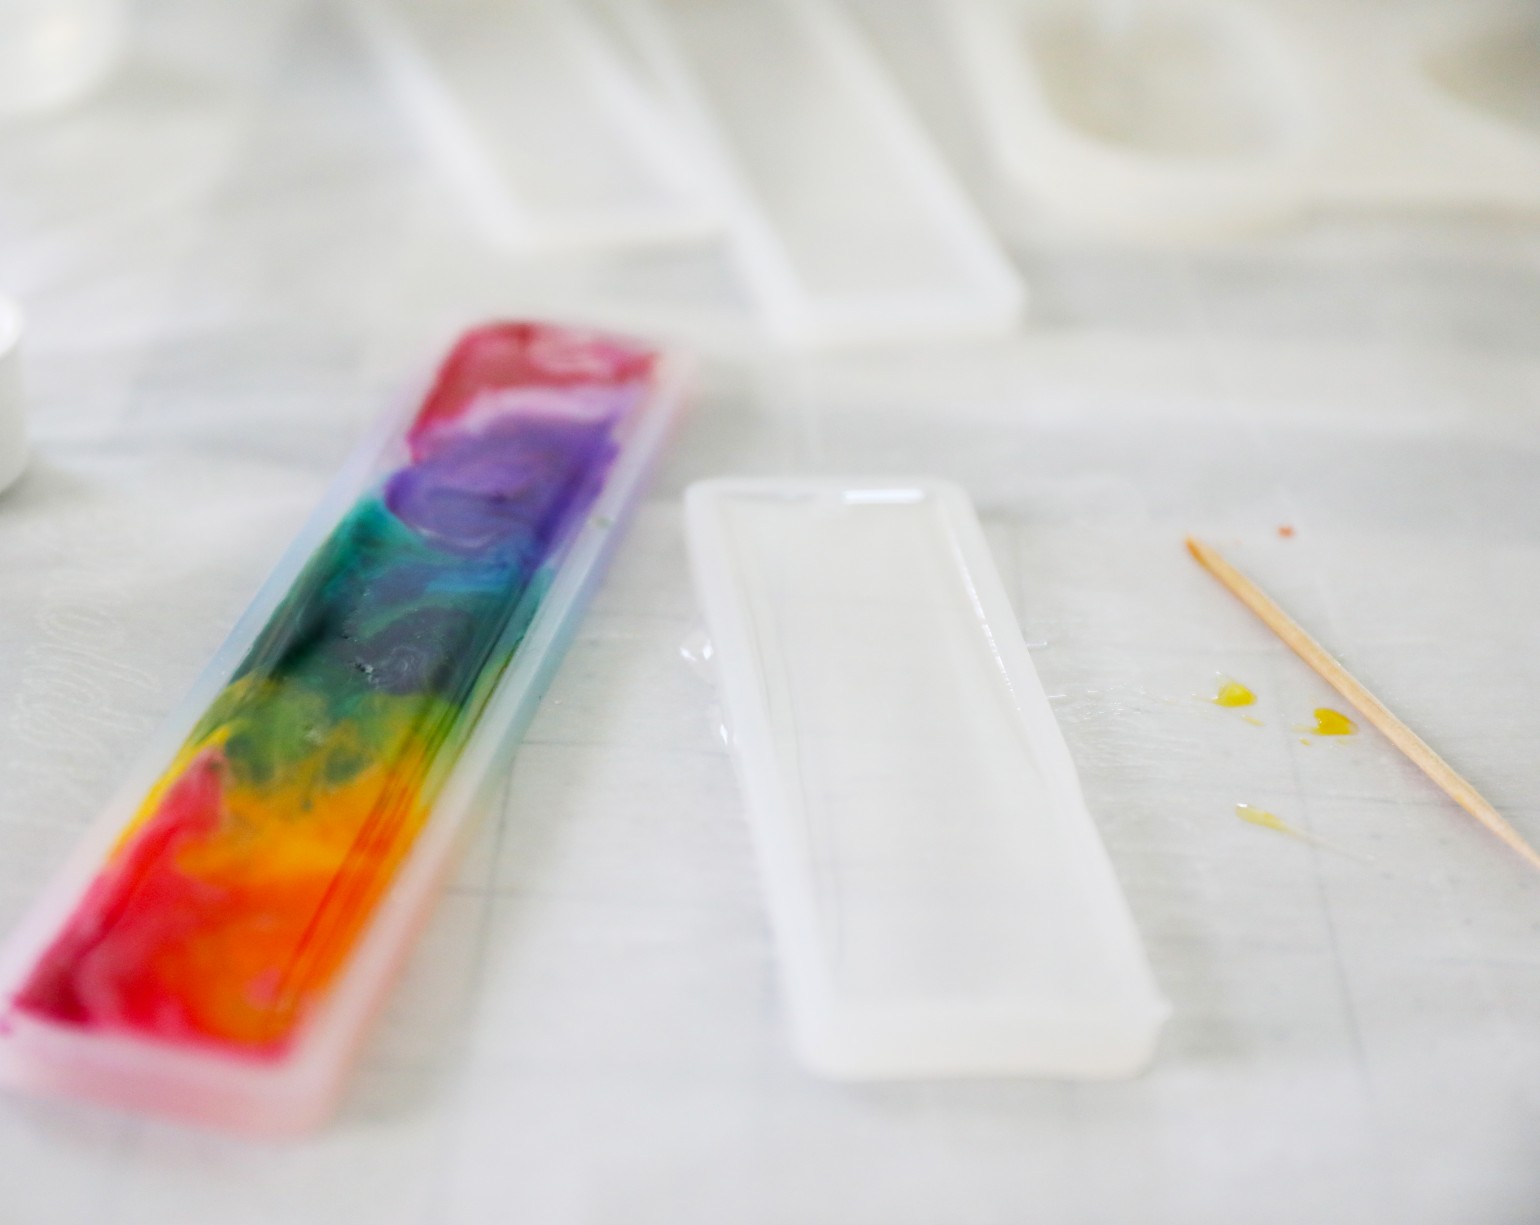
If you want to do the dye look:
Pour just a little of your resin mixture into the bottom of each mold.
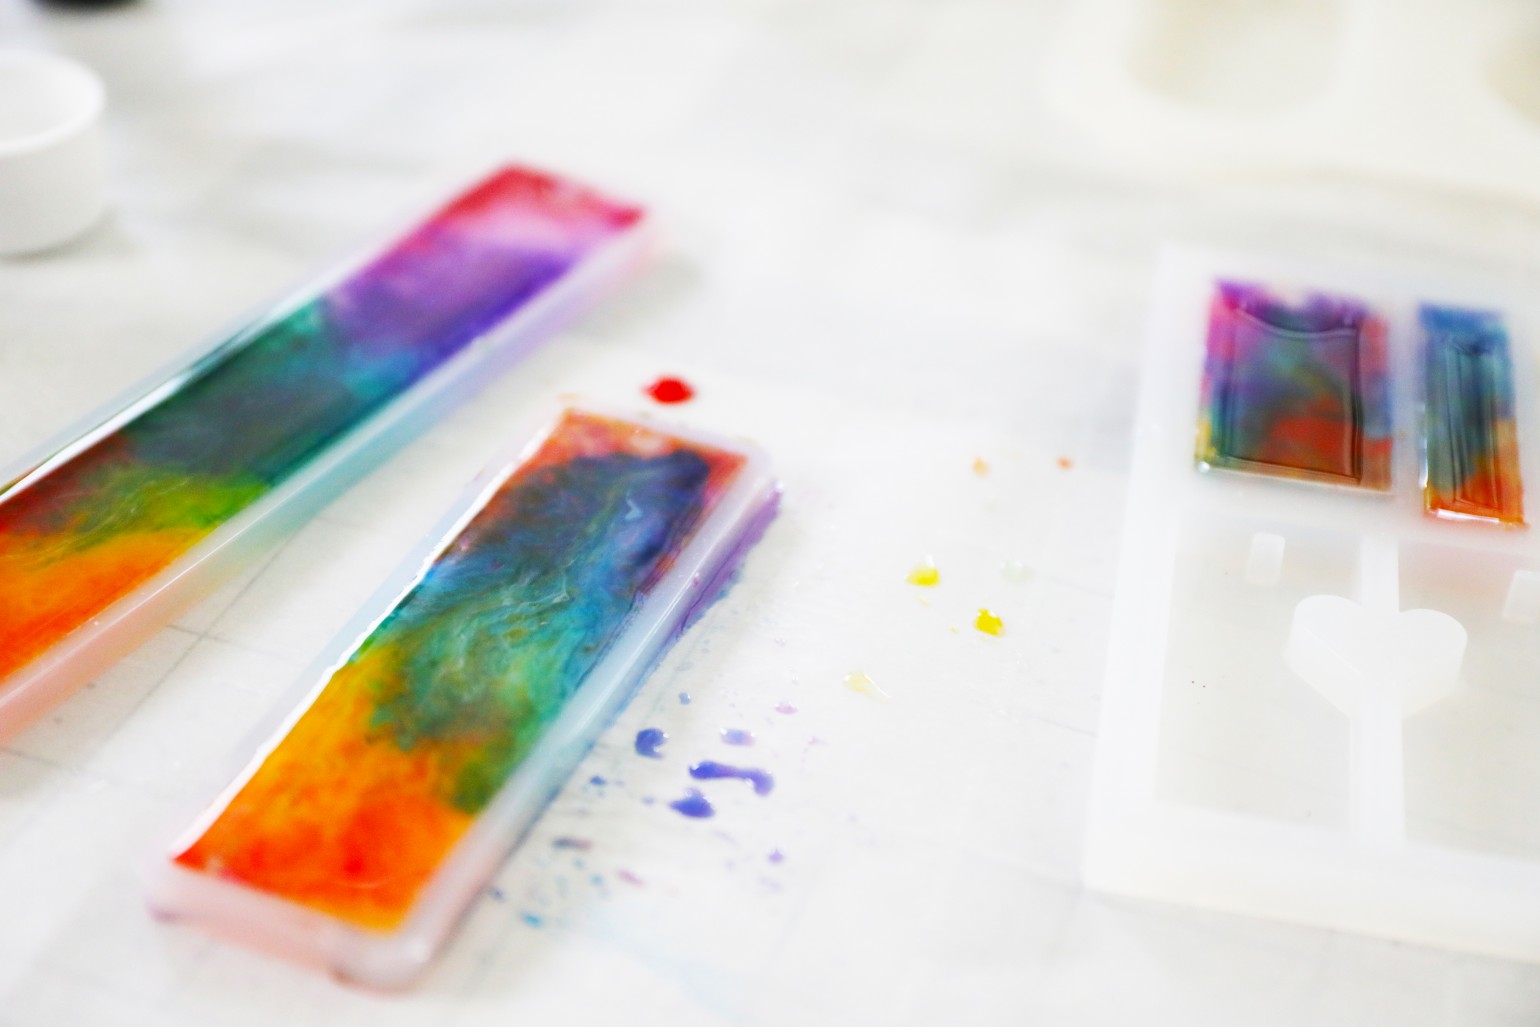
Put a few drops of dye into the mold, and stir gently with a toothpick, to give it the marbleized effect. {Your resin will go from liquid to soft gel in about 15 minutes.} We put little drops of dye in ours, and then moved it around with the toothpick. A little goes a long way, and i you use dye, it will take longer to dry. And when it does, if you use a lot, it will be more malleable or flexible when dry.
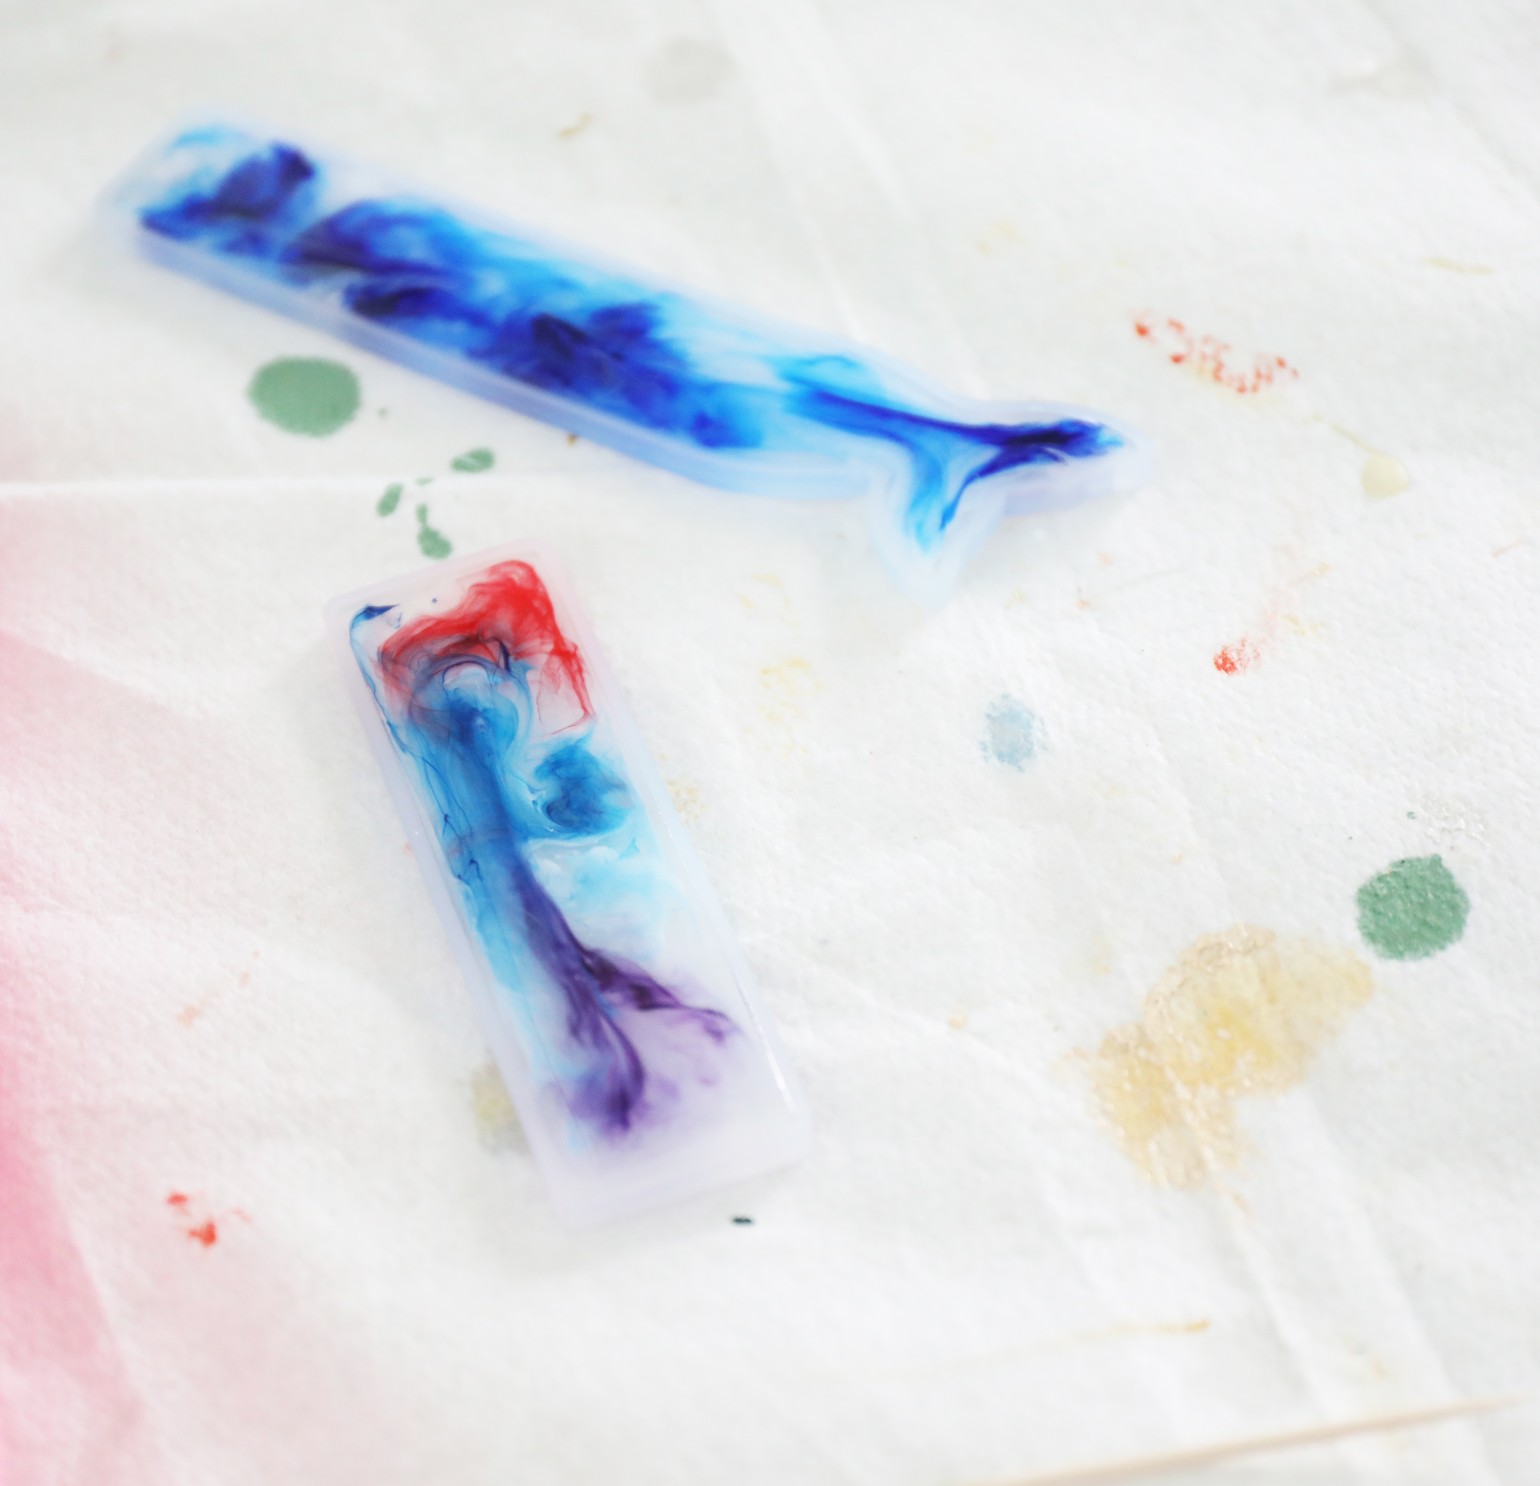
It’s so fun to play with all the fun designs!
The possibilities here really are endless.
Let it dry, for about 12 – 24 hours until it’s no longer tacky, and you’re done!
Clean up notes: you can use alcohol on your measuring cups while the resin still wet. I just clean them out with paper towels and some alcohol at the table.
Don’t pour it down the drain when cleaning – thus the paper towels. Also, if you get some on your skin, baking soda + salt are a good option for removal.
When they’re dry, and you can remove them {It takes the dye longer than the glitter} it’s time to add the tassels!
I just attached them with a jump ring and some small pliers for a fun look.
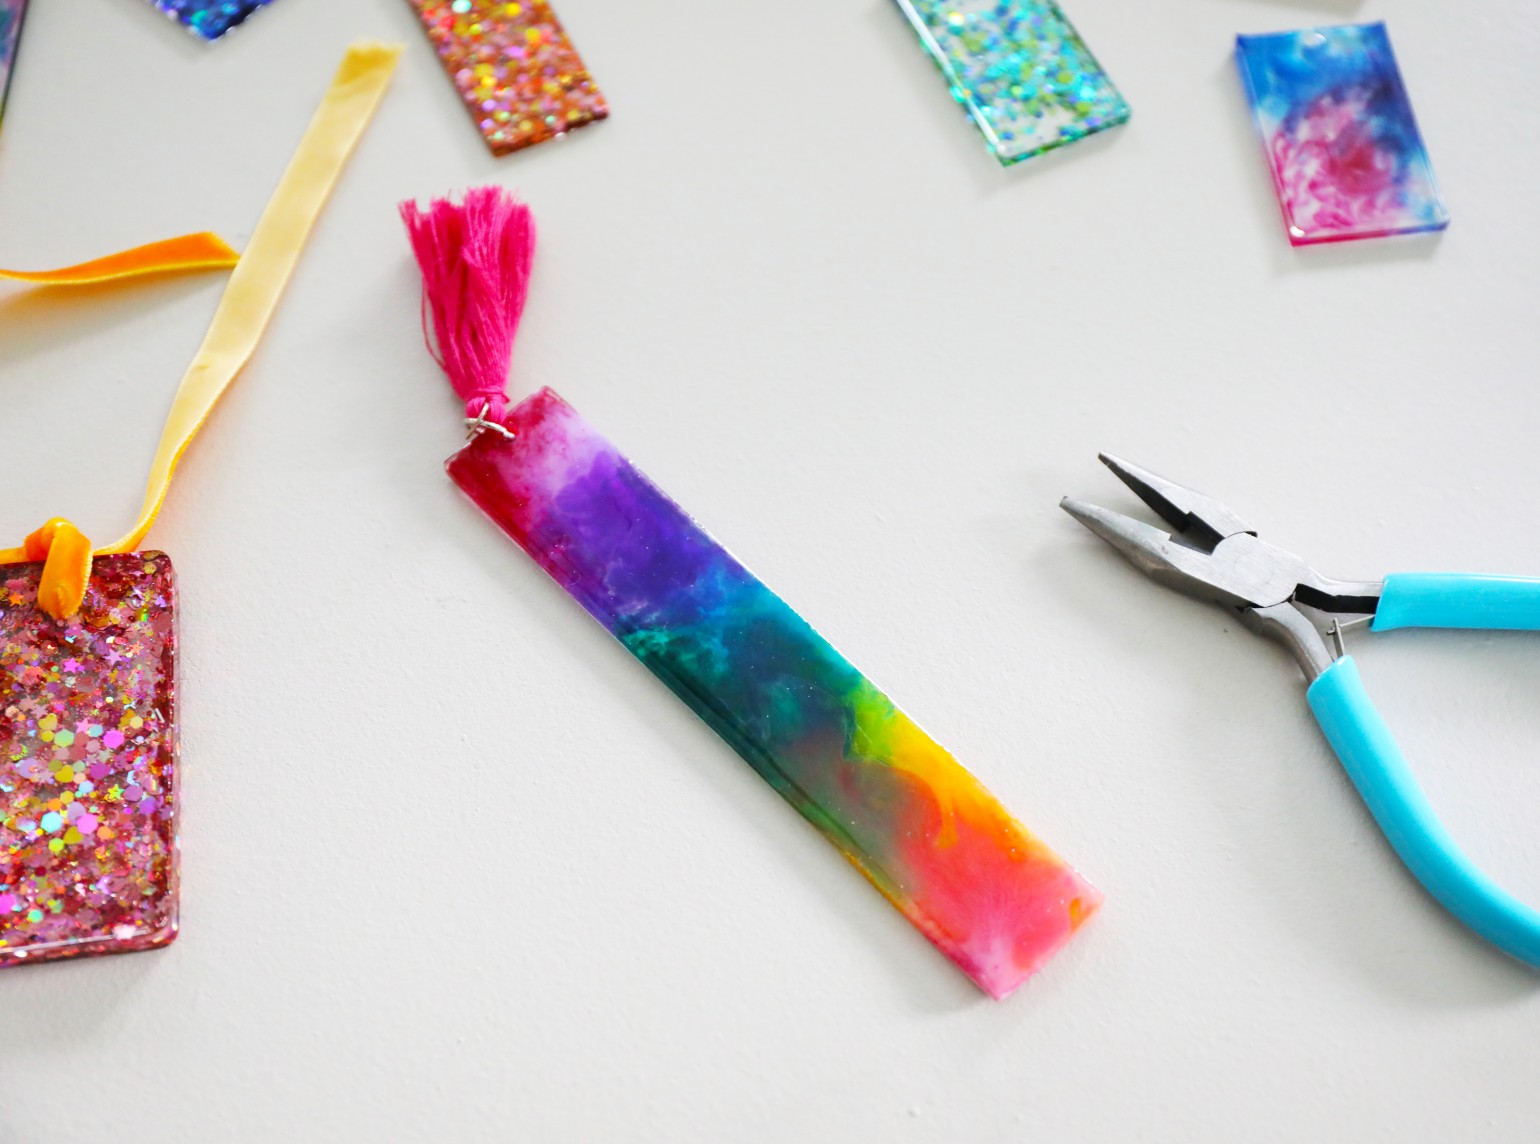
Don’t they make the cutest little book marks? We love this idea, of making some and gifting them with a book.
Or maybe even a gift card for teachers.
The possibilities really are endless.
As always, let us know if you try it. We’d love to hear!
We hope there are some lazy days in your future, if that’s what you need.
Have an inspired day!


This really is such a brilliant and simple idea. I’ve been kind of nervous about trying resin, but with your simple instructions I think I’m going to give it a go over the holidays. Thank you so much for the inspiration!
It became simple when I read your article! Thanks
Hi!
Such pretty items!
I have two questions–forgive me if you answered these in the article and I just didn’t see them:
1. When (at what stage of the process) and how do you make the hole in the bookmarks that you later put the jump rings through?
2. How many bookmarks would you estimate one resin kit makes?
Thanks!
Hi! I believe the kit comes with a premade hole at the top, so when you pour the resin you will automatically have a hole. I am awful at guestimating how many it makes, because it’s been a minute since I’ve done this, so I can not answer the second question. I know enough to always have two kids on hand though, because they do go quickly when making multiples of something. Hope this helps!