
how to lay a brick pathway
A few weeks ago, we were really busy with all things outdoors, prepping for the spring months coming our way before that cold winter weather set in. So far we’ve shared the reveal {curb appeal + phase one of our yard!}, and how to build a trellis with Yellawood™. Then we moved on to the backyard and all things reveals there as well. Today we’re thrilled to share how to build a brick pathway with Glengery Bricks!
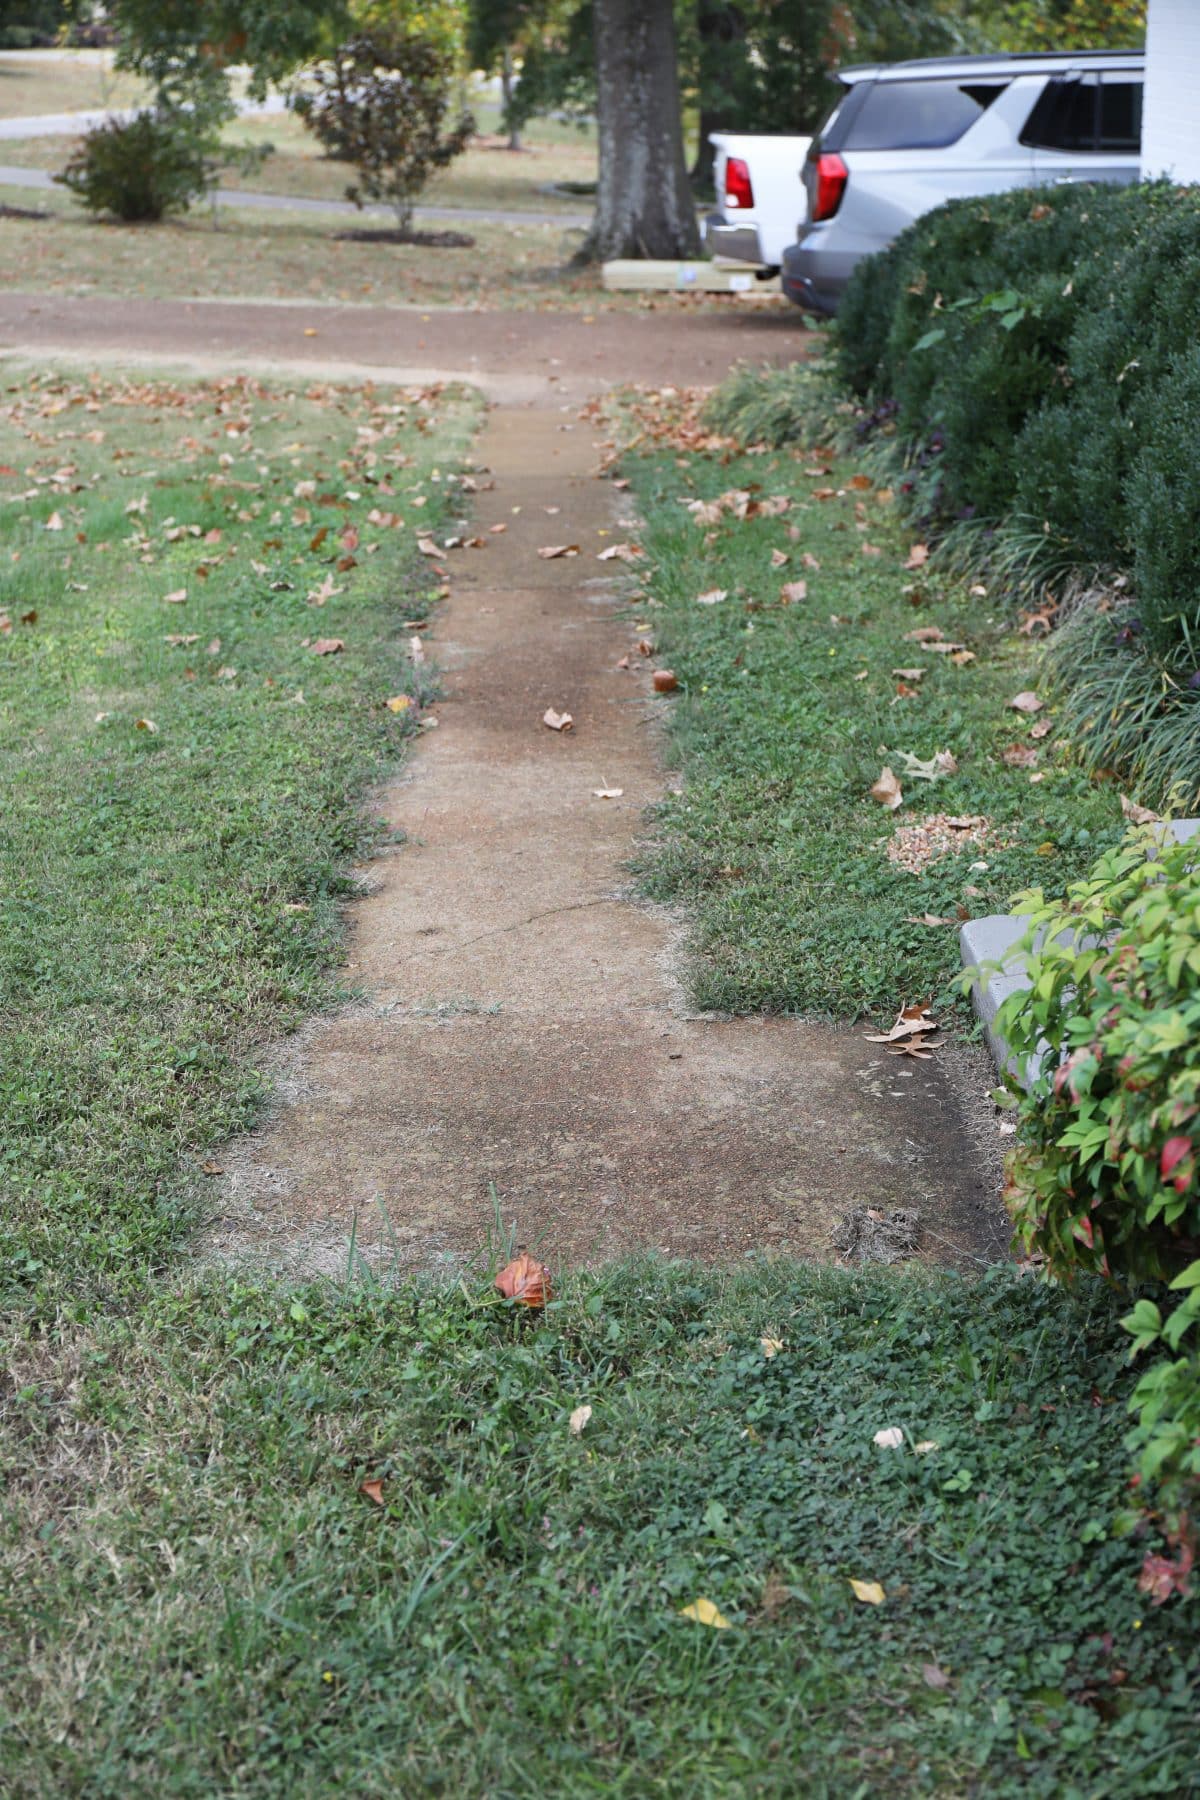
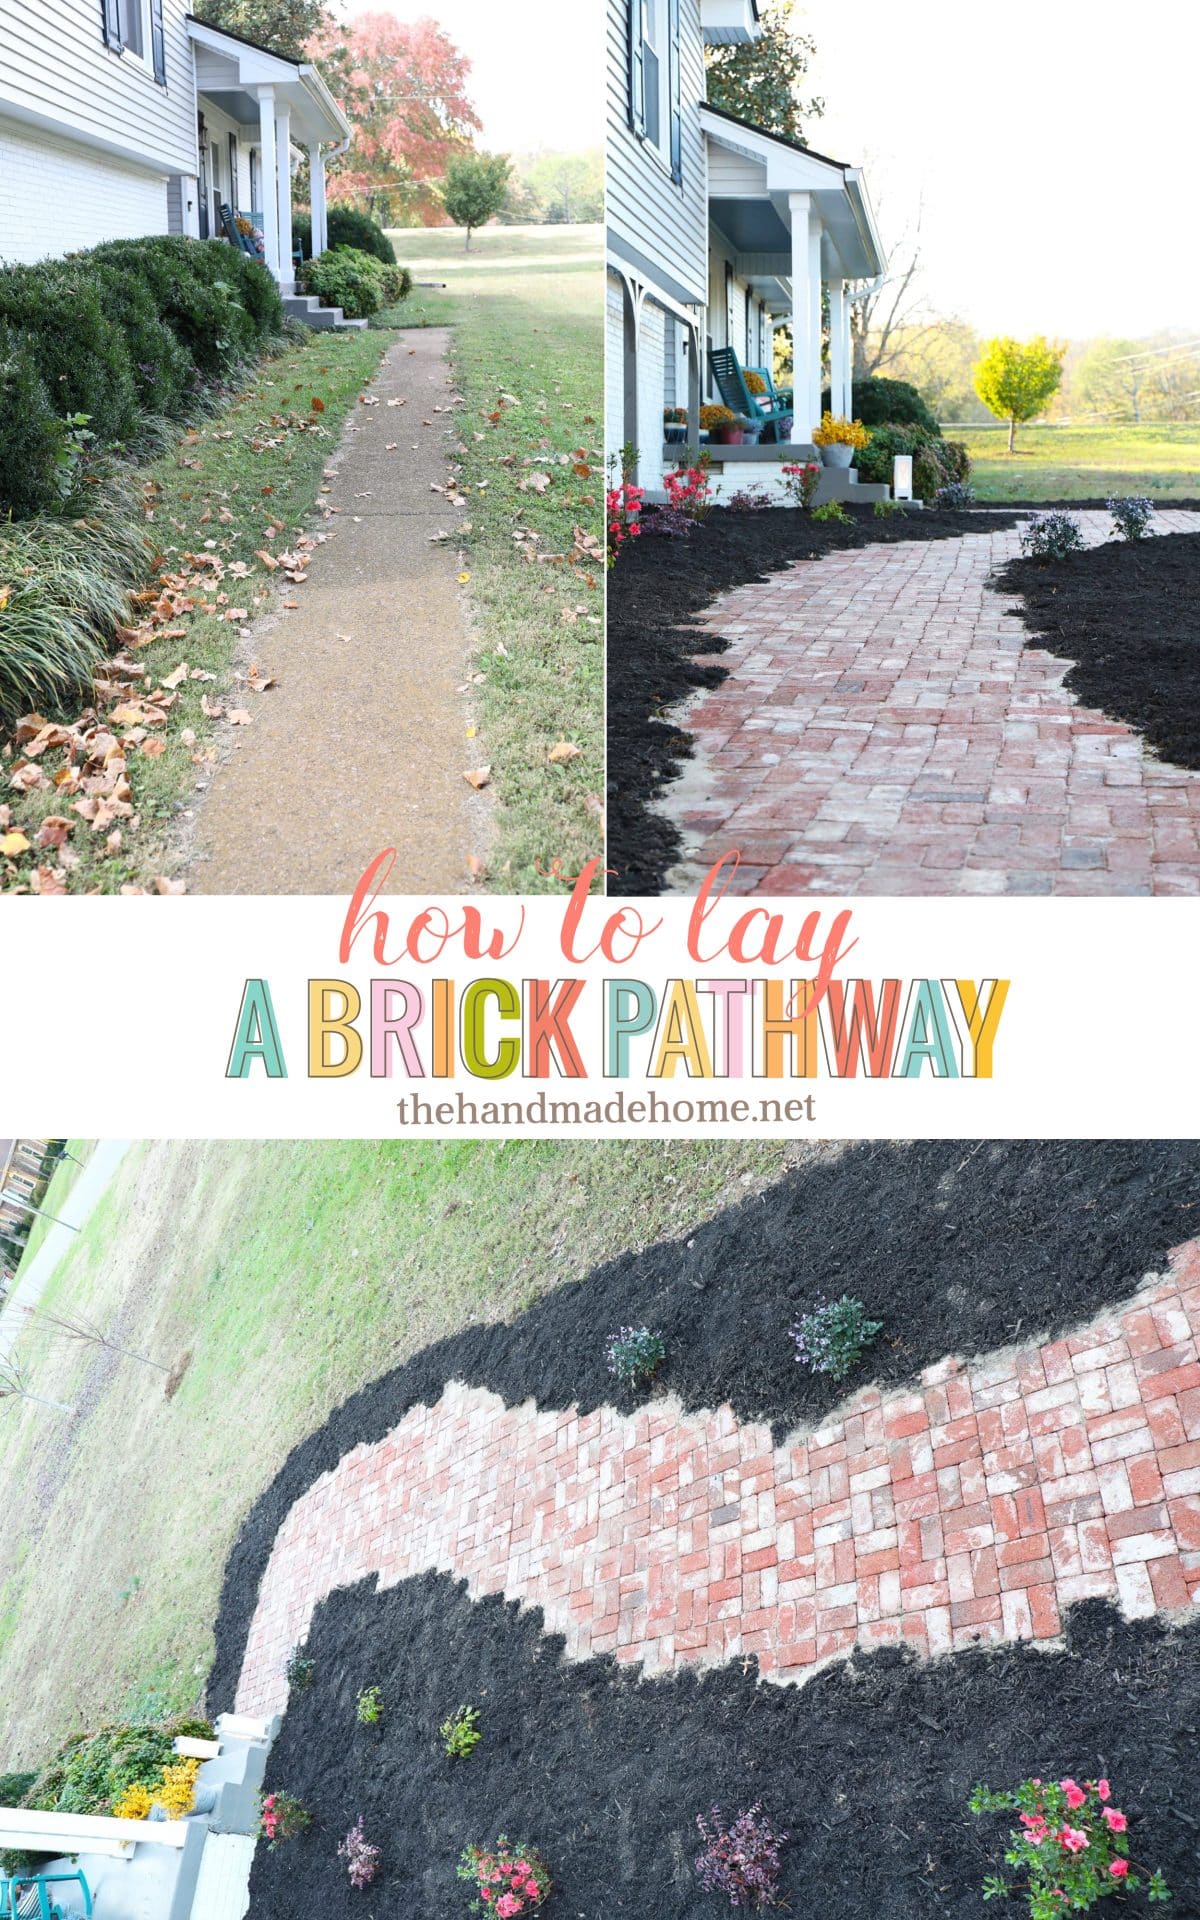
Here’s where we started:

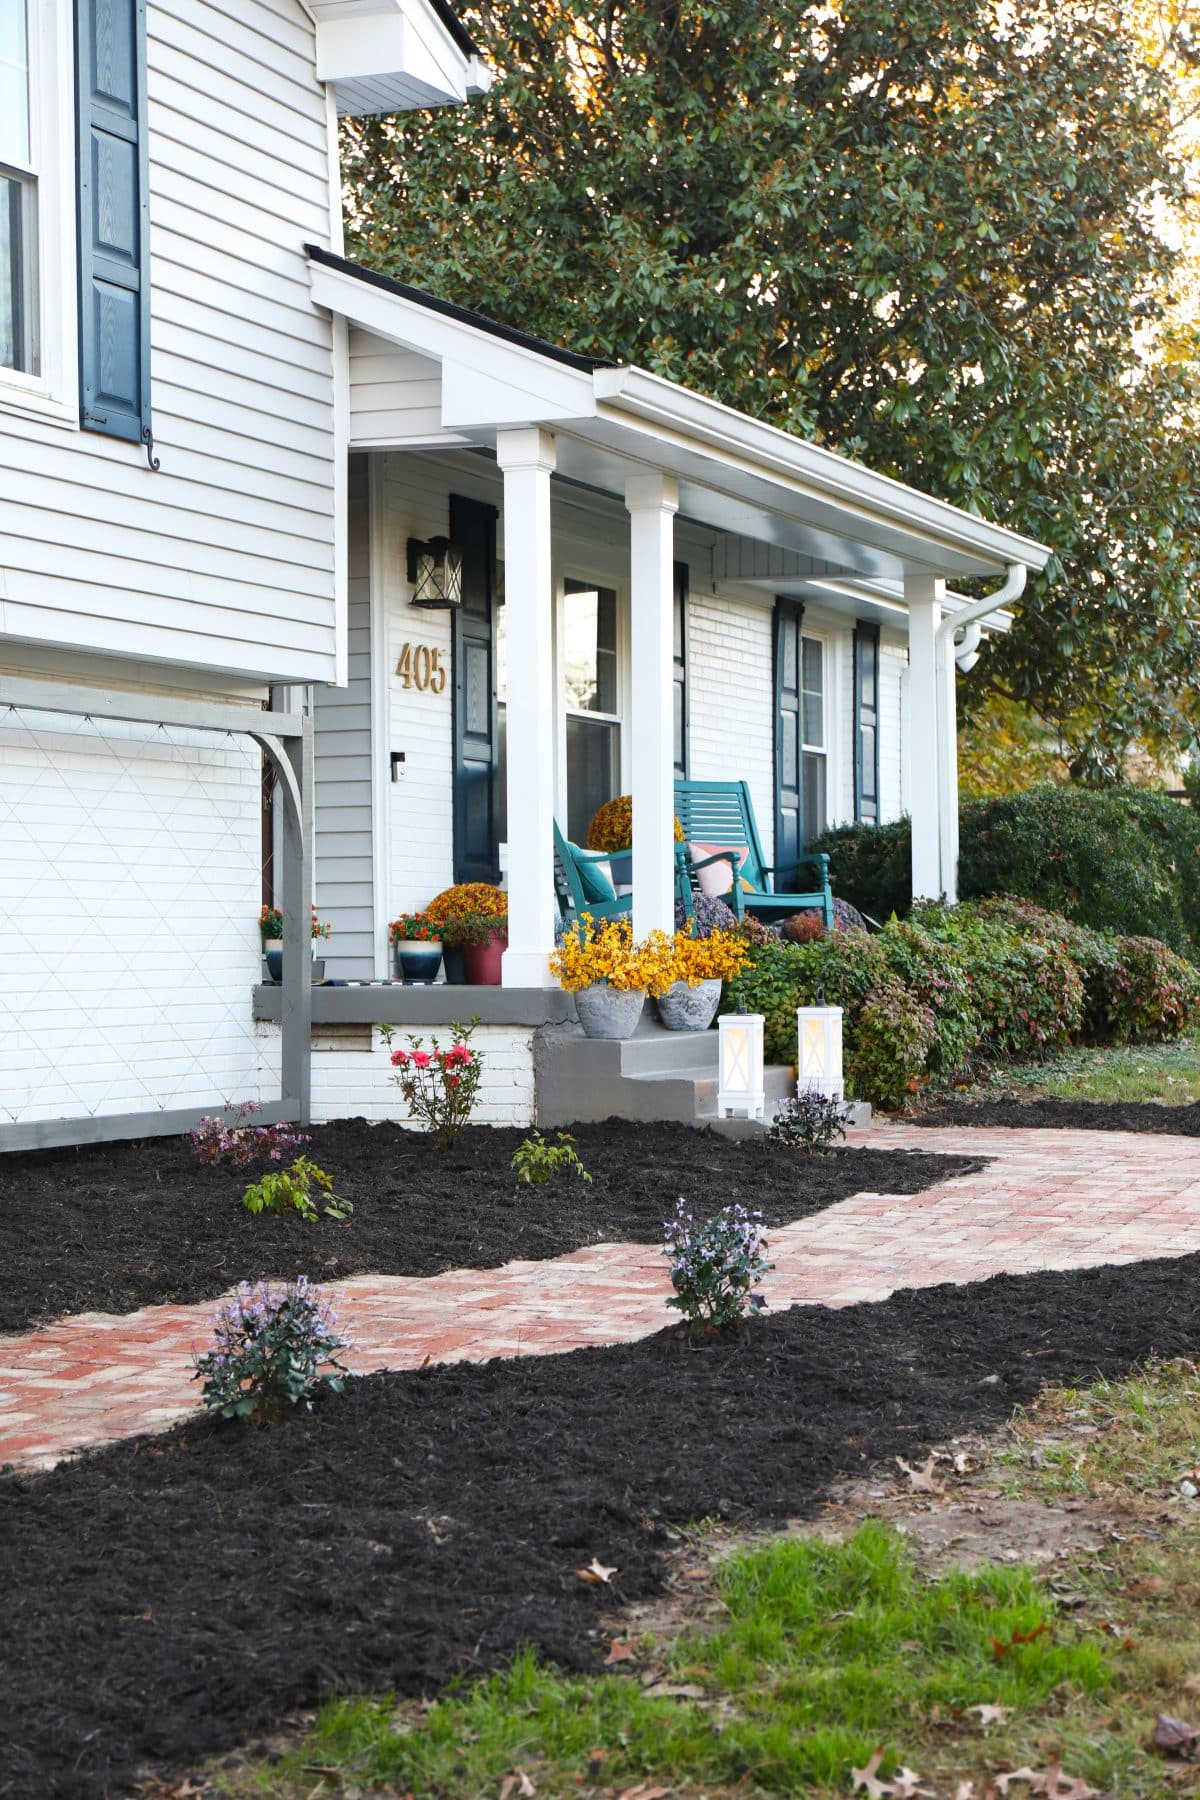
And here we are now!

We’ve come a long way from the before!
This is a nice foundation for our spring projects when it comes to our overall vision for the English garden look in our front yard. We only plan to build on what we’ve done here. So today we thought we’d share how we laid this brick pathway!
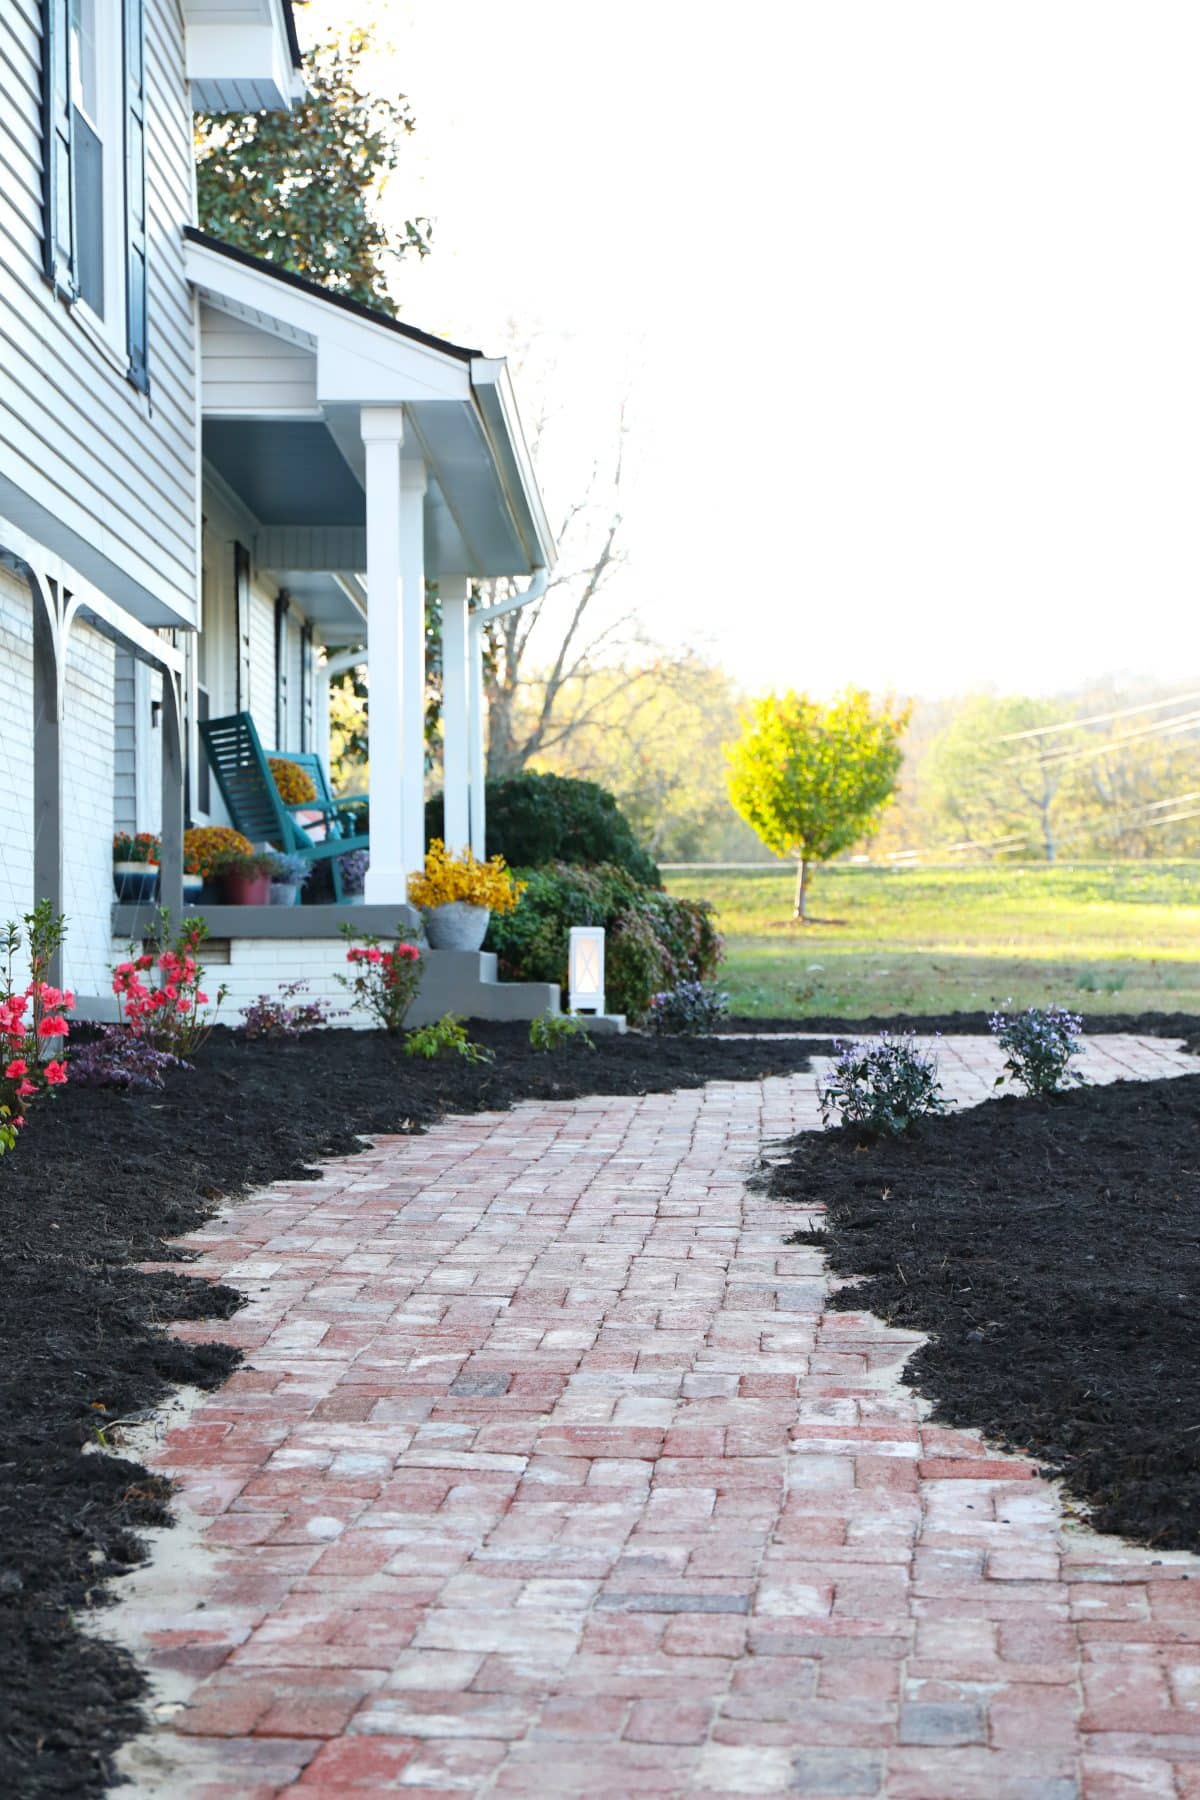
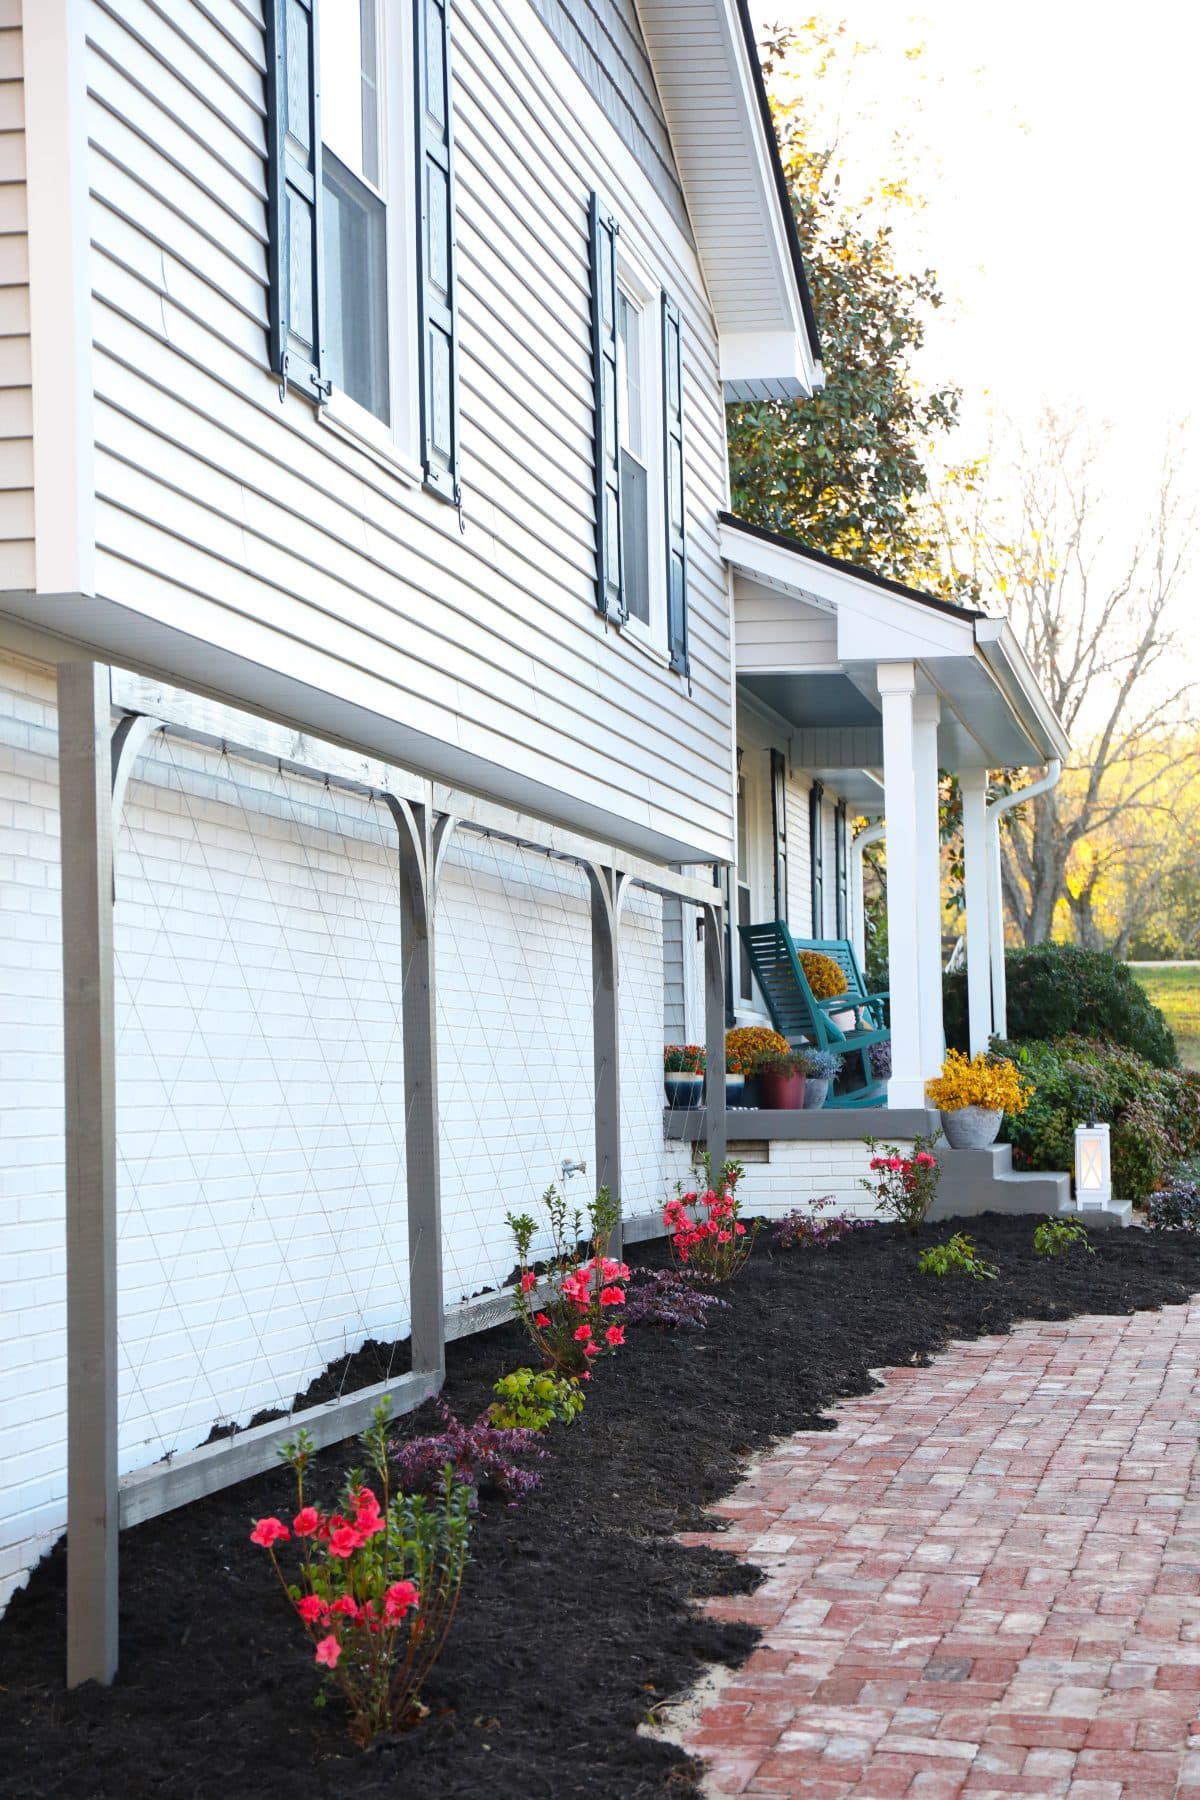
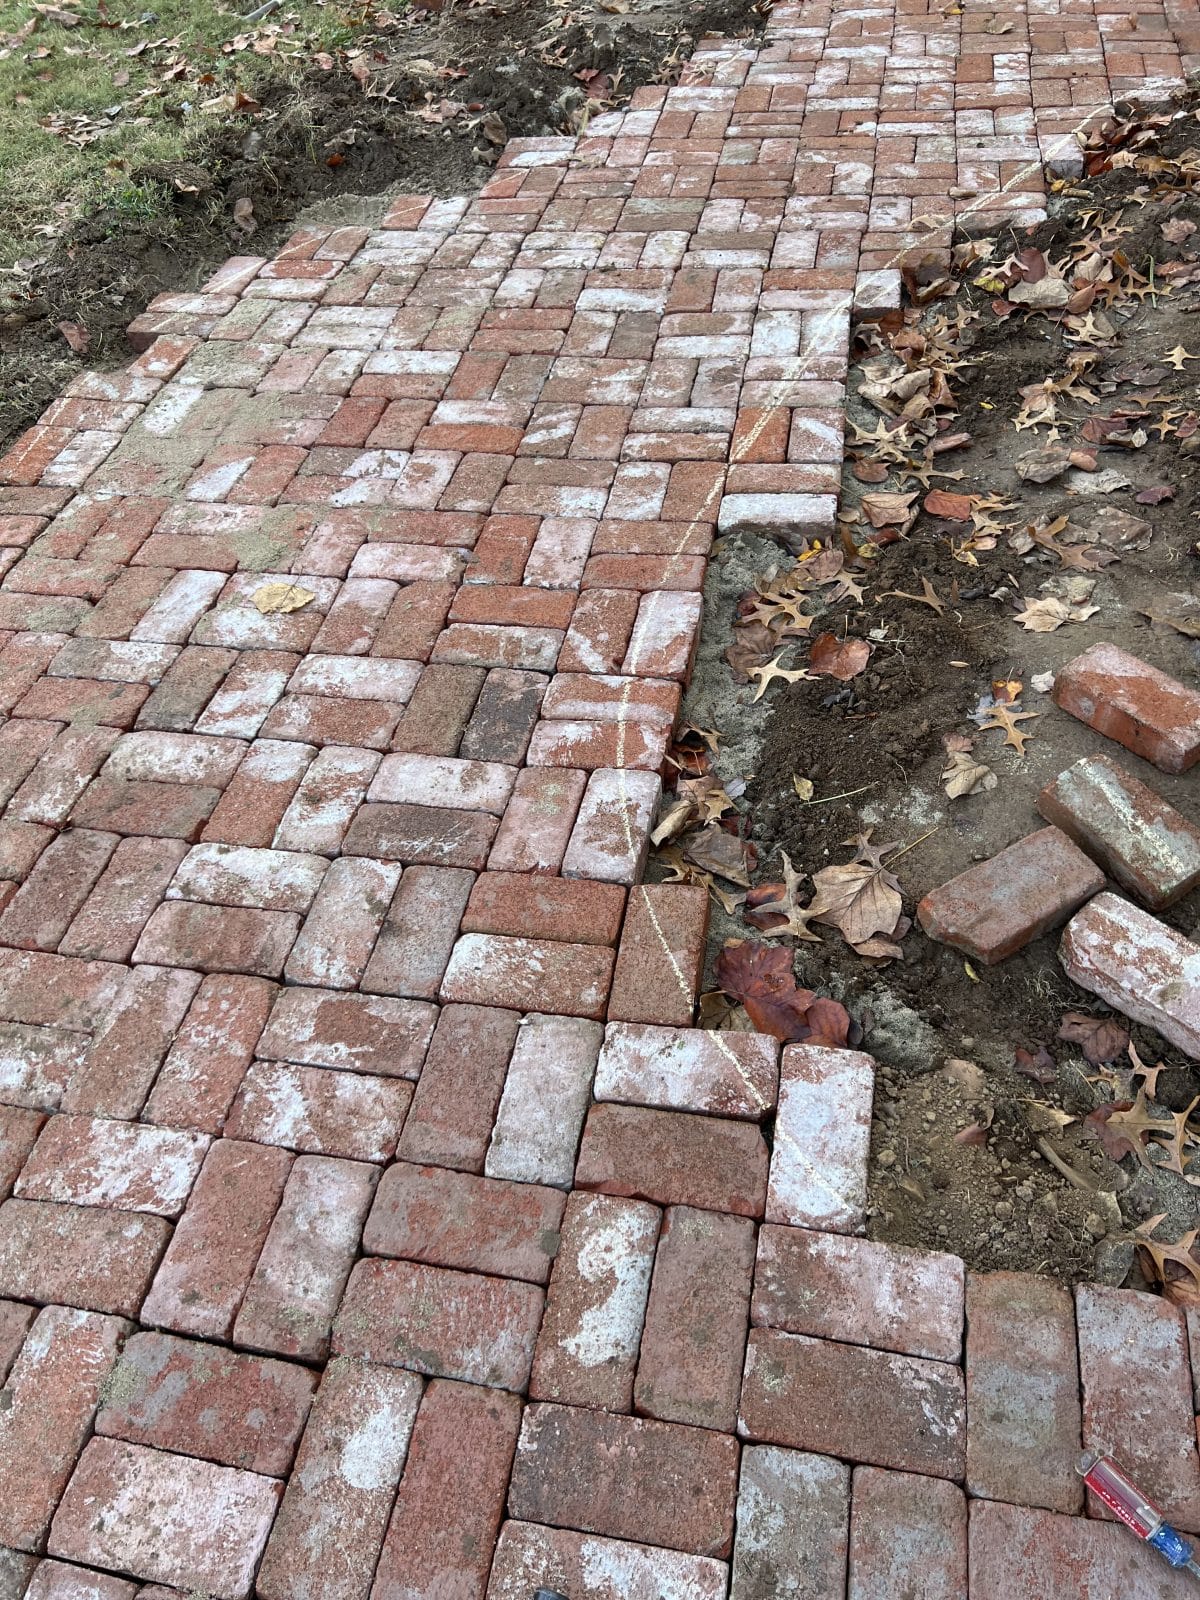
We couldn’t have pulled off this look, without these amazing pavers. We broke up the old walkway, and added these beautiful pavers from Glengery Bricks, to serve as an anchor for what is to come on all things yard and ground. It also got rid of that harsh angle with the old pathway, {Byyeee aggregate} and loved doing a basketweave pattern to add a little more curve.
The pavers {Market Street Pavers} are a part of a two part system with the trellis, to break up that rigid feel and give it a softer view. At first, we thought we would cut the bricks into a defined path, but we didn’t like the rigid look when we tried to trim it down, since this is what we were moving away from. We wanted this pathway to feel like it’s as old as the home itself, and with their unique character it wasn’t hard.
Because it felt kinda nice to say goodbye to 1976. And say hello in a new, character-filled timeless way.
1. How to Lay a Brick Pathway – What You’ll Need:
• shovels or an excavator
• metal rakes
• sand
• gravel – crush run
• tamper
• wheelbarrow
• pavers of choice
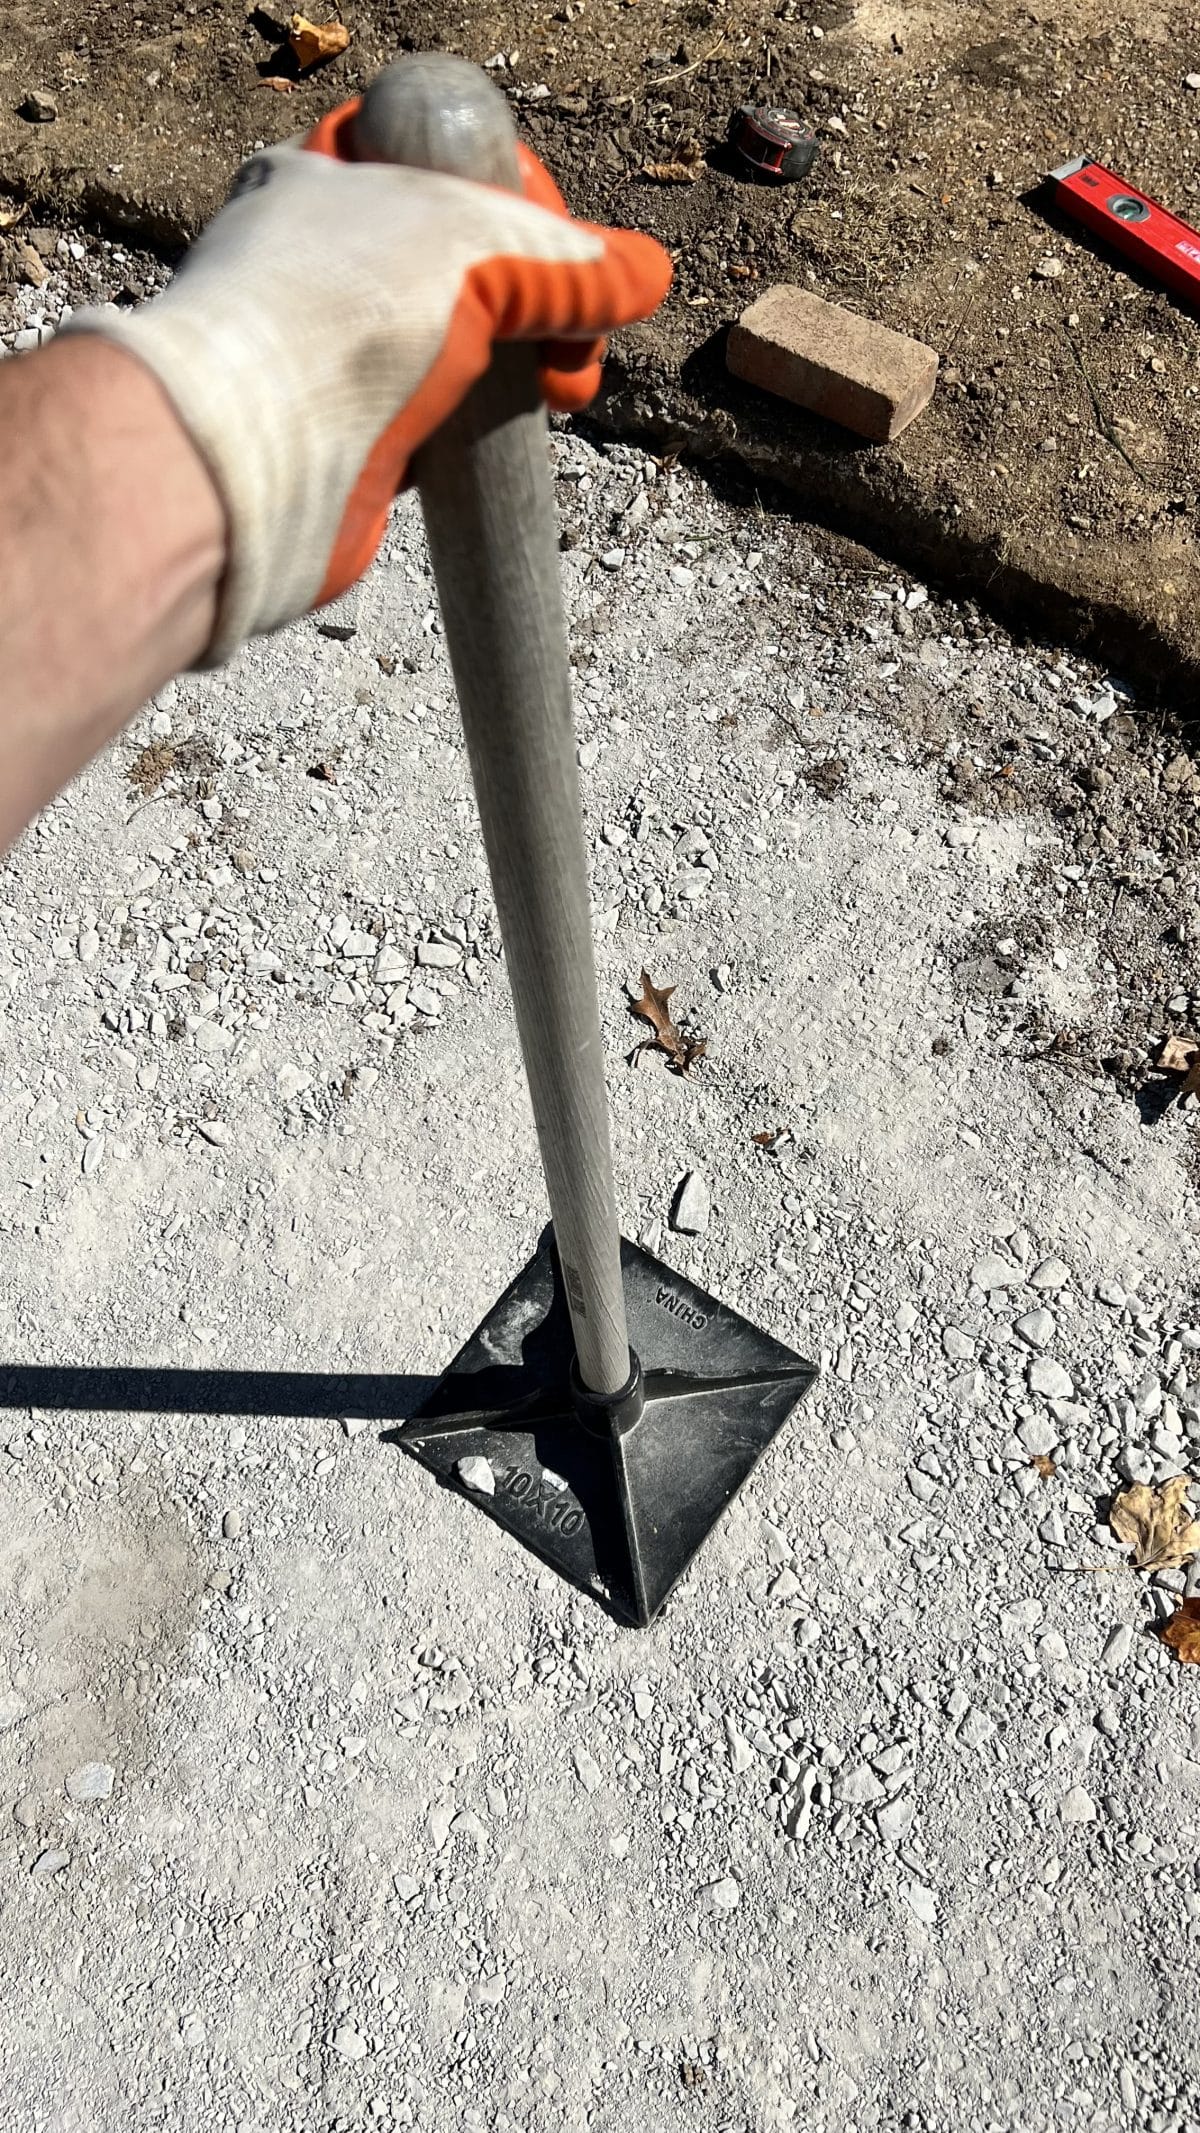
• level
• mallet
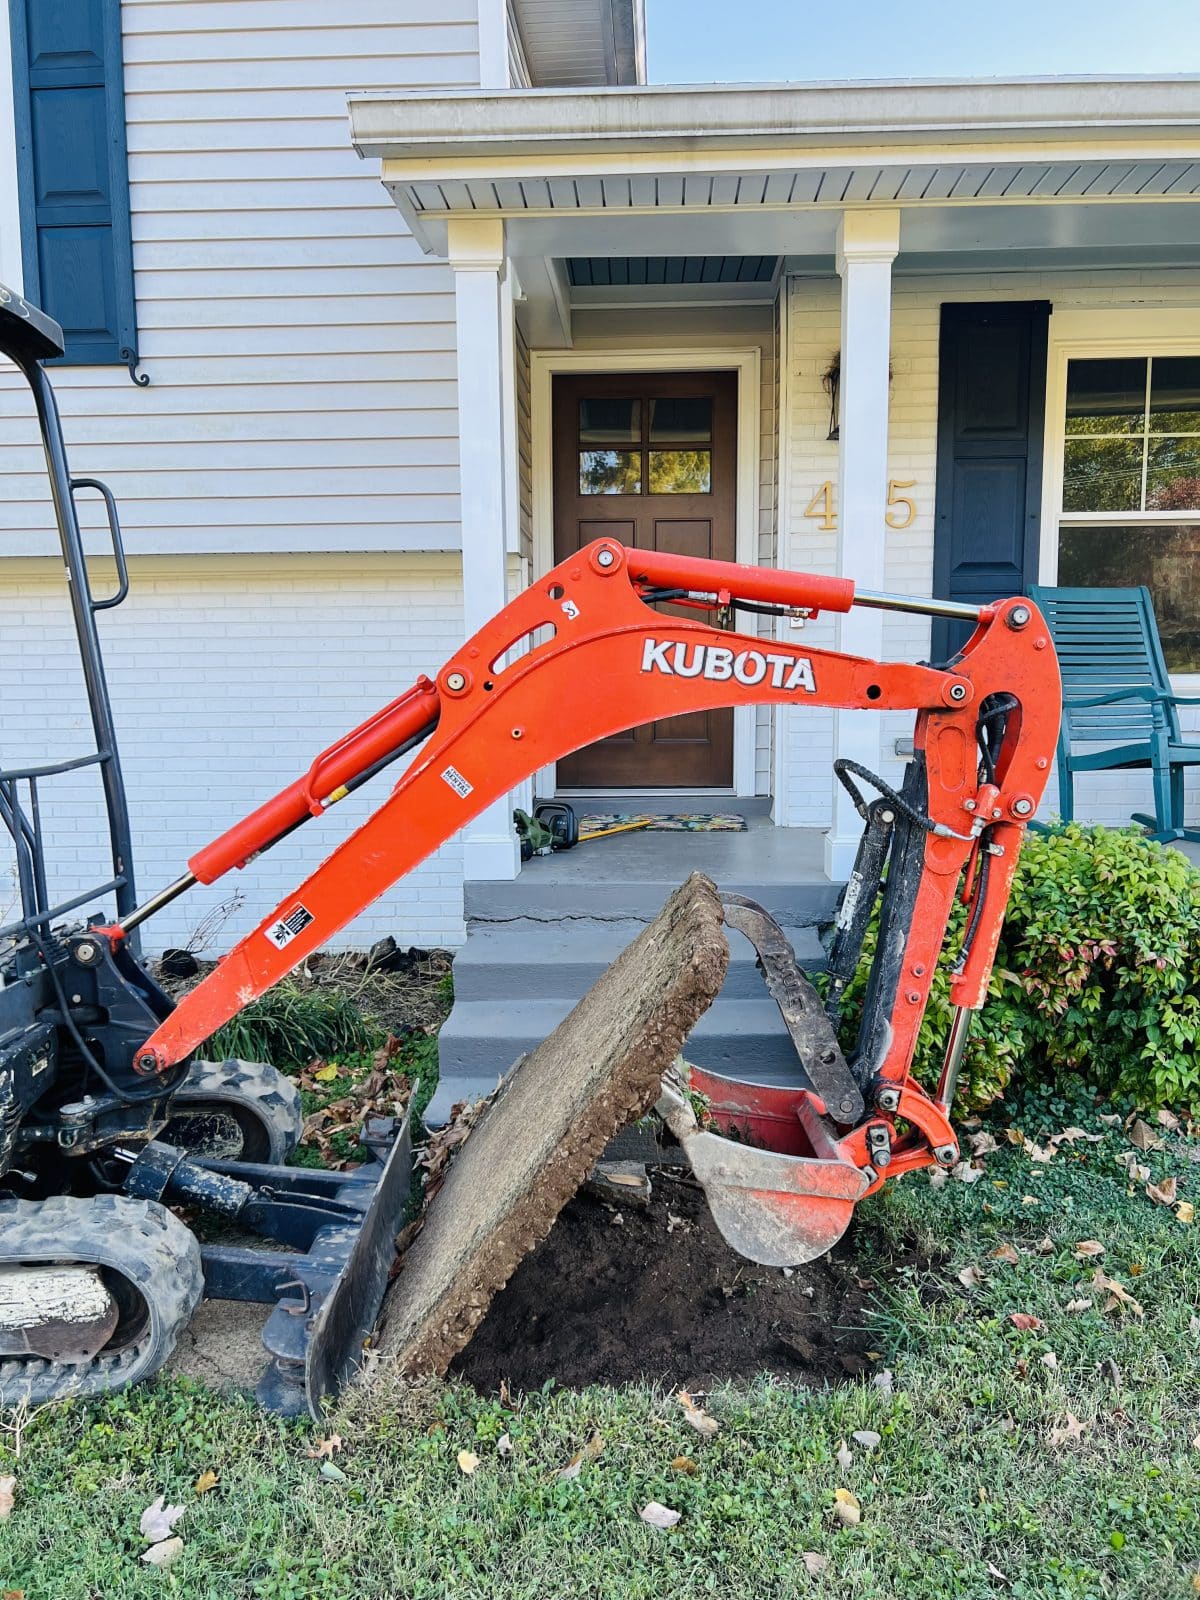
2. How to Lay a Brick Pathway: Break it Up
This may require some heavy-duty machinery, and we recommend using what works for you! We’ve seen people do it every way possible, but this isn’t difficult to rent at the local home improvement store. It can also save days of work.
No matter how you choose to remove what you presently have, you’ll still need to put in some good old fashioned physical labor by digging out the dirt and leveling the area. To figure out how deep your path should be, measure the paver height and add 3 inches for the sand and the gravel.

3. How to Lay a Brick Pathway: Level it Out
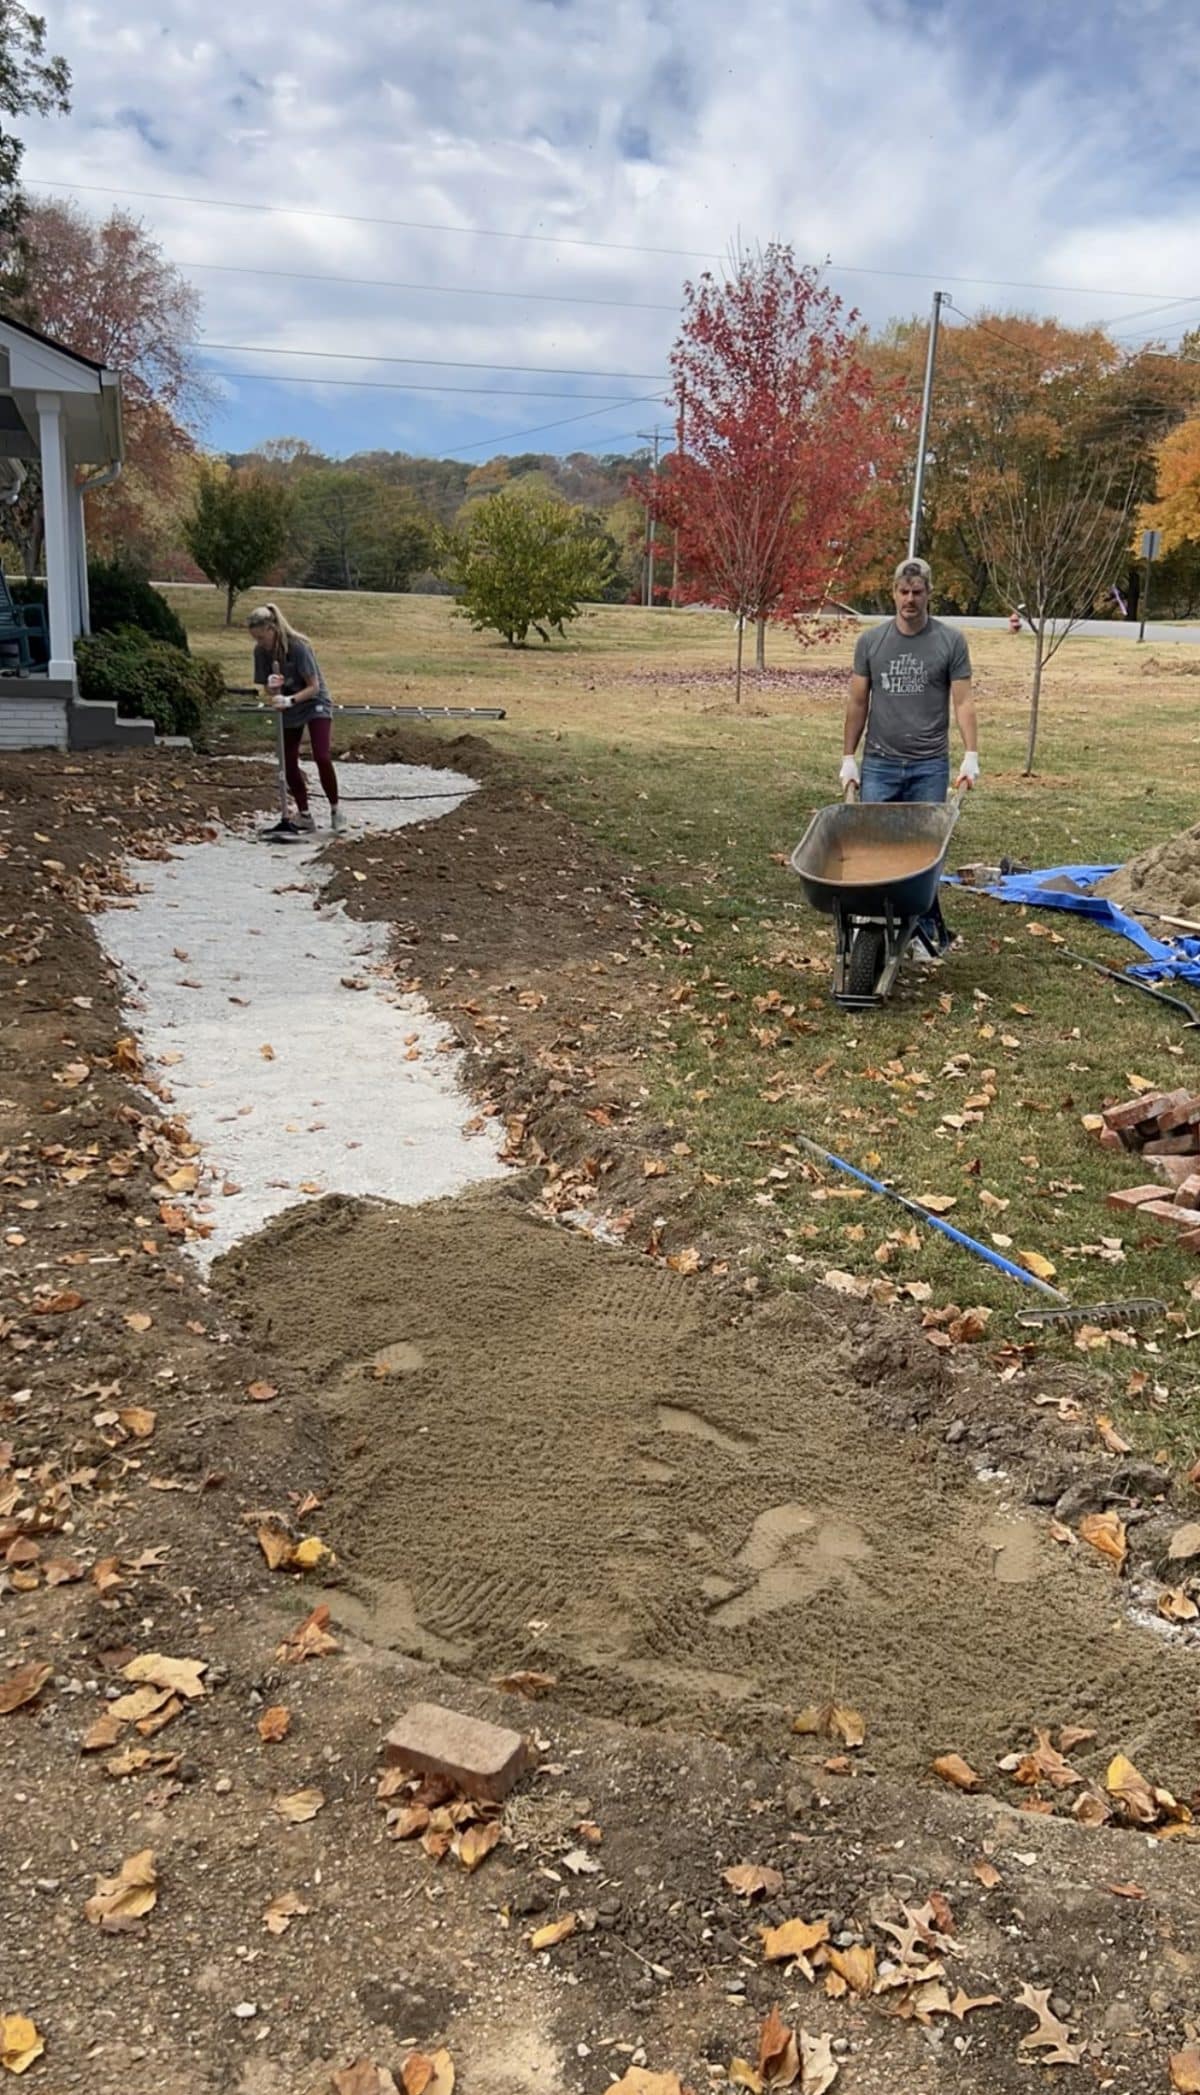
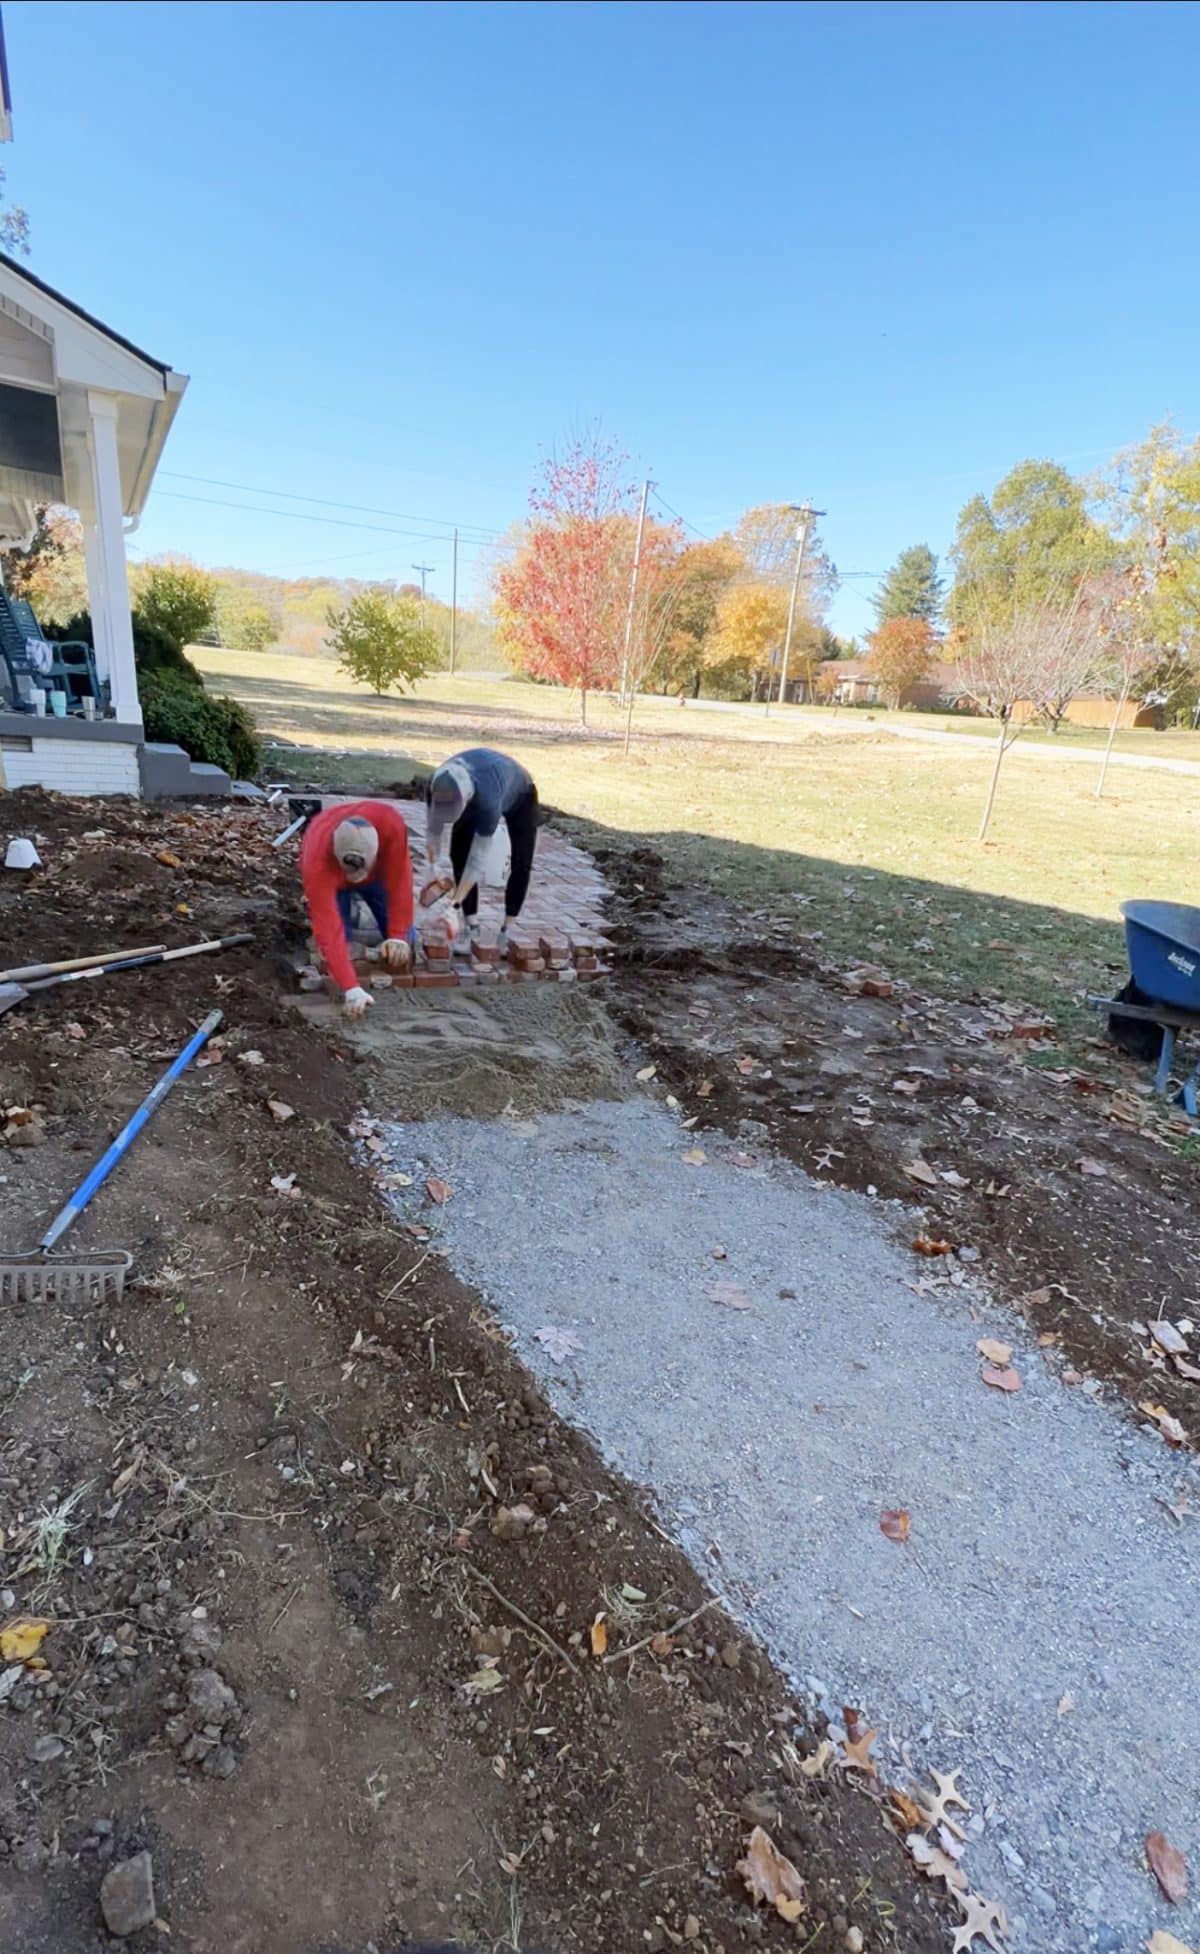
Once the area is cleared, you can plan out your pathway. We already had an overall plan, but this was our chance to commit. We knew that we wanted curves in our front yard to offset the harsh angles of a split-level home, so this was one of our main goals. It felt like a little like a rough draft, and we were able to plan out the area by using a shovel to shape the path.
Next up, was placing some gravel to help level out the ground. Our home is on a graded area, so we slowly went with the lot, letting it level down as we went.
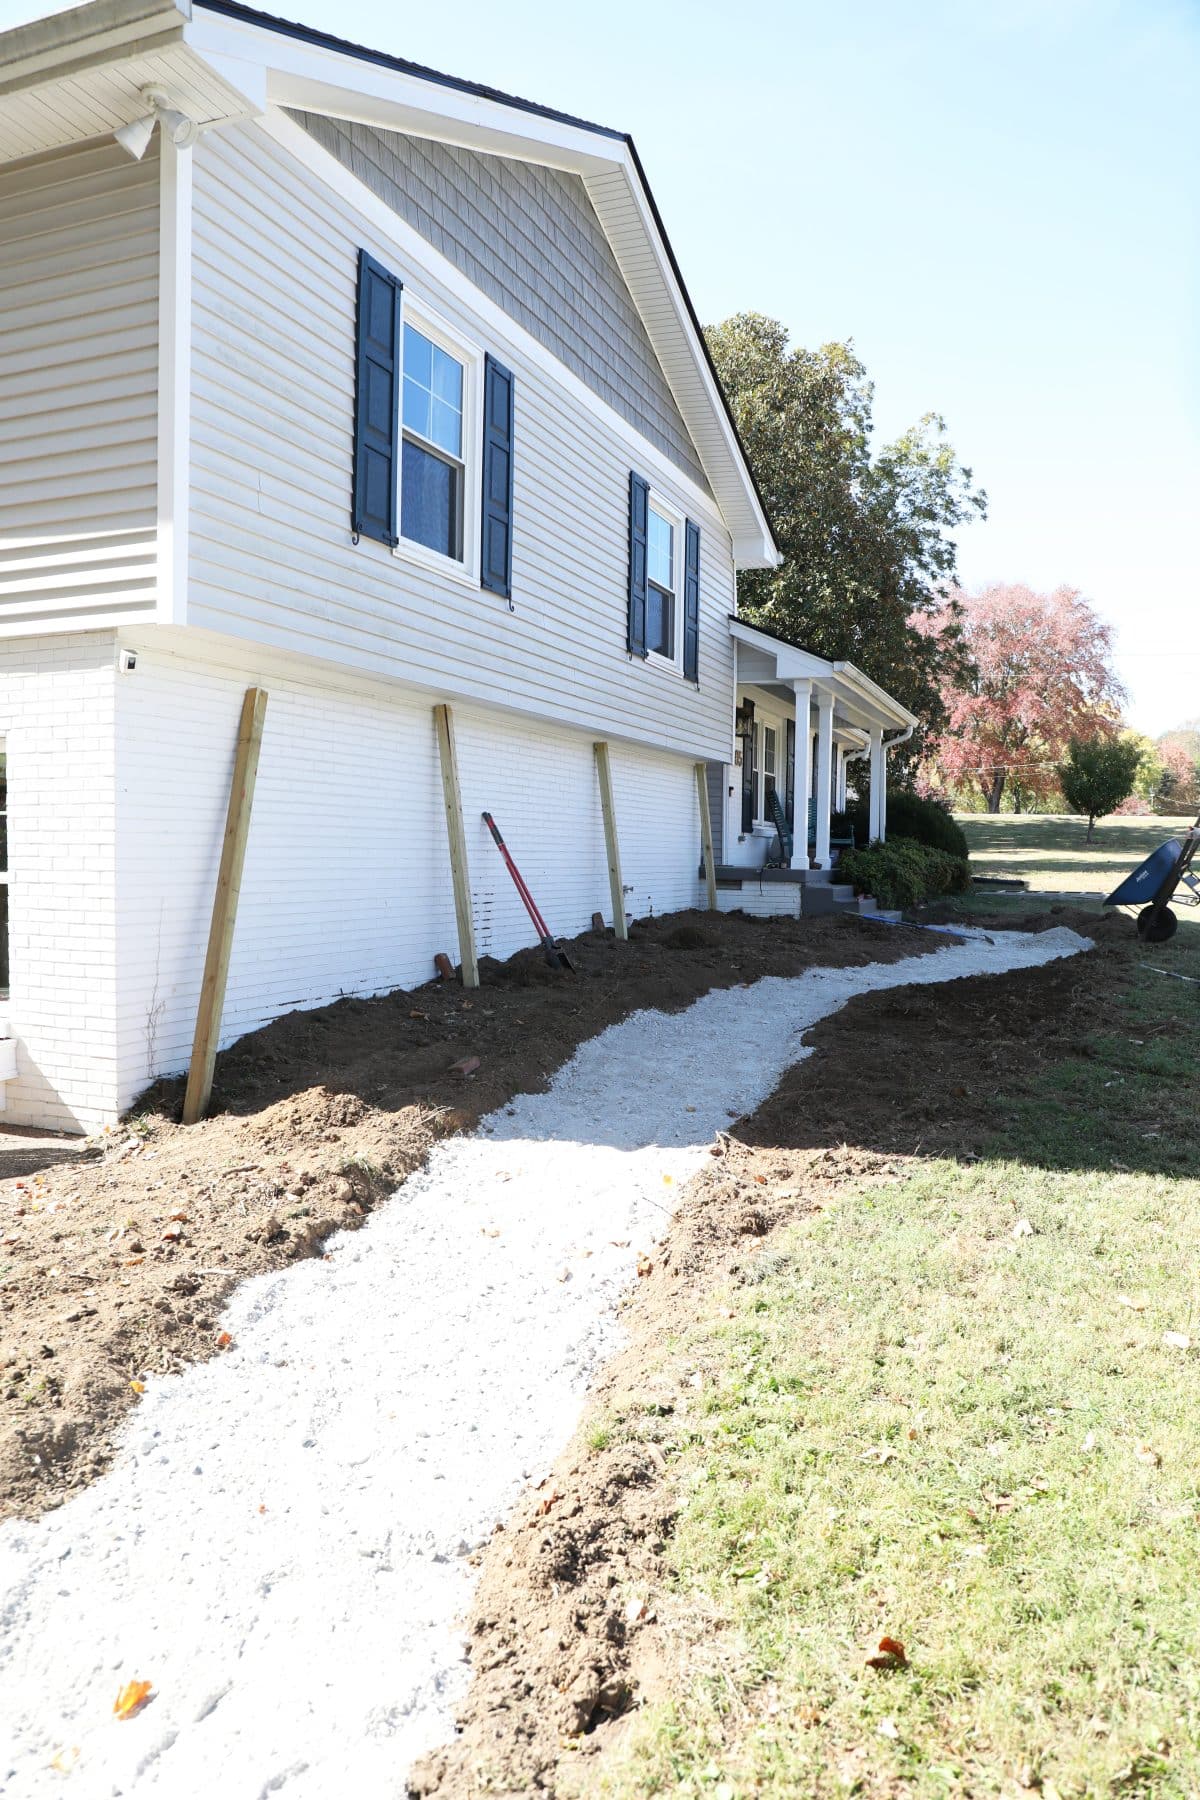
You’ll need 2 inches of gravel to create a nice bed and possibly three if you have very sandy soil.
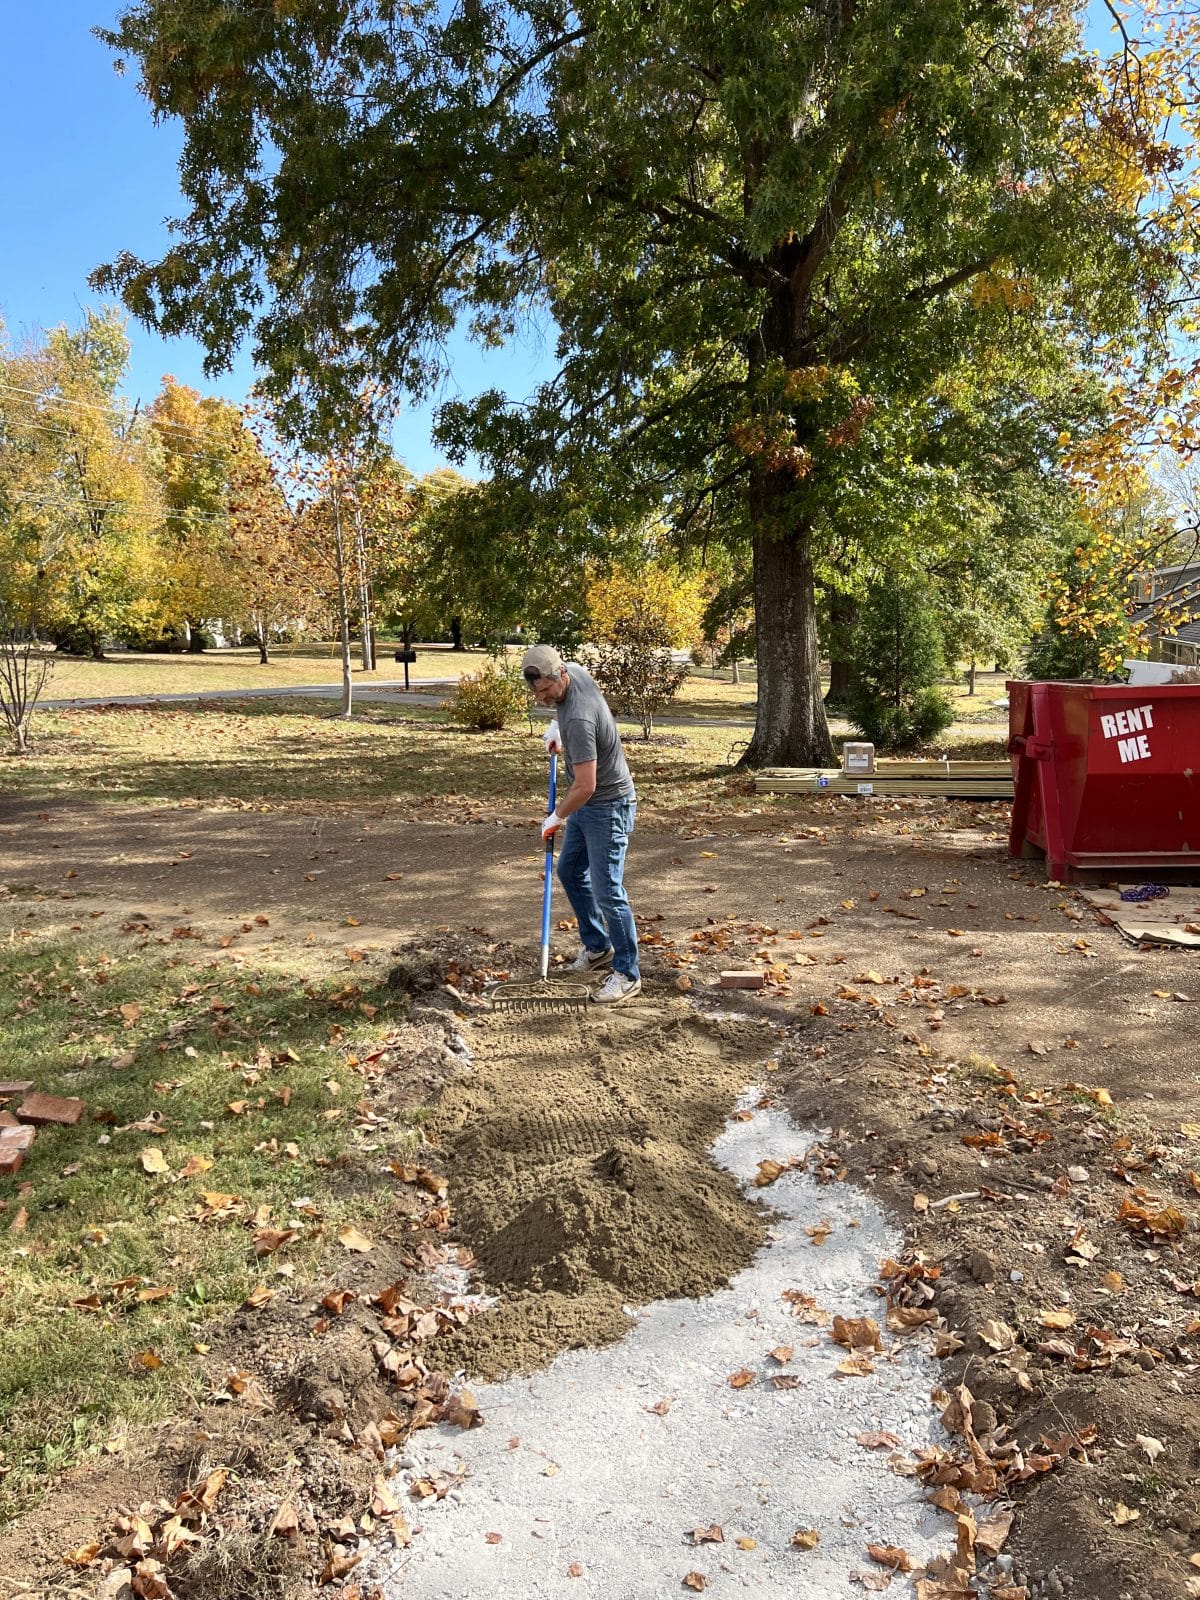
Just shovel the gravel in, then use a metal rake to spread the gravel and it will naturally settle into the ground as you work your way on the surface area.
It’s a good idea to over-spread your gravel so that you have some wiggle room when you start laying your pavers.
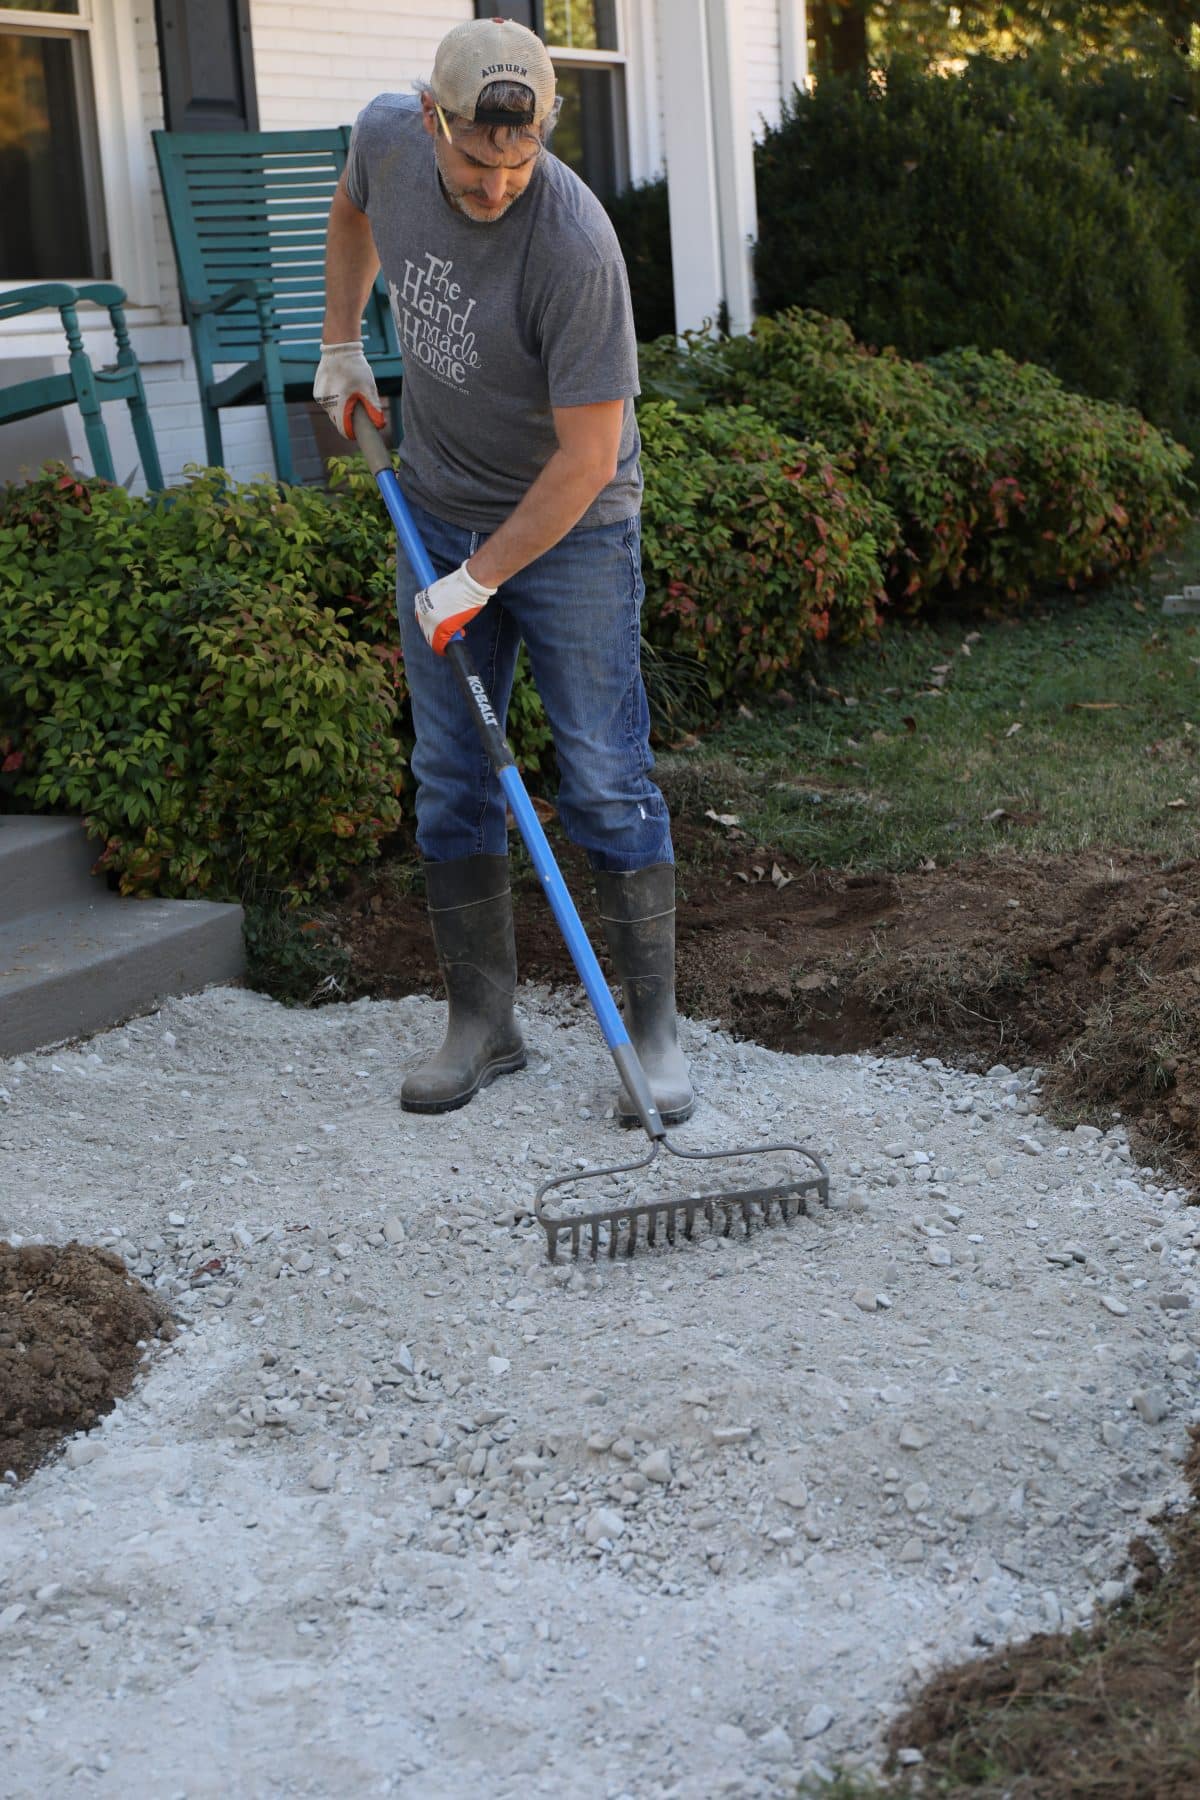
4. How to Lay a Brick Pathway: Tamp it Down
Once the gravel is spread throughout, you’ll need to compact it down. Tamp the gravel down and establish a nice, firm foundation underneath. It’s what provides the paver foundation and allows for drainage so that nothing erodes or settles in unevenly, later.
5. How to Lay a Brick Pathway: Add Sand + Start the Brick Pavers.
Decide the area you wish to work from, and add your sand to the layer of gravel. Smooth it out and tamp it down as you go. Spread it with a rake, and make sure you have at least an inch of sand.
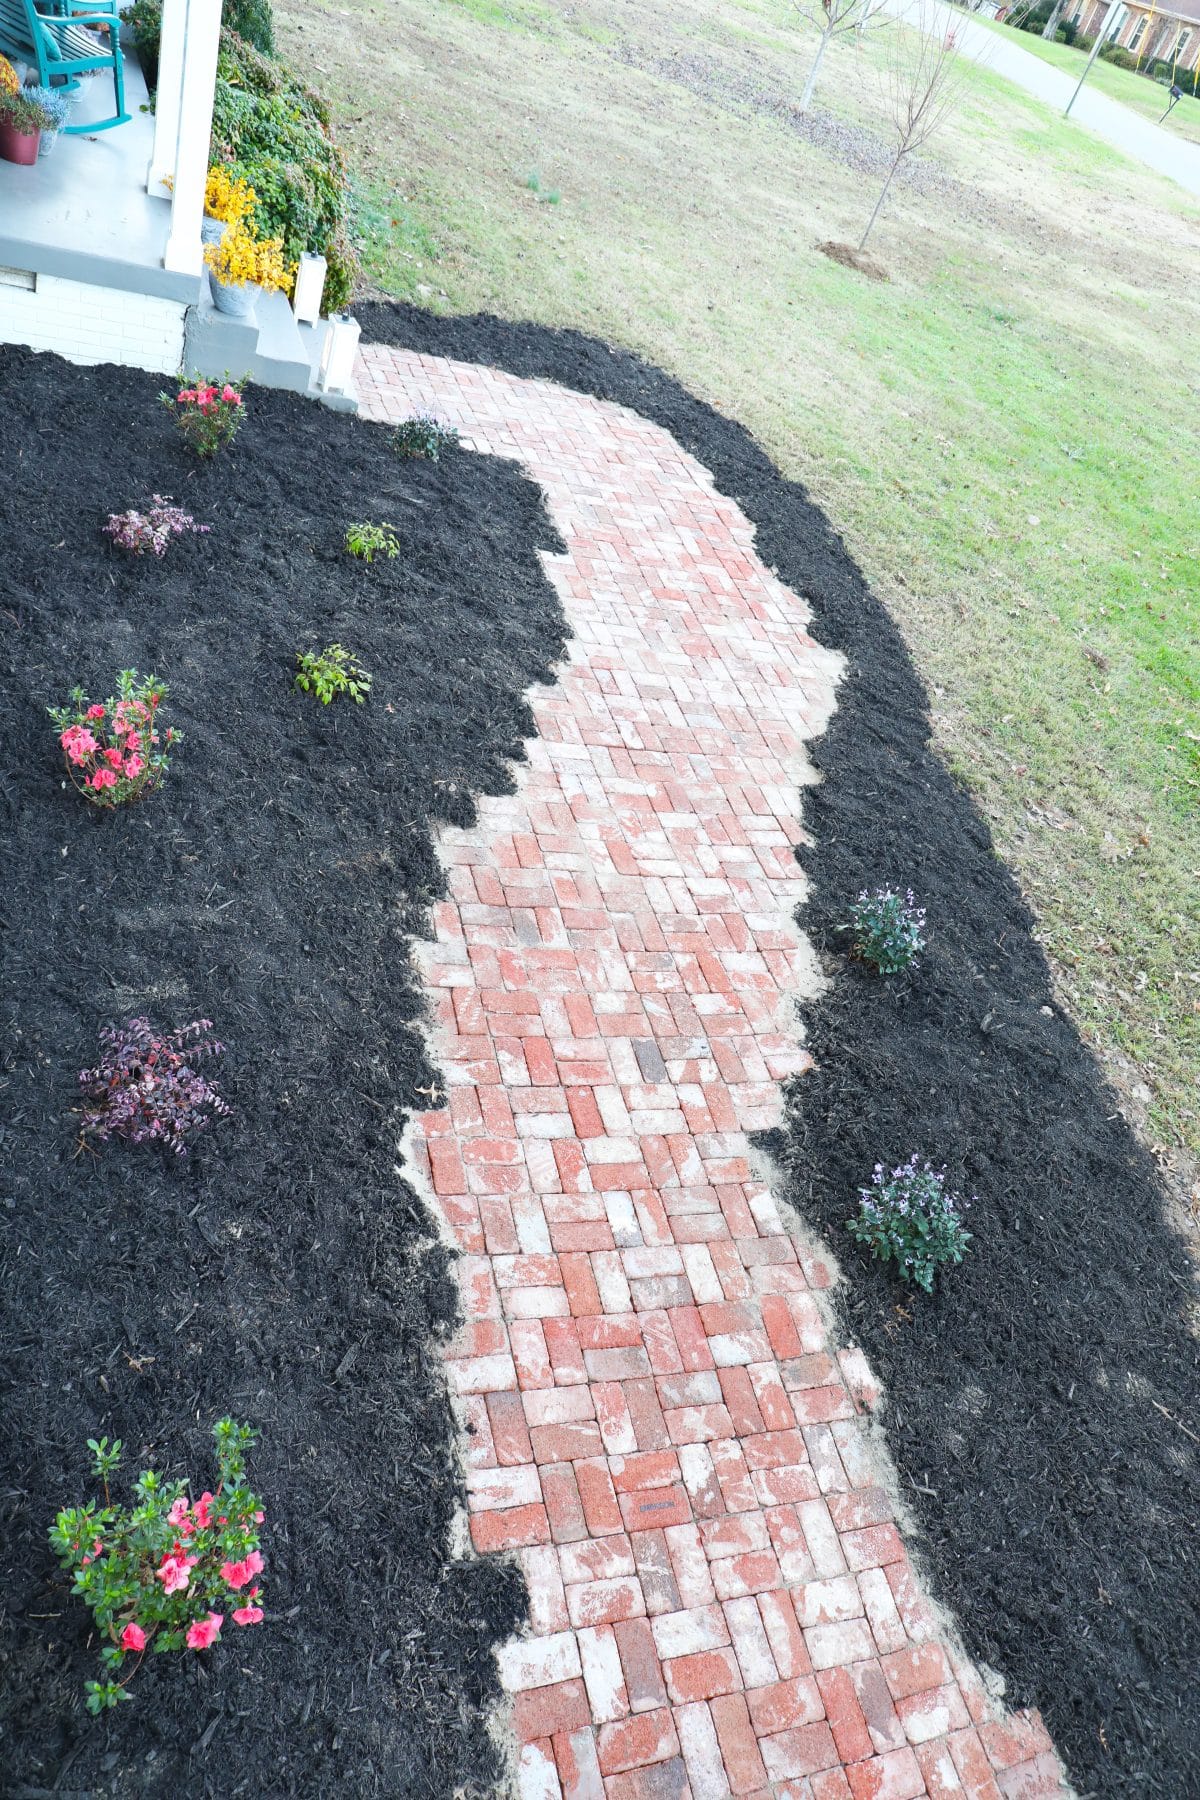
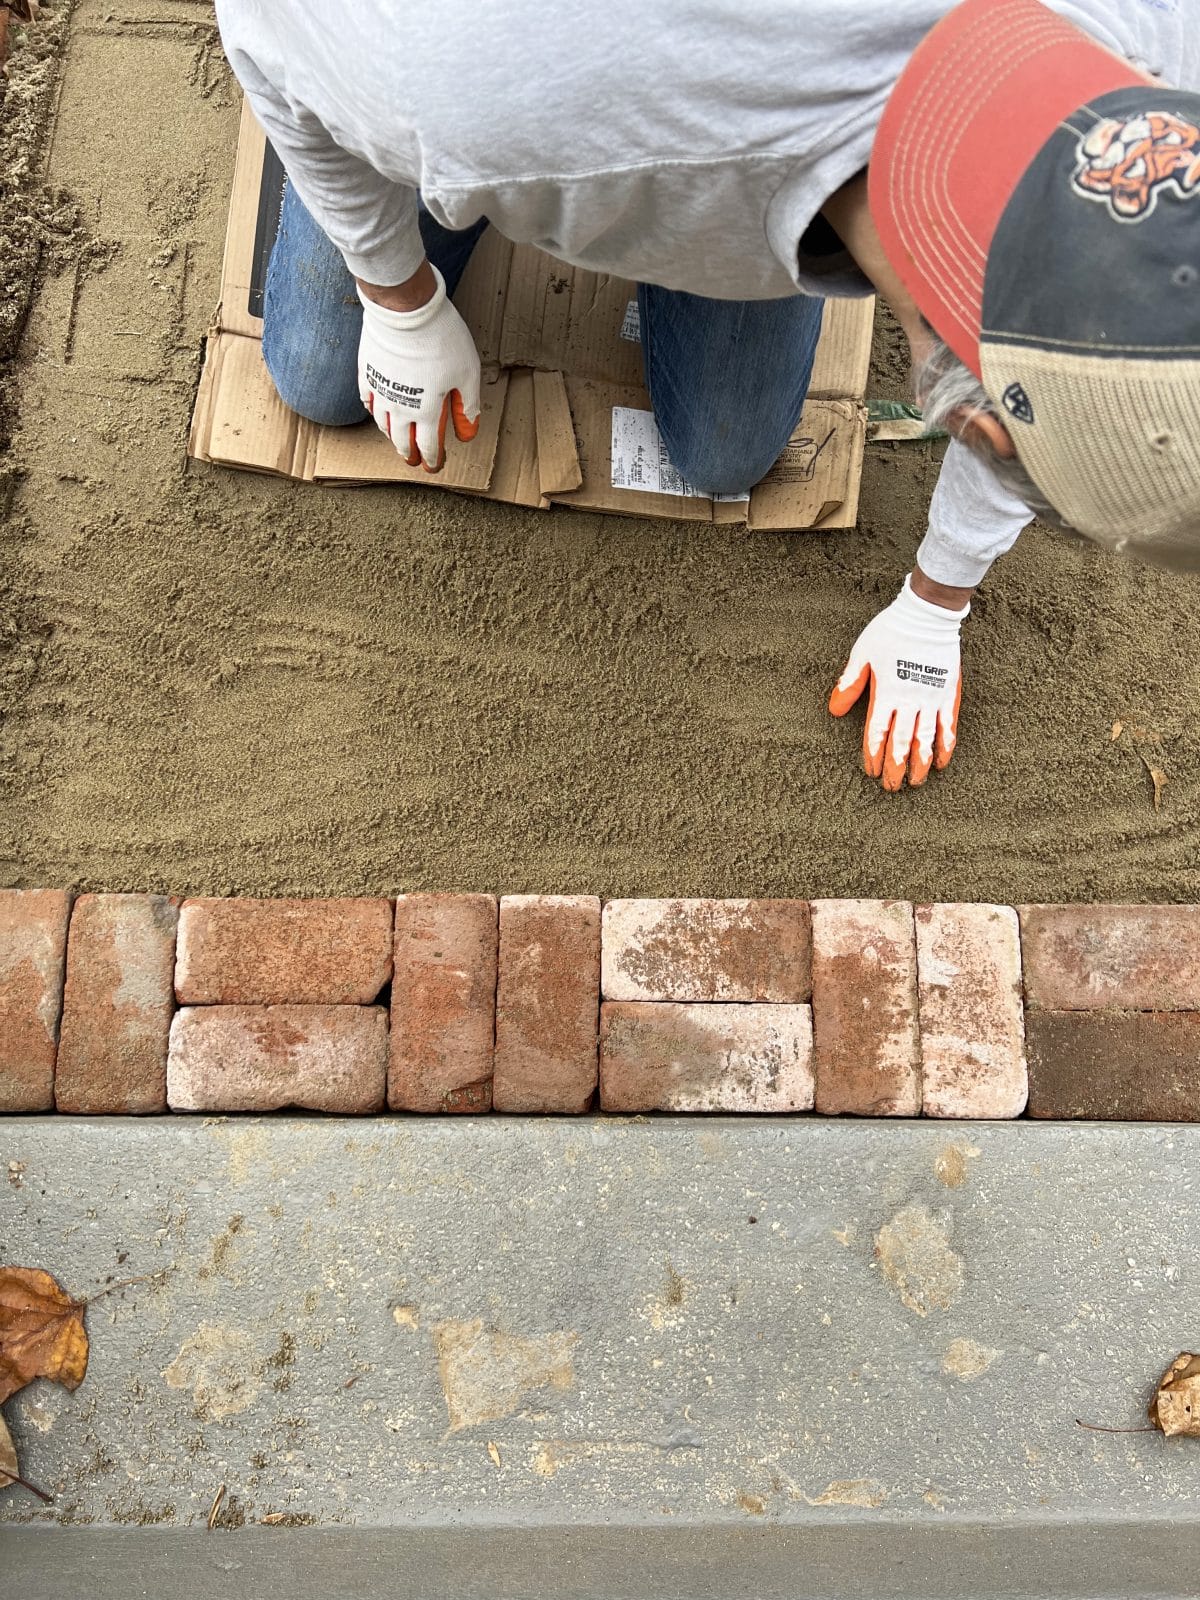
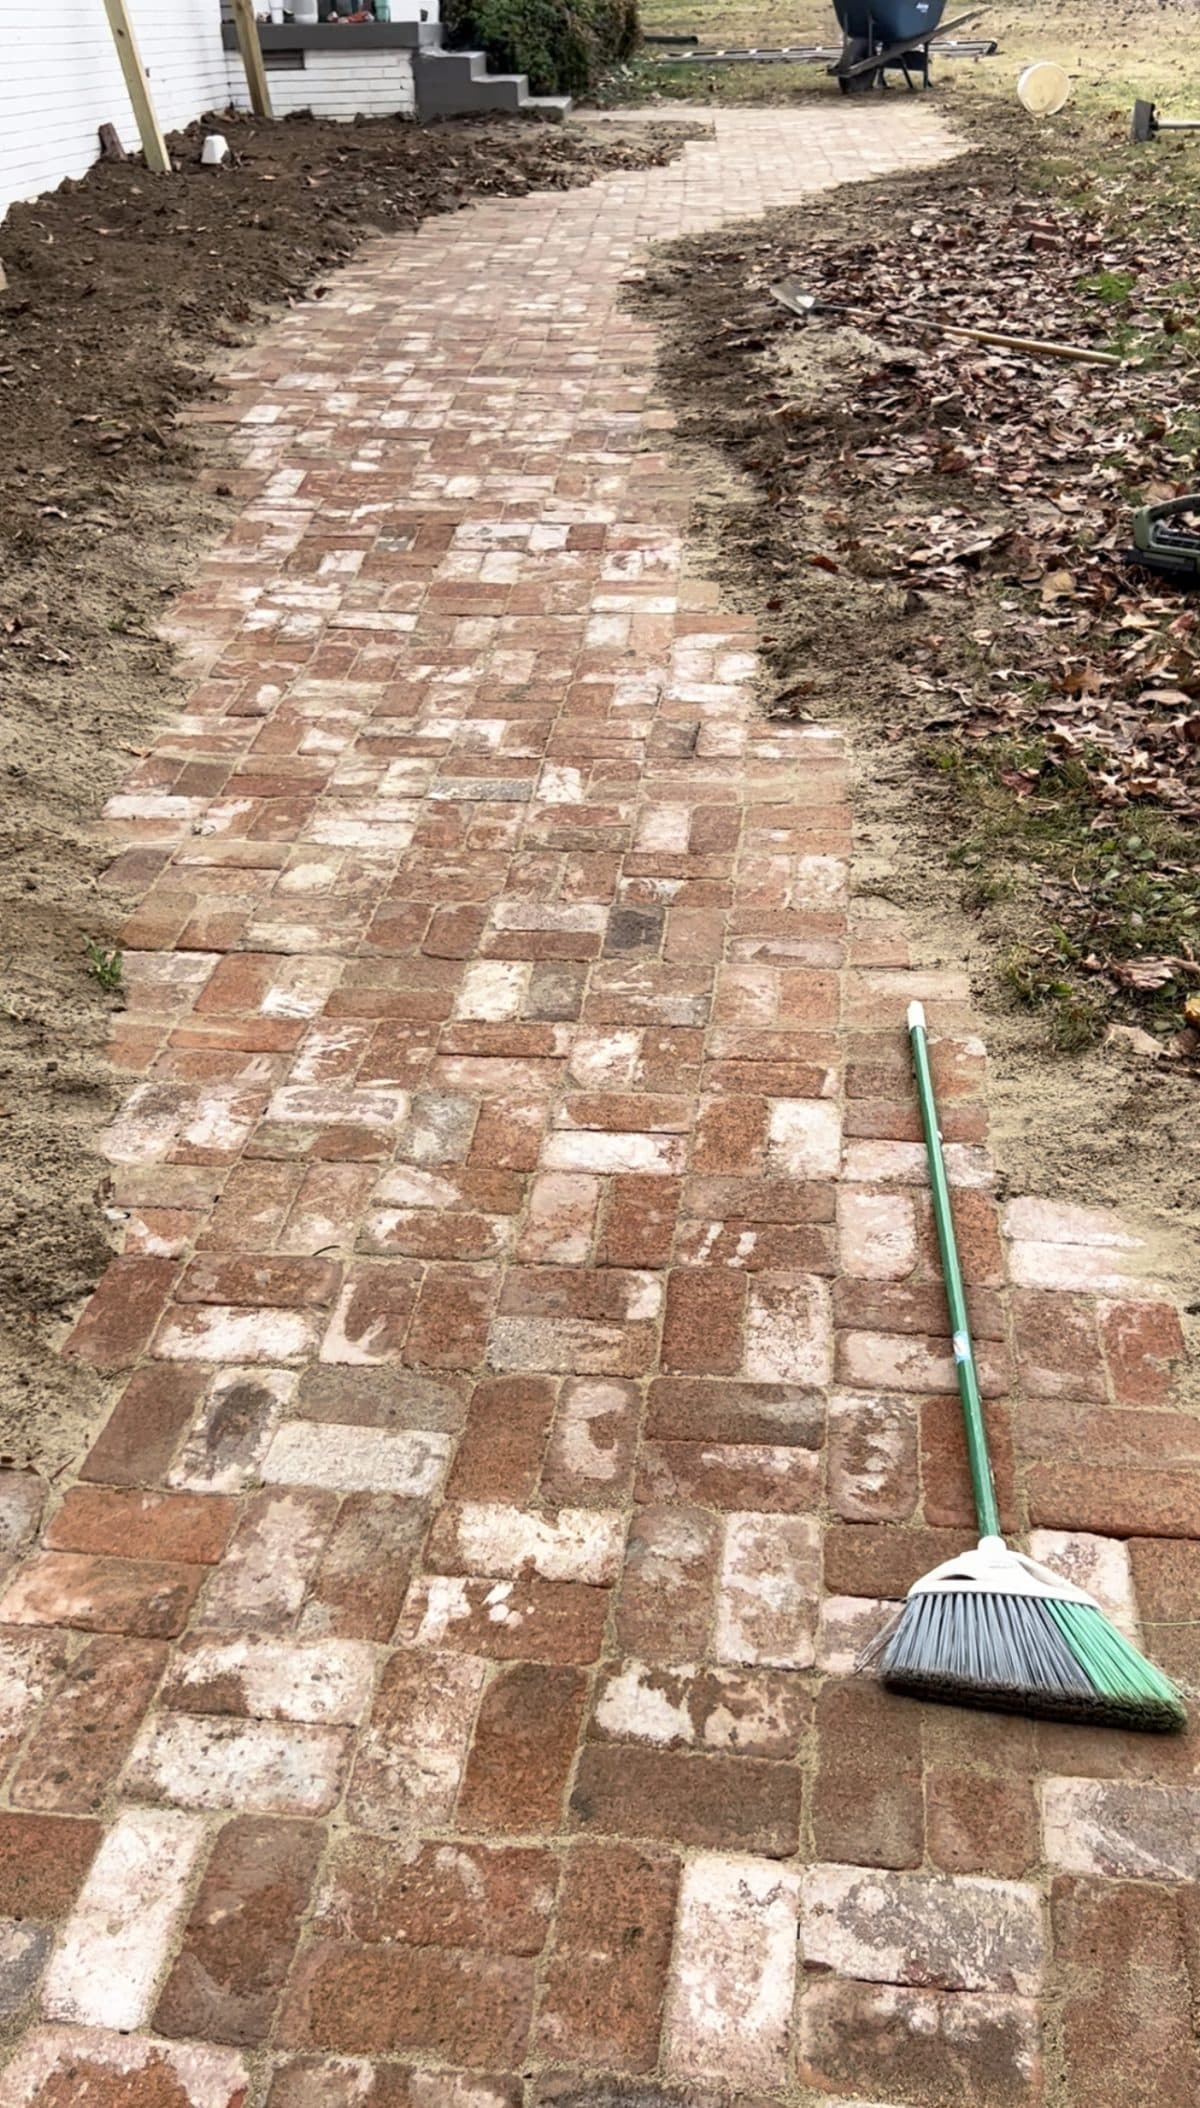
It’s best to start at an area where the pavers will meet another permanent structure like steps or a driveway. This will help you keep the path level. Depending on your pattern, lay it out so you can determine the look you want. In this case, we went with basketweave, which was a nice compliment to the timeless look we were going for.
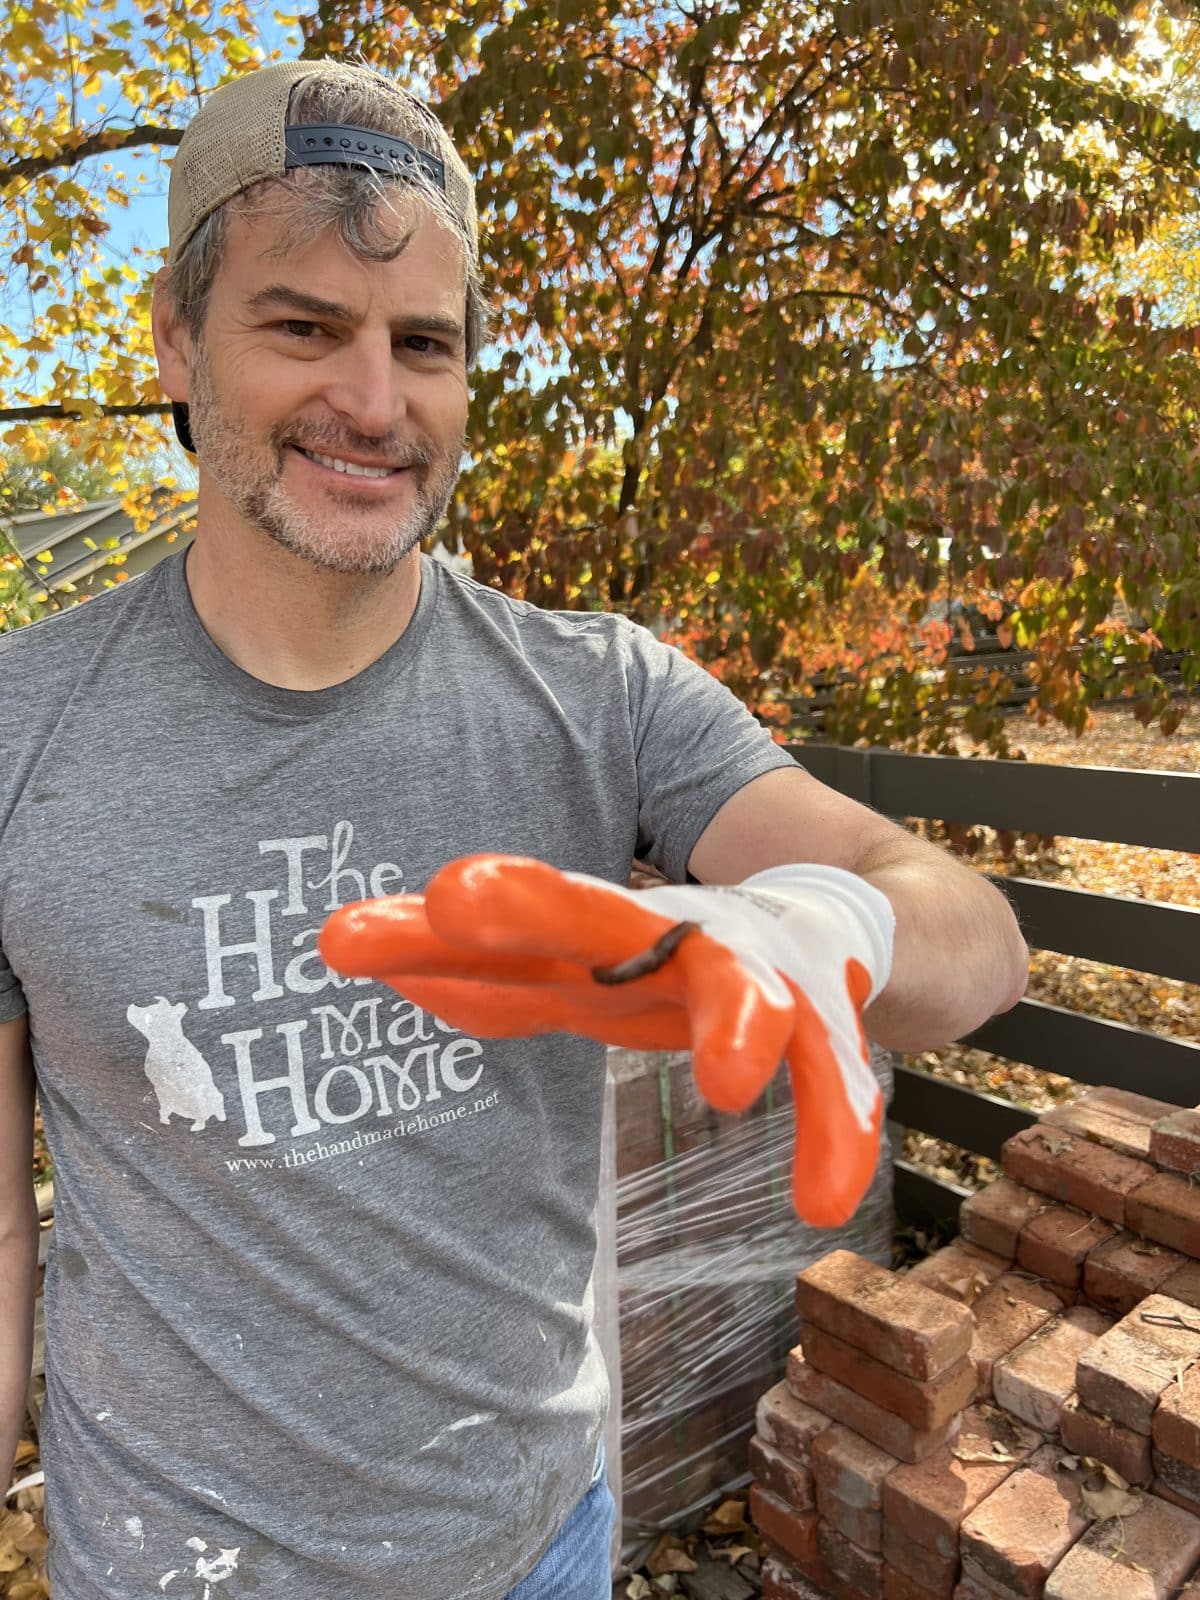
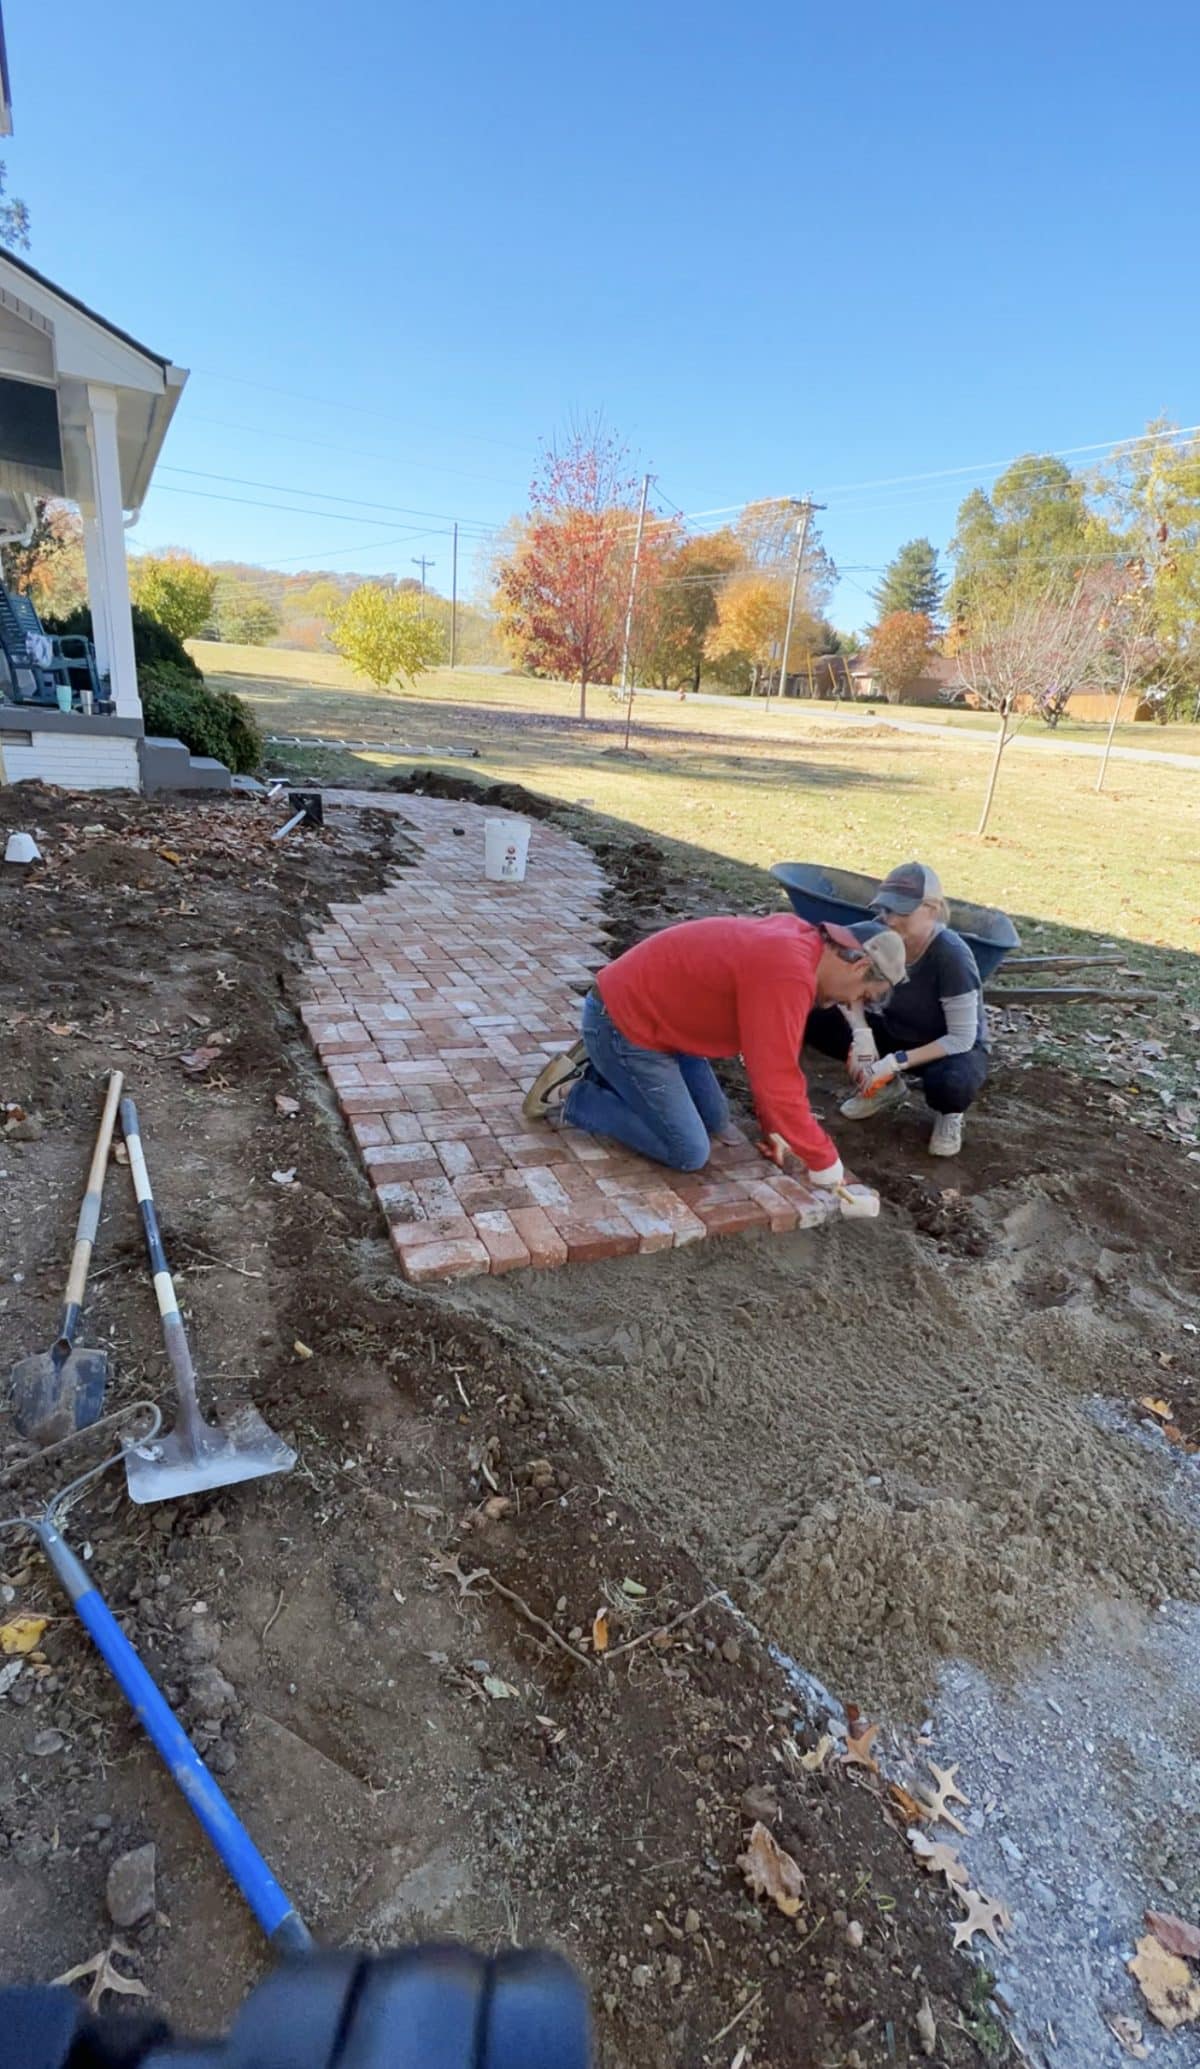
Depending on the surface area and task at hand, it helps to have another person bring the bricks so you can place as you go.
It took us a while to get started with this brick pathway, as we’d initially intended to begin last year. However, we were held up with all things codes in the area. So when we went to finally use these bricks, it was an entire ecosystem of roly-polies and slugs and snails and centipedes and…
We re-homed them in the nearby grass as we worked, but Ashley said if she never saw another slug {or those really fast moving millipede thingies that run at your face} again, it would be too soon.
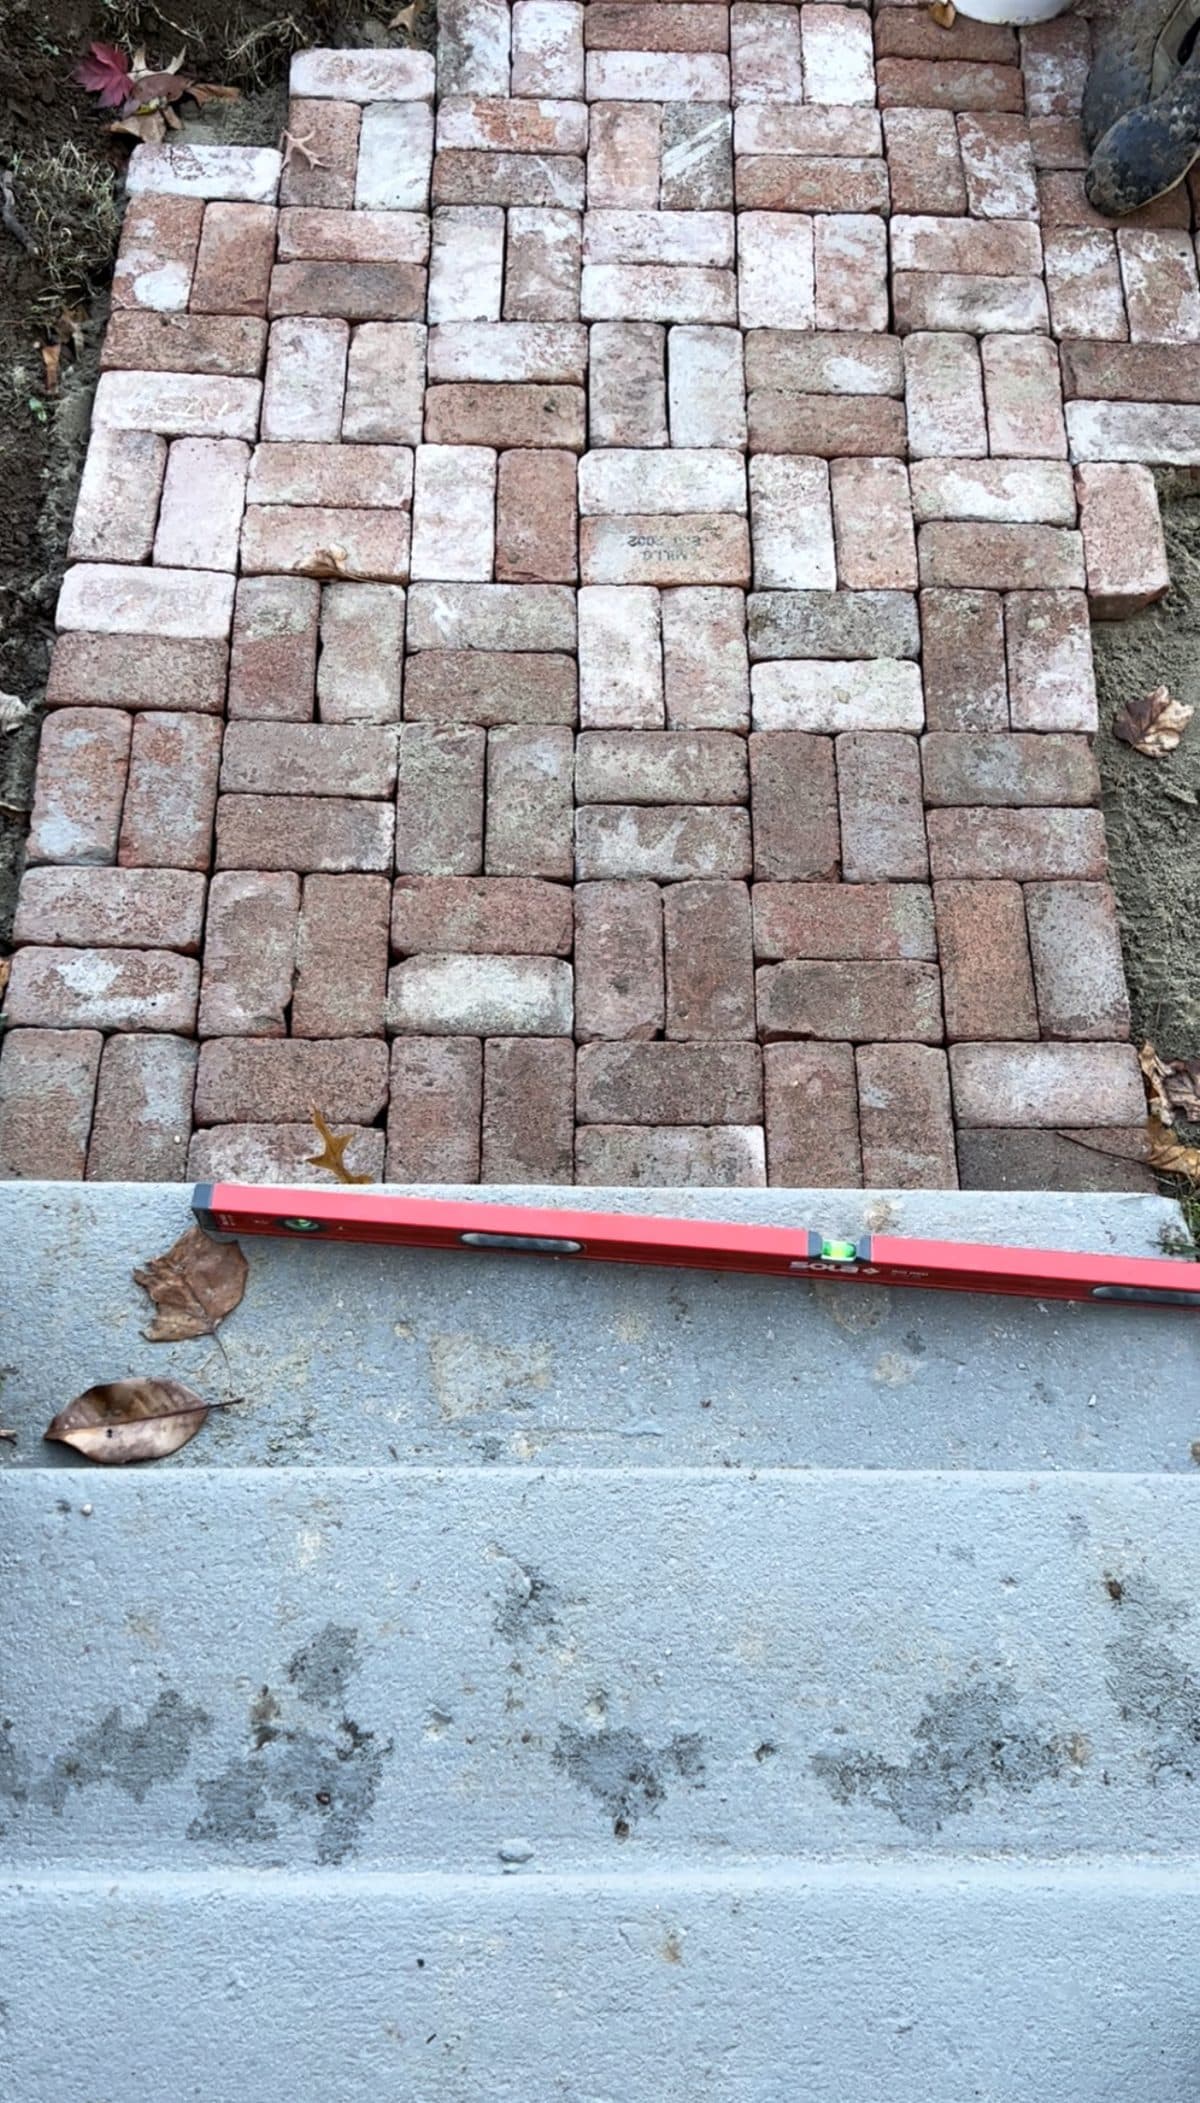
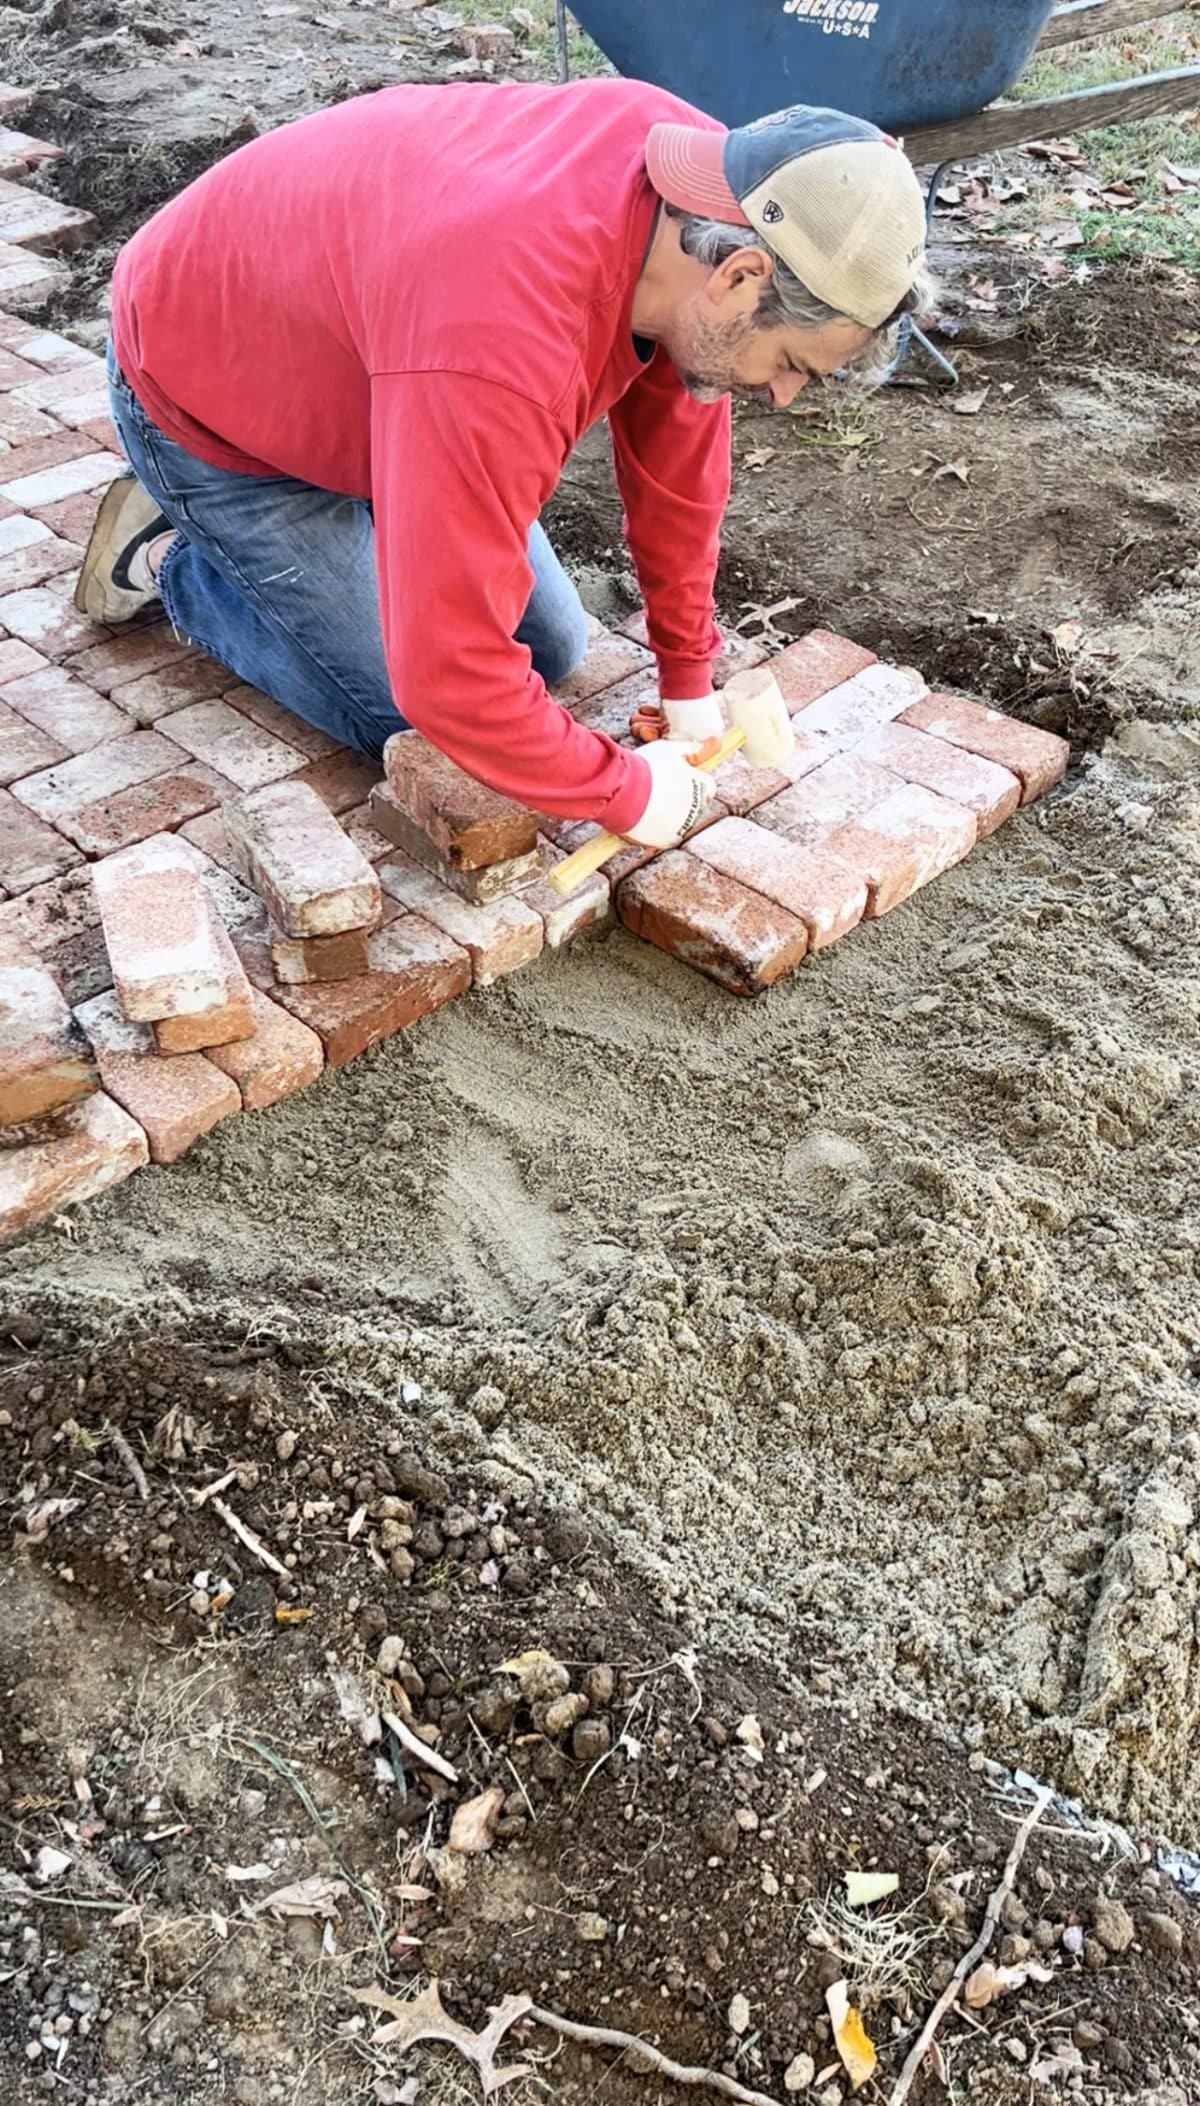
Using your hands to smooth out the sand, begin placing the pavers. A mallet is essential here to tamp them down to ensure they are level and set in the sand. As you move away from the starting row, use a 4-foot level to check that you are staying level with the rows you have already laid down or at least sloping in the direction that you intend.
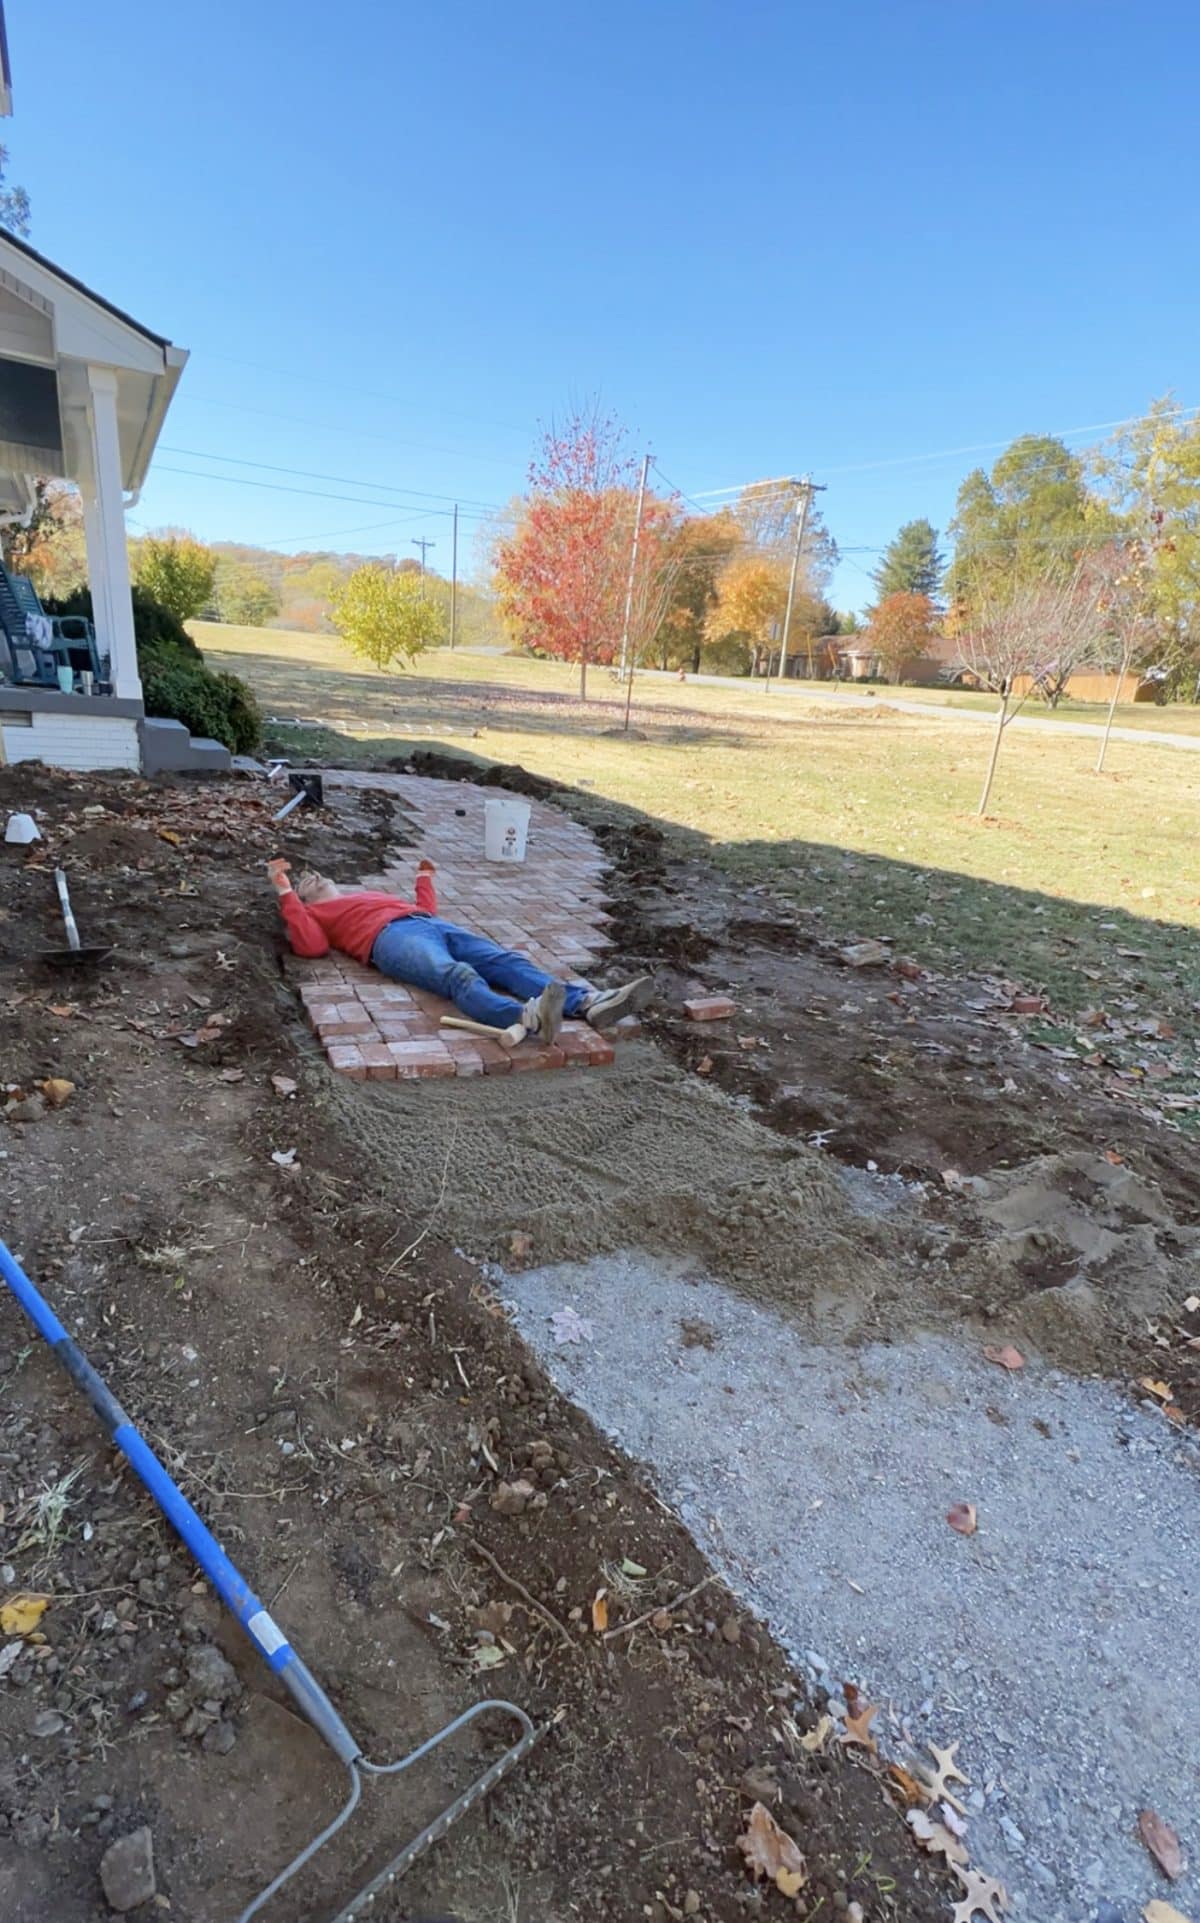
Laying brick pavers is an intense job.
Apply rest as needed.
Slowly but surely the path was laid out and complete!
We love this overhead view from one of the kiddos’ rooms.

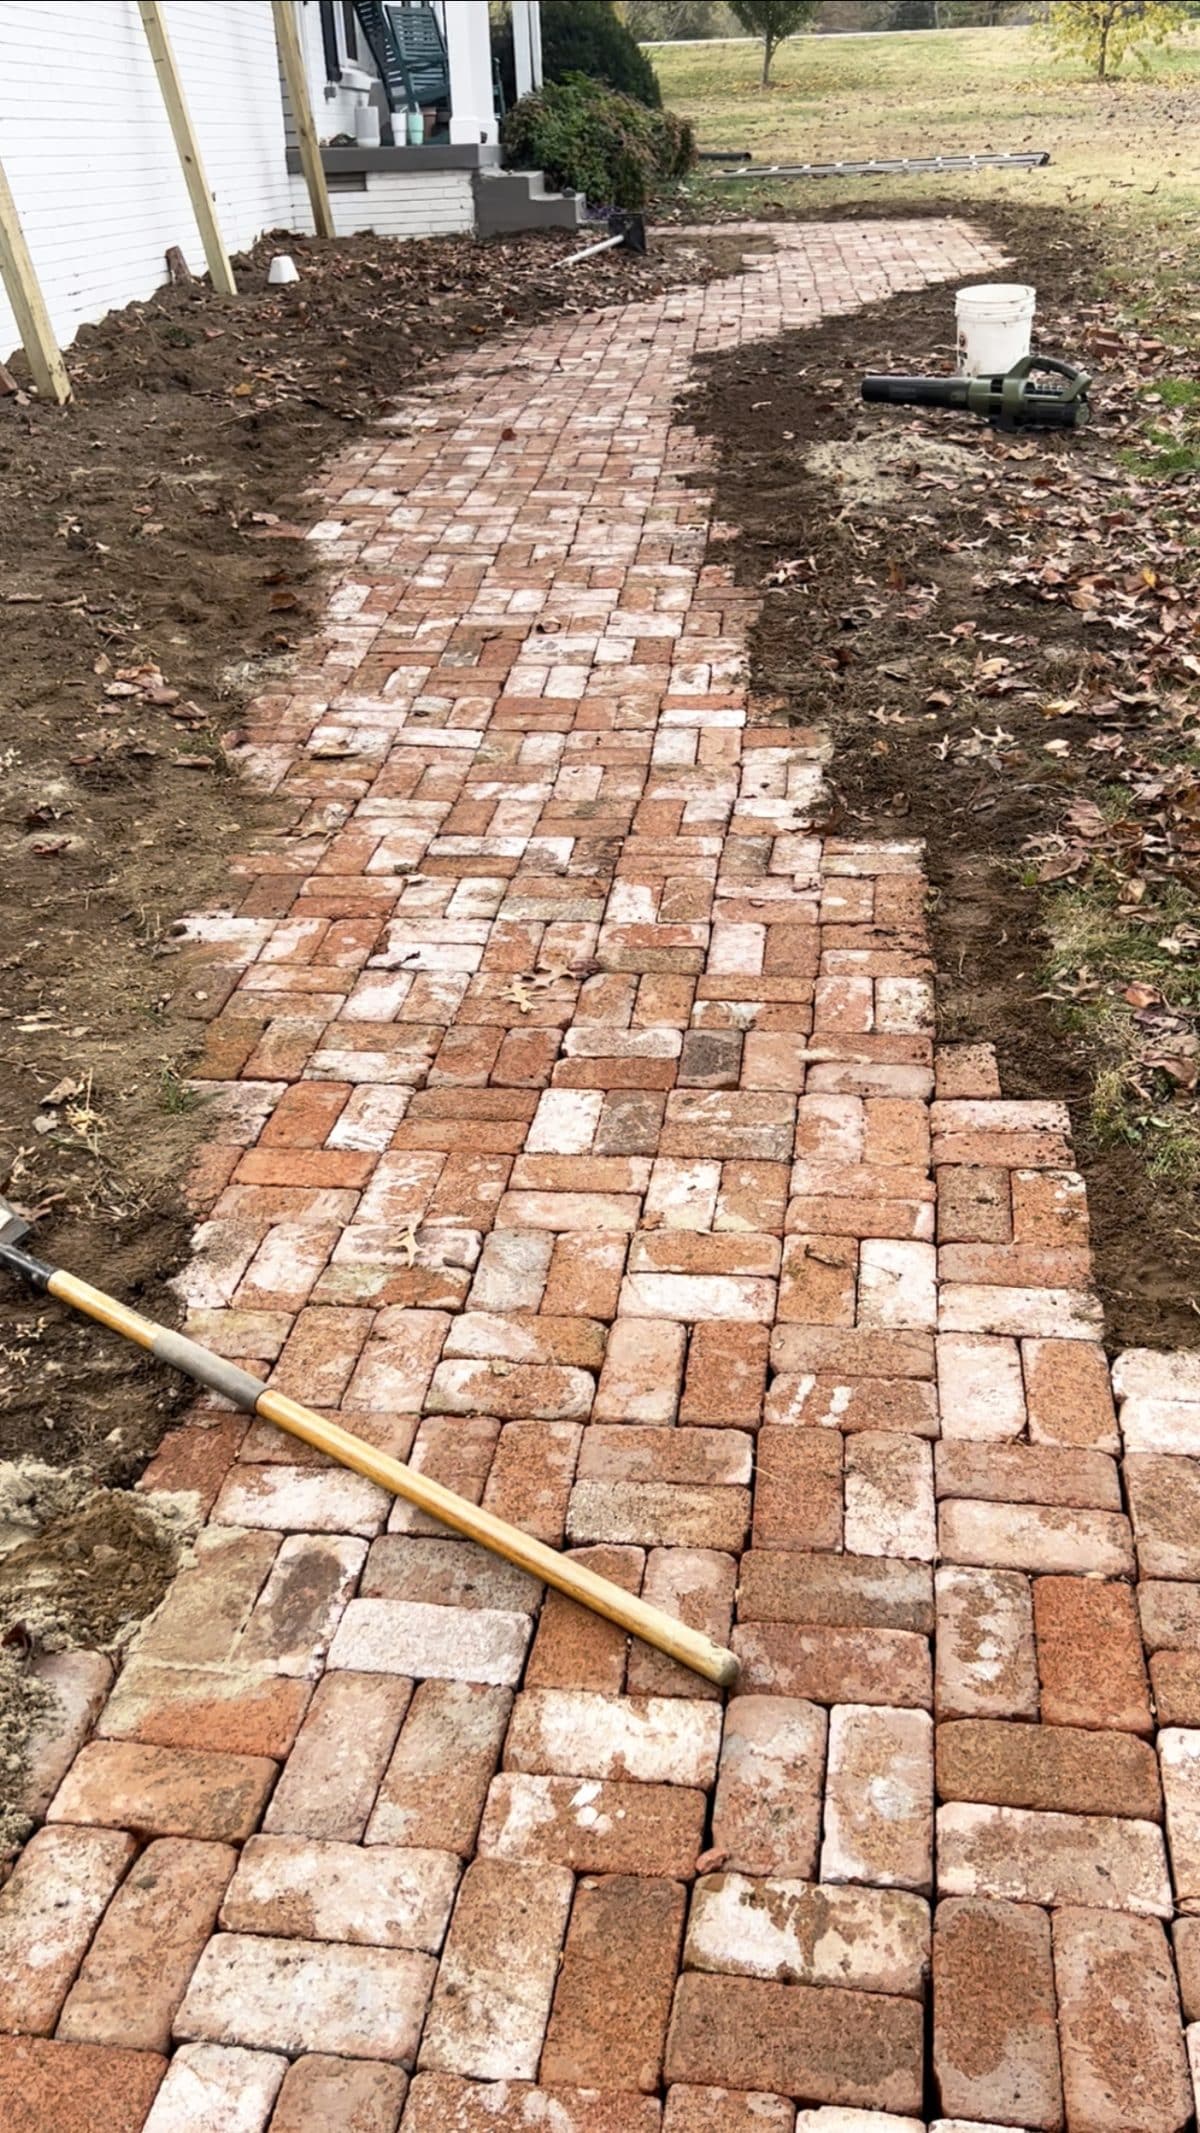
Since we ended the installation of the walkway at the driveway, we used a grinder to cut and add the bricks to the lines that mattered. It doesn’t have to be perfect, since we filled the rest in with sand {the next step!}
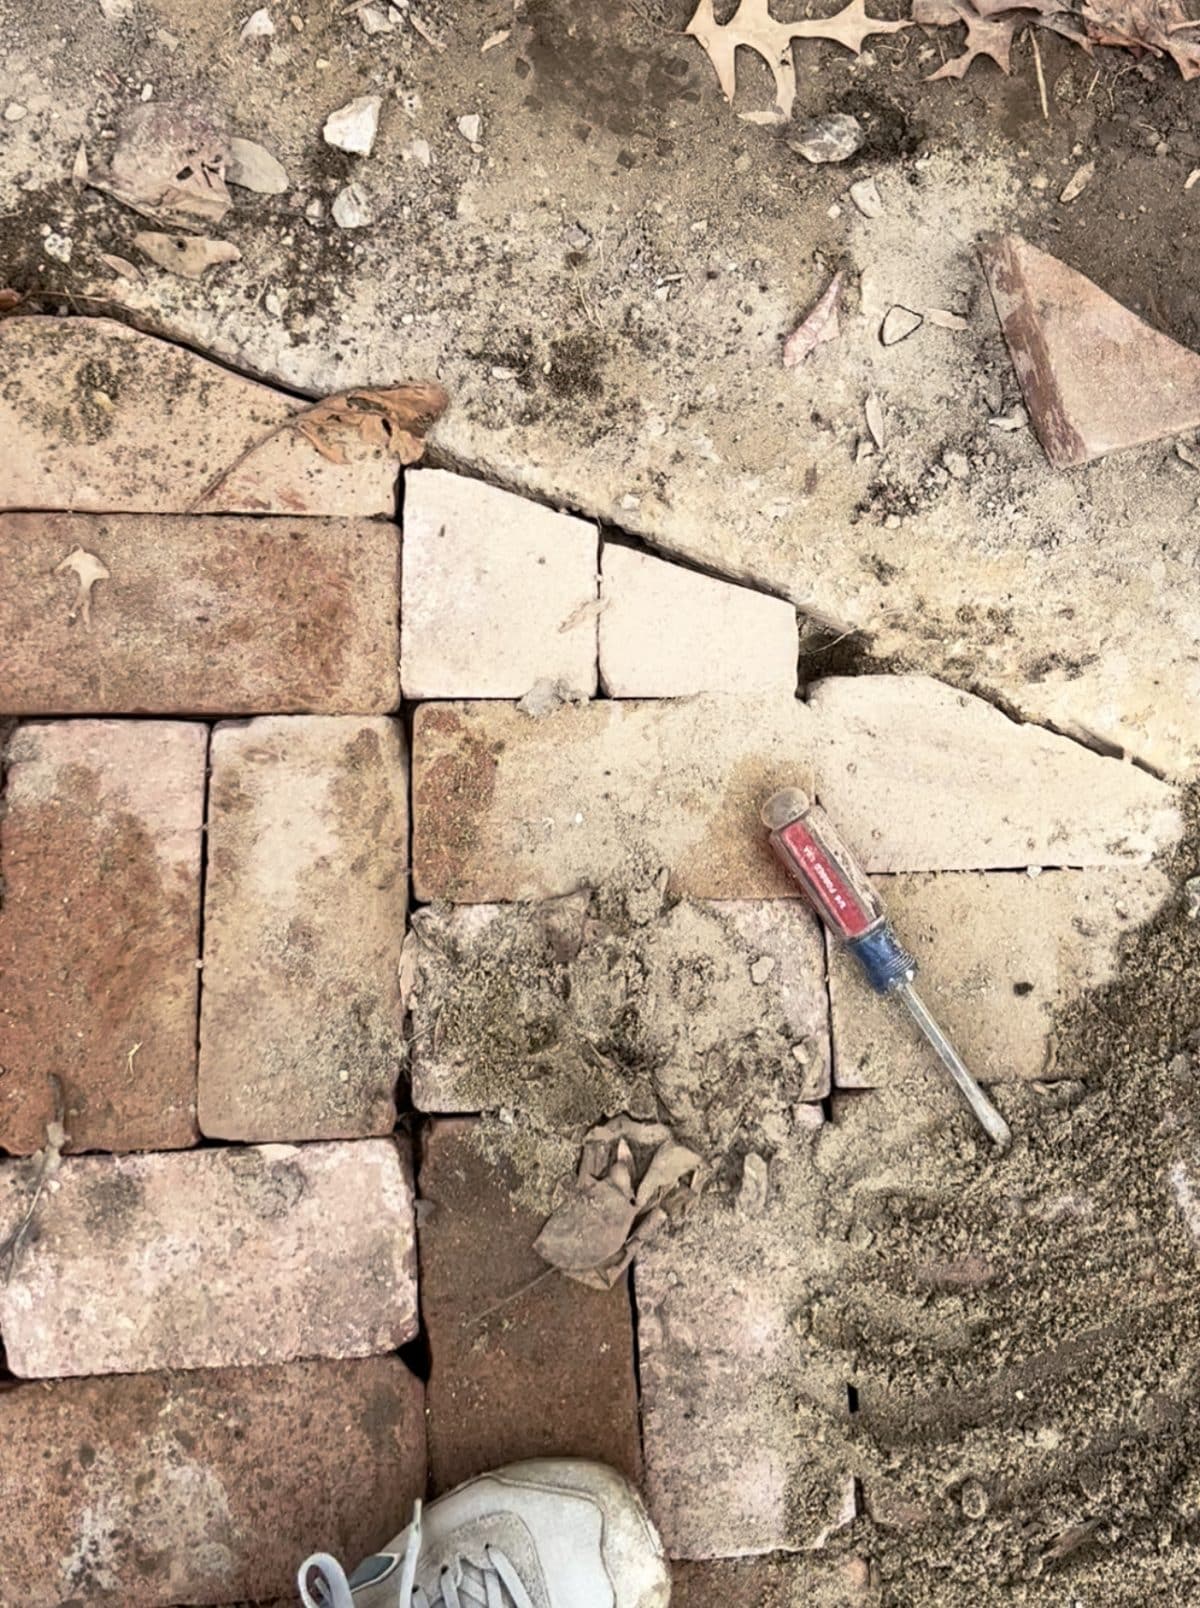
Here’s where we cheated: The entire time we worked, we initially intended to cut the edges, to make them uniform. As we were laying the bricks, we thought we were looking at the “pixelated” version of what we were working on vs. the final product. Basically a rough draft of where the curves would be cut. So when laying the pavers was complete, we drew out the edges with some chalk to get the intended look, so that we could begin cutting. Only we weren’t happy with it.
Once again {and to our luck} the pavers felt too rigid and stiff with their combined pattern and style to be cut on the edges. It just didn’t match the look we had going for us. We weren’t sad about it. So we made the call to leave them, and fill in the edges instead, with sand to keep them stable. We then topped with mulch for now.
This is your friendly reminder to never be afraid to break the rules.
Why? Because as a part of our phase 2 plan with our landscaping in this house, as mentioned above, we plan to use ground covering on the edges in the spring. We’d initially intended to place them between each brick, but decided against it in the end, due to future maintenance issues. There’s a fine line between charming and easy with future lawn care. This is a happy compromise. We get to keep that great organic shape, and still get our ground covering {such as moss or thyme} on the edges, without it becoming to invasive over time. And that pathway will {eventually} feel like it was there all along. FOR. EV. VER.
We even removed and added a few bricks along the edges so that it added to that timeless, organic feel. We love the way it all turned out in the end! On to the next step…
6. How to Lay a Brick Pathway: Pack Dirt On the Surrounding Edges
Once you’re happy with the pattern and design, pack dirt on the outside edges, to make your path stable. Tamp it down again as you go, making sure you pay attention to how the water will flow when it rains, once it’s complete.
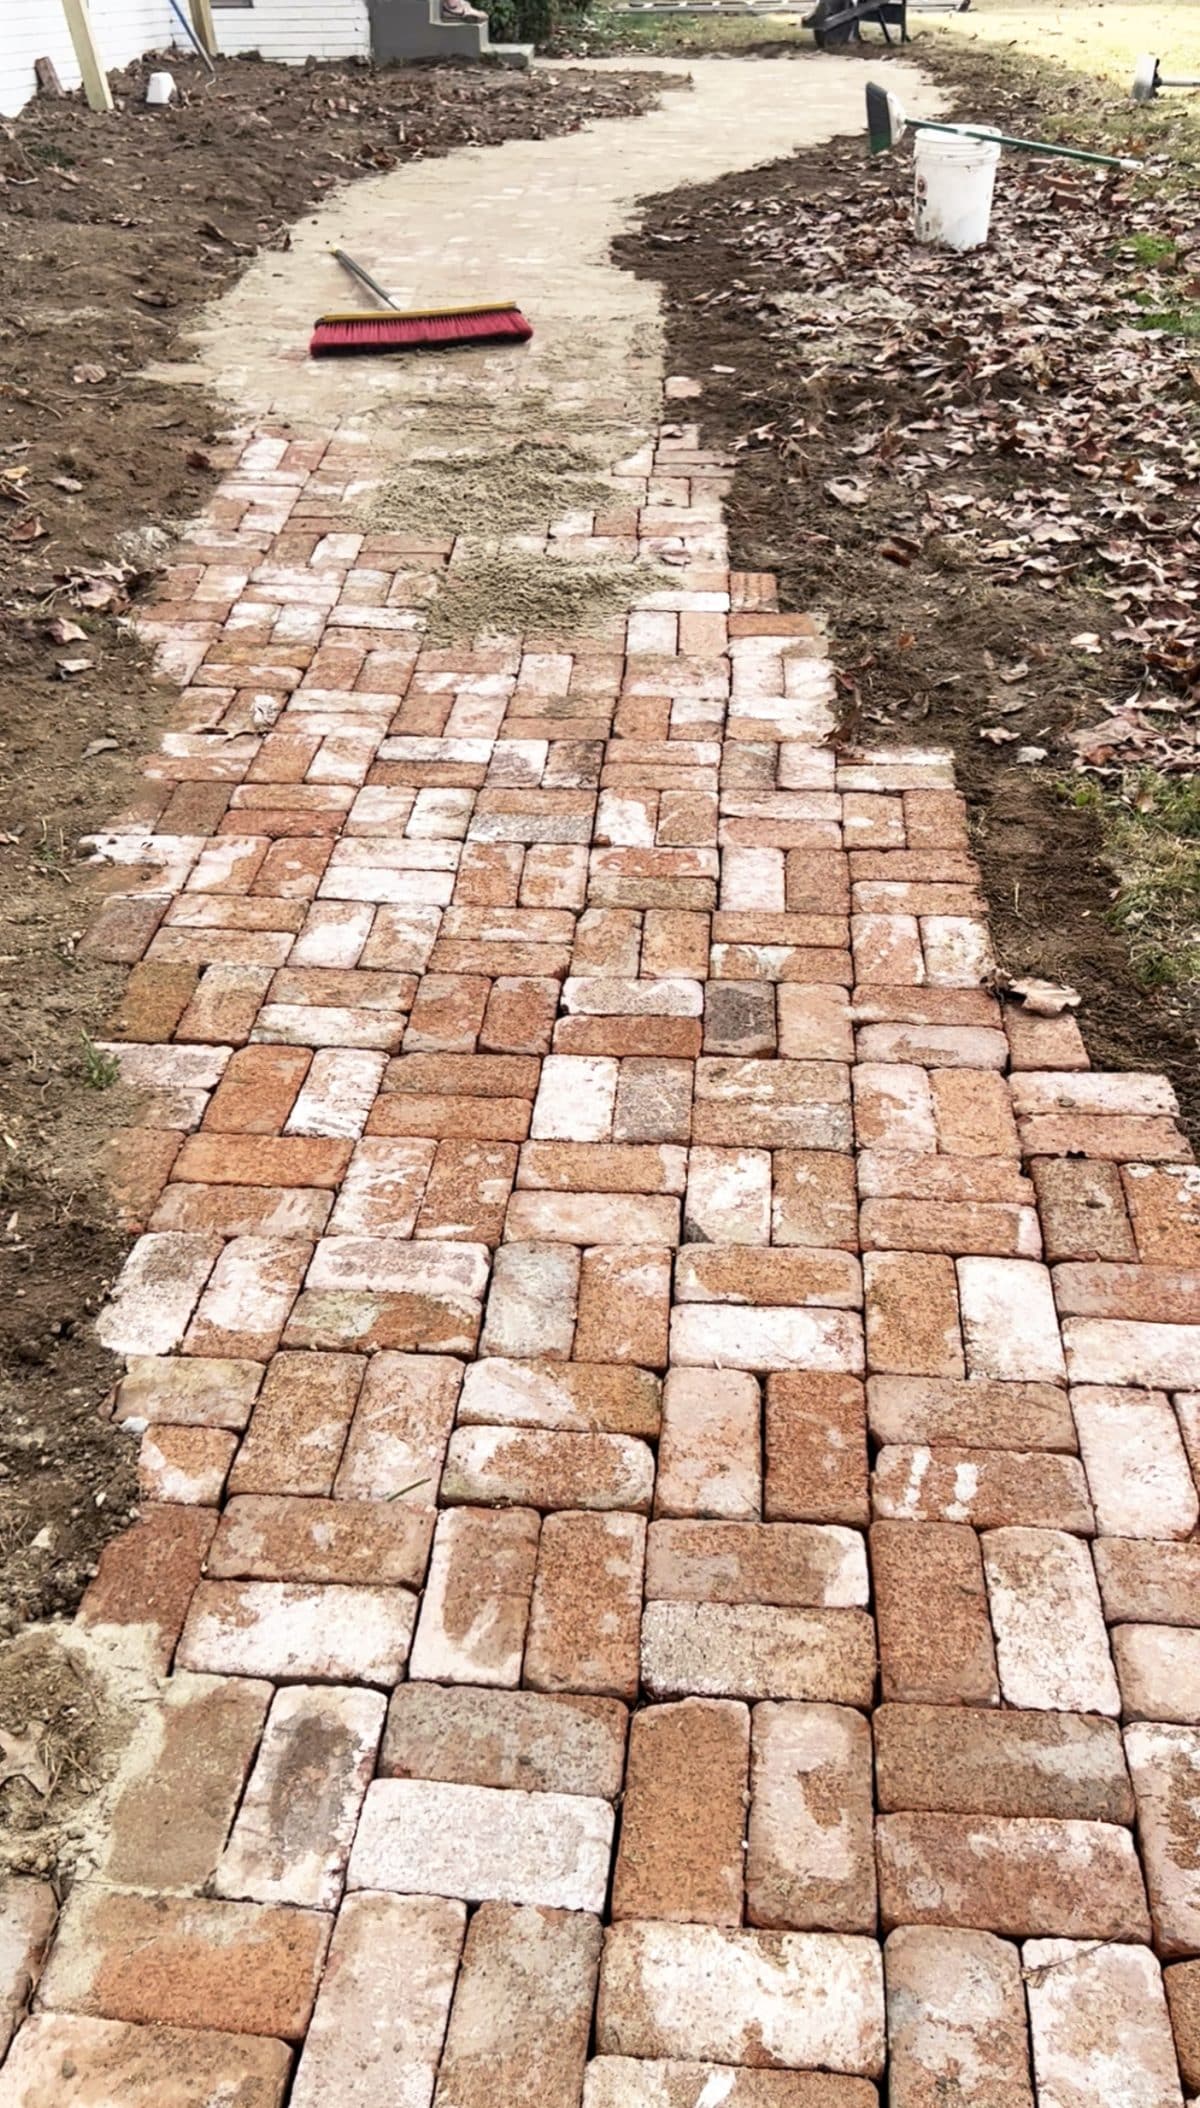
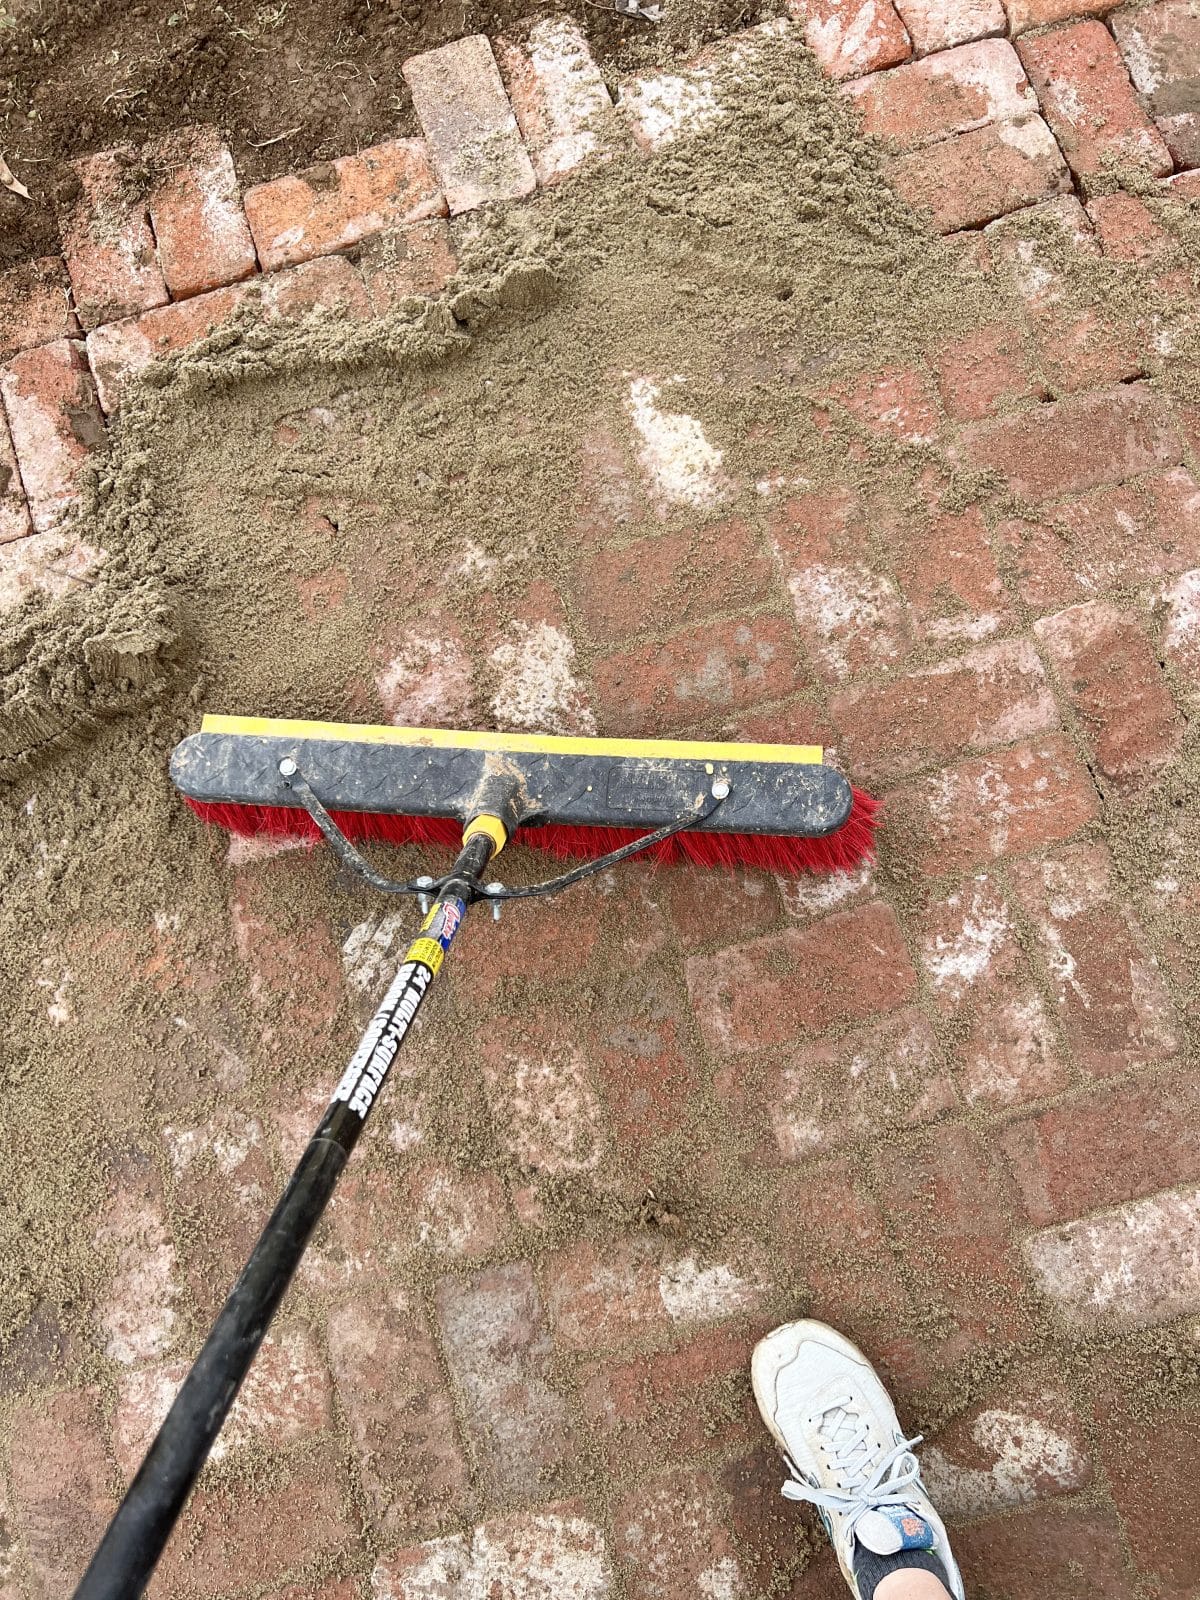
7. How to Lay a Brick Pathway: Add {More} Sand! + Repeat.
This is a step we will probably do again, before the winter months settle in. This is the important finishing step, for all things brick pavers. Simply add in increments {bucket fulls} and work from there. Use a combo of your hands, a push broom and normal broom to spread it all around, into every single crack, and work from every direction as you go packing it in.
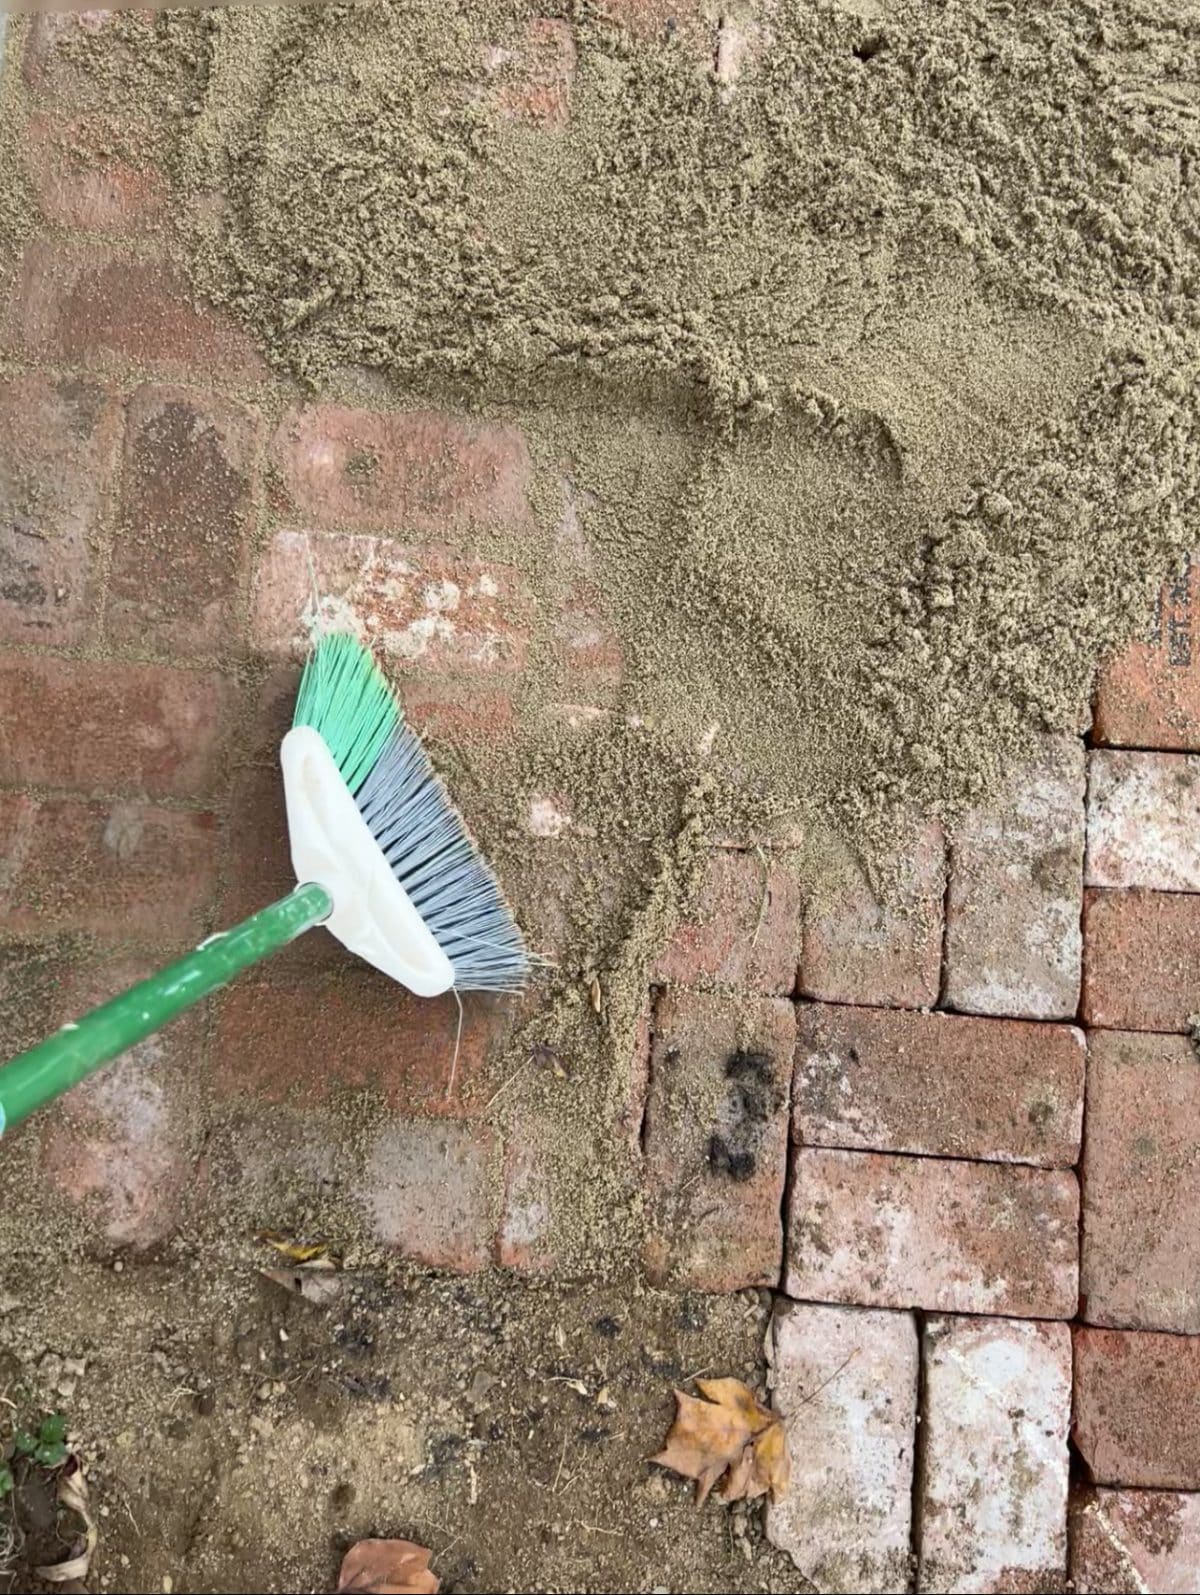
Repeat this step about 3-4 times until you’re happy with the end result. This doesn’t have to all be in one day… we did a few, and when it rained, let it sit, and then came back to repeat.
This is something that will be valuable to repeat over time, to keep your brick pavers sturdy and steady over the years.
8. How to Lay a Brick Pathway: Step Back and Enjoy All That Hard Work
Your home and your neighbors will thank you for adding so much to your beautiful house! We are thrilled to have built a nice solid foundation to work the rest of our garden around in the spring. A timeless look for a great yard… for years to come!

Once again, this gorgeous look just wouldn’t be the same without these amazing pavers from Glengery Bricks. Be sure to check out their site and all the options they have to offer for any future projects you may have in mind. They all just add so much character.
As always, let us know if you try it. Or if you have any questions at all.
We’d love to hear!
Have an inspired day!

One Comment