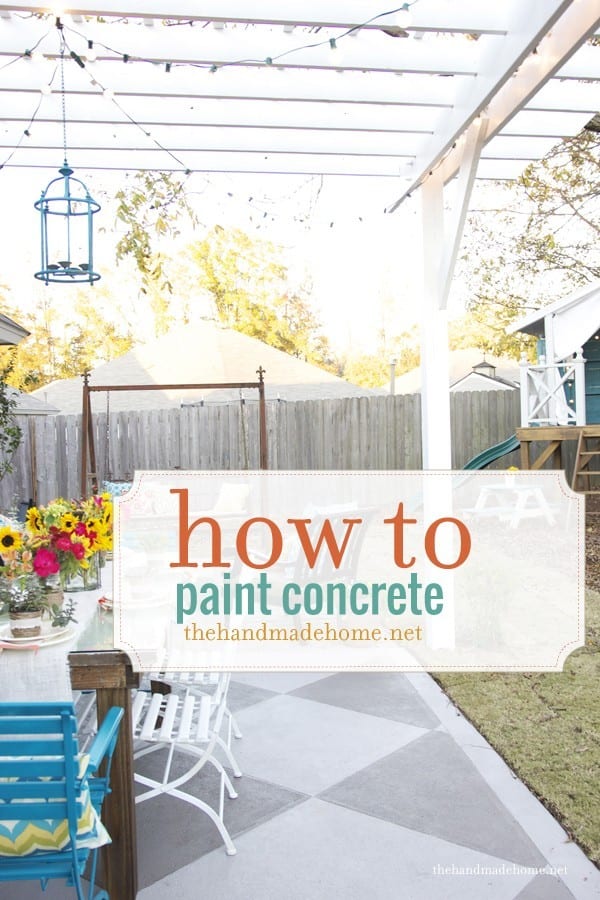
Hello lovelies! We hope you are having a wonderful Friday! Today, we thought we’d cover a little more on our backyard bliss series, and how to paint concrete specifically that diamondtastic (yes, I did just write that) pattern on our back porch underneath our pergola.
How to paint concrete
Once upon a time, when we moved into our home, the back porch area looked like this:
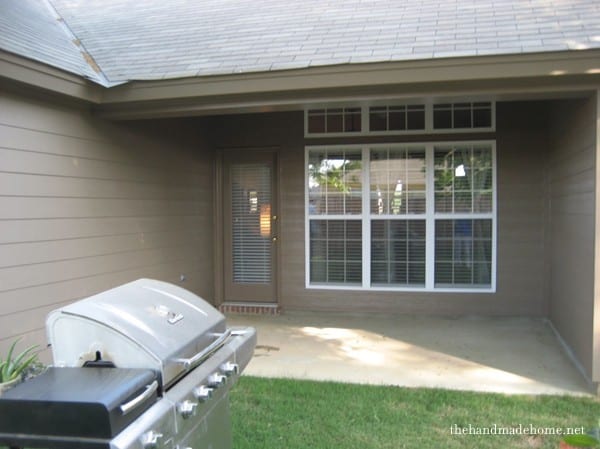
Cue the cheesy sound effects with a gigantic Womp womp. It was certainly nice, but a little lacking in the style and fun department. So we did a few things over the process of a few years to change it over.
Our process
First, we had concrete laid to extend our porch. While we are DIY’ers at heart, some things are best left to the professionals, and a big concrete slab like this was best left to them. (For the record, this was circa 2007, before we decided to take the bull by the horns, and even if we could, we would probably still leave this to a group of pros who can knock it out in a swift and efficient manner for us.)
When we first laid that concrete, it was a plain slab. So we cut into it, to give it a little personality. We had a quote at the time for stamped concrete, and this was just much more cost efficient. We enjoyed our porch and it was fabulous.
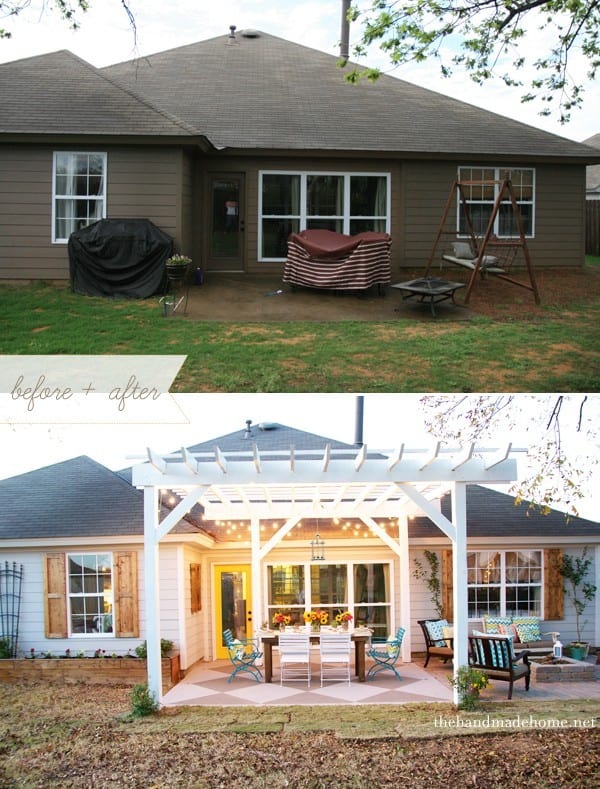
After that, we decided our home could use a little more space. It was actually Jamin’s idea – I still give him kudos for it. So we had a room added on to our home, by having a wall built. You can see the after here, and read more about the value that brought to our home, here. You’d be amazed at the difference one extra room can make.
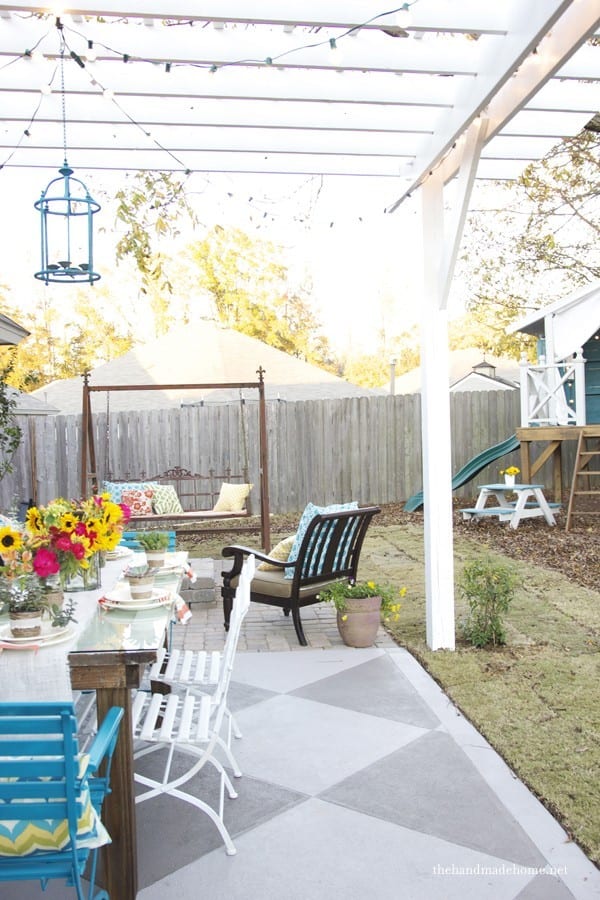
Today, we thought we’d touch on a few of those things that finally came together to complete the look of our pergola. This was such a long process that happened gradually over time, so we don’t have photographs for everything all in one place. As you can see, it sat outside, scored and stained for a very long time, before we decided to turn it into this:
On scoring the concrete:
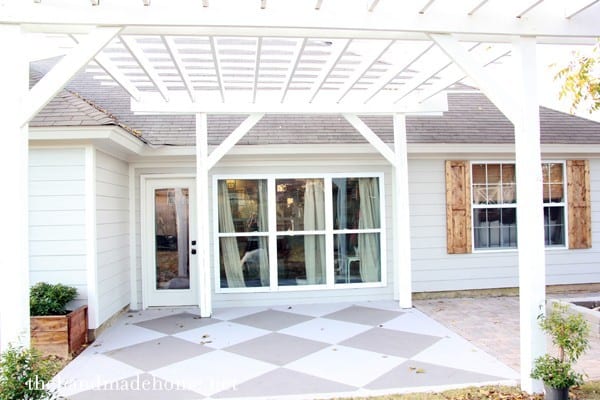
You can actually achieve the look of our porch just by painting your concrete. But we love the extra touch it brought to our outdoor space, with that extra detail. So we measured out exactly how our porch would be by establishing a border, and then measuring diagonal lines from there.
We used a chalkline to measure it all out, pop to mark the line, and cut. I had this post planned out with a detailed diagram, and then I realized (because the mom brain is mush and I’m one big dorkfest overachiever) that all of this will depend on the pattern you wish to use. Making me and my nerdy diagrams completely irrelevant. ;} Ours was a bit of a challenge because our porch is not a perfect square. So when we measured everything for our own porch, we made sure that all the large diamonds were even, and that the lines would be two feet apart.
We used a circular saw or skill saw, with a diamond tipped concrete blade. We set our depth (this is all preference) at about 1/8 of an inch. This process for our porch only took one blade, and it was a project that lasted the best part of an afternoon. That was it. A little personality for your concrete porch.
It sat for a few years (stained) before we were able to paint it.
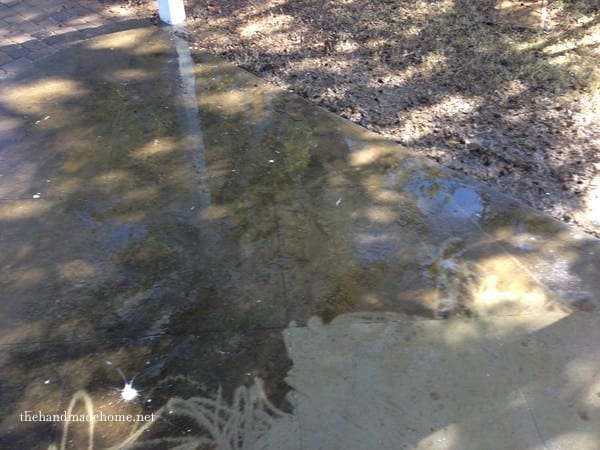
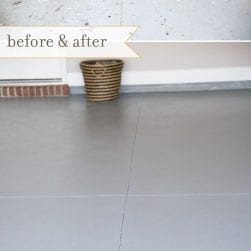
Before the paint:
We simply started by pressure washing our now gunky, under-the-pecan tree porch area. We were shocked by how much had accumulated over time. (Now that the concrete is painted, we will probably give it a yearly scrub-up. We won’t be pressure washing again unless we wish to remove the paint.)
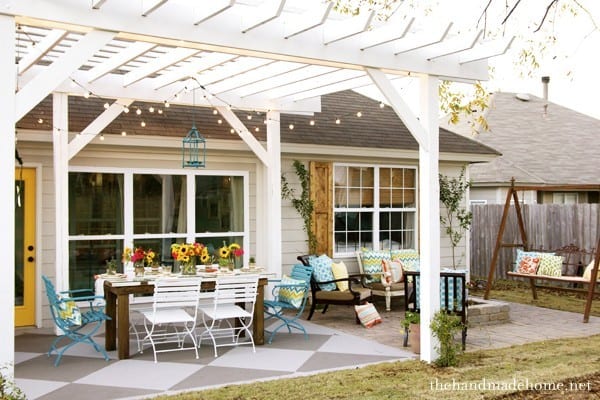
Using rollers for our project, we used the lighter grey color (Benjamin Moore’s Willow Creek) first and started next to our home’s wall, working our way out. Whatever light areas showed in the “grout lines” we overlapped, letting it dry before we added the dark grey (Benjamin Moore’s Bear Creek).
Please note:
only concrete paint will work with this. Latex will peel, so when having your paint mixed, be sure to let your handy dandy paint guy know what this is for. Concrete paint is thinner, allowing it to seep into the pours. This will give you a better finish for your outdoor floors.
Tada! We were finished… and it absolutely transformed our back porch… pergola or no. This only took a couple of hours to complete and really was worth the time and effort for an affordable, simple transformation.
We really can’t believe it took us that long to change it! And even longer to write about how to paint concrete.
 As always, if you guys try this let us know! We’d love to see!
Have an inspired day everyone!


I LOVE this. I’ve seen concrete painted before, but this has got to be the best job. Thanks for sharing!
thank you so much for this! our entire porch is a concrete slab, which is nice because less maintenance than wood…. but not so pretty! i was looking into maybe staining it, but i love this idea, too! i pinned it!
Great look, especially with the scored concrete! I love the colors you used!
I can vouch for the above comment.
This is great! Great job!
It looks fantastic. Seriously – who knew painting concrete could give a space such a face lift? Your back porch is ridiculously gorgeous.
Love it
I seriously love what you’ve done with this space. It looks twice as big finished this way as it did before. Such a great inspiration for if we ever have a nice outdoor space!
It looks phenomenal. Love it! I am overhauling my own porch right now and it is great to see yours as inspiration! 🙂
We! I love it! I once spilled paint on concrete and it has “held up” really well! ;). Looks awesome!
So absolutely beautiful. I send all your great ideas to my daughter and her husband who are gathering ideas for their home. Thank you for sharing all your great ideas and showing us how to “get it done” 🙂
Thank you! 😉
Great post..everything looks wonderful.
oh wow, that before and after is breathtaking!!!!
Wow, what a great transformation. The painted concrete looks great. I love the diamond pattern and the pergola. I want to paint the concrete in our screen porch but the outdoor carpet was put down with a tar like adhesive and there is a large crack that goes along the entire length of the concrete.
If you get creative, you can design a more free-form pattern (ivy vines, etc.) that will incorporate your tar spots and cracks. I do wood-burning and people always ask me, “what do you do when you make a mistake?” I just say, “I CHANGE the pattern!”
This is absolutely fantastic! My husband and I have decided to focus our energies on fixing up the outside of our home this year and I can’t wait to do this to our boring cement slab. Thank you so much for the idea!
Kari
this looks terrific. how is it holding up with time and weather? are you still happy with it?
yes! it’s just fine! We will probably soap it down in the spring once the pollen has settled but it’s great!
What a fantastic job – not only on the concrete but the change in color to the home and the addition of the shutters!! Great work.
Thank you! 😉
Really enjoyed the DIY! We have a deck that I am so doing this to.
Love this idea and your excellent instructions!
Hi! I love concrete creativeness! Your porch is so cute. I have a similar situation with a boring back porch area that is surrounded by unplanted-on mud, as of yet and I am looking for grass alternatives. How did you lay those cobblestones to extend your porch? What is that grass and how come it looks like squares? Thank you and many happy summer days and nights!
Marijana in Cleveland
Hey Marijana! You can read all about that here. And our entire series for our back yard, here. Our grass looked like squares at the time, because we had just laid some more fresh sod. (We have problems with our pecan tree. ;}) I hope that helps! ;}
Fabulous! It’s sooo darling! Can you tell me more about your shutters? Are they a DIY project? They’re awesome!
Hey Emily! You can read about all of our back yard projects here, and you’ll find the shutters how to there, as well. Thanks so much for dropping by! ;}
Awesome job!! I’ve been looking for ideas! I love everything, remarkable!!
Great outdoor space! We poured a new drive & extra pad. I have been looking for a way to soften the hard scape. Did you apply a final sealer? I’m wondering if moving patio furniture around scrapes the paint at all?
Have a raised postage stamp of a yard from back door, any ideas? may take a professional.
Do you have any issues with the painted surface being slippery when it rains?
Hi Nancy! We have never had any problem with that – our concrete is pretty rough, and because we didn’t finish it off with a glossy top coat of any kind, it’s been perfectly fine. I hope that helps!
Thanks for sharing. I really like this idea.
you only pressure washed it and did not have to put an acid on it…
nice
I love what you all did Fantastic…… Question What color did you paint your house ? I love the color, we are about to do a pergola and stain our concrete too.
Hey Deirdre, we used Benjamin Moore’s Cumulus cloud. Good luck on the pergola and concrete. I am sure it will be amazing, we’d love to see it!
Can this be done without scoring the patio? Like just tape out the design with frog tape and then paint with concrete paint? Love this oasis! This is the first design I have seen off of a 12×12 concrete slab! We want to add to our plain square and not over haul it. LOVE THIS REDO!
Hey Amanda! I don’t know why not! We just already had ours scored, and decided to paint it in. ;} Go for it! I hope that helps! ;}
LOVE the before and after! It look so adorable! So you do leave your cushions outside? I just bought patio furniture and my patio is not covered. I am not sure what to do with my cushions even though they are supposed to be weather proof. So currently I keep them in the house and bring them out when i have company. Any suggestions?
Hey Kristen! We do not leave them outside. Unfortunately, we have a giant man eating pecan tree, that will mildew all of the things if we leave it outside. After it’s bathed in pollen. BOOOOOO. We were using storage boxes outside, but those soon became places for the kids’ toys. And we have furniture covers, but who wants to stare out their back window and furniture covers all of the time? So we do exactly as you: bring the cushions in and out. Maybe that doesn’t help – but take solace that you’re not alone!
Love this! Question…we’re ready to paint our concrete patio, but my husband is concerned that the lighter colors will get super dirty looking. Did your white diamonds stay white?
Hey! They’re more of a grey, so they are fine. It will need to be cleaned off this spring once the pollen stops falling because we have a killer pecan tree in our back yard – so we will be pressure washing everything- but we have been very happy with it!
Thank you so much for this post!! I’m getting ready to pull the trigger on painting our back patio, but I’m wondering if chalk would draw alright on the painted surface?? It seems like a silly thing to consider, but my daughter would be so sad if she couldn’t use her chalk out there anymore!
I would like to know what kind of paint can I use to paint a Birdbath. The inside that looks like water,and smooth. Also the outside of the birdbath, but it doesn’t need to be smooth like the inside. But it can’t hurt the birds to drink water.
Thank you
Beverly McKay
Love your pages gives me so many ideas. Thanks
To protect your paint job, after the paint has thoroughly dried, you should apply a concrete sealant. It’s readily available at hardware stores, and is DIY friendly!
Love this look! Would it work on a fiberglass deck? We need to have our fiberglass deck refinished about every 2 years because it chips badly (Live near the ocean so it takes a beating). Also, we have been told it wasn’t done correctly by the builder’s contractor to begin with. Would love to be able to do something like this ourselves and hope it would hold up better?? Say it is so.
Hi Maddy! I honestly do not know the answer to this as I have never tried it on a fiberglass deck. That may be a great question for the local paint store guy! ;}
just curious as to what state you live in. the wood covering on the patie does not seem to be fastened down anywhere, is this possible. I live in s.e.wisc and would love to put up a patio covering such as you have in this picture, but i don’t want ot attch ot to the newly sided walls of my home, i would need tp pull apermit for that and I do not wish to do that. Take in mind that we have tornadoes in this part of the state as well. Any info you can share is greatly appreciated.
Hi Carol – you can read all about our backyard redos in detail with full out tutorials here I hope this helps set you in the right direction!
How long ago did u do this and how has it held up? What climate are u in? I live in NE PA and most everyone tells me concrete paint doesn’t hold up here
Hey Susan! We did this about two years ago. We live under a pecan tree so it needs to be washed well because of the mess the pecan tree makes. But other than that it has been great! We live in Alabama
Love this! Will it definitely come off it pressure washed? My husband is concerned that if we sold out house and it was a few years down the road that people might not like the concrete paint.
Hey Lynsie! I would do it because you love it, and are excited about your home, not because you hope the future homeowners may or may not… that’s definitely our philosophy around here, or else we would never do anything to our home, worrying about that. ;} I don’t think someone won’t purchase your home because they don’t like the concrete paint. As long as you don’t go magenta and chartreuse, I can’t imagine it being a real problem ;} That being said, there are methods to get up the paint, so if it makes you feel better I would research those. Over time, it fades as well if it’s not refinished. I hope that helps. We always say go for it!
Looks great. I’ve been wanting to paint a rug on our patio.
Love the look of this it’s fabulous. I really want to try this.
OMG I’m dying here…this is an amazing transformation!!!! I have plans to do mine soon when it warms up, It’ll be really nice but not quite as much work as you’ve put into yours. Love this so much, what an amazing job!!!
this is beautiful! How wide did you make the engraving with the circular saw? It doesnt look like the grout lines are painted a different color in the picture, are they? I have Willow Creek painted on my FR walls and they look medium gray where this picture comes off as a gray and an off white. I am thinking black and white….do you think that would work? My patio is 20′ x 20′, is it too big to do this? I am a bit scared but if it looks like yours I will be really happy
Pati, we made one run with the saw, so it is only the width of the blade and I don’t think you’d have any problem with a 20×20 patio. Good luck and I hope it turns out amazing!
how did you do the blocks? did you draw lines or use a template of sorts?
Hey, It is truly arbitrary. We decided what size would work best for our space then simply measured them out with a tape measure and marked it with a caulk line and made our cuts.
I hope that helps some!
Nice looking patio!
My question is how did you continue those cuts close to the house?
Wouldn’t the base of the saw interfere?
Hey, John. Yes, the base will get in the way, which is why we went with a border around it, which is close to the width of the base of the saw. I hope that helps and best of luck on your project!