
handmade hideaway 2.0 – building the foundation
We’re super excited to begin the construction tutorials for the new handmade hideaway, and we can’t wait to see all the amazing things all of you do with your own builds. We are still amazed by all the people who have built, tweaked and simply made awesome the first handmade hideaway. It’s pretty cool to see all those versions on social media and when you email us with them and we love running into you in person and hearing your stories about the build!
Today we’re going to cover laying the foundation.

Before we jump into it though, a little friendly heads up: This is a little more than a weekend project. You’ll want to commit some time to it and have a decent desire to perspire a bit. Or as we say in the South, glisten.
These posts are meaty. So we’re taking you one step at a time. Be sure to read them carefully, but even though the writing seems tedious, we’re just making sure we cover all our bases. The Handmade Hideaway is actually a really fun build. Be sure to check out the entire series here, if you’d like to organize them all in one spot.
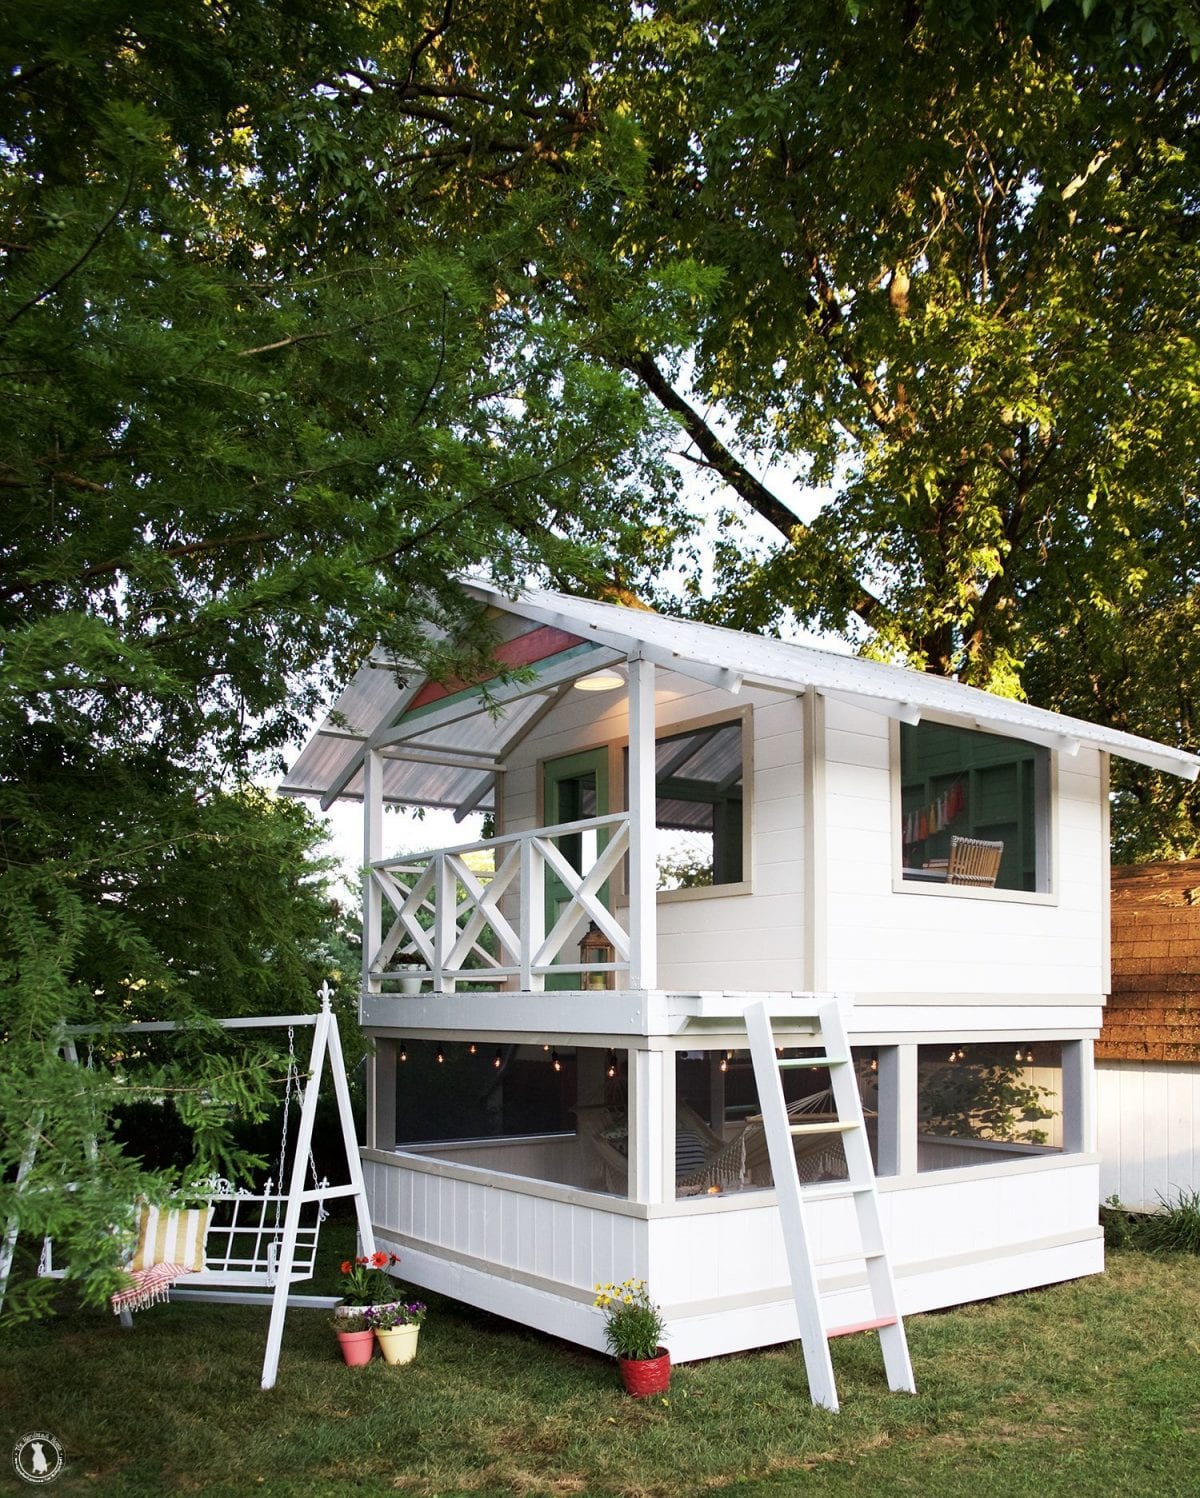
The project comes in at 10 ft x 12 ft x 16 1/2 ft. And we love every inch of it!
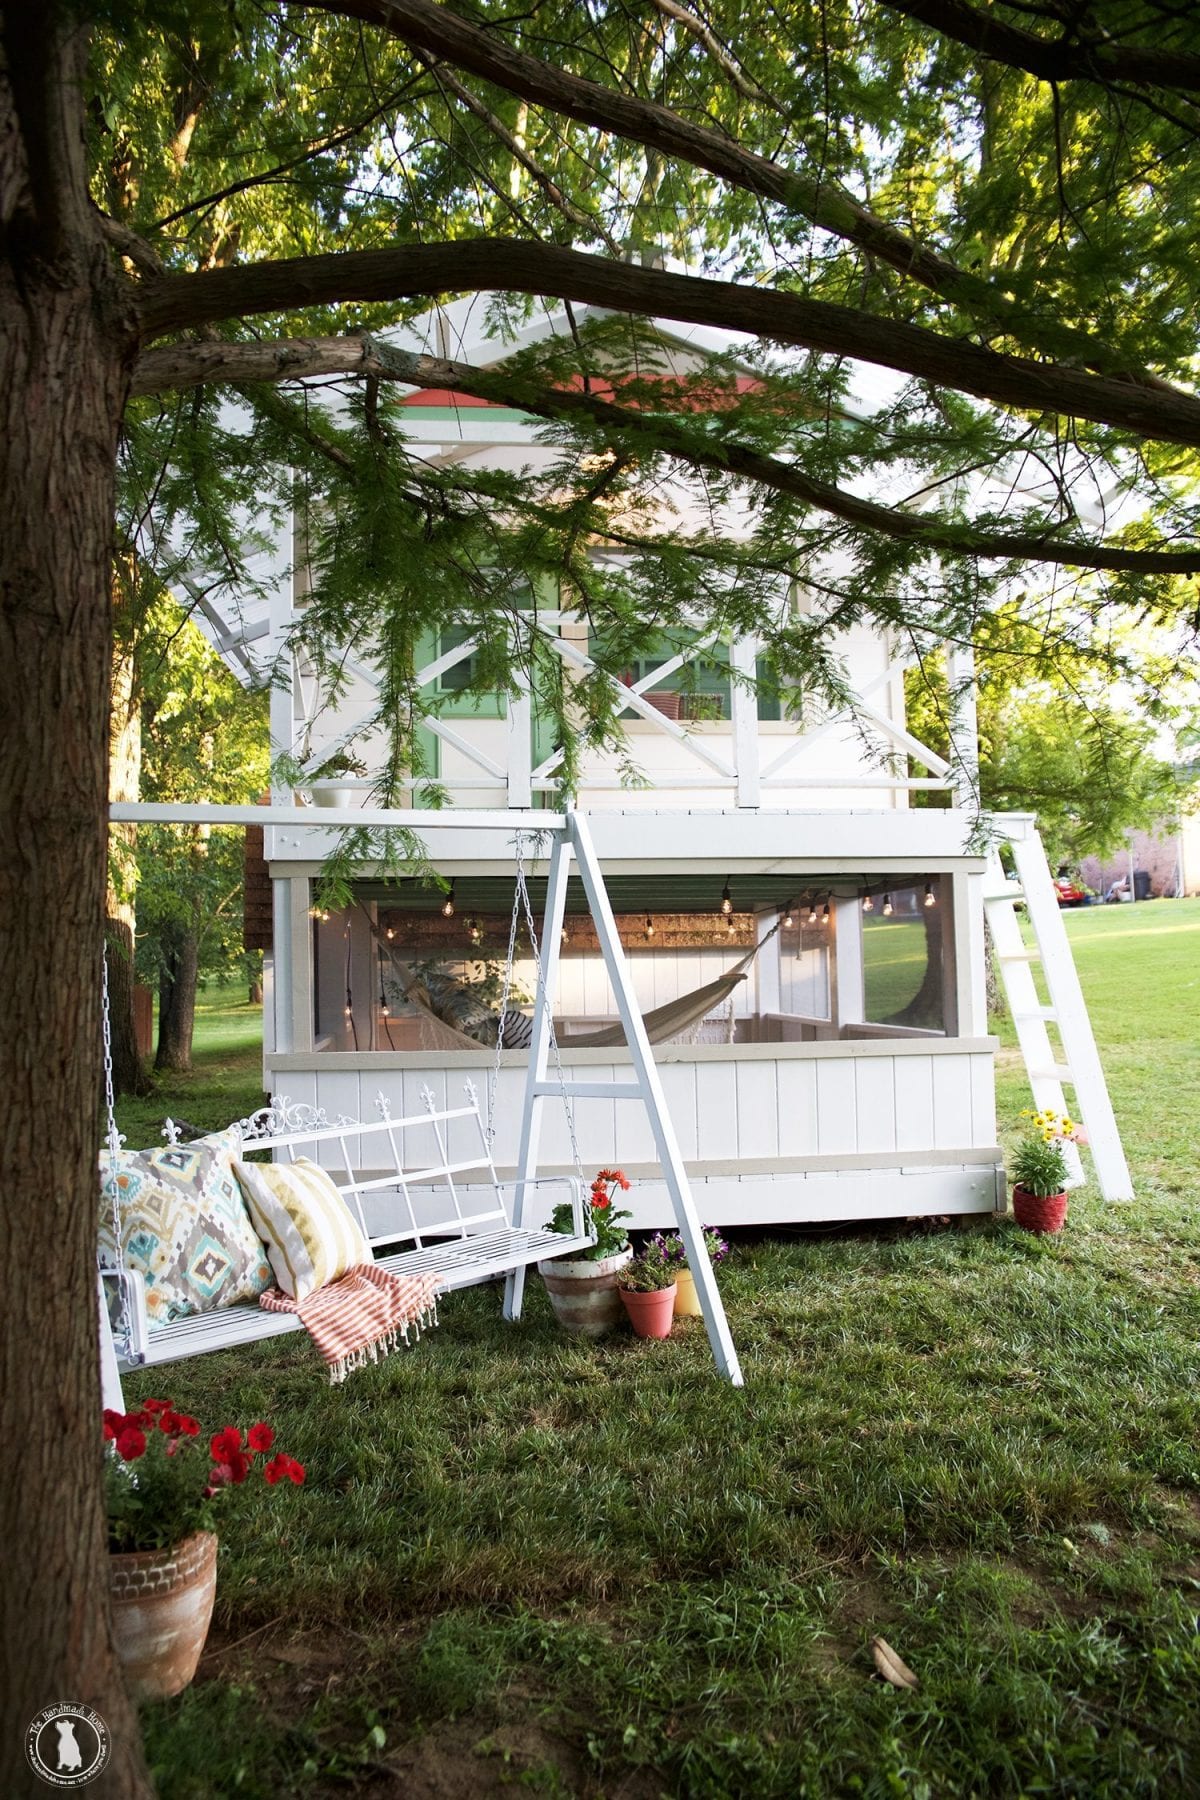
The finished product is so worth it. The kids will love it, and if I’m honest I sneak out to ours to hide from everyone on occasion. Introverts gonna introvert. I’m not really sure what that means, but it sounds like a good t-shirt idea.

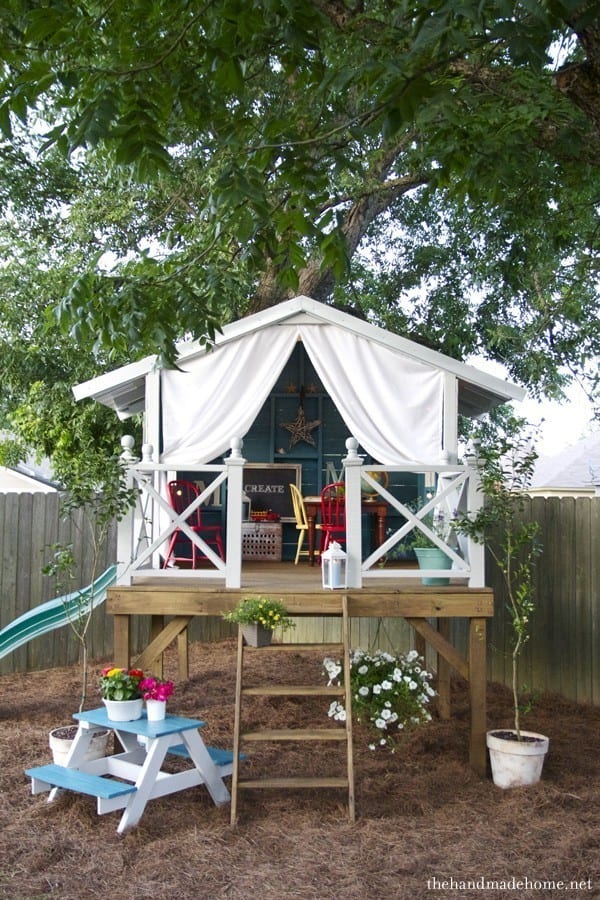
If you’re need for a quicker build or have smaller children, you can always check out our first version here.
(Also, just because the lawyers make us say it; if you decide to take on this project or any project from our site, we aren’t responsible for anything you do. Really how could we be we aren’t there? You acknowledge by reading and following this or any tutorial that we provide that you do so at your own risk, that we do not warranty or guarantee anything we write about. You are solely responsible for checking all materials, measurements and the safety of the project. That was awkward – Glad that’s out of the way.)
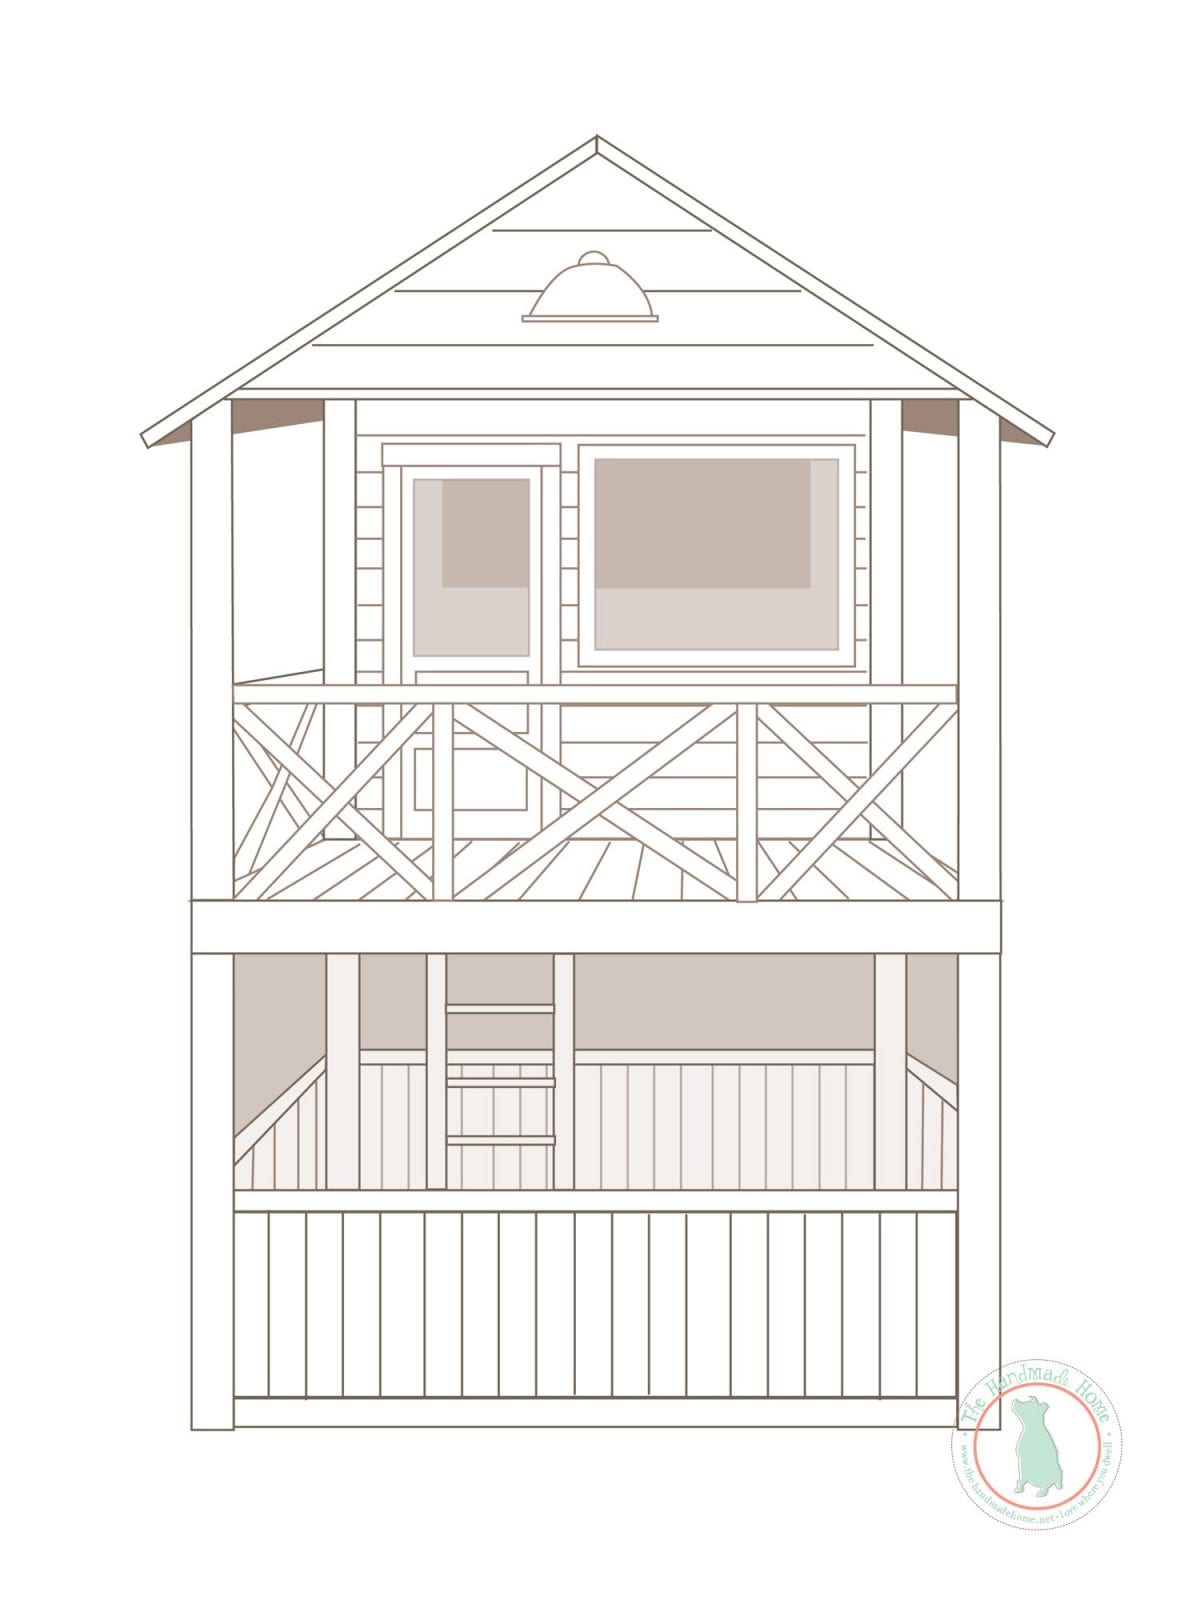
We started out with a quick sketch, and it evolved and changed from there {as all good projects do}. Yes, we know some of the angles are off. Again, this was our starting point. Some of the changes to the design were based on the location, and others, the practicality behind it.
You can see though that over all, we stayed with the basic look. We knew that we wanted two main things: for it to be screened in, and that we only wanted access from the top to the bottom level. We love the way it makes it feel like a true treehouse.
Here’s the tools you will need for this portion: {contains affiliate links}
• post hole digger
• axe or sharp shooter to cut any roots
• Drill
• Drill bits
• Socket wrench
• hammer drill with nut driver
• hammer
• chalk line
• skill saw
•miter saw
• Levels (4 foot and post level)
• clamps if working alone
Supplies you will need for this stage:
• 2 bags of 60# concrete per hole
• String
• Stakes
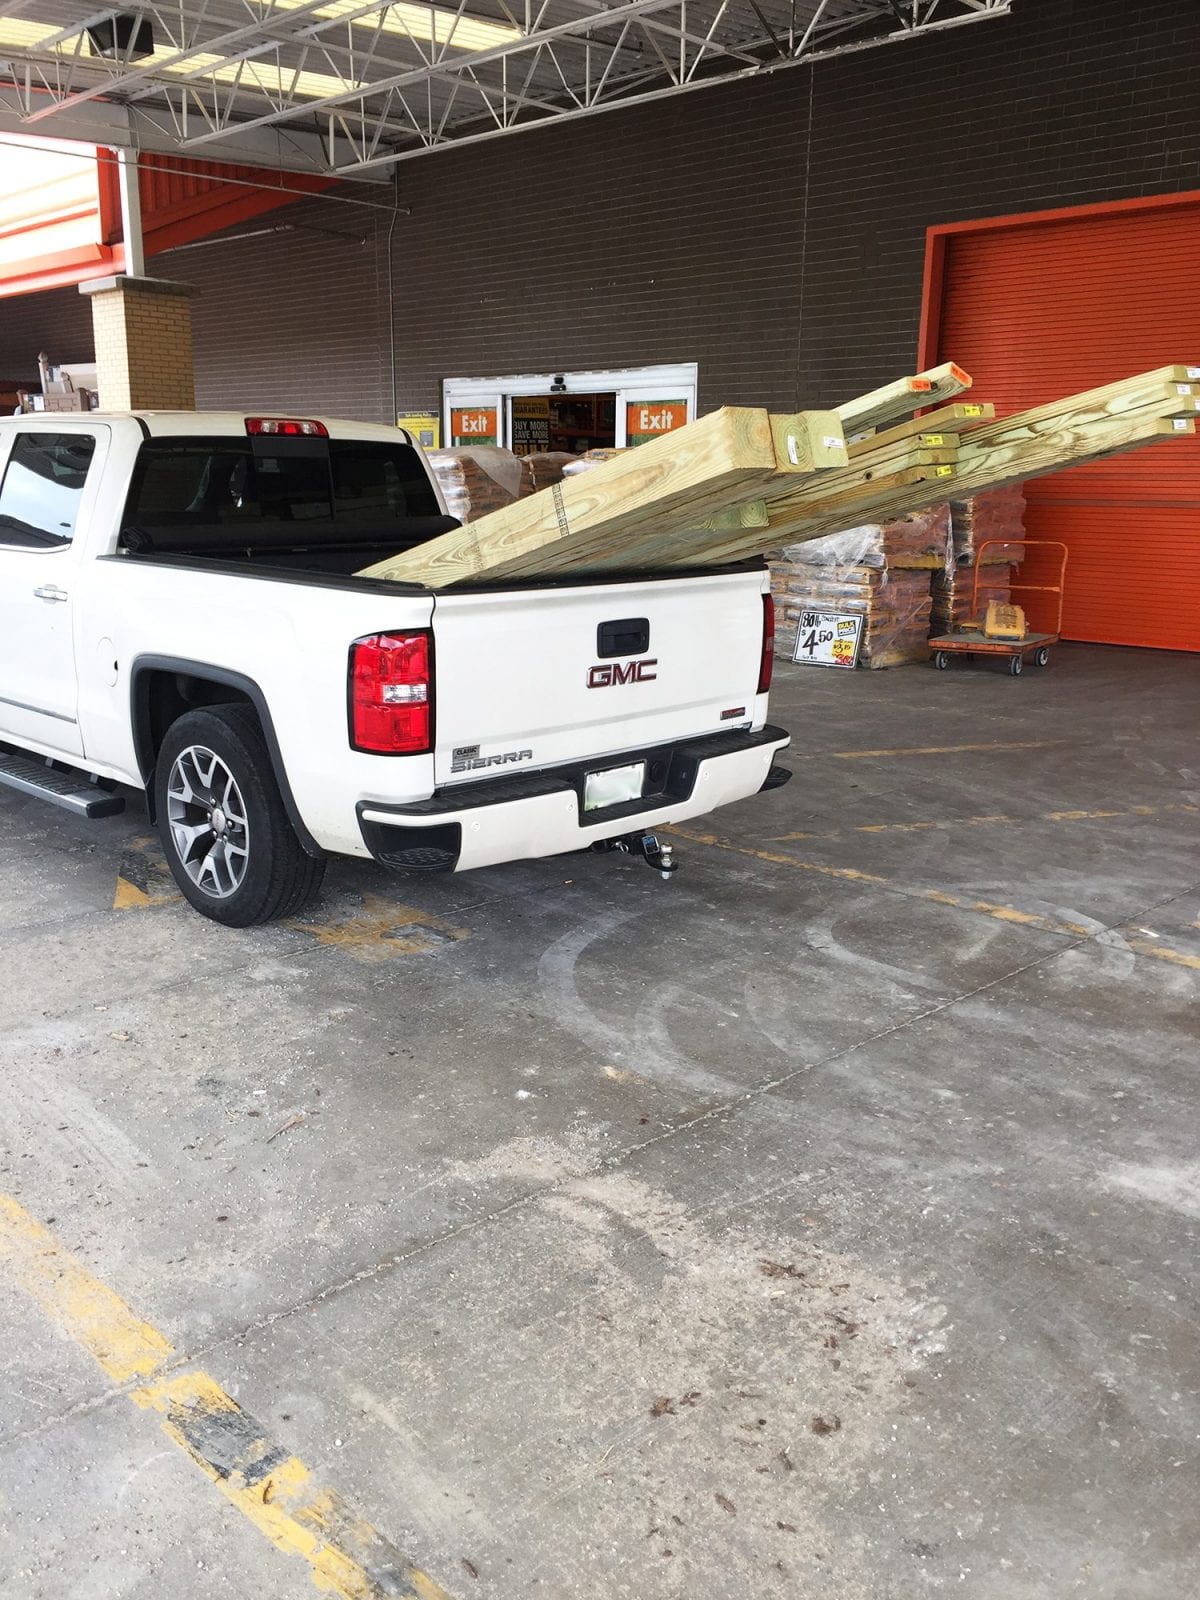
• (6) – 6 x 6 x (8,10 or 12) – YellaWood® pressure treated – These are for your post legs every region may need a different length, you should buy according to your need. To figure out the length you need follow this formula – {(frost line + 6″) + height off the ground + lower level joist size + lower level deck + lower level height + upper-level joist size = 6 x 6 height} (You can find your frost line here.)
• (4) – 2 x 8 x 12 – YellaWood®pressure treated
• (24) – – 2 x 8 x 10 – YellaWood® pressure treated
• (50) – 1/2 inch x 4 inch lag bolts
• (2) 5 pound boxes of 2 1/2 deck screws
• (24) joist hangers
• box of nails and screws for the joist hangers
• (38) – 5/4 x 6 x 12 YellaWood® pressure treated deck boards
• (12) 2 x 4 x 10 – YellaWood® pressure treated
• (6) 12 in concrete forms if you want to use them

Now, on to the fun part of locating a place to build your hideaway.
The best advice we can give here, is not to rush it. Talk through the pros and cons of each space. Check out the area in the morning midday and sunset to see how the sun will impact it.
We waited an entire year after moving, because of some other things going on with our house and approval stuff – see: entire home renovation. But we were kind of glad we did, because it took us a while to decide. We had a lot of possibilities with a bigger yard, and the spot we chose was just right a-la goldilocks and the three bears.
Also, pay attention to the space in rain storms.Once you settled on the location, take some tape and mark it off, then sleep on it.
We also used a little spray paint to generally mark where our posts would go in the planning process.
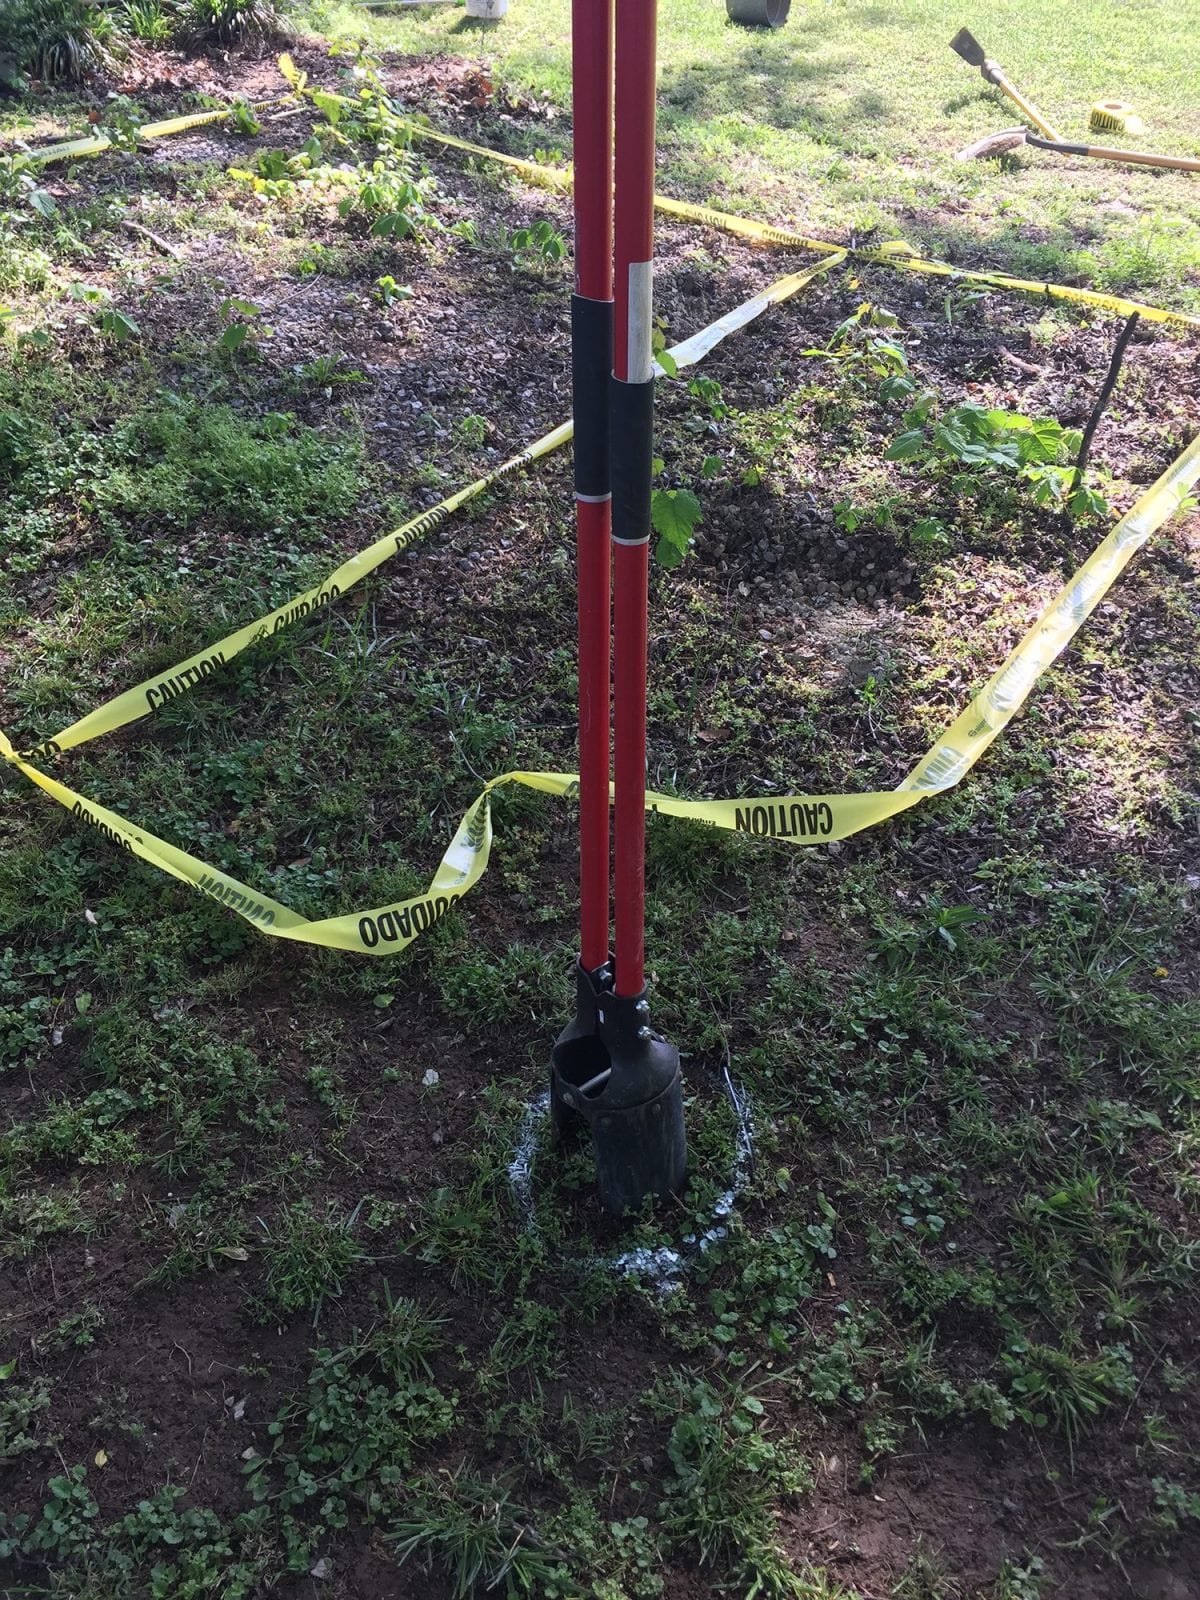
Once you’re sure about the location, it’s time to break ground and dig the cornerstone. You’ll need to dig below the frost line to prevent any movement in the structure. Here is a good reference for your area.
You’ll also need it to be 12 inches wide if not using a form, or about 16 wide if you are.
Total side note: Ashley said she got a major arms, shoulders, thighs and chest workout with this one. You’ll be surprised by which muscles are sore.
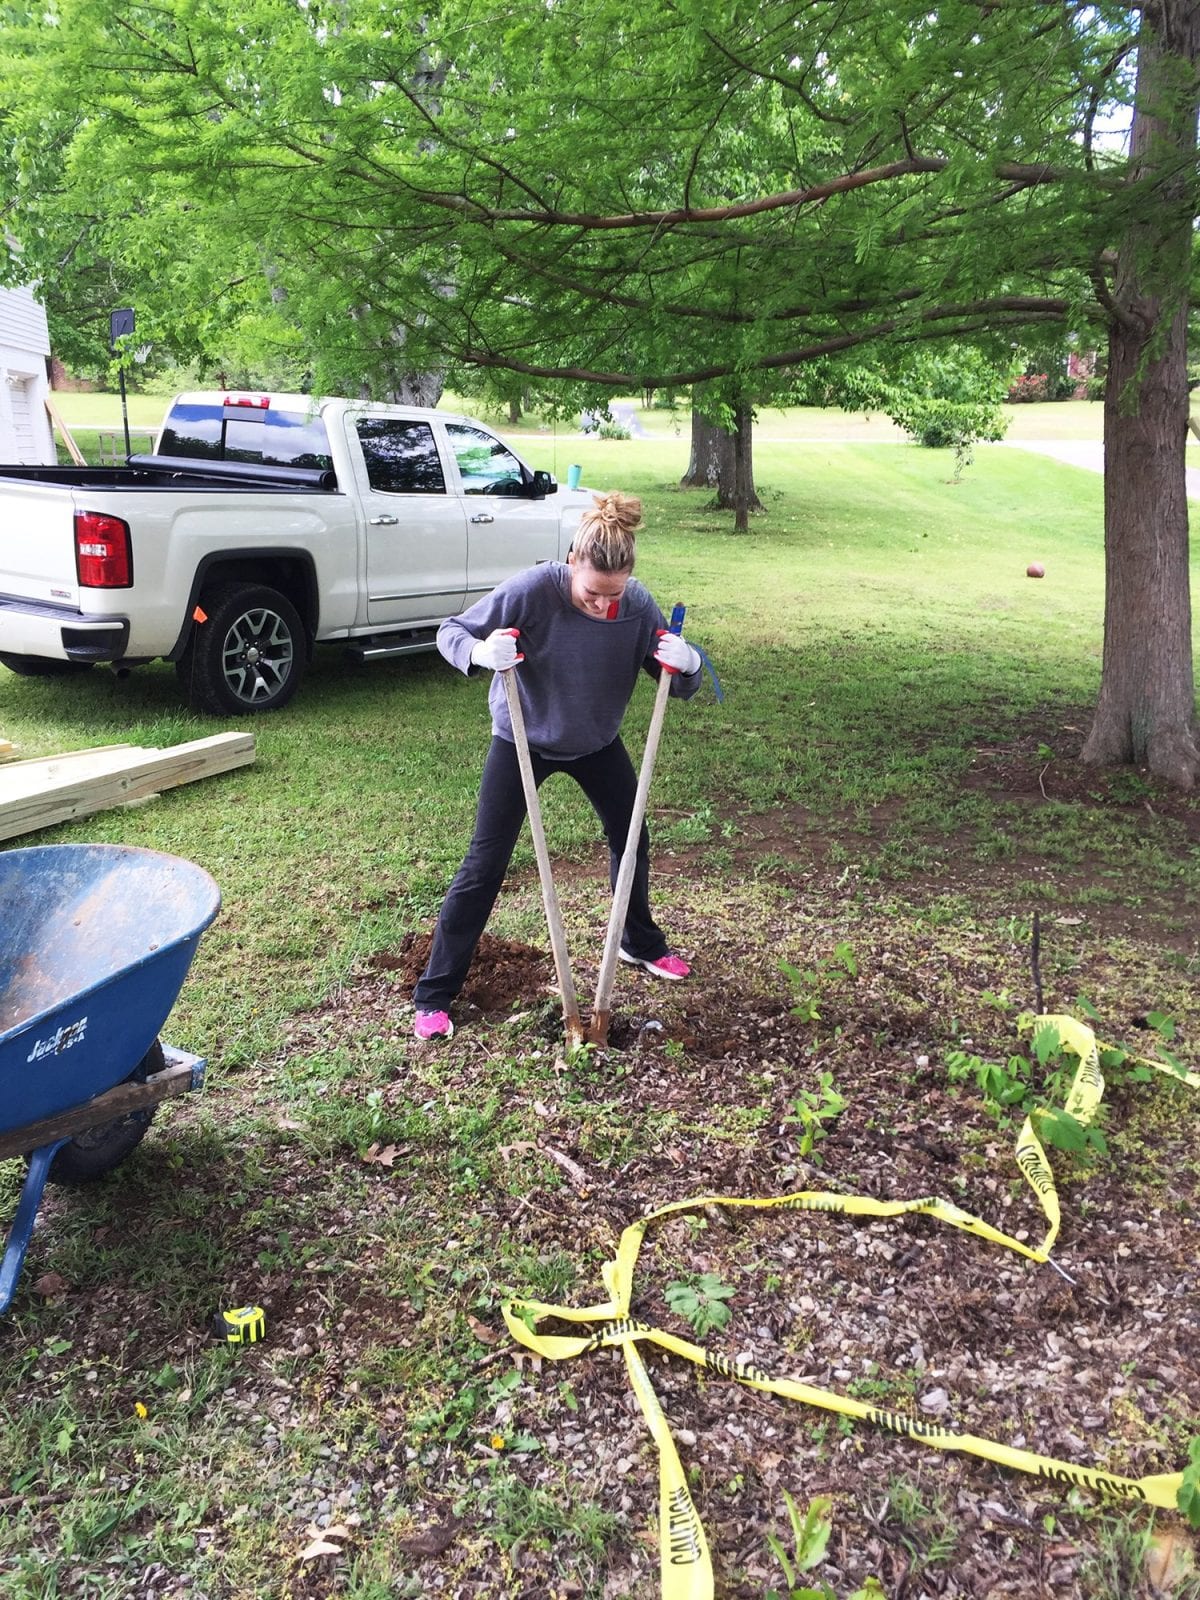
It’s also a good idea to either remove or spray all the vegetation in the area you’ll be building. This was a sad little area that had a lot of gravel and we weren’t sure what to do with it before we decided to actually build here. We think the last owners used it as a place to store their boat. We had a little poison ivy in the area and didn’t want it growing back. We even went so far as to have the pest company spray the area for bugs and ants once it was finished. Little moves like this can be a game changer.
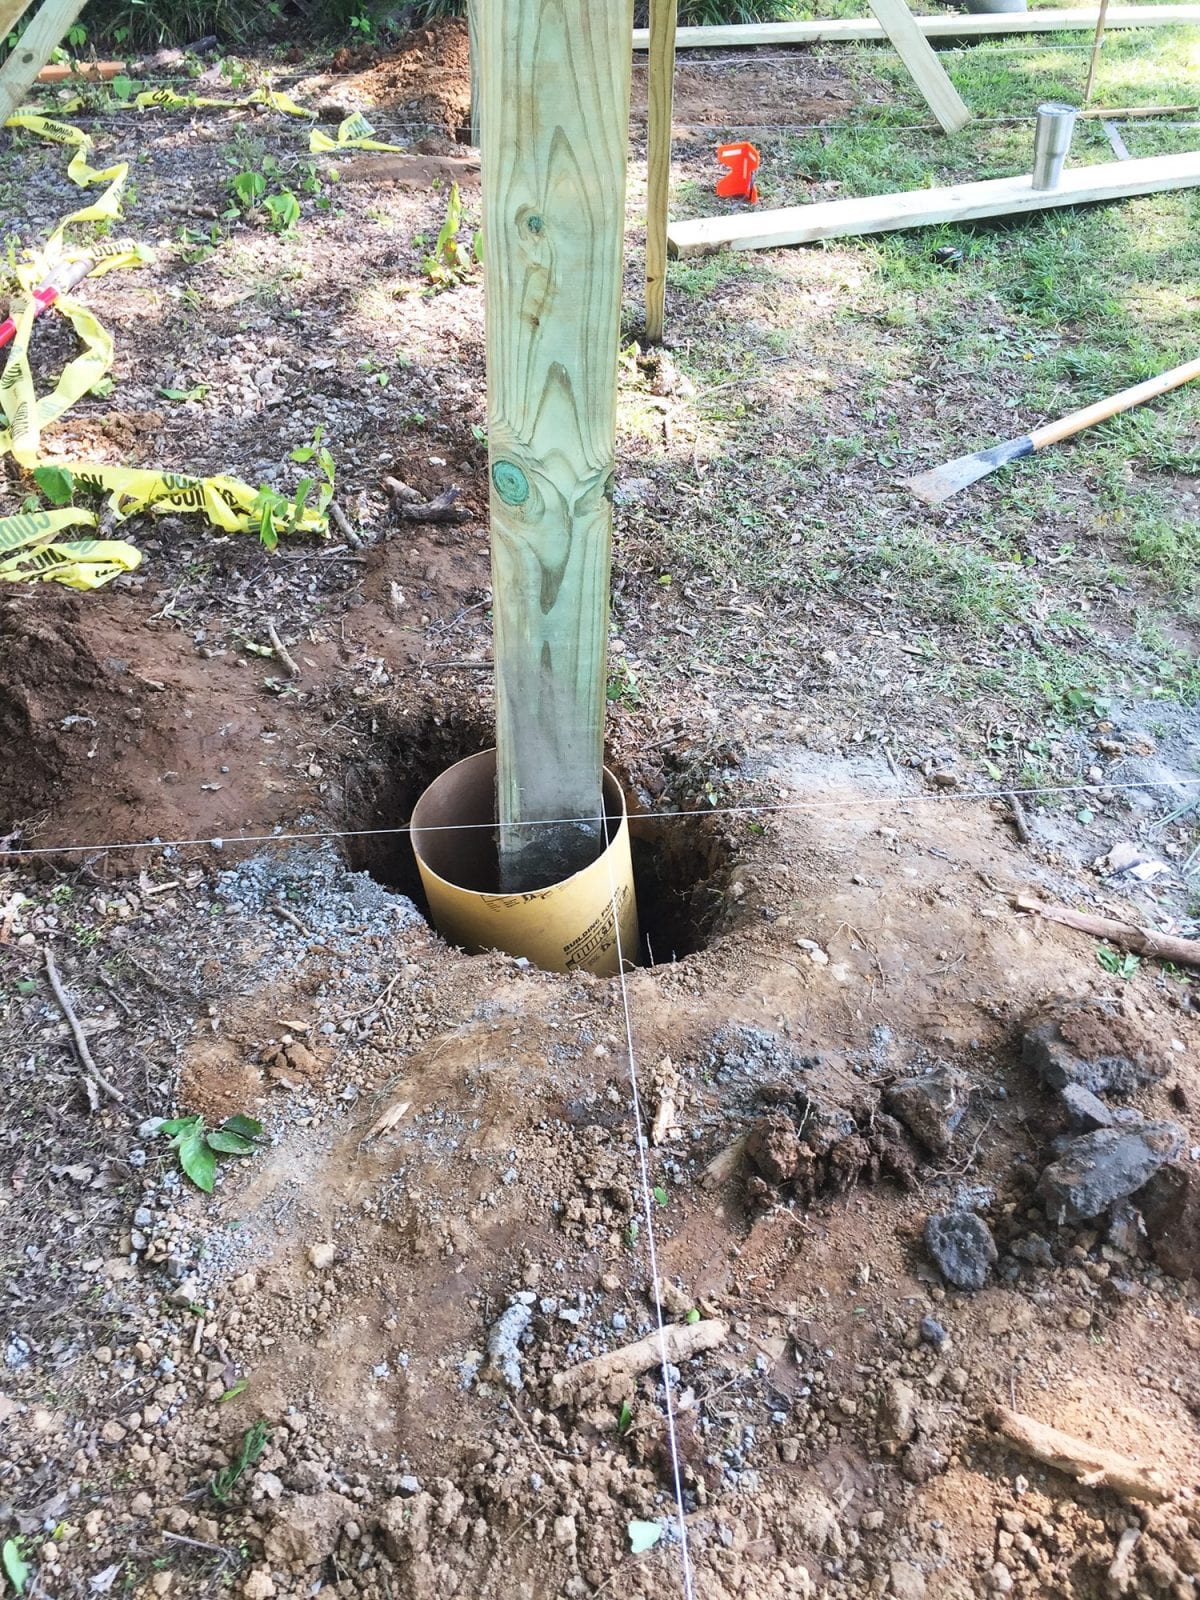
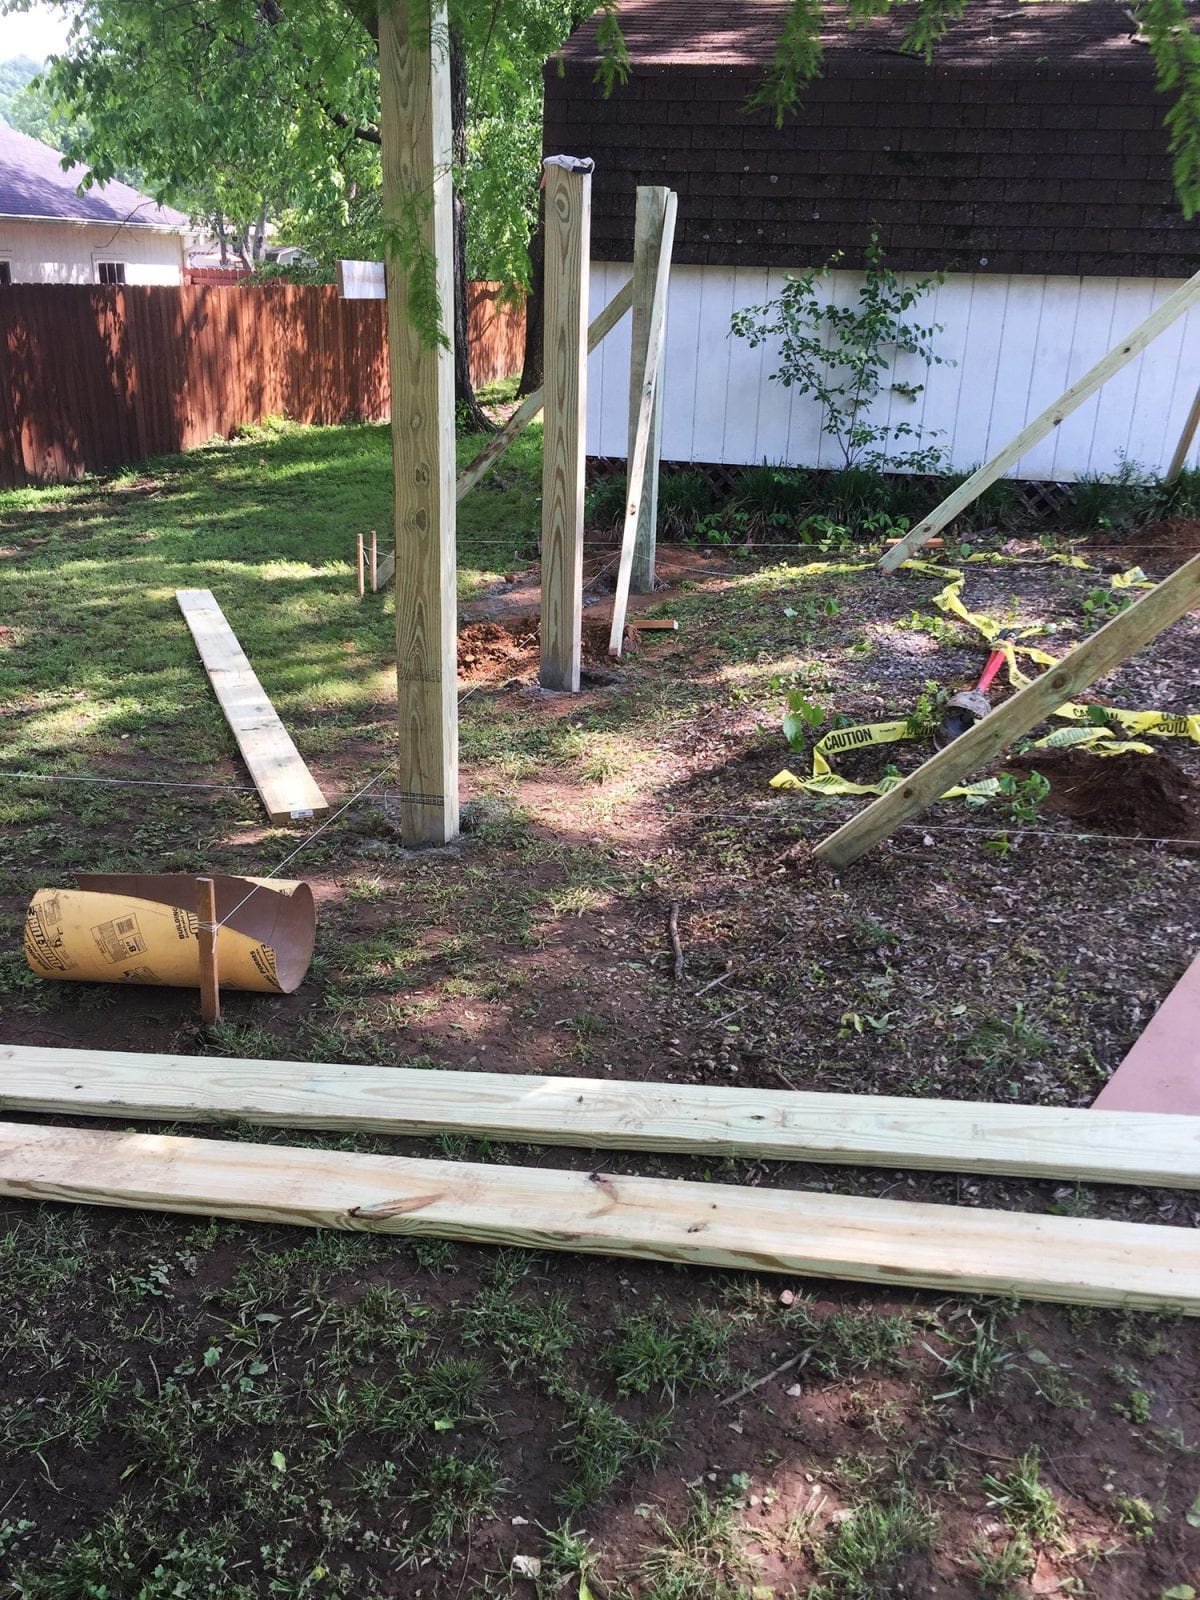
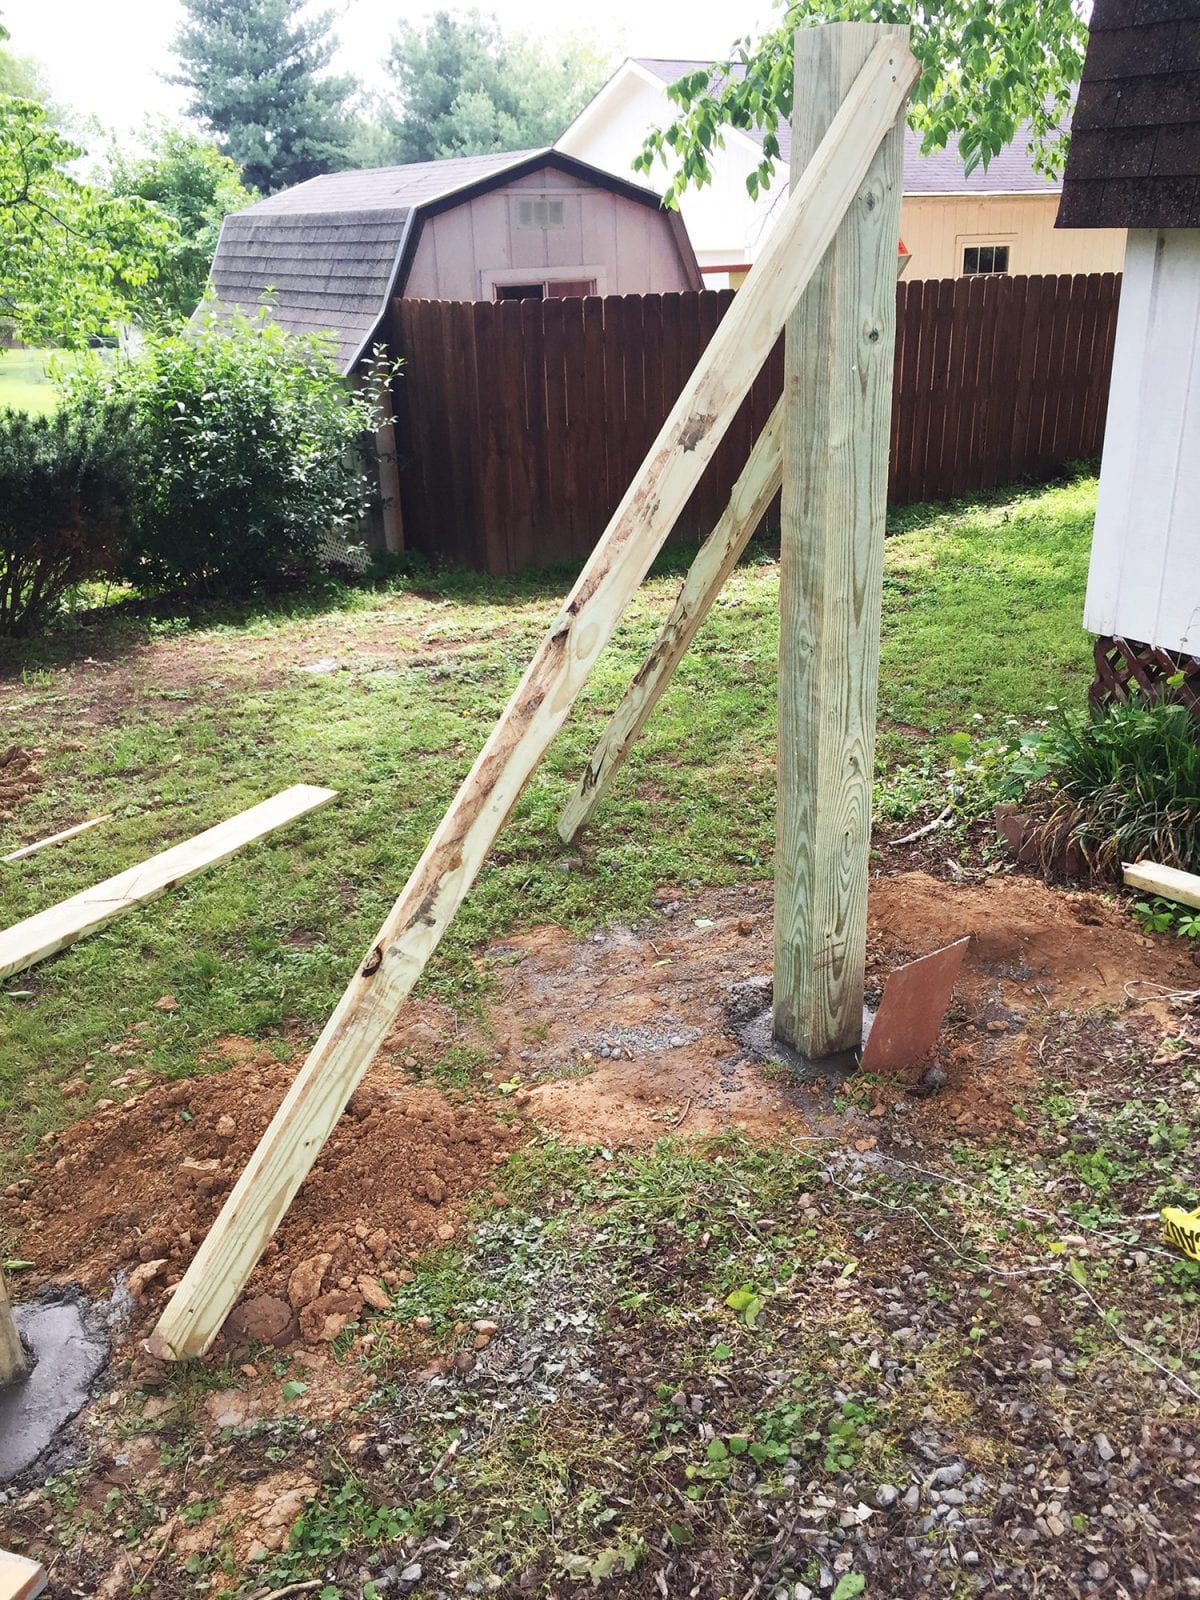
Once you have the first hole, you’ll want to drop a 6 x 6 in the hole along with the form, if you are using them.
Then, using your 4-foot level and post level you’ll want to make sure that is, in fact, level. Check straight up and down and all sides. Use the 2 x 4’s and a few screws to support and stabilize the 6 x 6.
From here, you’ll set stakes in the ground and run the string from the stake, down to where the next post will go and also about 4 or more feet beyond to another stake. This will help you square off the foundation. You’ll simply want the string to kiss the edge of the cornerstone post. This will give you one line for the post to work off of.
Then you’ll want to mark the second line going in the opposite direction, but staying on the outside of the post. Tie it to stakes about 4 feet past, where you’ll place or have a post, and make sure it is just kissing the cornerstone post. This gives you the outside edge of the next corner post. Now you can place the second post in the ground, secure it and run a string across it as you did the first one. This will give you the placement of the next post.
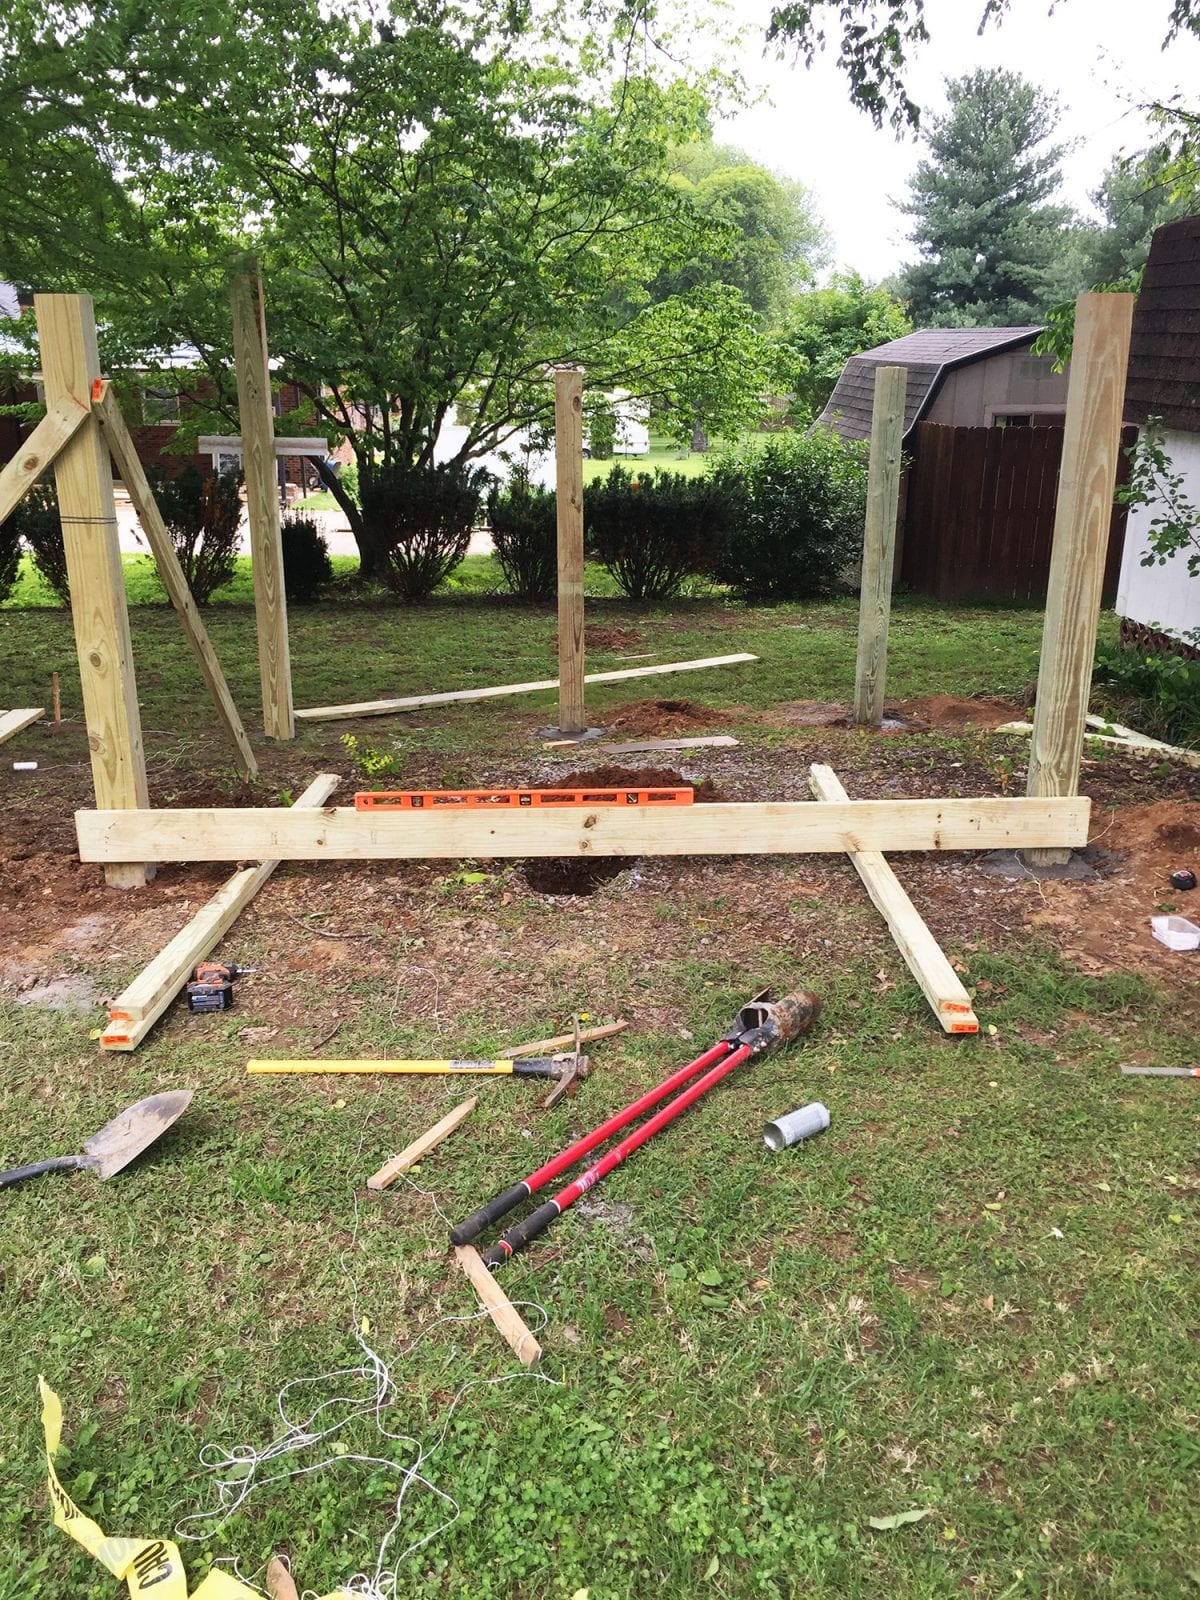
Continue working around the permitter until you get all four corner posts. You can add the two middle posts after all four are set.
We’ll be honest… this is the hardest part of building a hideaway. It’s important to make sure everything is square, and it’s okay to take your time here. There are other ways to do this, but I find this the most forgiving.
The tricky part now, is making sure all 4 sides are squared. Being in an open space with no reference can make it difficult. However, if you’ve used the string you should be pretty close, and you’ll just need to take a few measurements and a few adjustments.
First, measure both for length and width to make sure your posts are the correct distance you want. You’ll be measuring outside to outside on the posts.
Next, measure from inside corner to the opposite inside corner, diagonally on both sets of the corner posts. If this measurement is the same you’re square. If it is not, then you need to adjust to make it square.
Geometry is hard.
We cannot stress enough how important it is to take your time on this and get it right. Even half an inch off can cause serious issues when you move to framing the roof.
Trust us, it’s worth going slow and getting it right.
Now that you’re satisfied with the structure being square, it’s time to pour the concrete.
Mixing it in the wheelbarrow is probably the best, but you don’t have to. If you don’t have a wheelbarrow, you can simply pour 1/4 of the concrete mix in the hole, add some water until it is soupy, and continue the process until it is filled.
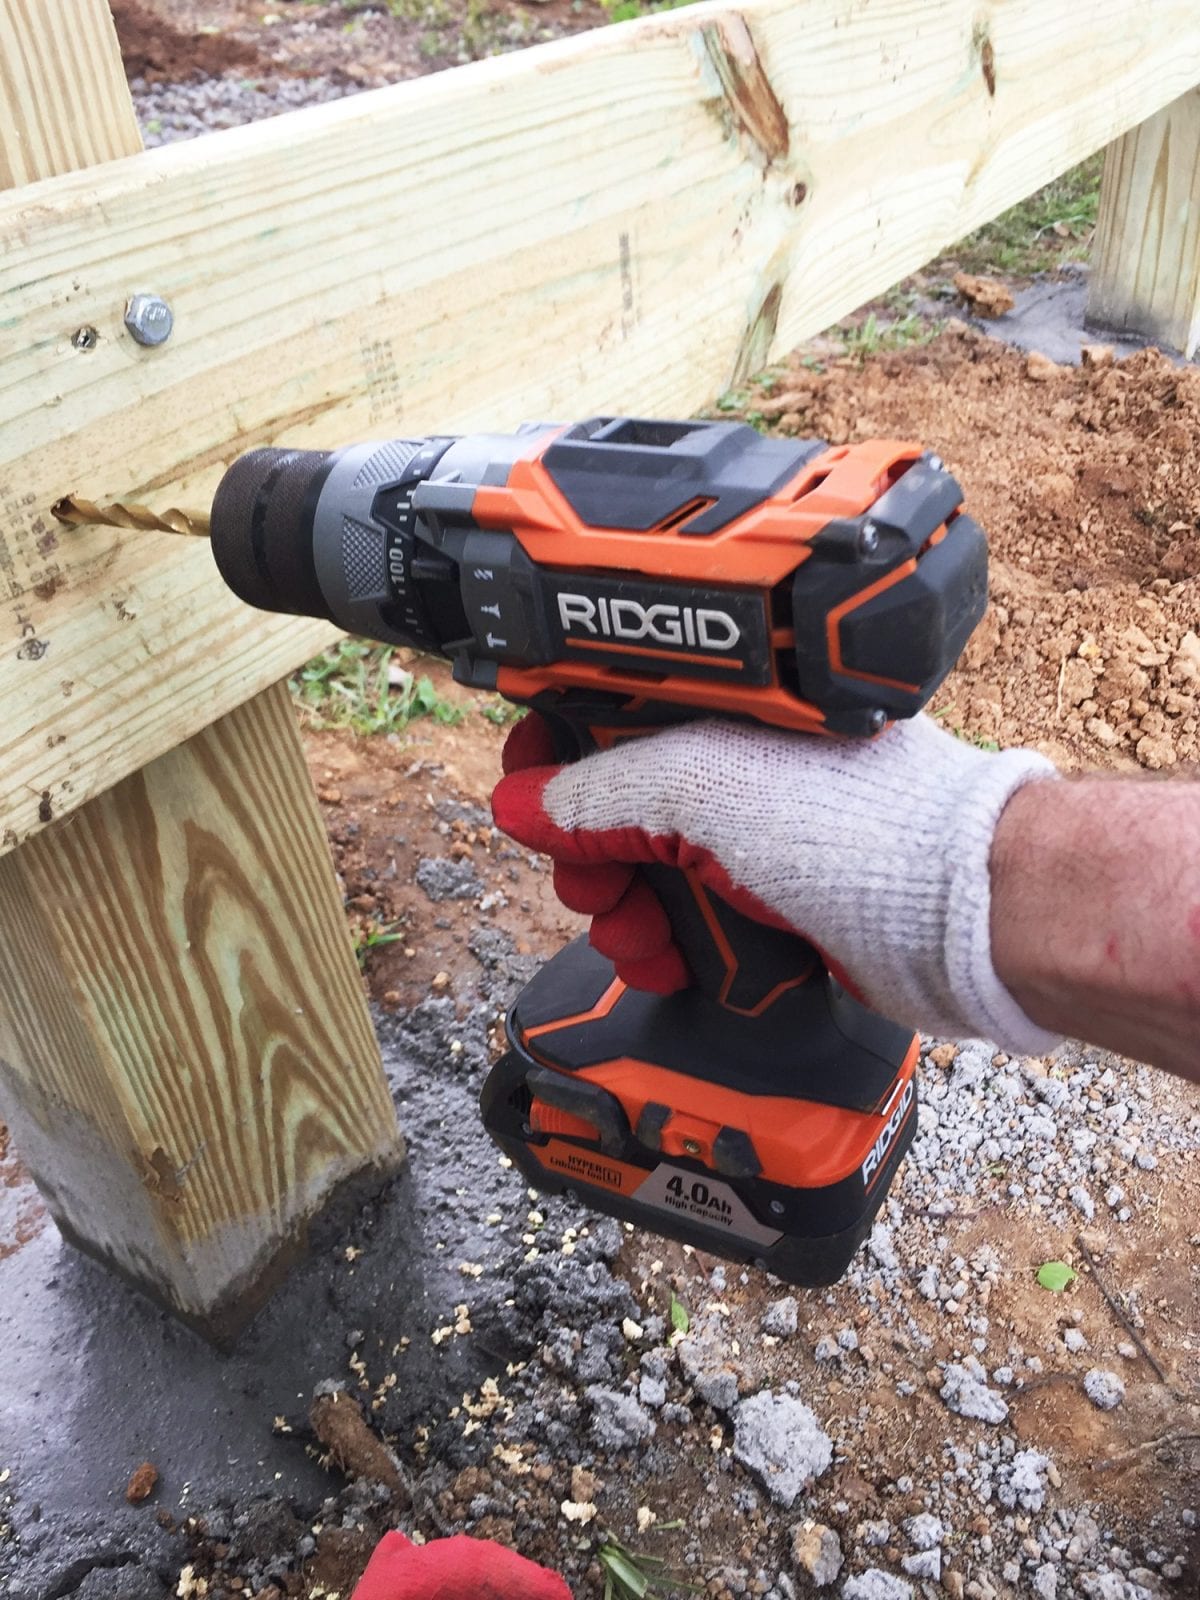
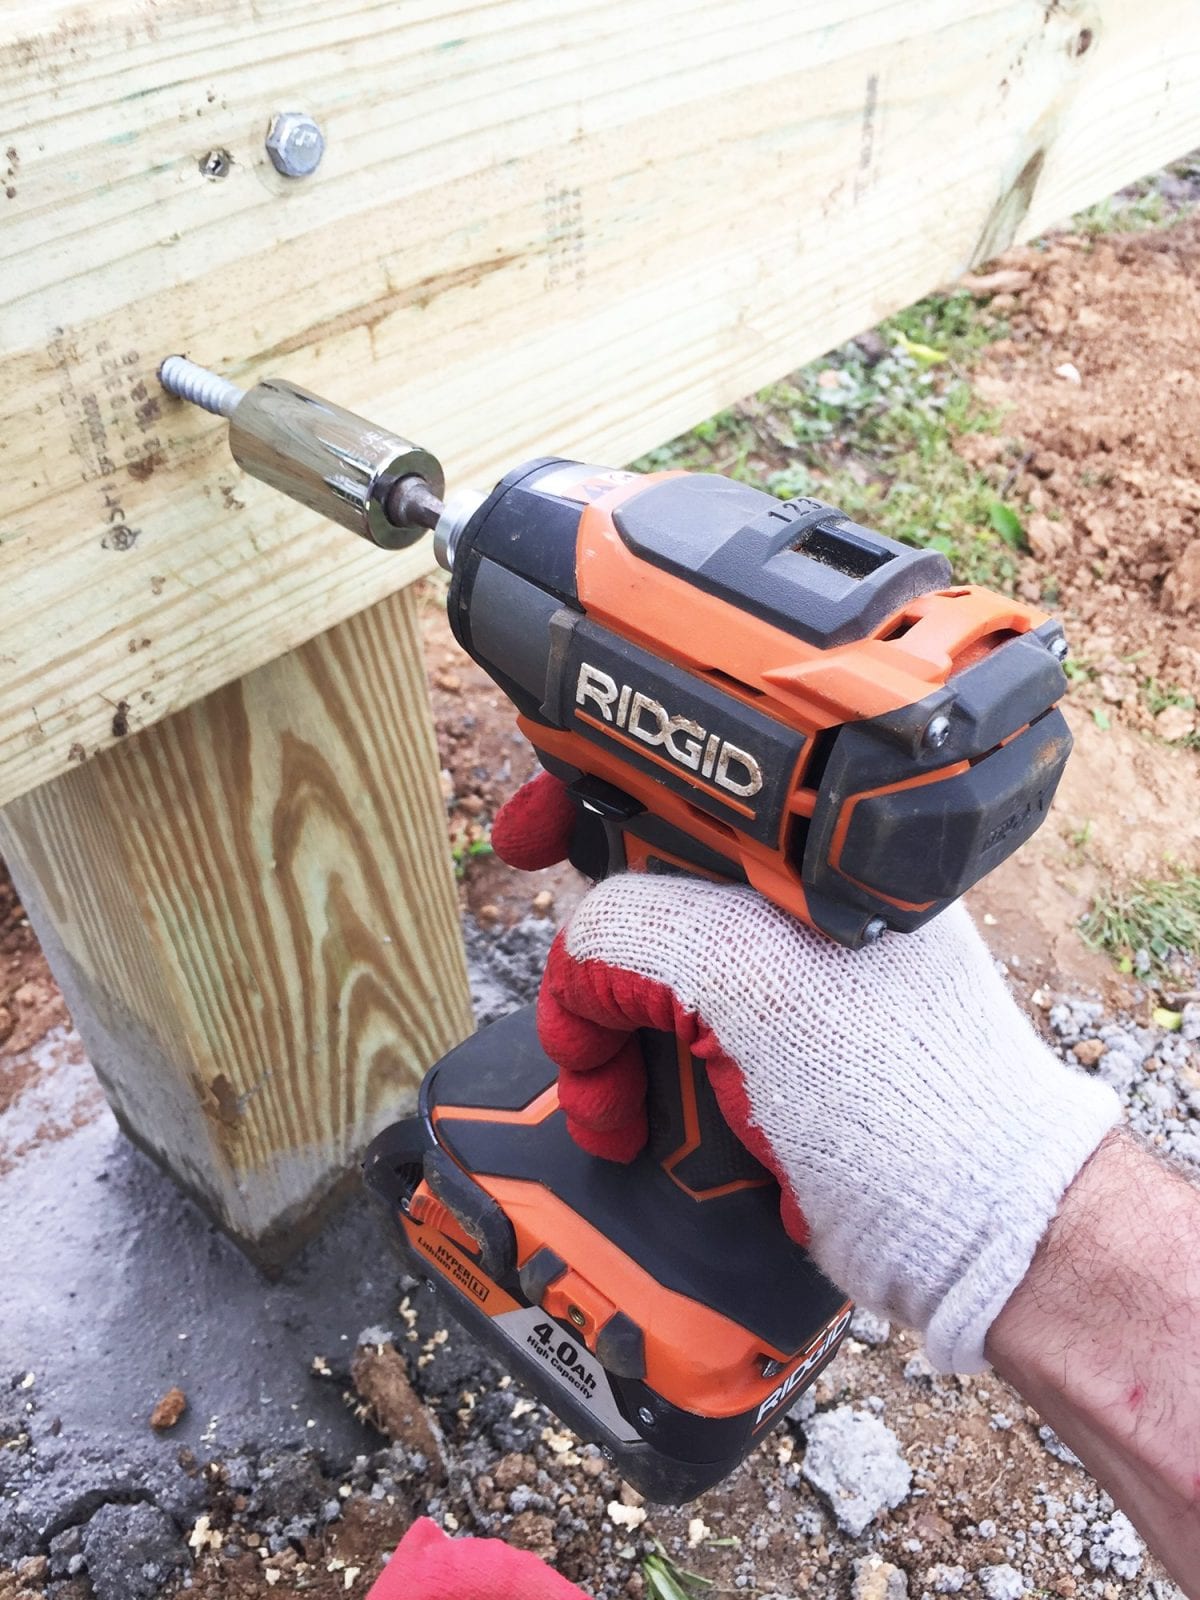
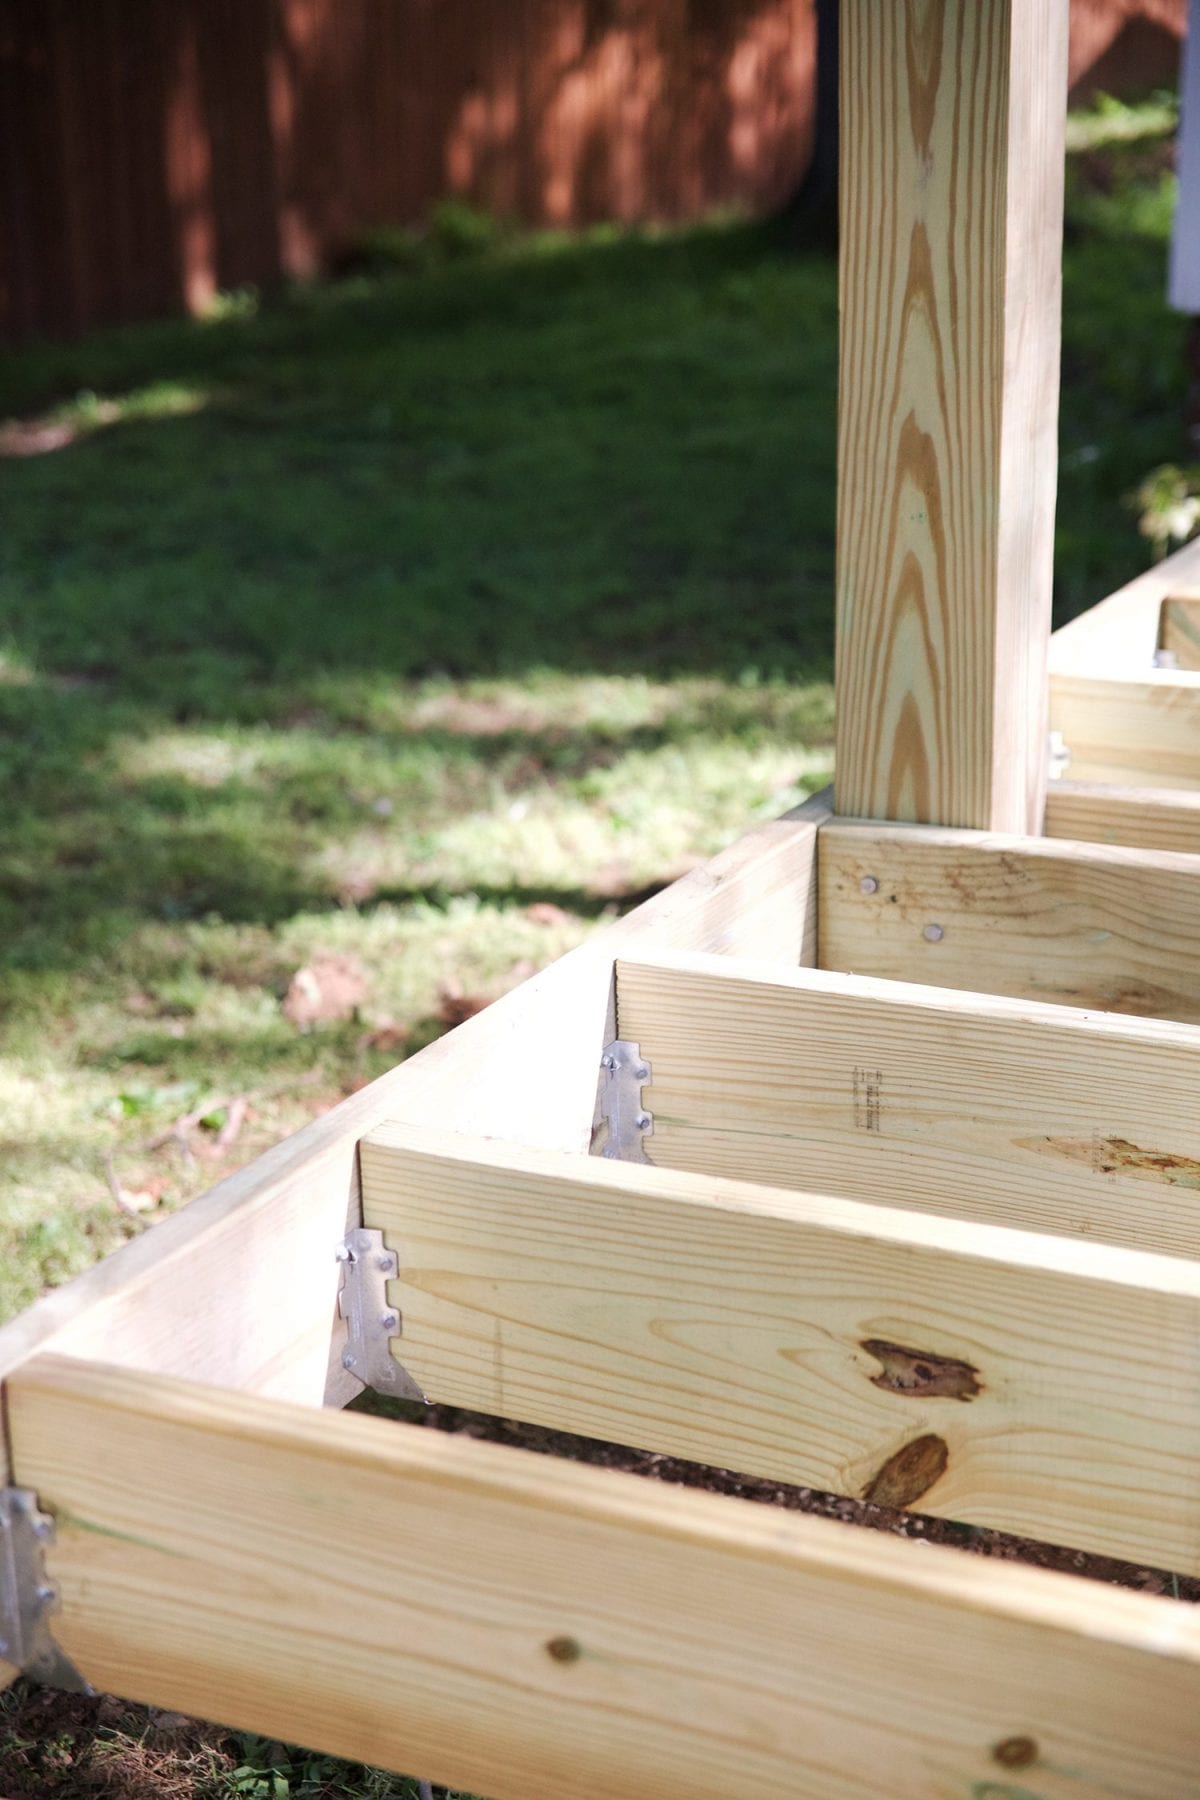
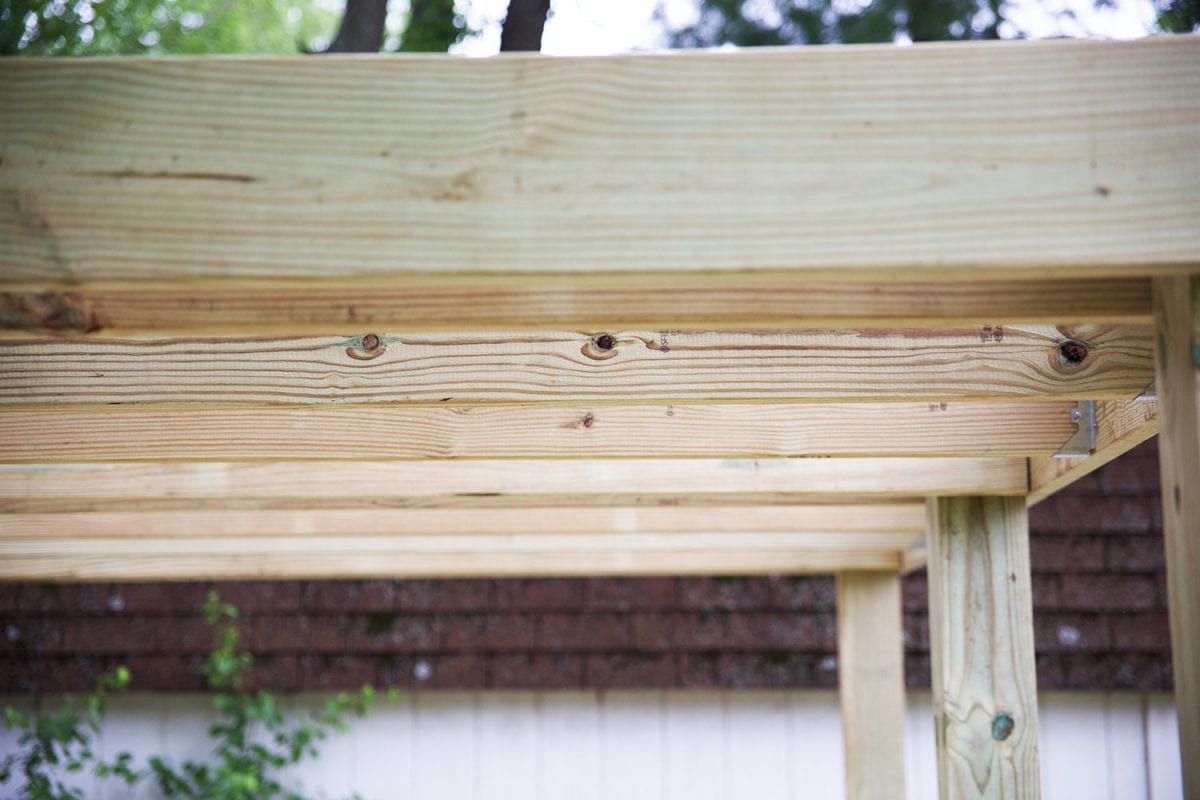
At this point to add more stability as the concrete sets, we began attaching our outside 2 x 8’s by simply pre-drilling a hole, and then using a hammer drill to drive in the lag bolts through the 2 x 8 into the 6 x 6.
You’ll also want to use a socket wrench to tighten the last few turns.
You might also need to cut an inch or two off your 2 x 8’s as they come a tad longer than 12 or 10 feet. Simply use a jig saw to do this after they are attached or a miter or skill saw before.
If, like in our case, the ground is slightly uneven then simply measure on one post where you want to attach the 2 x 8. We kept it 4 inches off the ground and then used a 4-foot level to make sure it was at the appropriate height on the opposite pole.
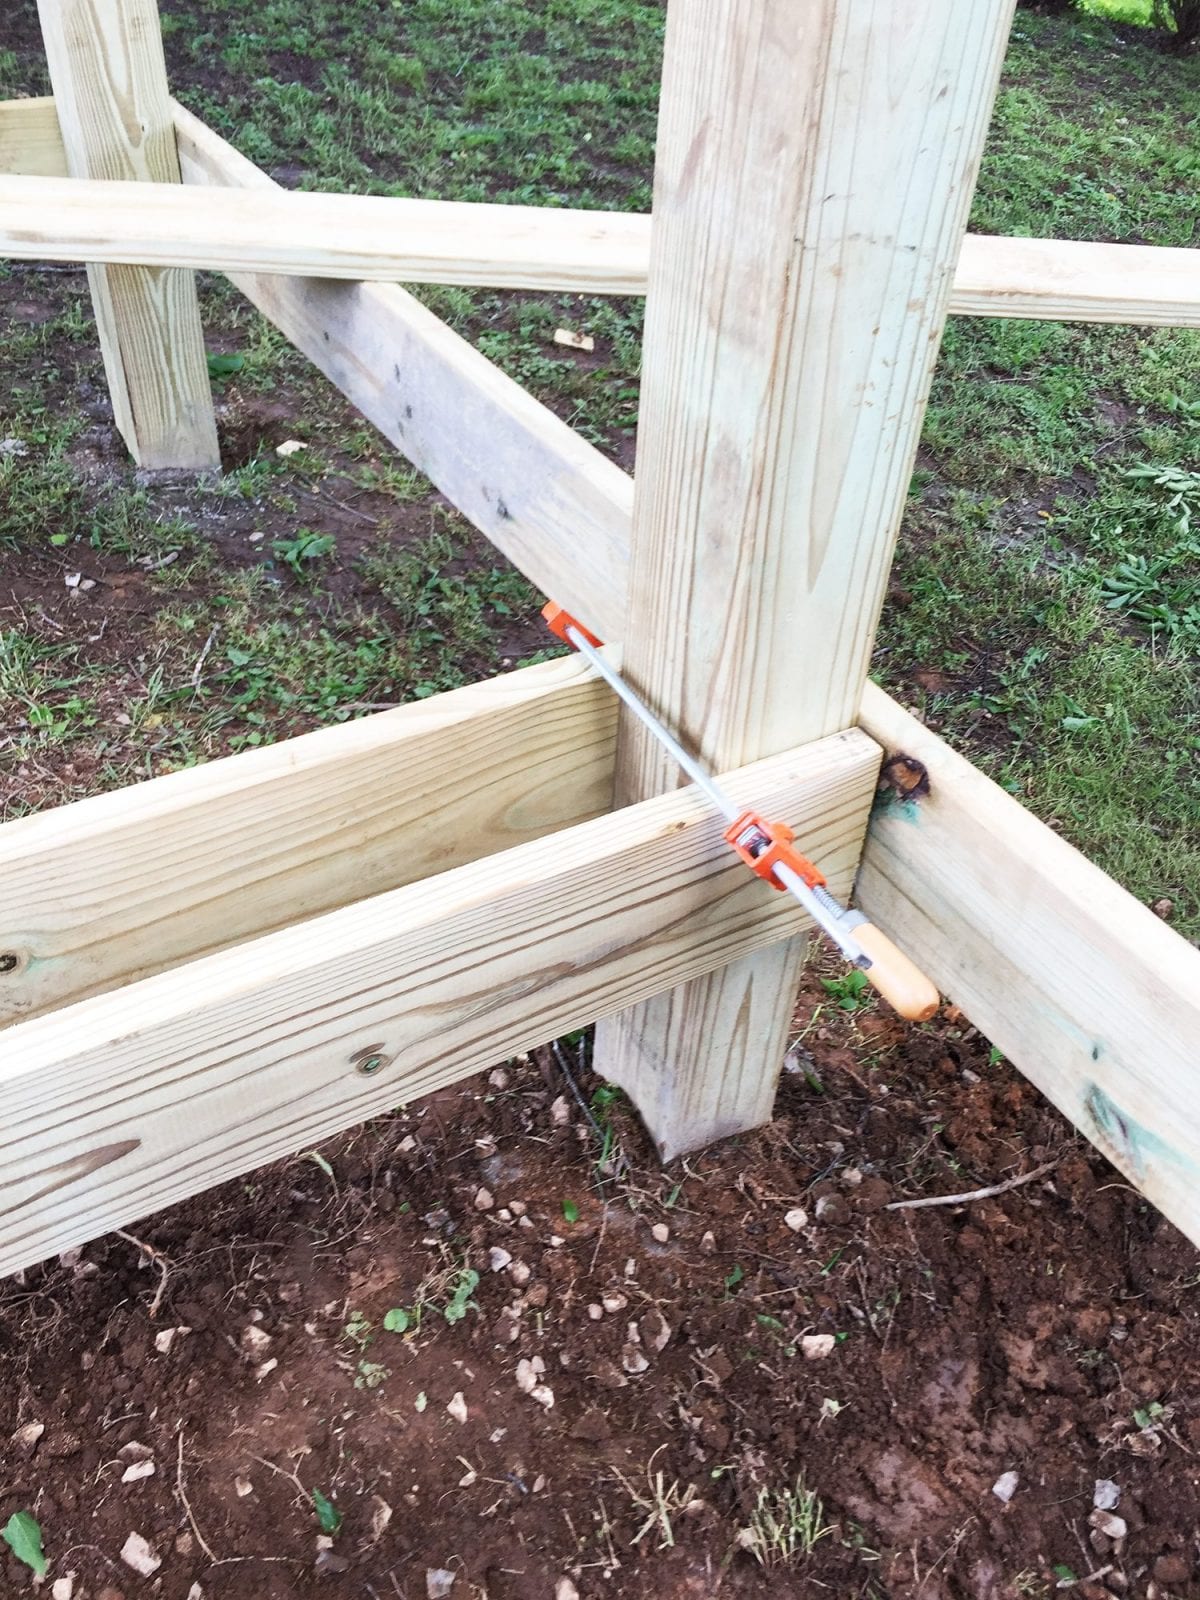
It’s great to have help in this step, but if you don’t you can use clamps to hold the pieces in place while you level them and attach them. Another option is to notch the post so that the 2 x 8’s rest on the post, but I find lag bolts easier and just as good.
It’s also good practice to continue measuring as you add the 4 outside beams.
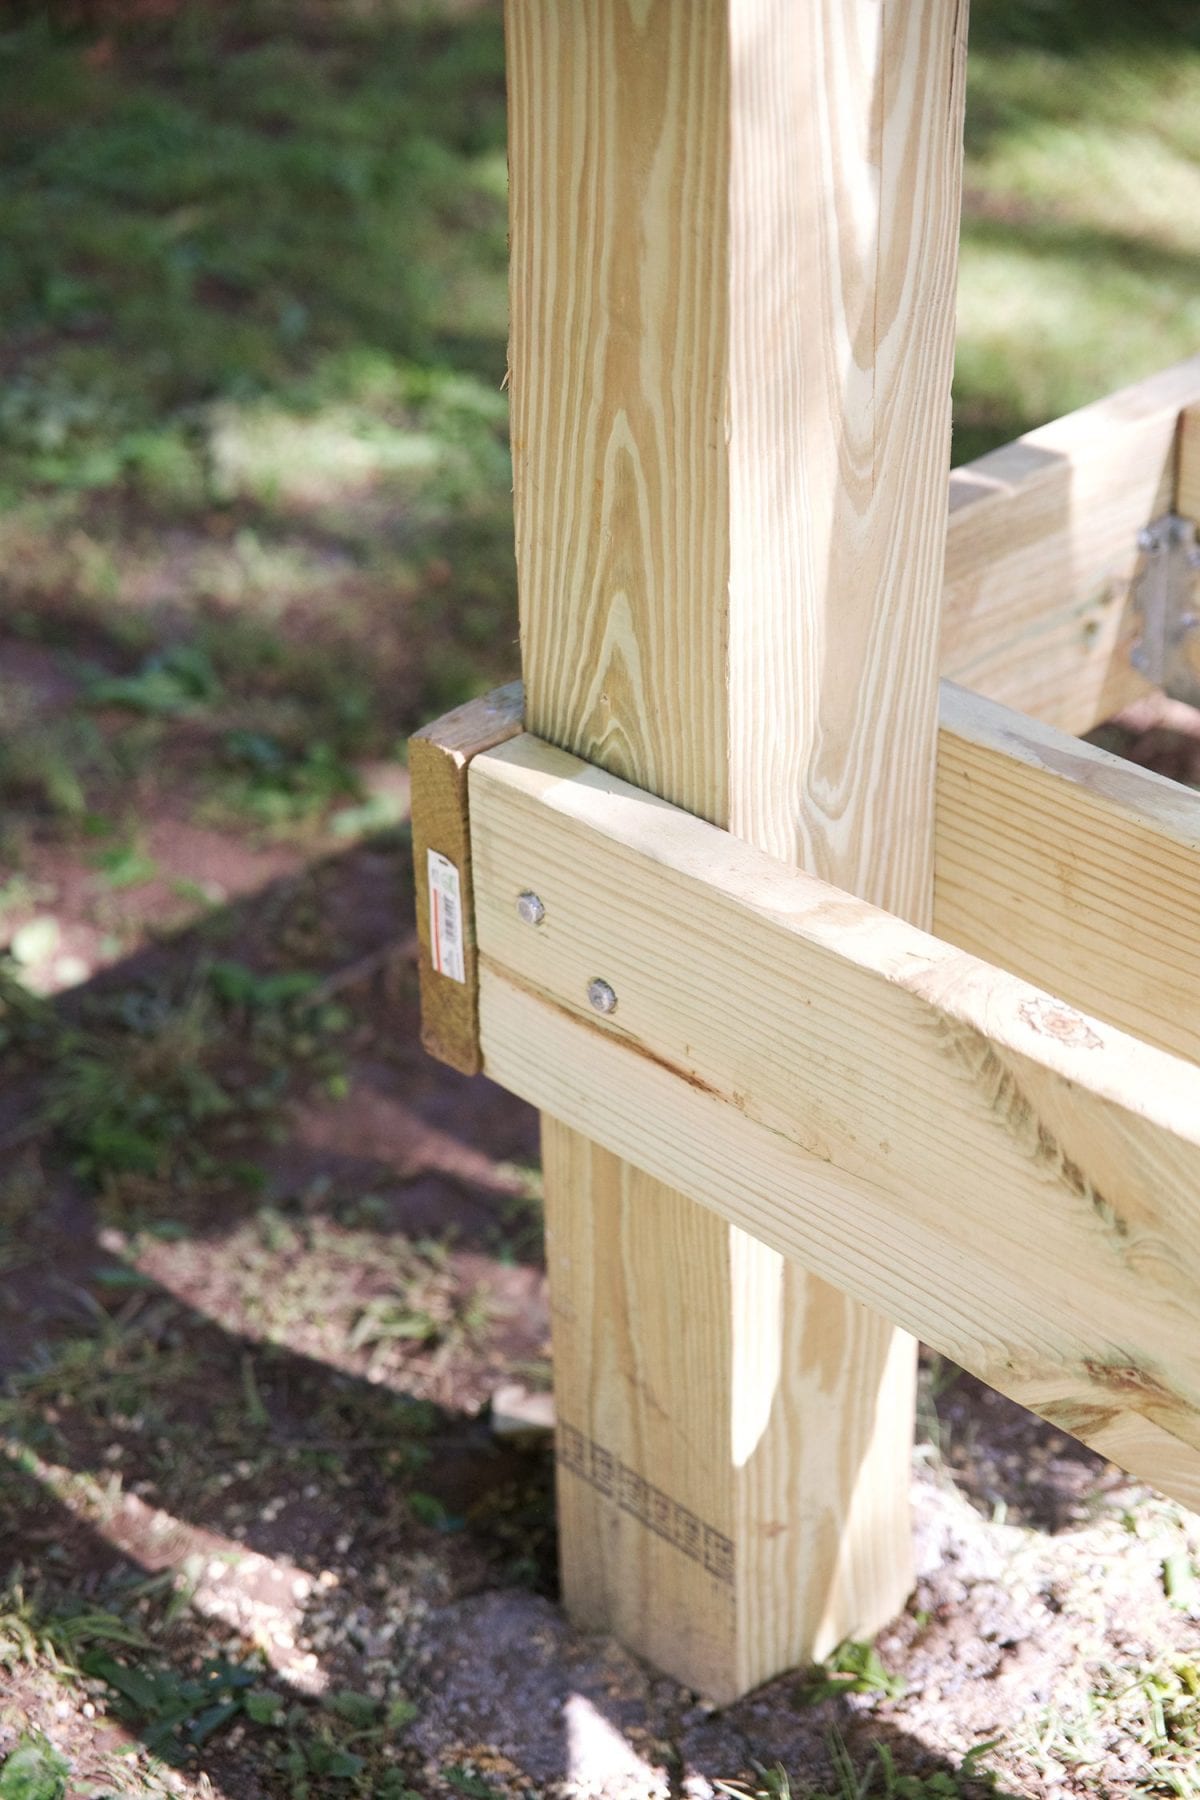
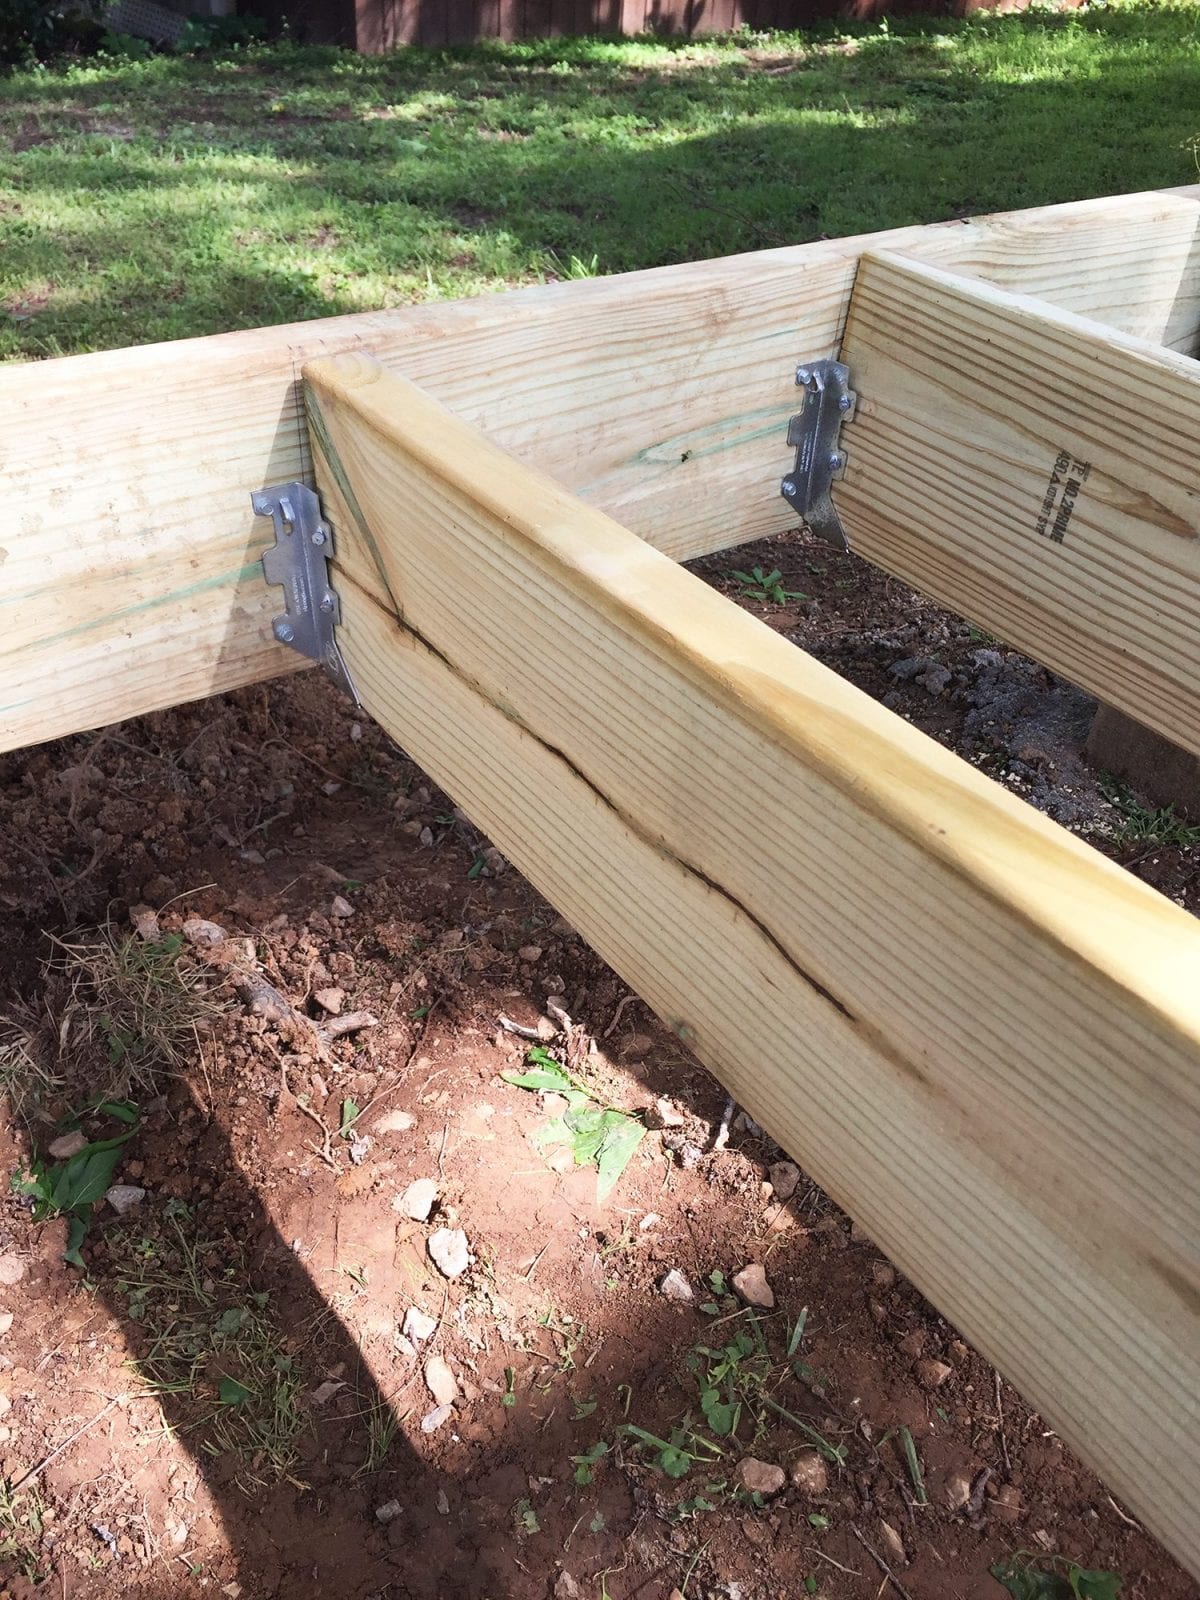
Once the 4 outside 2 x 8’s were set we sandwiched the two 6 x 6 posts in the middle, attaching them with lag bolts as well. We then added another one to the inside of each of the front and back posts, so that they sandwiched those posts as well.
Now you should have all six post sandwiched by 2 x 8’s.
Now you should have all six posts sandwiched by 2 x 8’s, 3 on each side. Take one final measurement and if everything is still square, let the project sit for the night as the concrete cures.
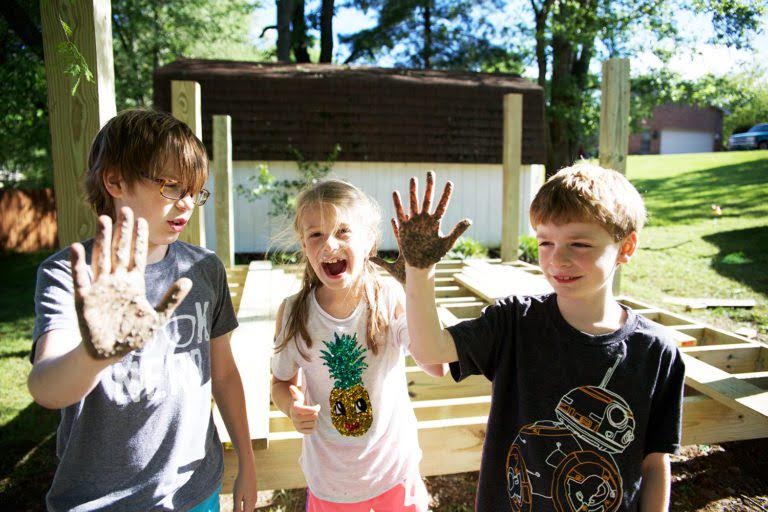
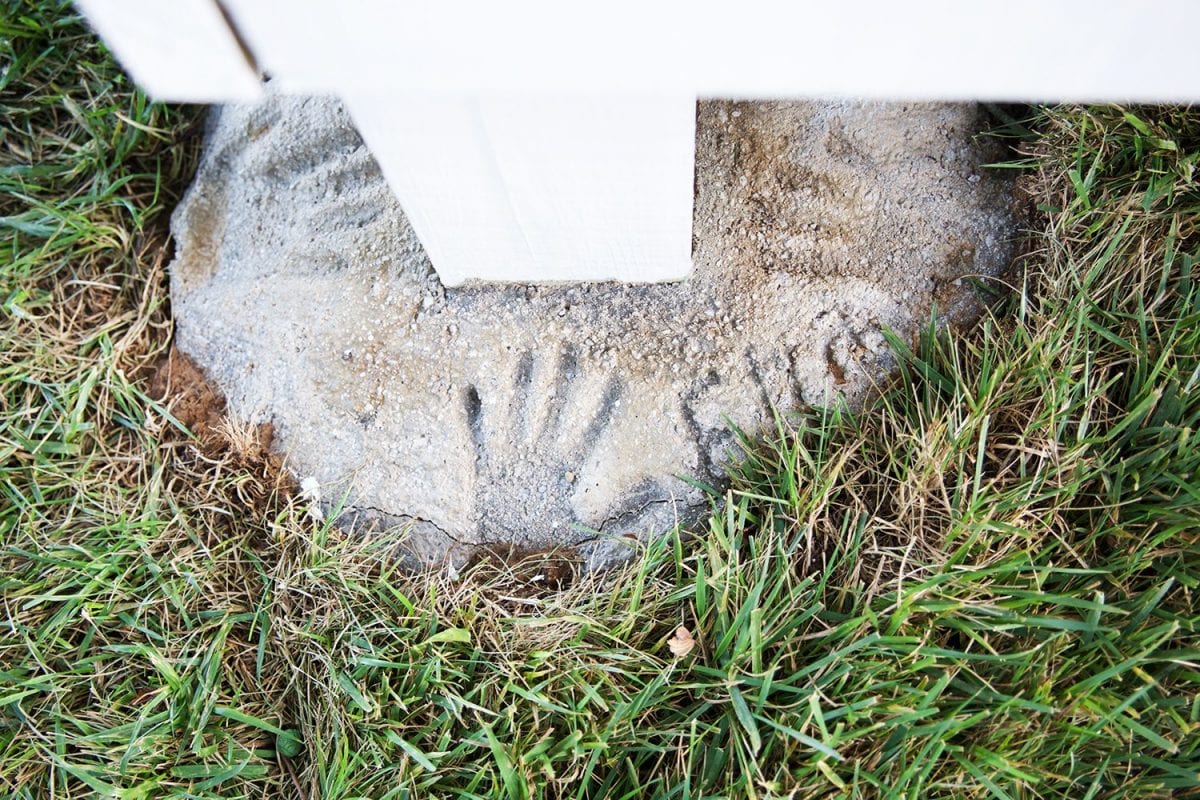
To preserve the moment in time, we let the kids put handprints in the concrete before it set.
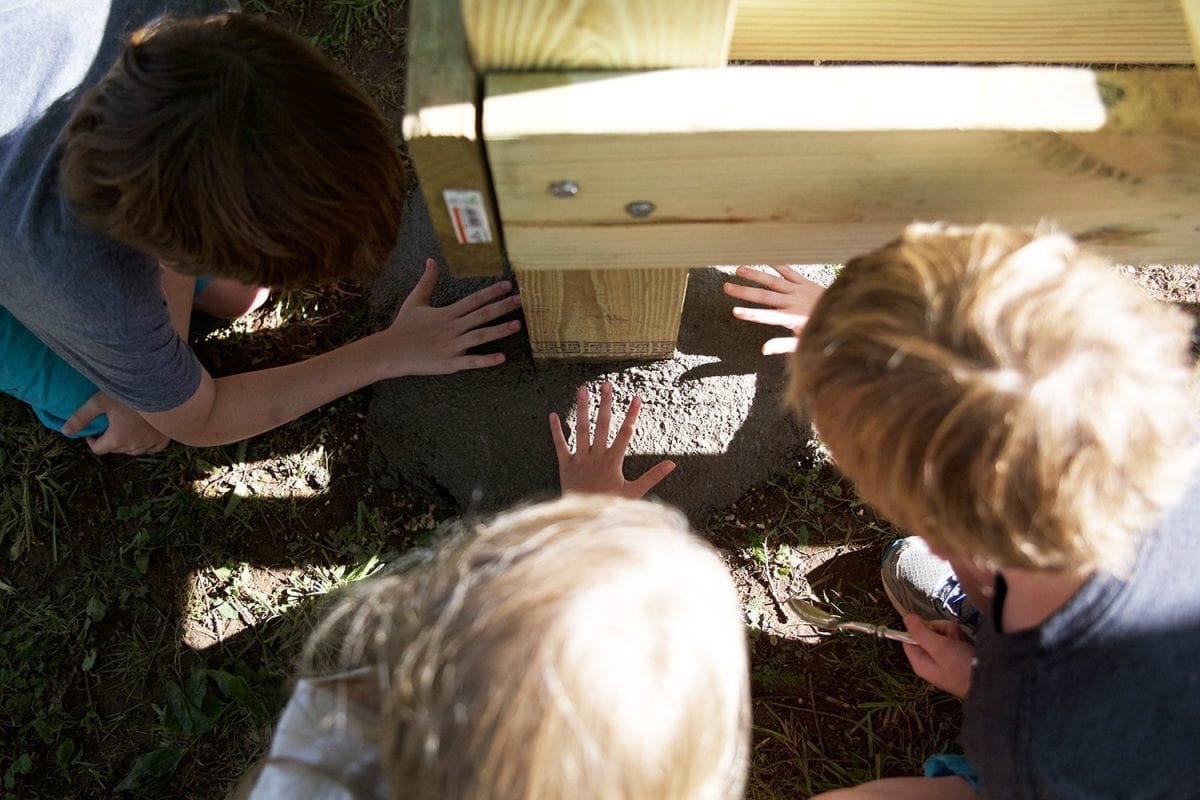
Some of them were more excited about this process than others.
Typically a joist is 16 inches apart on center from another joist.
Meaning that from the center of one joist to another, is 16 inches.
Since our structure can be thought of as two parts with the middle two joists splitting it, we simply measured each space that was between the middle joists on the front and back. We then divided by 3, and this would be the distance of our joists – not exactly 16 inches, but the load bearing wasn’t huge either so we could fudge a little. Plus we wanted an equal space between them
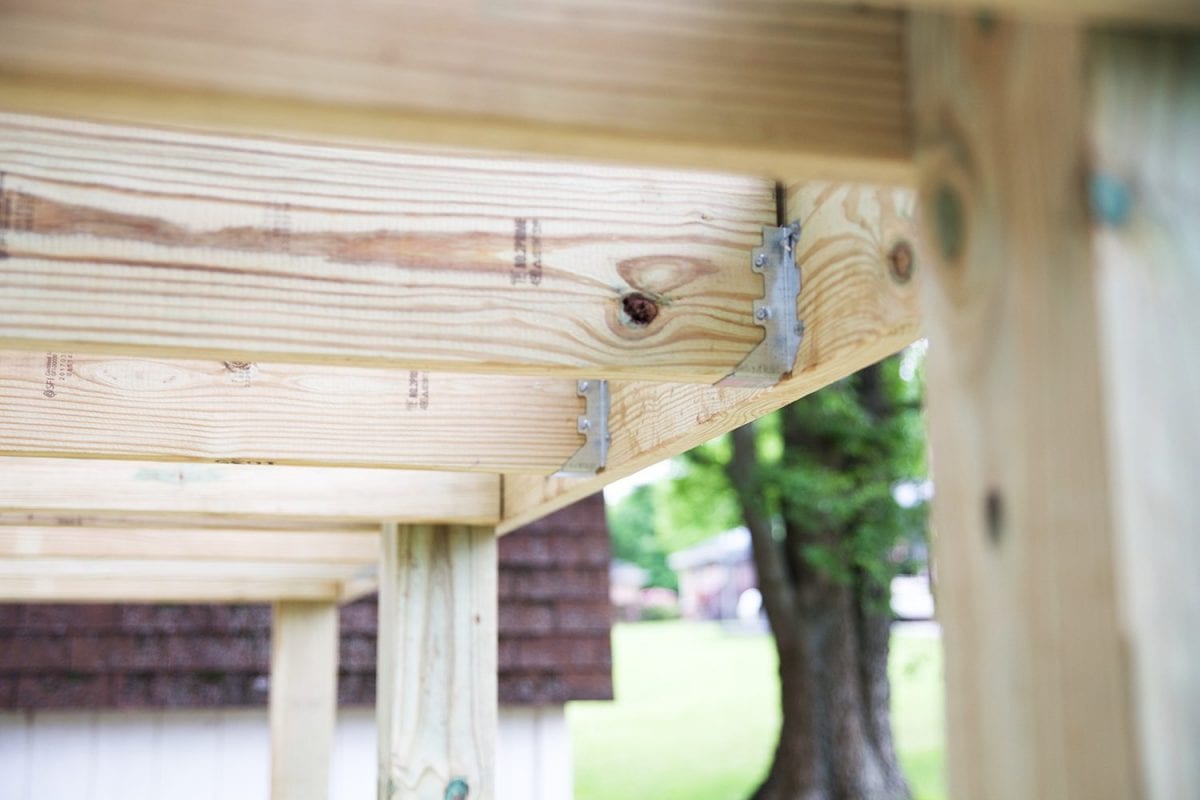
Once we knew this measurement, we marked on the length of each joist the appropriate distance, and began attaching the joist hangers. Keep in mind if you measure on center, that you’ll need 3/4 of an inch on each side of that center to make room for the entire 2 x 8. So if you find that center mark and measure out 3/4 of an inch each way, this is where the edge of your joist hanger should be.
This is a pretty quick and easy process. AKA the part where we actually started to make progress after taking a while to get our location and foundation right.
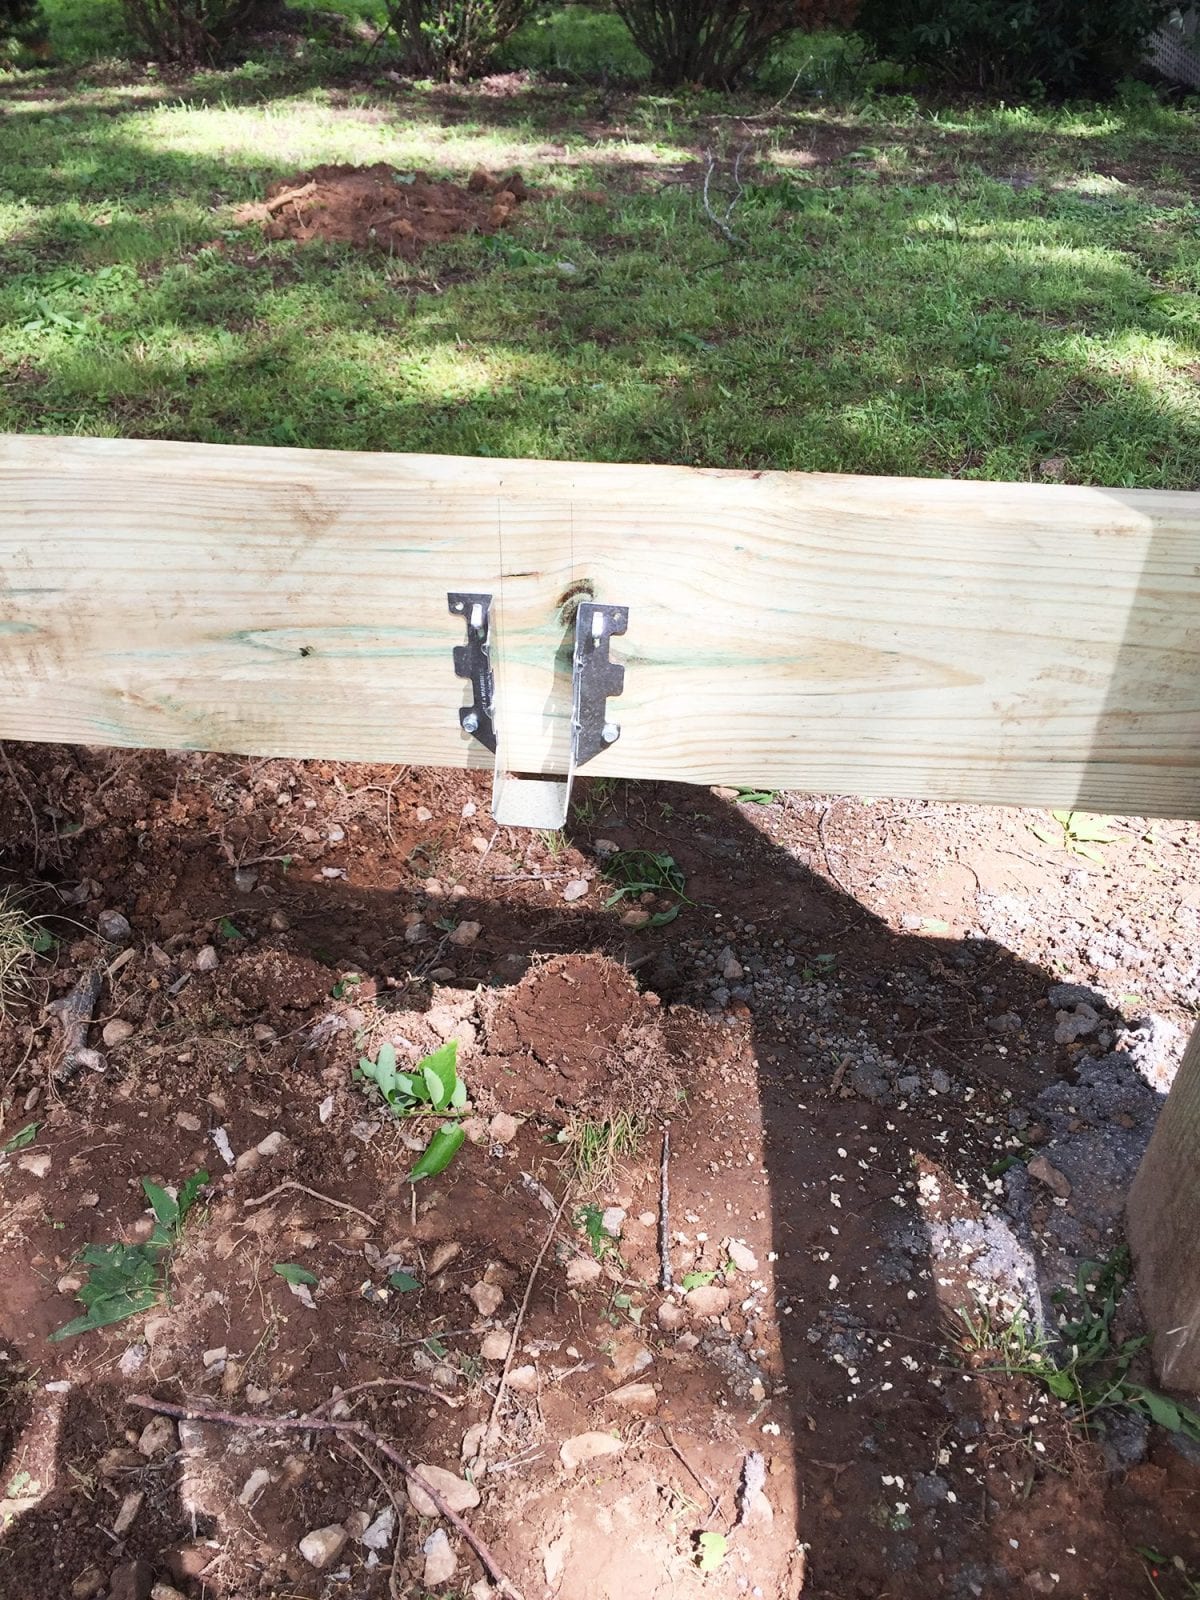
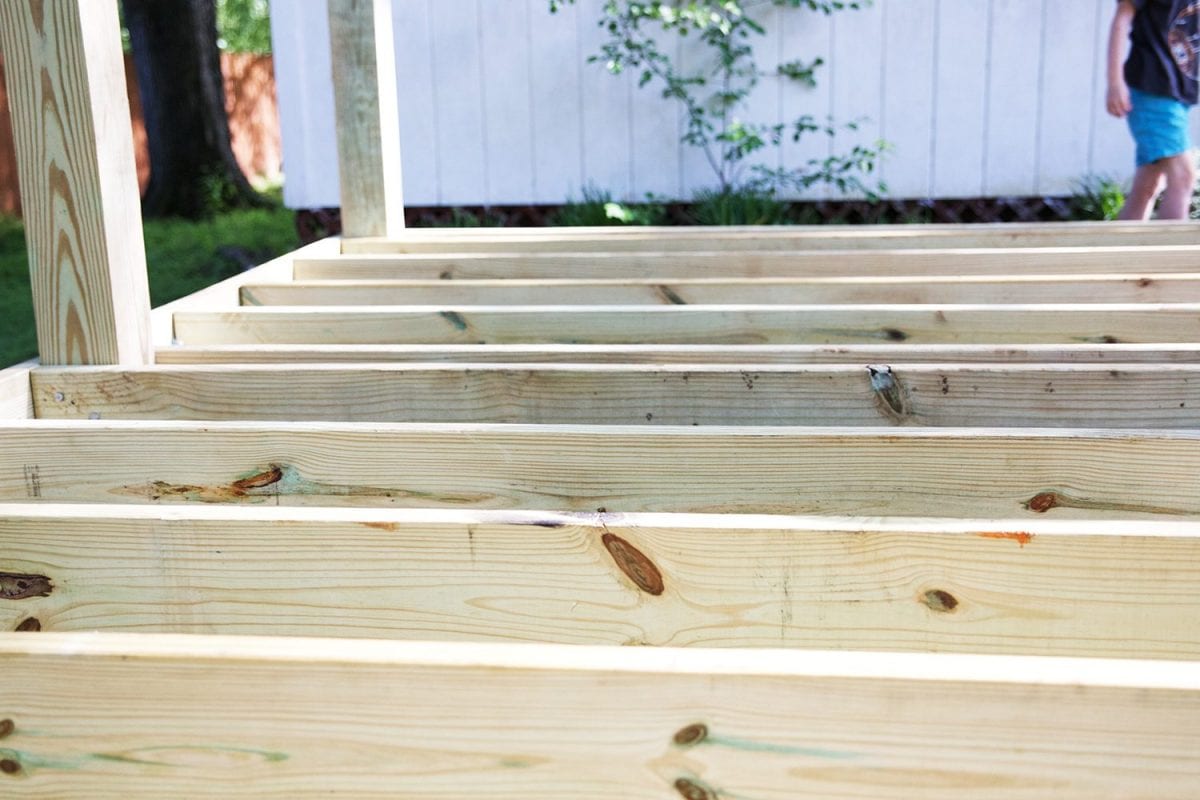
Joists are great products for multiple reasons, but one of the reasons we love them most is that they make it easy to hang joists by yourself. Simply screw the hangers into place where you’ve marked them off, then lift one end at a time into place and nail them in.
Truly a great invention and time saver.
As you’re hanging them, make sure that they are placed at the appropriate distance and that they are level with the outside piece.
You don’t want any rises or dips in the joists to the outside beam, as this will mess with the decking and possibly make it uneven.
It was like Christmas as our kids came home from school to see if we’d done any work on the hideaway that day. I truly believe they could have played on the joists for hours.

Adding the decking is pretty straightforward, but takes a little time. Pick a side to start on and cut around the 6 x 6 post. You can either piecemeal it together, or you can notch out for them. Your choice, both are okay.
You’ll want to make sure that you use two screws for each joist that you’re attaching to the decking.
Also, don’t worry about cutting the decking to length. There’s a simple way to do that after they’re attached.
So line up the decking with the front edge of the platform, and begin screwing it all in, one piece at a time. {Hint: if you have a board that is a little warped you can use a long clamp to pull it into place.}
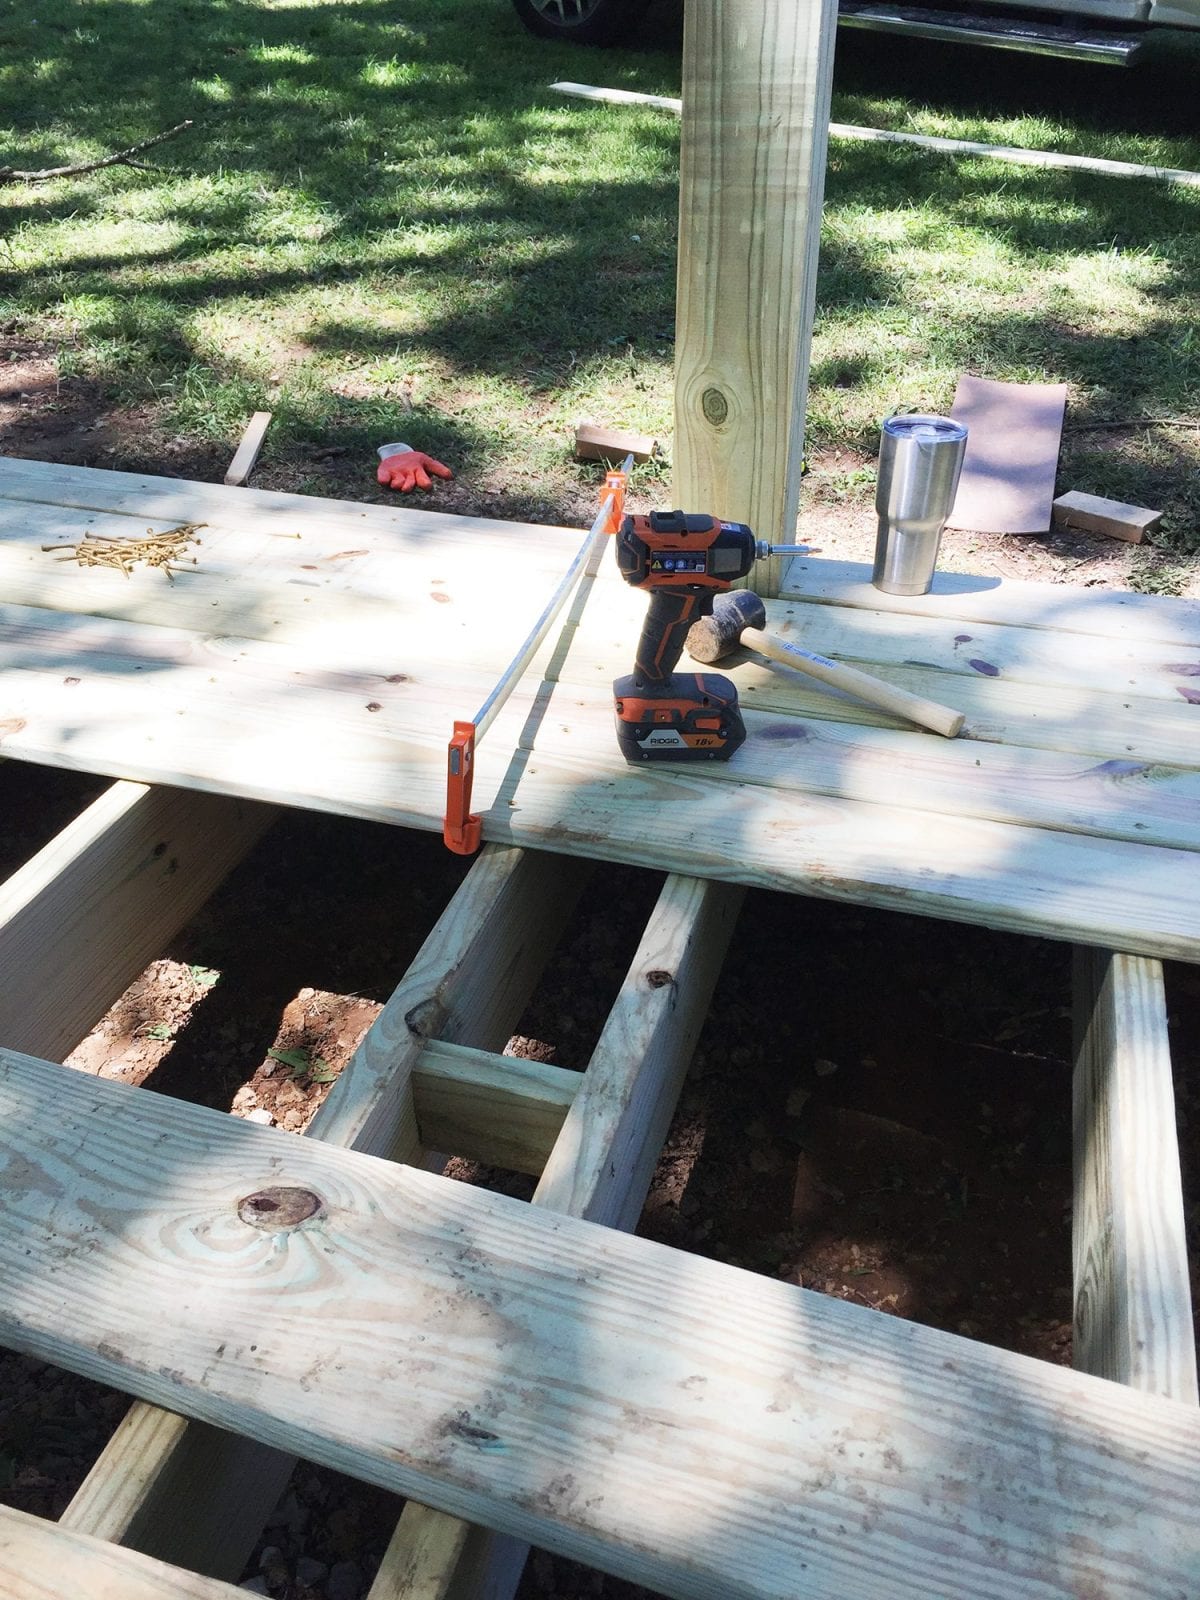
Cheaters alert: Once you’ve got them in, simply take a chalk line and mark the edge of the back of the platform, and use your skill saw to cut off any piece that hangs over. As you run the skill saw down the edge of the platform the excess falls right off, much easier than cutting each piece before you put it on.
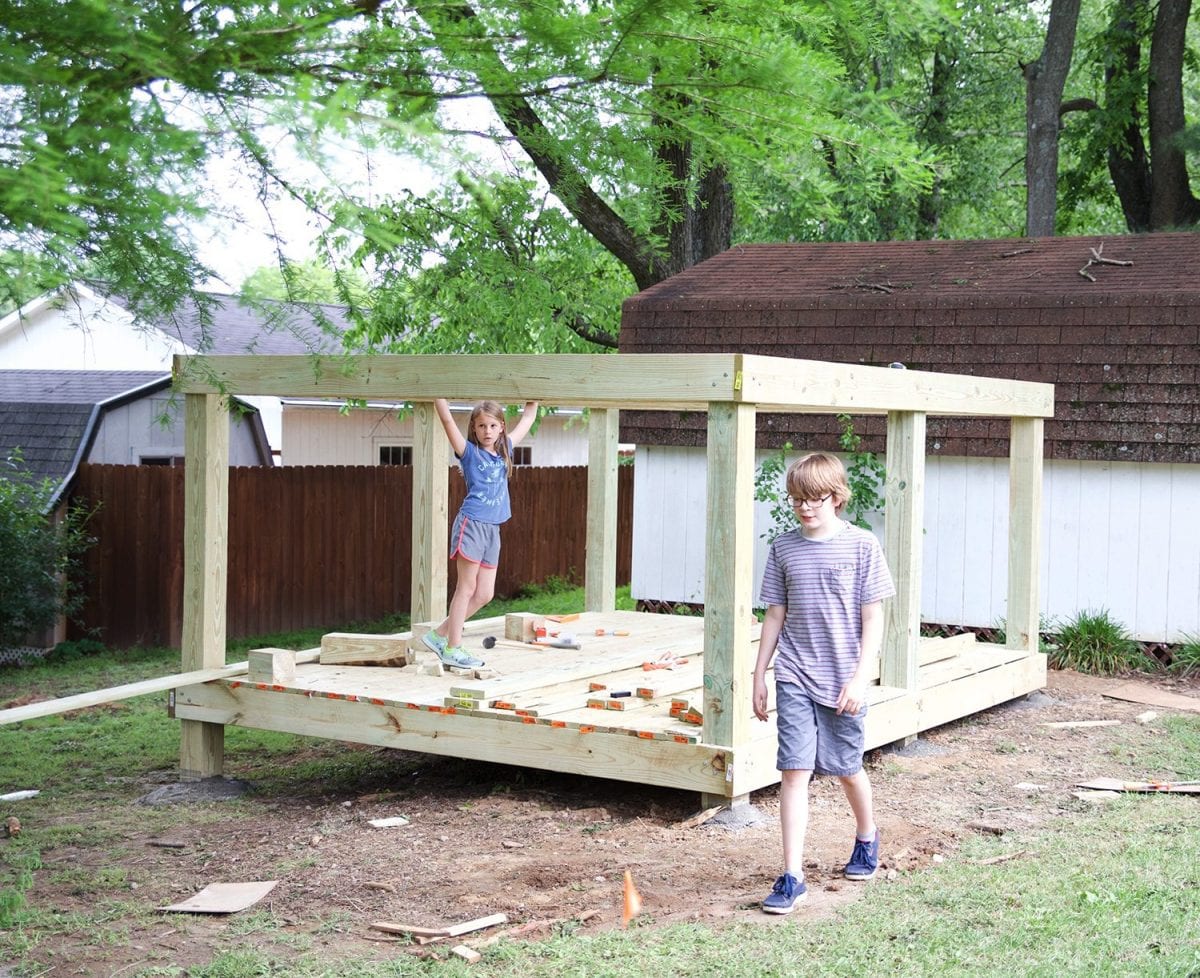
Now it’s time to begin adding the second story deck. You’ll simply follow the same process for hanging the joists as you did for the first level, only this time you have to lift the lumber higher! We decided to space our two decks at 5 feet 2 inches form deck to deck, which would put the bottom of the joist on the top deck at about 4 feet 7 1/2 inches.
One additional step will be to cut off any excess 6 x 6.
You can either attach the 2 x 8’s on the perimeter and then cut, or you can measure and cut before you add the 2 x 8’s. Either way works fine.
Again having help with this is great, but you can do it alone as well with a few clamps, patience and some joist hangers.
Another thing that is different about the second story is that you’ll need to add a trap door.
Ours was placed on the back left so we spaced those joists a little farther apart. The best way to do this is to literally stand there and ask – how much space do I need to get down this ladder? We used 20 inches.
So between the joist attached to the back 6 x 6, and the first one on a joist hanger, we moved to 20 inches.
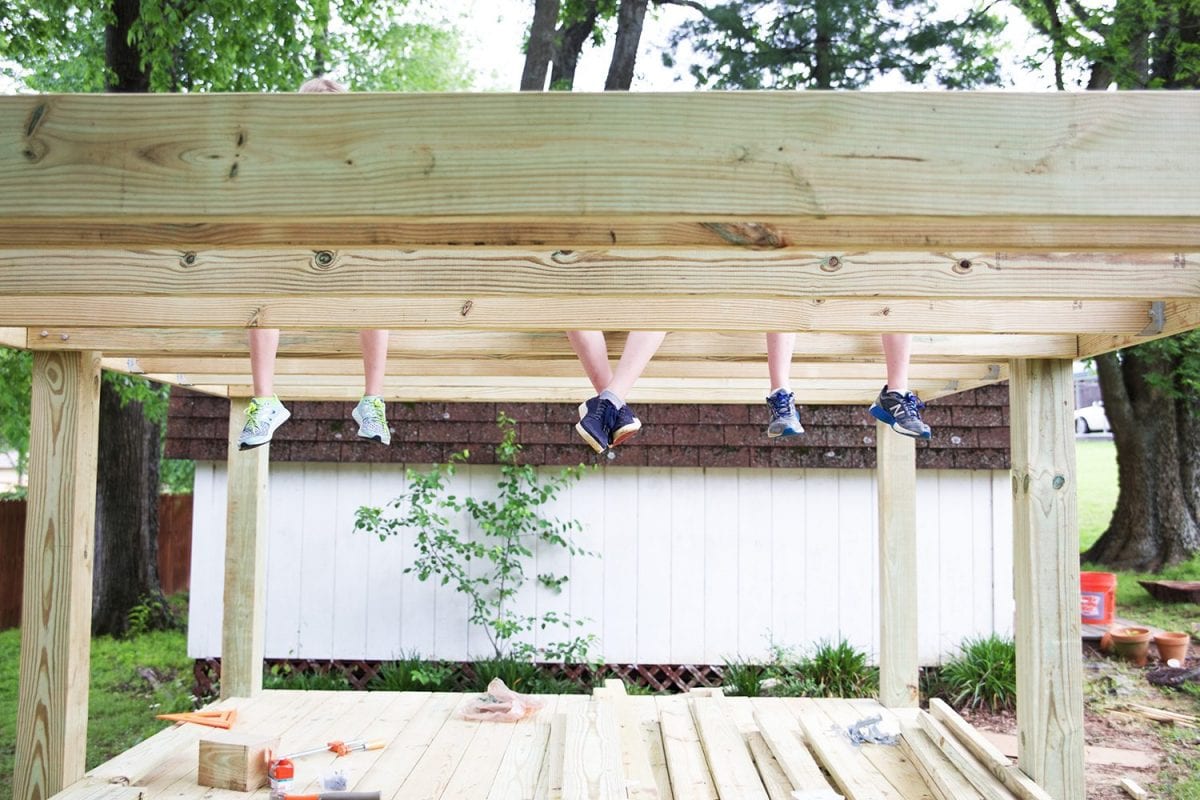
(Cheesy attempt at 1920’s Rockefeller lunch photo – but we do love those growing-too-fast feet.)
And then it was time for the top level. We’re pretty sure OSHA wouldn’t approve of the no shoes thing.
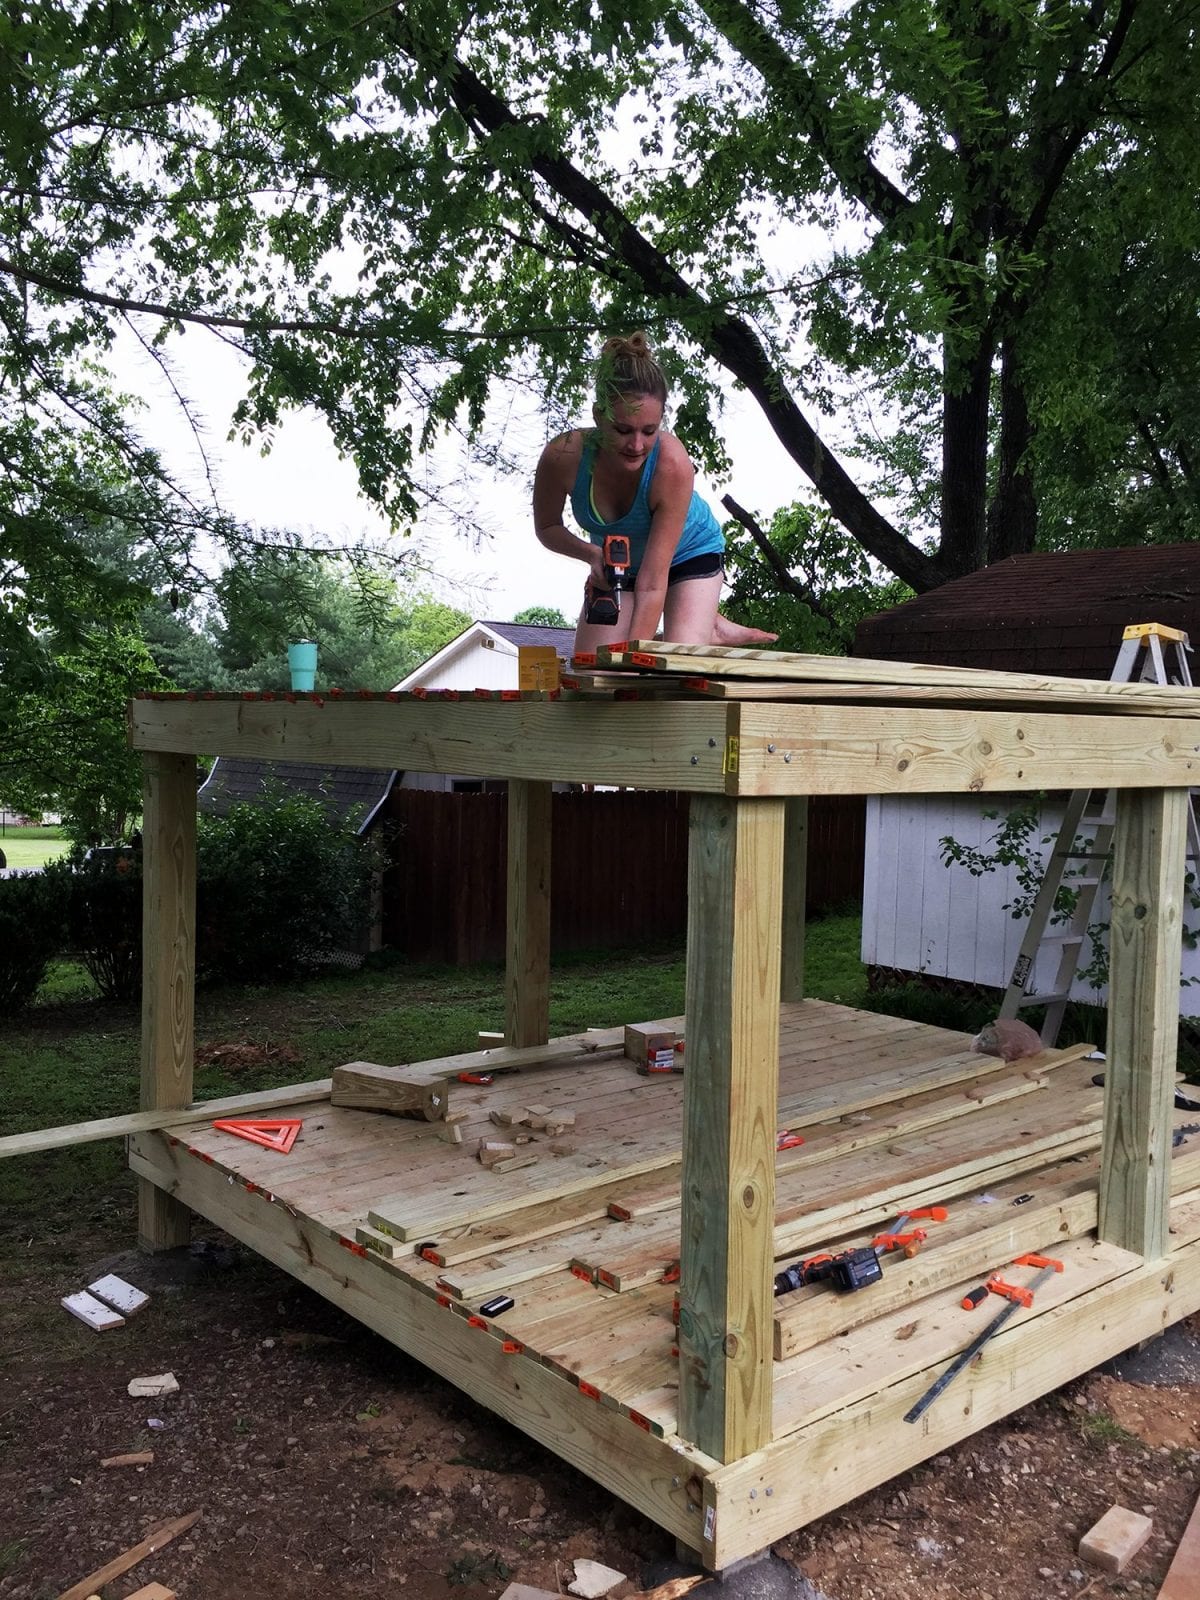
The kids even got in on the action sorting screws and getting them in the right place for Ashley to drive in.
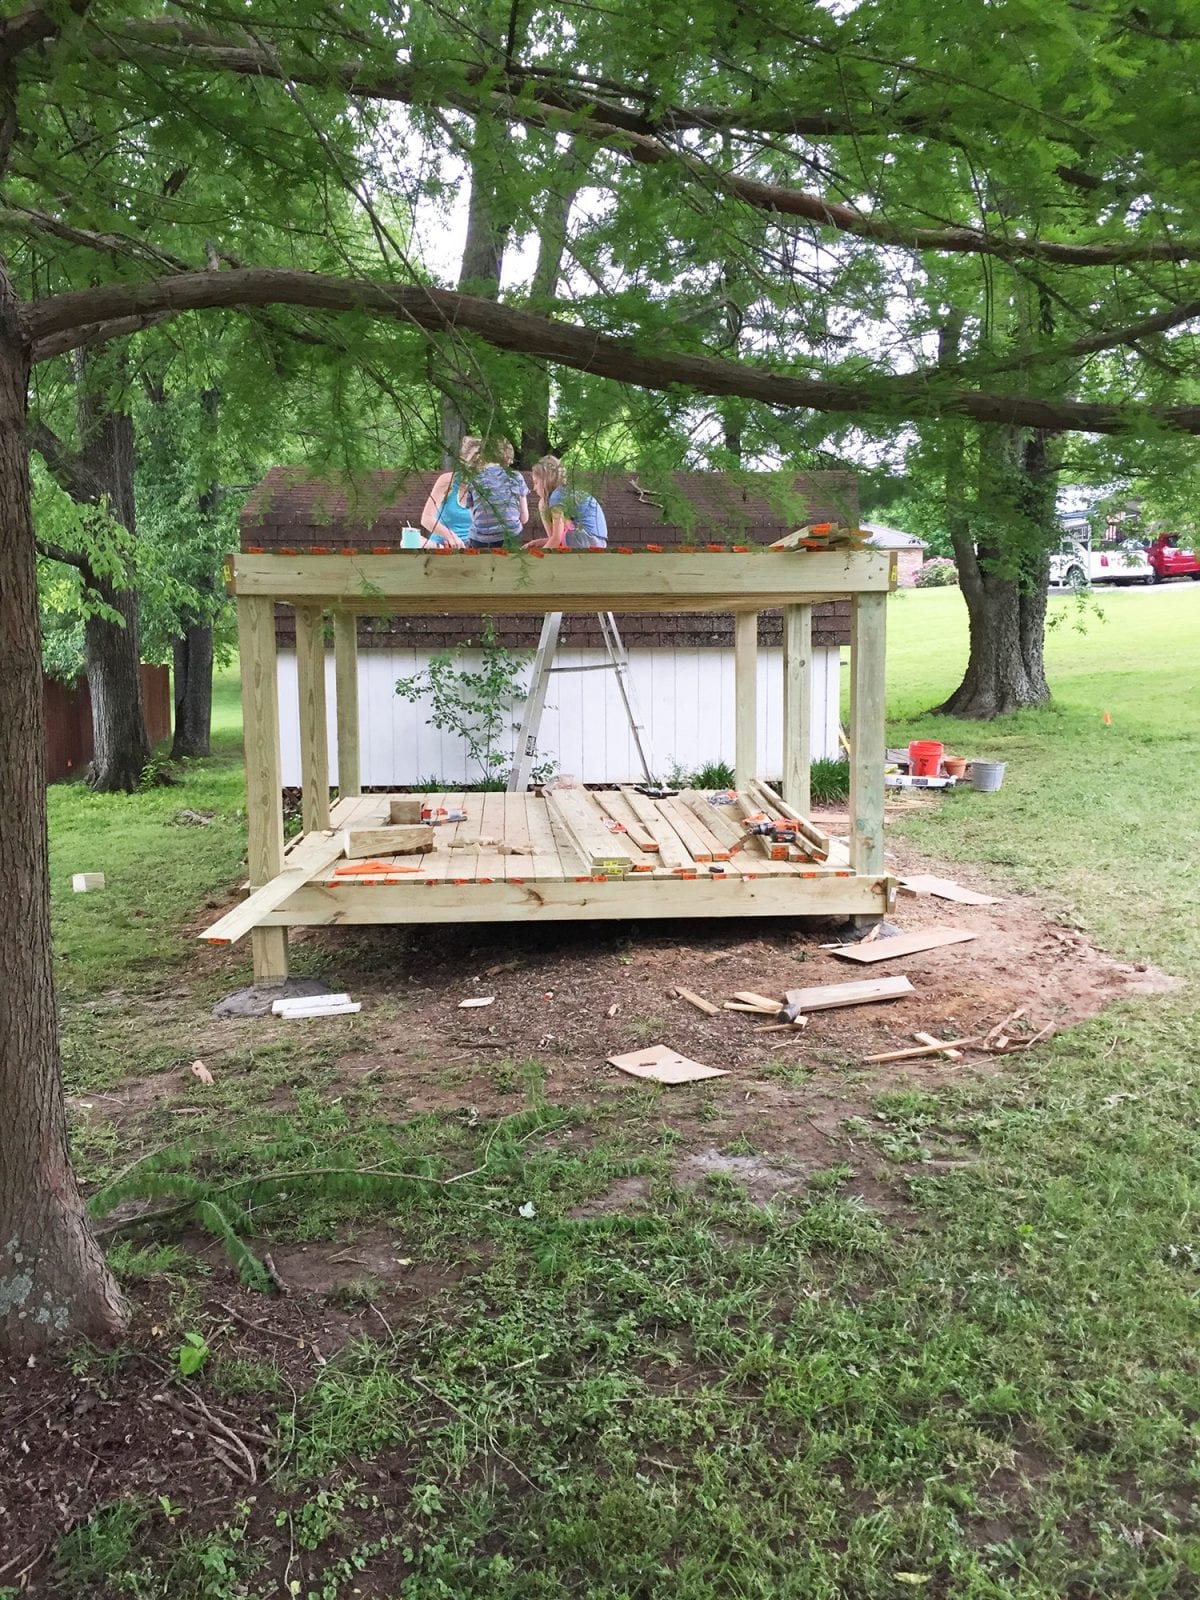
And just like on the bottom level, once you’ve secured all the decking in place simply chalk it and cut off the excess amount.
Tada!
There is also no need to worry about cutting for the trap door yet, we will deal with that step towards the very end… we don’t want anyone to fall in while building!
As always, let us know if we can answer any questions for this process.
We’ll be back next week as we start talking about framing the structure.
Stay tuned!
To see this entire series, be sure to check it out here …and as always, our fabulous reader creations, here!


I love this and wish someone would build me one!! LOL Such a welcoming area to enjoy summer days and “glisten.”
Wow it is so beautiful.I will try to make this one.Thanks for sharing.
how deep do your post holes need to be?
Hey, Ben. There is a link to a reference guide in the post when we talk about digging the holes, that should help you out for your local, as every area of the country is different and if you’re still unsure pull the local building codes and they’ll have a recommendation for your town. Hope that helps.
Hi Jamin and Ashley,
You two have done a great job. I am curious about the estimated cost that has involved to build this kind of project. Looking forward.
Is there a printable PDF for this that I could purchase? My kiddos want one of these so bad, yours is amazing
Hey, There is not, but I promise it is super easy. You got this!
Wow, What a creation! I like your idea very much and appreciate your project.
Thanks for share.
Where can I find the plans for the first build?
Hey – all the how to for 1.0 can be found here!
I love this project. Thank you so much for sharing. My wife and I are working on getting the needed supplies so we can build this for our boys. The only question I had after looking at the foundation instructions is how far apart did you guys place the 6×6 post. I was curious on what the distance was between all the post. Not sure if you guys have the exact measurements but that would be greatly appreciated. Thanks again.
Our foundation was 10 x 12. But you can make it any size you’d like for it to be.
Have you ever heard of someone setting the posts in gravel vs. concrete to help with drainage? Wondering about the structure strength of gravel vs. concrete. Also would be interested in knowing the final dimensions of the post placements as I noticed you offset the posts a little on the 12ft sides.
Yes, I have heard of setting the post in only gravel and compacted dirt, but I wouldn’t advise it for this project. I see that more with a fence post, etc. things that don’t have to be as structurally sound. In fact, I just built a privacy wall and only set the post in compacted dirt, mainly because I didn’t want anything permanent.
Some people do claim that concrete causes the post to decay faster so they will put crushed gravel underneath the post set the post on the gravel then pour concrete.
In the end my view is simply that ground contact lumber is “suppose” to last 25 years and by then I’m pretty sure I’ll want a new design. Ha! But there are some options like a gravel bed, painting the bottom with tar or adding a waterproofer to the bottom of the post.
As far as the post, I’m pretty sure the post are set 12 feet apart from outside to outside.
I can’t find 6x6x12 lumber at my hardware stores. Do you think the structure would be ok with 4x4s?
I can’t say that it wouldn’t be ok, but I can say I wouldn’t use them. I personally don’t think they would support a structure of this size. Have you tried local lumber yards, not a Home Depot or Lowe’s but a builder supply lumber yard? You might also try special ordering them online from an HD or a Lowes.
Thank you SO much, I really appreciate your response. I did some more reading, I think you are definitely right. The other thing I was also researching was having the 6x6s on top of the concrete with a Simpson strong tie deck base that is set into the concrete. Any advice on doing that or not going that route? If I do that I probably don’t need a 6x6x12, maybe just a 6x6x8 which the local Lowe’s has.
So, I am never a big fan of putting all four corners on something like a metal post base for a structure of this size. If it were just two and the other two posts were in cement then it might be ok. Basically I couldn’t feel good about endorsing putting all 4 on a deck base. The height is what really gives me pause on doing it that way. If this was the first version then I’d be fine with it, but because of how large this one is I just wouldn’t feel good about it.
Hi again! Last question..I think! LOL! Your supplies list says 6x6x12 but I was trying to do the math with how far you guys put them in the ground. The bottom of your upper joists were 4 ft 7.5 off the ground I think you said, which puts the top of your platform about 5 ft 3 inches I think…did you bury your posts 6 ft 9 inches into the ground? Or were these maybe 6x6x10s and they were buried about 4ft 9in? In the truck bed photo the 6x6s look a lot shorter than four 2x8x12s you have in there. Just trying to do the math with burying a 12 foot piece of lumber. If I bury it 3 feet I would still have a 9 feet above ground, that seems too tall. Right? Lol! I could definitely be missing something here.
Thanks for asking this. I’ve had the same thoughts.
Hey, So to answer the question about how deep to put them in the ground…it really depends on the frost line in the region you live in. You will want to research what your local frost level is and then dig at least 6″ deeper. For example, the frost line in the southern states can be as little as 5 inches, while in some northern states it can hit 80+ inches. (You can find your frost line here.) I would always suggest going at least 24″. From there you can decide how far off the ground you would like each level and buy the correct post you need. If you are building on a slope you could possibly even need different size posts for each hole. Or you can simply cut them once they are in the ground, which is what I typically do because it is easier to ensure they are all level. You can also adjust height of the lower level if you’d like it to be taller or shorter. So, in essence, the formula for the size post you need is: {(frost line + 6″) + height off the ground + lower level joist size + lower level deck + lower level height + upper level joist size = 6 x 6 height}
When all is said and done, how tall is the lower level?
Ours is on a slight slope, but the high side is about 6 feet off the ground and the low side closer to 7 1/2 feet off the ground.
I am getting ready to begin on the handmade hideaway 2.0 and I wanted to ask how wide you make the holes for the 6×6 posts? Thanks so much!
It’s always good to dig the hole at least twice the size of your post, but also pay attention to your depth and frost line.
Is there a reason to bury posts in concrete vs using steel anchors that sit on top of the concrete? Any worry about wood rot if in concrete?
Anytime wood comes in contact with water there is concern about wood rot. It is also true that post in concrete will never be totally dry. However, ground-contact wood can be in contact with water for 20+ years. Steel anchors can be better but require a little more work and knowledge. At the end of the day, I think you are fine with either, but there is certainly nothing wrong with doing the anchors, it’s what we do in homebuilding.
Hi! I absolutely loved you first hideaway and was getting ready to build it for my boys (ages 4 and 6.5) when I discovered this one. I like the idea of building this one instead so that it can grow with them and be a family spot. The question I have is is there a way to build this so it can be moved in the future if needed (without the posts being in concrete)? Thanks!
Hi, Amy. I not sure I would advise building the two-story hideaway without securing it to the ground in some fashion. Also once it is built the only way I would see that us feasible to move it is to disassemble the entire thing and honestly I think it’d be simpler to just start fresh.
I know it’s all broken down throughout the build walkthrough but is there any way to get a more concise list of materials and costs for the hideaway 2.0? I’m not very experienced with this kind of project and I really want to build this for my daughter. I promised her a treehouse years ago but we don’t have any suitable trees in the yard.
What clamp are you using for this. The link provided shows different types.
You can use any clamp that will be big enough to fit the pieces.
Hi! Attempting to plan for a similar playhouse as a first-time builder/novice 🙂 But it looks amazing, and we are motivated to learn! If we are going to do a smaller 8×10 footprint, would we need all six of the 6×6 support beams, or would we just need four, one for each corner?
Hey, yes I would use them for stability.
Hello, i’m planning on getting the post installed soon and moving ahead with vigor, this project and your details are amazing. With the post dimensions and seeing the initial 2x8x12 overhanging the outside of the posts and the 12ft deck boards being flush on the top. Does that mean I should take in the outside measurement of the posts by 3 inches on the 12 foot side? Thanks so much for the help in advance!
Yes, that would give you a flush deck.
Hello,
Happy 4th of July. Wonderful job and posts. My kids were inspired, so I’m gearing up to make an imitation of your hideaway 2.0. But I had a question on the concrete. Using 6 x6 postings, I’m digging a hole that will use a 16 inches wide tube form. You note that each hole required 2 #60 bags of concrete mix in 12inch tube forms. You poured and went (no pre mixing) from what I’ve gathered. However, all of the Quikrete fast setting calculations has me using 4 – 9 bags per hole. What am I missing? Did I incorrectly assume you used fast drying and instead used regular concrete? If so, how did you mix? In the hole or in a wheelbarrow?
Thank you and wonderful job.
Hey, SO in full disclosure, I have no idea what I did, haha. If I wrote 2 bags, then that would have been what I used, and sounds about right to me. I doubt I used the fast setting as I don’t like it. I most likely used high strength. 4 bags for a 16″ form could be right, but no way you need 9. Also, most likely I did just pour in the concrete and mix it in the hole. Just make sure you do that in intervals not the whole bag at one time and don’t overdo the water, it weakens the concrete. I hope that helps some, best of luck building!
“You’ll also need it to be 12 inches wide if not using a form, or about 16 wide if you are.” What does this mean? Also, just want to confirm, is it 10 (sides) x 12 (front/back)?
Thanks!
Yes, it is 10′ w and 12’l, but you can change the measurements to whatever fits your space. As far as the footers your hole for the concrete either needs to be 12″ w if you are only using concrete and about 16″ wide if you are using a concrete form just to give you some wiggle room.
I hope that helps.
This is an amazing design! Thank you so much for sharing.
We are starting to prep to build. Our frost line is at 20” and we are building on level ground. Would we be better to use 6x6x8 or 6x6x12?
That depends on how tall you would like the lower level to be. A 12′ would allow you to add more height to the lower level.