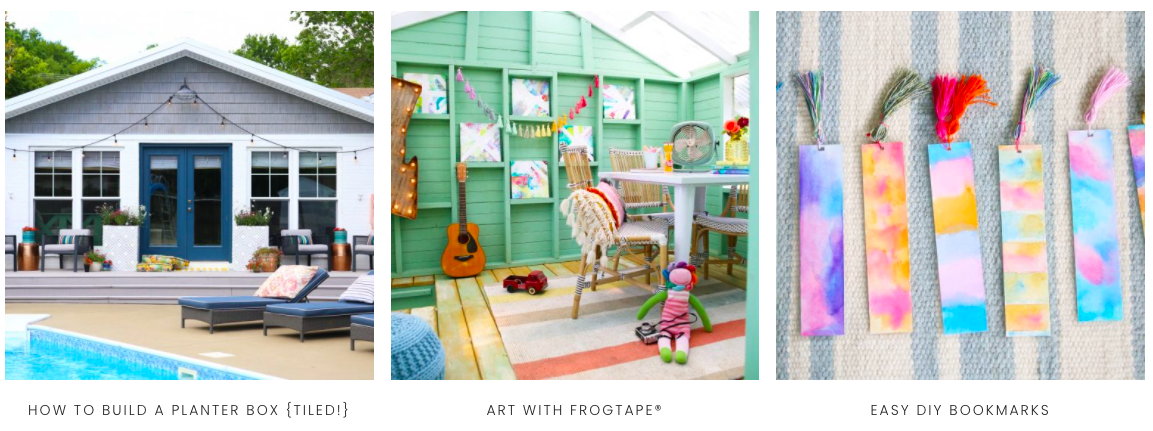
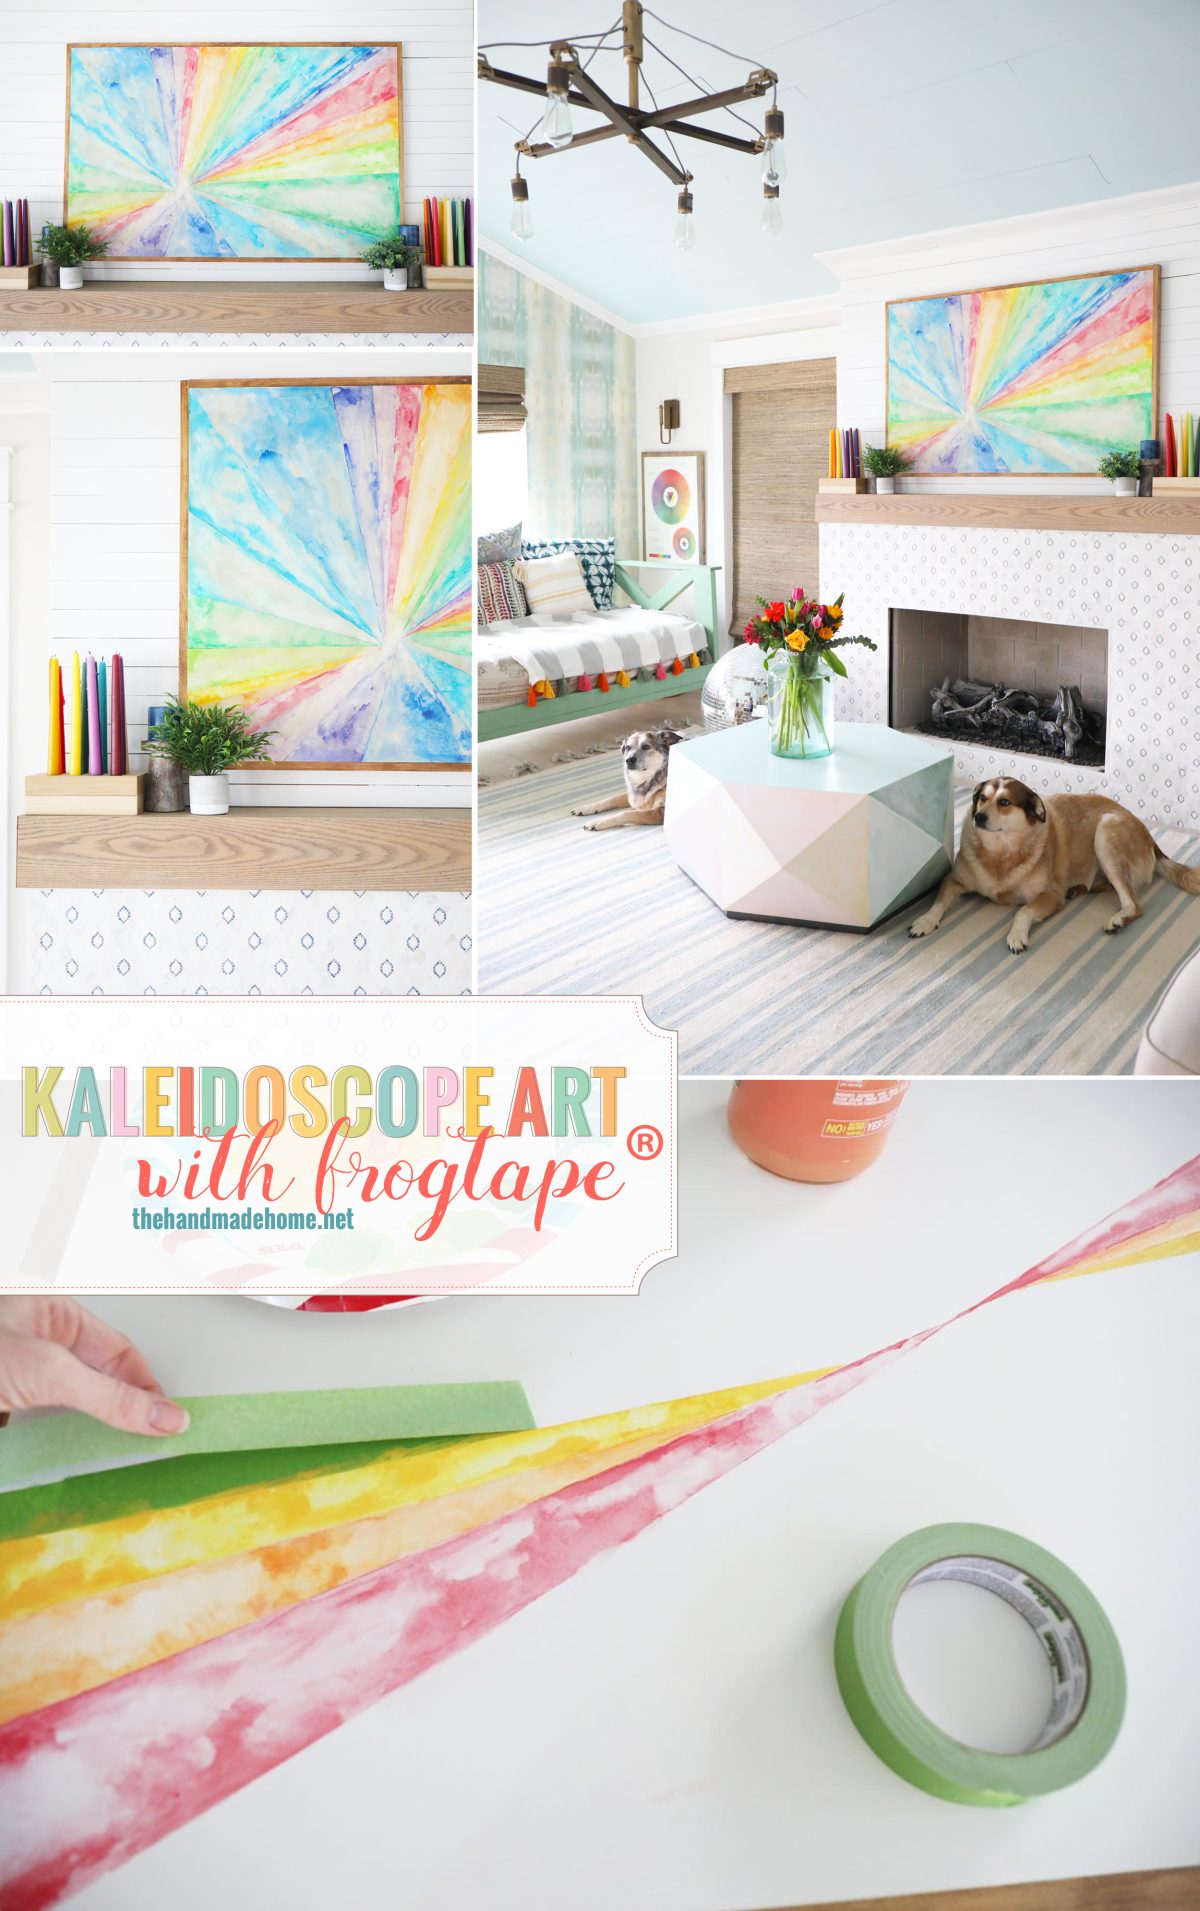
kaleidoscope art with frogtape®
If you’re no stranger to our site, then you know that we absolutely adore FrogTape® to conquer just about anything.
We’re not even kidding… we even have an entire round up below of the MANY ENDLESS uses to our most versatile tool. It’s equal parts crazy and amazing, and the ideas just keep coming. {It’s currently being used to assist me in my latest craze of stained glass, and I can’t wait to share more.} In the meantime, we were thrilled to create something with them to celebrate the onset of spring, and decided what better way than some fun art for our mantel? So today we’re sharing how to make vintage Kaleidoscope Art with FrogTape®!
But back to that FrogTape® for everything part… because we even used FrogTape® to plan all of this out…

It’s so fun when looking back! Sometimes measurements translate differently from paper to reality, and we always double check ourselves with placement, encouraging our sweet clients to do the same. It’s such a helpful tool in more ways than one.

We’ve come so far. But today I’m sharing how we made this fantastic vintage kaleidoscope art! We wanted to share a simple art idea that anyone could take on, to add instant color to their home. And we loved cooking this up with FrogTape®!
Pssst… don’t miss our super satisfying video we’ve included on instagram today! It’s so fun to watch, if we do say so ourselves.
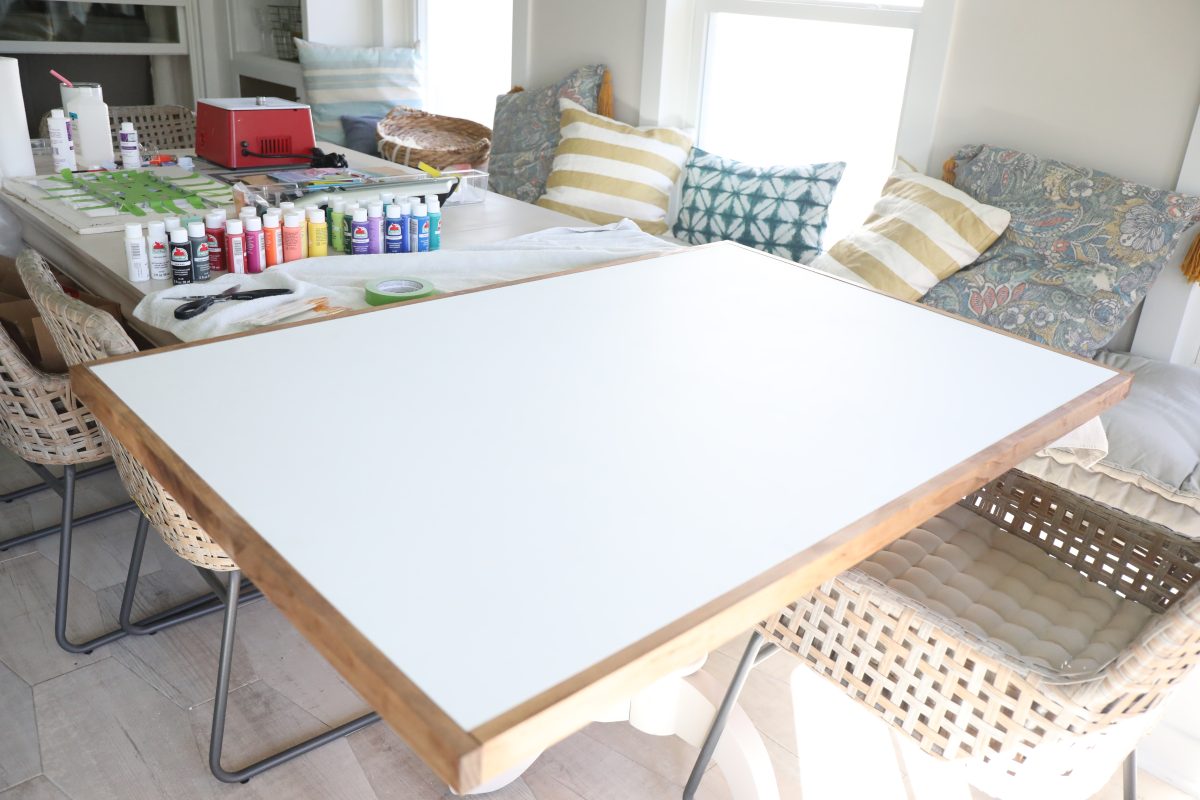
1. Kaleidoscope Art with FrogTape® : What You’ll Need
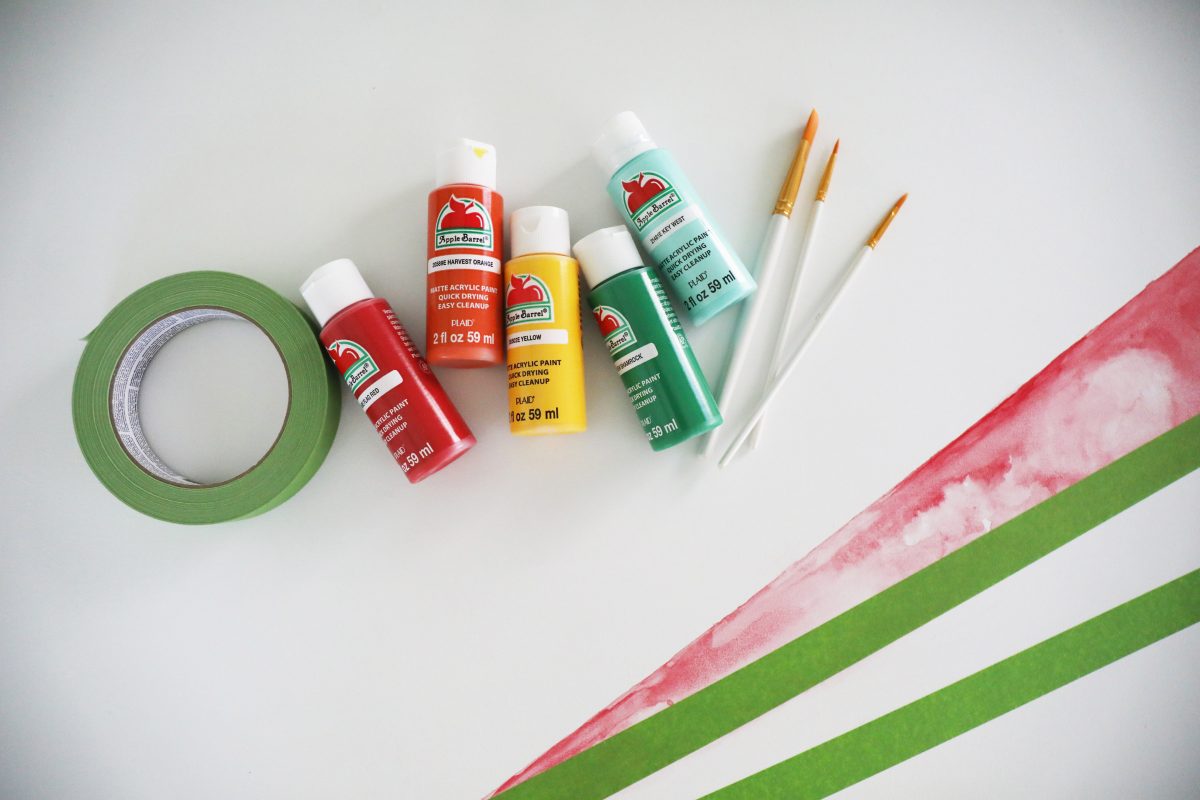
Want to make one of your own? It’s the perfect weekend project you can knock out in an afternoon, in any scale, color or space. Here’s what you’ll need:
• FrogTape®
• Acrylics in any color of your choice – tip: try to stay with the same brand so they mix well
• Water + brushes
• Paper Towels or Rags
• Stain of your choice
• Canvas of some kind: We used Primed MDF, since we were working with Acrylics and water for a more sealed surface – you’ll see what we mean below! – Check out our easy framing guide here to polish it off.
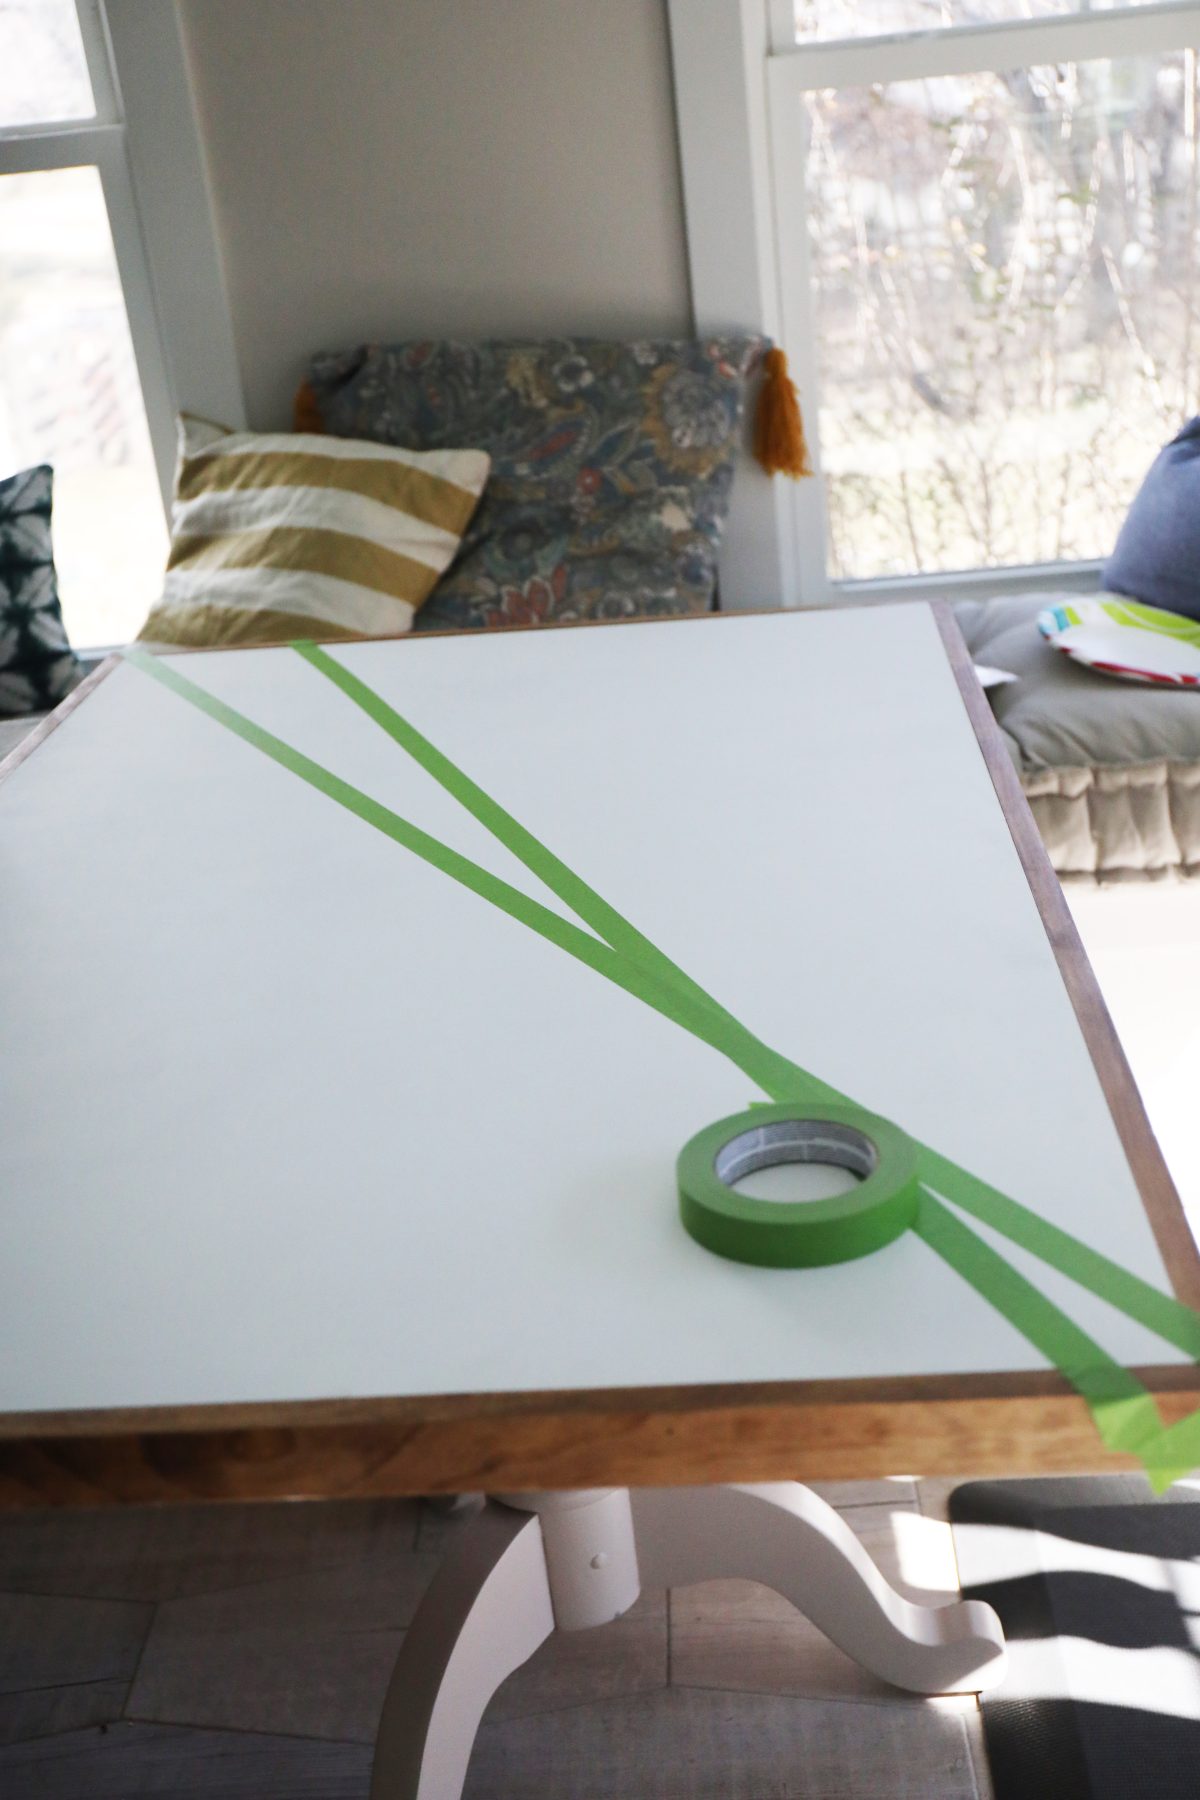
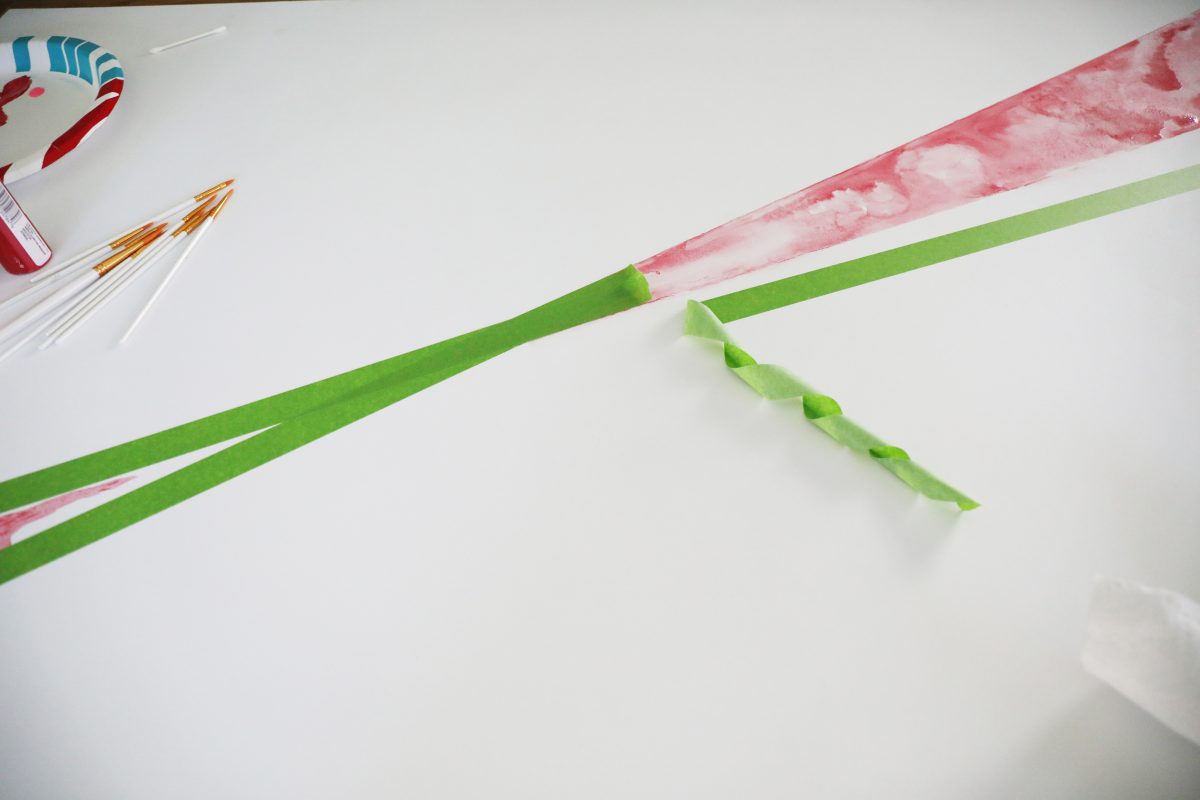
2. Kaleidoscope Art with FrogTape® : Establish a Starting Point
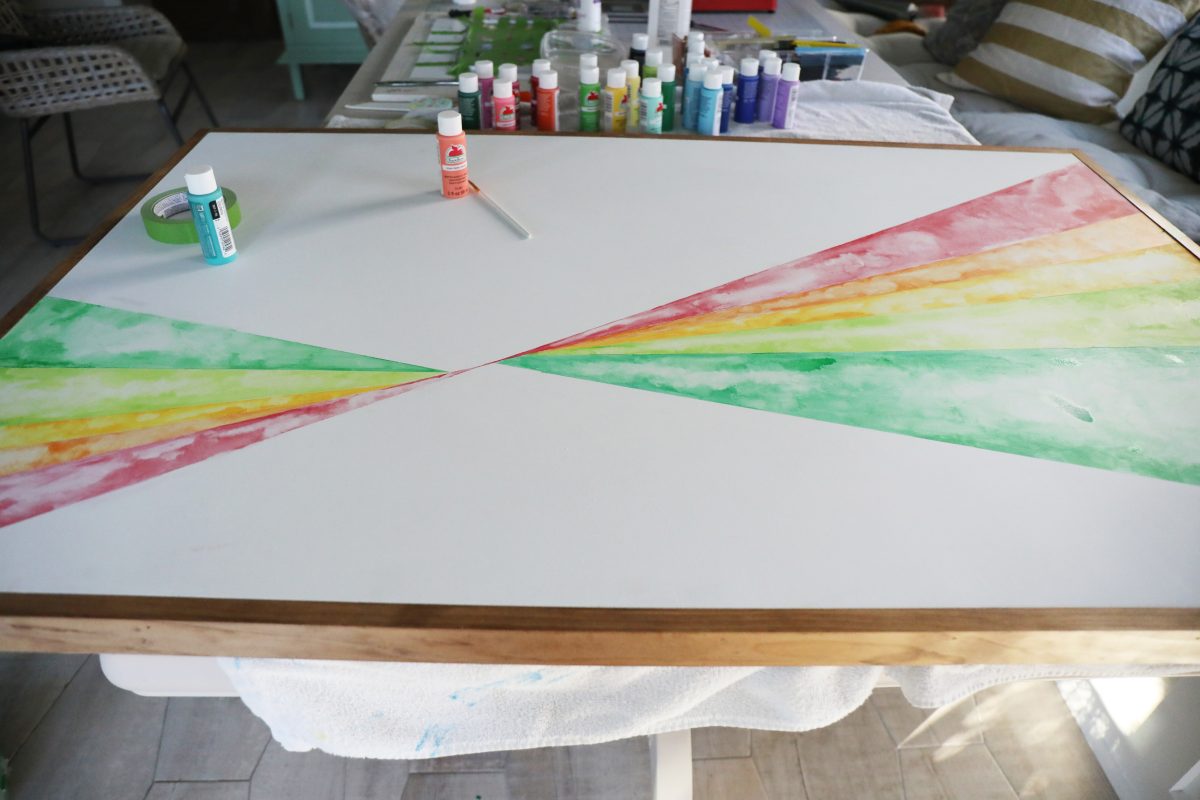
So on your surface, establish the starting point.
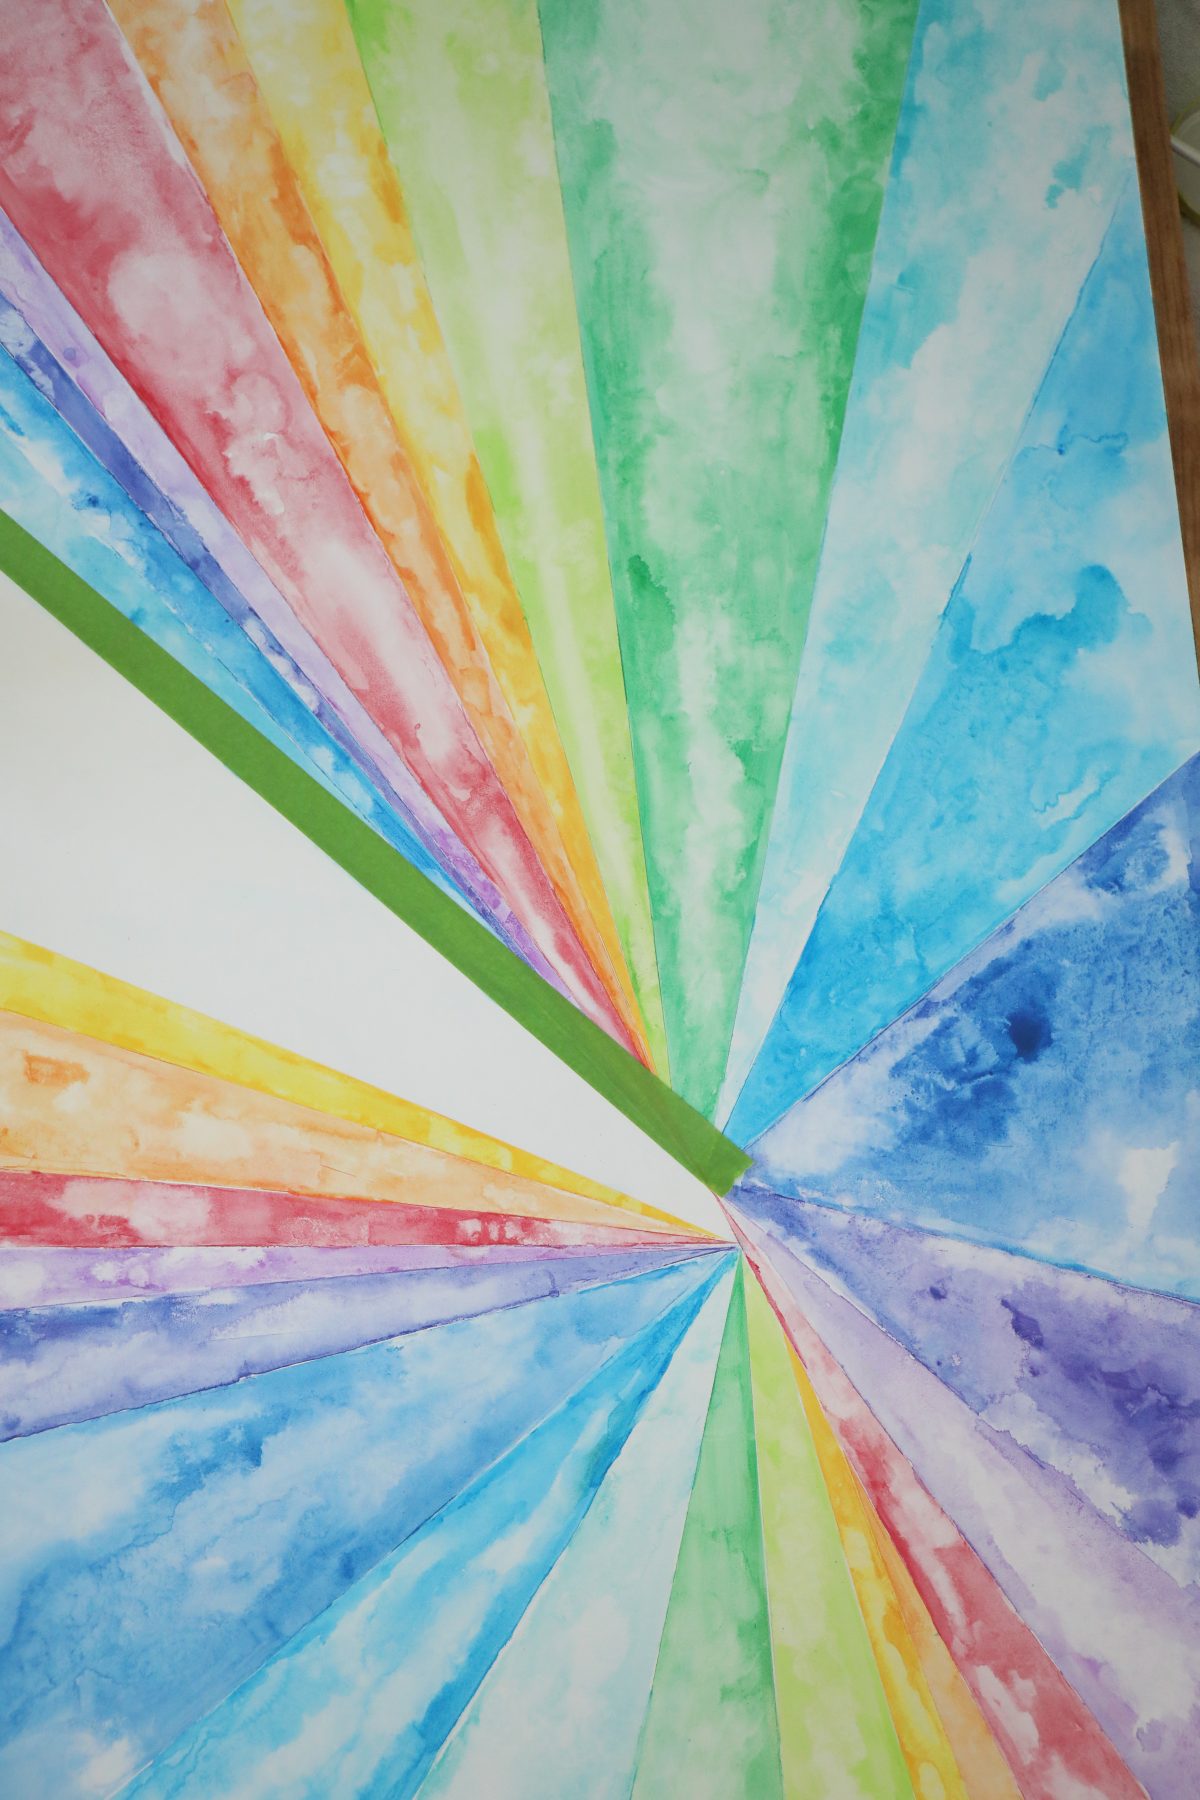
Just remember one thing here, it doesn’t have to be perfect. This is what makes this art so fun. We decided to stretch the tape across and make a natural x shape, with the point in the middle determining where all the other points would meet. When I say don’t worry about being perfect… be sure to check that out, below. It had a happy ending because it wasn’t going to end up seamlessly with the off-center point. It was more fun not having to worry about the math. We’ve done that one before – and it was still fun because FrogTape®, check out our son’s room here.
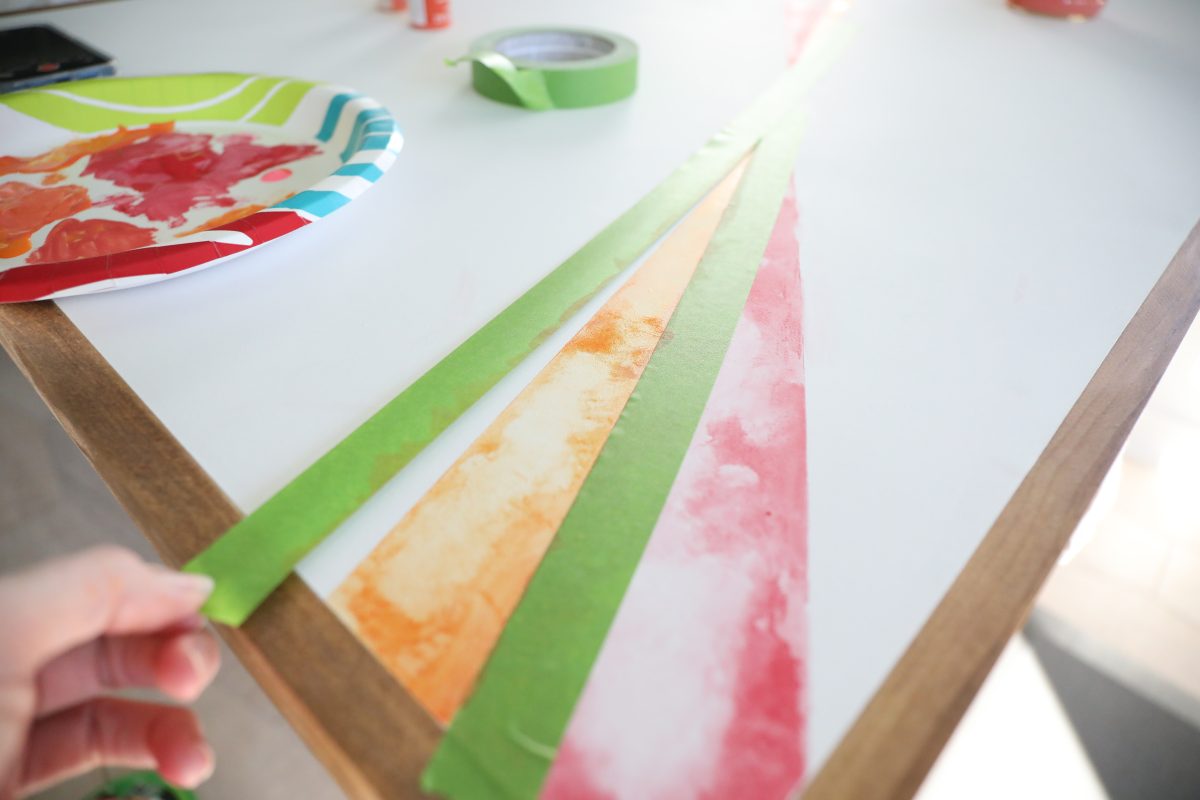
3. Kaleidoscope Art with FrogTape® : One Section at a Time
So start working on your painting, one triangle at a time. I chose to start with red, because I knew I was going with the spectrum since I was craving something colorful to get through the colder months. Blending a little red and a smidge of pink I had on hand, with a lot of water, I slowly filled it in, diluting the paint as I go.
Helpful hint: A very fast way to turn any acrylic into watercolor, is to just use water, all the way across to dilute it. It has the same effect but more versatility on various surfaces.
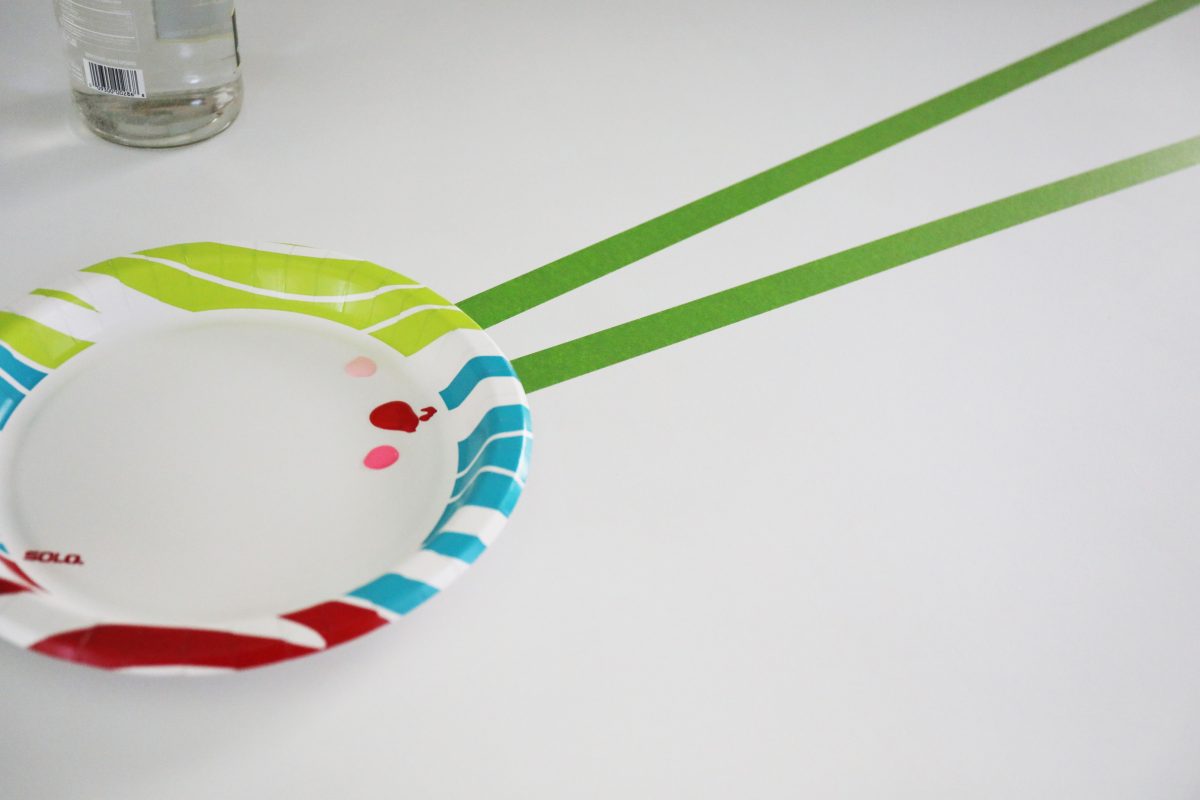
I always recommend painting away from the tape when you’re working with a watery medium, so that you’re ensured sharper lines.

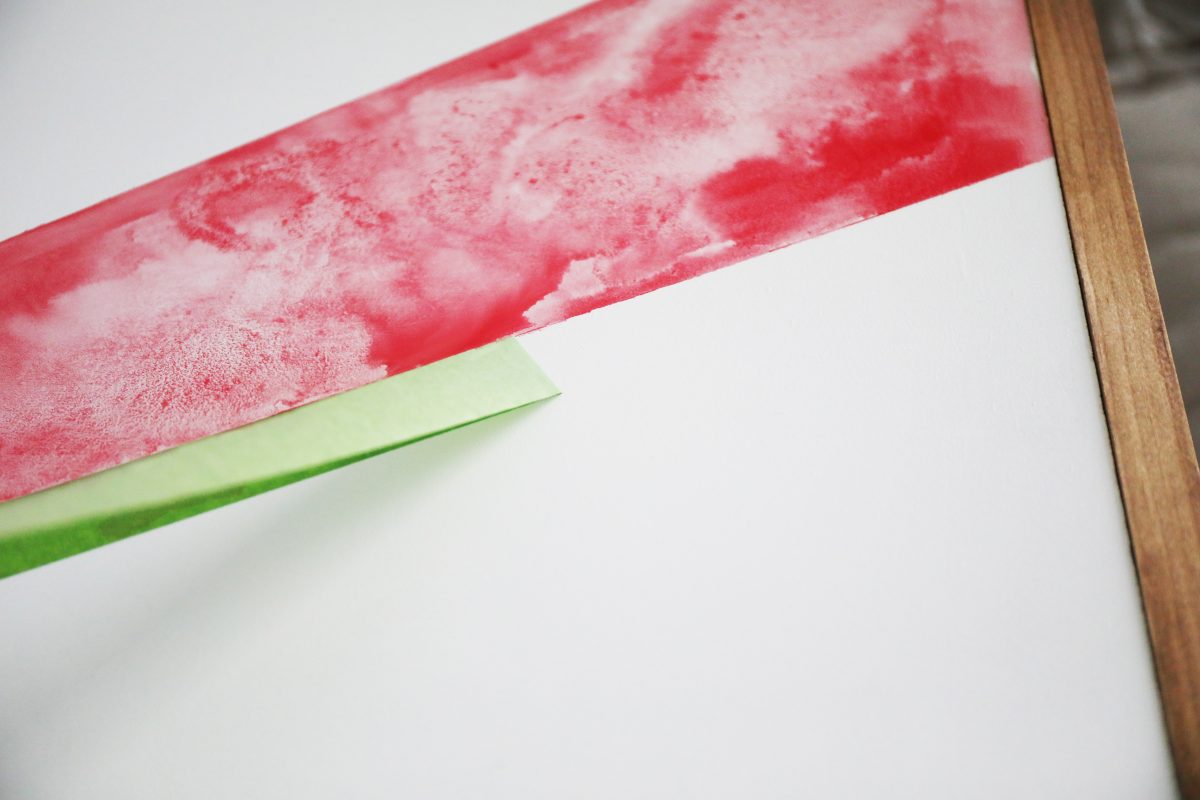
4. Kaleidoscope Art with FrogTape® : Pull It Back
Because you’re essentially working in a circle when it comes to the spectrum, give your first grouping of color time to dry. Then pull the tape back, and tada! You’re done with your first section. Oh. So. Satisfying.
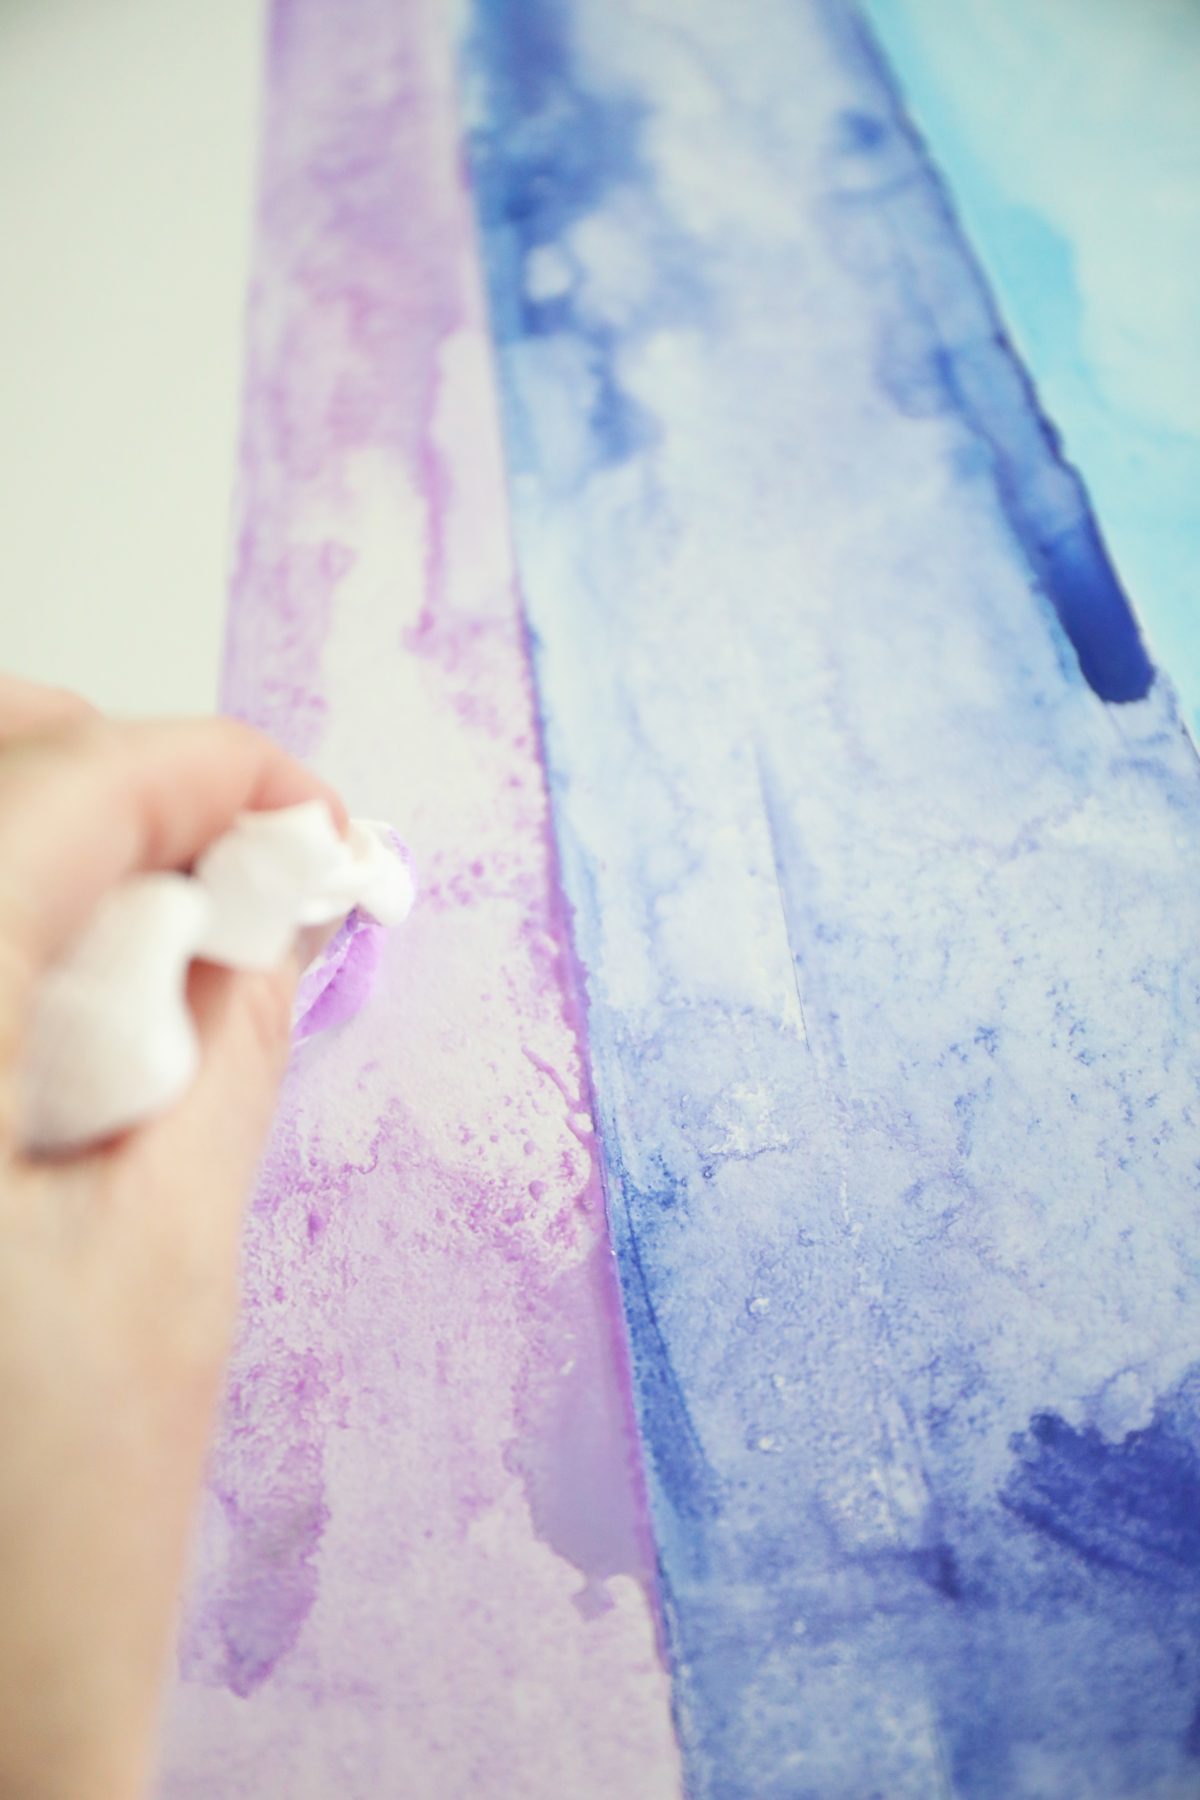
I liked playing with the water in various sections for a diverse, aged feel. I also went back with my paper towel and “cheated” by blotting it all up a little as I went. It sped up the drying time, and gave it more of that timeless look, as well.
5. Kaleidoscope Art with FrogTape® : Reposition
When the first little section was dry, I repositioned the tape on top of the existing triangle, to ensure that the lines, lined up.
The first positioning was to give a good idea as to where it would all hit on my off-center point.
The second one was to keep the lines aligned, so that the colors all hit nicely around the canvas.
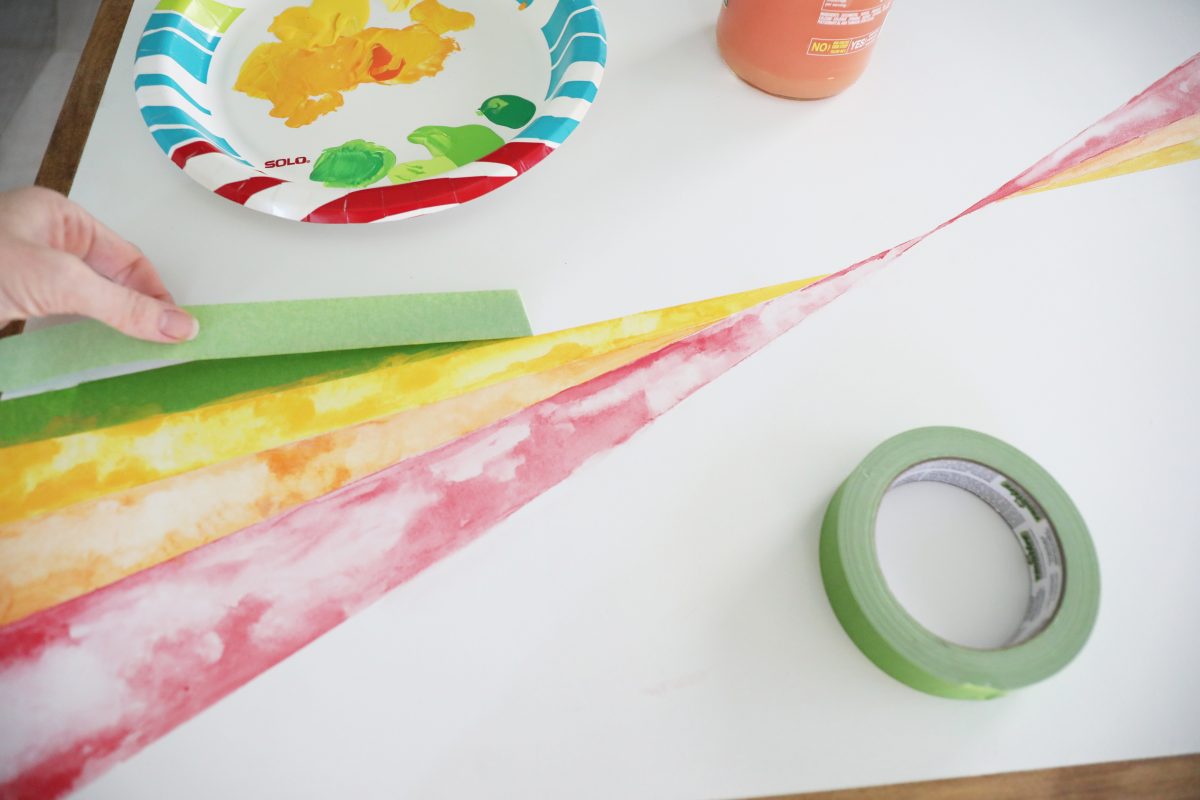
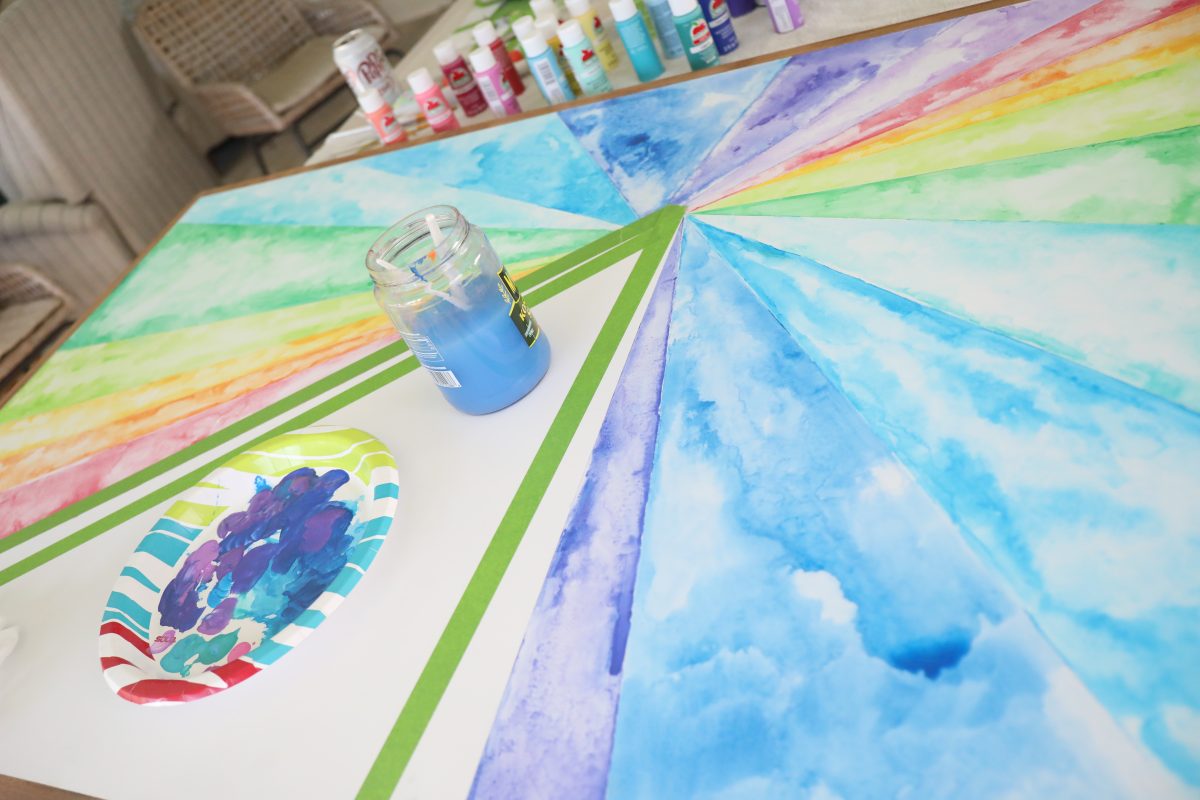
6. Kaleidoscope Art with FrogTape® : Alternate
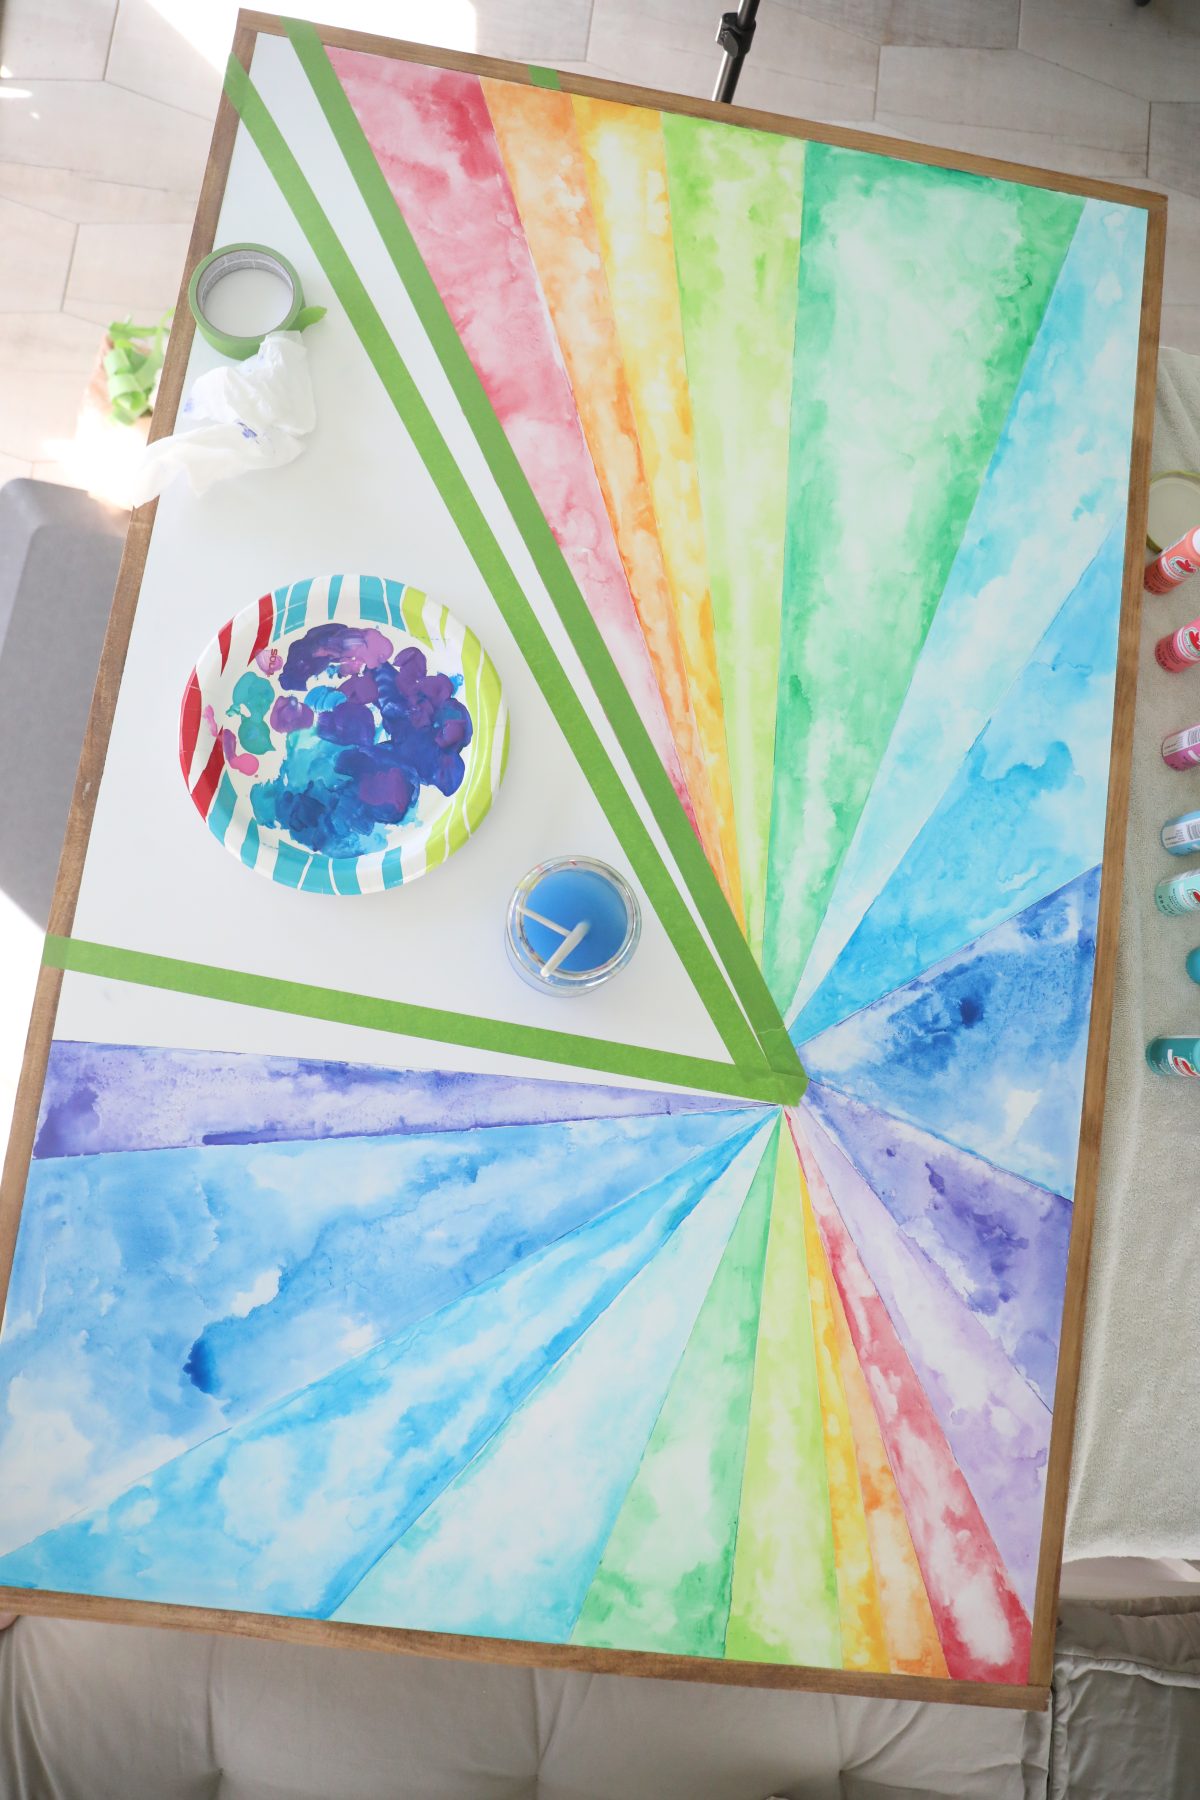
Now that you have two parts of your first full color on the canvas, you can alternate around the canvas to work.
This gives your first side a chance to dry, while you line up and work on the second side. It also helps ensure that your colors are the same, all the way around… though depending on how large your piece is, you will be repeating again.
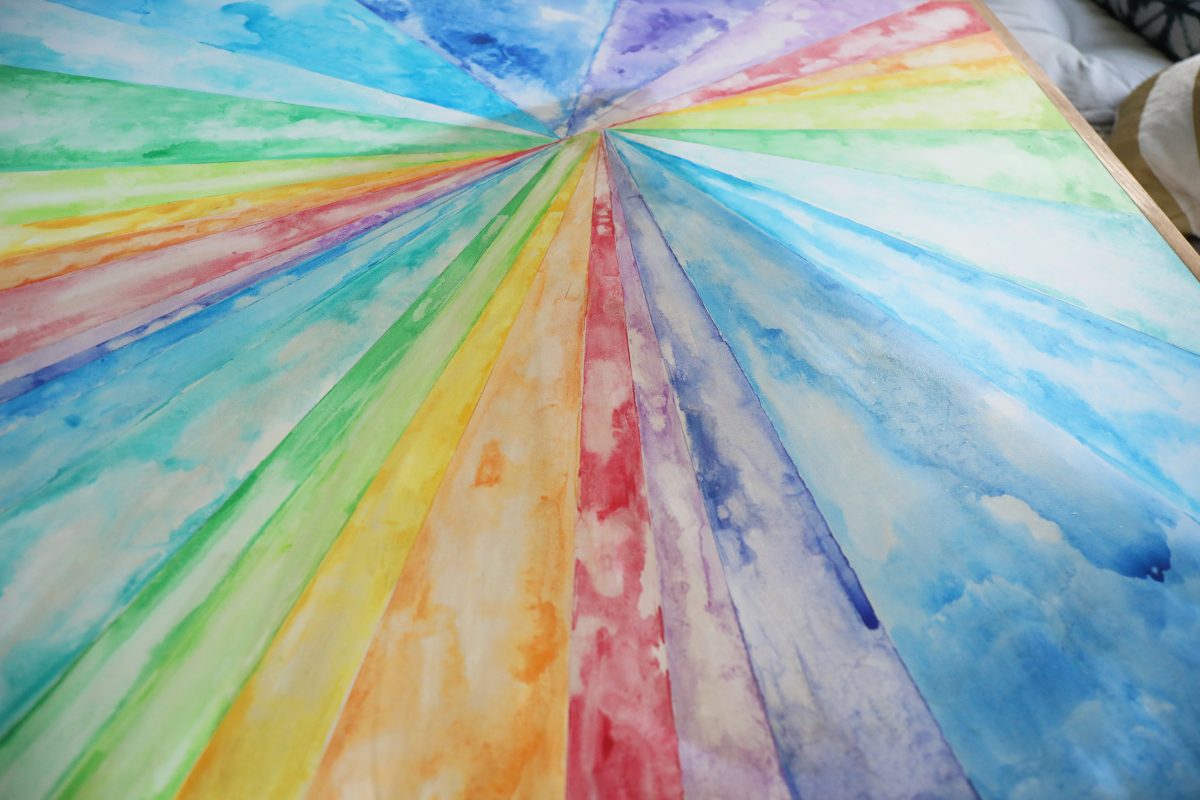
Here’s another example of that repeated process. I literally blended bottled colors with ROYGBIV, and water as I worked. Then I would remove my tape, one side at a time, and reposition as I went, ensuring that the little lines all lined up.
7. Kaleidoscope Art with FrogTape® : Repeat
From here, it’s just repeating as you go, alternating sides as you work. You can even go back and add a little interest once the tape is removed, to make sure the colors do what you want.
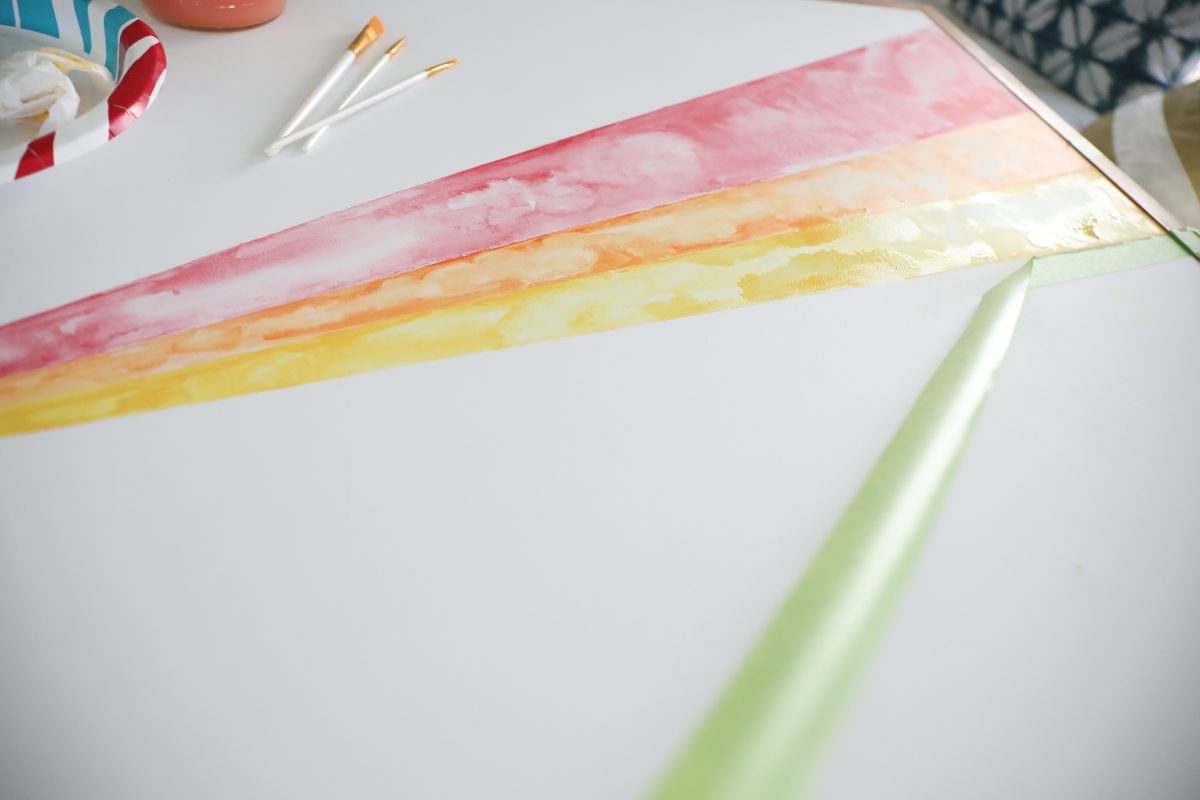
Here’s an example of the blotting as we go, to make the colors puddle and pool as we want, while working. We love the way it all turned out!
8. Kaleidoscope Art with FrogTape® : Be Fearless
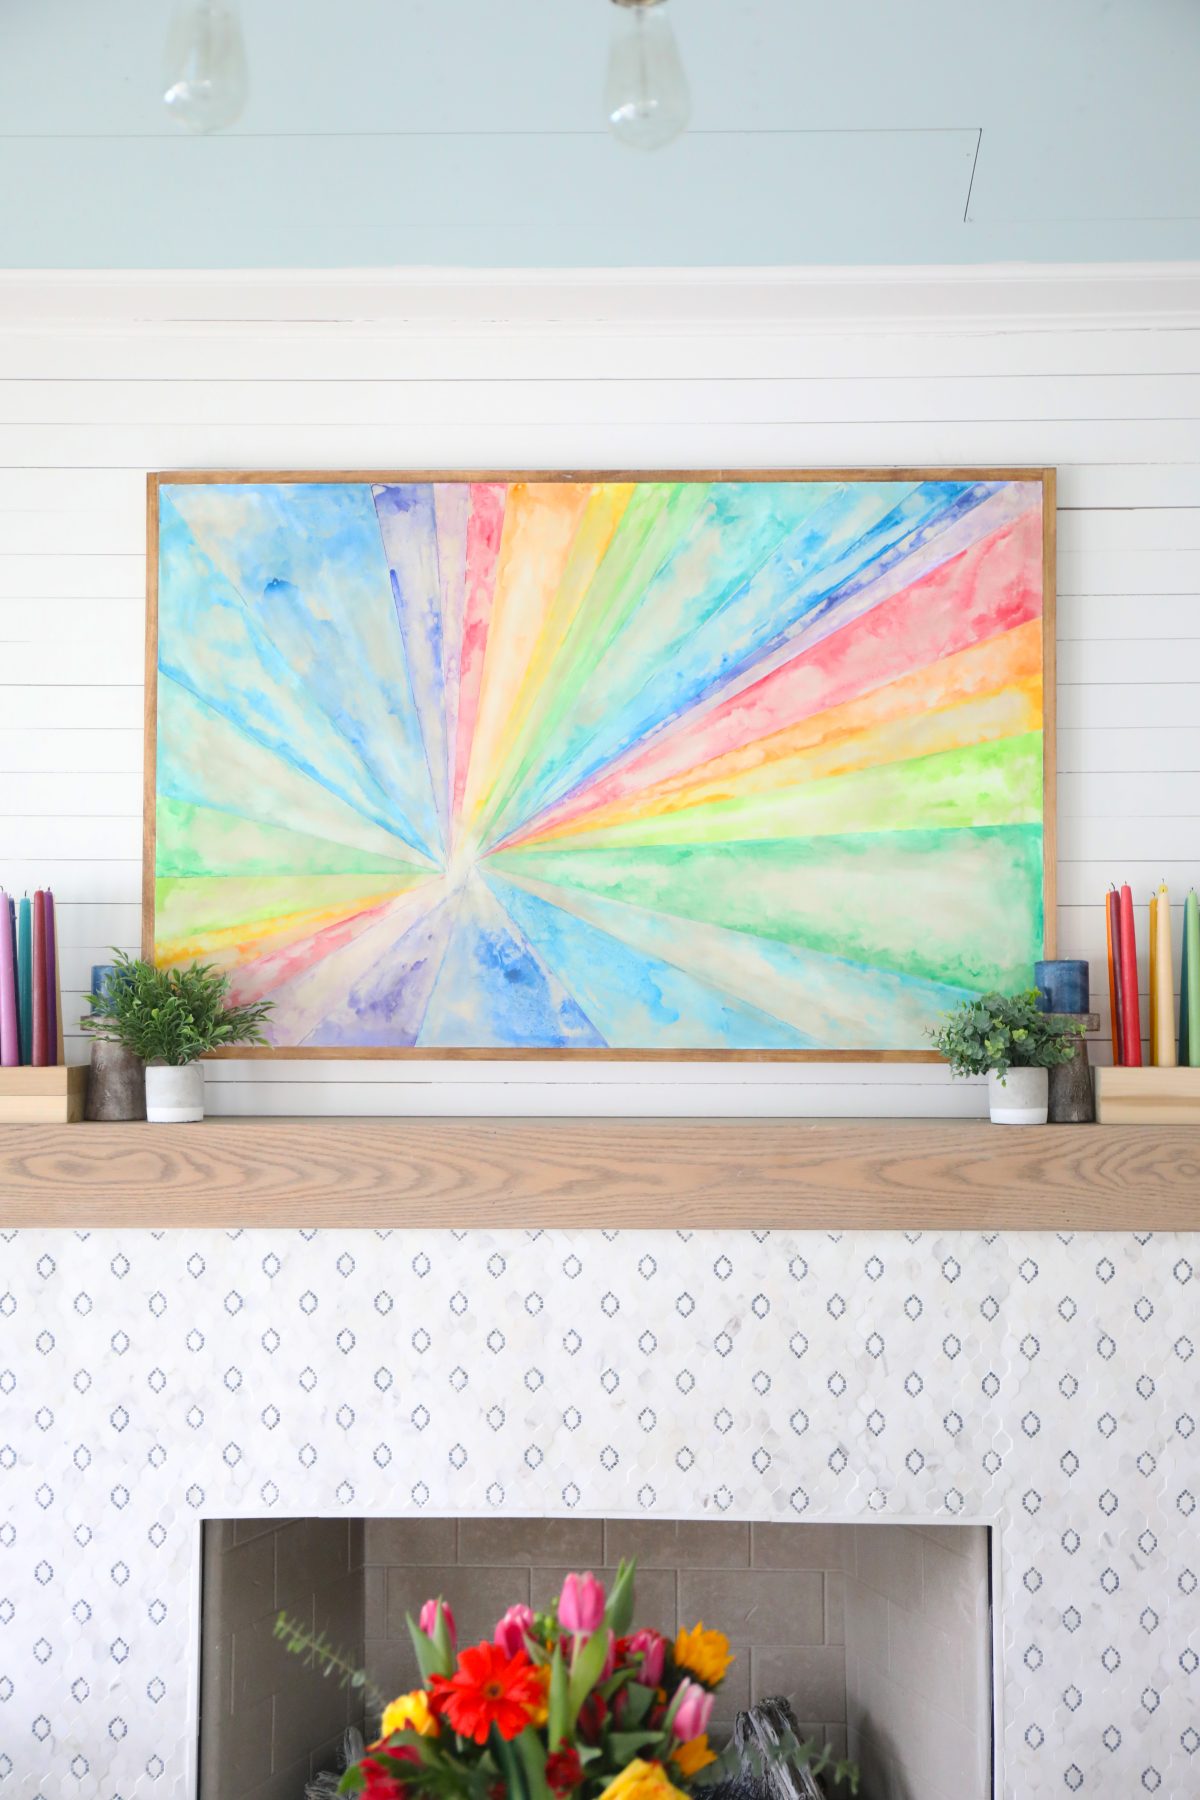
If you look closely at our colors, each one repeated three times. By the time I was on my third round, because I was working from an off center point on both sides, the “triangles” or beams of color were a little off-kilter.
Don’t let that freak you out.
I’ll say it again for the people in the back: Don’t let it freak you out, because we have a plan for that, below. This little problem literally takes care of itself. It was time to finish this up, and when it was dry, apply the stain.
8. Kaleidoscope Art with FrogTape® : Apply the Stain
When I finished up the paint colors and they were dry enough for my taste, I knew it was time to stain.
See that final little green color that didn’t line up perfectly with all the others? This part takes care of itself.
I simply dabbled a paper towel in my stain and had a dry one to follow up behind me, quickly rubbing it on and off. Literally the process is wax on, wax off, rub down. I went in the direction of the paint lines, from the center, out.
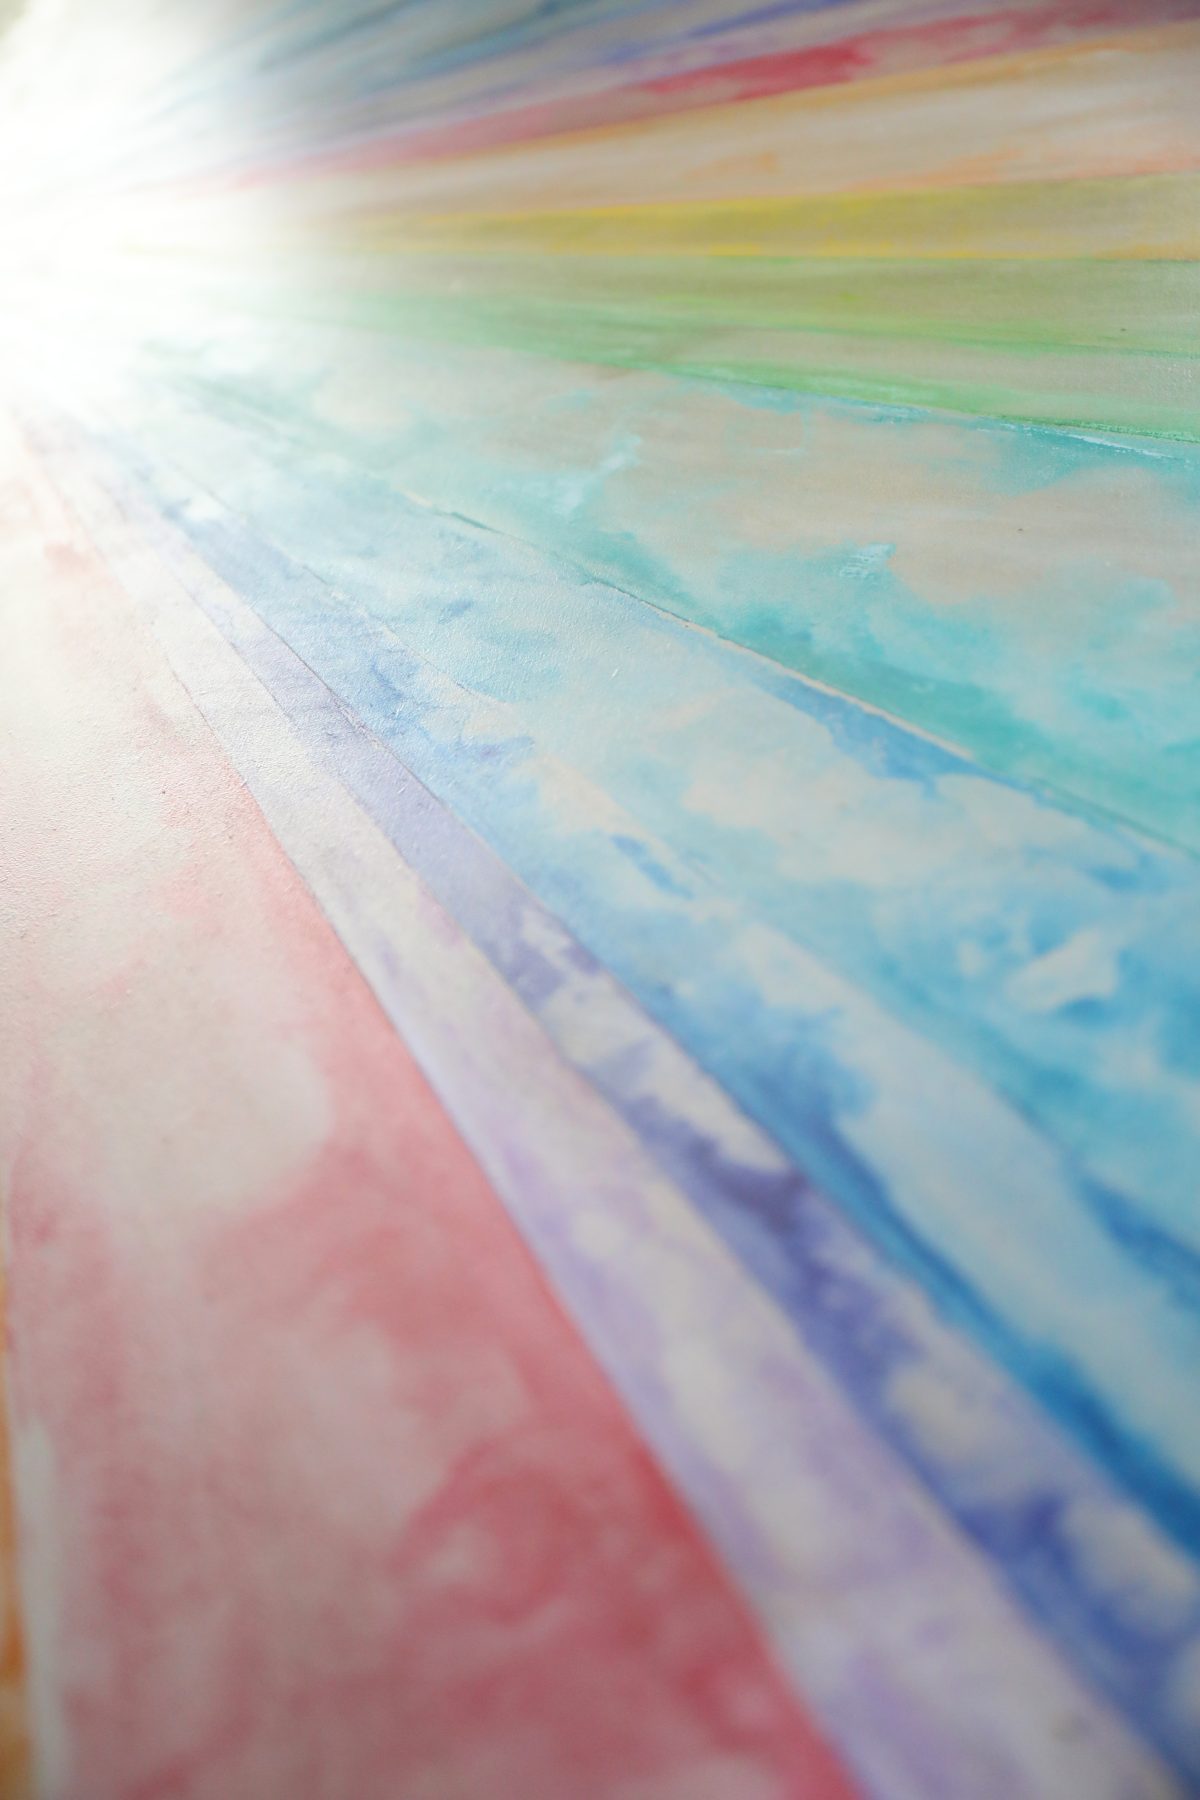
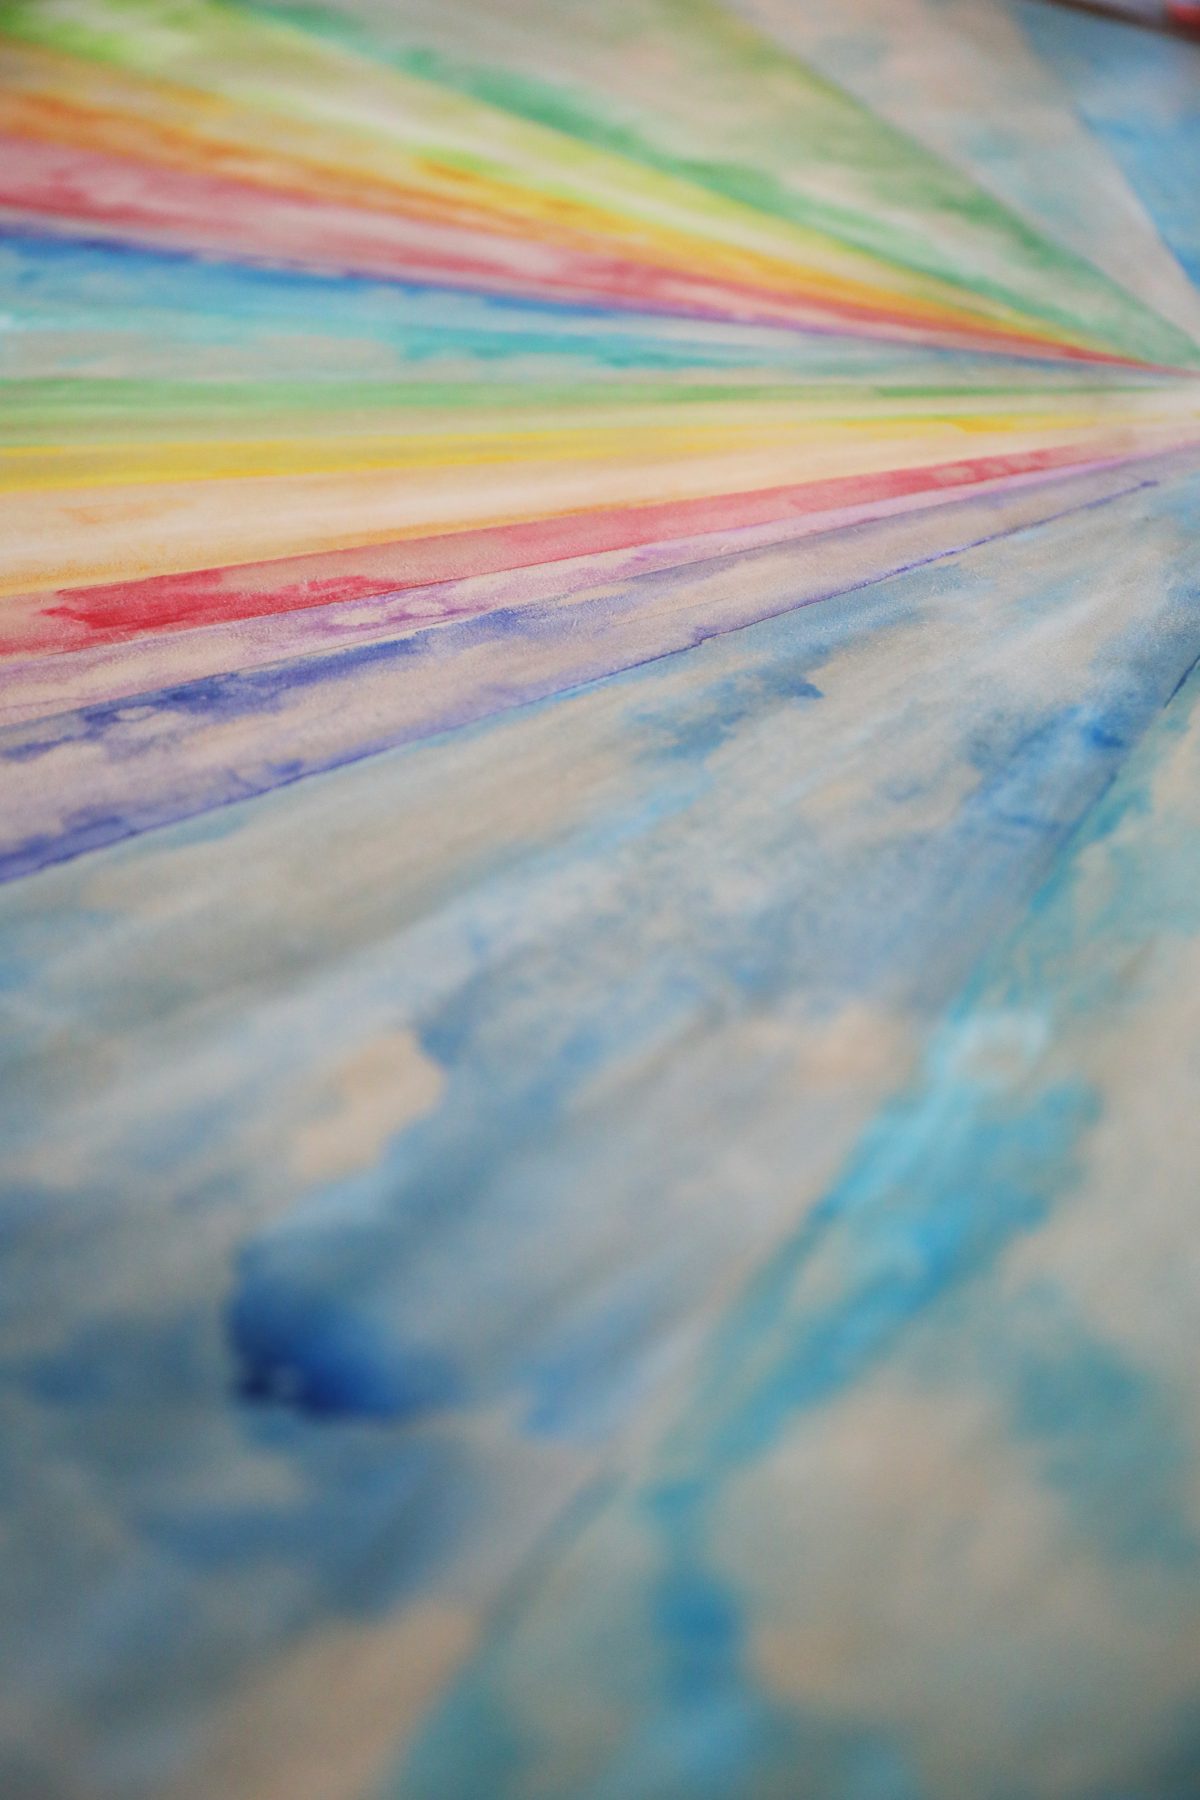
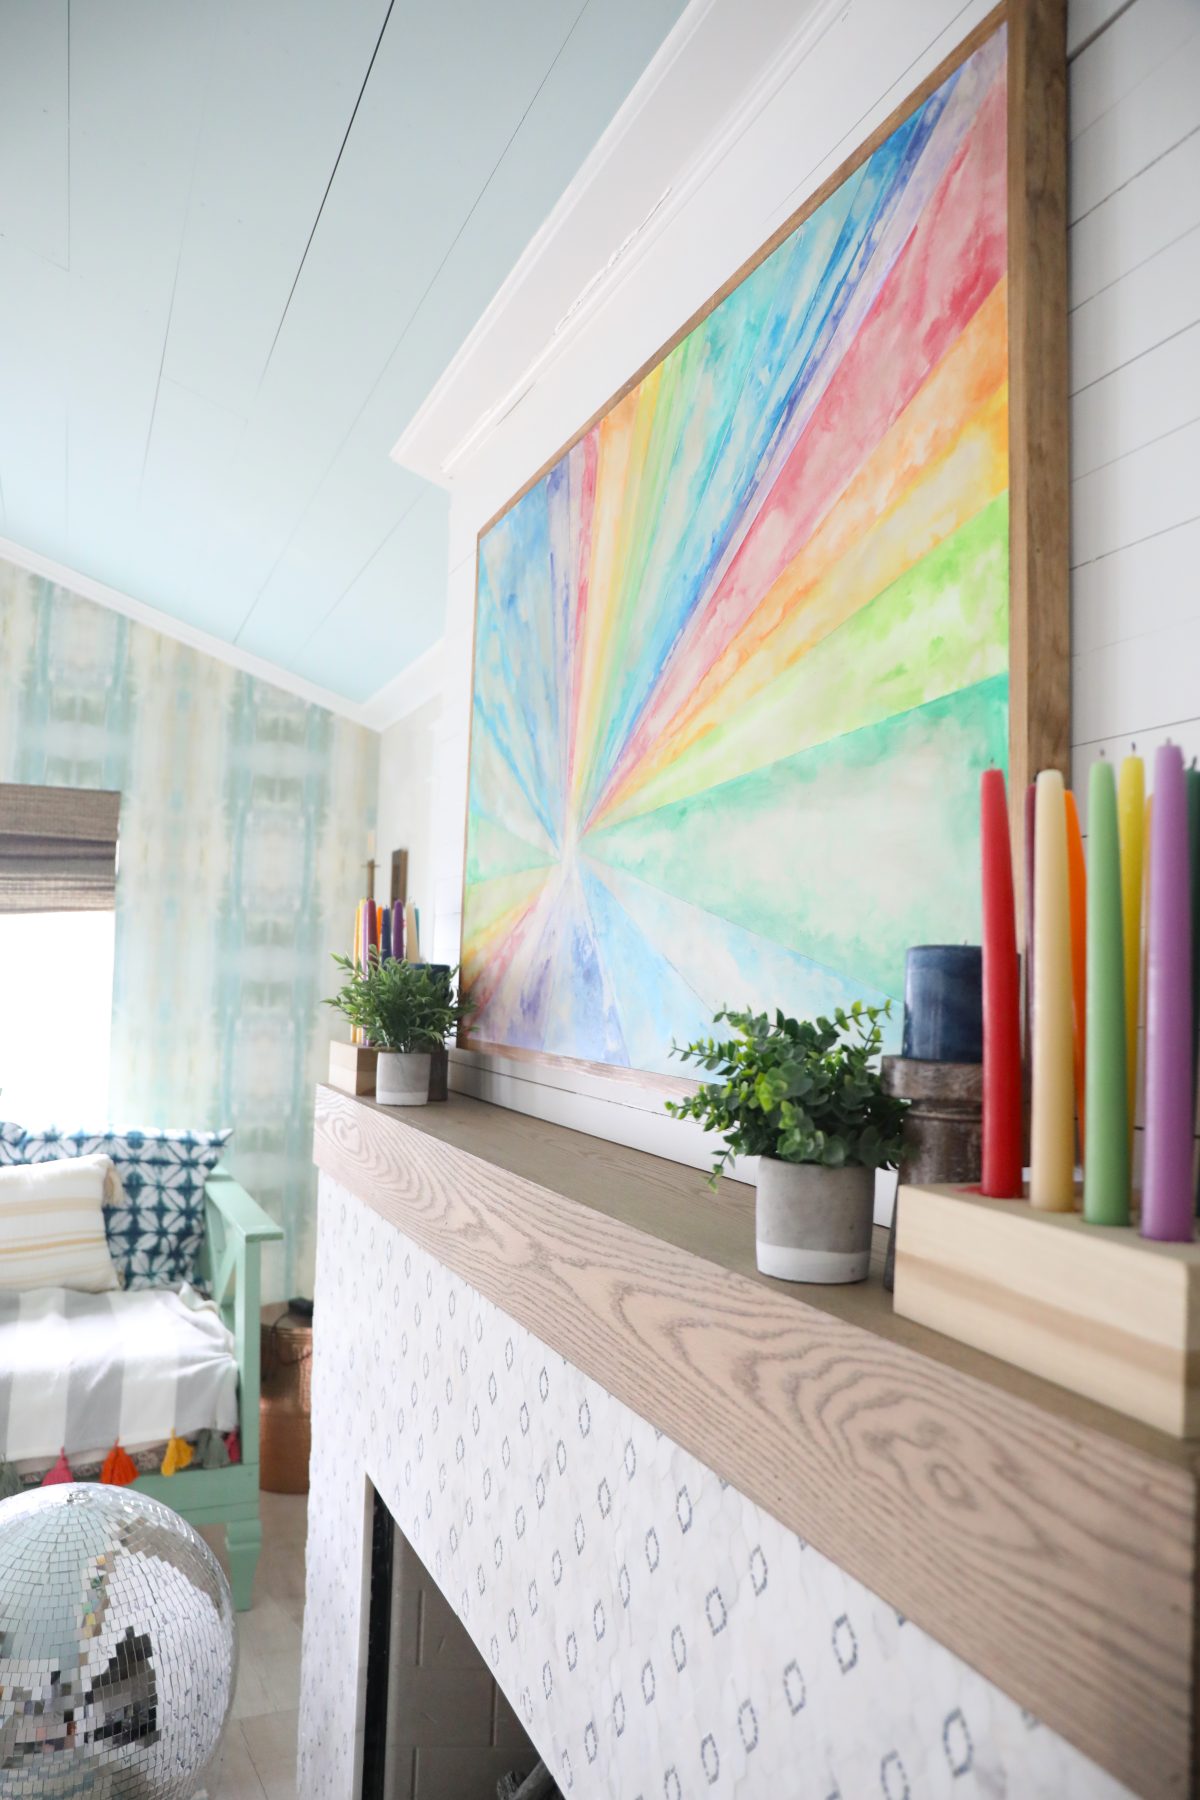
Be sure to check out our video where I shared the process today in fast motion. But I added the stain to give it the “vintage” look. The end product almost reminds me of something found, maybe left over from a carnival of some sort. And the stain on top, really aged the paint, even taking some out in tiny areas, so that we didn’t have to worry about being precise.
We still had the fun colors, and awesome sharp lines paired with a great aged and vintage feel all because of FrogTape®!
We thought this made such a great contrast.
It’s really fun to see what these colorful lines did with Frogtape®!
I love the end product.
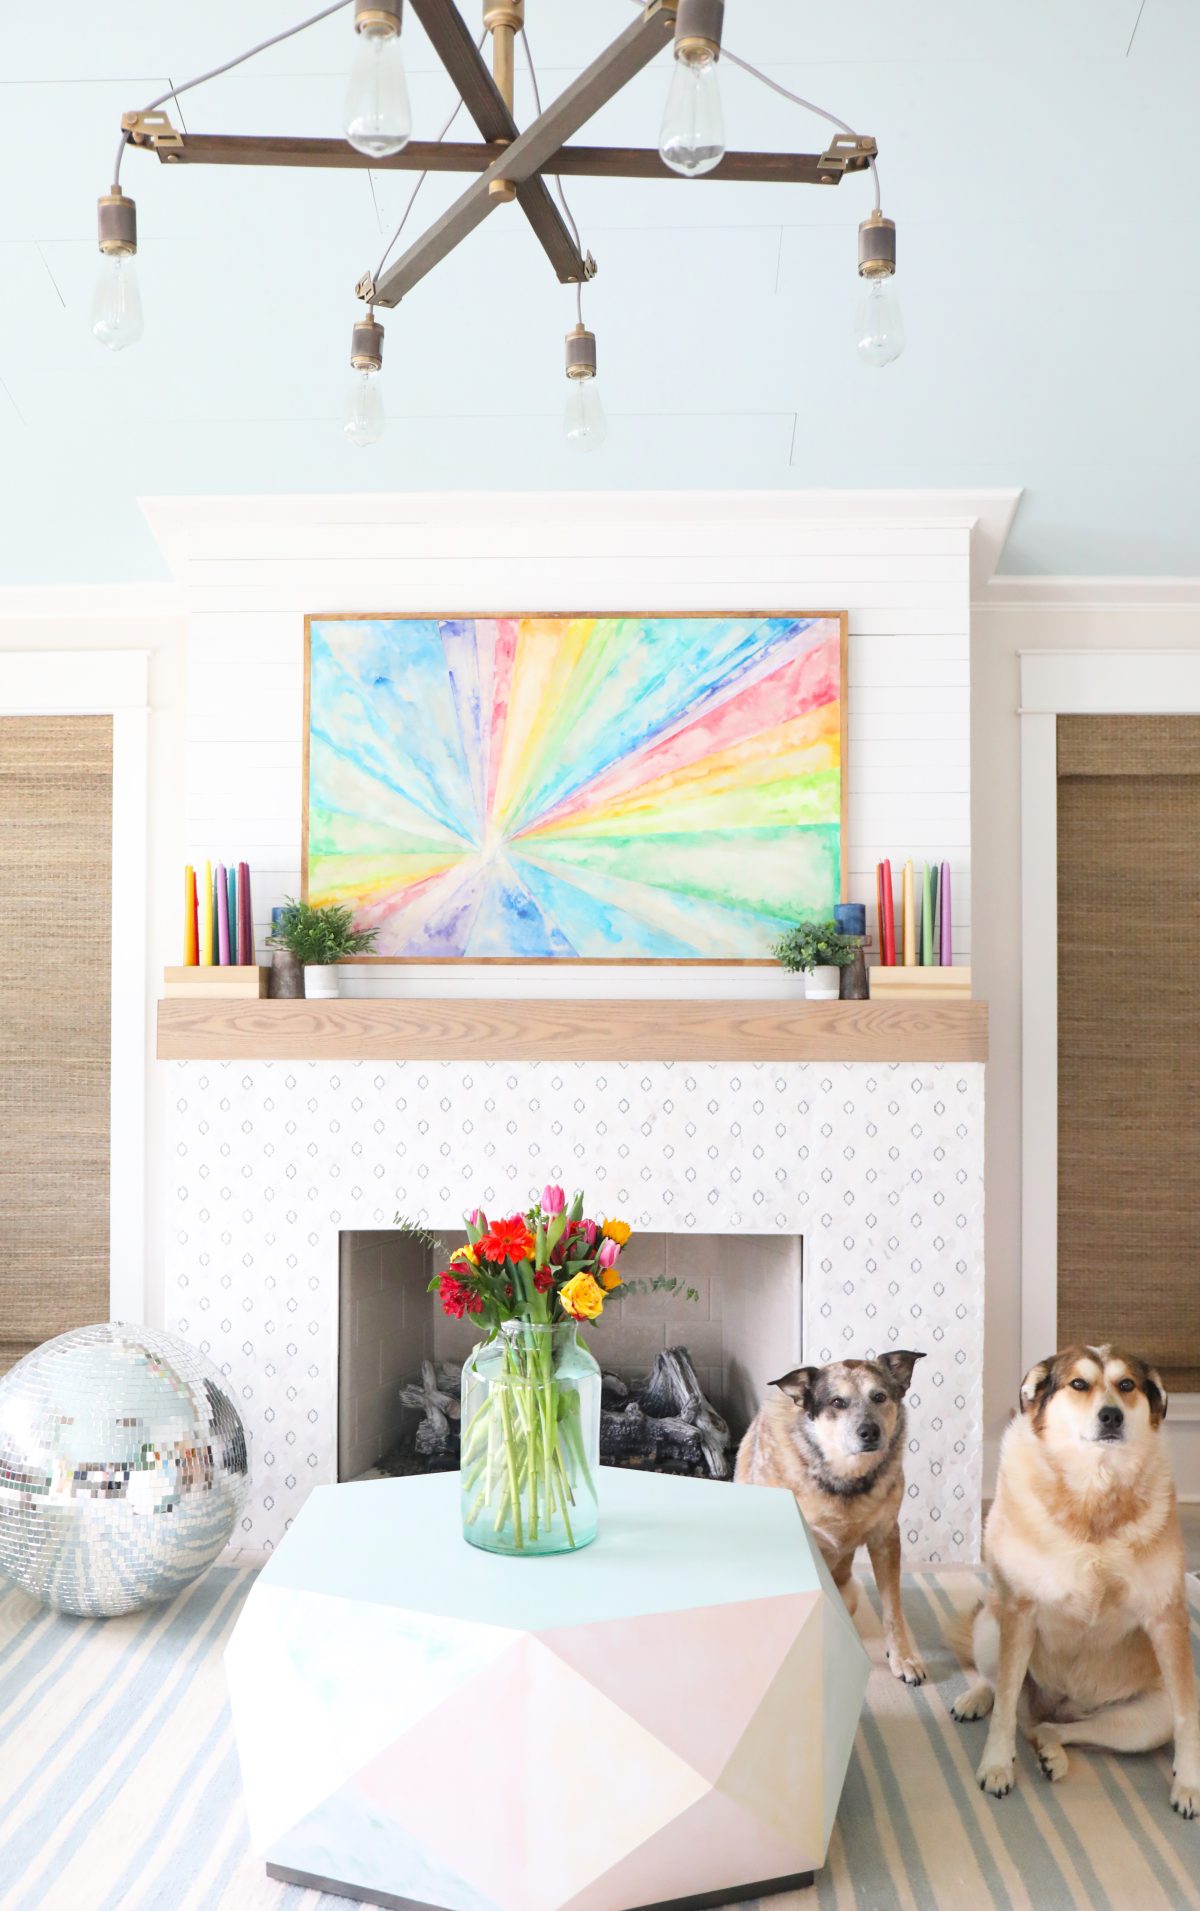
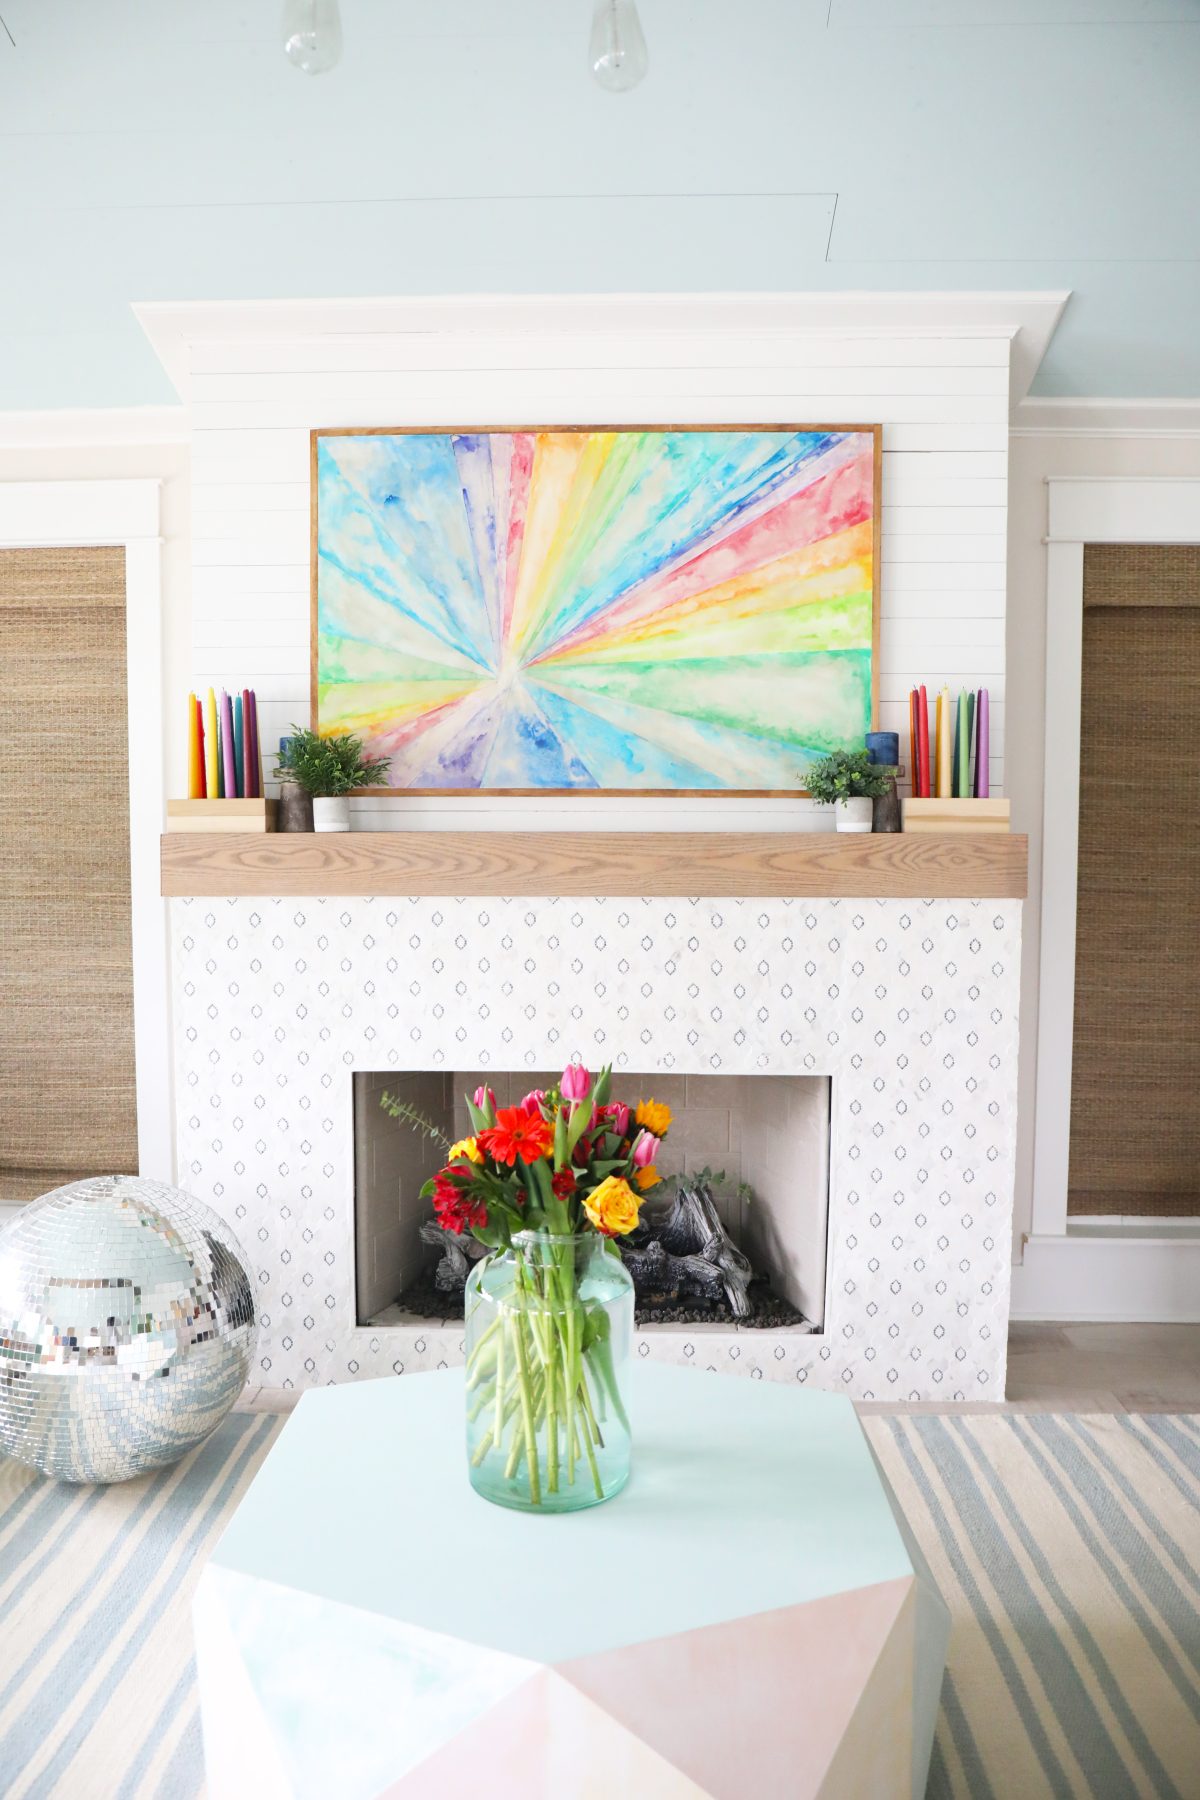
Once dry, it was ready to hang!
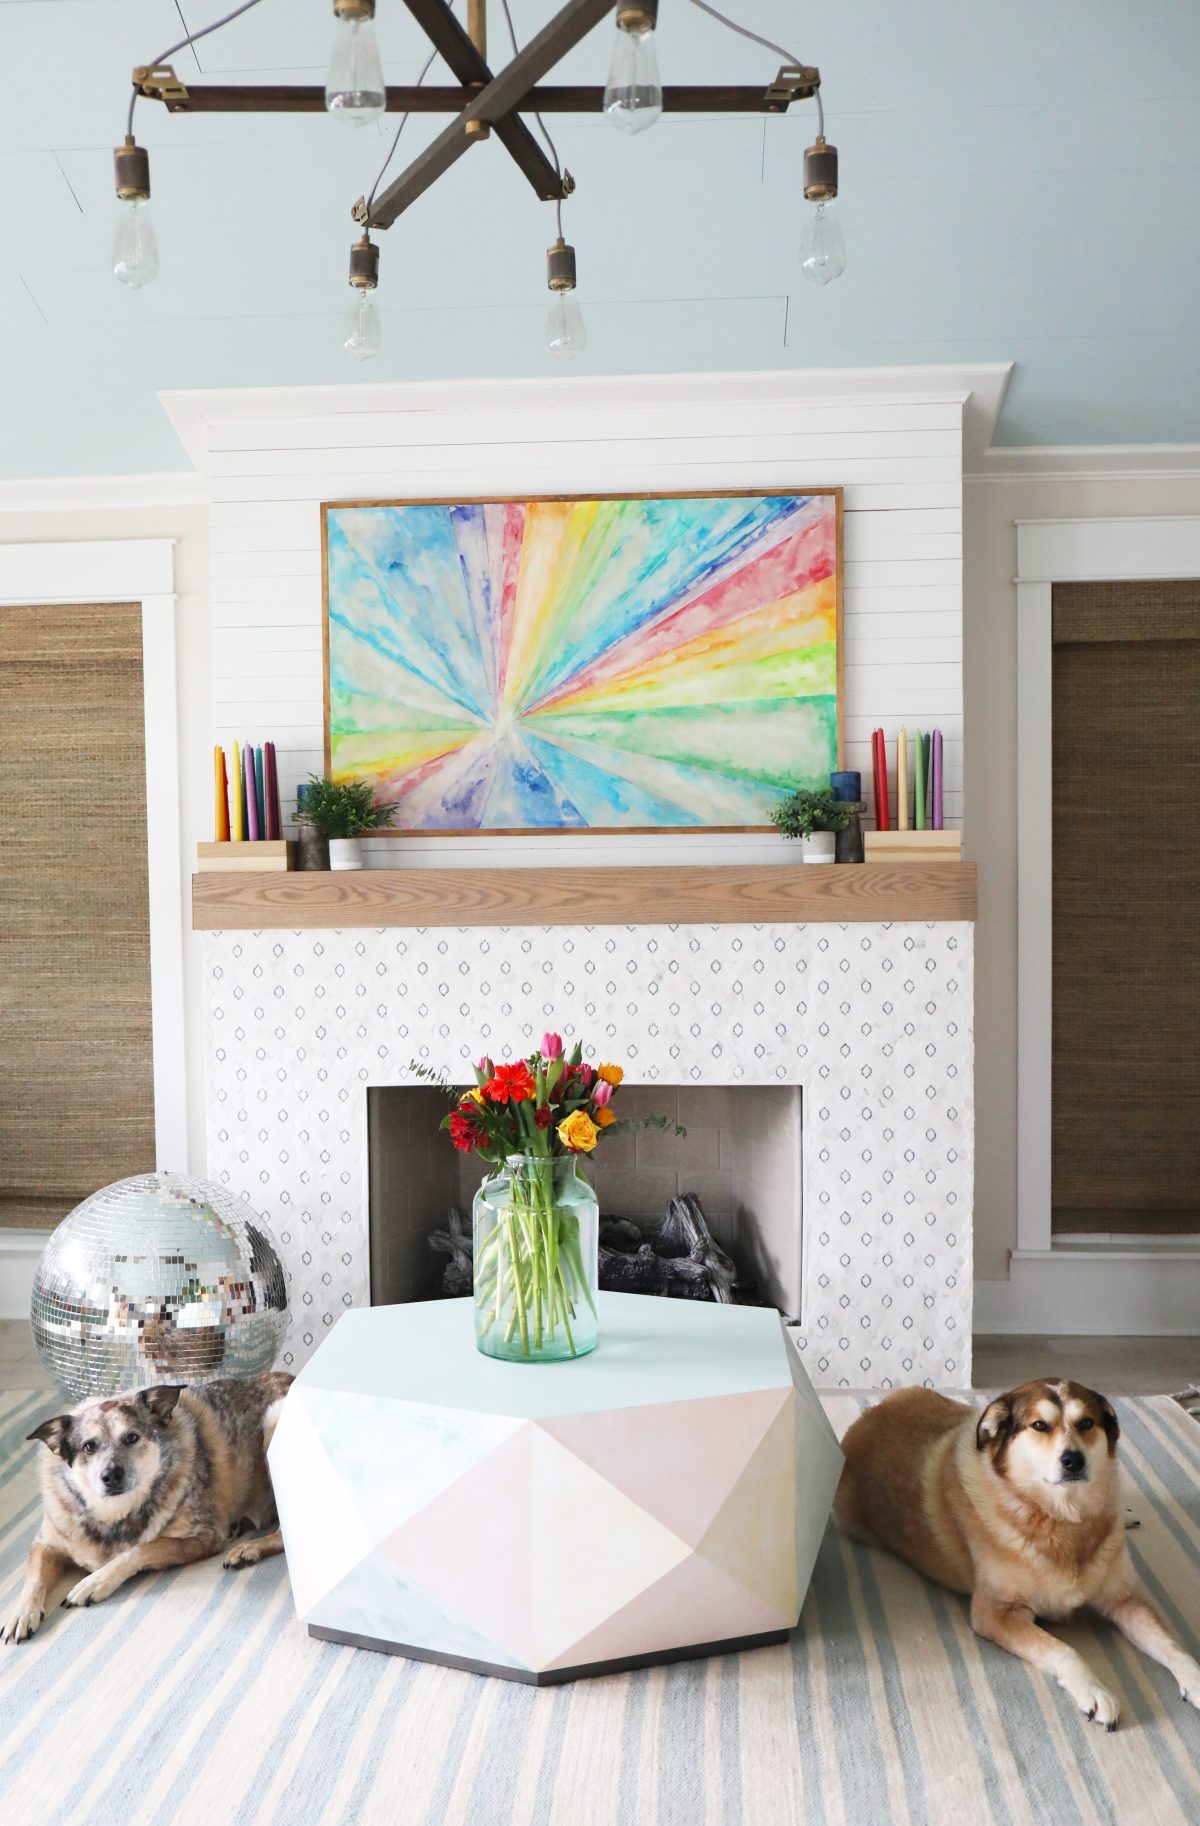
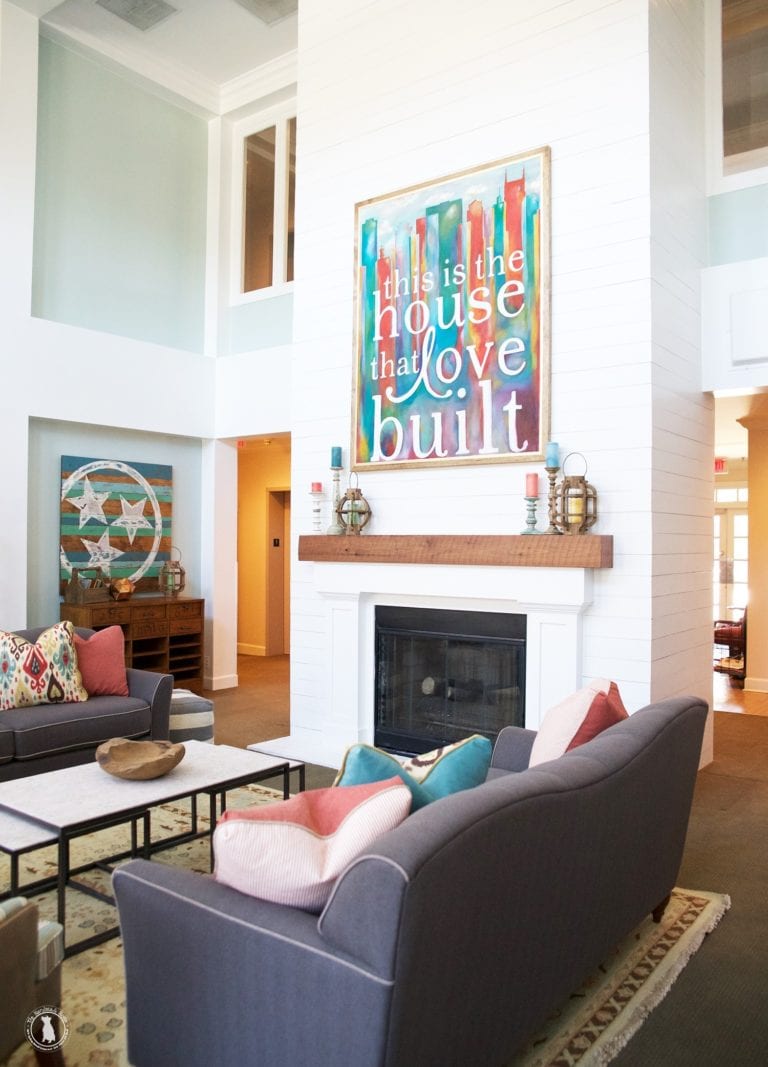
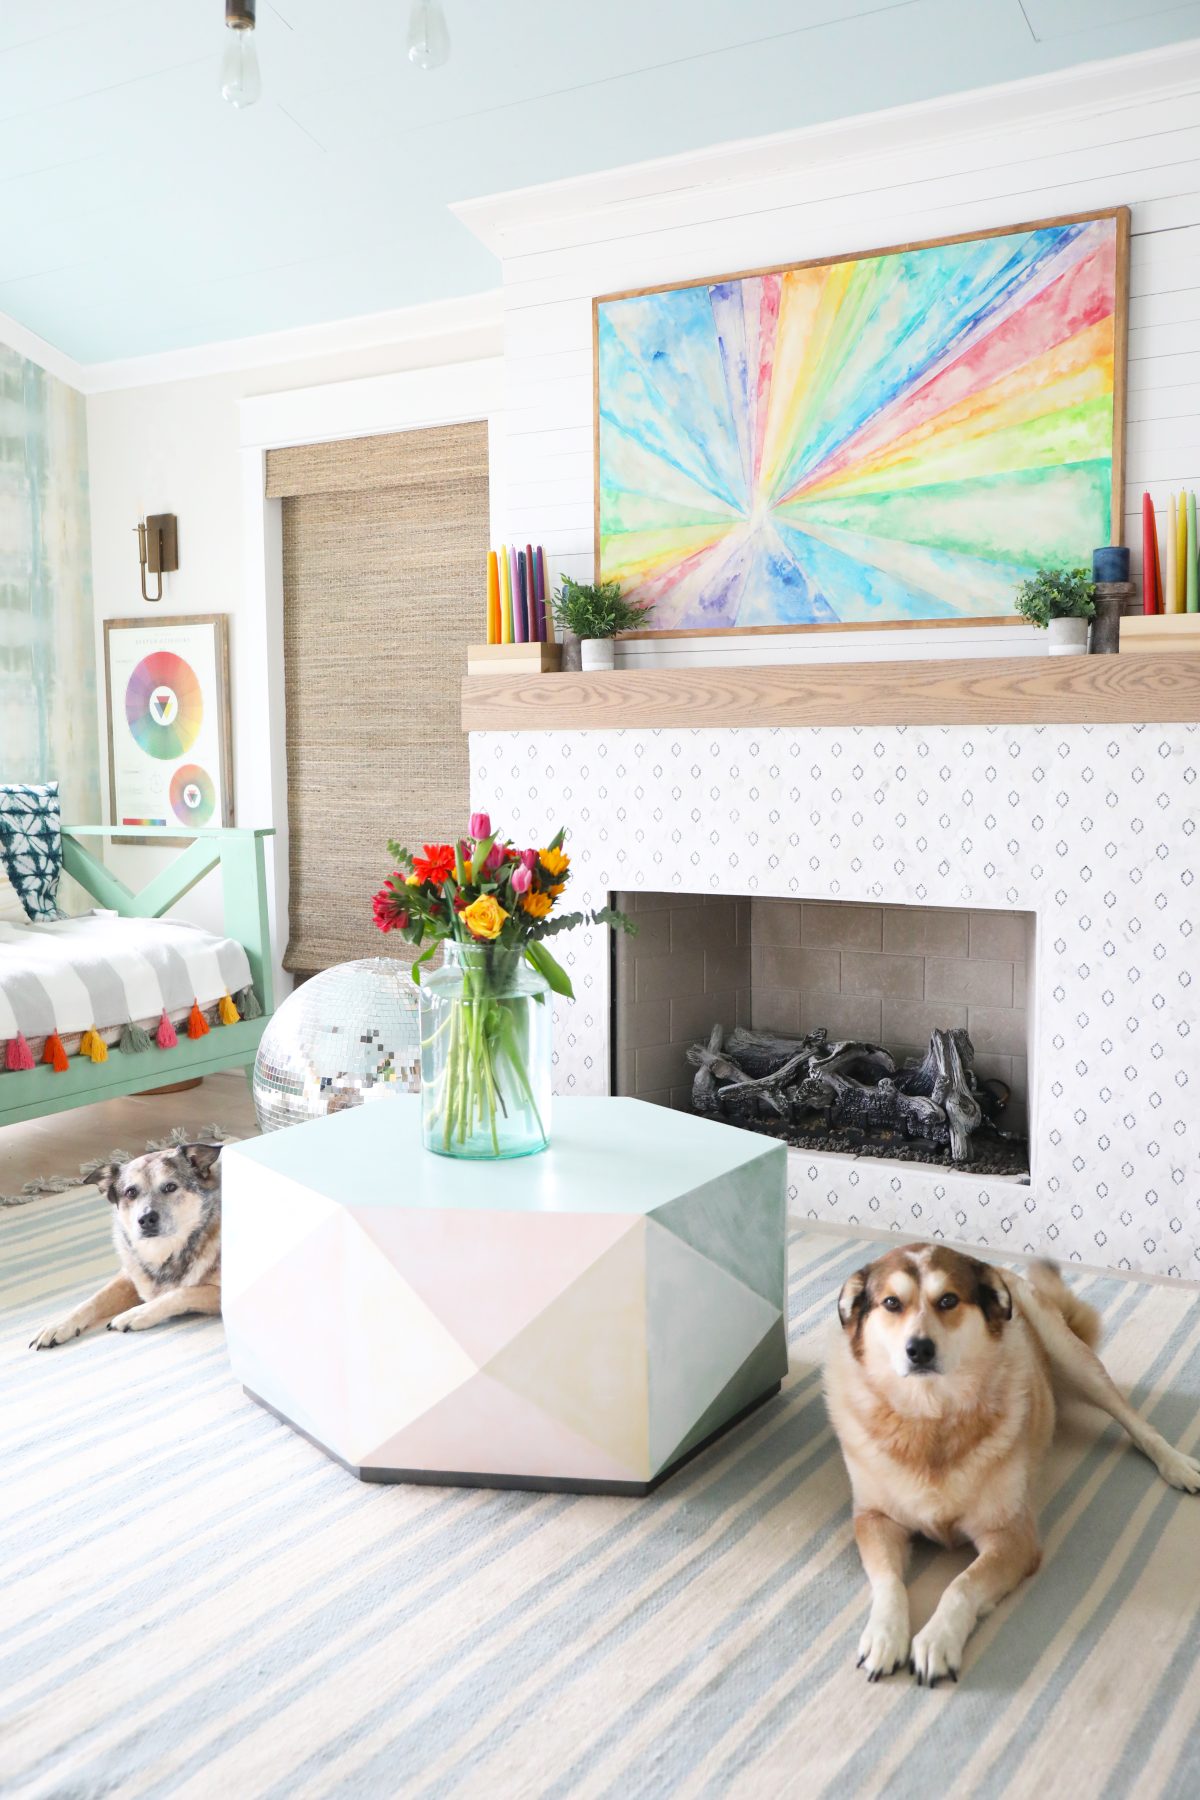
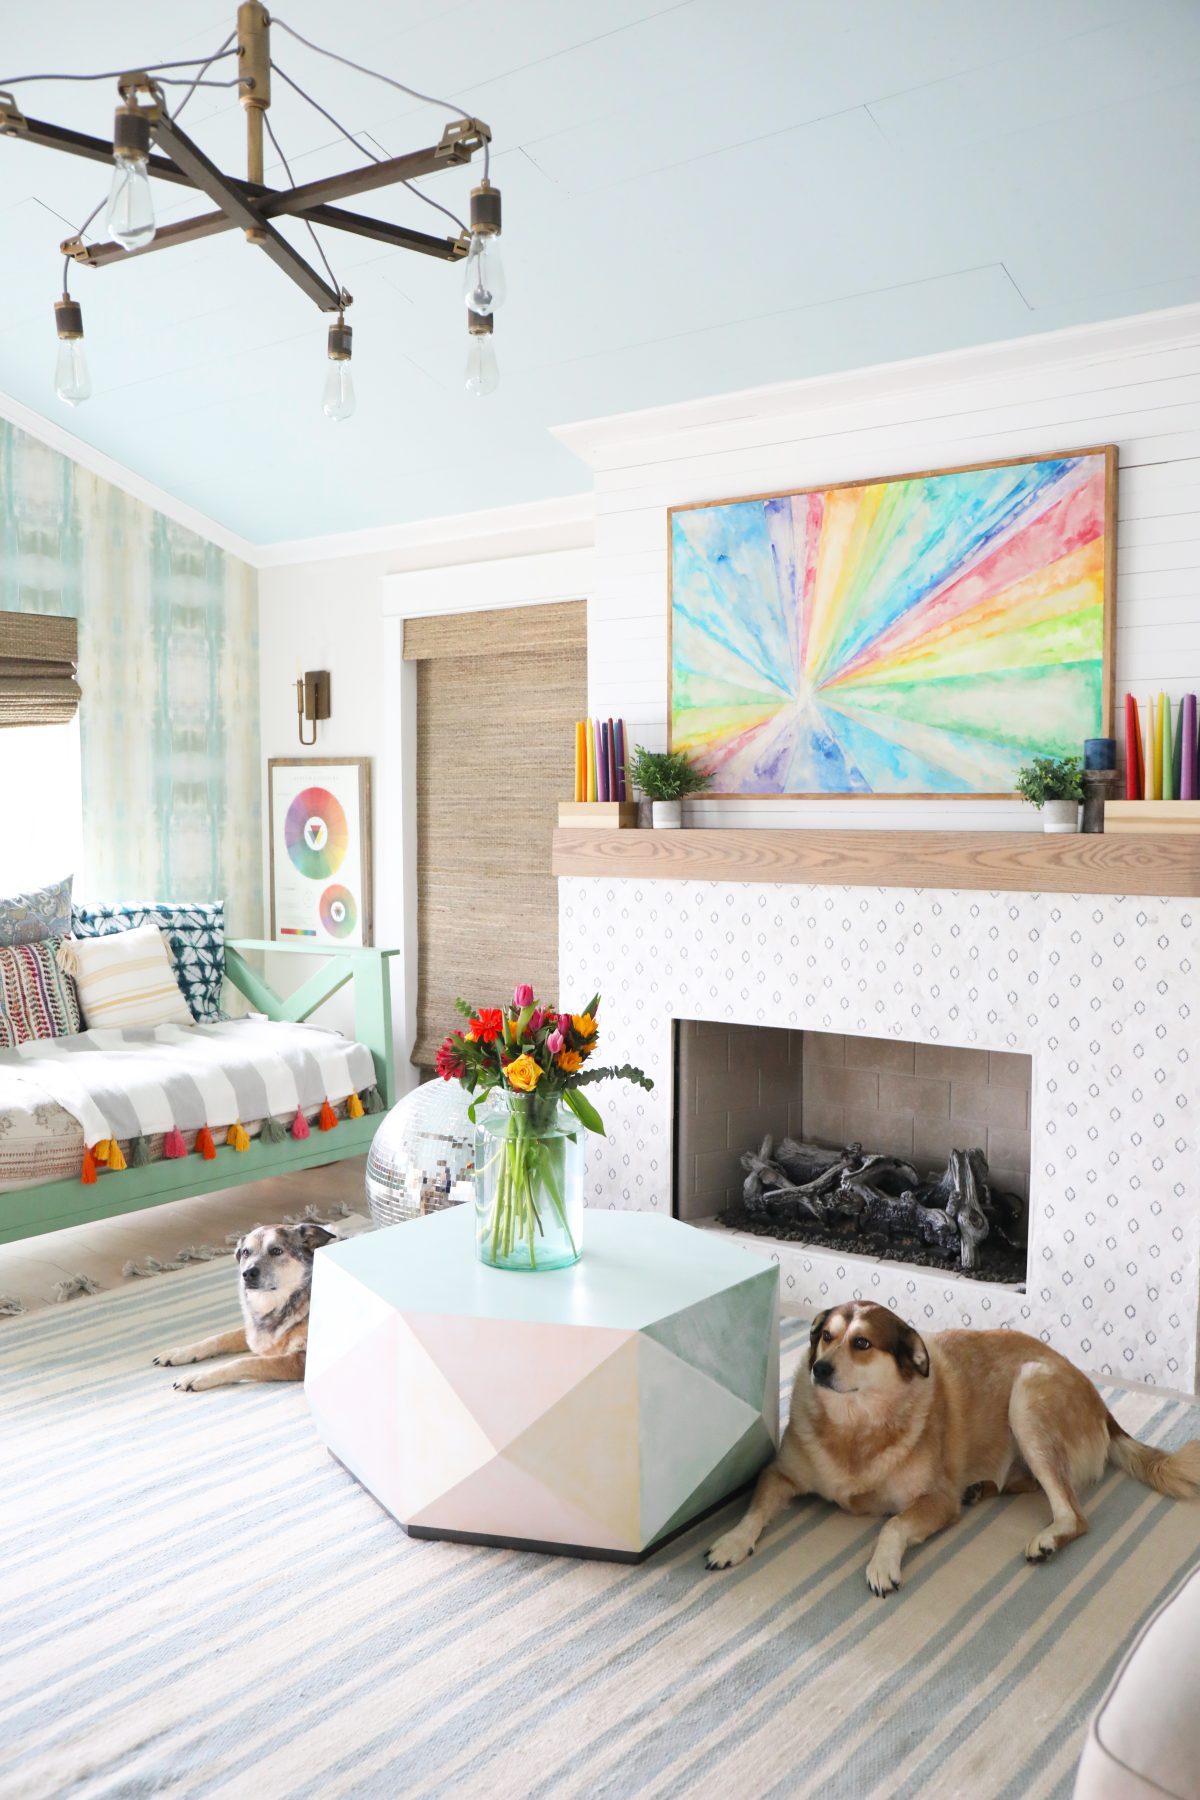
We use this art to hide our little TV alcove, and it’s the perfect addition to our space for spring.
Bring on that warm weather! We are SO ready.
So what do you think of this vintage kaleidoscope art with FrogTape®?
It’s so easy, and fun with a great way to add interest and color to your home. It makes the perfect little weekend project to add a little happy.
Hurray for affordable, easy art!
As always, let us know if you take it on.
And be sure to check out our round up for all of our favorite projects and ideas we’ve been able to tackle with FrogTape®! We hope you find some inspiration here.
Have an inspired day!
{We partnered with and are sponsored by our good friends at Frogtape®. For more info on our branded content please visit our disclosure page.}