
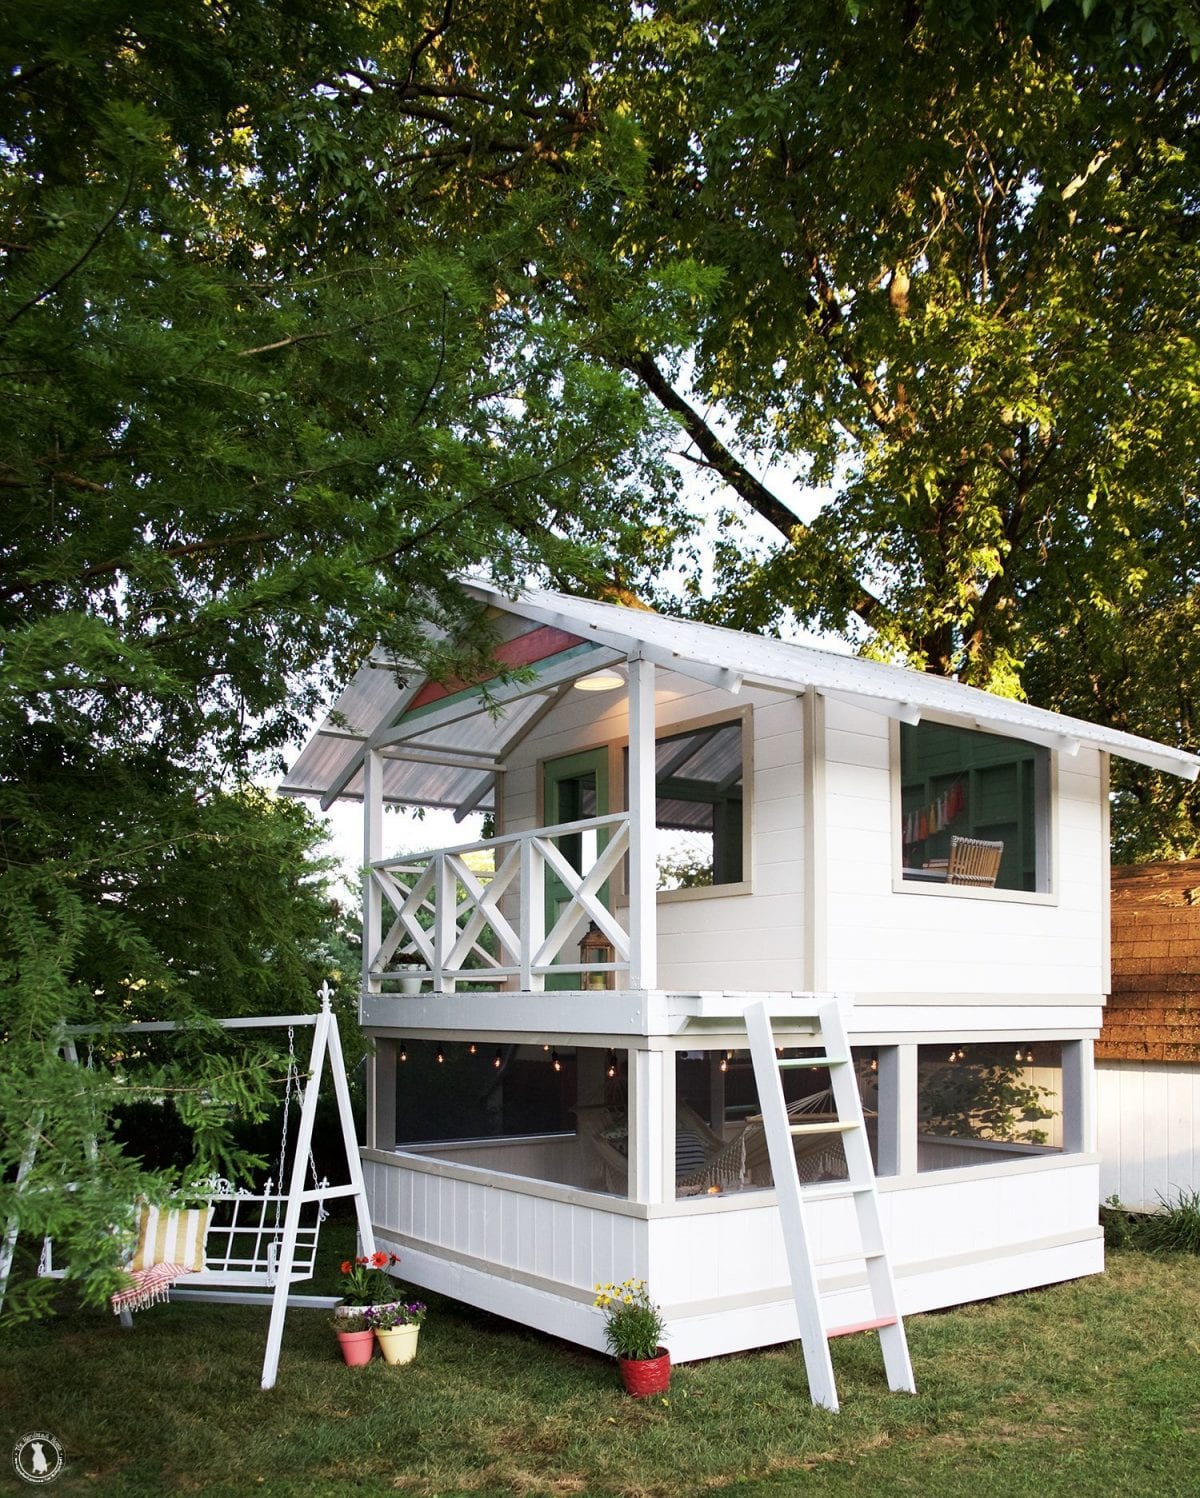
handmade hideaway 2.0 – adding the railings
This might be the shortest post in the series, but also the one that can be the most frustrating, especially if geometry isn’t your friend.
If you haven’t read the three posts before this one go check them out first because it would be weird to build the railing first. You can find the reveal here, how to build the foundation here and starting the framing here.
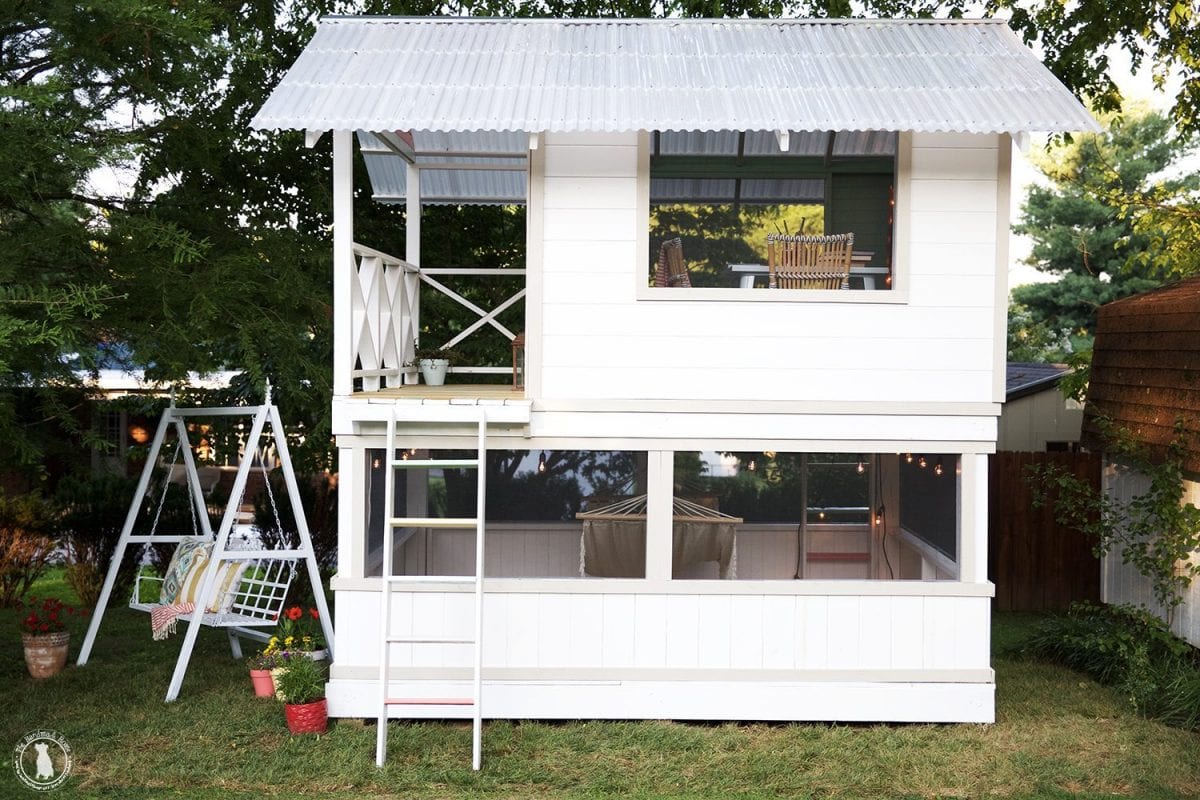
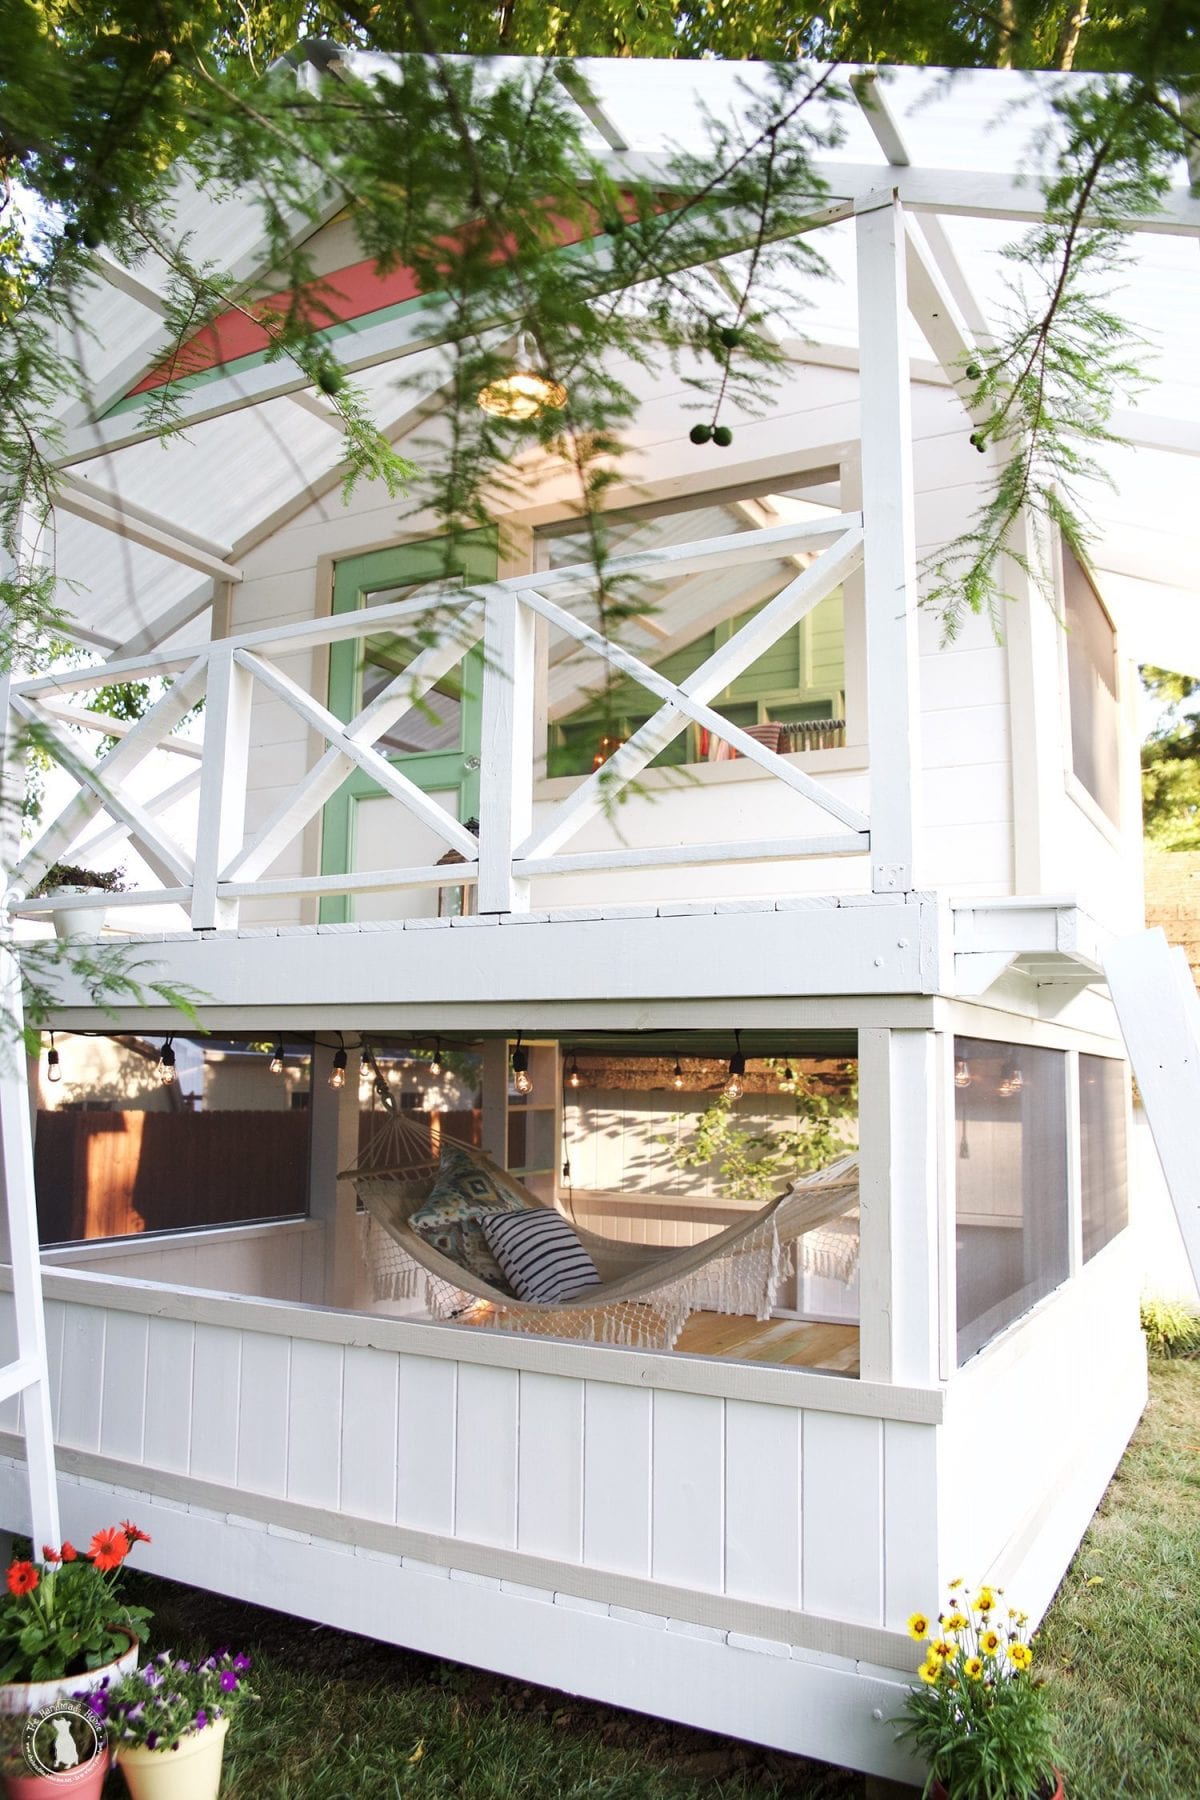
Today we are going to tackle the railing on the second level.
Tools you’ll need:
• Miter saw
• Drill
• Hammer drill
• Tape measure
• 4-foot level
Supplies you’ll need:
• (5) 2 x 4 x 10 YellaWood® pressure treated.
• (2) 4 x 4 x 8 YellaWood® pressure treated.
• (6) 4 x 4 post bases
(12) 18 gauge steel angle piece
box of 2 1/2 inch deck screws
box of 2-inch deck screws.
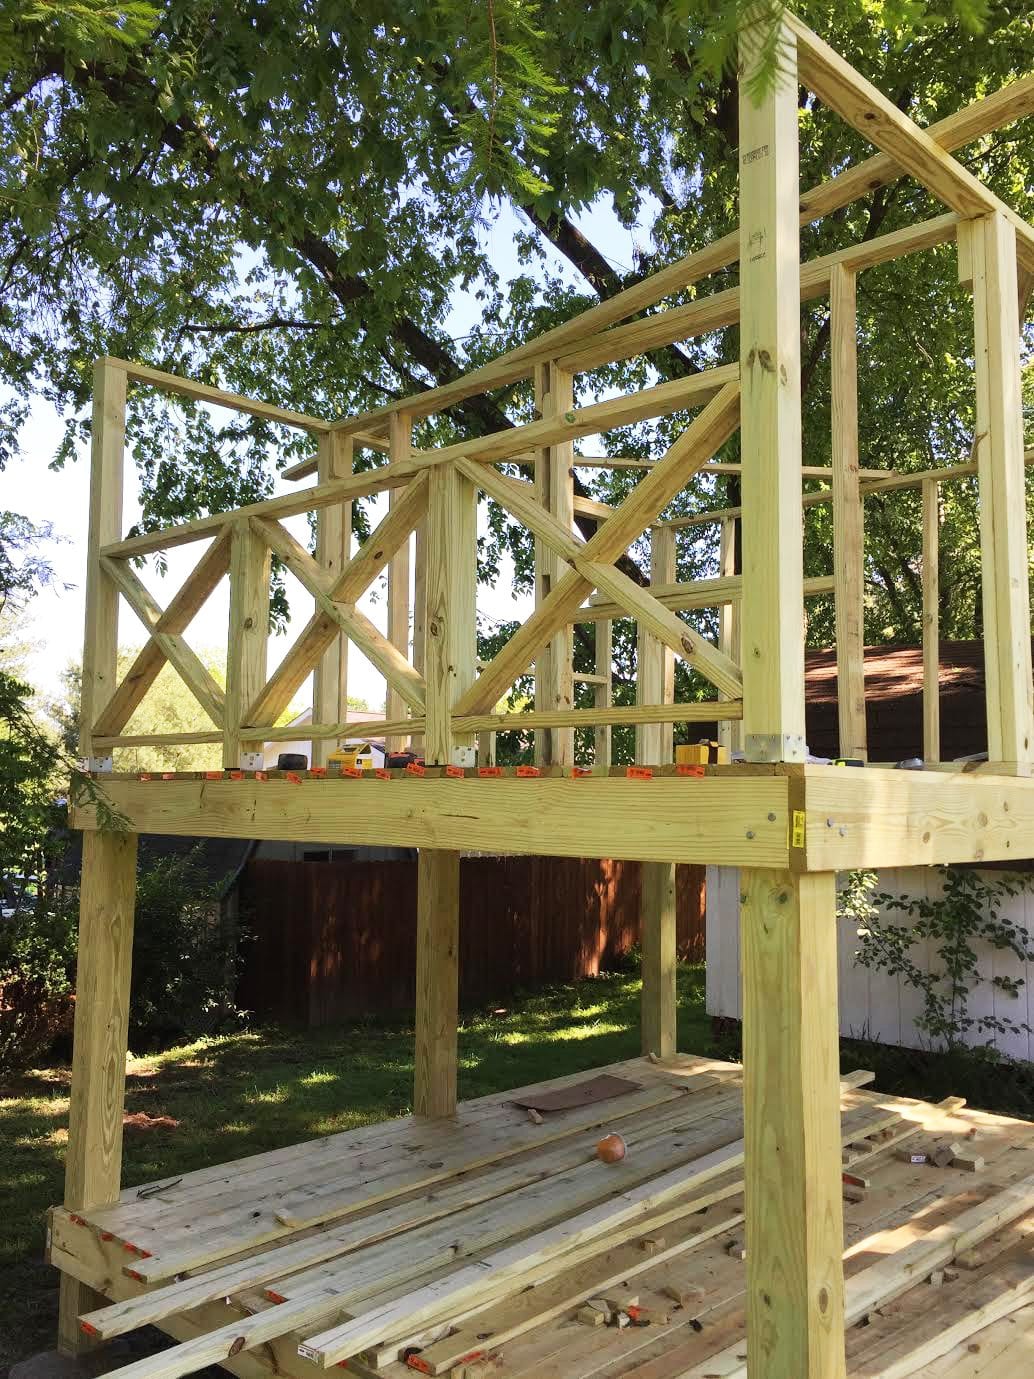
At this point in the build, you should have all 4 walls framed and standing.
There should also be a 2 x 4 x 12 that runs on the top of both side walls, and is extending to the porch area. We’d mentioned you could temporarily brace these. As part of the railing, we will add in the permanent supports.
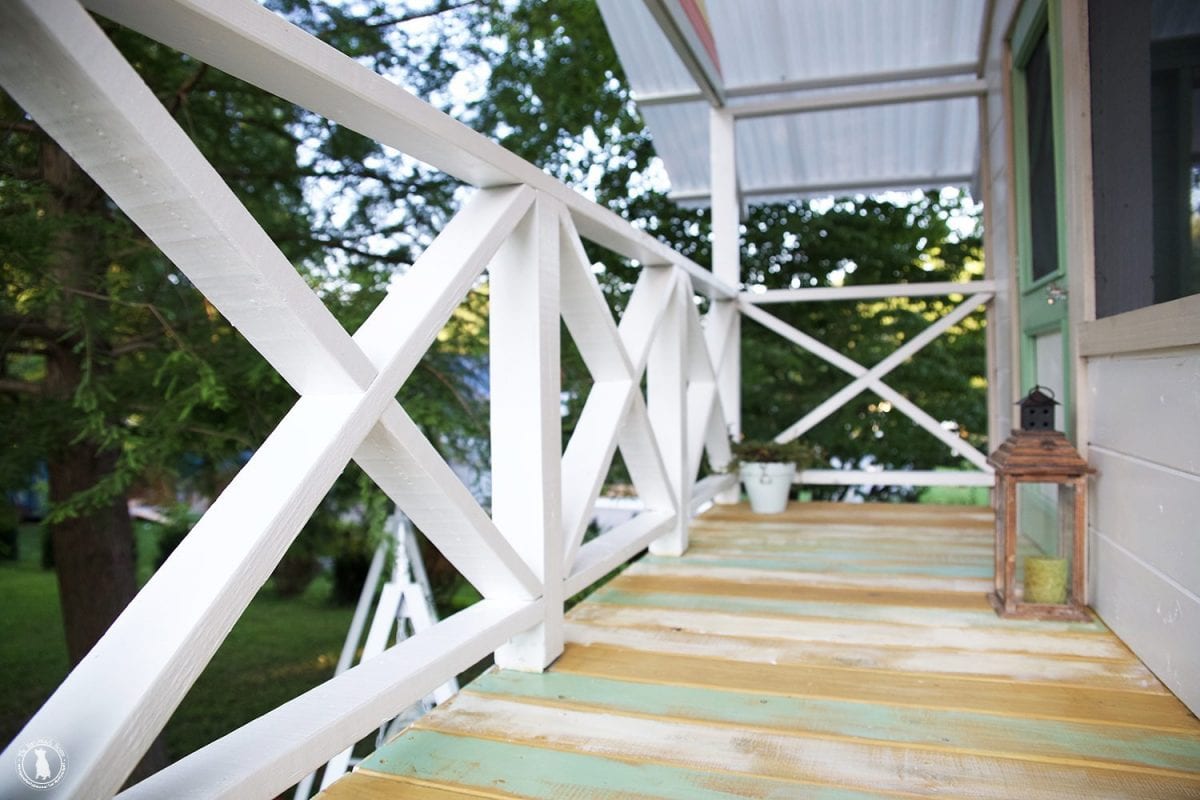
You’ll start by locating where the 4 x 4 supports will be placed on the porch. You want to make sure they stay in line with the wall and are square with each other. This can be tricky without having much of a reference to work off of. However, if your walls are square as they should be it will make everything straightforward.
We located the spot for our post by using a 4-foot level to help keep us in line with the wall.
Because I know my wall is square, I was able to place the level against the wall and use the outside edge of it as my line. I drew a line from the edge of the platform back in 4 inches along the edge of the level. This line would serve as my guide, just like the string did when setting the foundation post. We repeated this process on both sides.
We want the post to be on the edge of the platform, but there is a chance that your boards are a little off, so simply measure from the edge of the wall to the edge of the platform on both sides. If they are the same, great. If there is a 1/8 inch or more difference, add that into the next step.
Assuming the measurements were the same, now measure in from the edge of the deck 3 1/2 inches and draw a line. If one was longer add that measurement to the 3 1/2 inches and draw a line. This line will serve as your other guide.
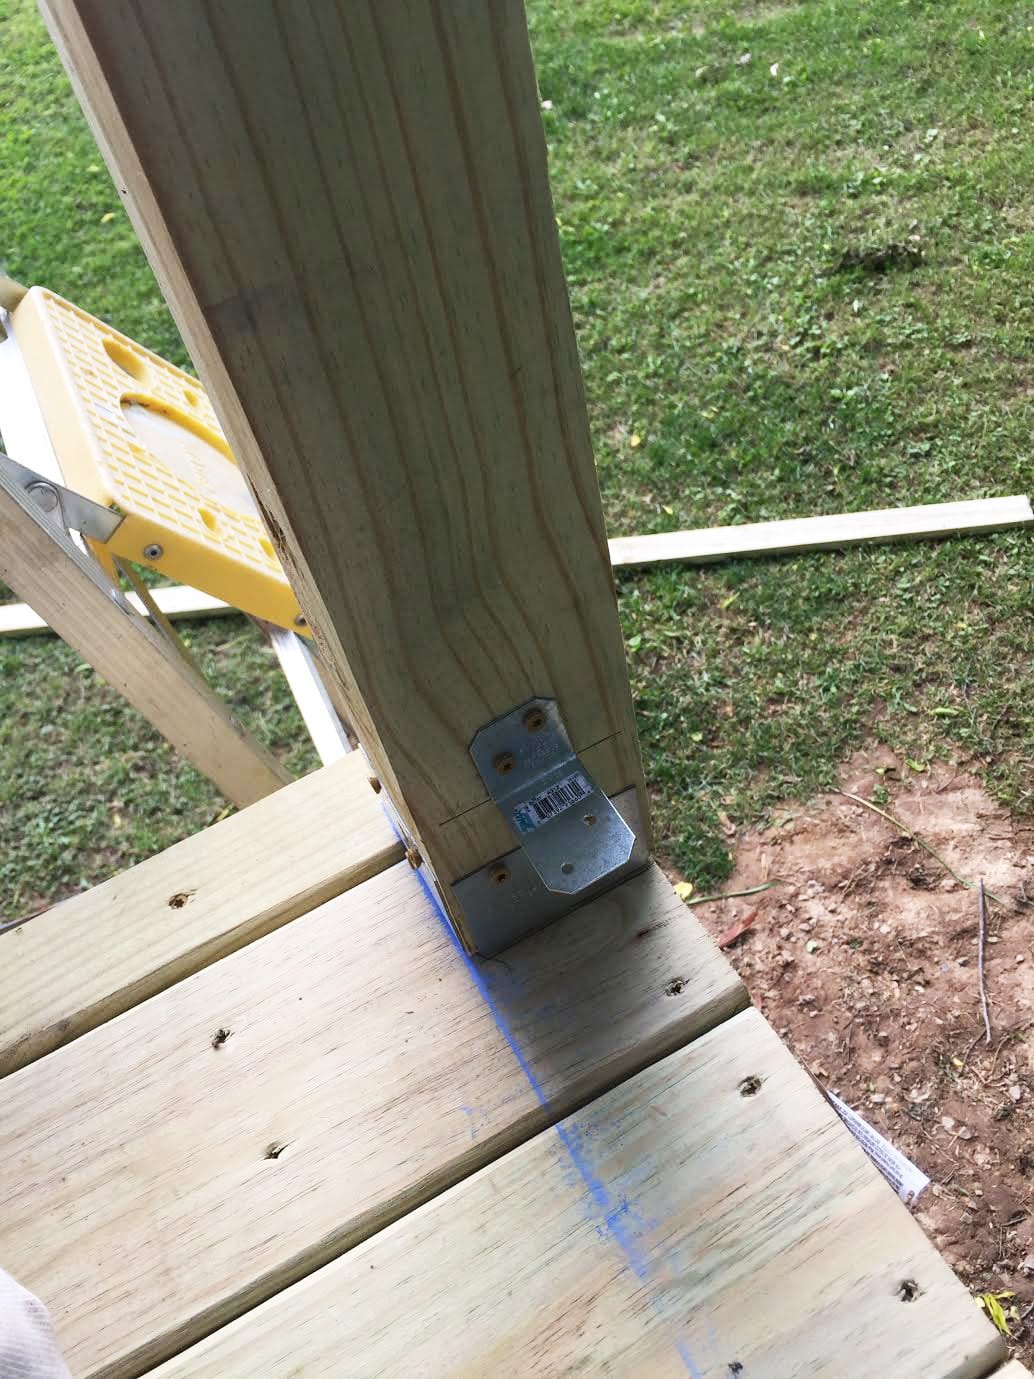
Using these lines, you’ll want to place your 4 x 4 post base and screw them into the decking with 2-inch screws. (Note you’ll be using (2) 2-sided post bases.
Now cut both 4 x 4’s down to 62 inches, and set each one in a post base. Then screw the post base to the 4 x 4 with 2-inch screws. Also, screw the 2 x 4 x 12 into the 4 x 4 post from the top.
Once this is done, take a caulk line and pop a line from one post to the next. This will give you your line for the center post.
You’ll want to measure and cut one of your 2 x 4 x 10’s down to 113 1/2 inches and the remaining 4 x 4’s down to (2) 30-inch pieces.
Next, measuring from the inside of one post, measure 35 1/2 towards the center and draw a line.
From that line, measure 3 1/2 inches, and place a mark.
From that line measure 35 1/2 inches, and place a mark.
From that line measure 3 1/2 inches, and place a mark.
These marks along with the caulk line will give you the placement of your (2) 30 inch 4 x 4 posts. With these, you only have to use one post base.

Secure the 4 x 4 pieces using the base caps, and then lay the 2 x 4 you cut to 113 1/2 inches on top of it. Make the same marks on it that you did on the decking for the base caps. These marks will tell you where to secure the 4 x 4 using 2 1/2 inch screws.
Once the 2 x4 is secured to the 4 x 4’s in the center, you should be able to pull the outside 4 x 4’s into the edge of the 2 x 4 and secure it with an 18 gauge steel angle piece and some 2-inch screws. You can also at this point, secure the 4 x 4 to the 2 x 4 x 12 that was left hanging in the last portion of the build.
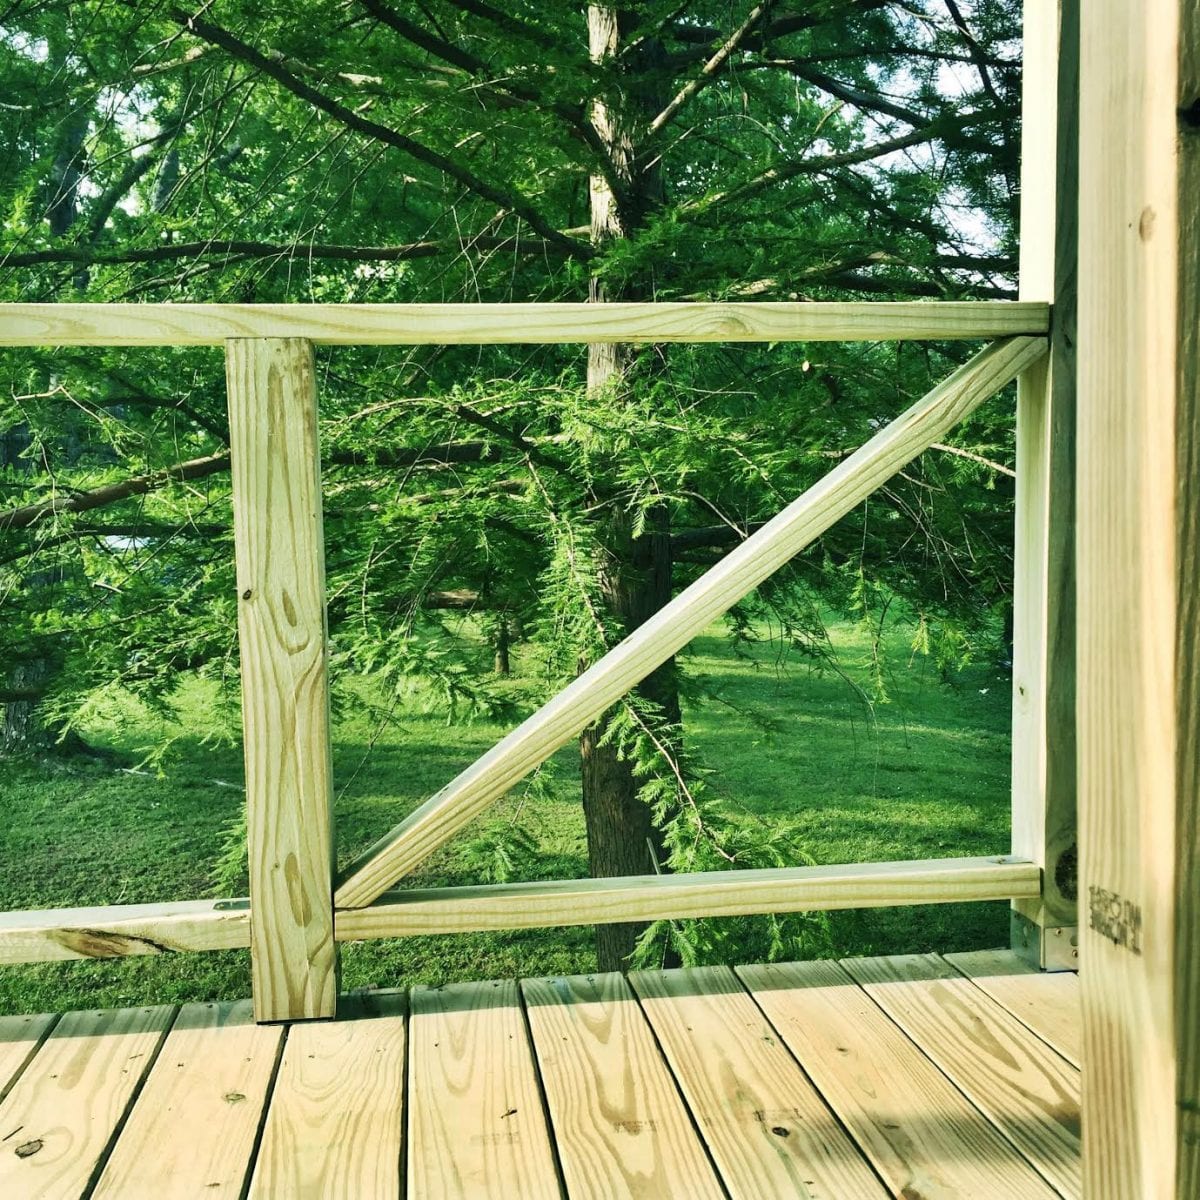
Now cut a 2 x 4 x 10 into (3) 35 1/2 inches and attach them to the bottom portion of the railing between the 4 x 4 post. We did this at 3 3/4 inches off the decking.

To form the “X” pattern in the middle, you need to cut 2 x 4’s to these lengths. (But don’t make straight cuts yet, keep reading.)
• (3) 44 1/4
• (6) 21 1/2
We might suggest cutting them as you need them to make sure your build is matching ours. If you are a little off square or any other measurement is off, then yours could be different. To measure your own, just measure from one corner to the other. The angle of the cut is what matters most.
To get these pieces, take a 2 x 4 and cut one end at a 50-degree angle, then flip it and cut it on a 34-degree angle. Measure down the board 44 1/4 inches and perform the same cuts but on opposing sides, making sure the point hits the 44 1/4 inch mark you made.
You’ll make this same type of cut for each long piece of an “X”.
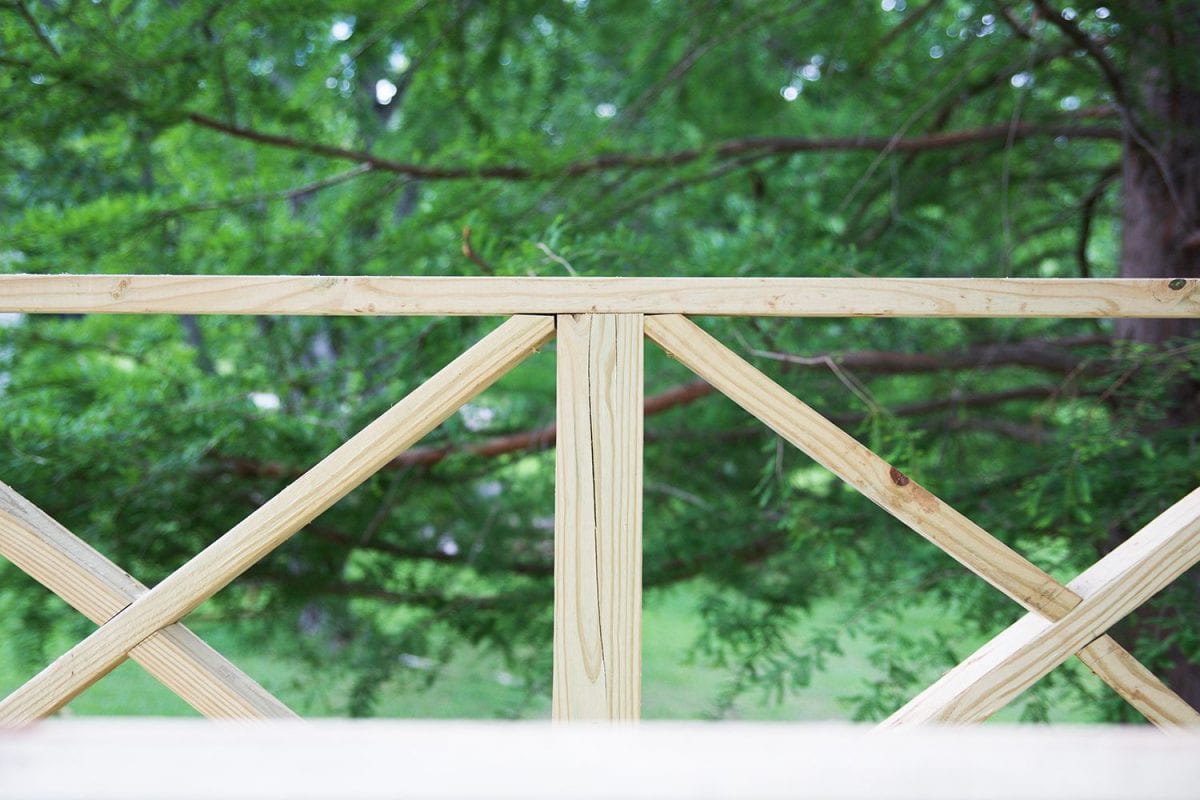
For the 21 1/2 piece, make the same degree cuts on one end. But on the other end, you cut the angle at 16 degrees. Again, a simple and one of the best ways to check your angle is to cut the piece a little longer, place it next to where it is going and simply draw a line. Then line your miter saw blade up with it and make your cut.
You’ll make these same cuts for each section and screw them all in with 2 1/2 inch screws.
You’ll also need to make a section for the edge of the porch that won’t have the ladder.
The top and bottom railing will be 38 inches long and the “X” will be (1) 44 1/2 piece and (2) 21 1/2 pieces with the same angles as before.
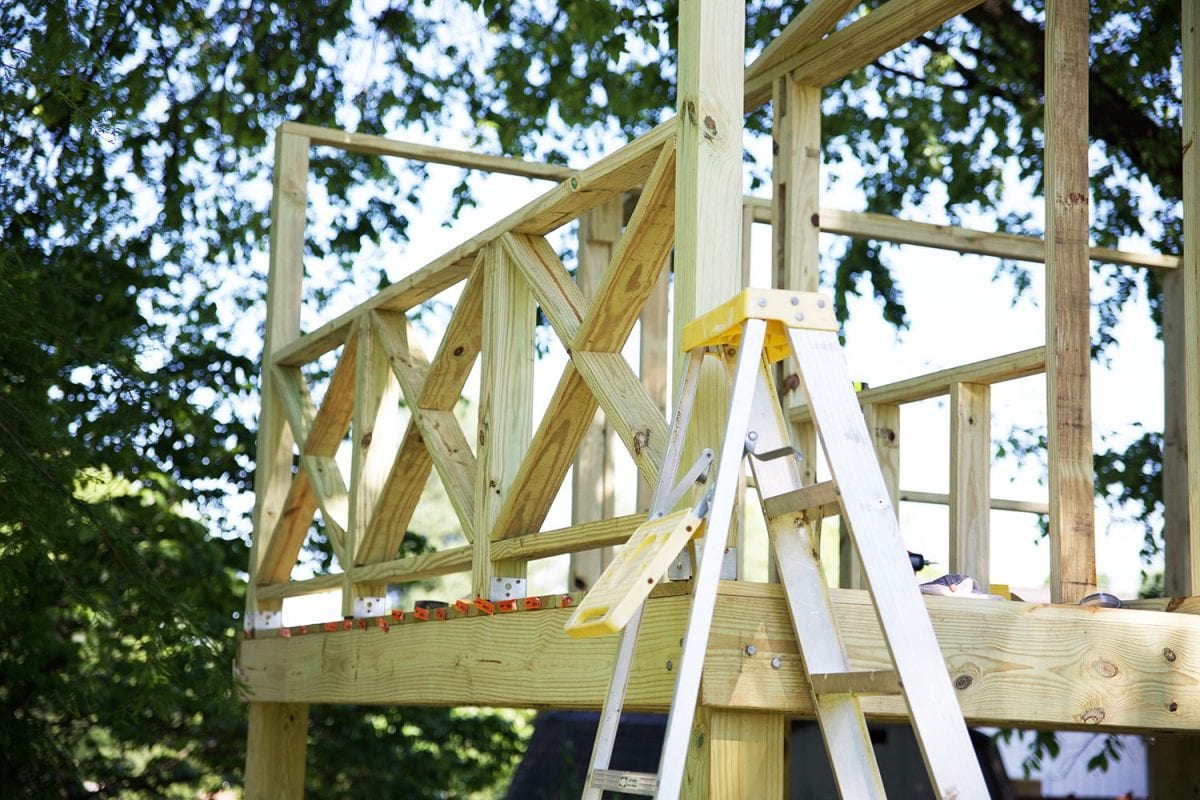
Now you should be able to remove any bracings you had holding any of the framing in place as all four walls and the railing should work together to keep things in place.
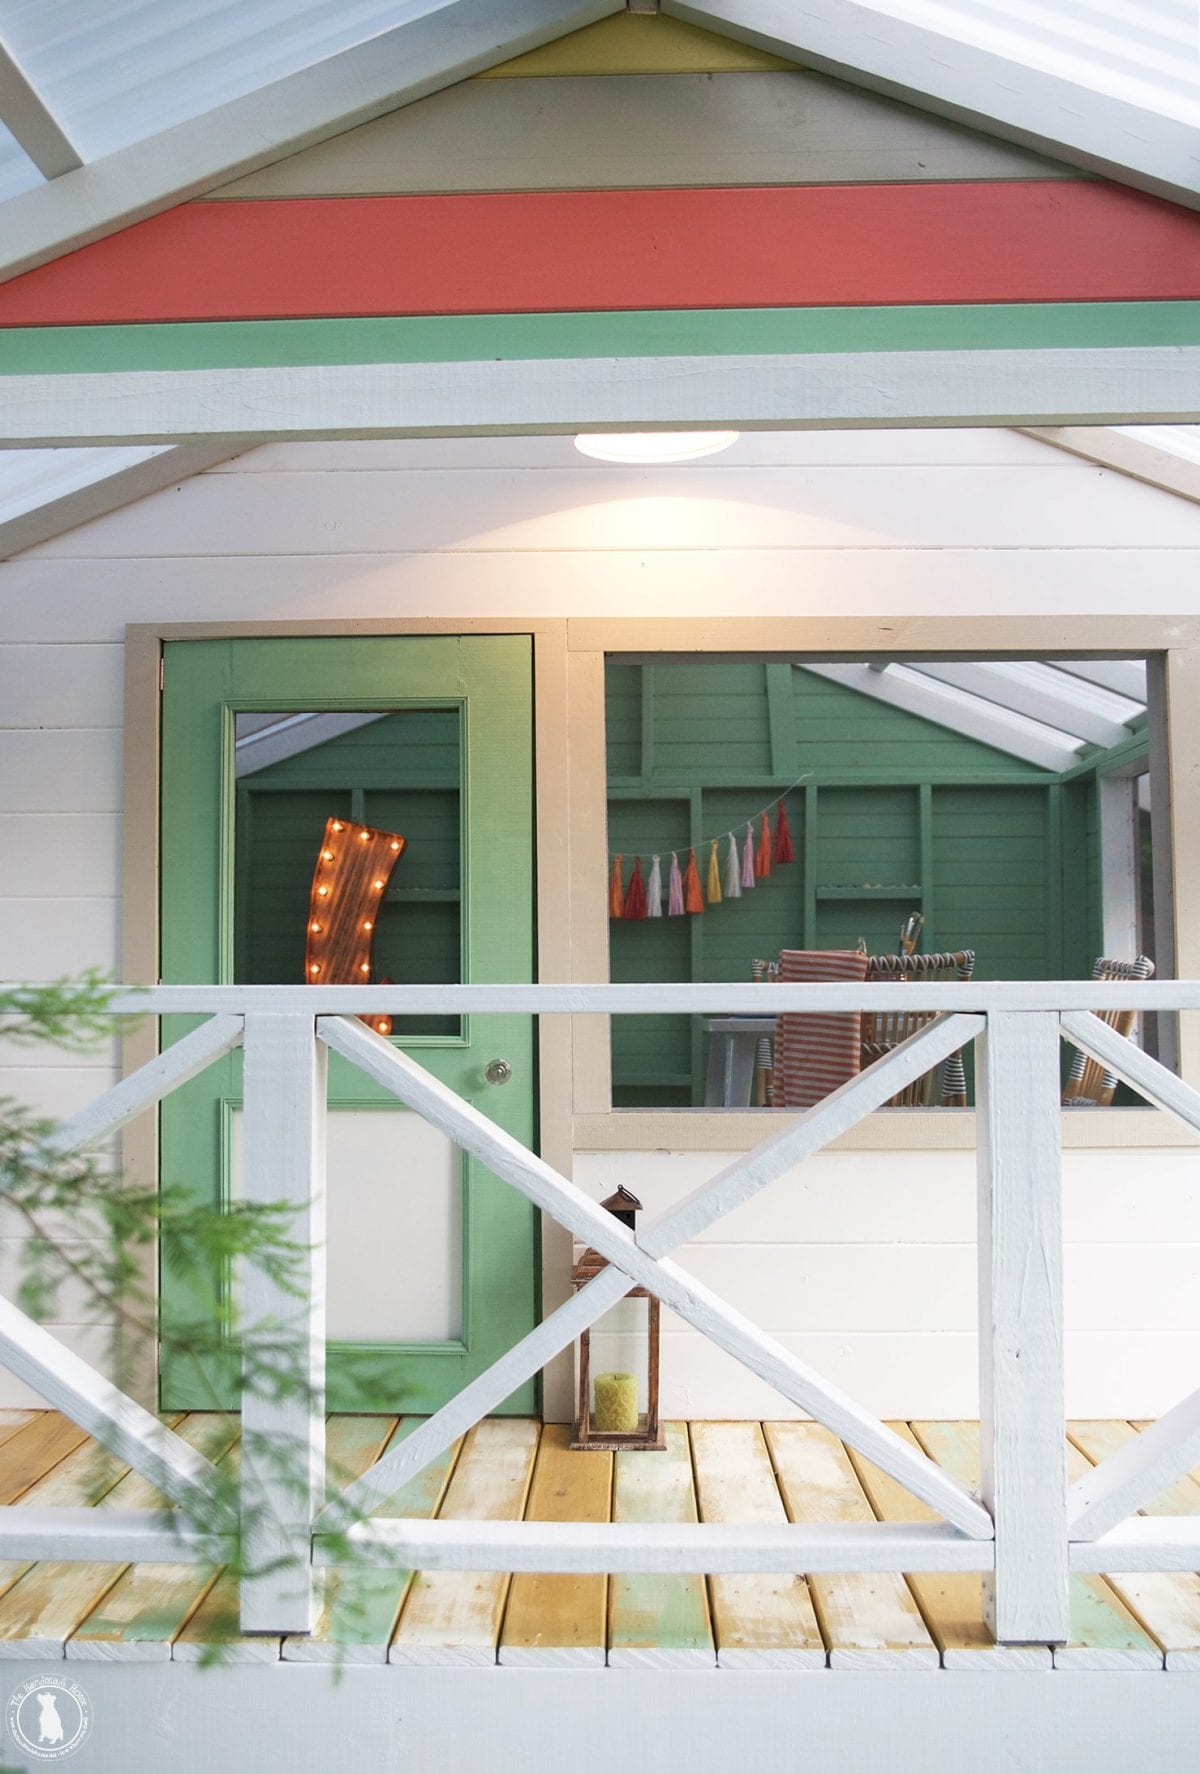
It’s really crazy how paint transforms it… but more on that, coming up!
Next up: framing the roof and siding!
Stay tuned… and as always, if you’re building any of the versions be sure to share with the hashtag #handmadehideaway on instagram. We’d love to see!
To see this entire series, be sure to check it out here …and as always, our fabulous reader creations, here!
Have an inspired day!
This little s=escape is so very cool! I adore it! Would love this in my yard!
Love the new, bigger backyard fort! Thanks for sharing! Any idea when you’ll be posting about the siding and framing the roof? We’re getting ready to start attempting to build this. Thanks again!
Hi Megan! That post will be up this next week, ASAP! Hope that helps!
Thank you! I have a question about the Tuftex roofing. With it being translucent and allowing a lot of light in, does the inside get extremely hot in the summer?
Awsunnnnn
Thank you so much! I will make one for my kids very soon, just like yours
Thank you!
Hi there! Did you ever post the instructions for framing the roof? Thanks 🙂
Hey, Nicholas, we sure did and you can find that tutorial below. I hope that helps and happy building. Also we’d love to see you share your work on social media using the #handmadehideaway
https://www.thehandmadehome.net/handmade-hideaway-2-0-framing-roofing/