
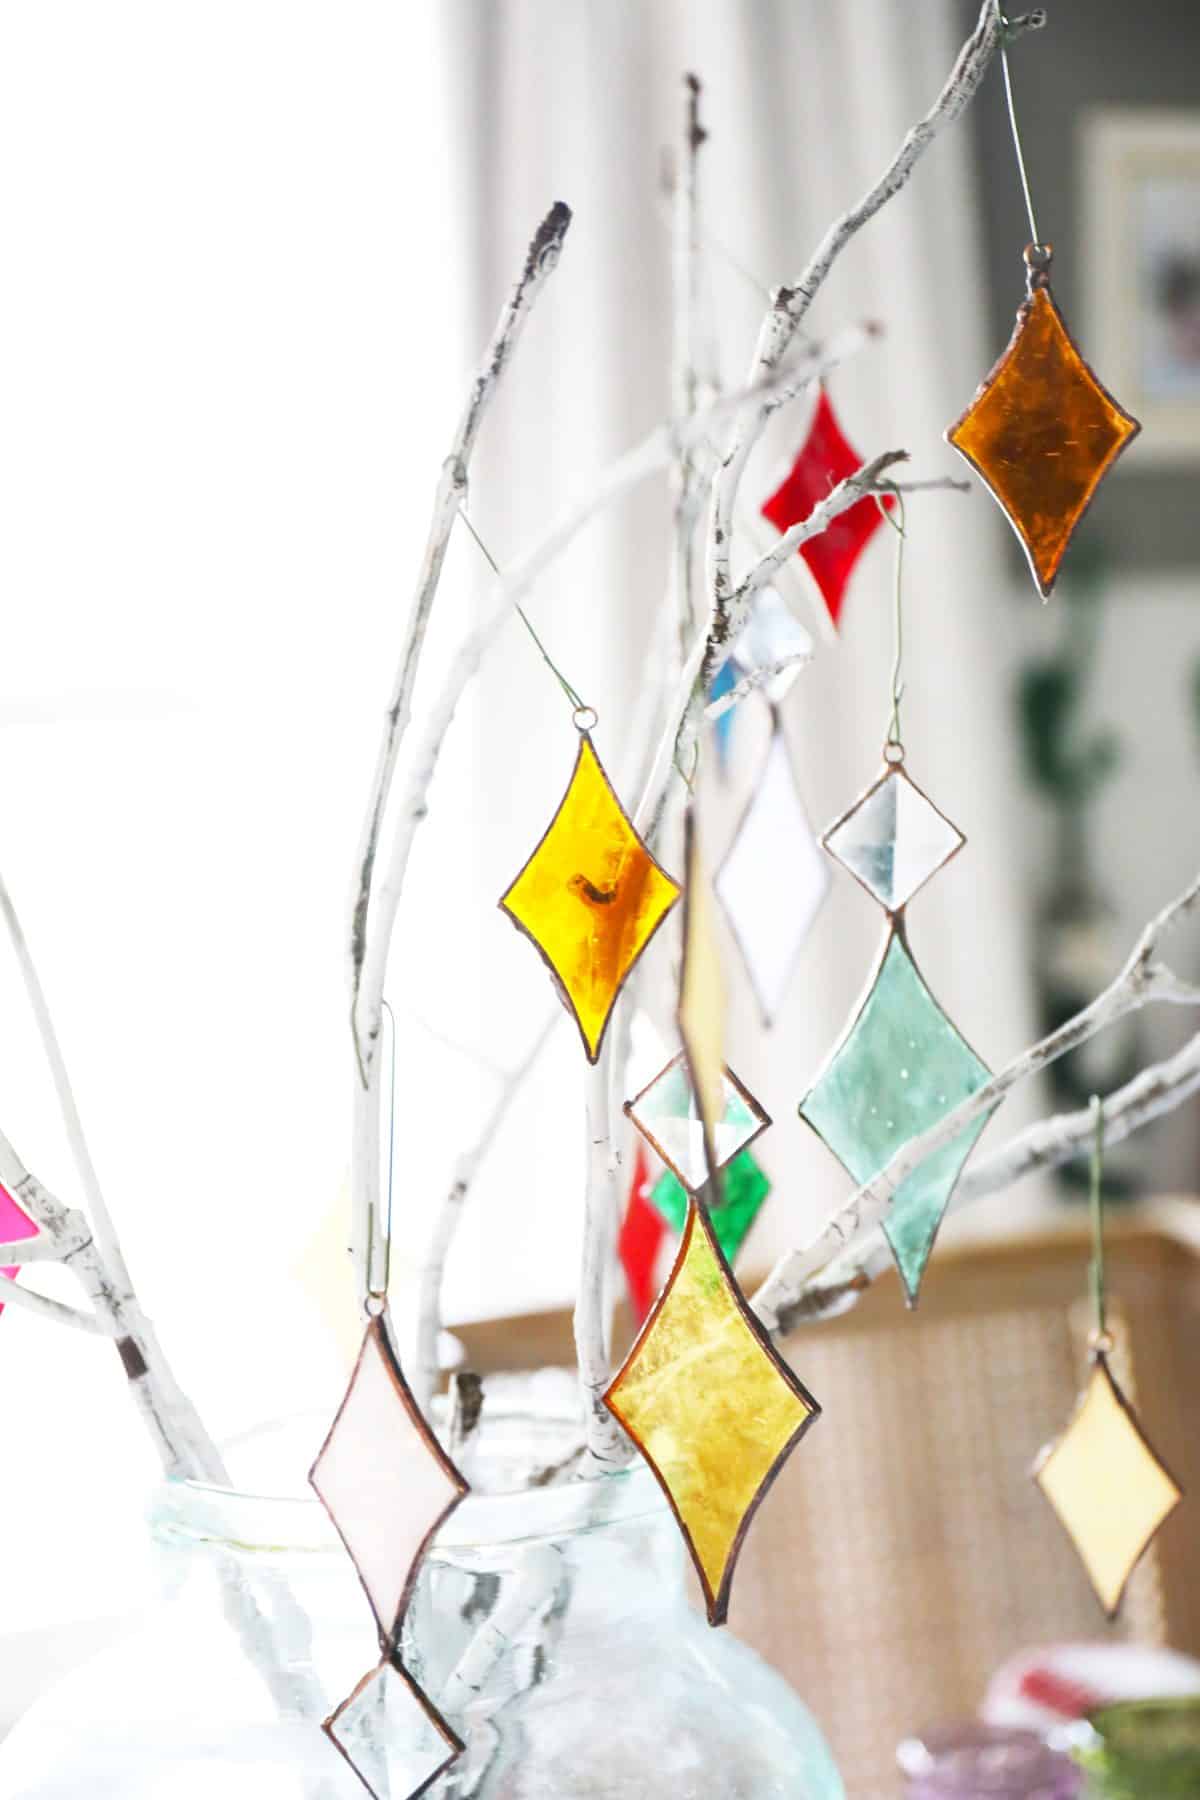
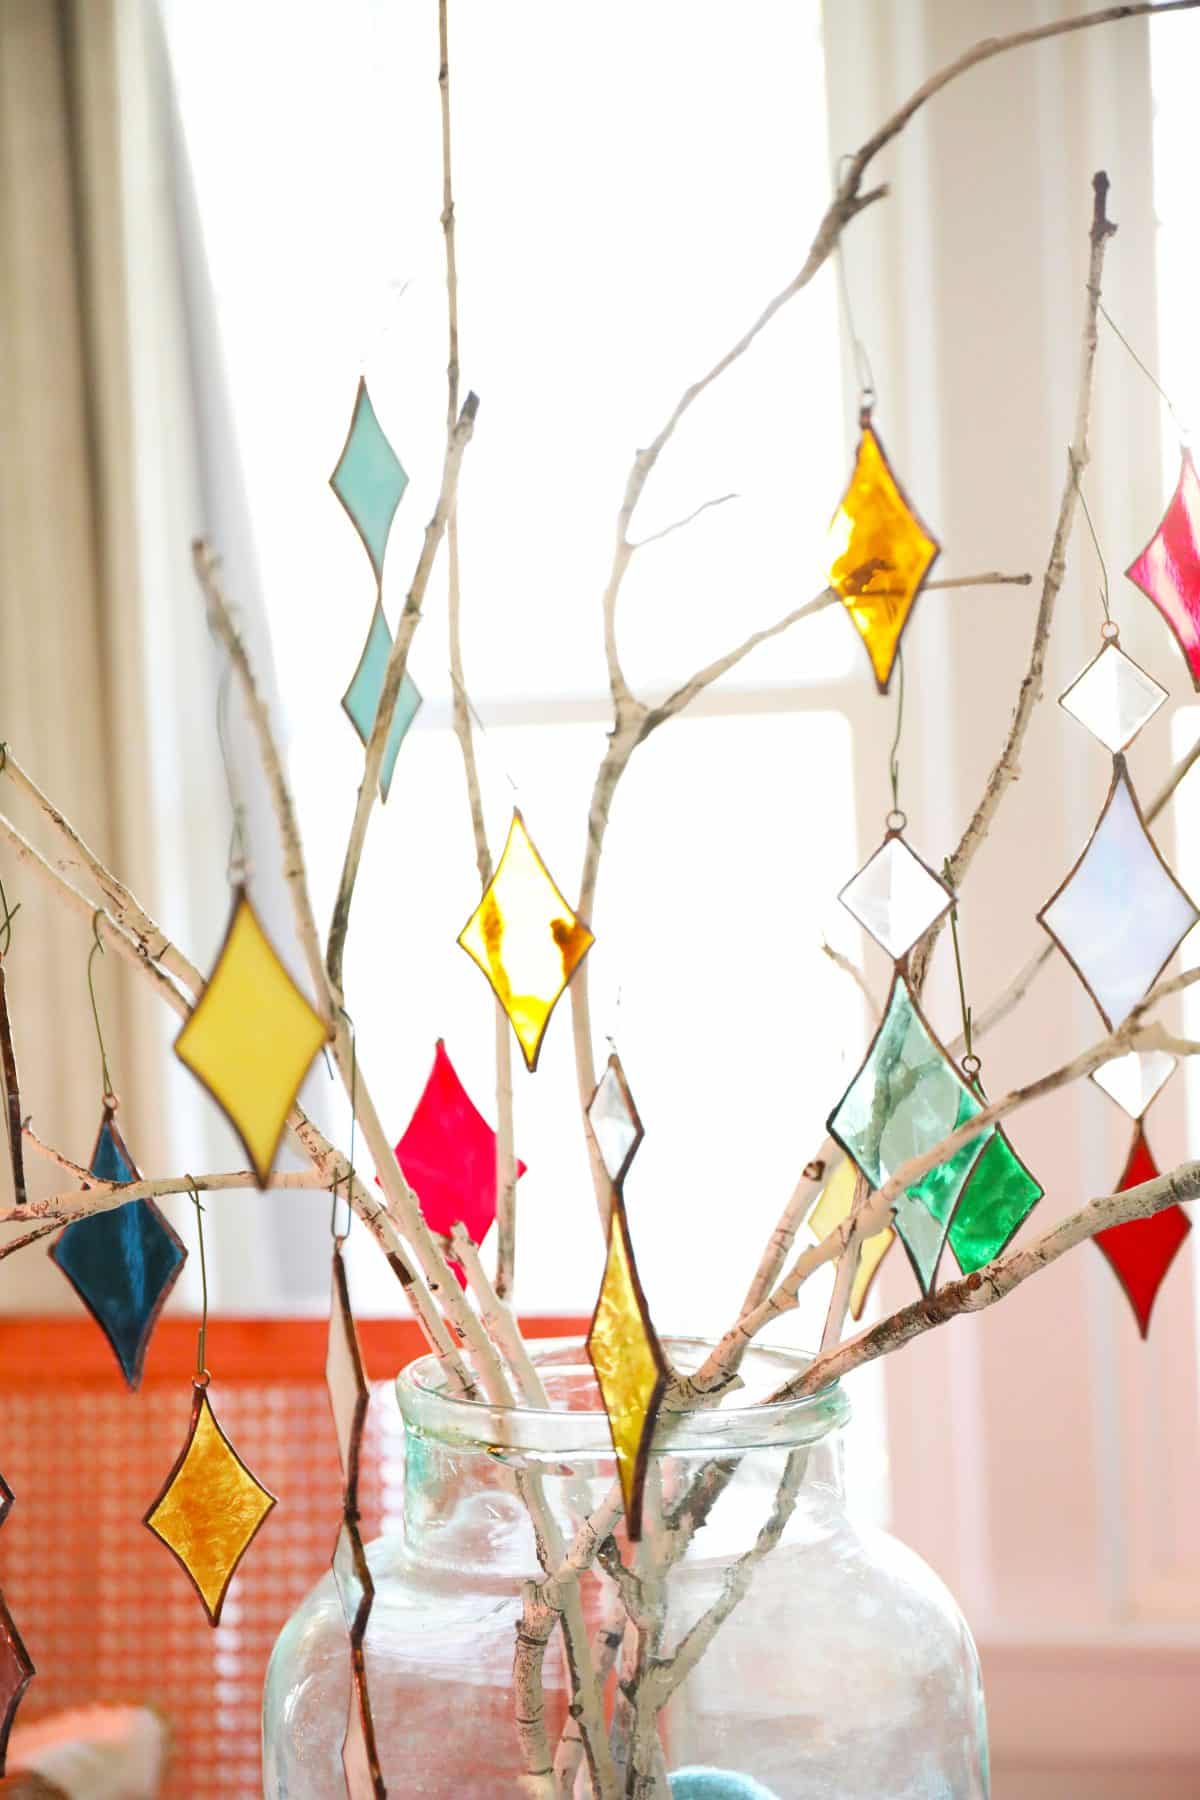
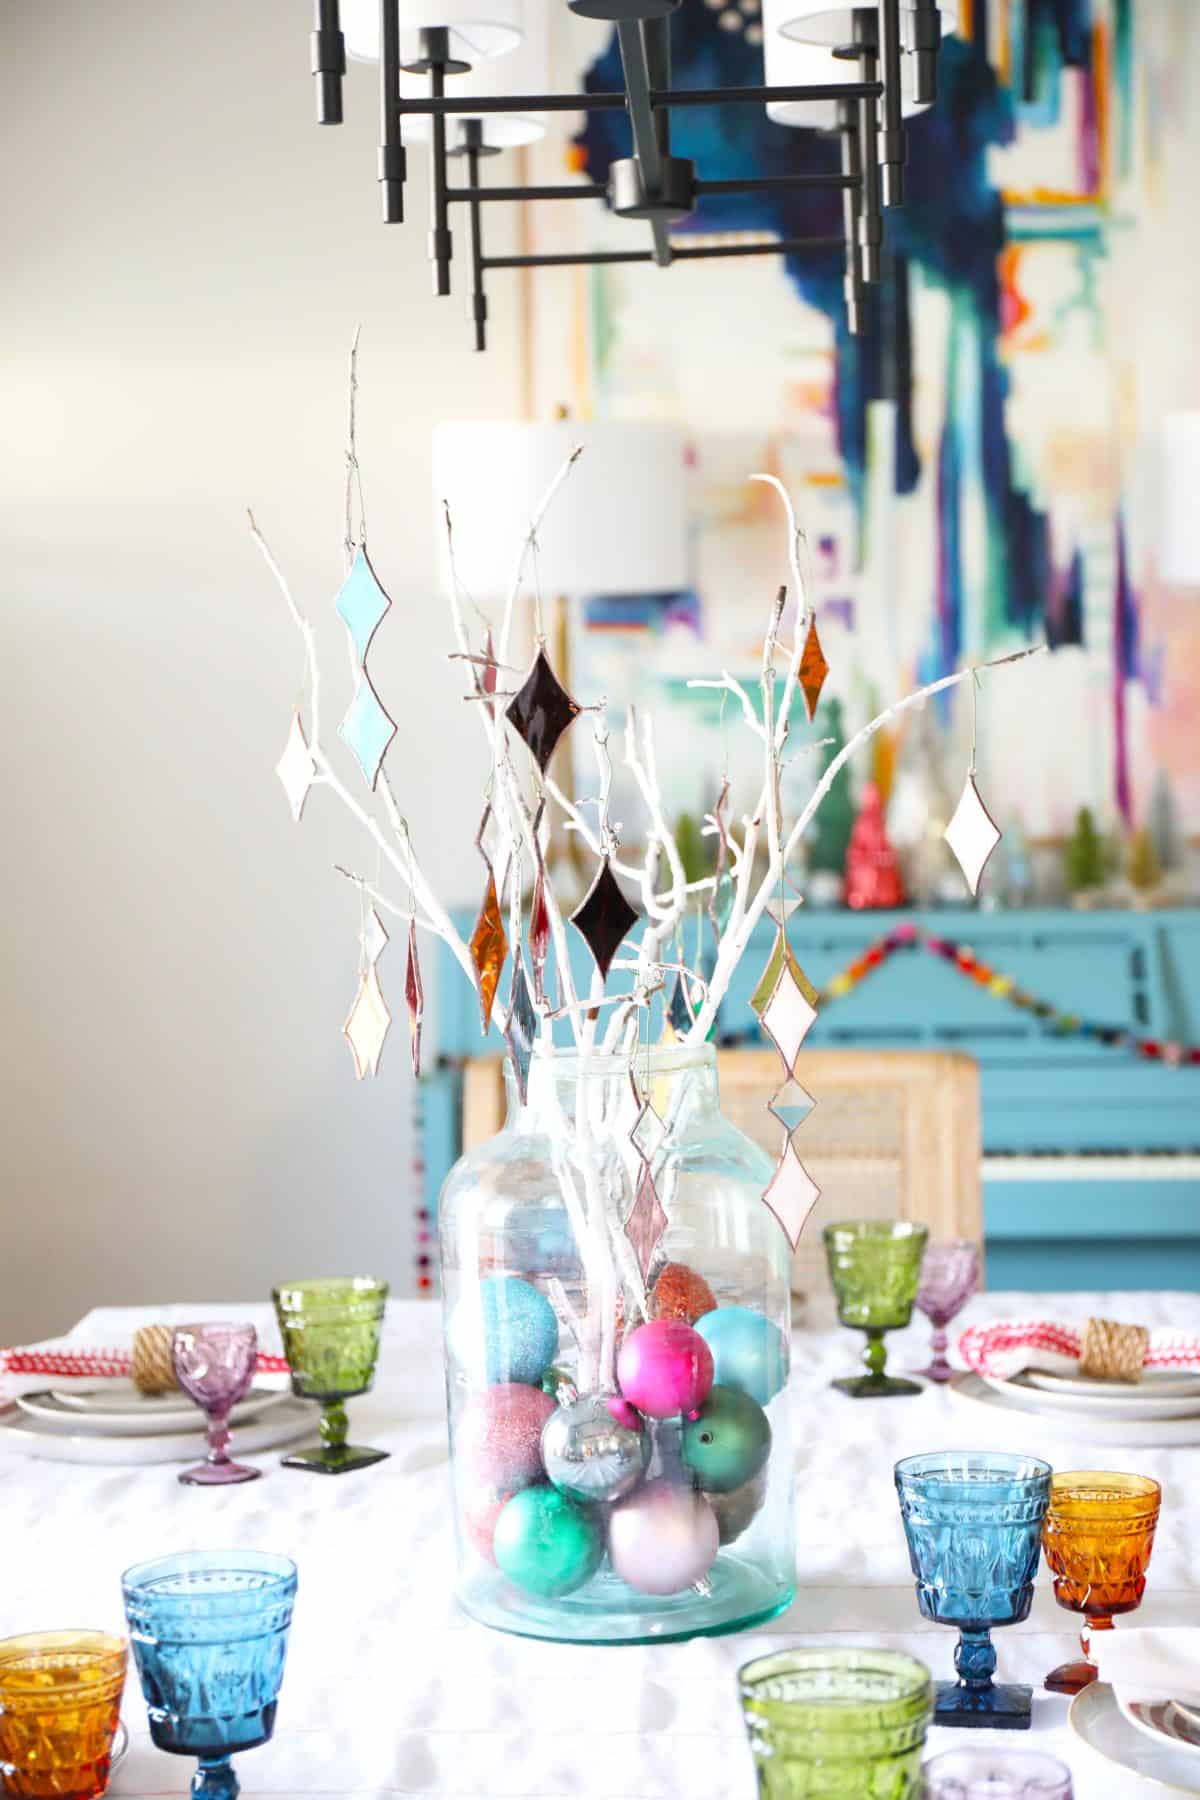
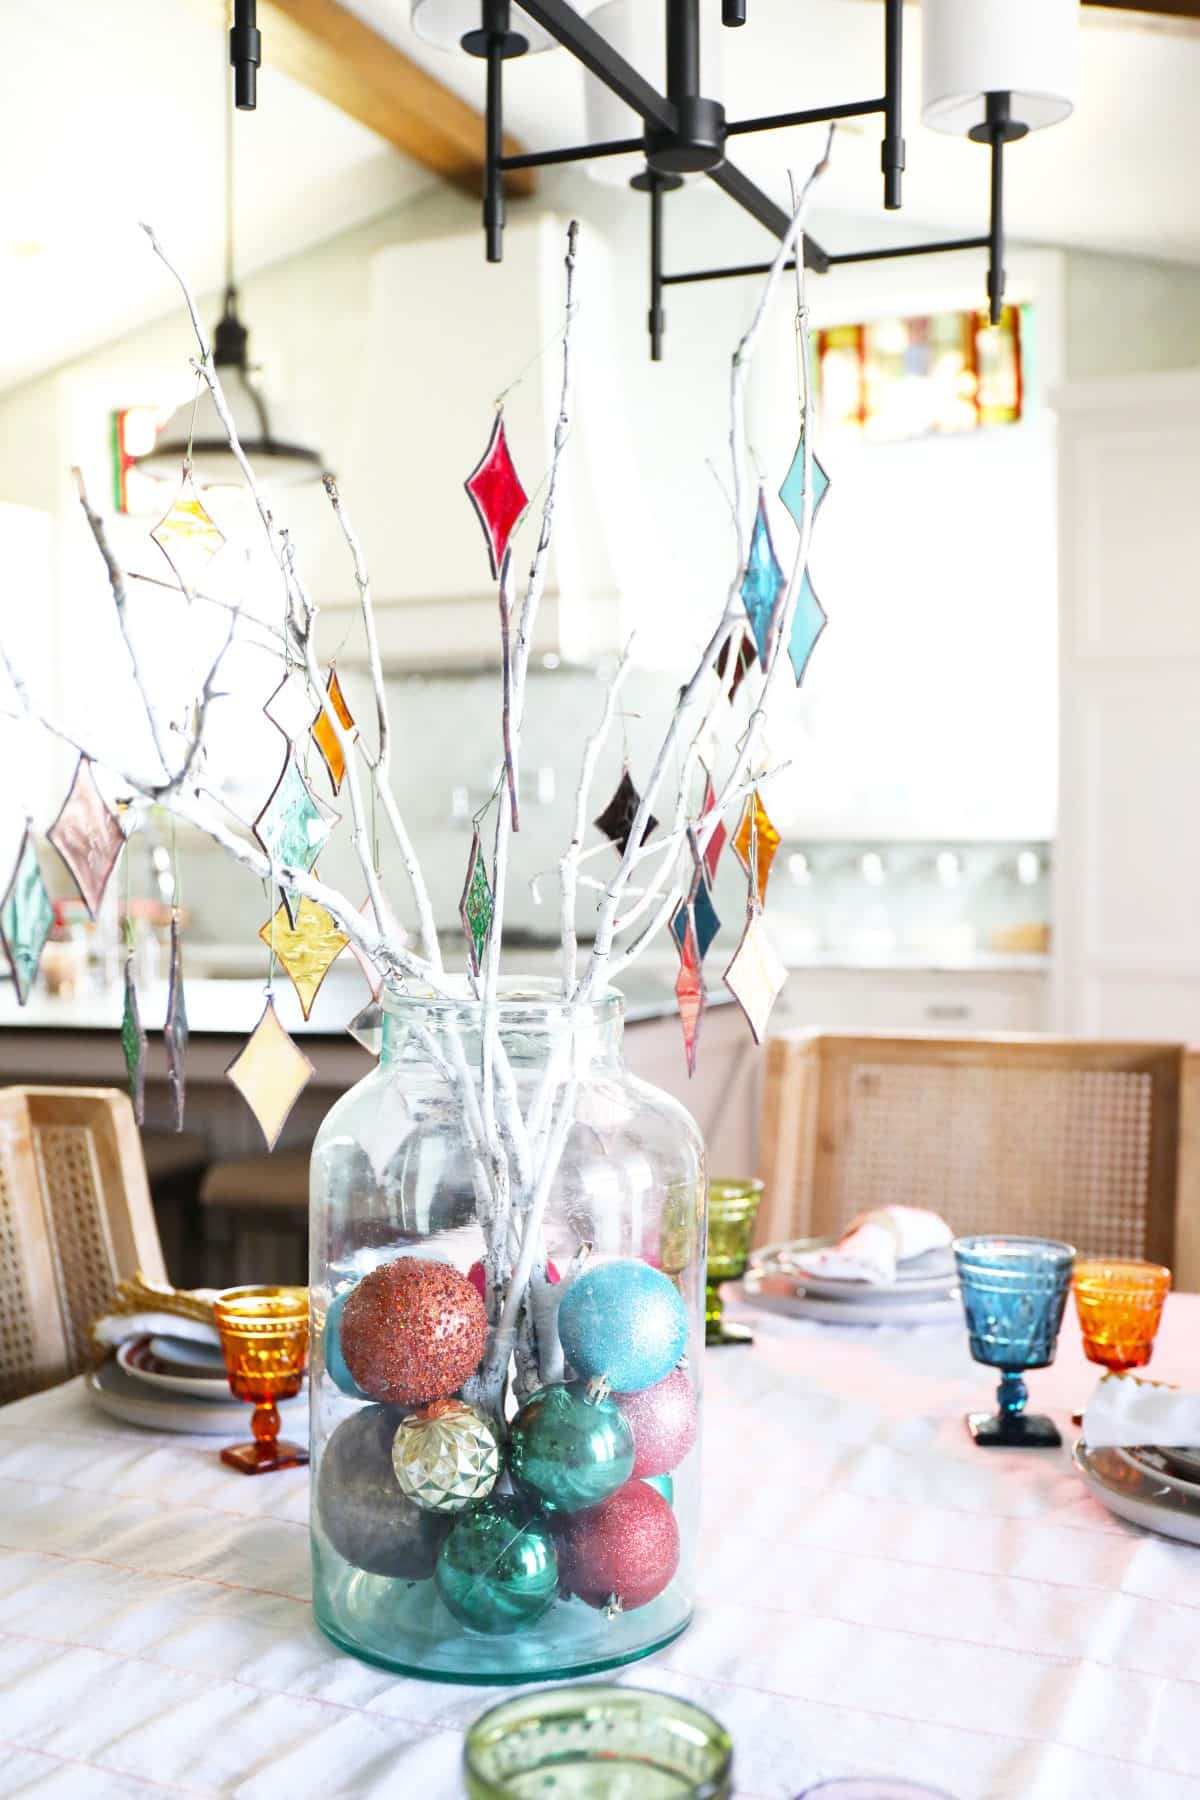
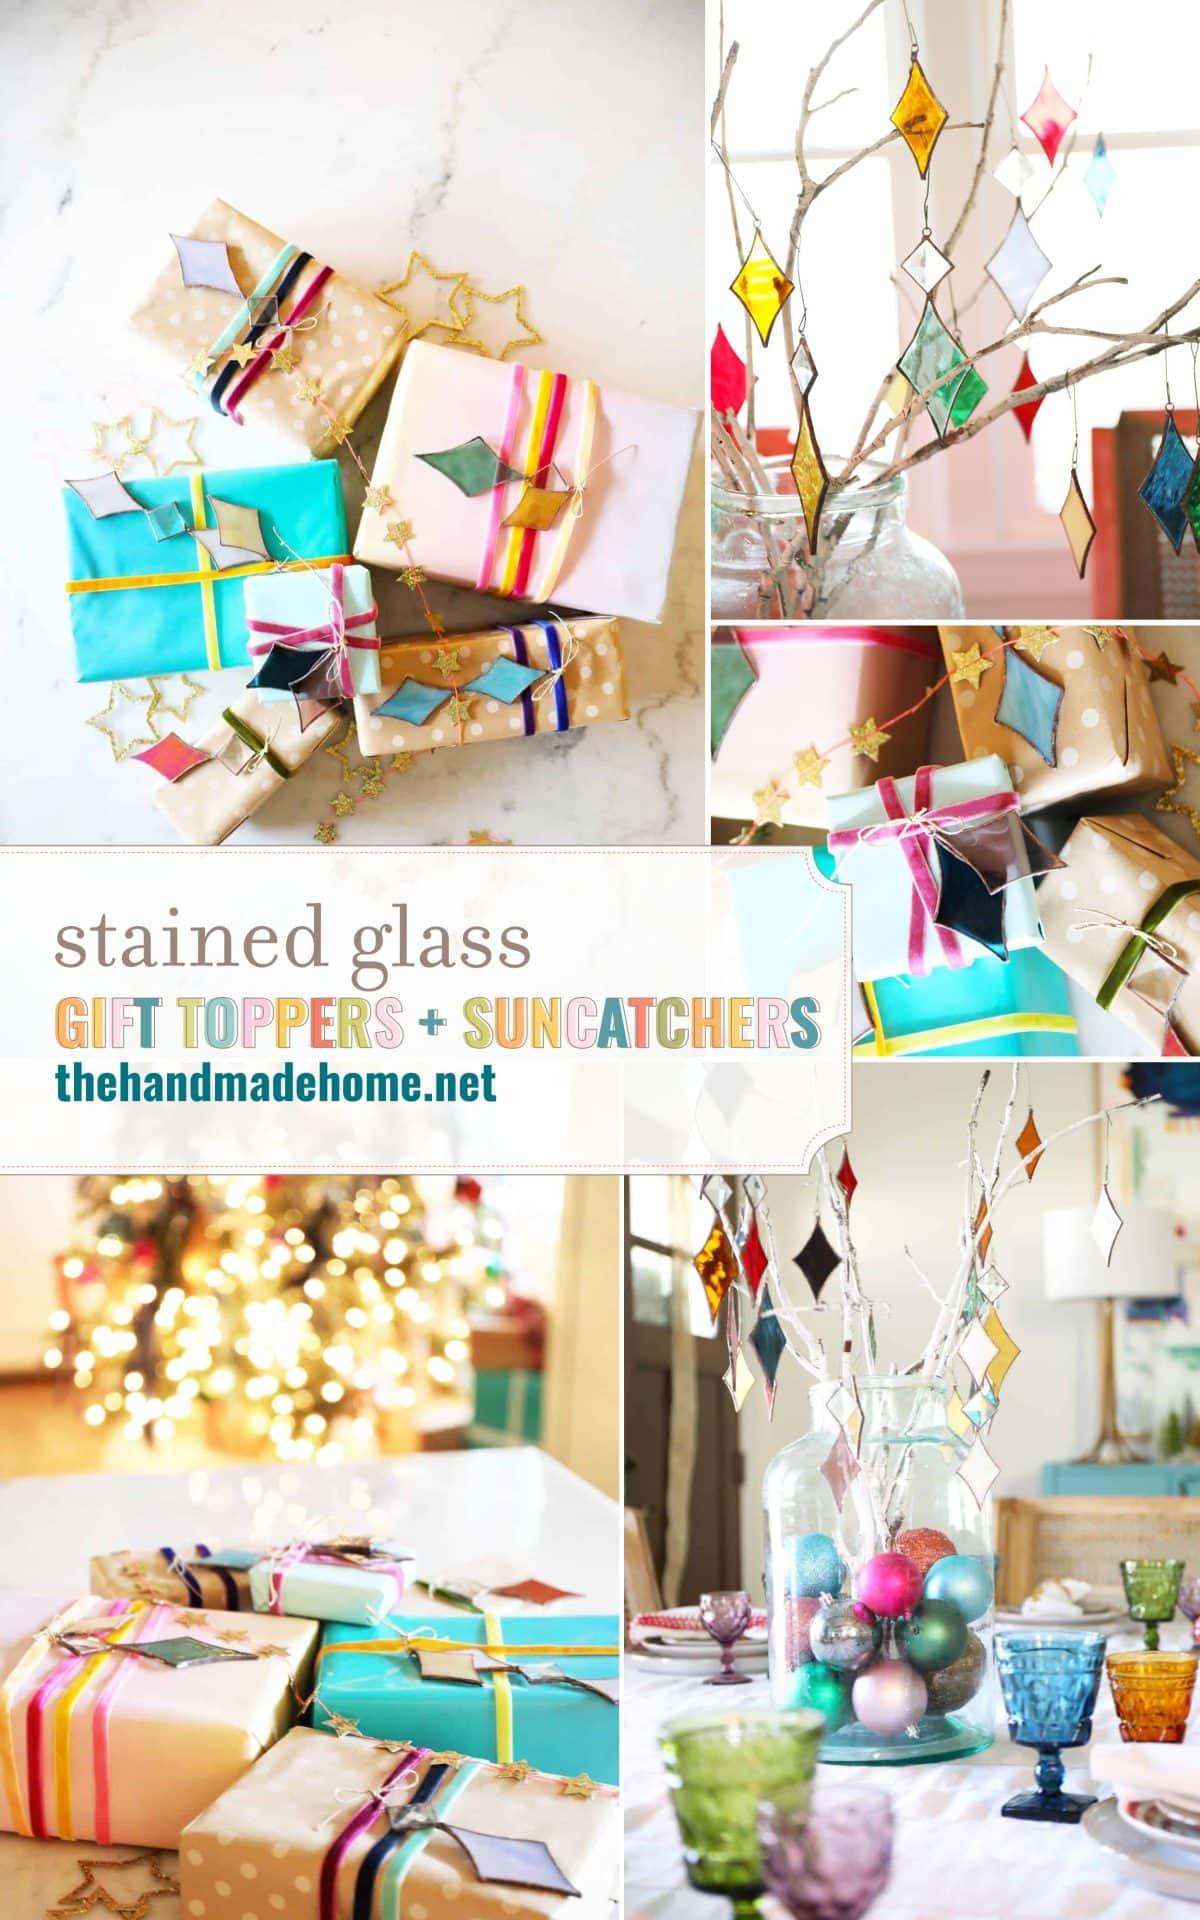
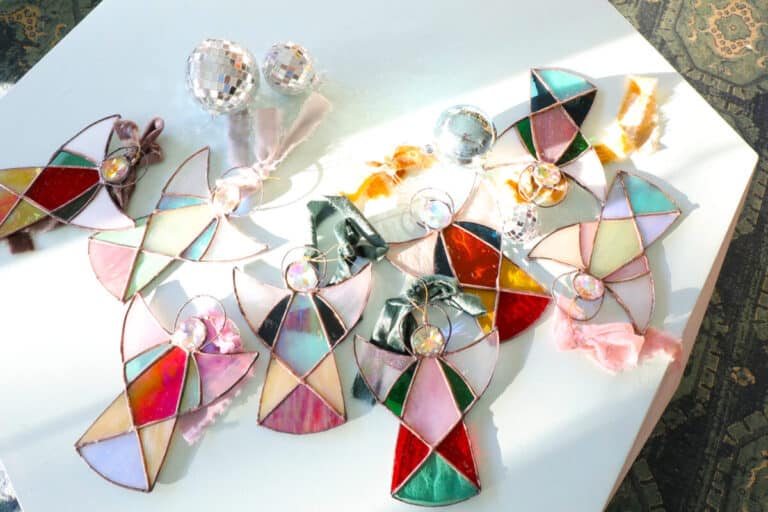
stained glass suncatchers + gift toppers
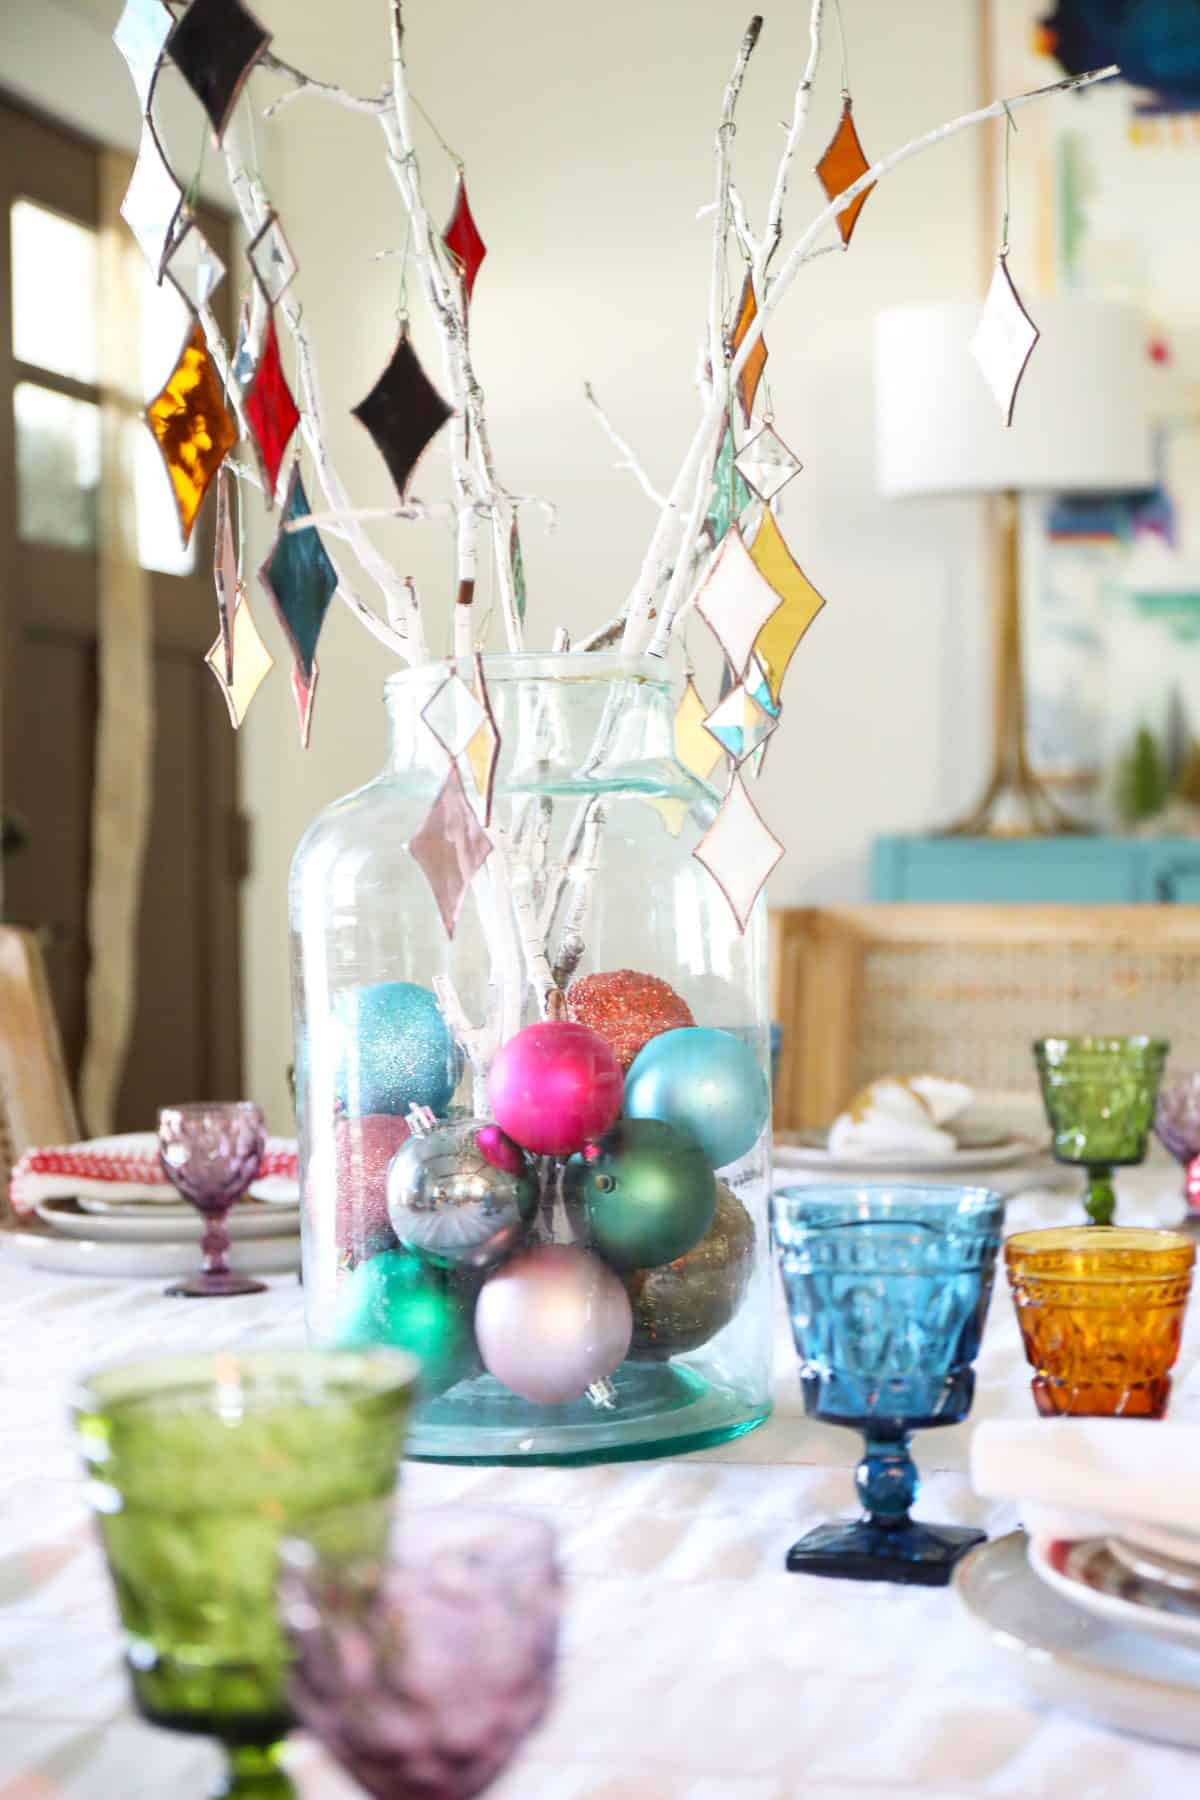
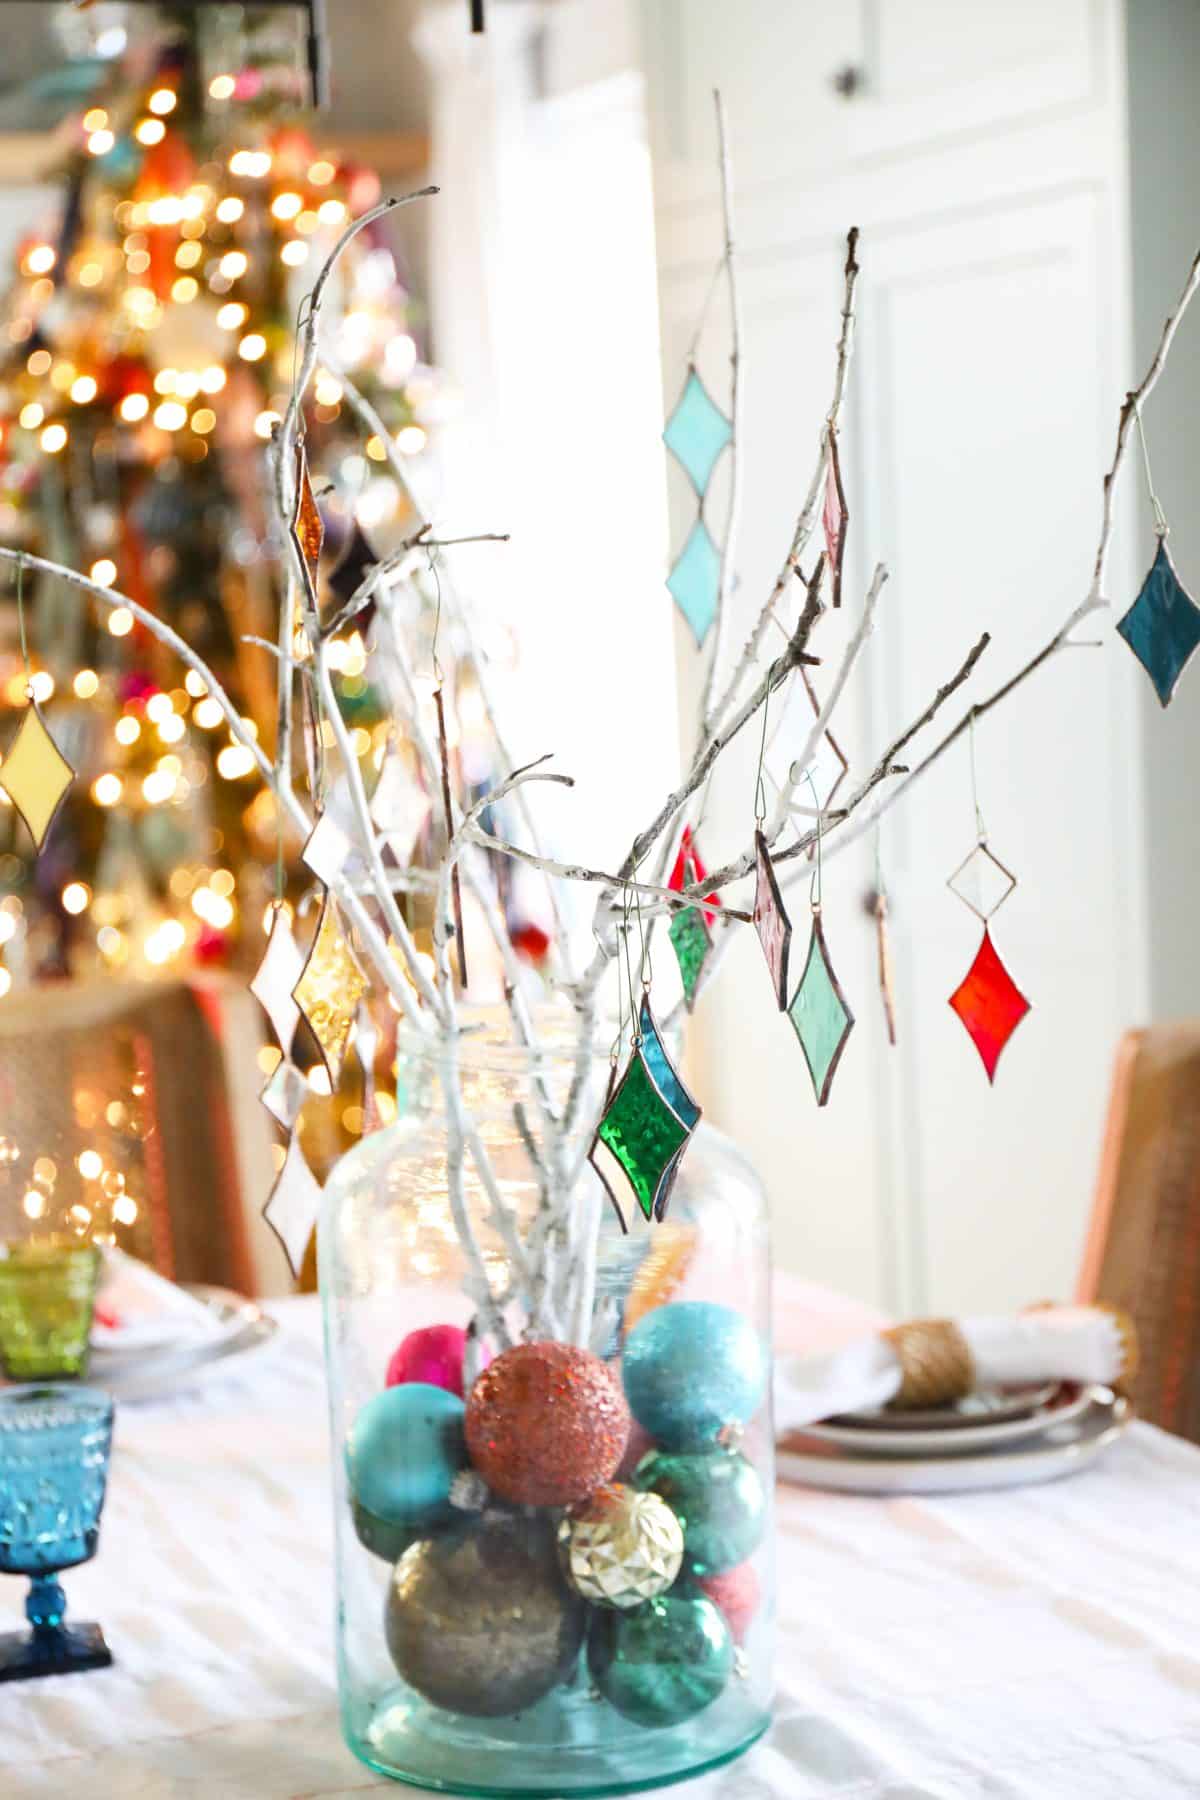
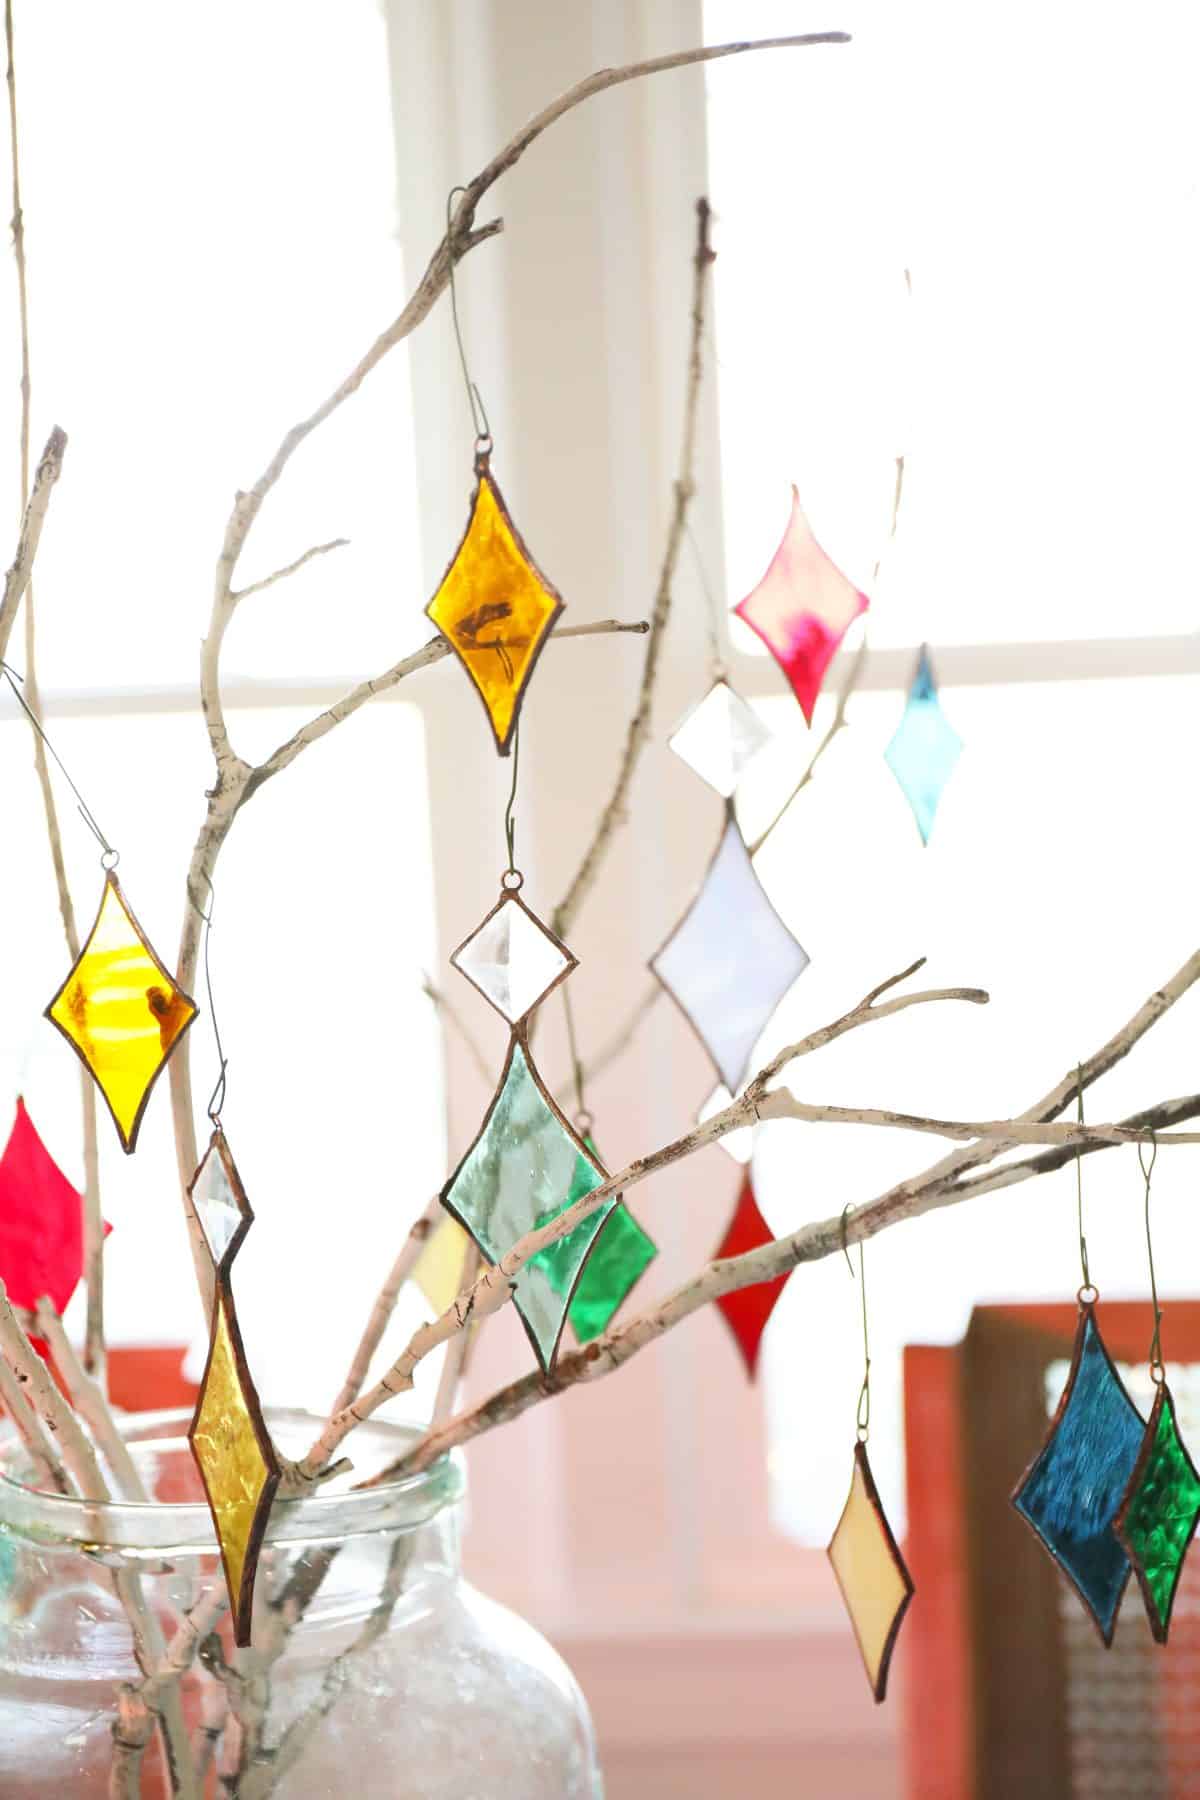
Last week, we shared this colorful tablescape for Christmas, and I loved sharing such fun ideas with all of you for the holidays. But my favorite part? This little centerpiece with sun catchers in the middle. Today, I thought I’d return to this topic to share this easy how-to for the holidays.
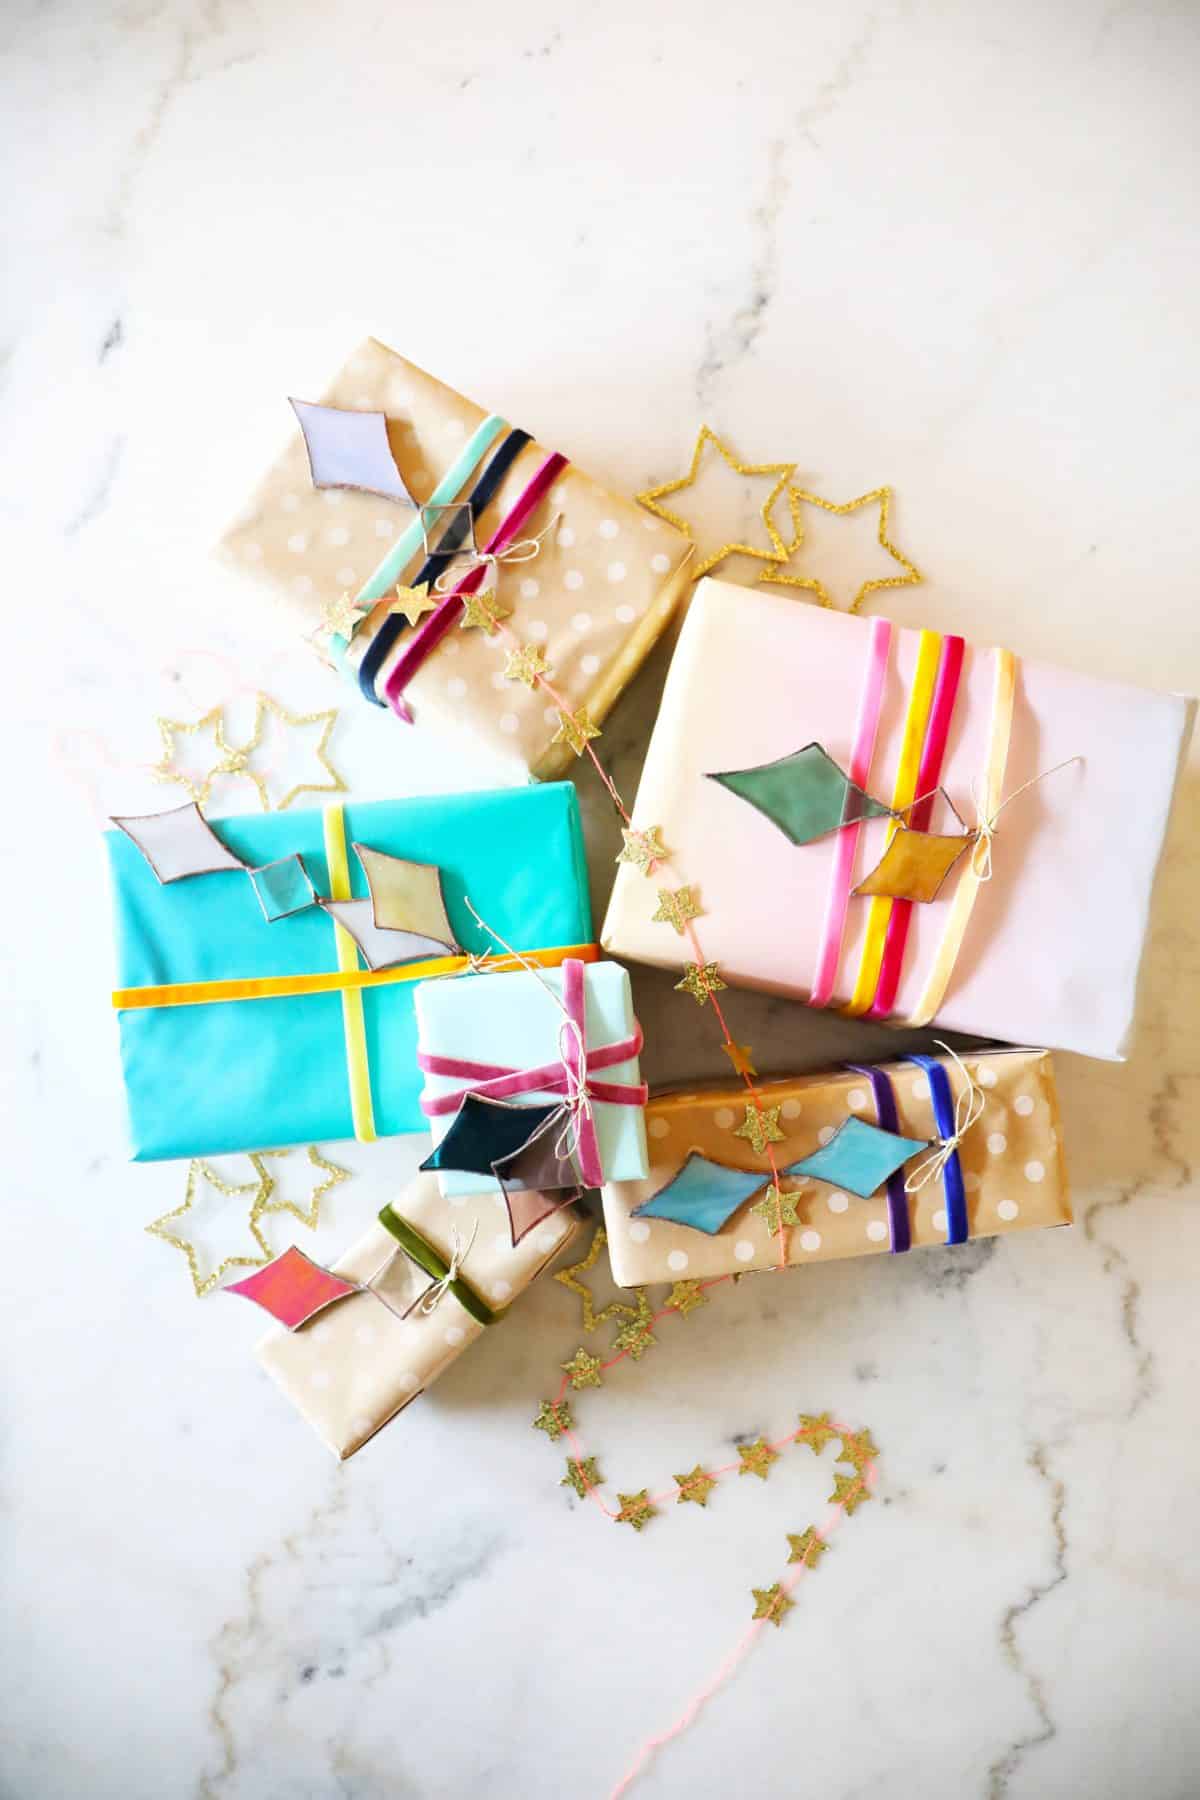
In case you were wondering, these make great gift toppers, too. They dress up any gift, and we love the idea of a simple ornament to adorn a tree or a little happy to gift someone.
This is a great way to get into stained glass if you’ve been wanting to give it a try. This is the smallest project we’ve made so far in all things stained glass, and today, I’m breaking it down if you’d like to give it a whirl.

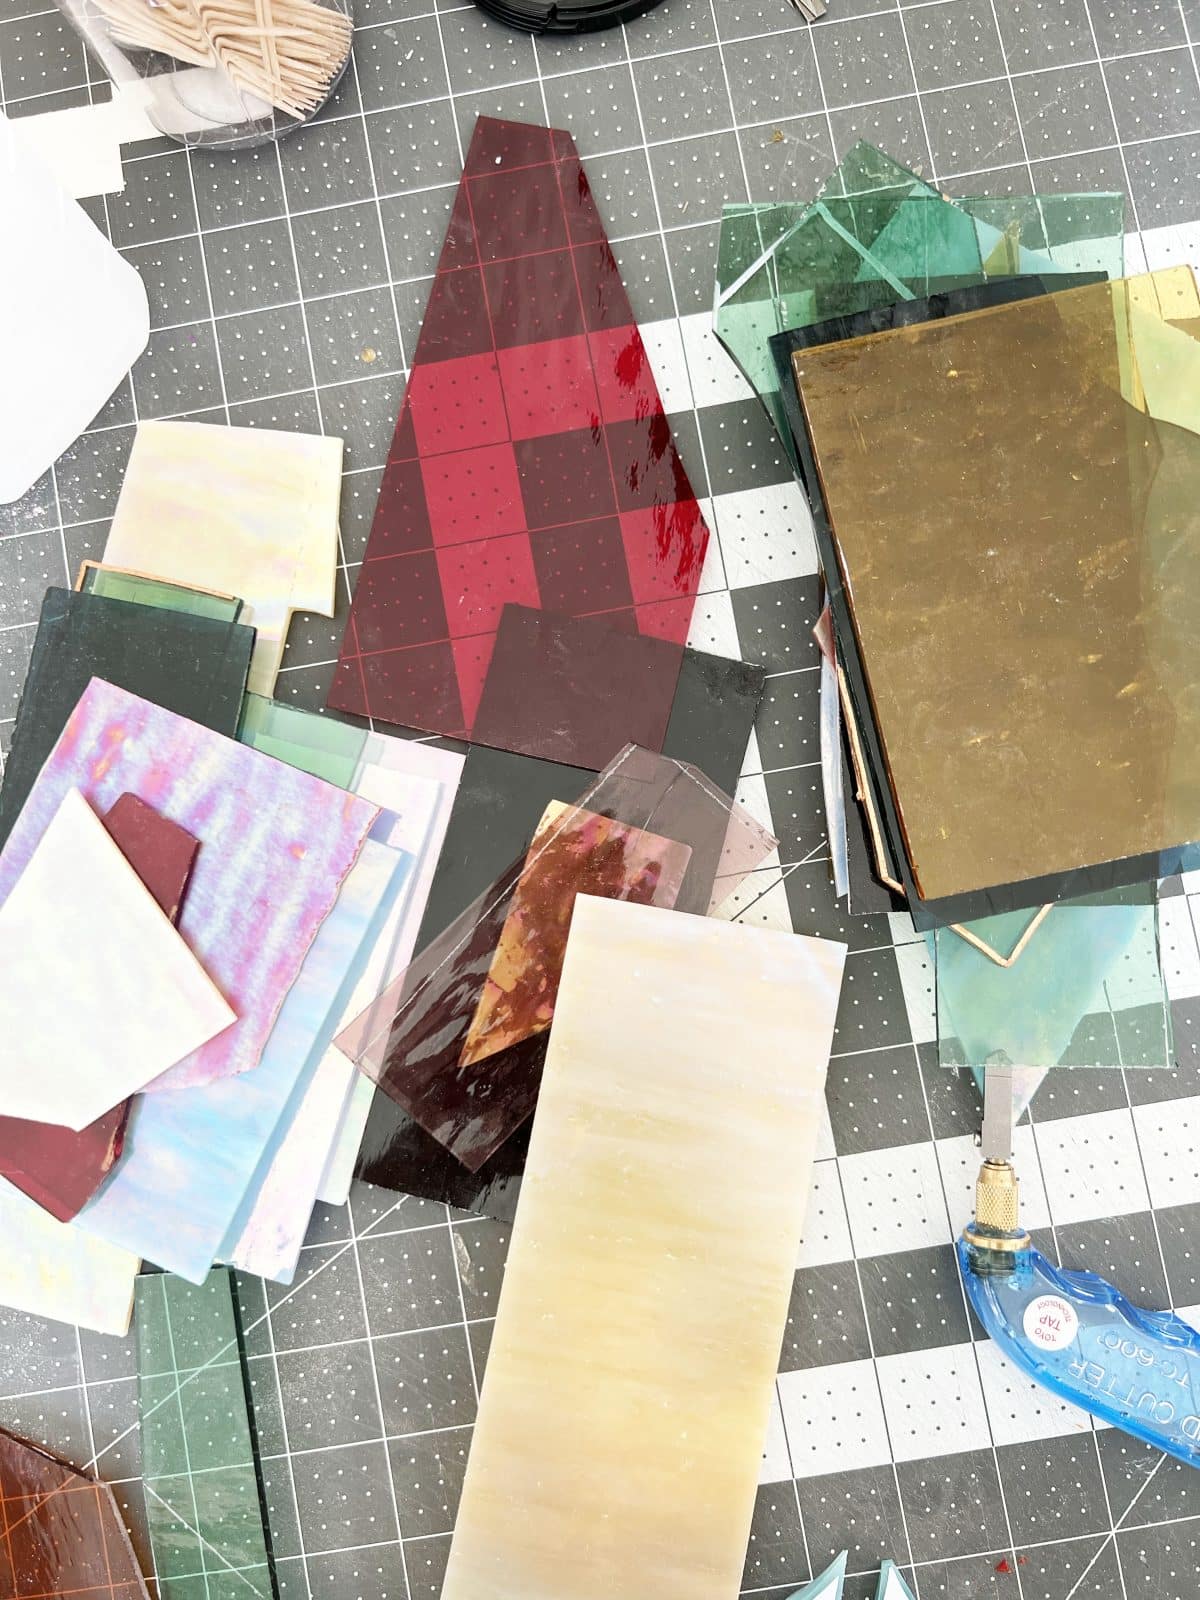
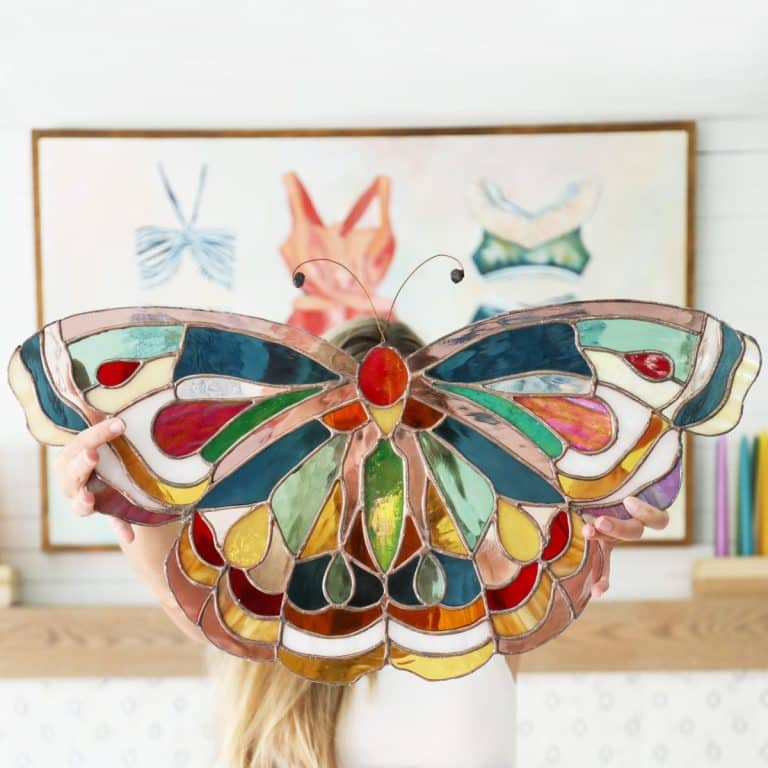
The possibilities for this are endless, and I love the various combos you can try.

They also make a great glass-buster if you have a lot of scraps you’ve been holding on to for that perfect smaller piece. So let’s dive in, shall we?


But first, a history
As always, I’m starting it with some background info, if this is your first time diving in. {You’ll want to refer back to some of these if you’re getting your toes wet in the world of stained glass. I recommend familiarizing yourself with the entire process so that you know what I’m talking about below. This post will only be actually an outline form, while the in-depth process can be found below. I’ve covered them thoroughly in the past, so I’ll cover them briefly in this post. Links needed are below} :
• Check out all the supplies I listed + a little take on getting started here.
• We covered the basics of stained glass, here.
It’s pretty in-depth, with good videos referenced as well, so be sure to check it out.
More projects: Be sure to check out our entire section on stained glass, with full-on patterns, details + more.
What you’ll need:
• Check out all the supplies + a little take on getting started here.
Again, linking to this because this is an actual stained glass project. It helps to have the intended supplies, and I’m pretty thorough with everything here.
• When I list the steps, be sure to check out the basics of stained glass, here.
This is complete with videos and more to help get you started.
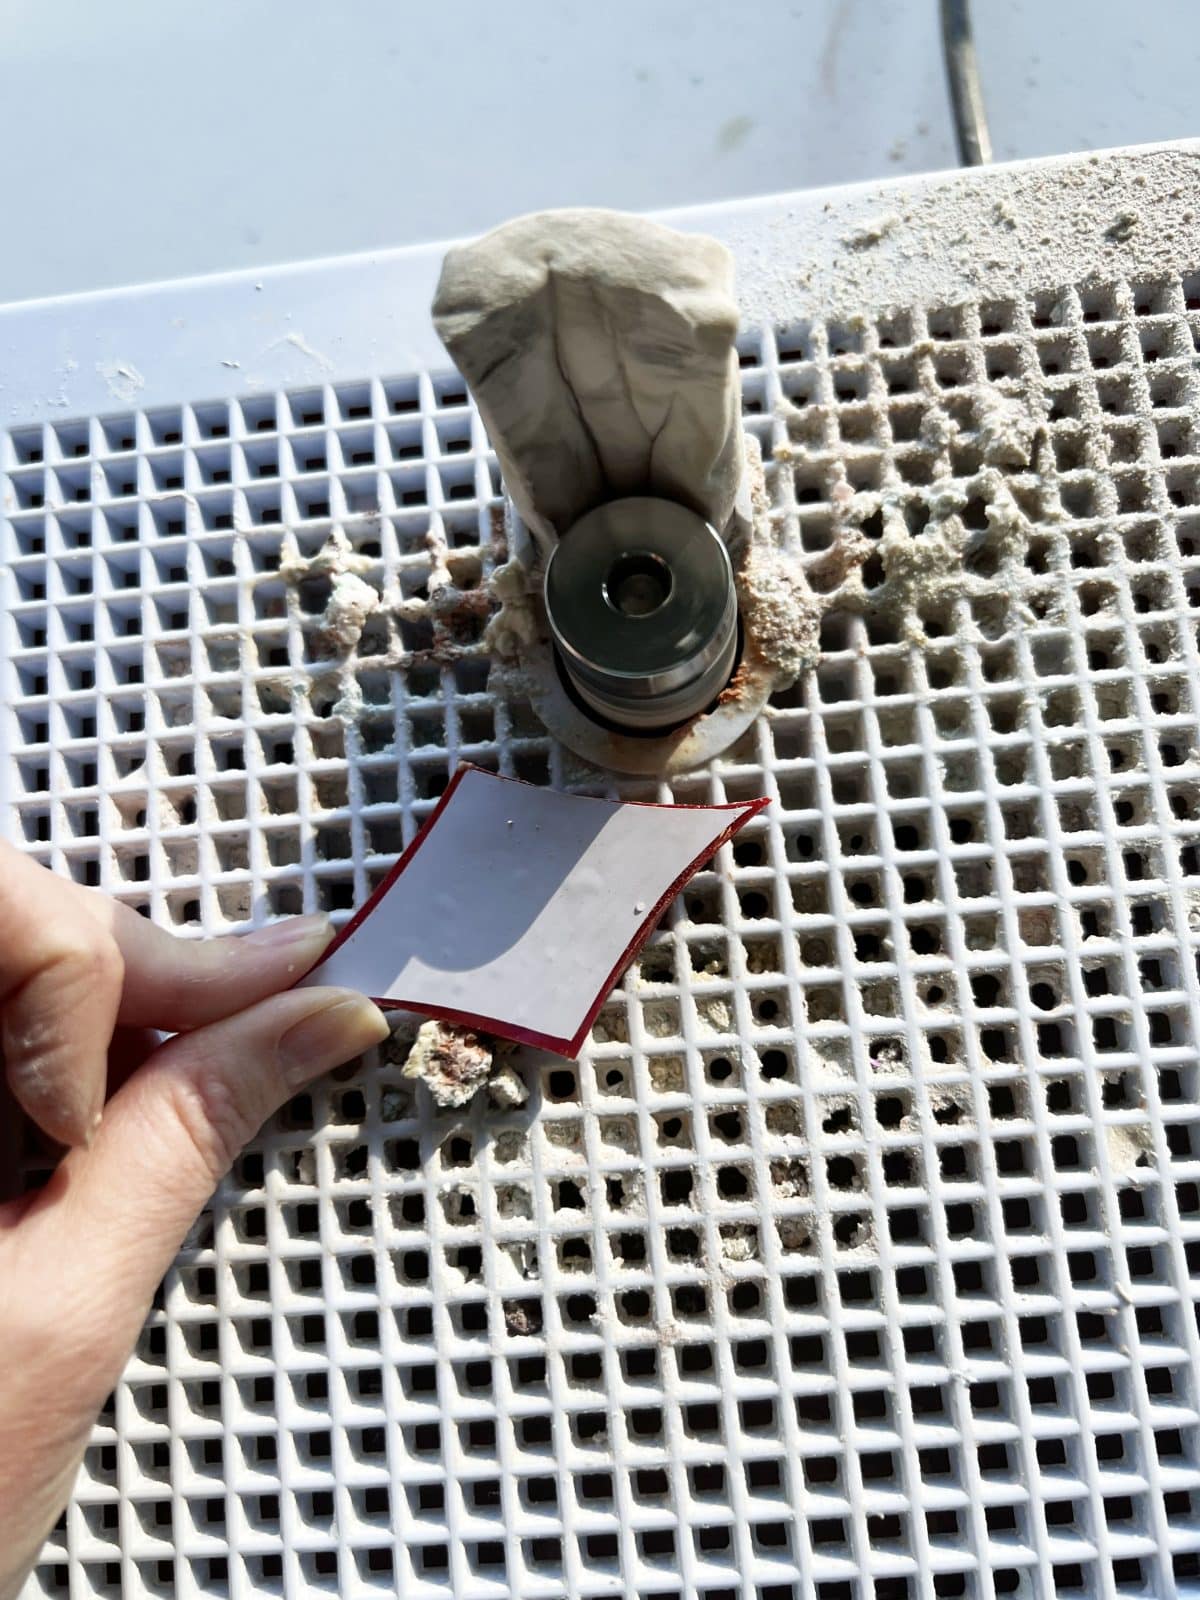
Before we start, please review all safety points here. This article perfectly covers everything to consider when it comes to your safety and stained glass.
Get your files here:
• Suncatchers single
• Suncatchers 8 x 10
• Suncatchers for Cricut
I recommend printing the first file if you want to try just one. If you’ll make multiple, I have them on an 8 x 10 sheet in the second file for easy, at-home printing. {See the three main approaches below to help you decide what you’ll want to do} And if you want them on the Cricut method, download the third file. You’ll send this to cut via your Cricut with some vinyl, and it’s a fast, easy fix.
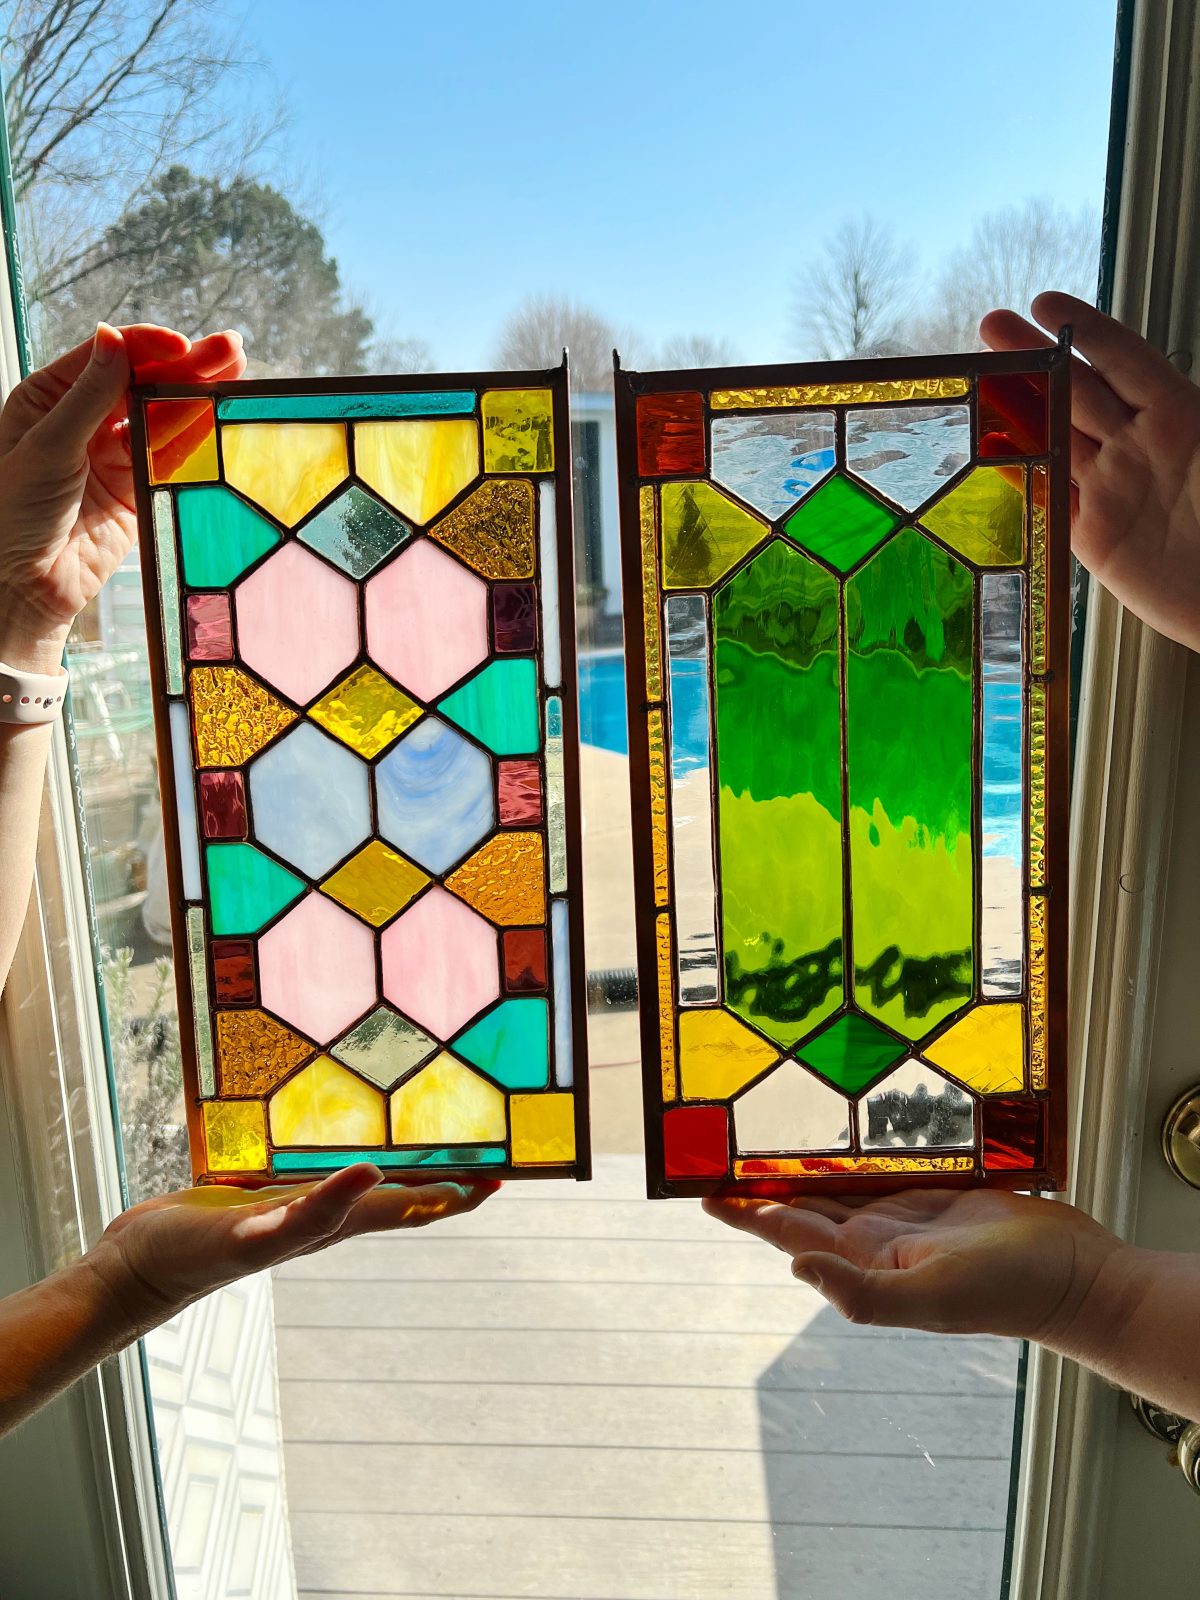
• Select the glass that you’ll want from this project. I have a plethora left over from my past projects, so you may recognize many of the colors + this collection of square bevels I’d had from a past project. The possibilities with this are endless, so have fun!
• Since these are hanging ornaments with loops, you can use copper wire or jewelry loops or jump rings, which we will attach to the top of each one + some pliers to hold since they will get hot. More on that below.
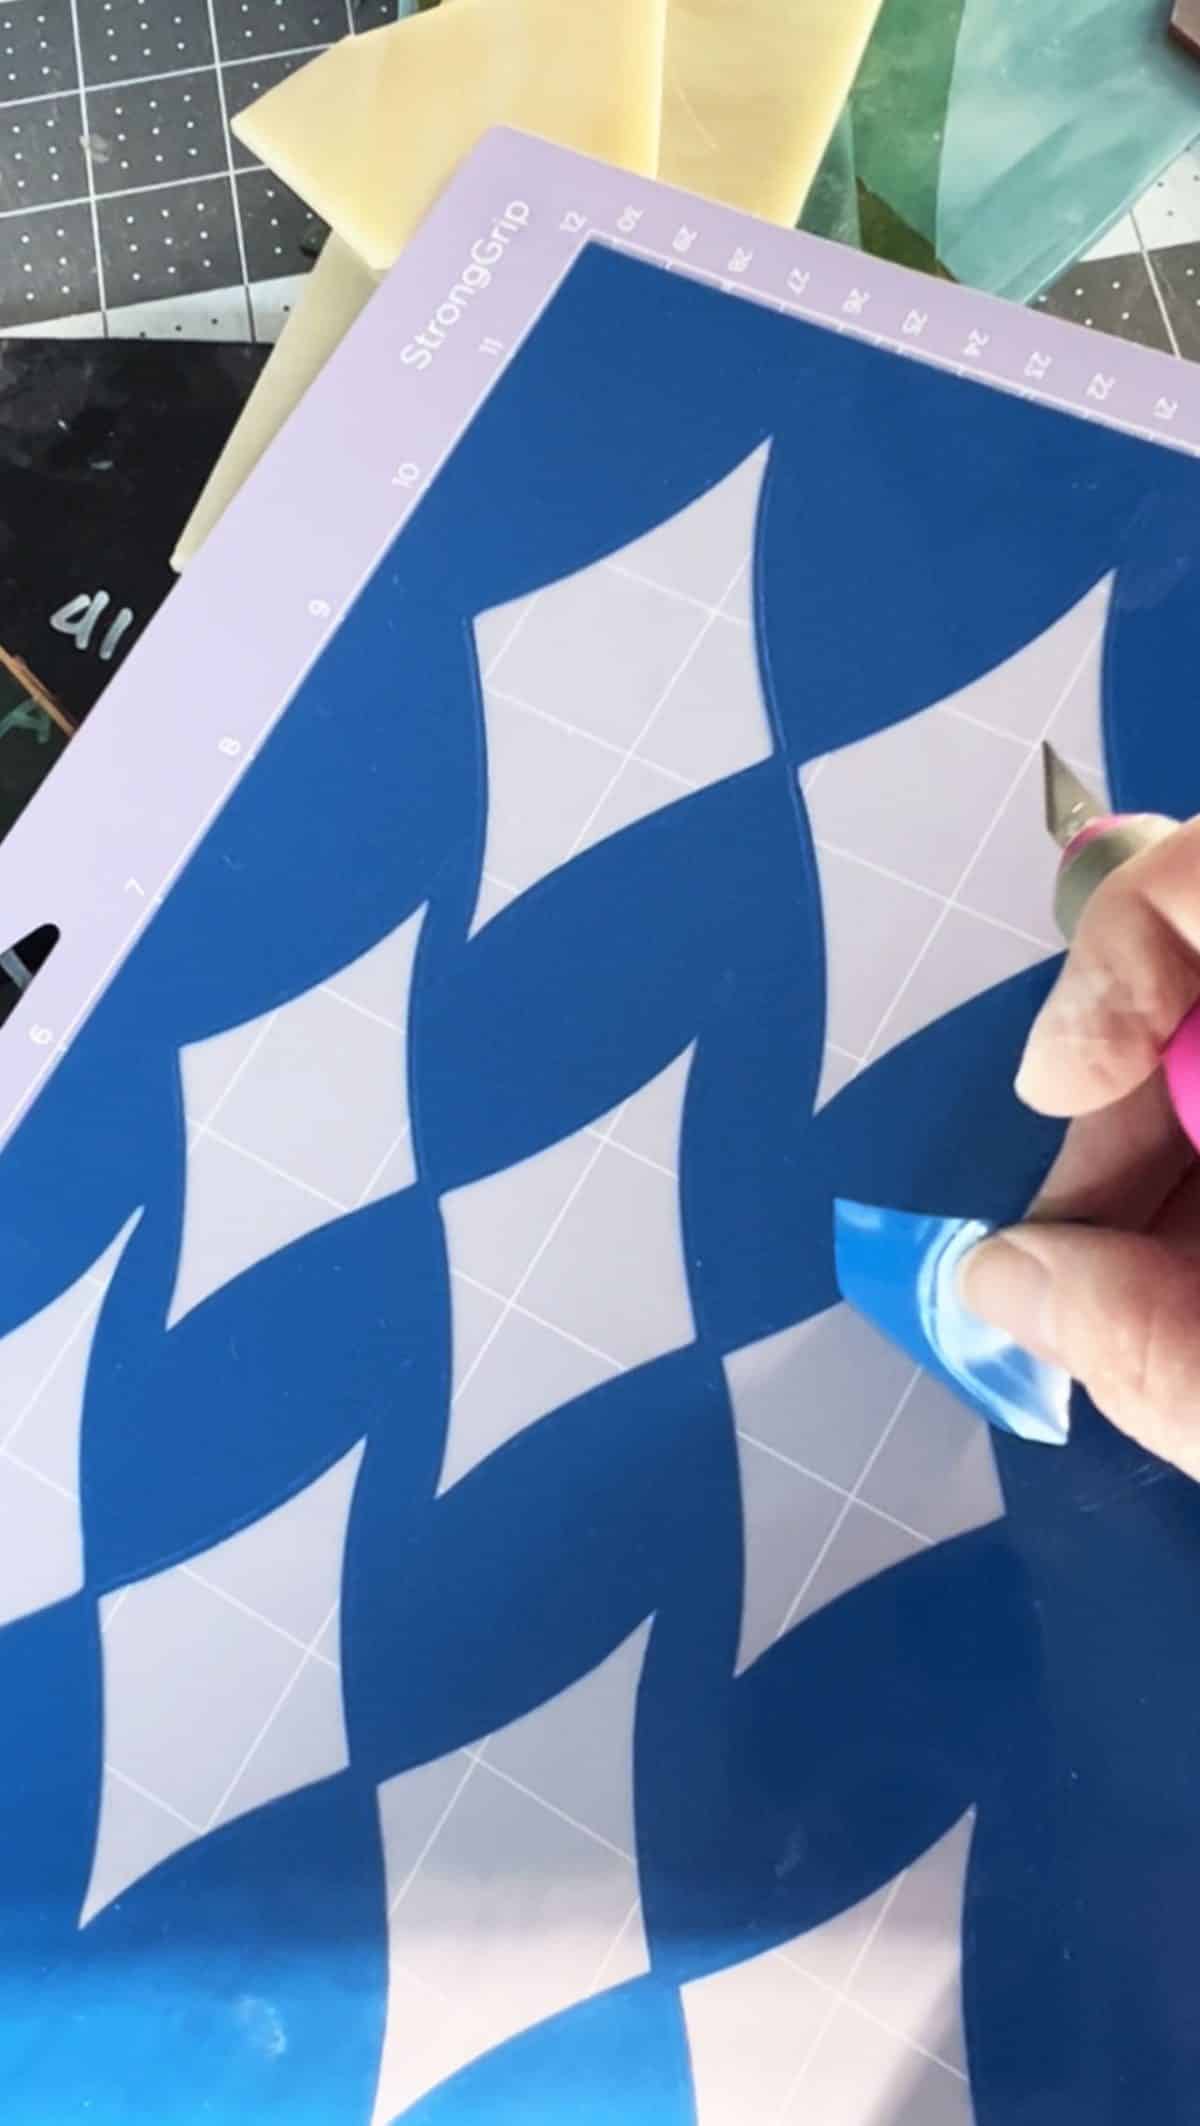
• Tracing – There are three ways to trace your pattern: You can see more of that process in detail, here.
1. Transparency film + sharpie + glue stick – Lay your transparency over your shape, trace + cut. Then lay it over your glass and repeat to achieve the same shape.
2. Just lay your glass on top of the pattern, trace, and cut.
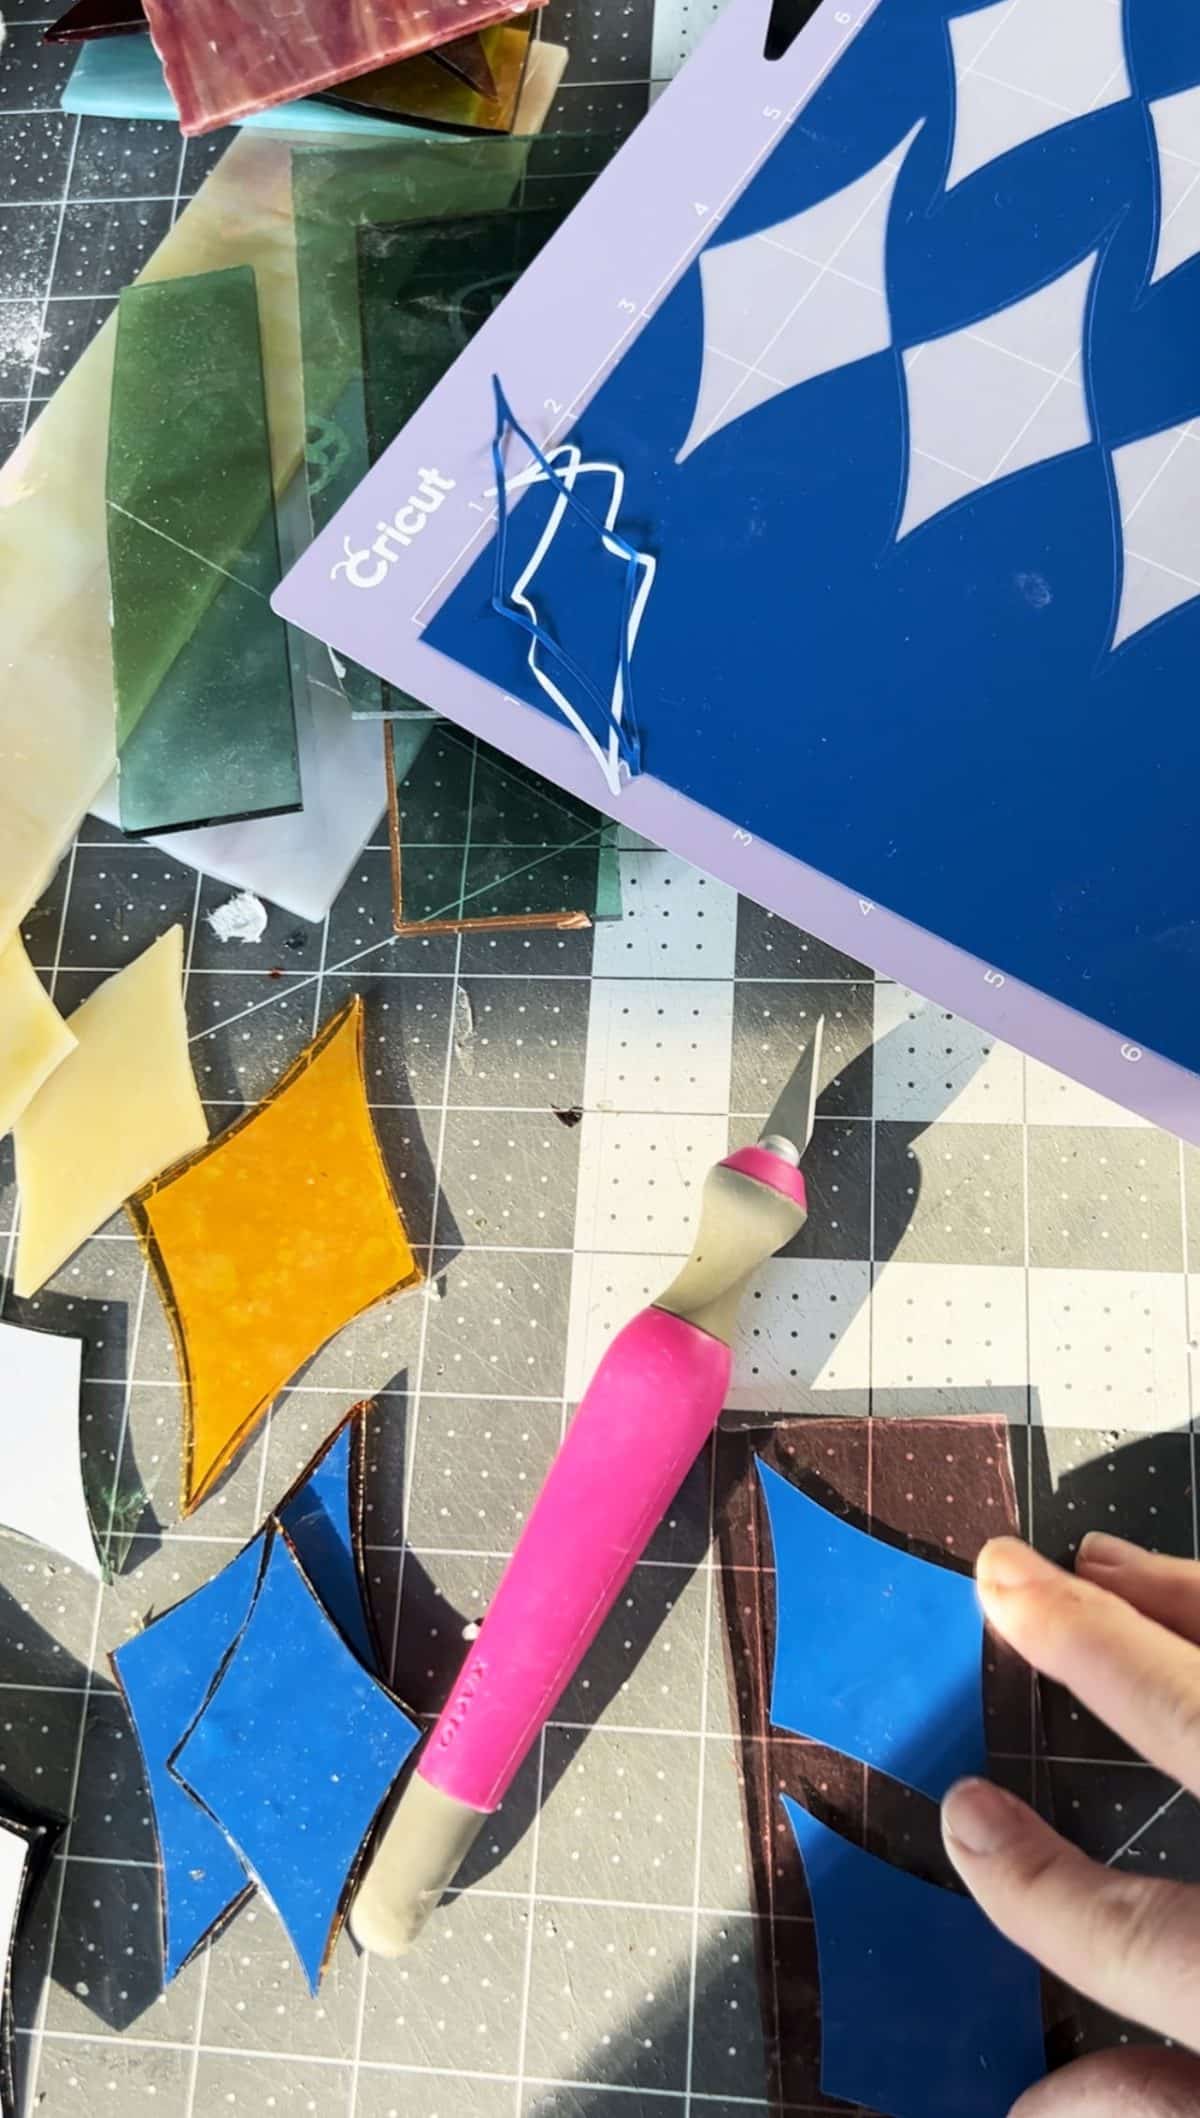
3. For this project, I simply loaded the same pattern into my Cricut and cut it on vinyl. It’s a smaller size project, so this worked perfectly.
• upload the pattern to your Cricut program and cut it out on vinyl. Make sure it’s the same as the printed version if you adjust the size in any way.
• Then it cuts the template for you. Remove the vinyl and stick it on the glass. Use this as your guide to cut.
• While I think that the vinyl process is more straightforward, it’s almost like one extra step in the beginning to omit the middle step. So either way, it’s a wash and depends on which is easiest for you. If you’re familiar with Cricut, then I recommend starting here with a simple pattern. It will give you a little more confidence in using it all.
Over time, I have enjoyed the Cricut method with smaller projects and the glass/trace method with larger ones.
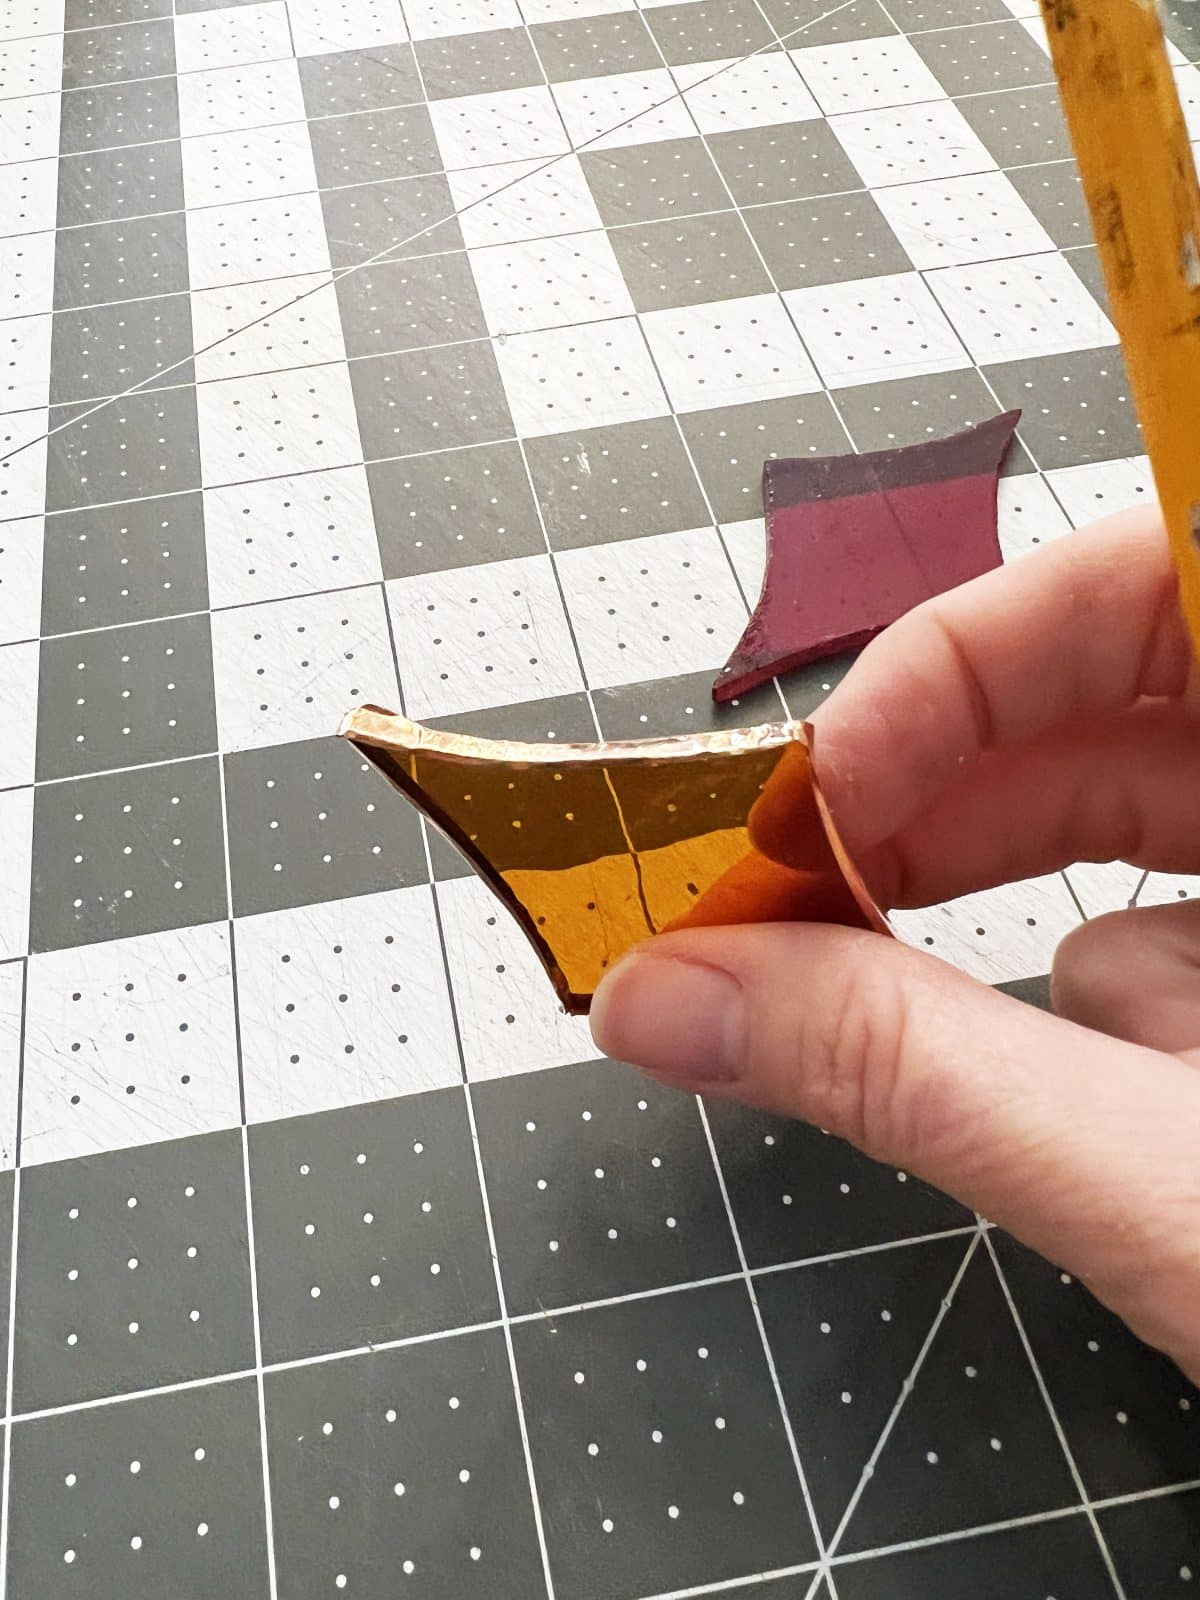
• Cutting + Grinding – Again, I outlined it in more detail here.
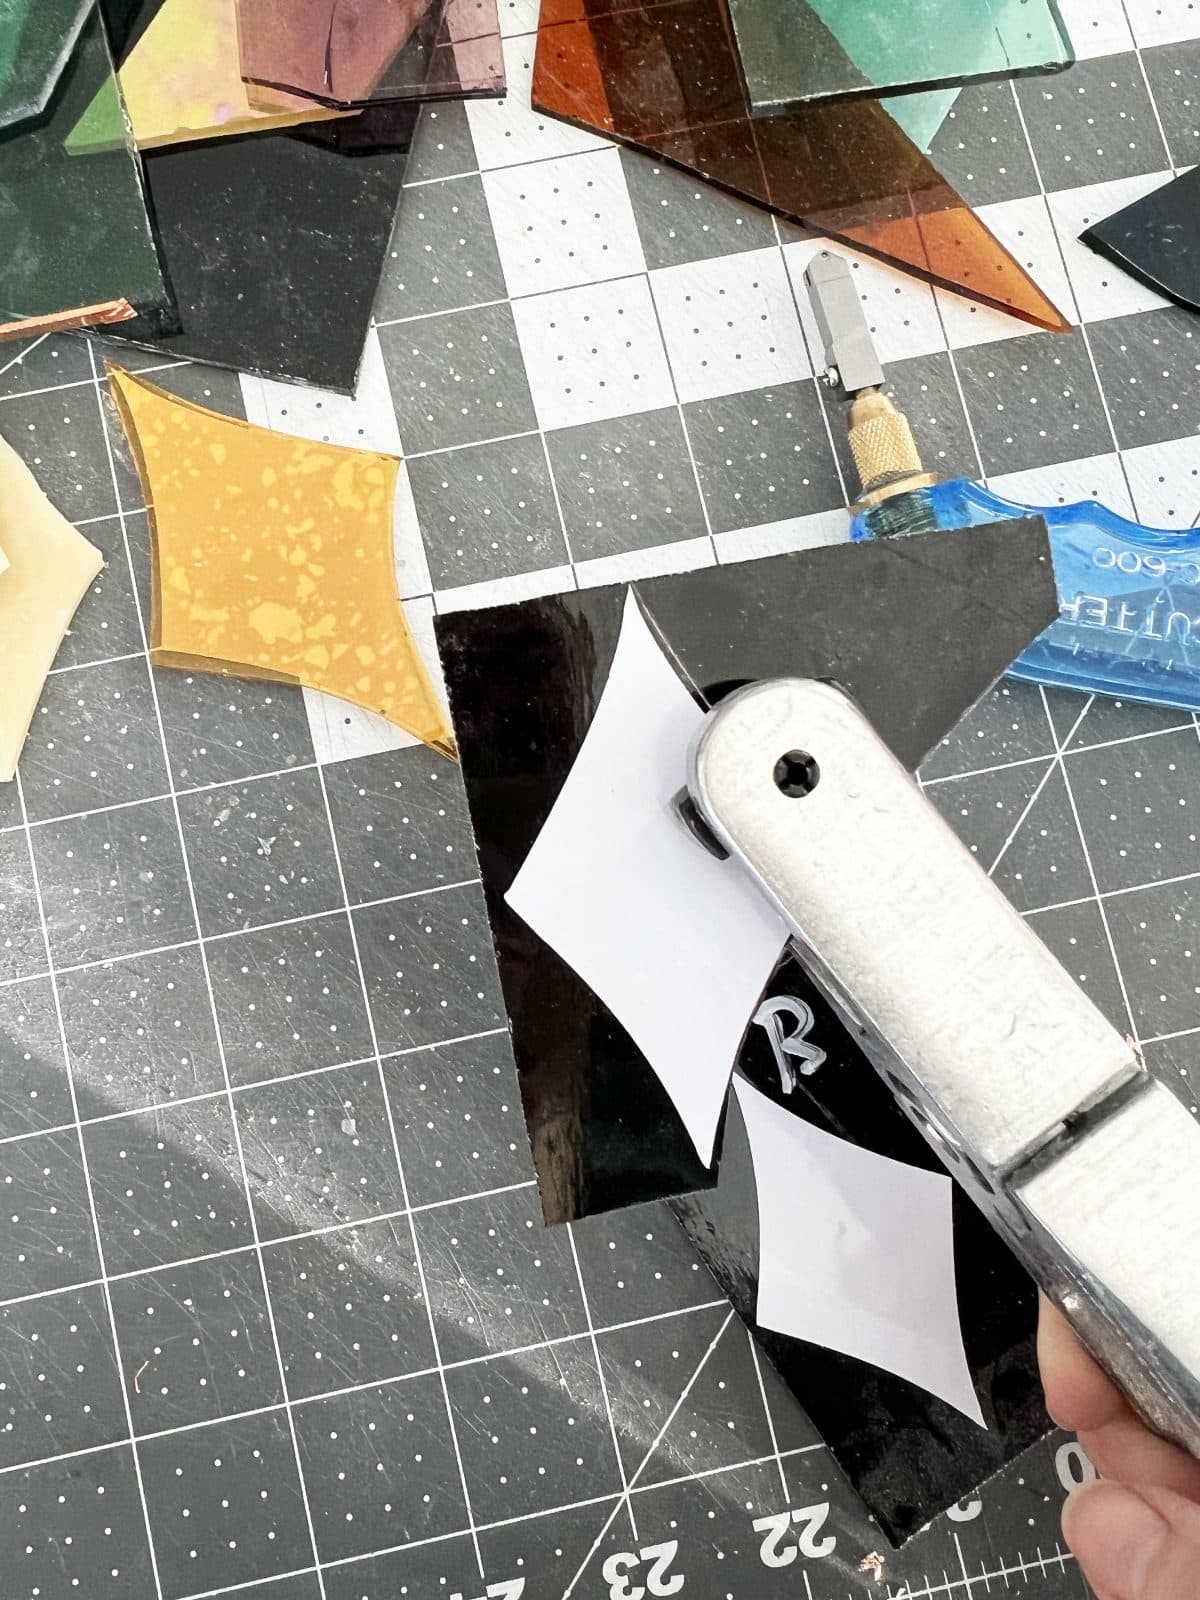
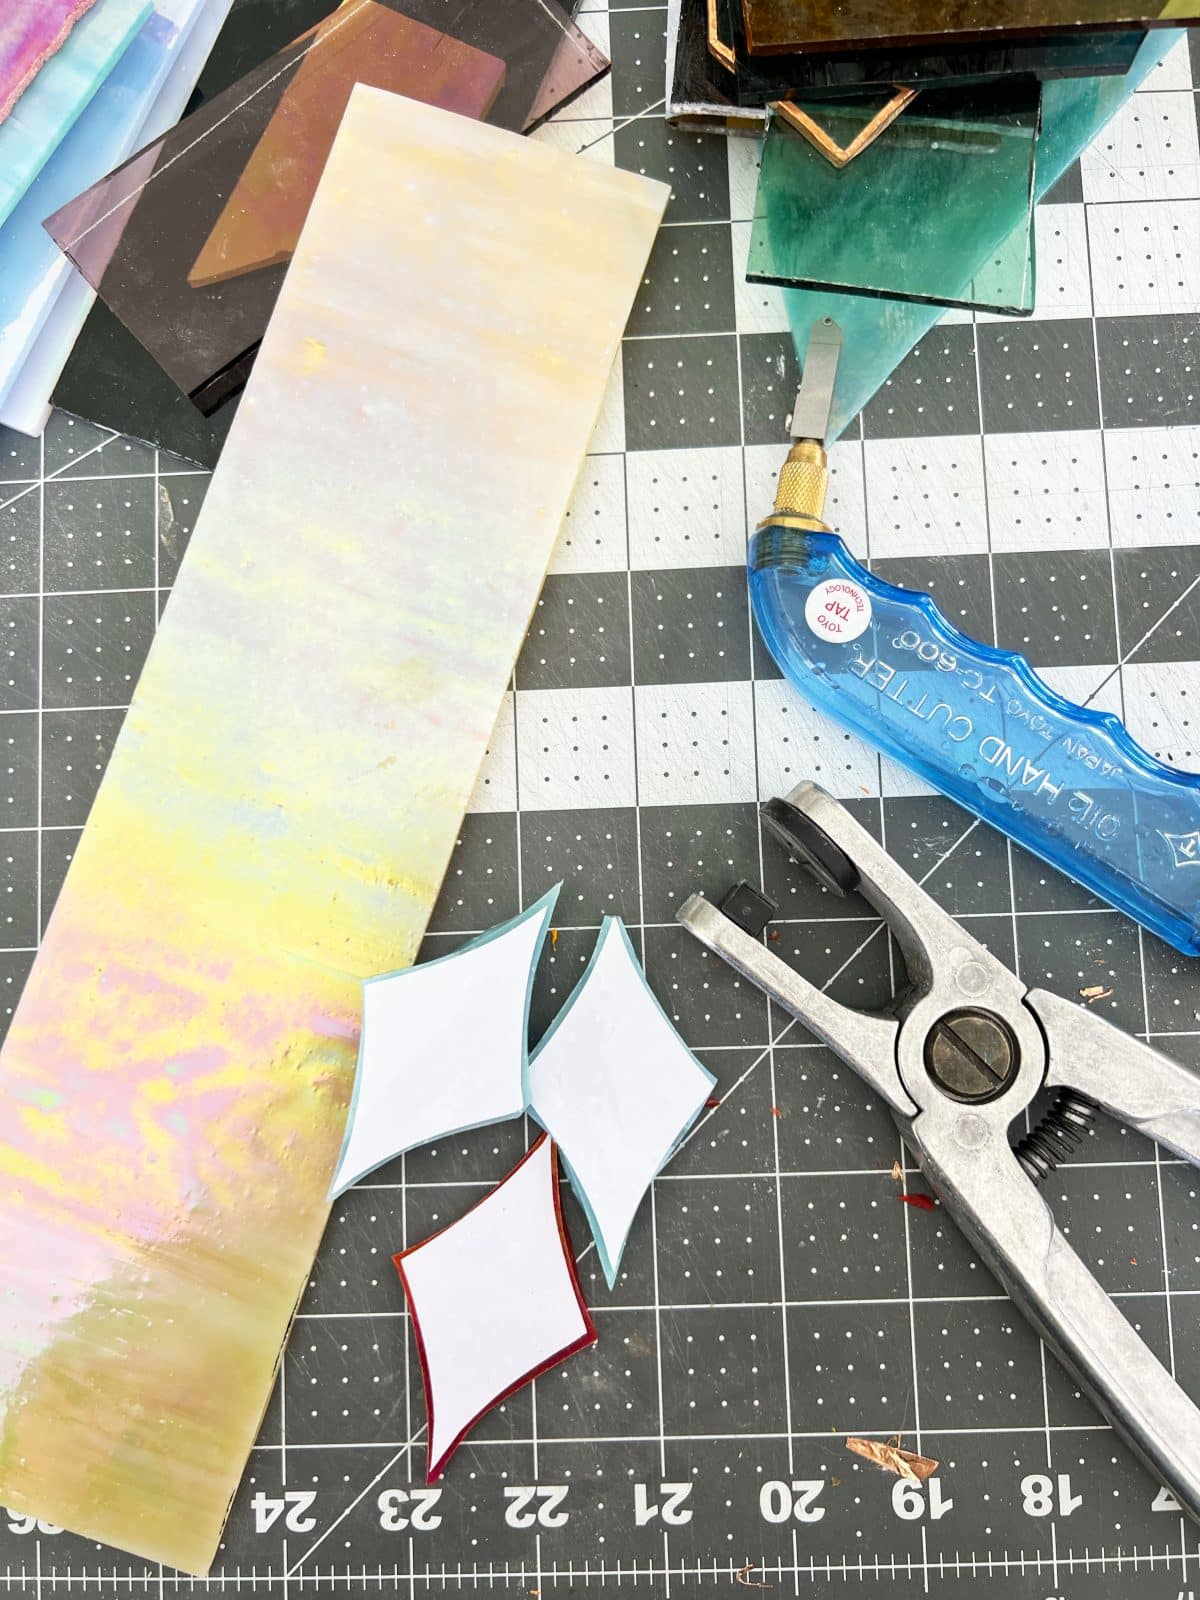
Whichever way you choose, ensure you get that shape as tight as possible. Cut and grind it down. There is no fitting here as is usual with the laminated pattern. You are just cutting and grinding. Repeat with each piece before moving on to the next stage. When working with multiple pieces, I find it easier to keep it in groups as you go.
When grinding, use protective eyewear, and I’d recommend a mask, too.
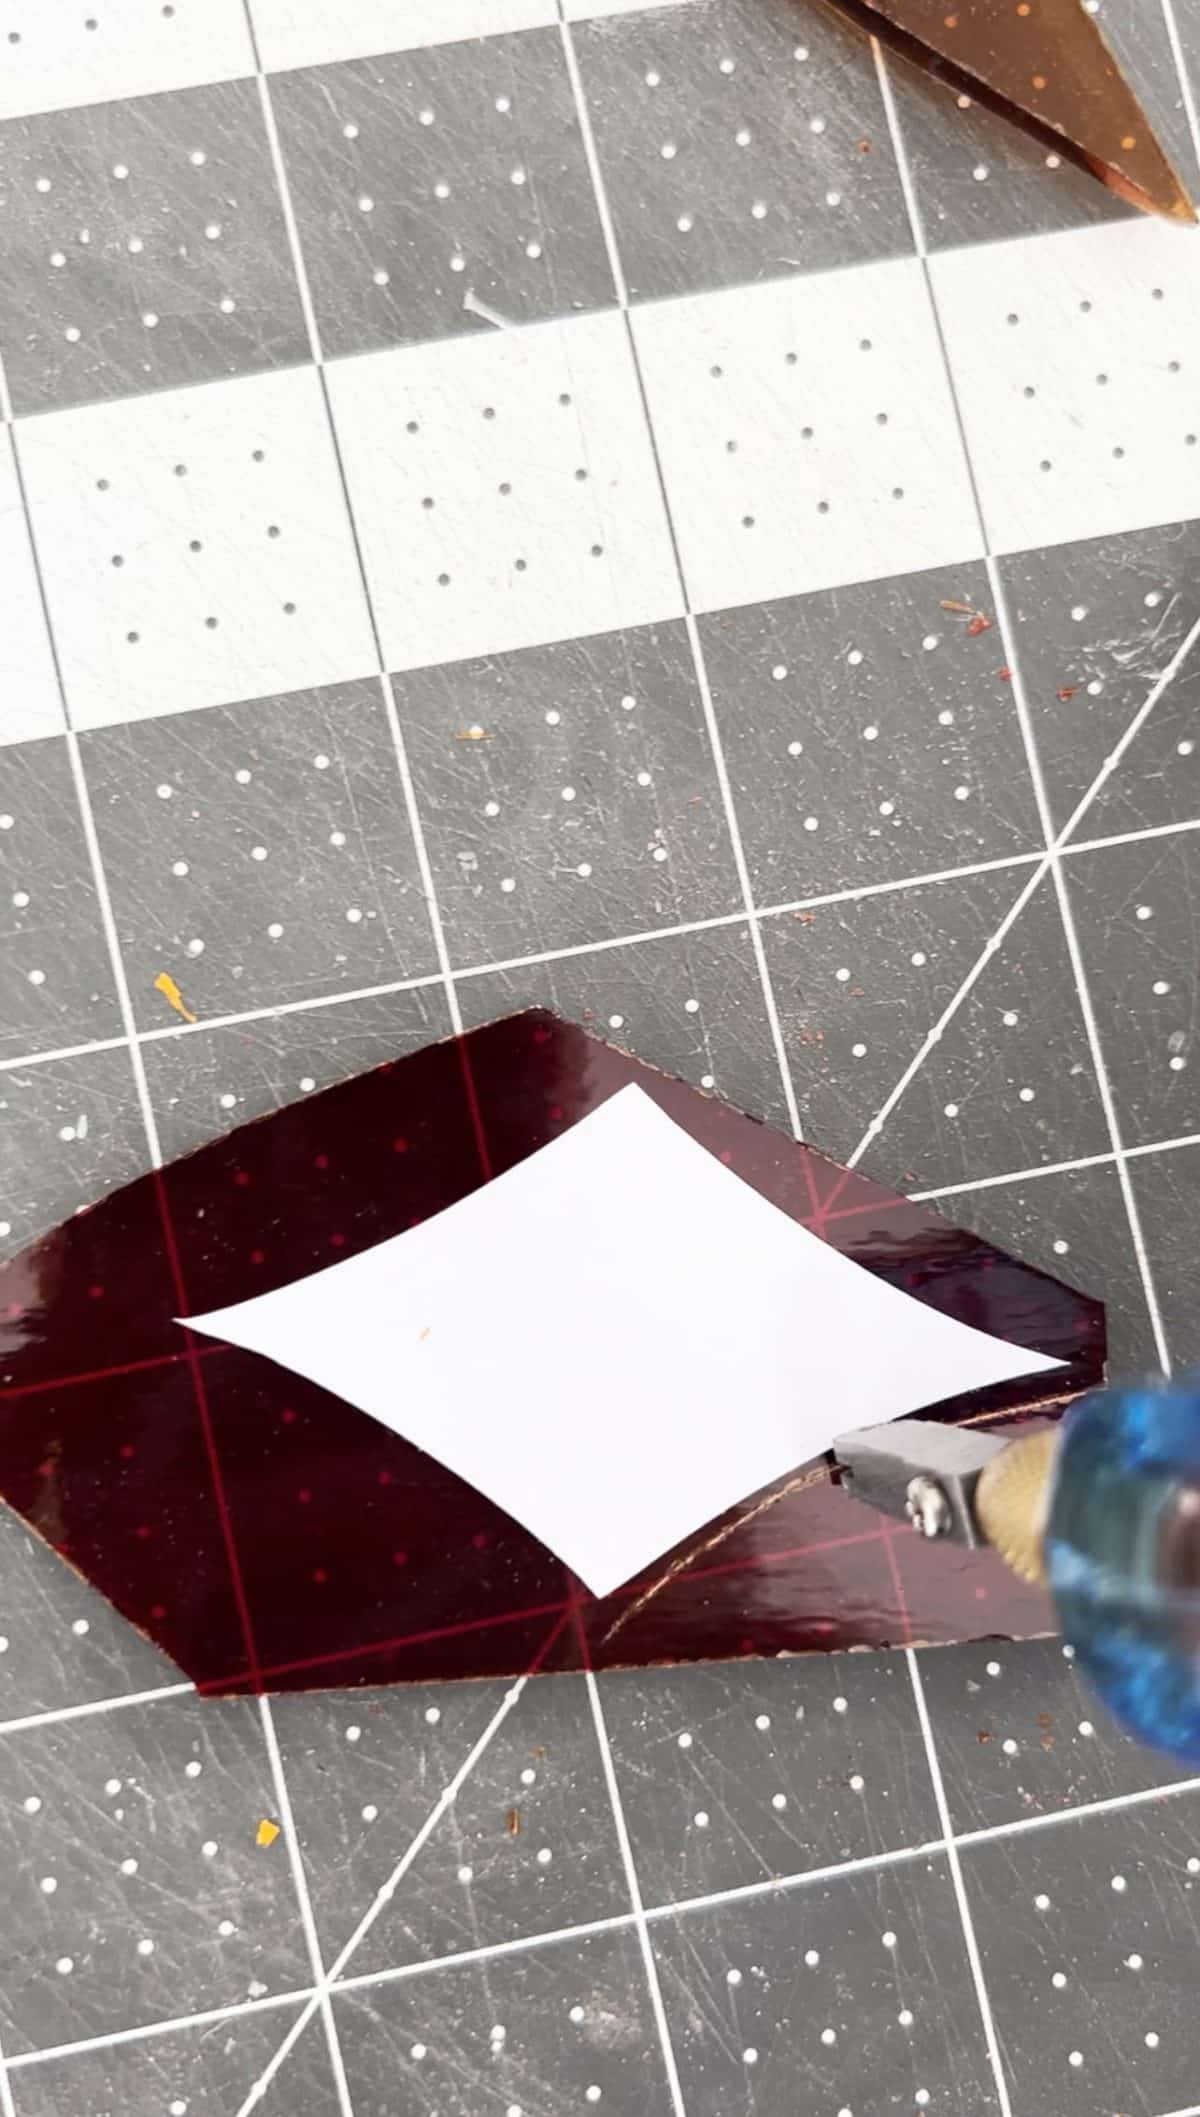
Simply place your shape on top of the glass and use your glass cutter to cut the shape.
Break off each piece with your running pliers, and repeat before grinding.
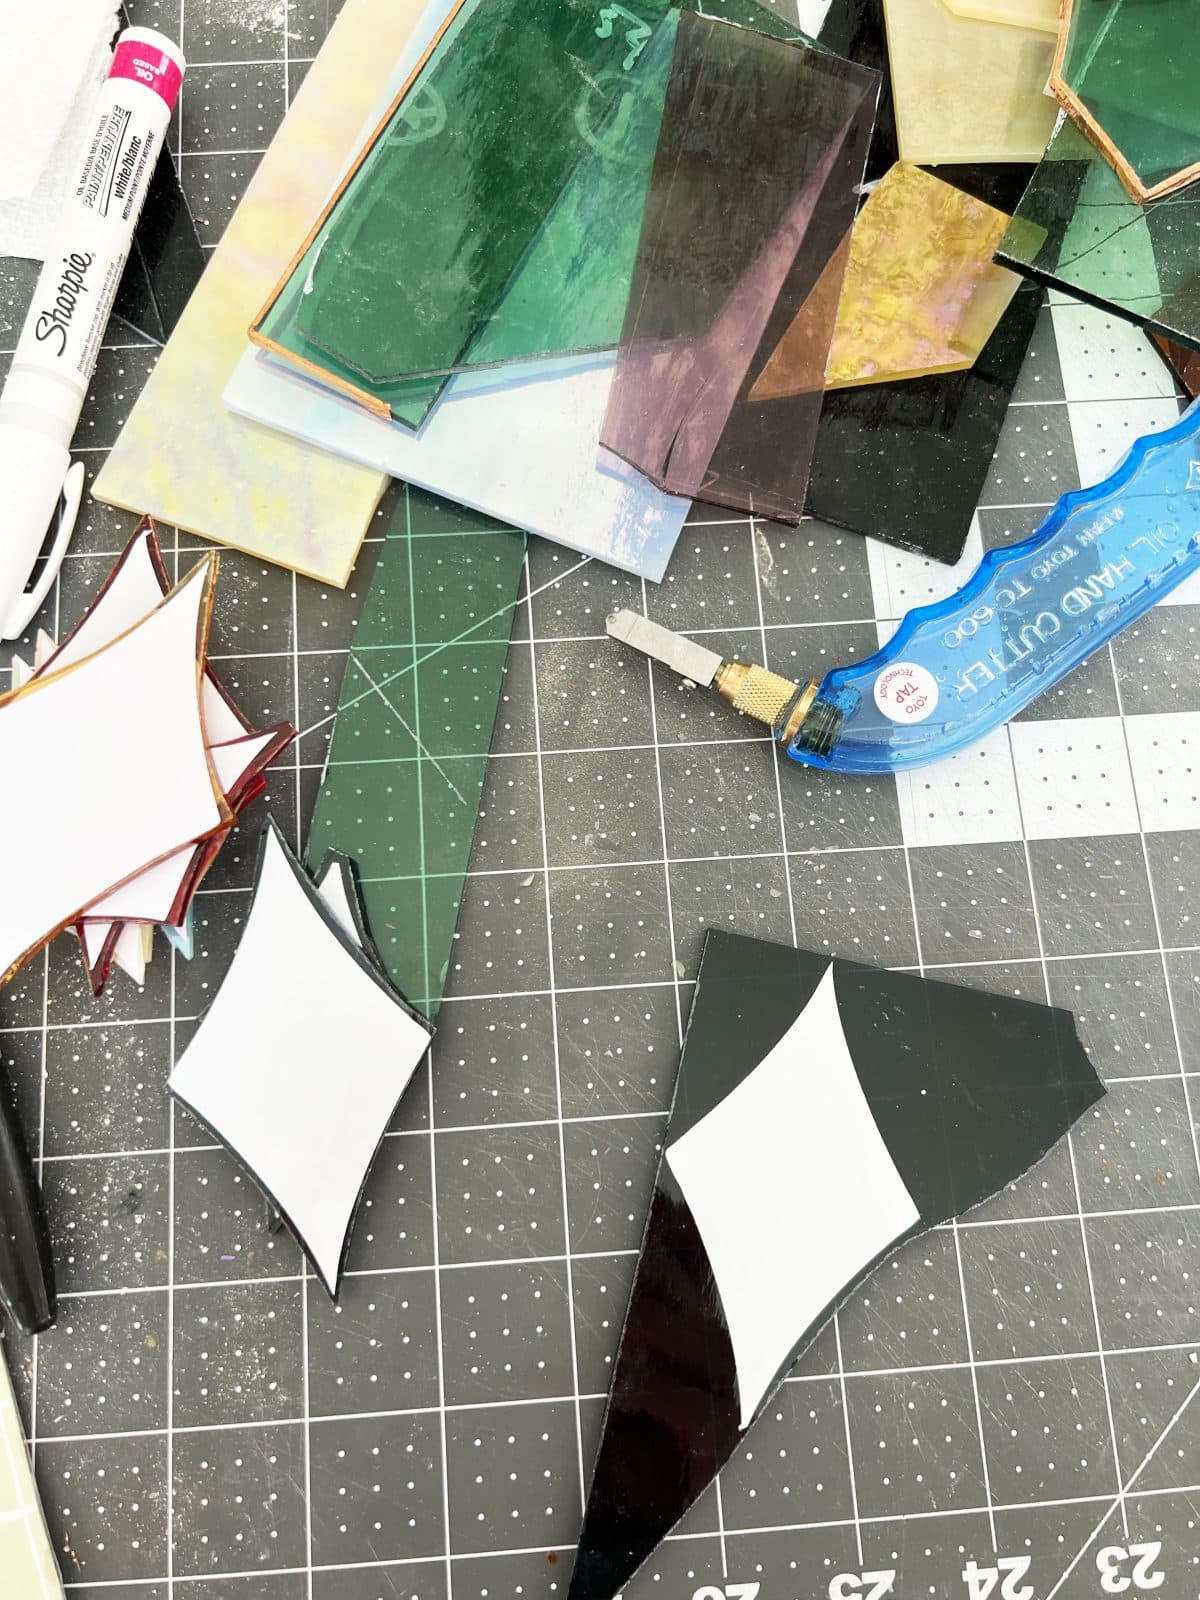
Here you can see I cut multiple pieces before moving on to the grinding phase.
I kept one hand on the piece to take a photo, but always use both hands when grinding. See this shape? It could honestly be ground down more, to the very edge of the vinyl, but it doesn’t matter since the shape is not as precise cut {as it usually is}. Again, check out the link above if you need a more detailed description of the cutting + grinding process.
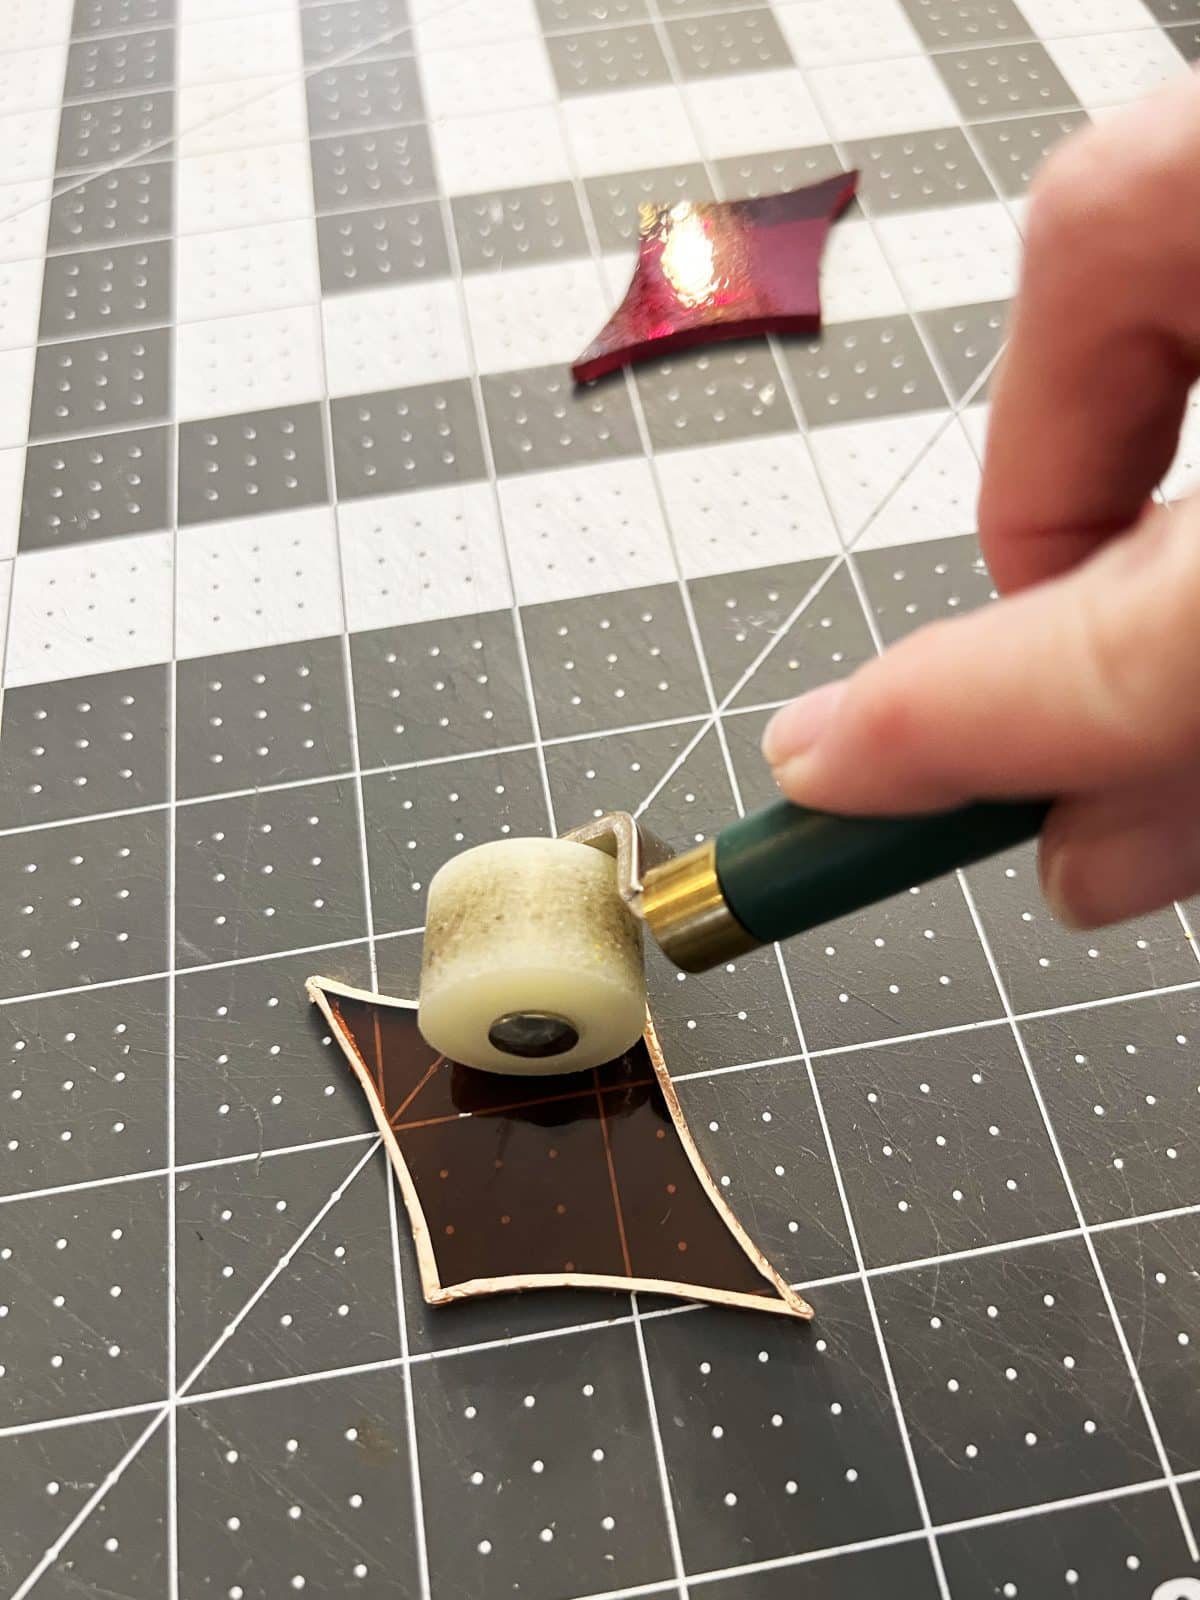
• Foiling + Burnishing
Once all your pieces are ready, it’s time to foil and burnish.
Again, you can find all that outlined as thoroughly as possible here.
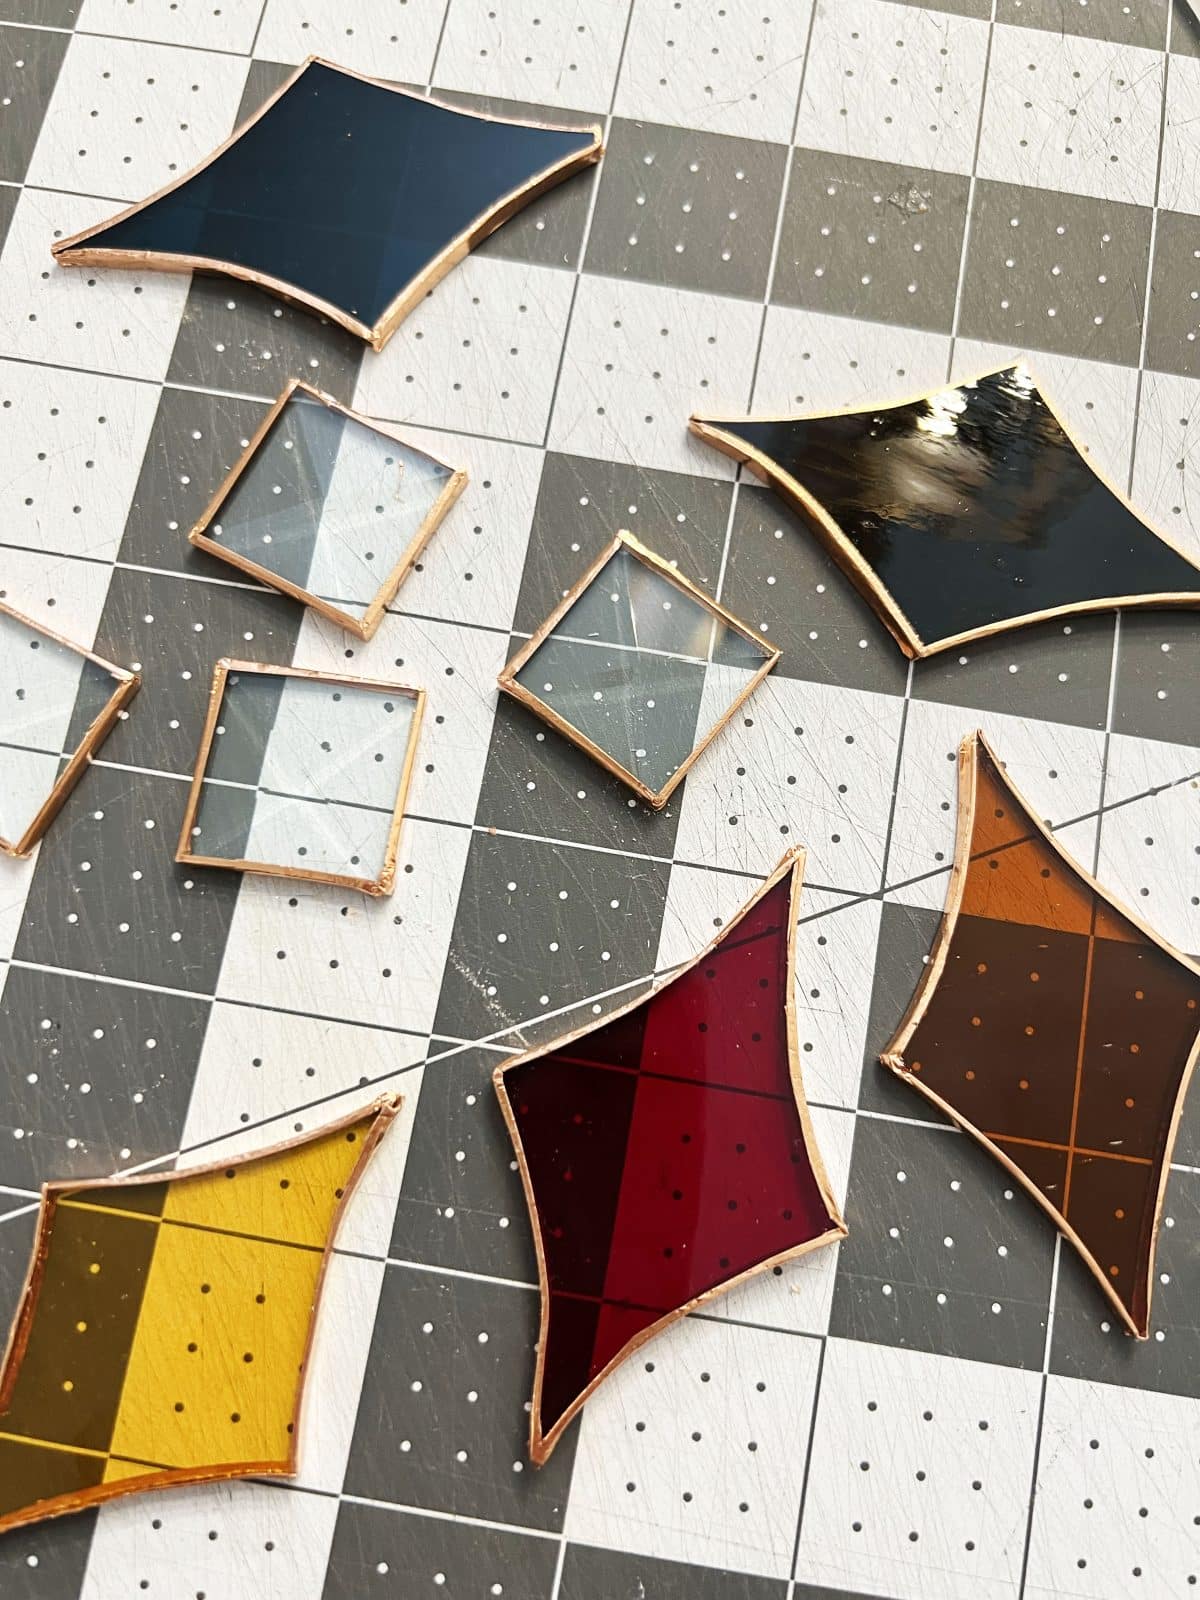
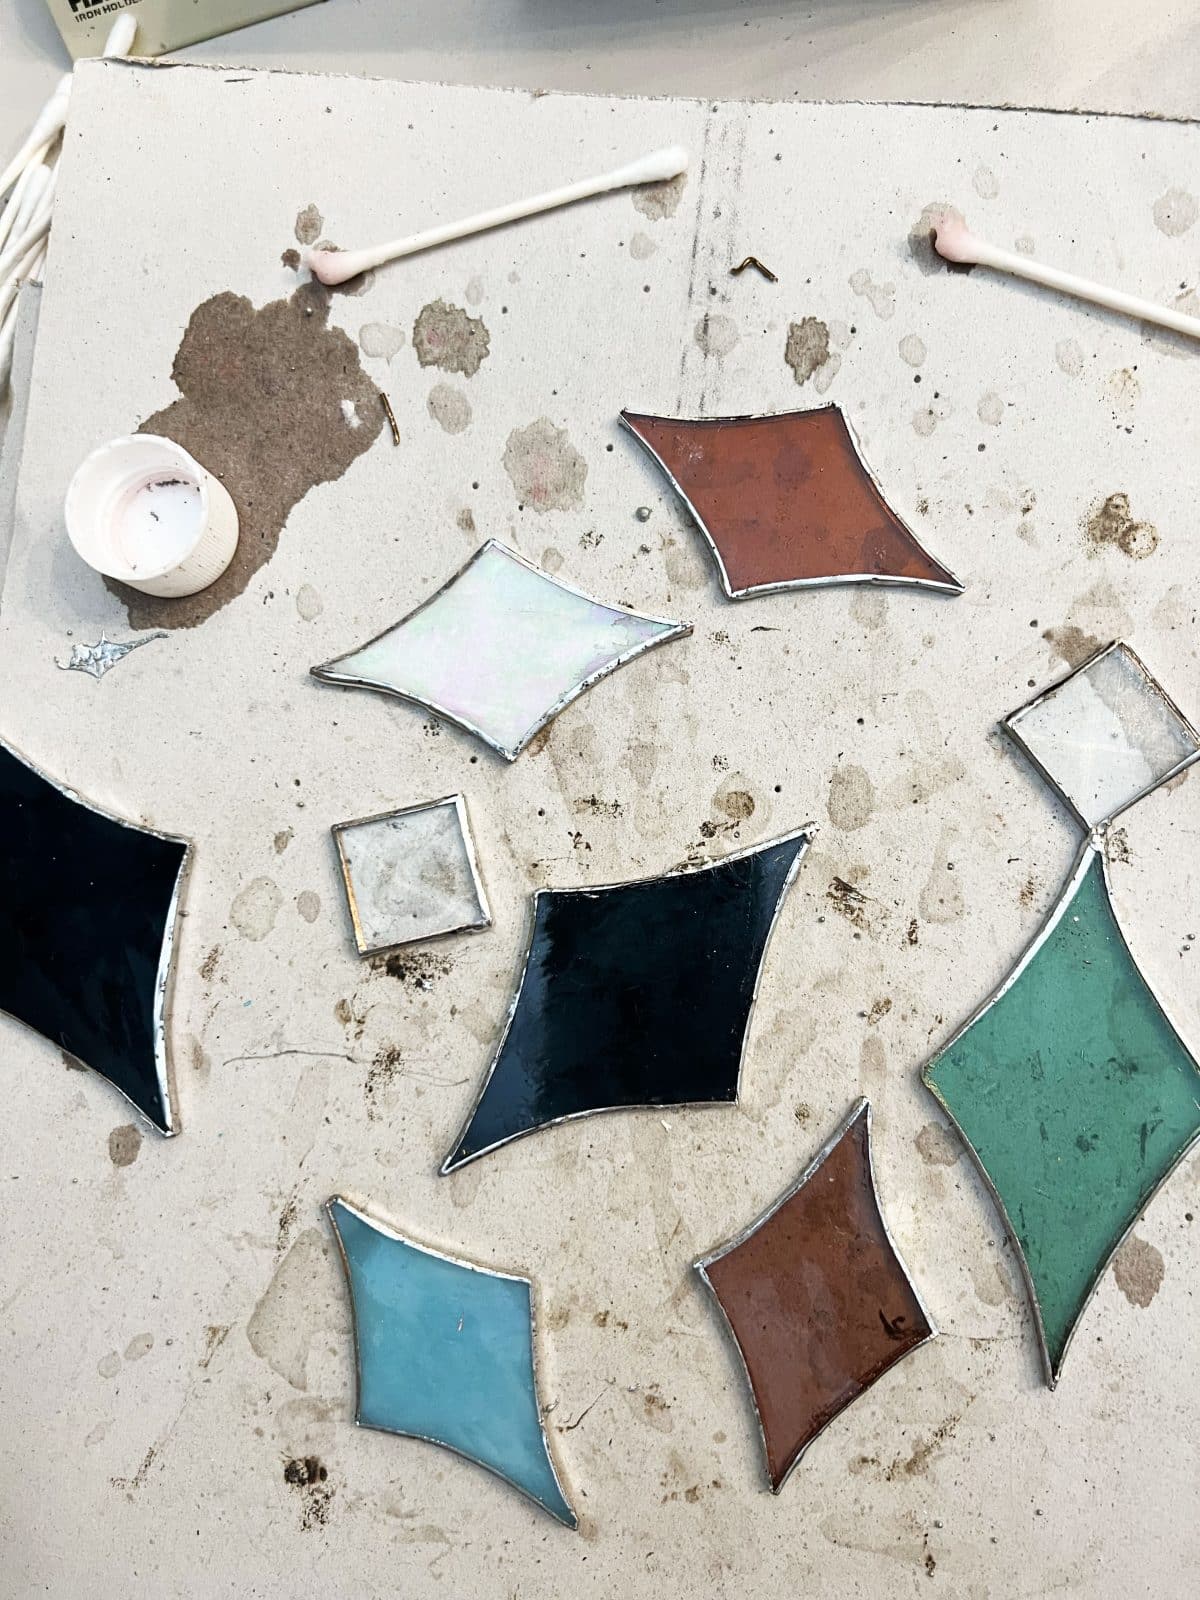
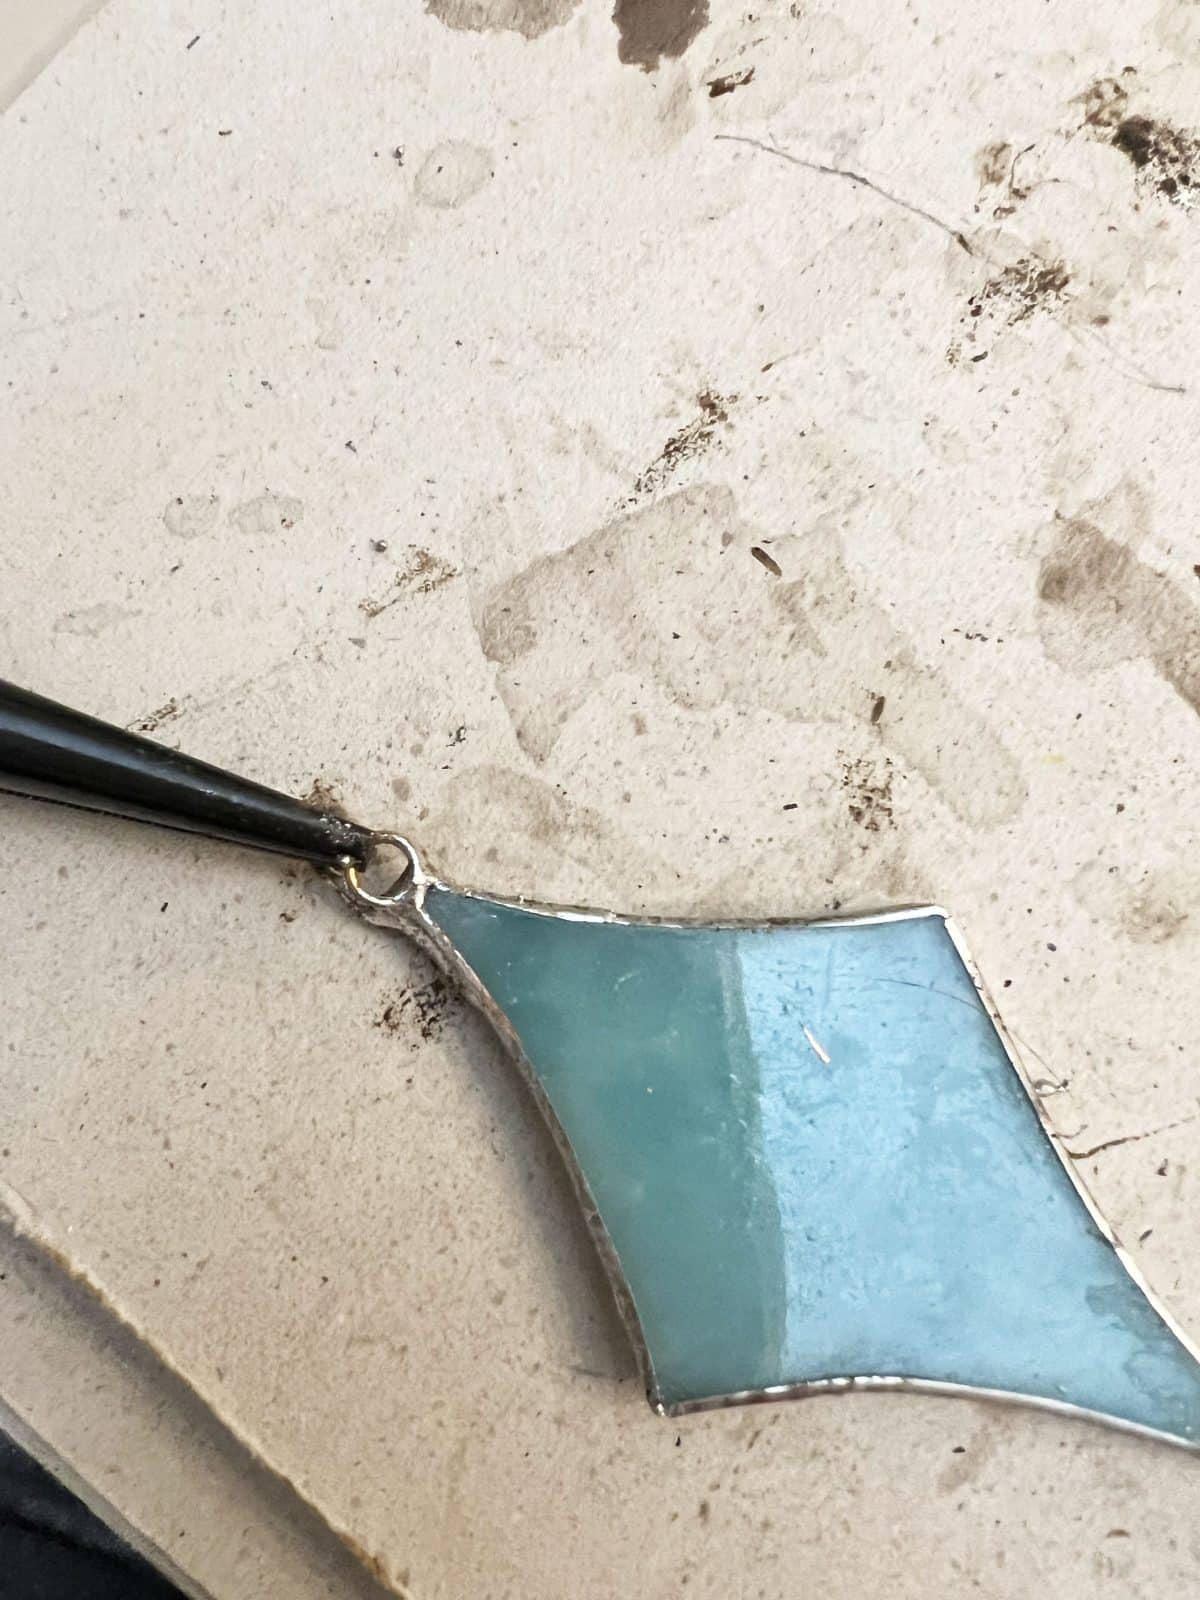
But when you’re finished, your little piece should look like this.
Here they are, all in a row.

When they’re laid out, it’s time for the next step!
• Soldering
Here’s a quick shot from the video I created to show you how it should look as you go.
Again, I’ve outlined it all here.
{Please follow all safety precautions from open windows to ventilation systems here.}
With a free form like this, it may help to dab a little of the solder on as you go, {after you apply that ruby fluid, of course}. Your end goal, {again covered more thoroughly here} is usually for your solder to have a slight curve to it on the finished piece. These pieces are so small you’re just covering them slightly to give them a nice coat of that solder. I then did the sides before flipping it over to move on to the backside.

Tip: I may have mentioned this in the past, but with smaller pieces, these trivets are amazing. They’re heat resistant so they prevent splashing, and catch all the little pieces of that pricey solder before it’s lost for good. You can touch it with your iron and heat it enough to use on your pieces. A great way to recycle that stuff with these smaller pieces.
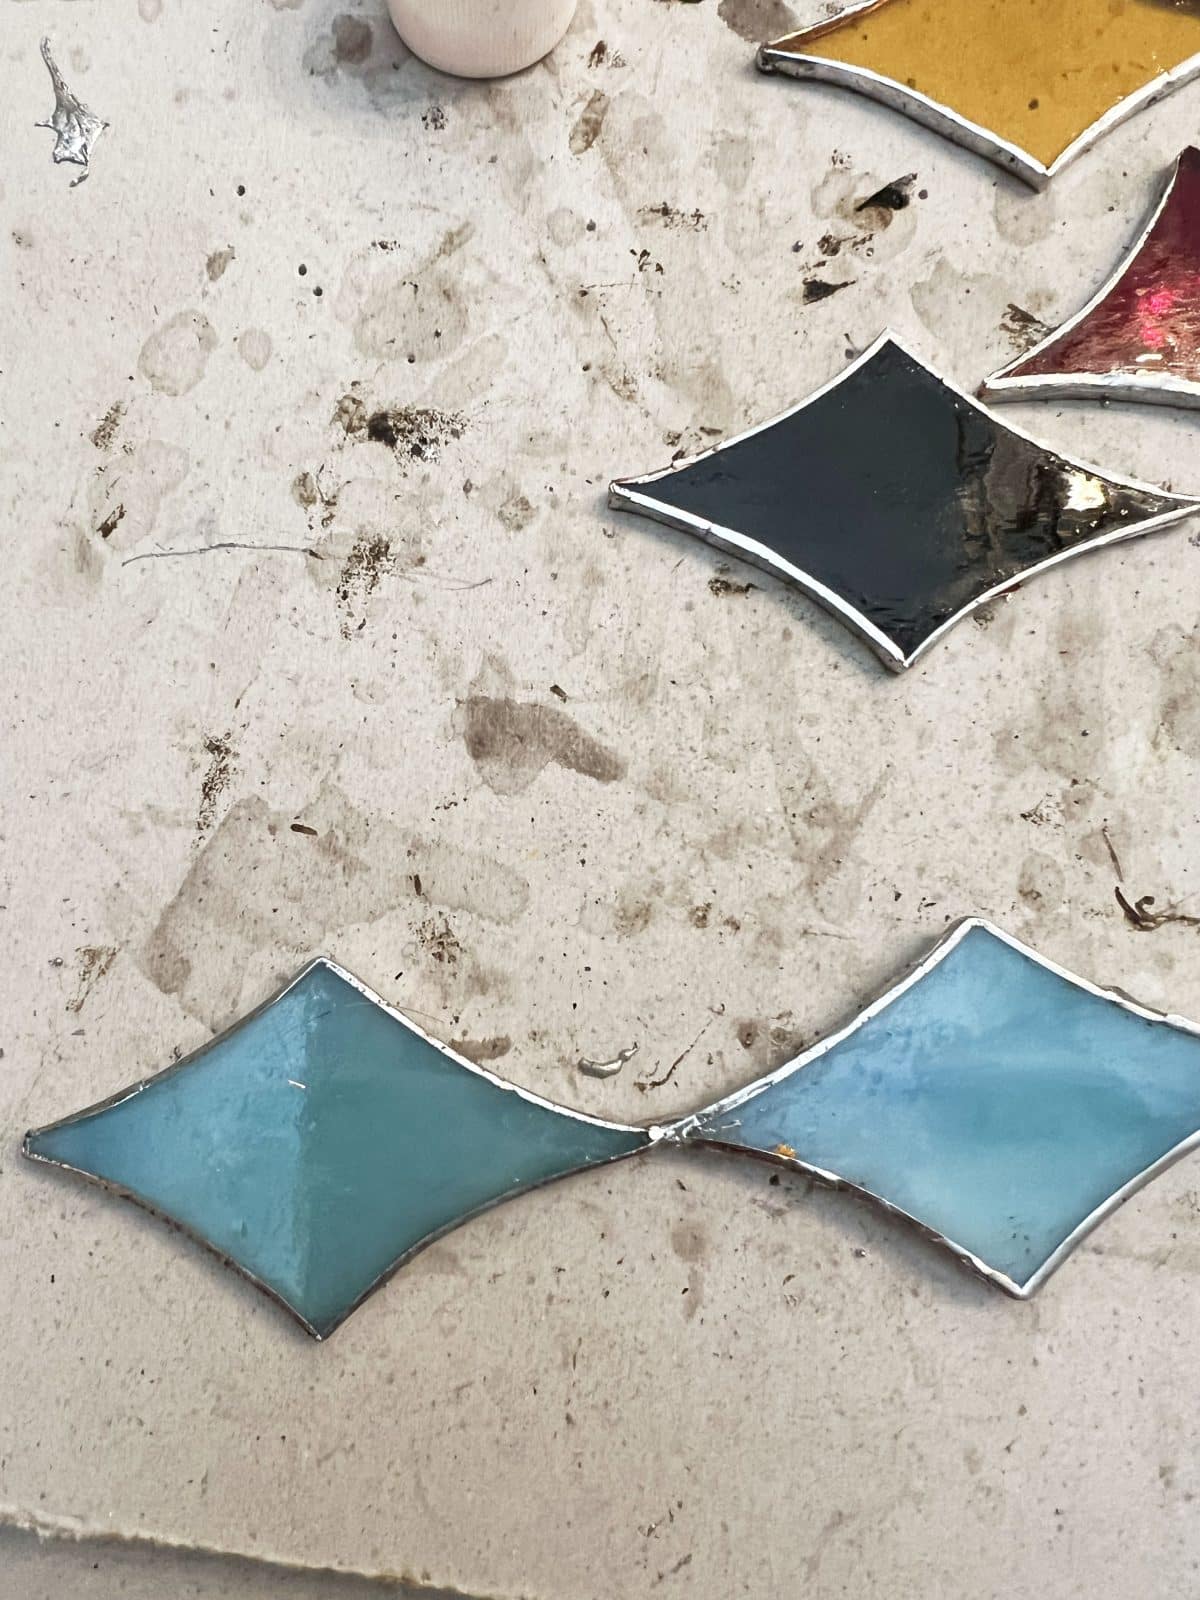
When you’re finito, your first side should look like this. I joined pieces with a tiny dab as I saw the opportunity while working. Again, this is more of a free-form pattern with however you want it to end. I love the way these charming little pieces came together!
Be careful with these smaller pieces, as they heat up quickly. I worked with multiple pieces simultaneously, so they had time to cool in between. Then I flipped them over and did the other side.
Jump Rings: You can attach these at the end or at this stage. I prefer this stage before the cleanup and patina steps.
Using a pair of pliers to hold your jump ring, cover it in ruby fluid and solder, coating the entire thing well. This is where the trivets come in handy because you can heat up solder in a little section and dip them in while rubbing it with your iron. Then, hold it to your piece, and attach it to the top with a little more solder. It should stay easily in place, and you can remove the pliers once they stay. It’s a learning curve with a satisfying step.
• Clean it up {see more detail here}
This is the usual order, in case you’re curious. But for these tiny pieces, I fudged a little since I went ahead and soldered both sides and edges.
Here’s the usual: Breaking it down, the order goes like this for each side:
1. Flux + Solder {You’ve already done this}
2. Kwik Clean {rub it on and clean the glass/solder
3. Clarity – It’s a stained glass finishing compound {it makes everything shine – technically it is wax – oh so satisfying}
Flip it over, and you’re ready to do the second side.
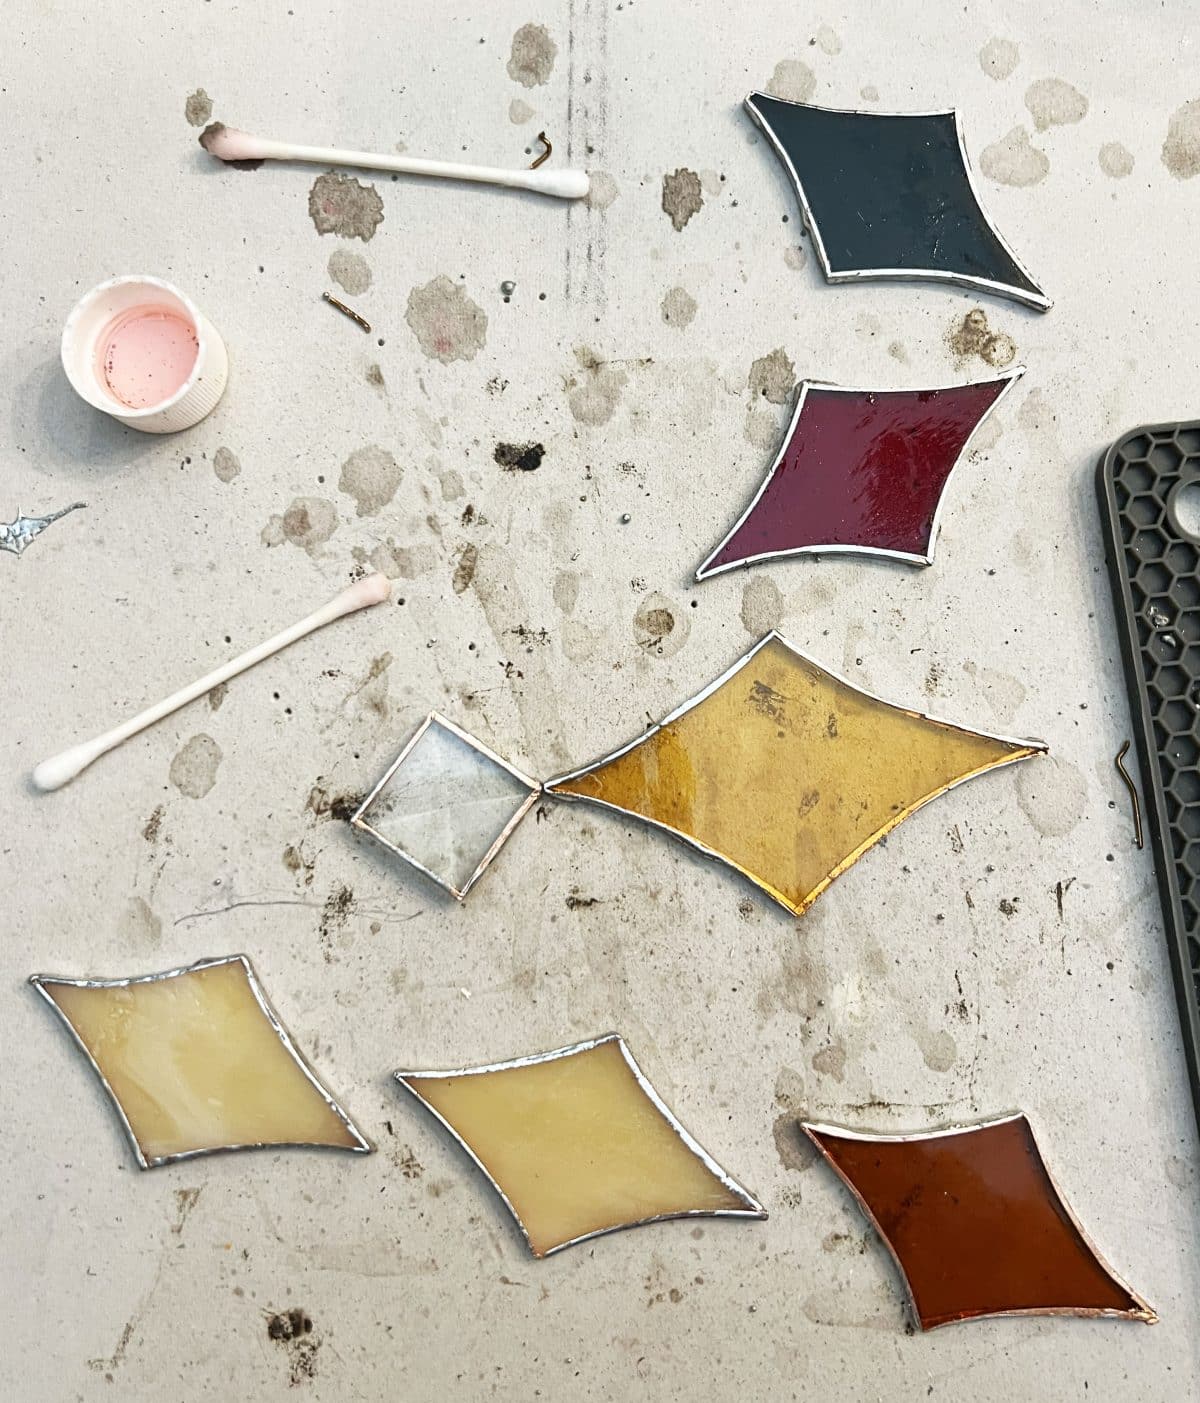
For these pieces, I used Kwik Clean on each side after soldering all, careful not to scrub the tape too hard, or it will come off on such a delicate piece. Then I was ready to patina. I returned to the polishing part after the patina, which I will outline below.
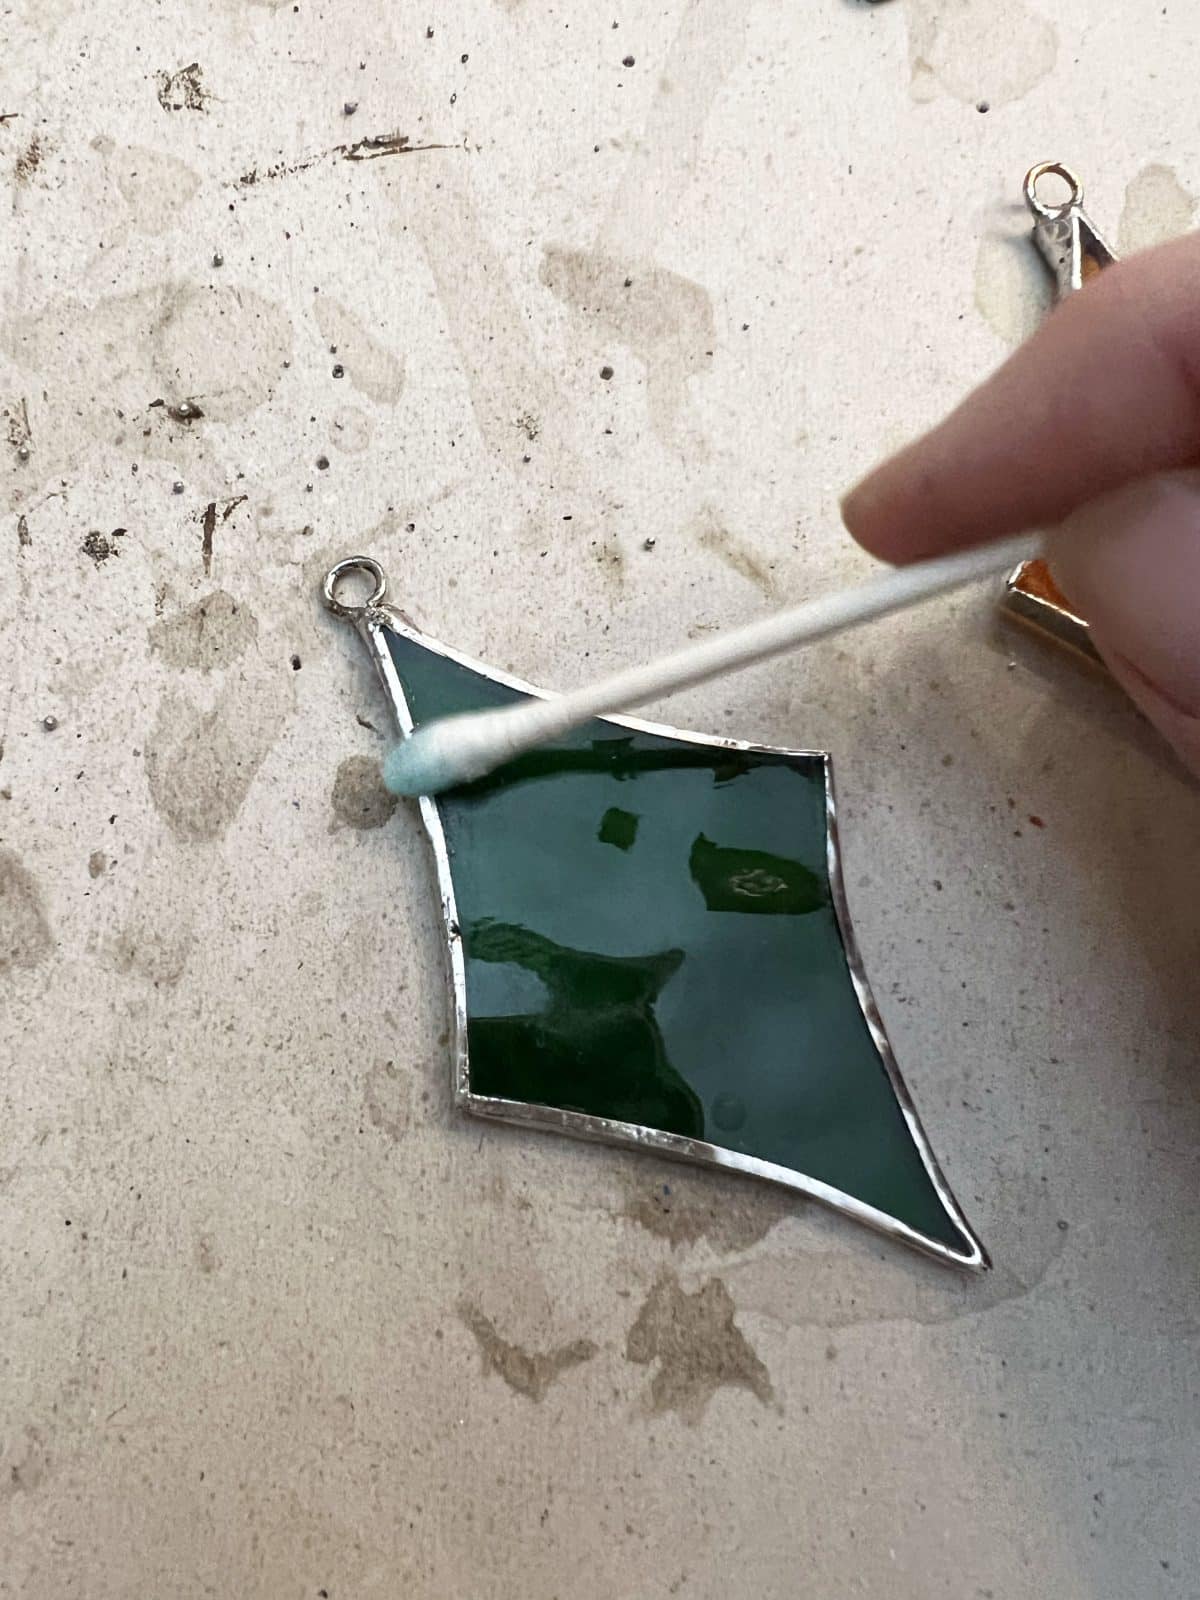
Once it’s clean, you can add your patina if you wish to do this step. You can always leave them silver. If you’d like to do that, then please move on to the cleaning process below. I like patina because it covers all my sins. ;}
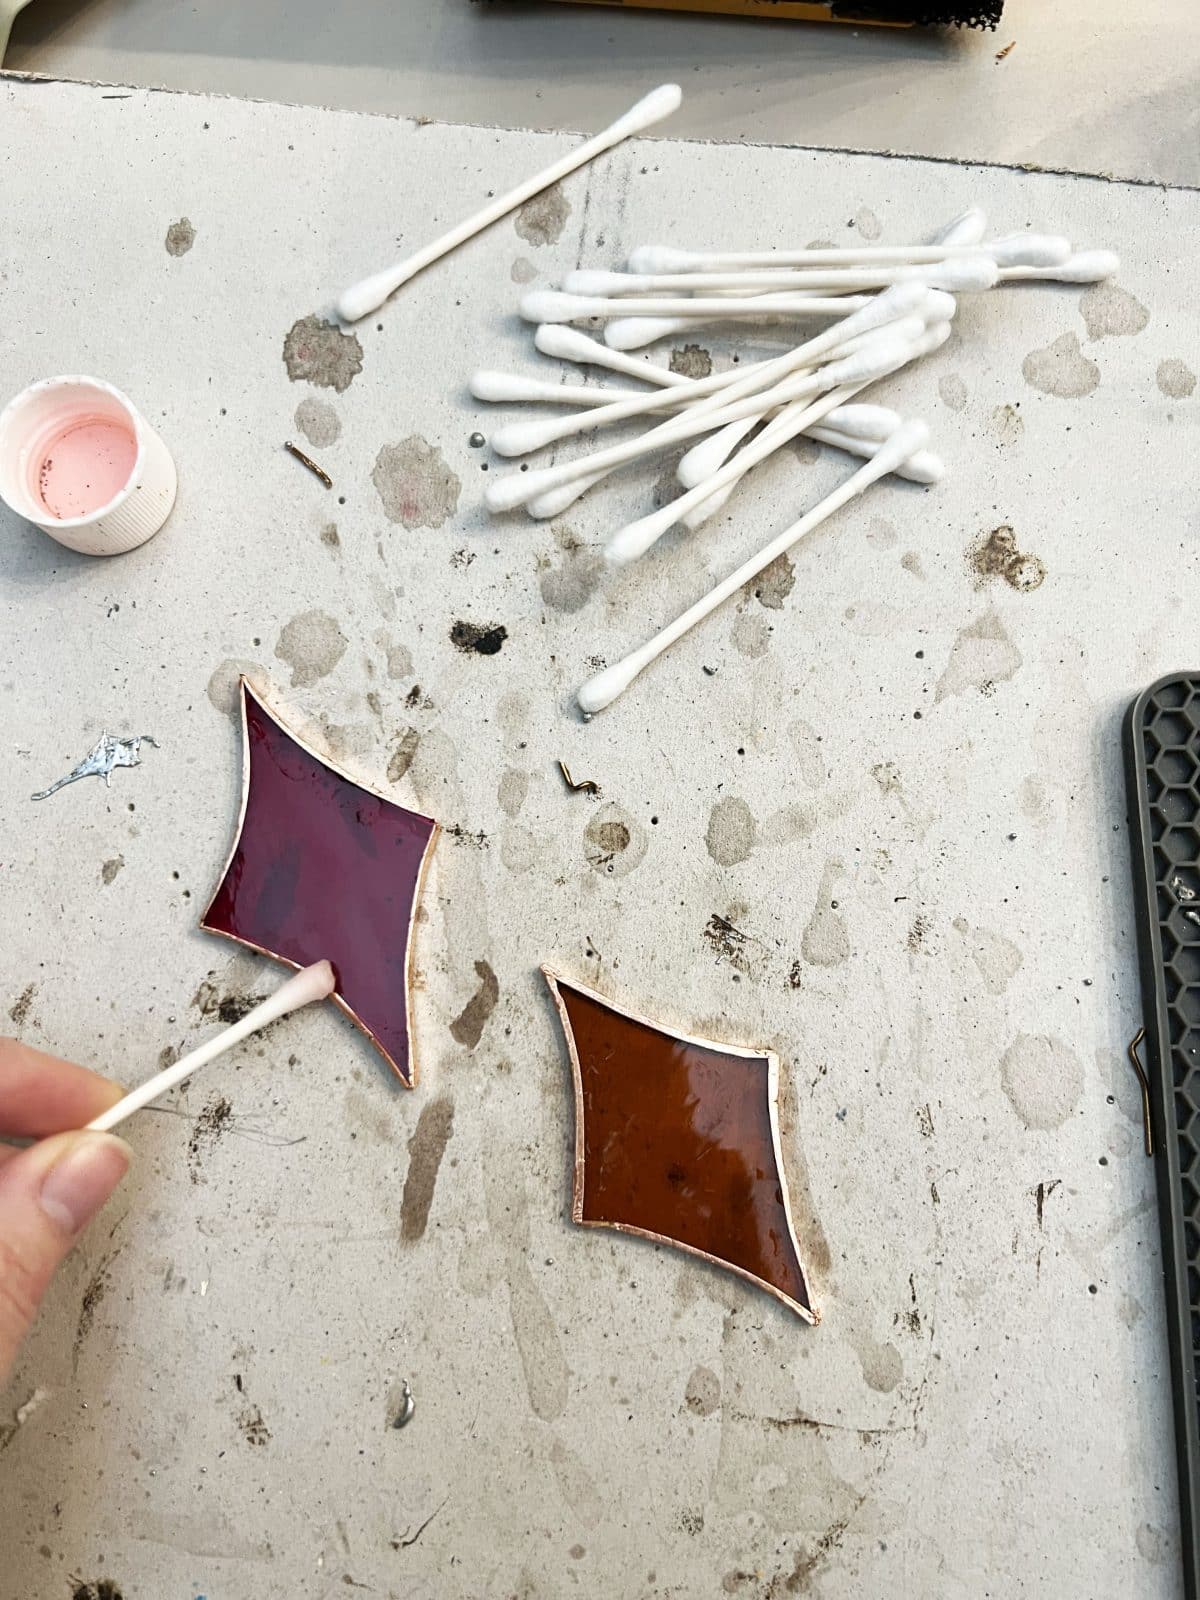
• Patina
• Then you’ll break out your Super Brite {finishes in black, copper + just leaving it silver}
• I use a combo of Q-tips + paper towels to rub it on, including all sides. Remember that magic coloring book you had as a kid with the clear marker, and when you drew on top, it made things change colors? This is that, for adults.
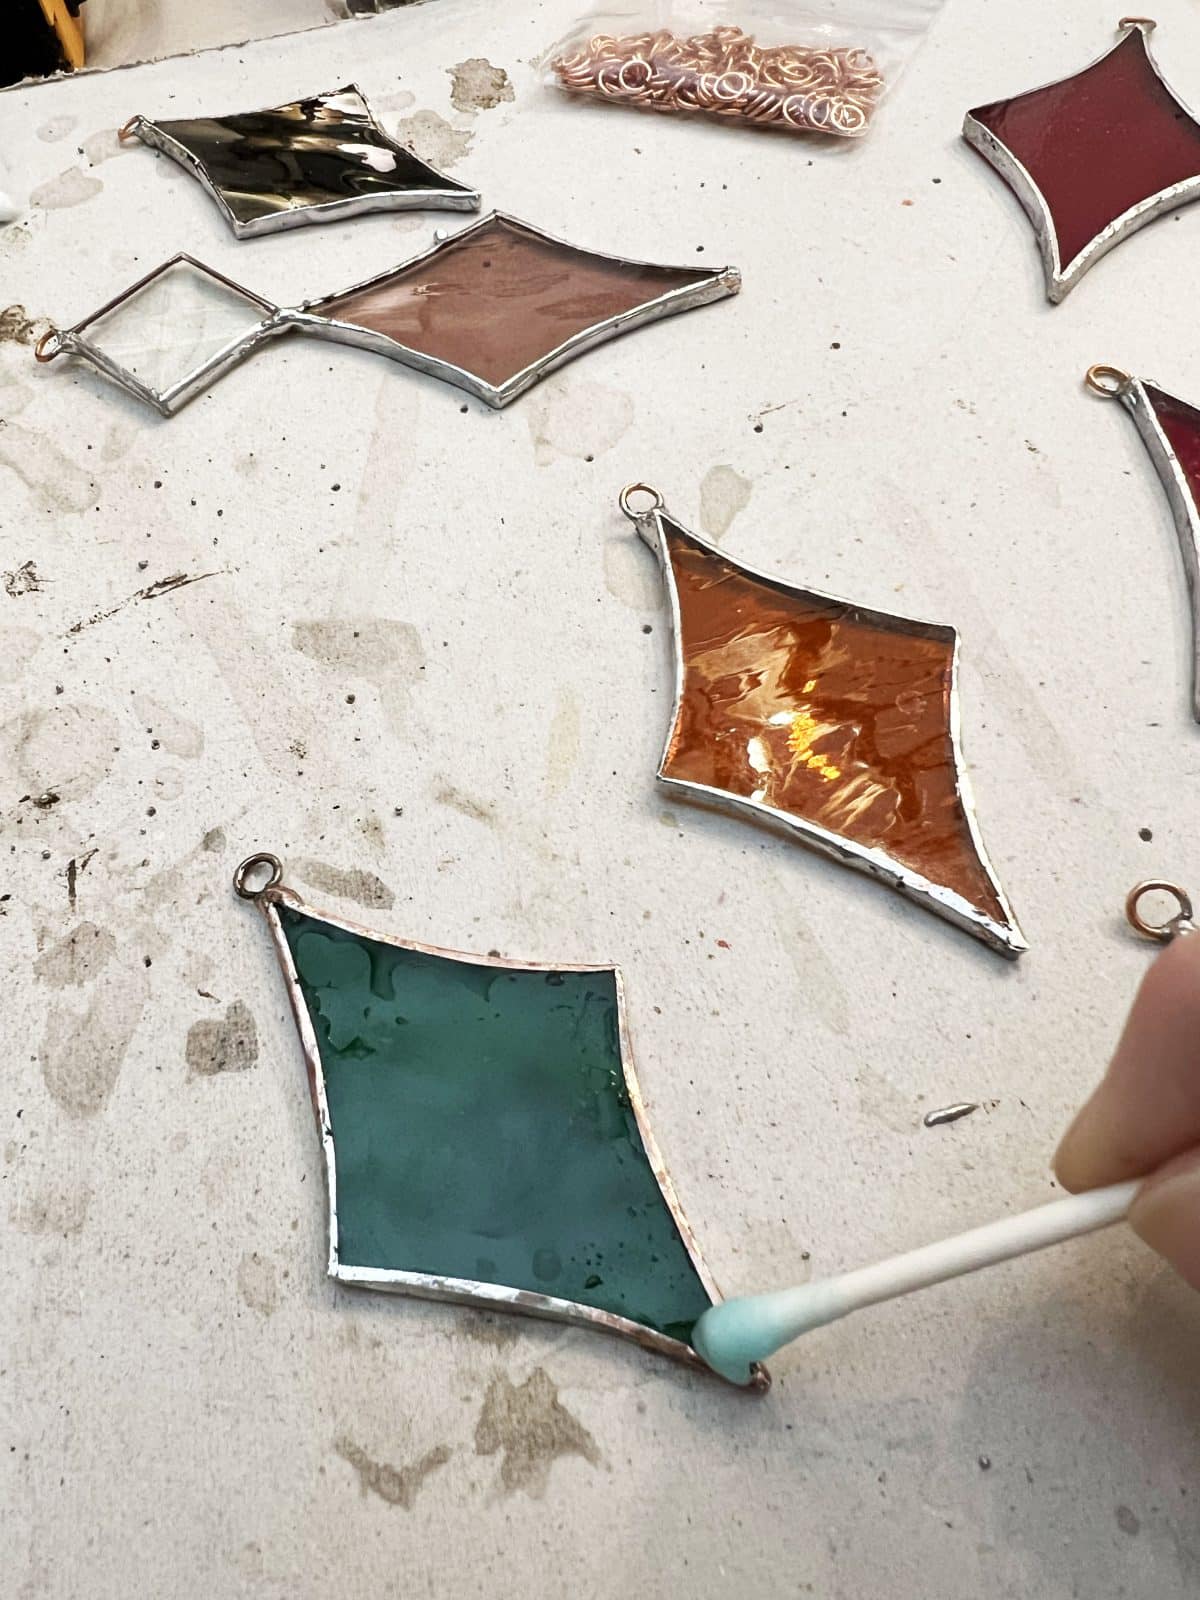
Clean + polish: Kwik Clean + Clarity. Just rub until it shines.
• This time, I again used the Kwik Clean on each side, and then polished with the Clarity. It was so satisfying to polish them up and bring them to life!

Now add some twine or ribbon, and your little pieces are ready!
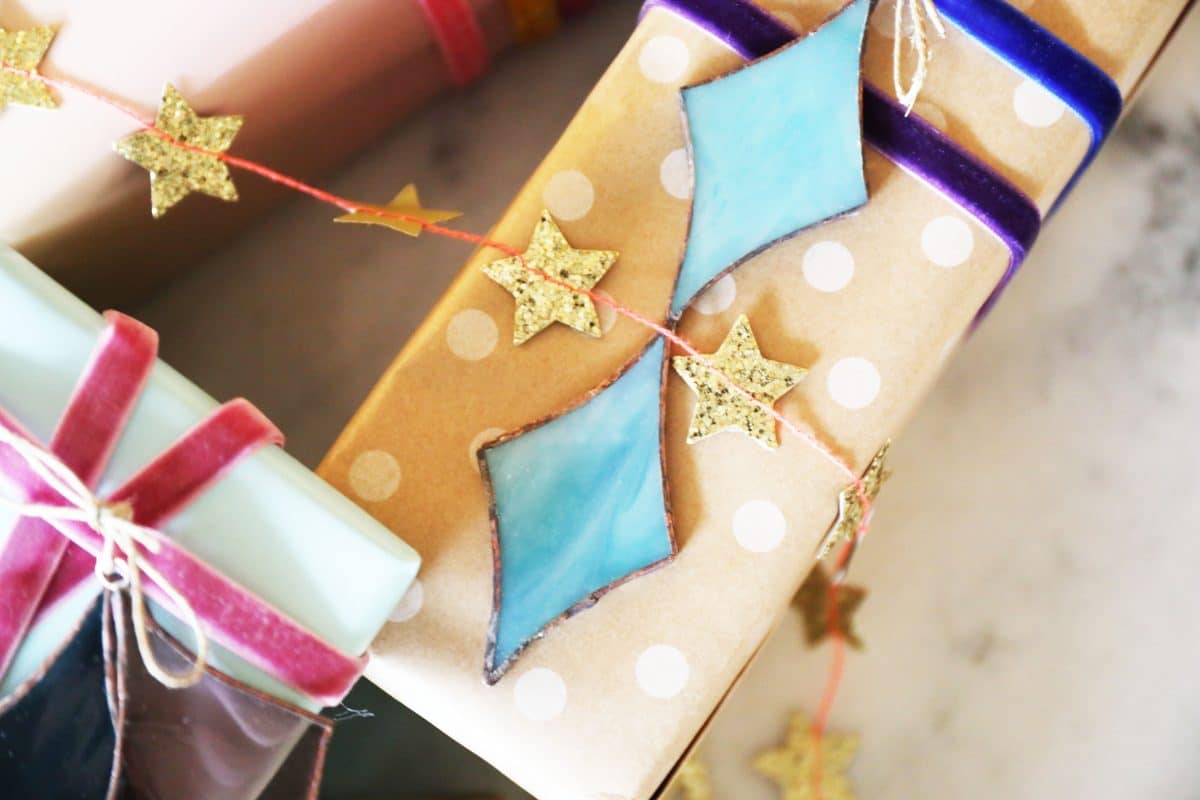
I love them as gifts, gift toppers, ornaments and sun catchers. Honestly, you could make a ton for yourself and friends, and move yours around your house all year long. I’m tempted to use mine as window hangings for the winter months.

But I love the charming vibe they add here!

As always, if you use them, we’d love to hear!
These take my breath away with their whimsy and style!
As always, don’t hesitate to let me know if you have any questions. Have an inspired day!


Absolutely love this!
Thank you so much, Margaret! ;}