
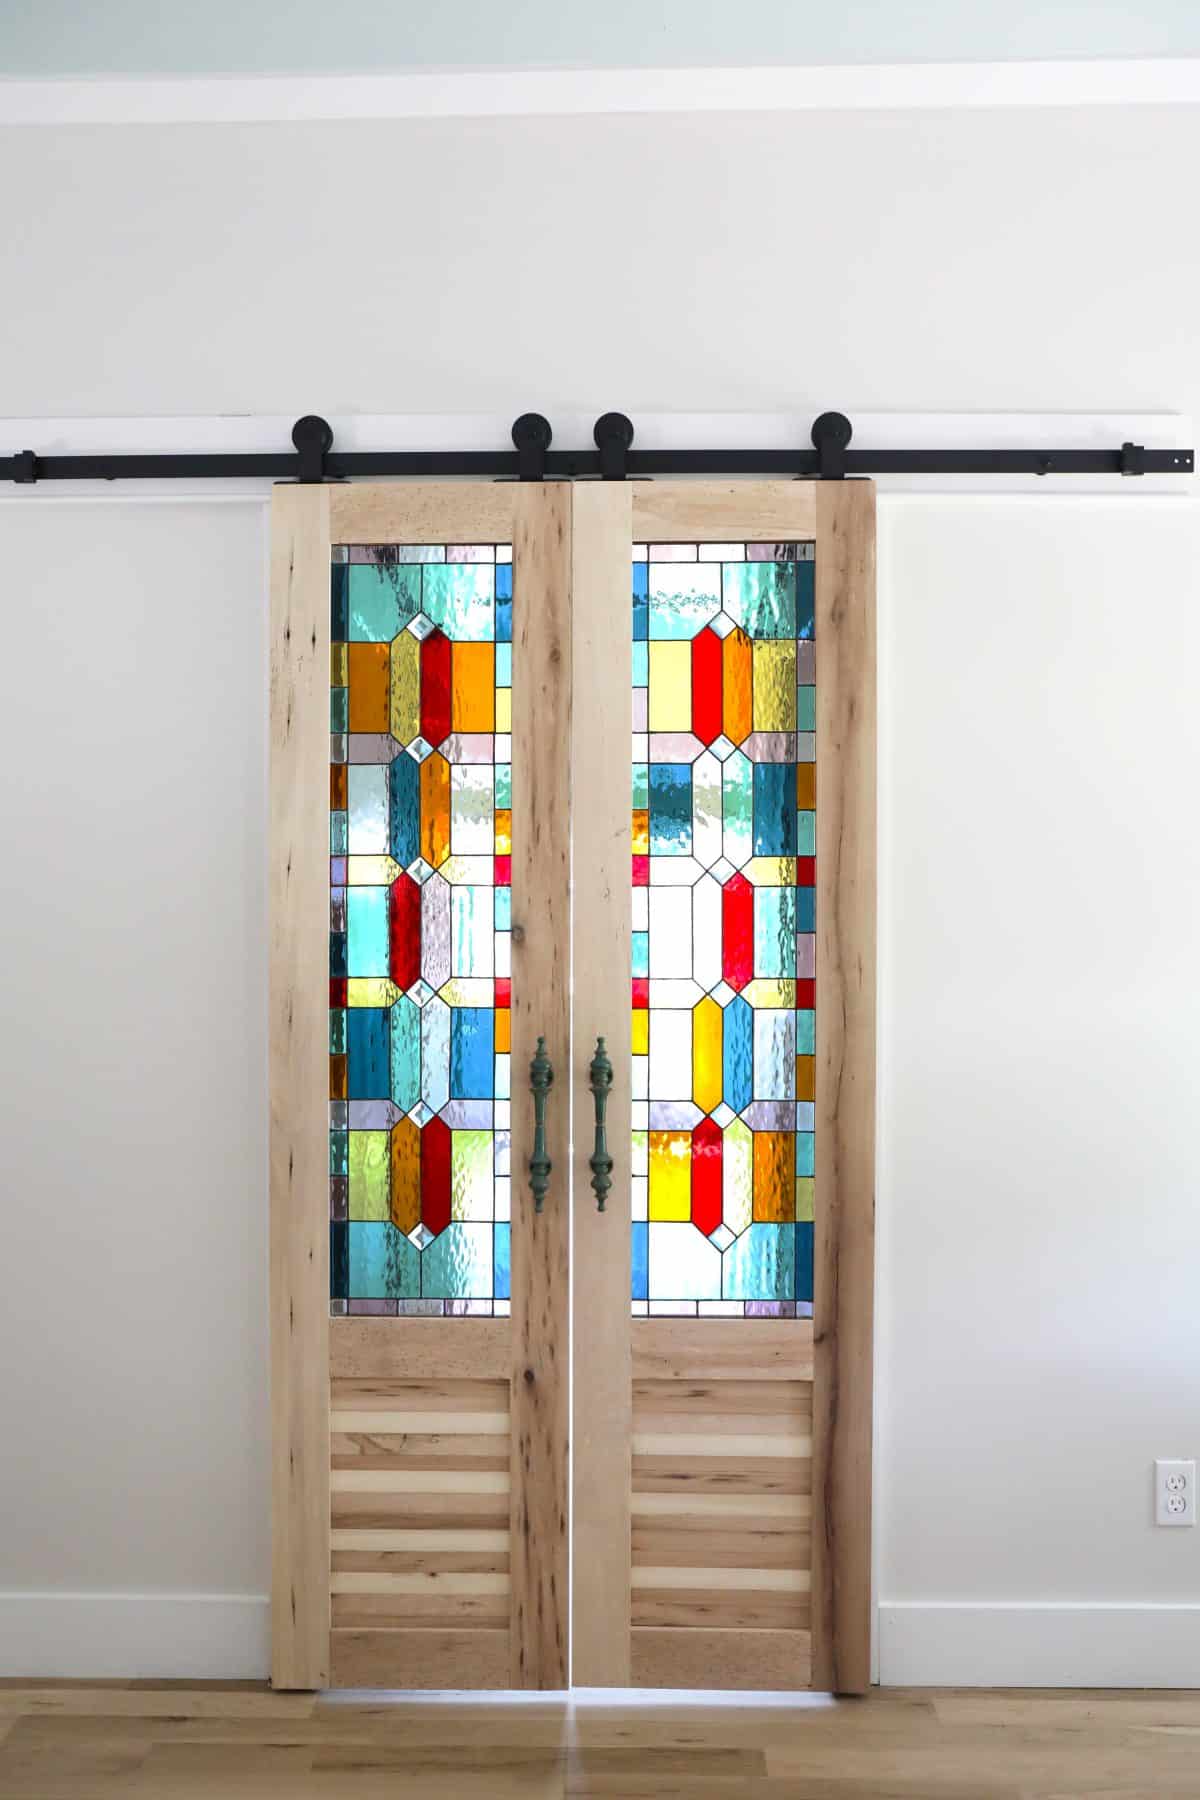
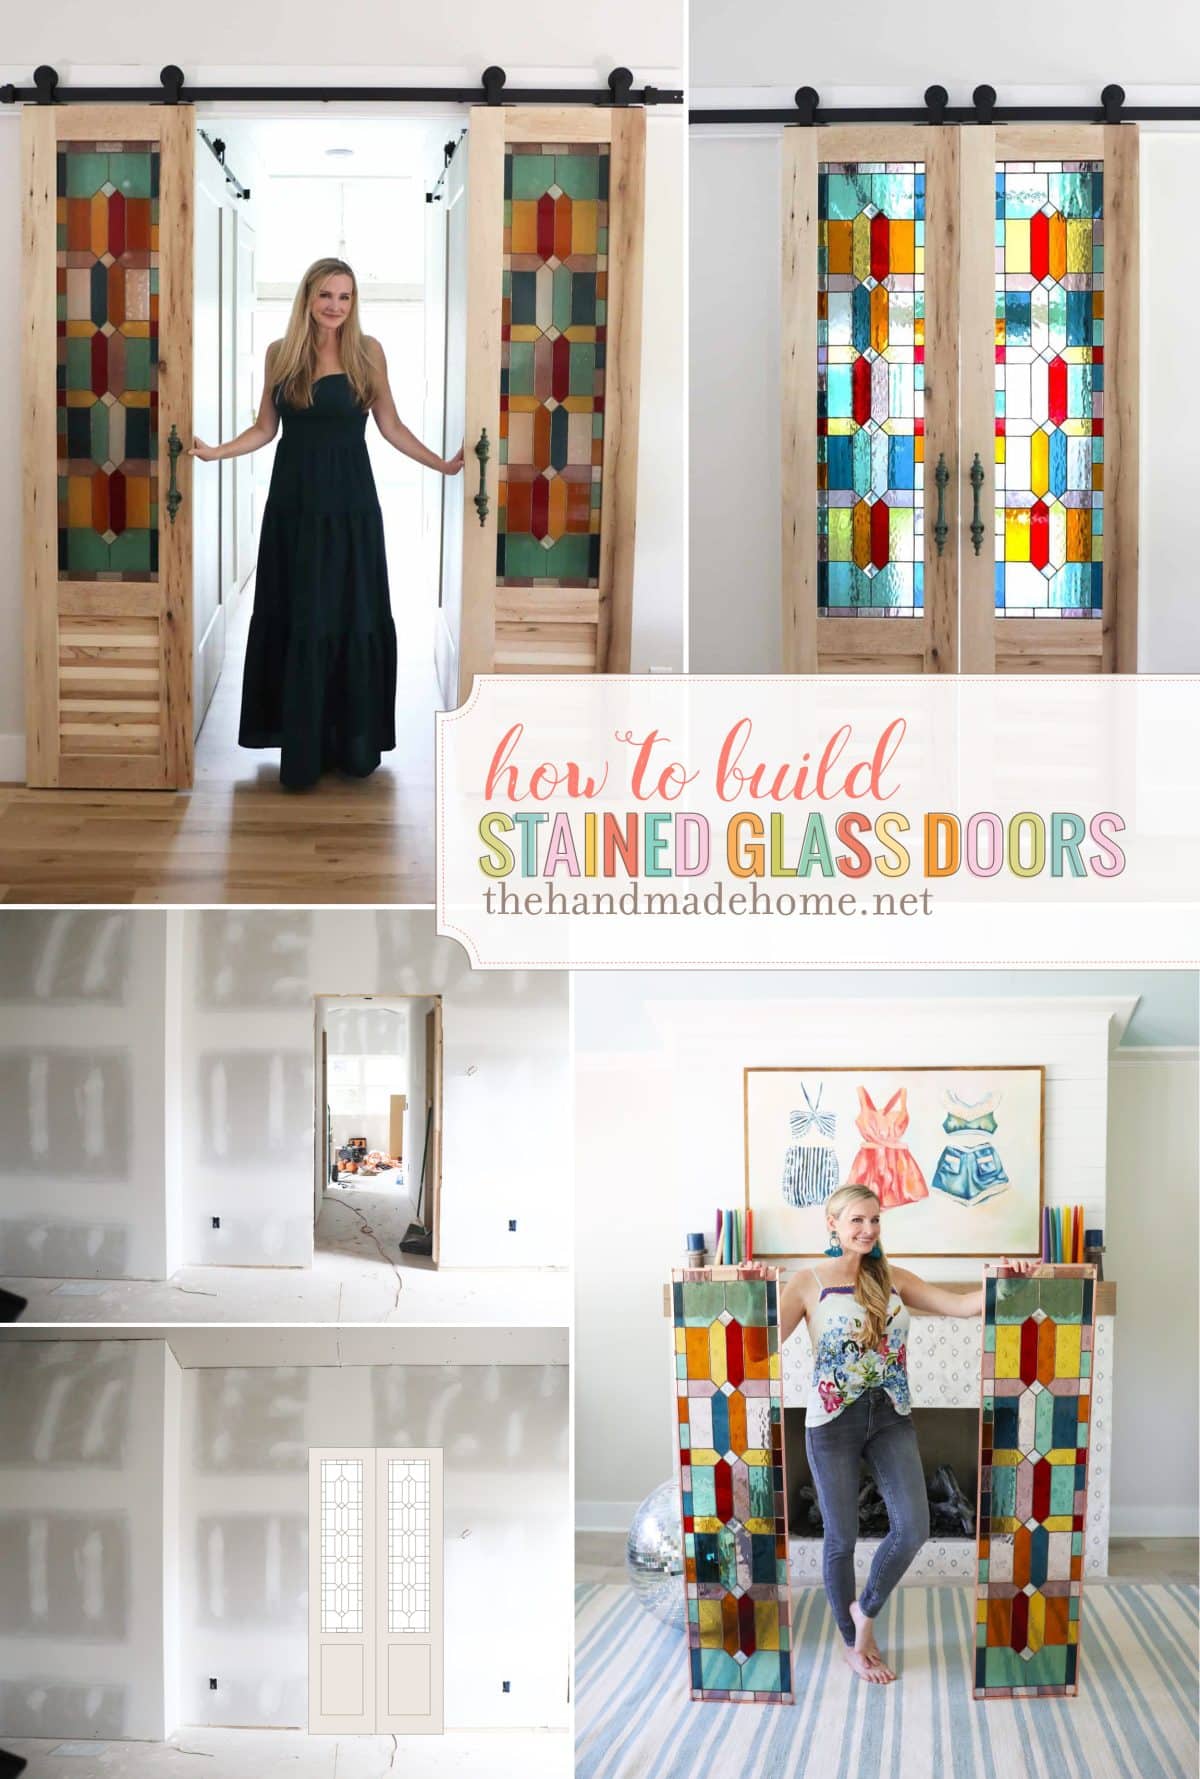
how to build stained glass doors
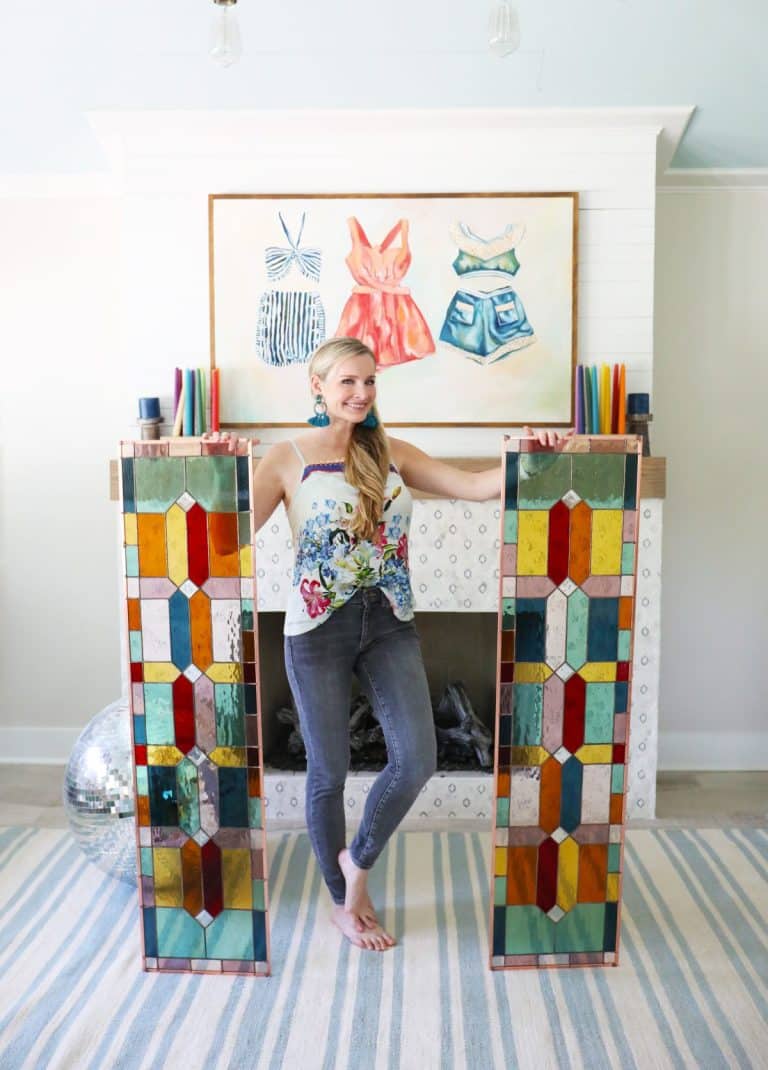
A few weeks ago, I was absolutely thrilled to share this creation with all of you, and the beautiful results that came from one of our favorite projects!
We knew we wanted something pretty fantastical to flank the entryway of this space we’ve waited on for 5+ {6? I’ve lost count} years. So this winter when I signed up for a fun stained glass course with a fun friend, I knew this was going to be quite the undertaking, but well worth it in the end.

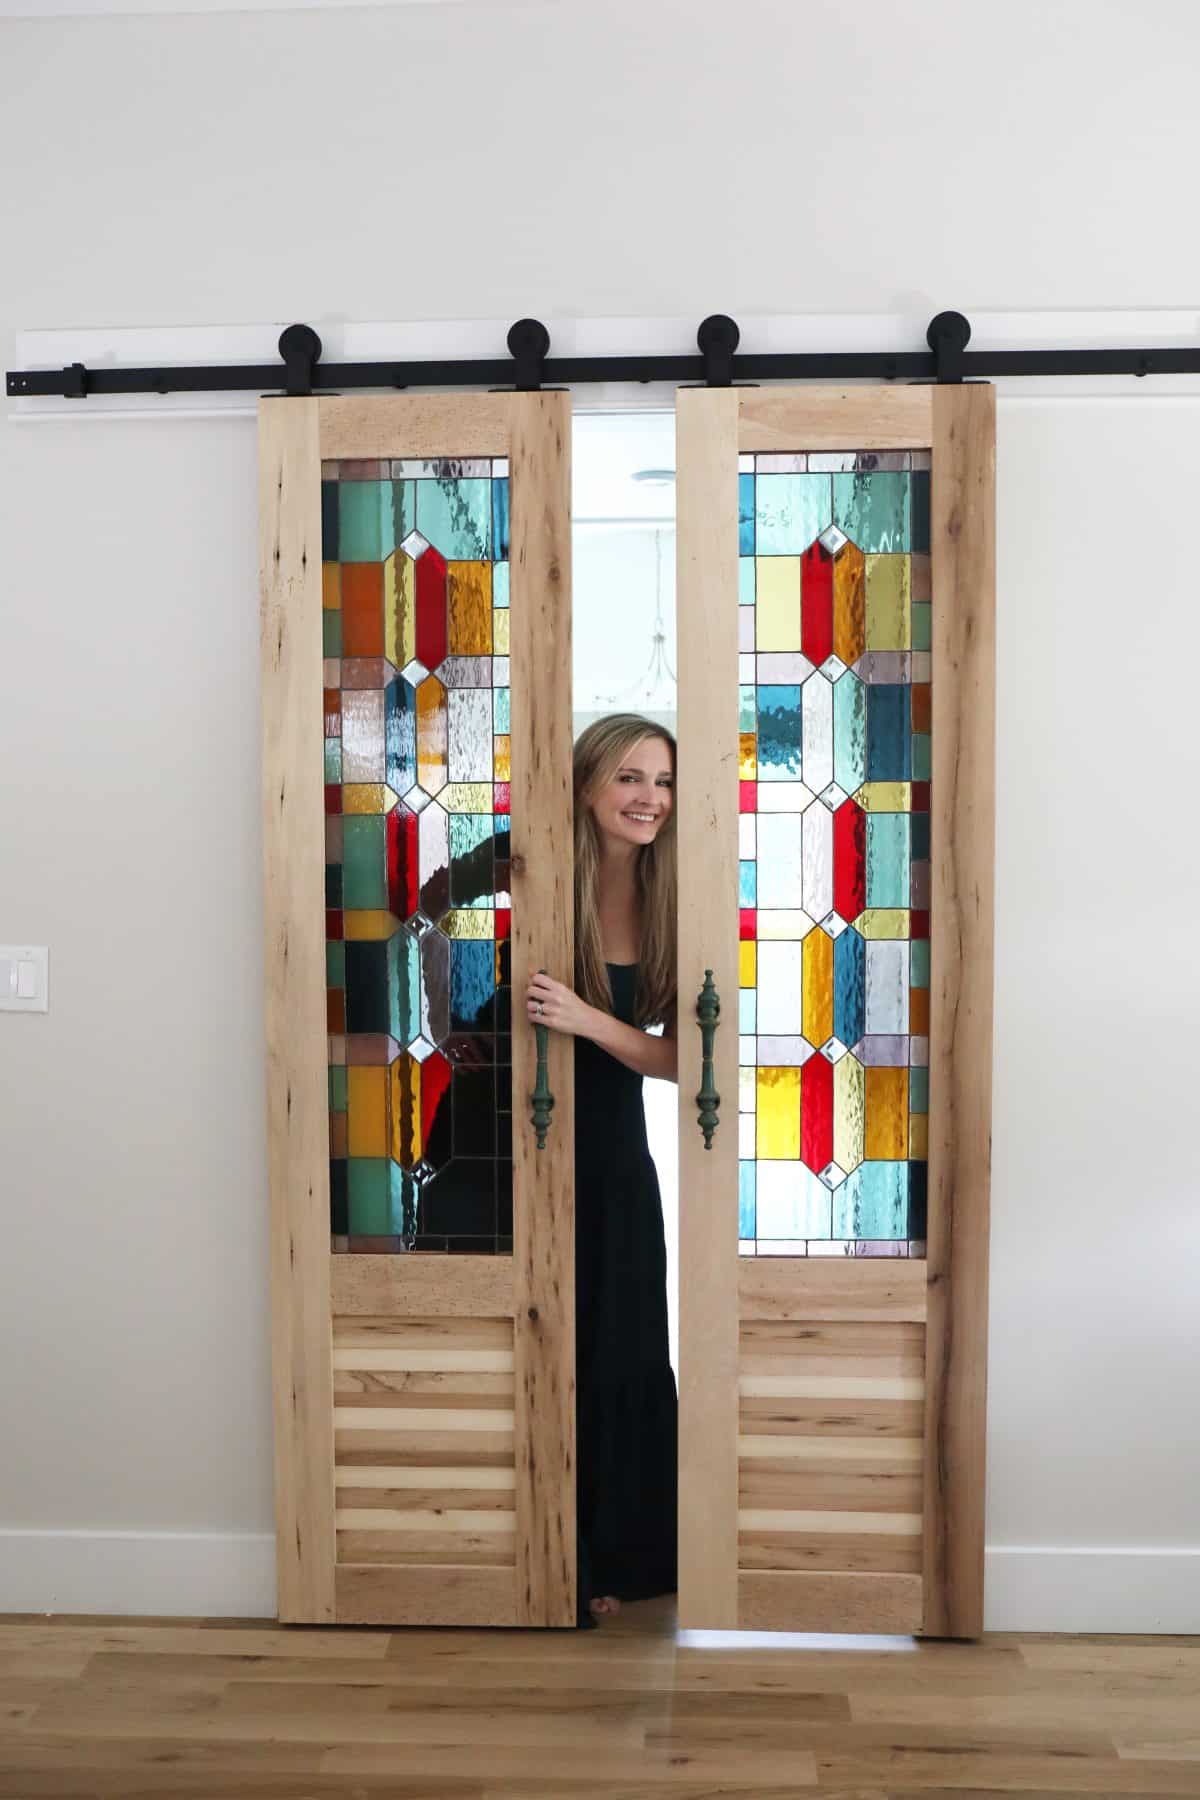
I couldn’t be more thrilled with the way they turned out, and today we’re going to show you just how we made them! {Here’s a fun video too if you want to see them working in real life.}
Please note, this tutorial is for the actual door build. If you’re interested in all things stained glass, check out the following posts:
• All the supplies + a little take on getting started, here.
• The basics of stained glass, here.
• The free window pattern for building the doors, here + links to more free patterns

So let’s begin with building the doors, shall we?
{Keep in mind, our door opening was 36′ by 82″}
The supplies for building the door are super simple and we were thrilled to team up with Manomin Resawn Timbers for some amazing reclaimed wood that they graciously provided. You really need to check out all they have to offer for floors, beams, and more.
We used five of their 2′ x 4′ x 8′ pieces and with the right tools, some sandpaper, and wood glue, we were off. We also teamed up with a great friend who had a better set up than us, and has awesome finesse as a builder! Jamin and he were amazing, and it was a fun project to do with someone else.
The tools you need are:
• Miter saw
• Table saw
• Planner
• Router
• Domino joiner
The first step will be to measure, cut and plane all your pieces.
We went with (4) 82″ pieces and (6) 13″ pieces.
With reclaimed wood this beautiful, we knew we wanted to keep it raw. There’s just something about that contrast in the colorful glass and the actual wood. So we planned accordingly with the design.

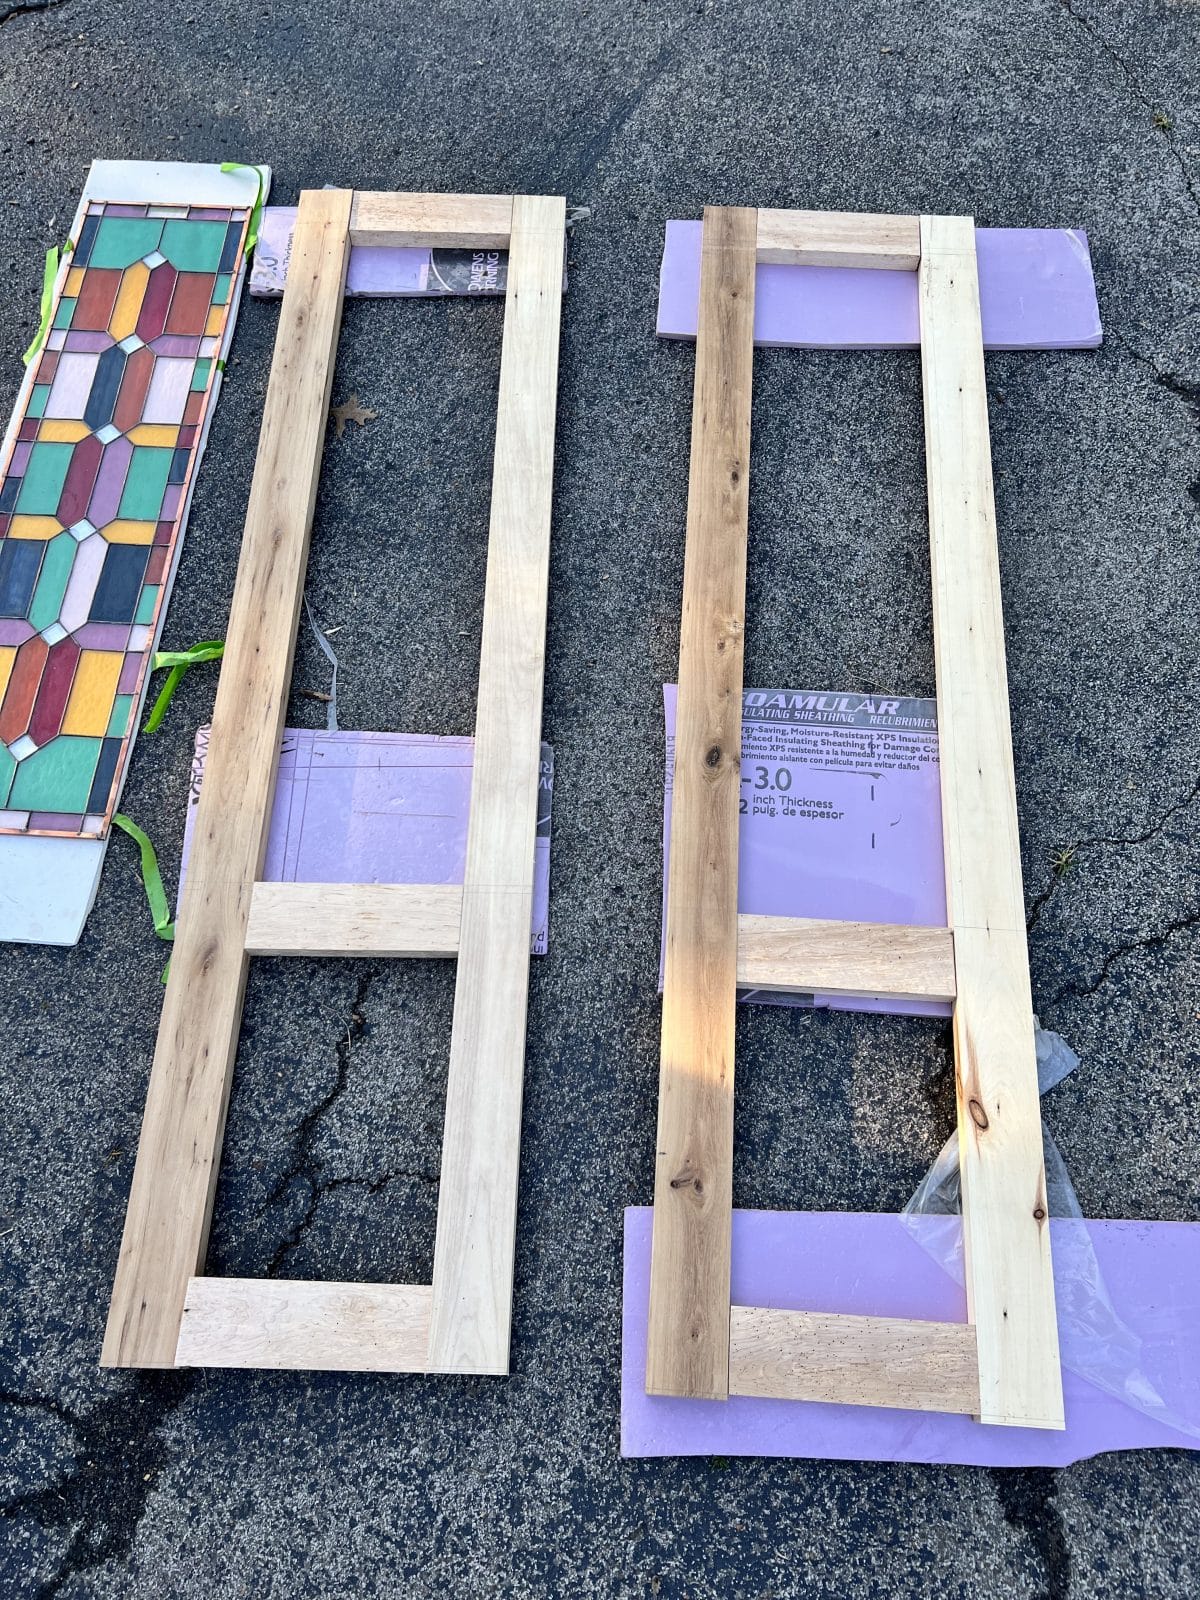
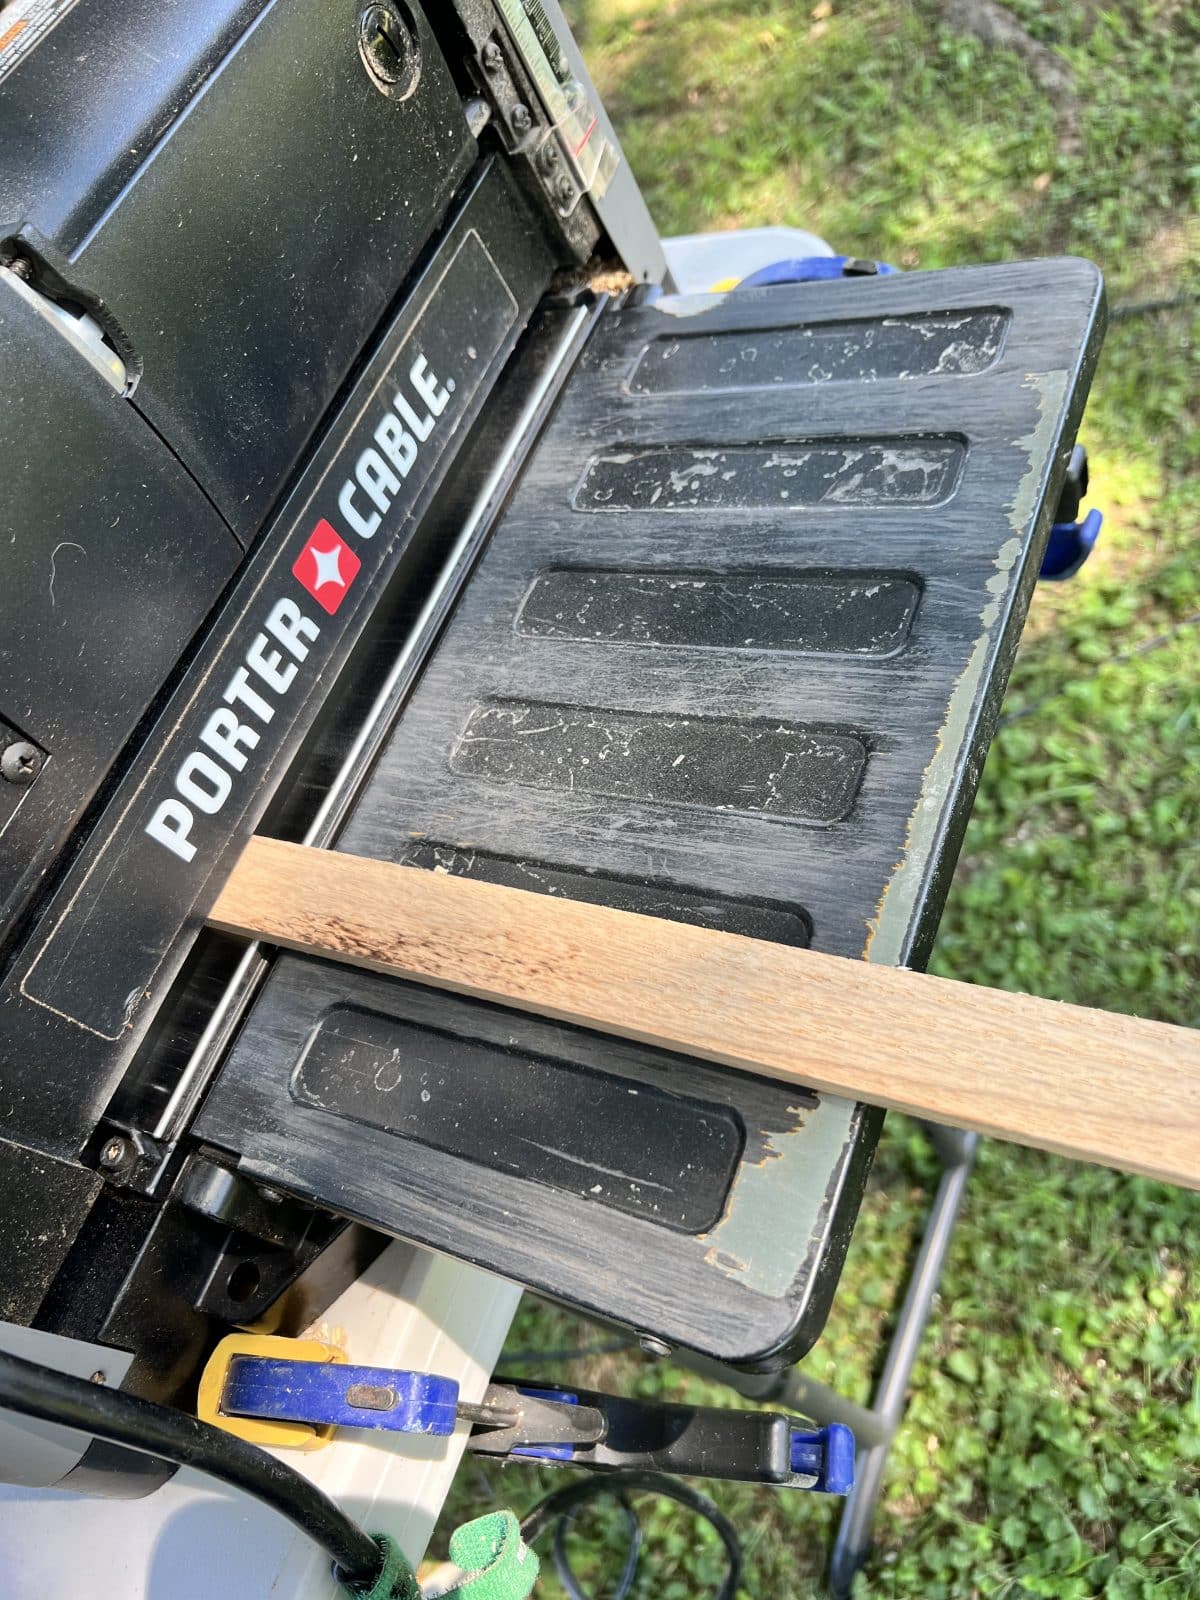
Then we took some of the scraps and ran it through the table saw to create some slats for the bottom frame area.
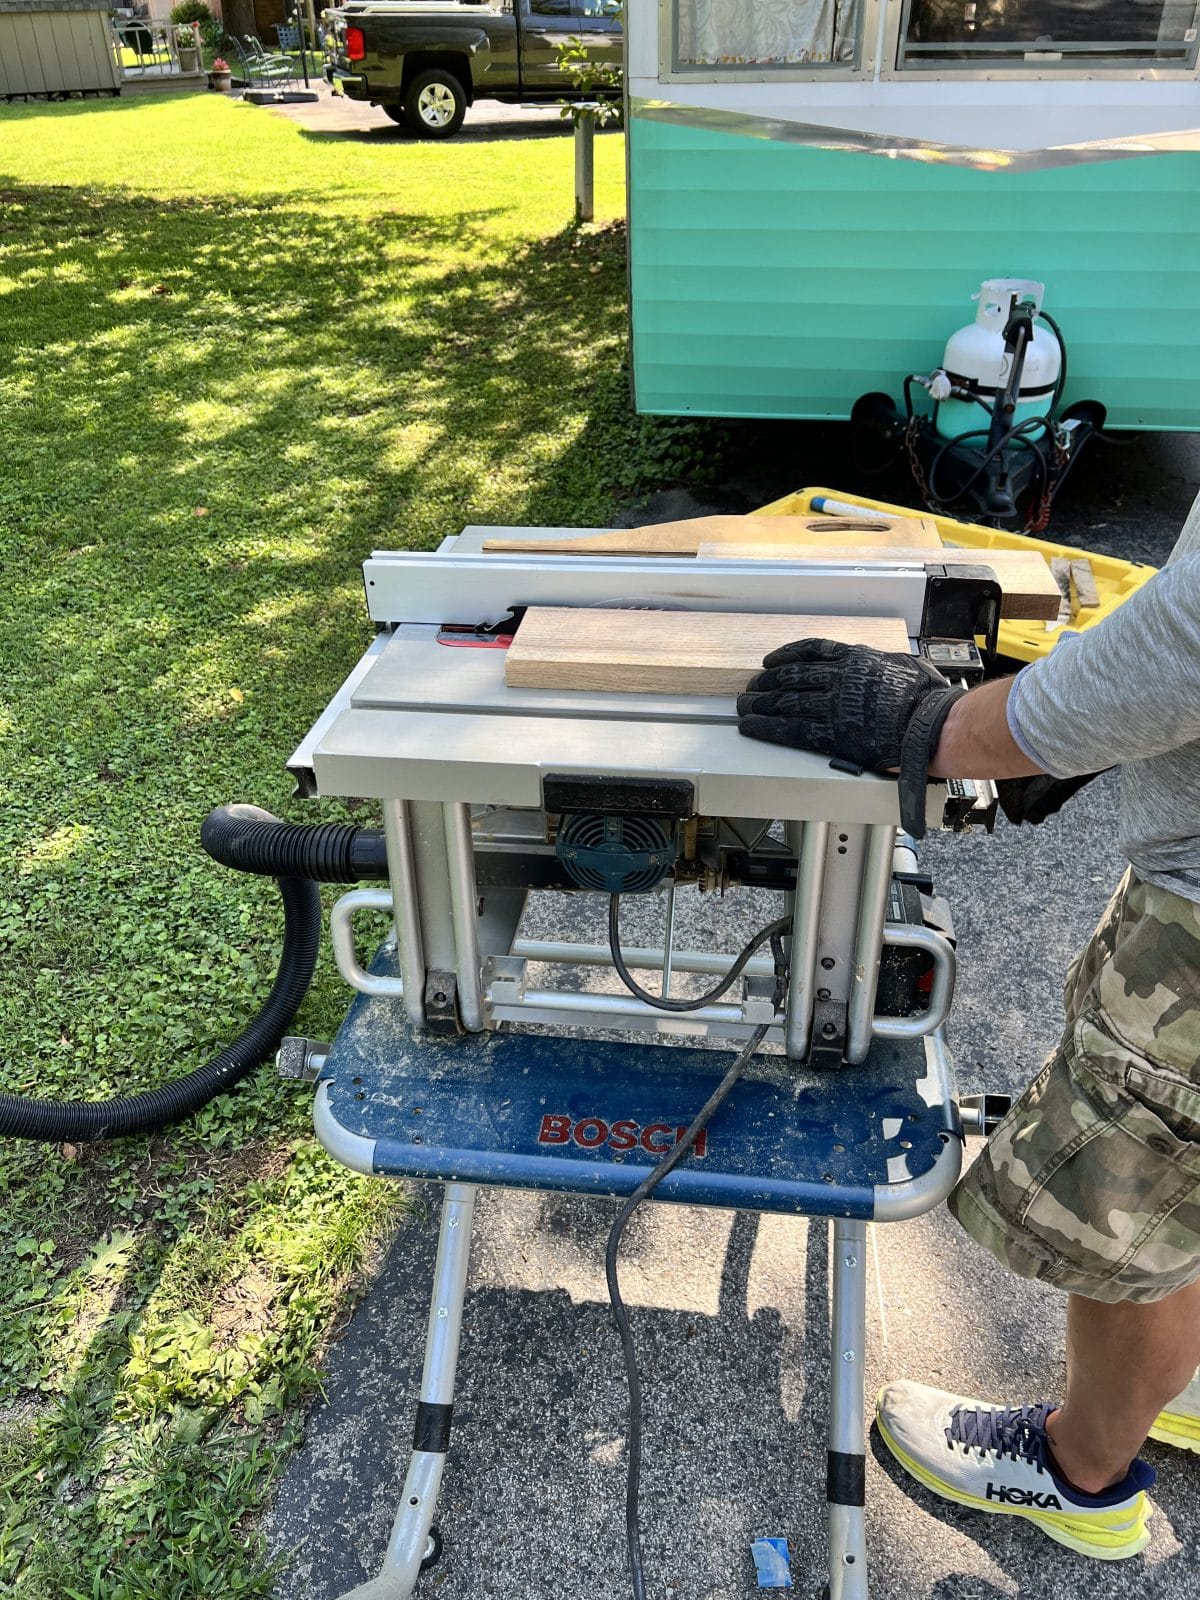
Once we had them cut, we ran everything through the planer.
Next, we used our domino joiner and router, so that we could join the frame together and have a slot to house the glass and slats.
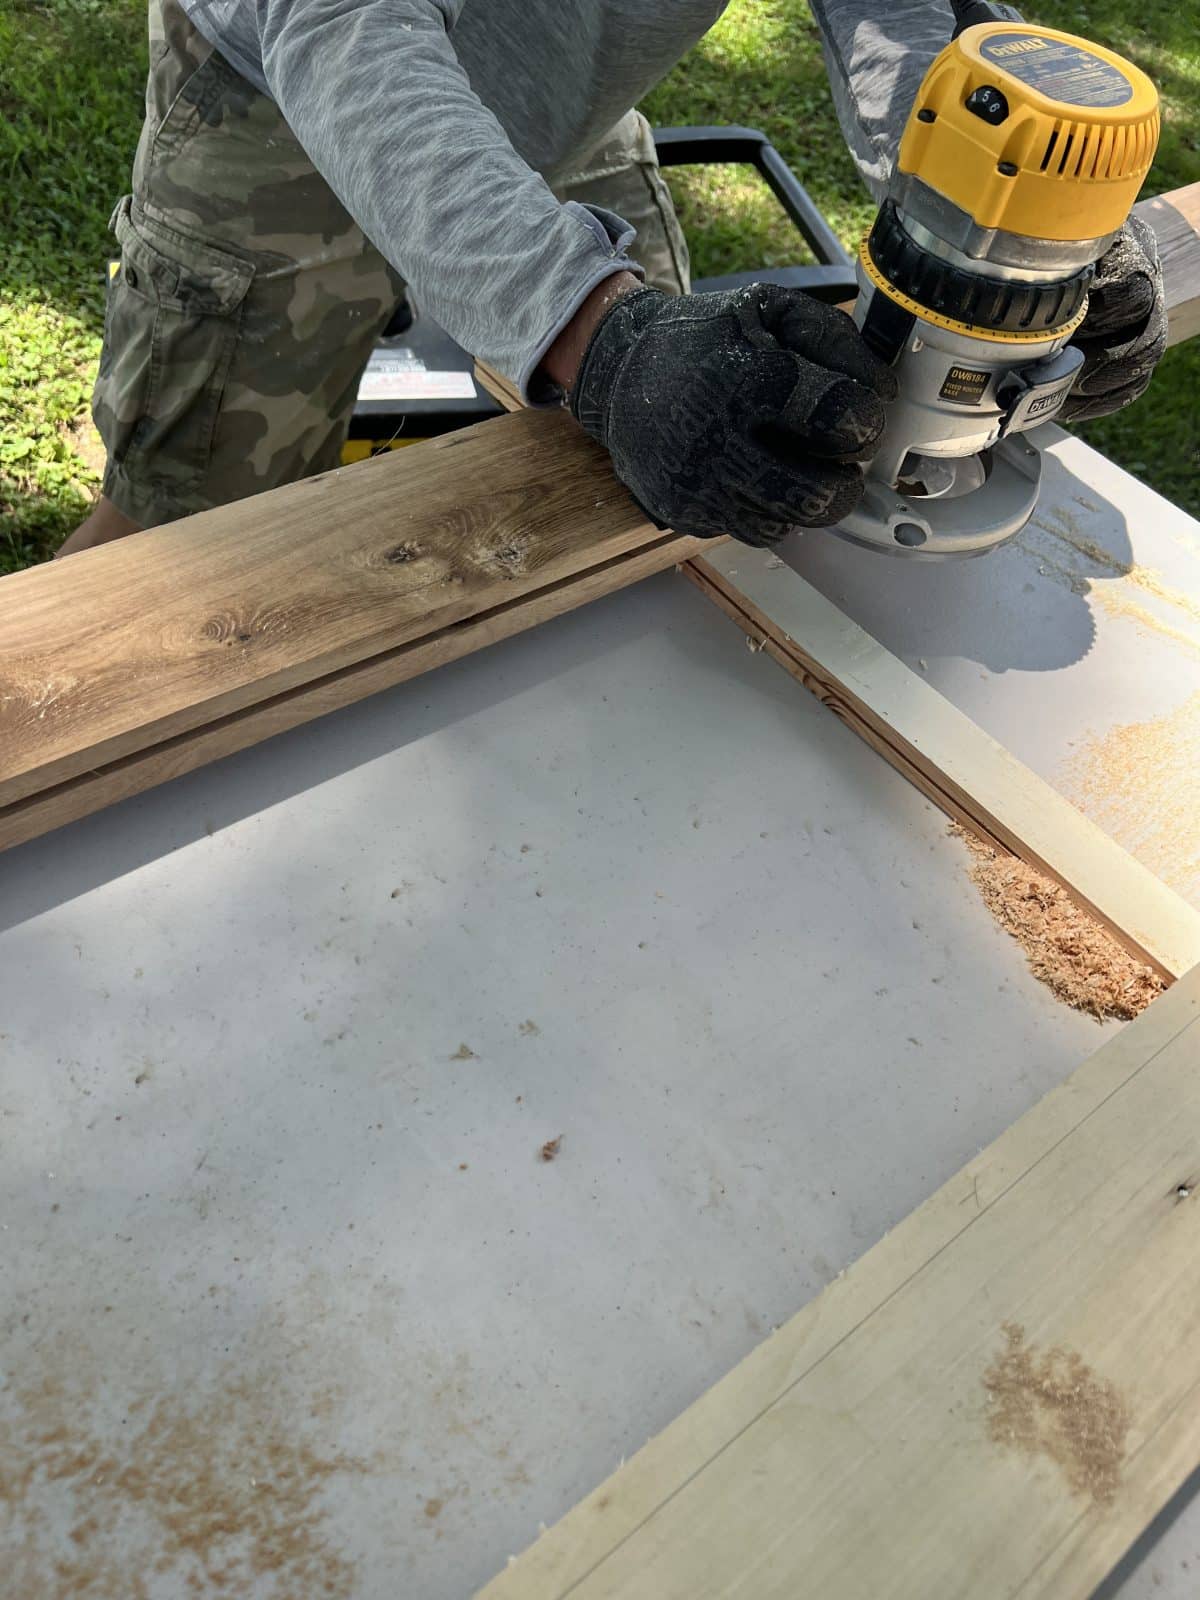
There’s just something so satisfying about this look and process.
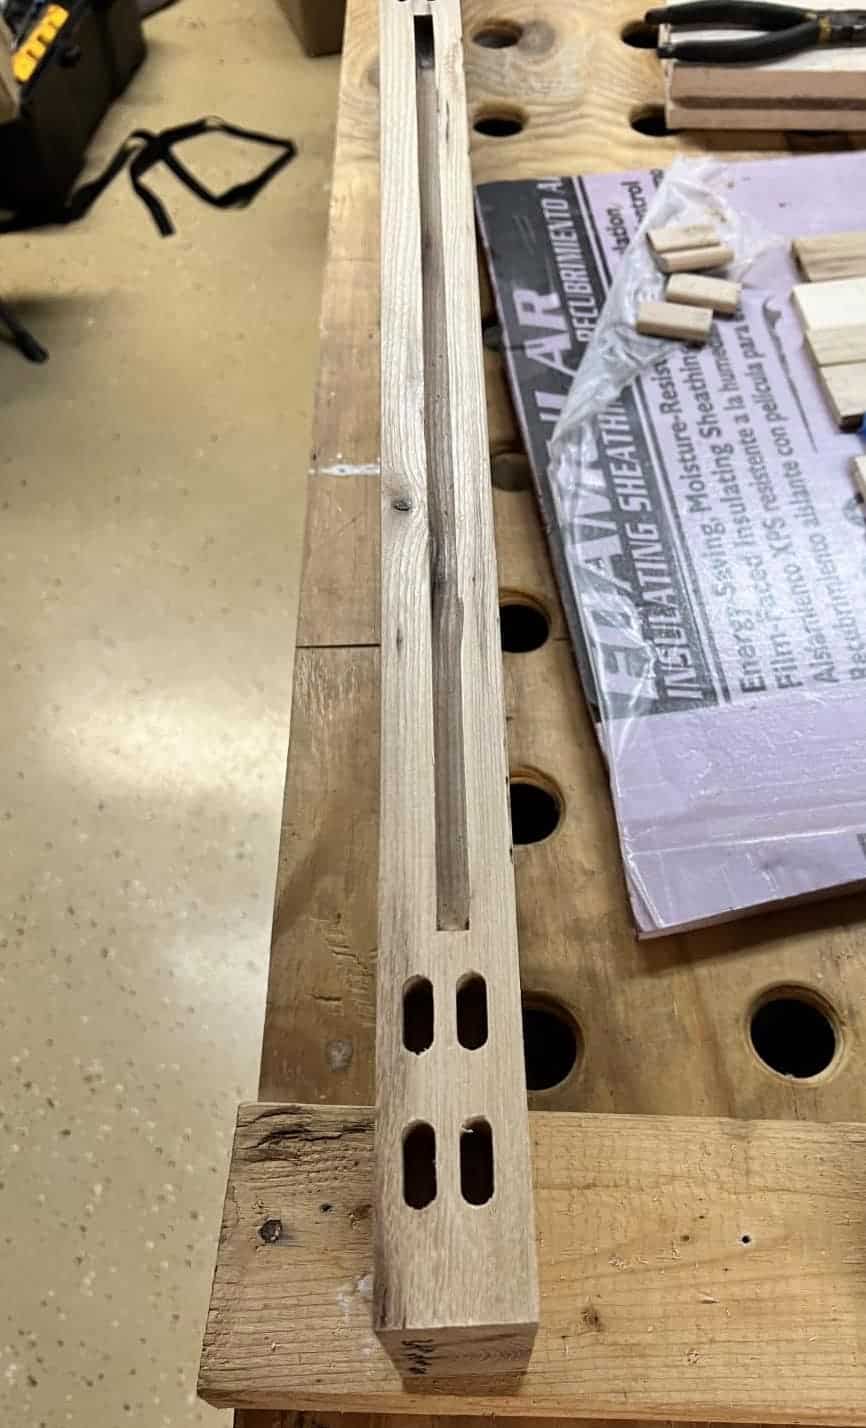
Once everything was routed, it was dry fit together.
We marked it with some blue FrogTape place that needed to be sanded a little.

Once the dry fitting was complete, we glued it all back together and clamped it. We inserted some wedges on the back side where we needed a little stability. This was a delicate process because stained glass while sturdy… is still glass. And breaking it at this point would be a tragedy.
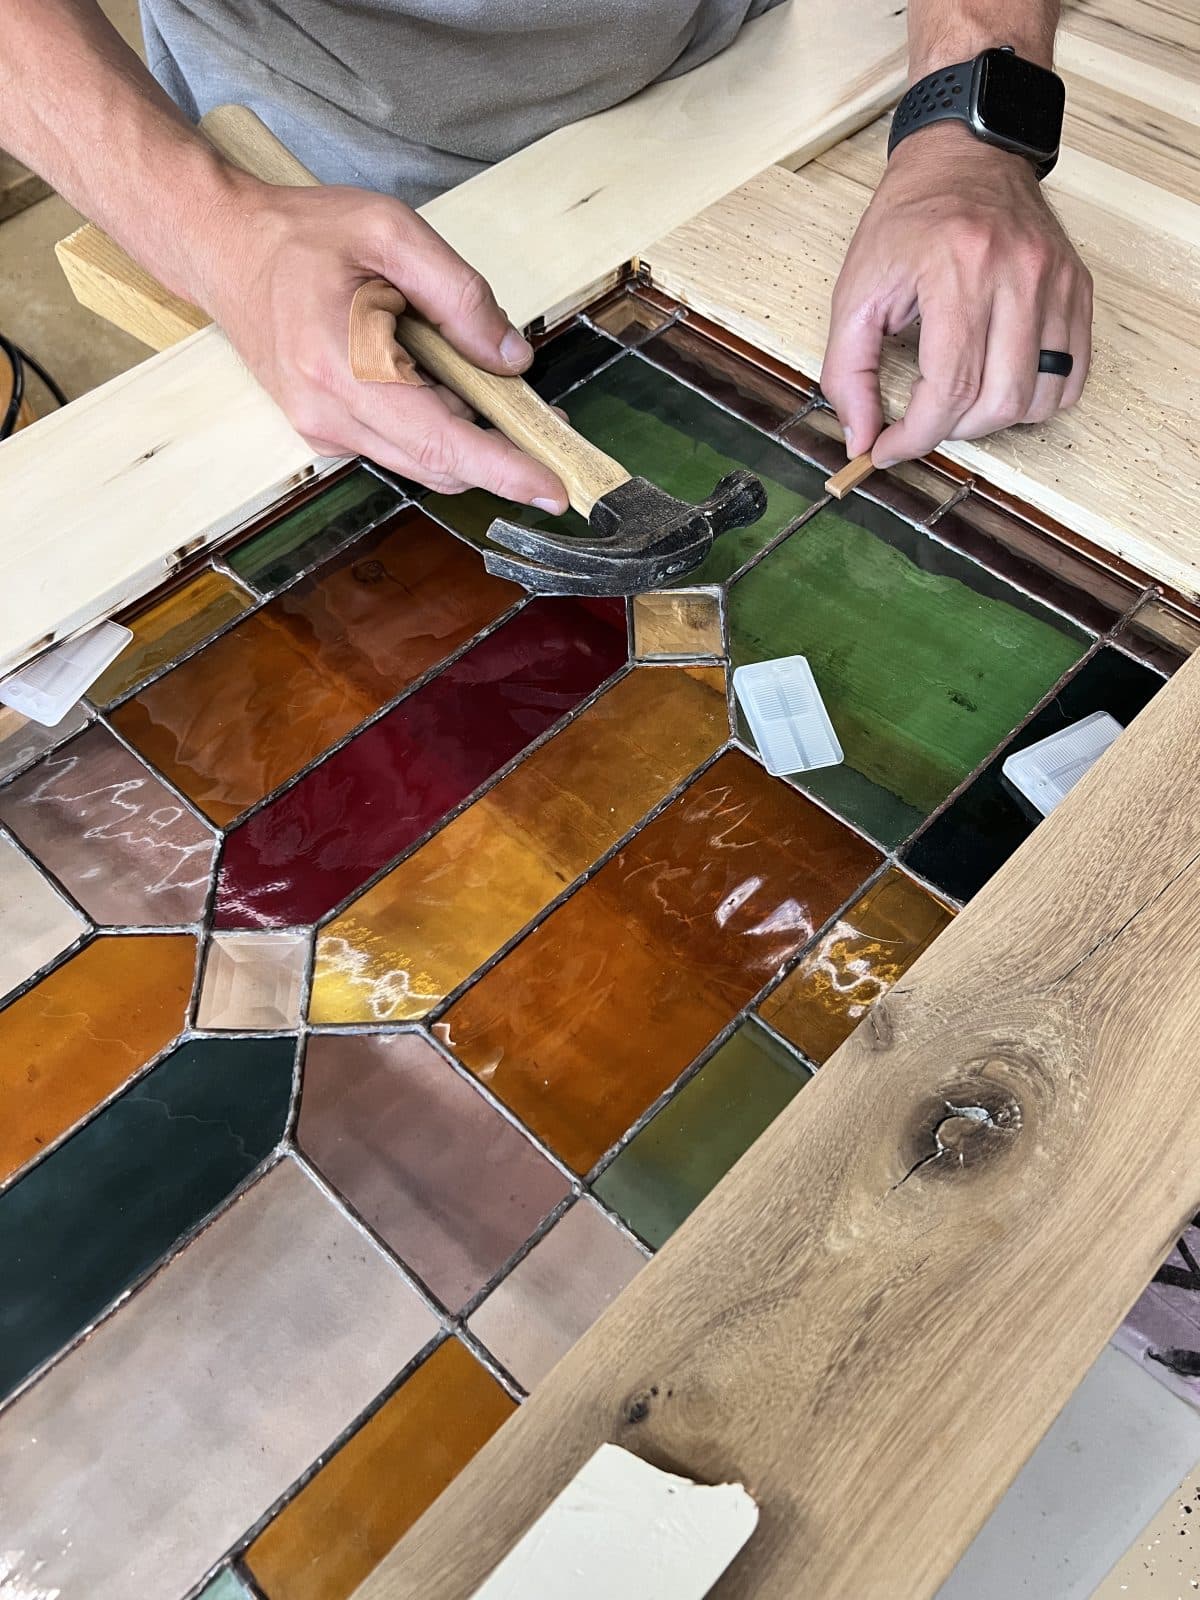
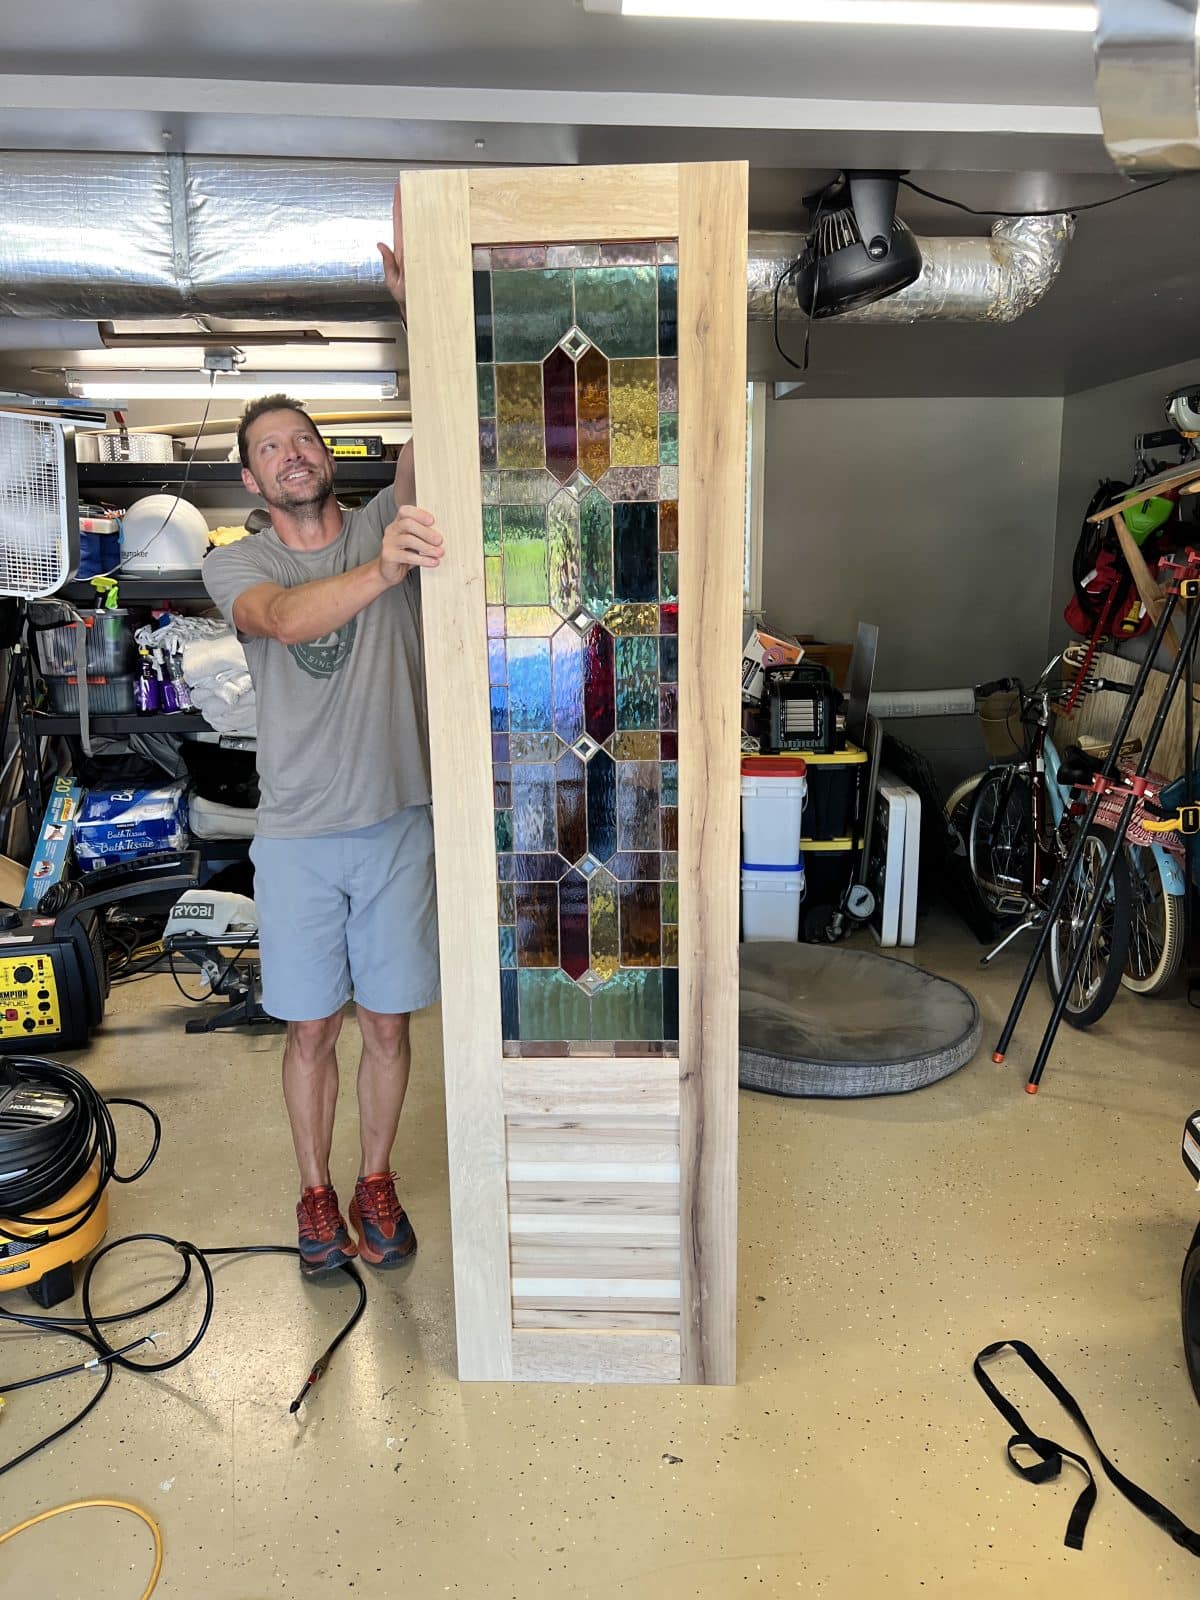
But tada! The door was built!
Major thanks to our sweet friend who has an awesome space to work and is certainly a woodworking expert! We love this photo Jamin grabbed of him – we think he was relieved it didn’t break. HA! Everyone was a little nervous. And by everyone, we mean Ashley.
Adding the track is simple, just follow the instructions given to you by the maker, but remember to pre-drill your holes.
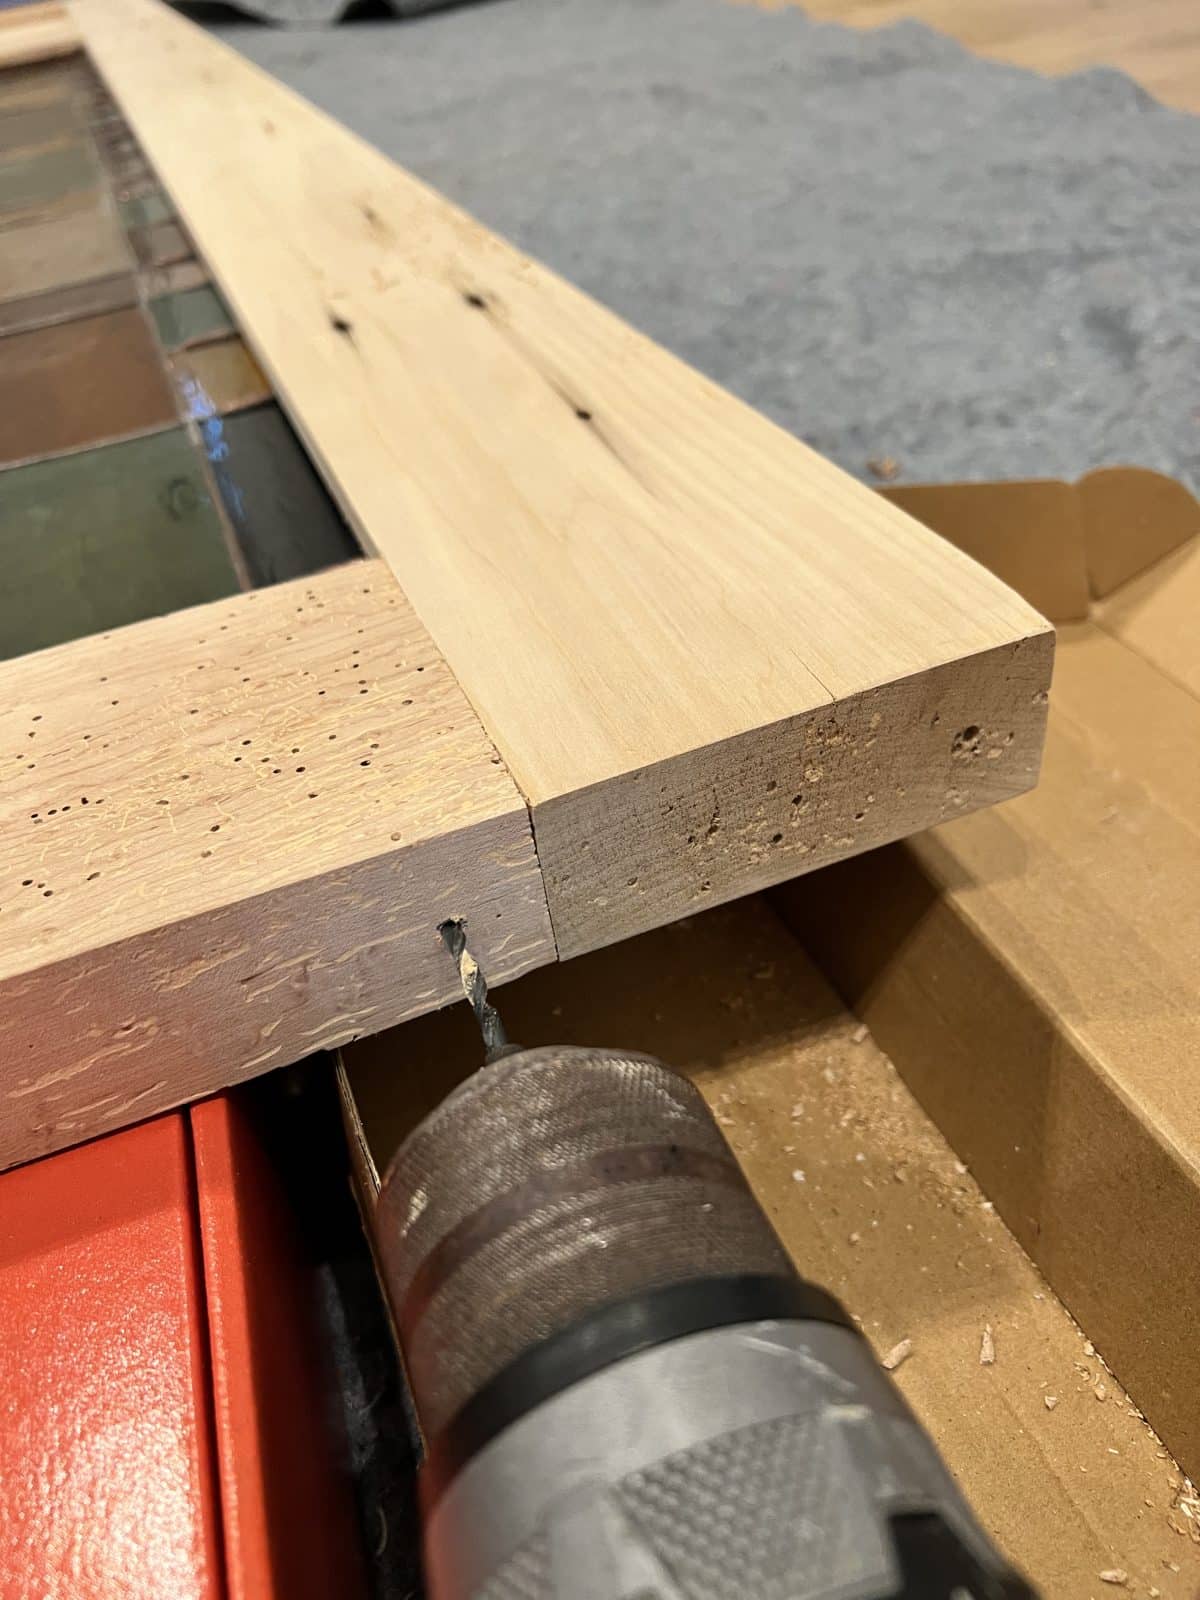
And then attach the wheels!


And no that’s not an ad for Crescent, but we do love them. Have you tried their measuring tapes? Smooth like butta.
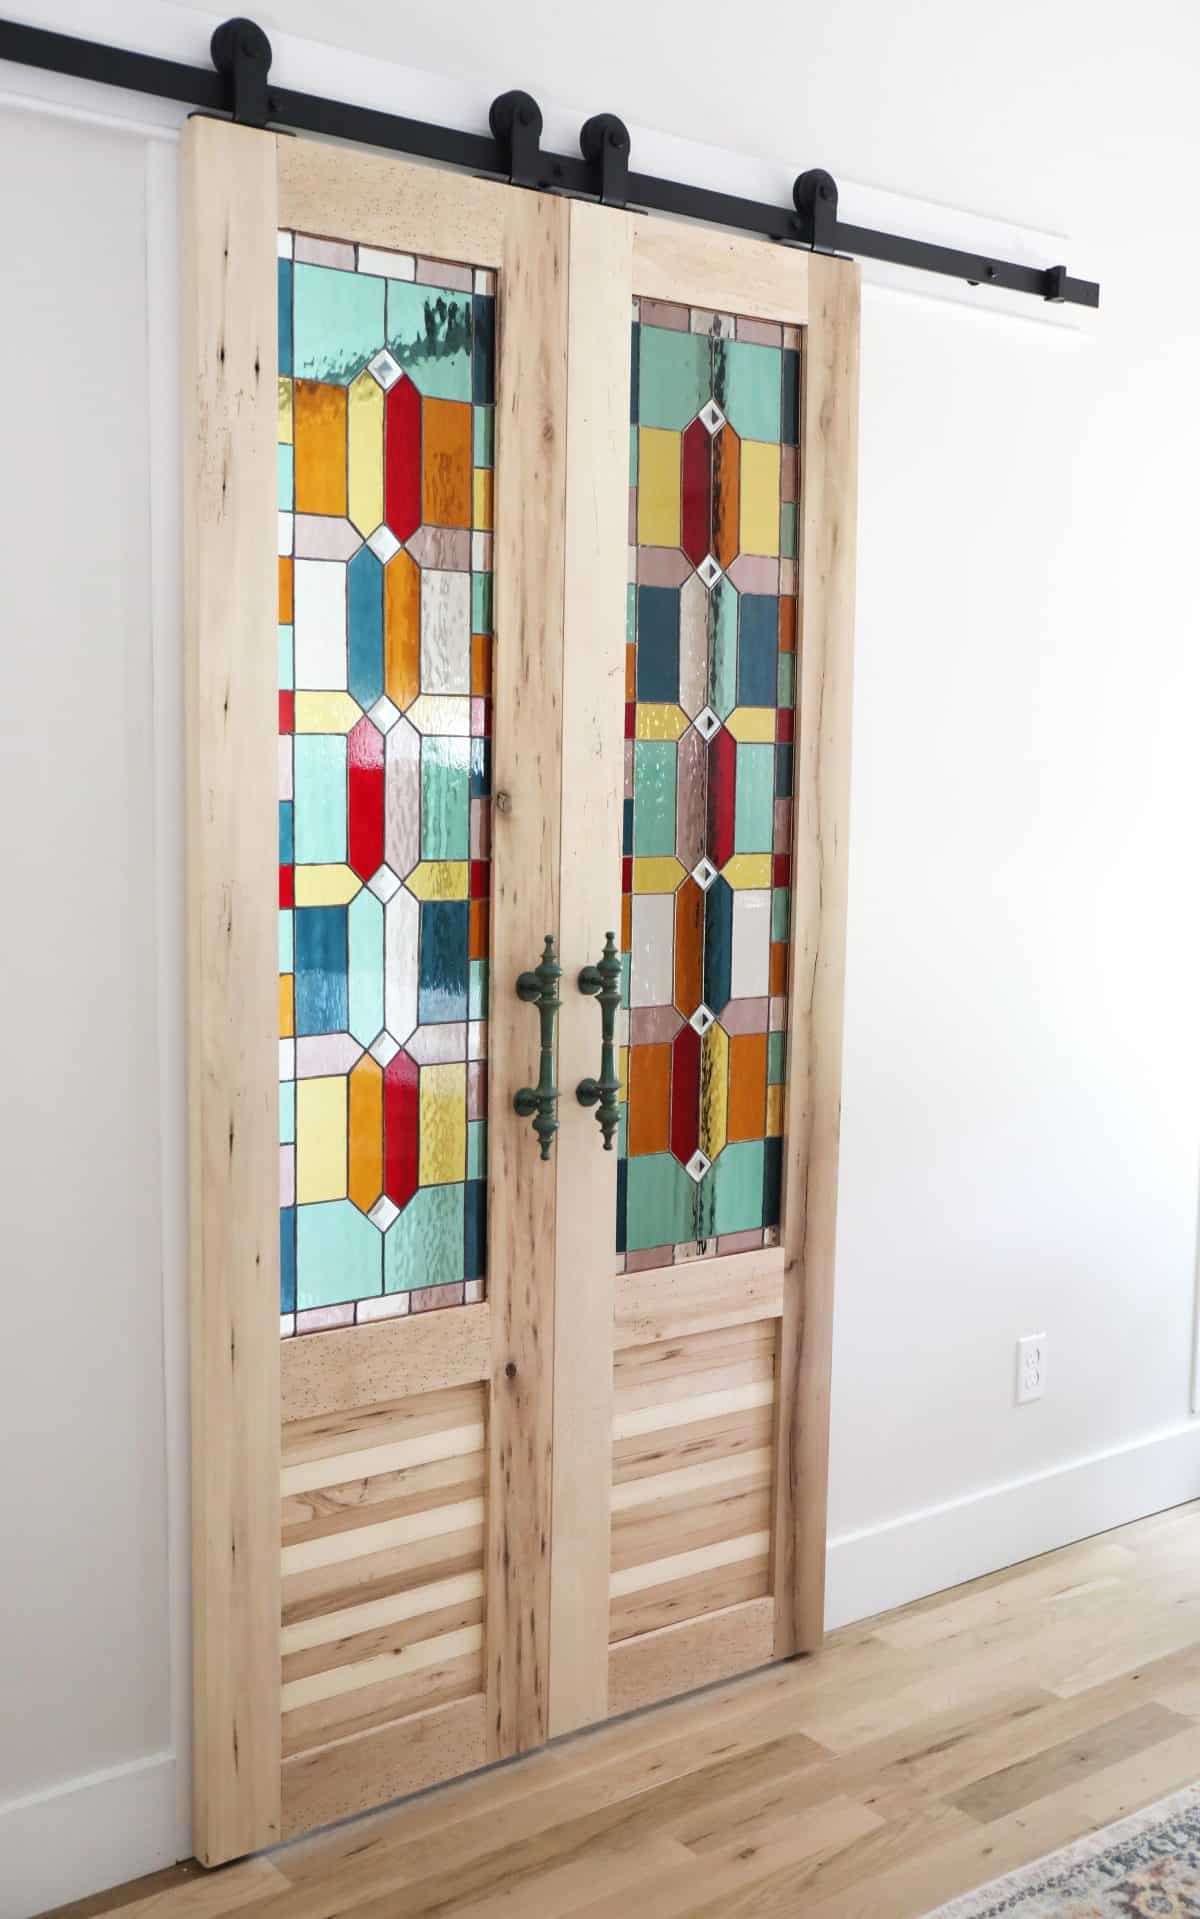
We were so happy to have them finished! As always, let us know if you take something on like this. It is quite the labor of love but SO worth it! I’m on to the next stained glass project I have up my sleeves and can’t wait to show you!
Have an inspired day!


Beautiful windows. Your color choice is spot on excellent!
Wondering if I could use your stained glass design to build a pair of stained glass shutters. This is for personal use and would not be sold.
I will be putting them at our family lodge in Northern Michigan.
Thank you and I wait your reply.
Donna Steinman
Hi! Of course – the pattern can be found under this section here. Hope that helps!
Hi–I’ve scouring the internet for an idea like these doors. We have two stained glass panels that we just removed from our bathroom, and want to repurpose them. One would be a barn door for the entrance to the bathroom, and the other we’re going to use for our clothes closet. Do you have some more specific info on how you actually built the door to accommodate the glass panels? The blog post is really helpful, but I’d like to show this to our contractor, and the more info I can share the better. 😉 Thanks for any help you can provide!