
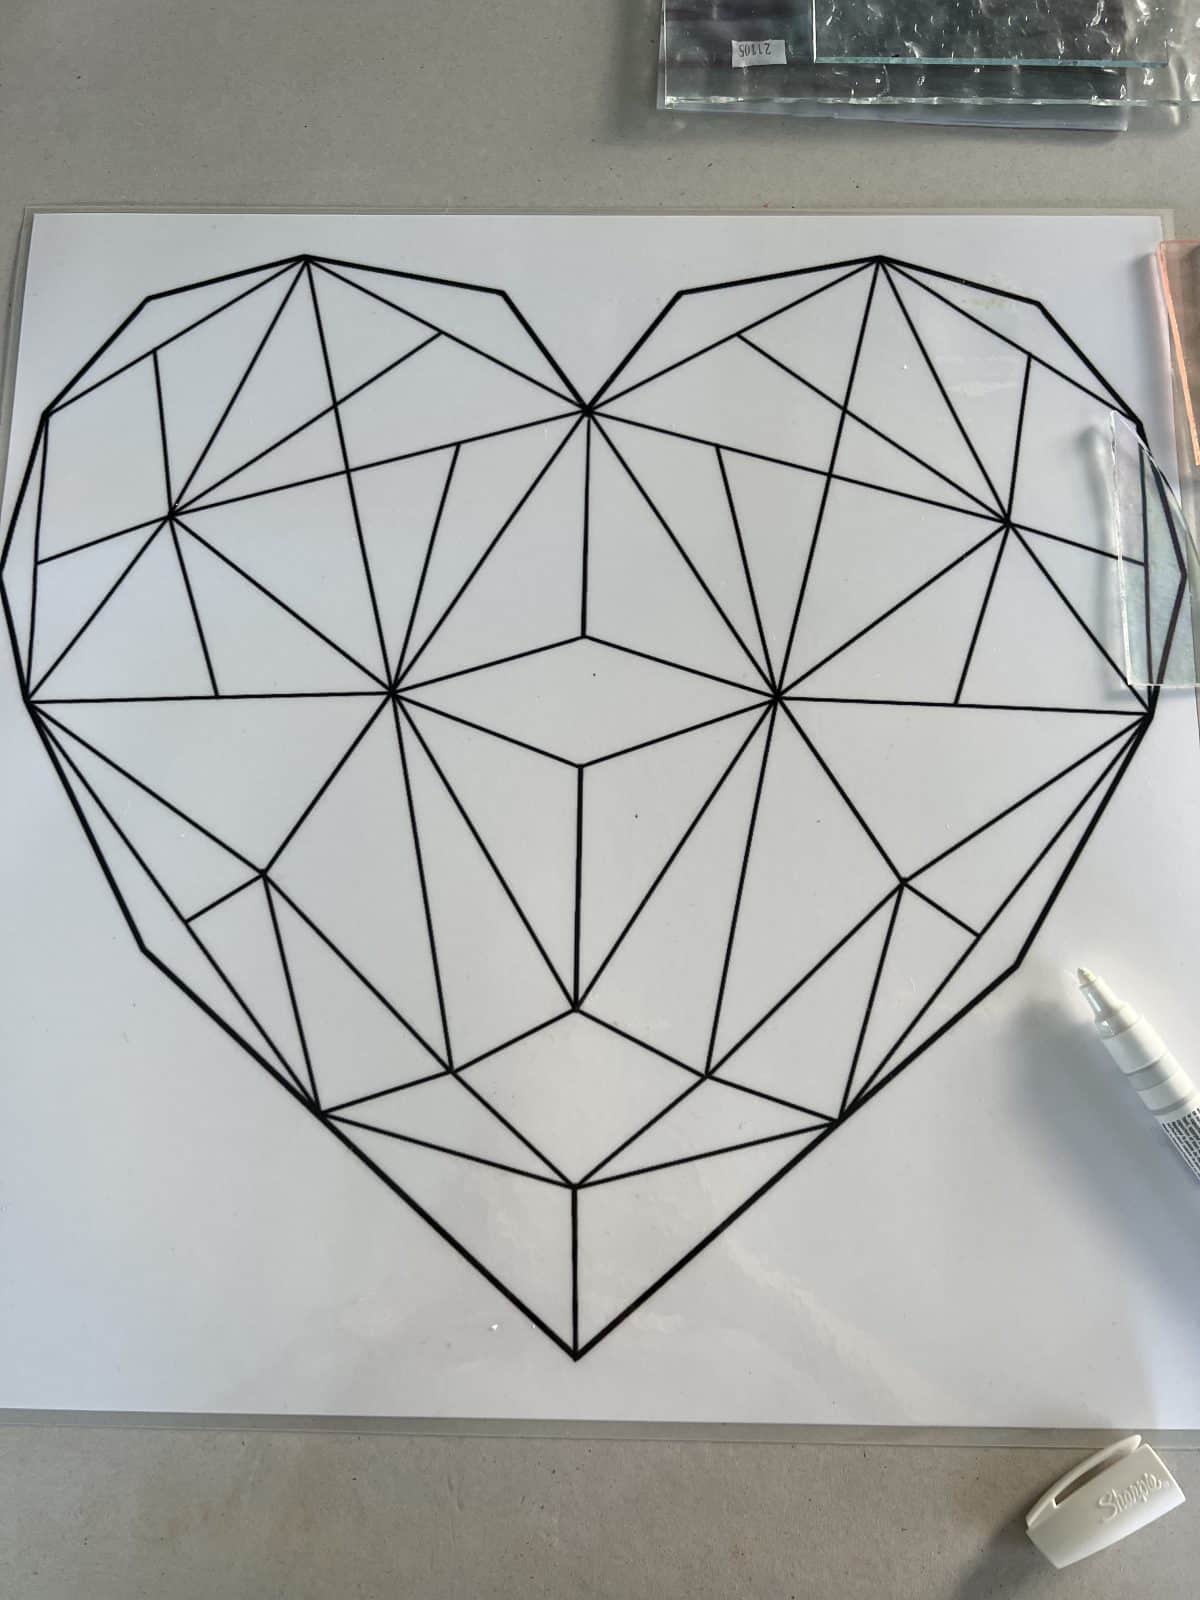
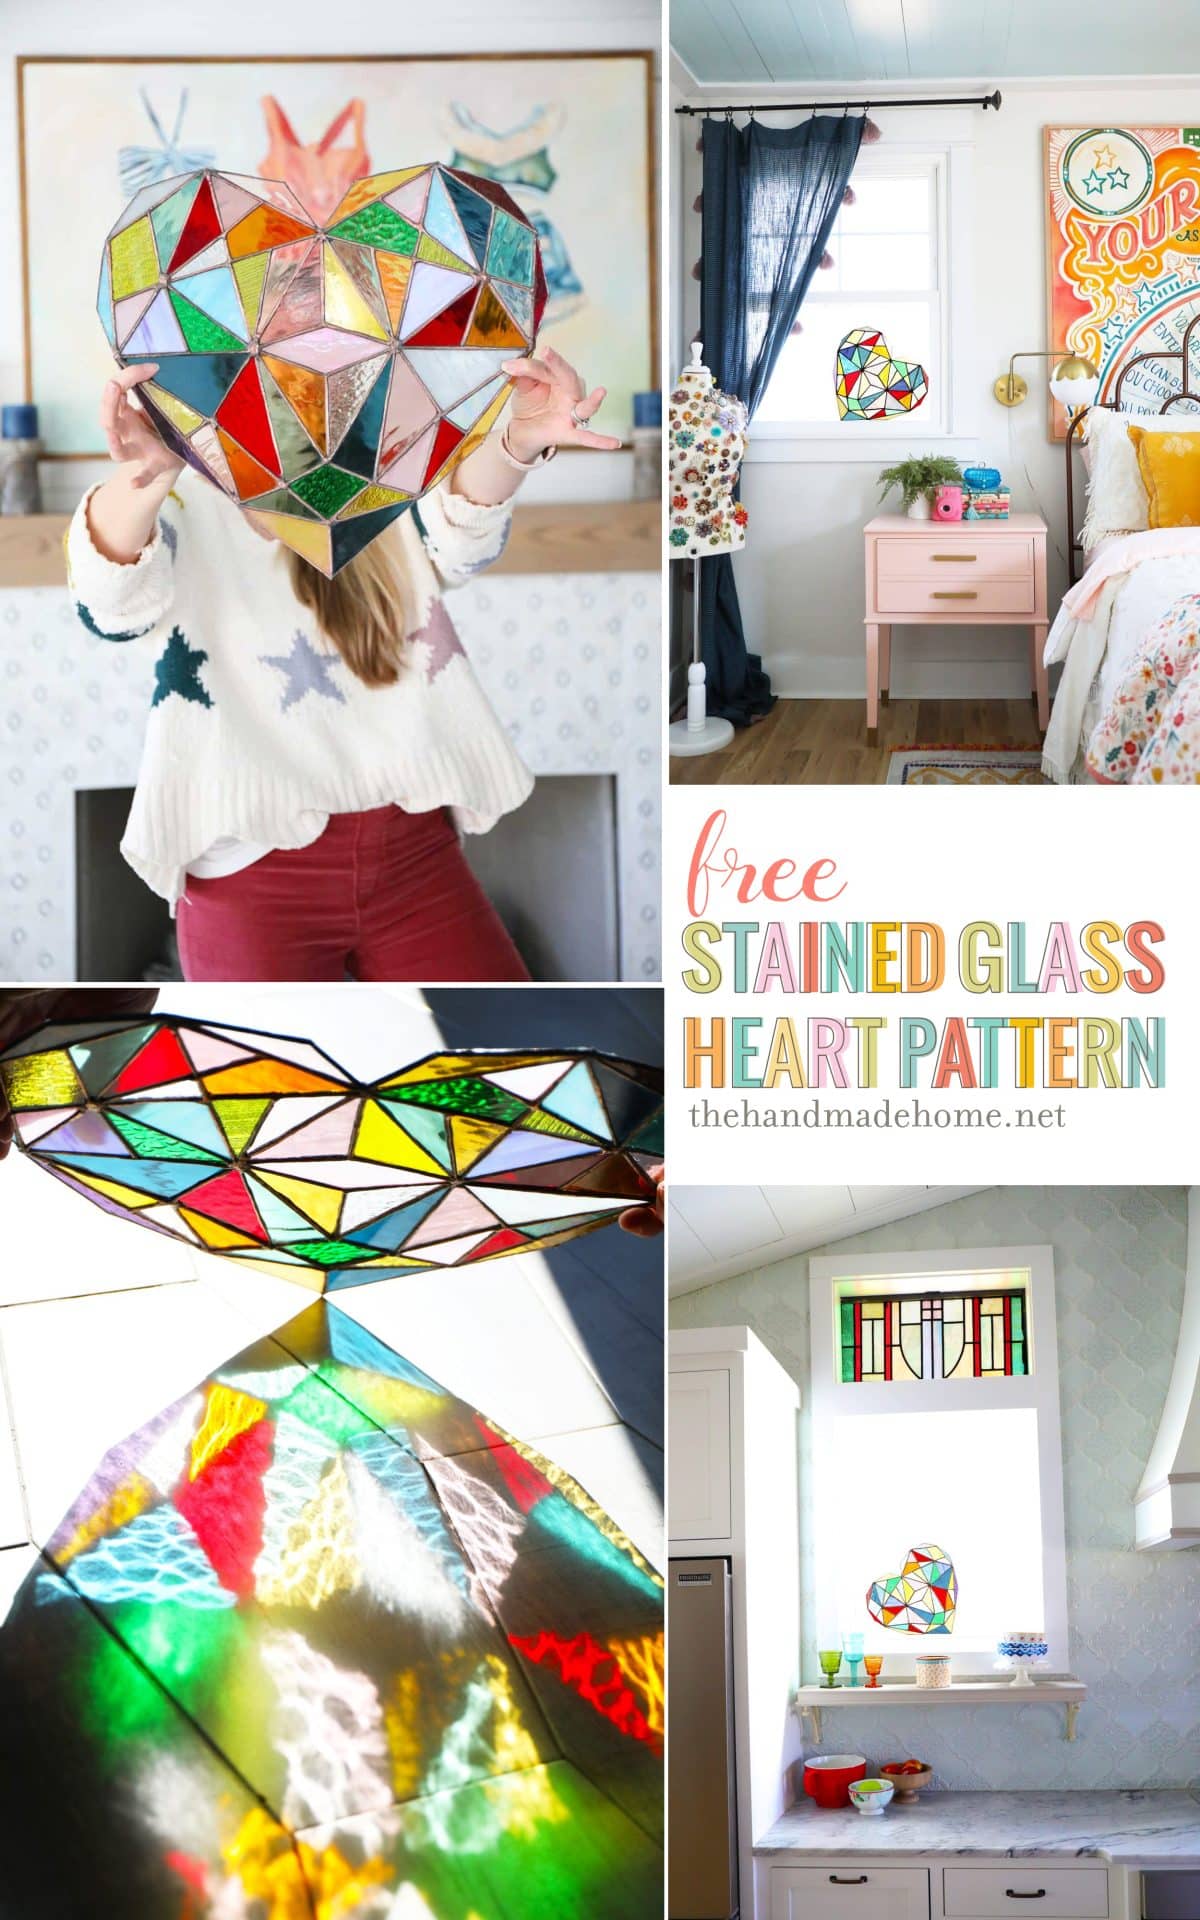
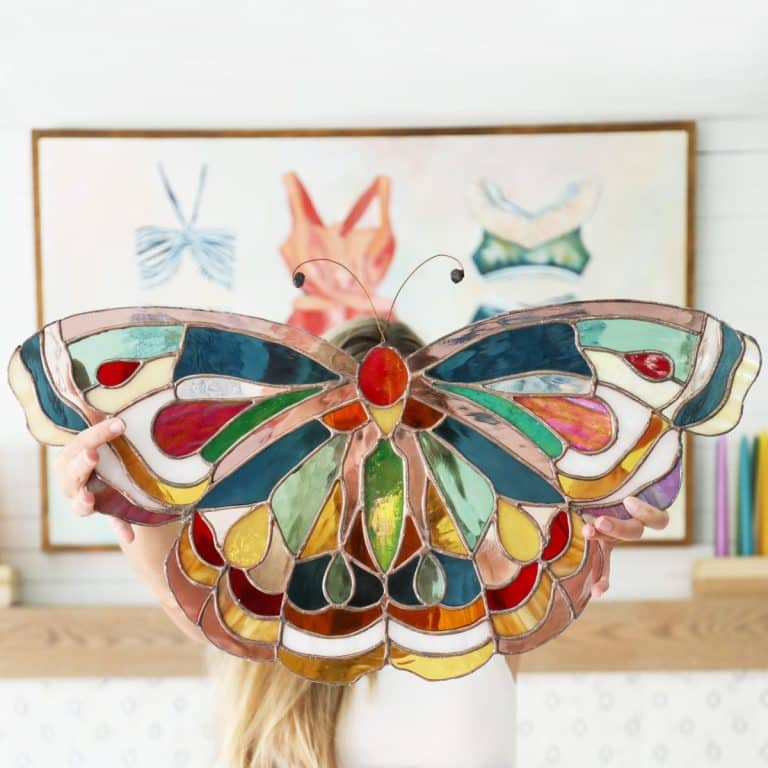
stained glass heart pattern {free}
If you’ve been following along for a while, you know I took up stained glass in 2022/23. Because why not add another time-consuming passion to my life, alongside oil painting in my downtime? {Side-eyeing on the “downtime” concept. That’s cute.} Just in time for all things Valentine’s, I decided to share this one again! I only hope to share more this year as I have another project of sorts consuming all my time, so in the meantime… this fun heart project. A free stained glass heart pattern!
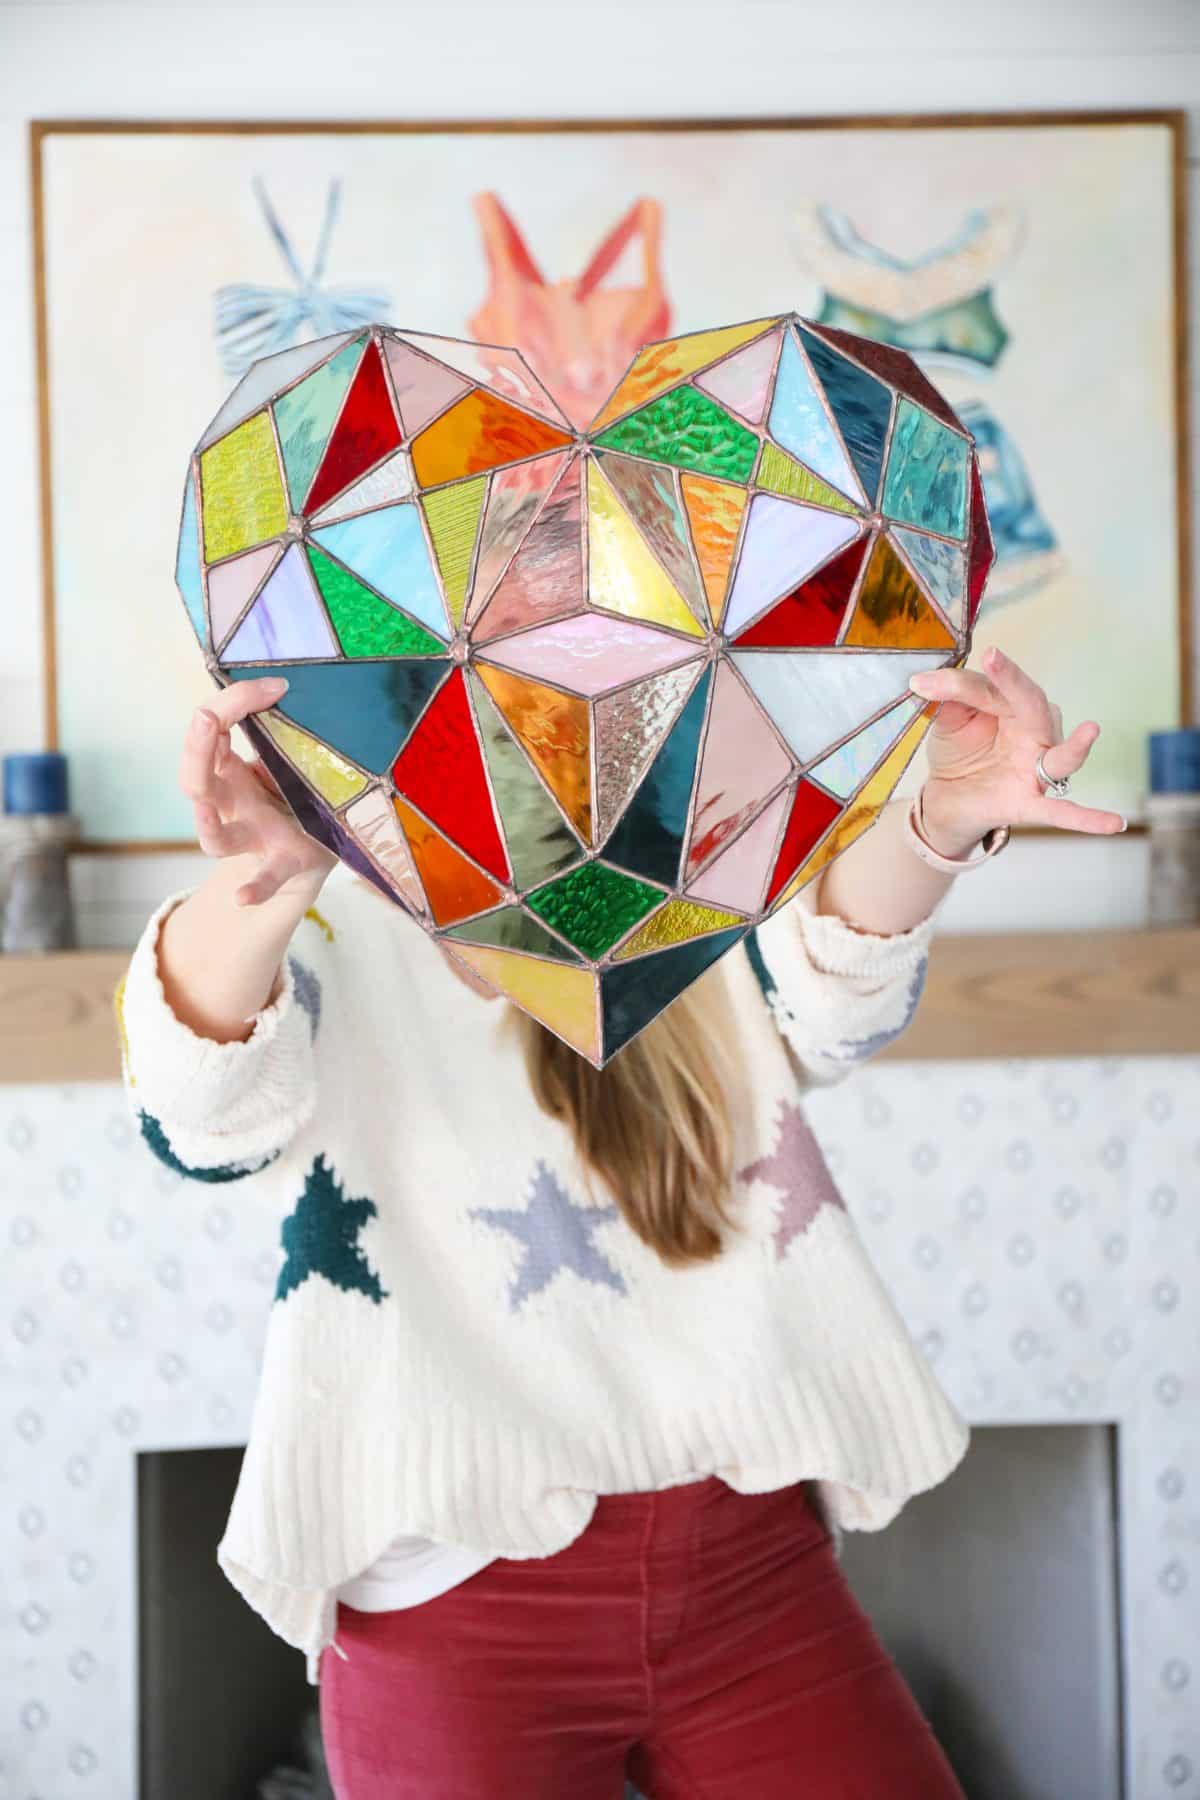
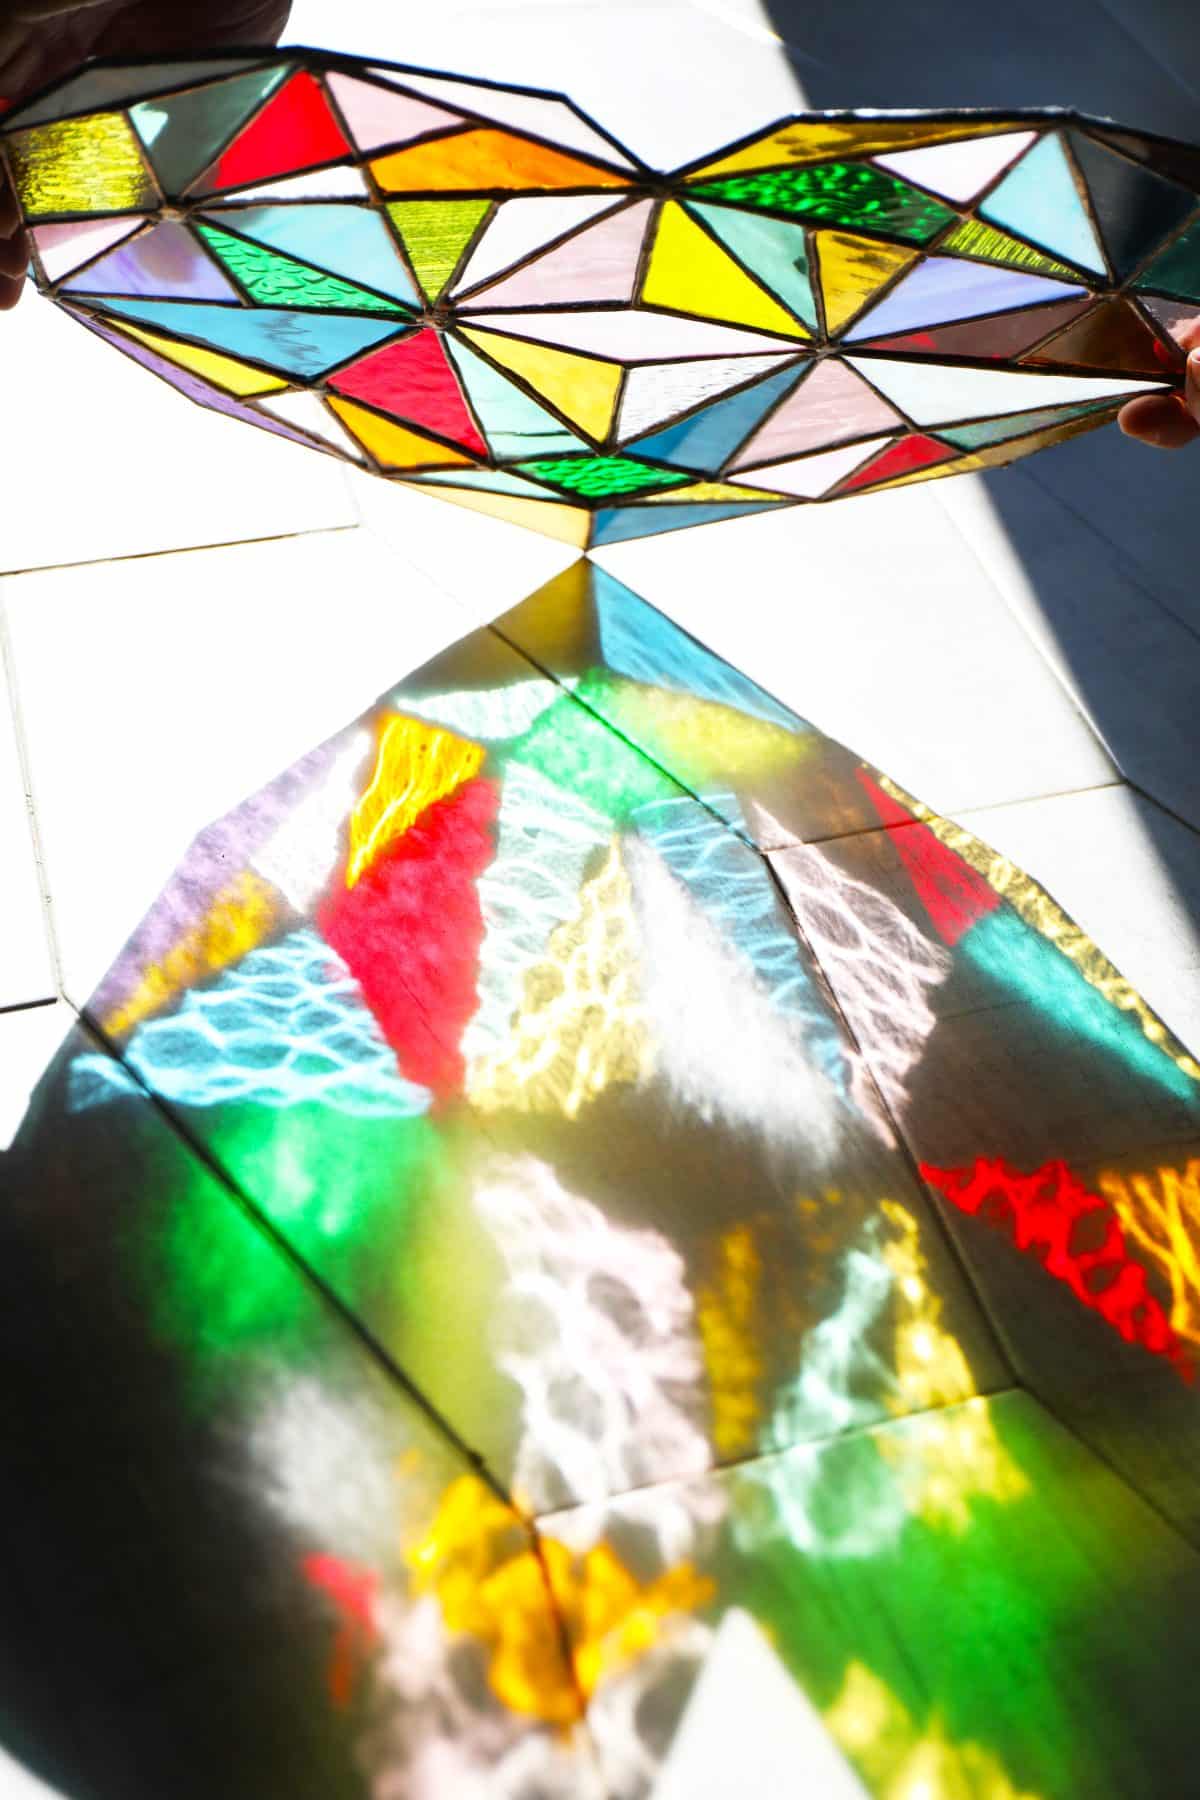
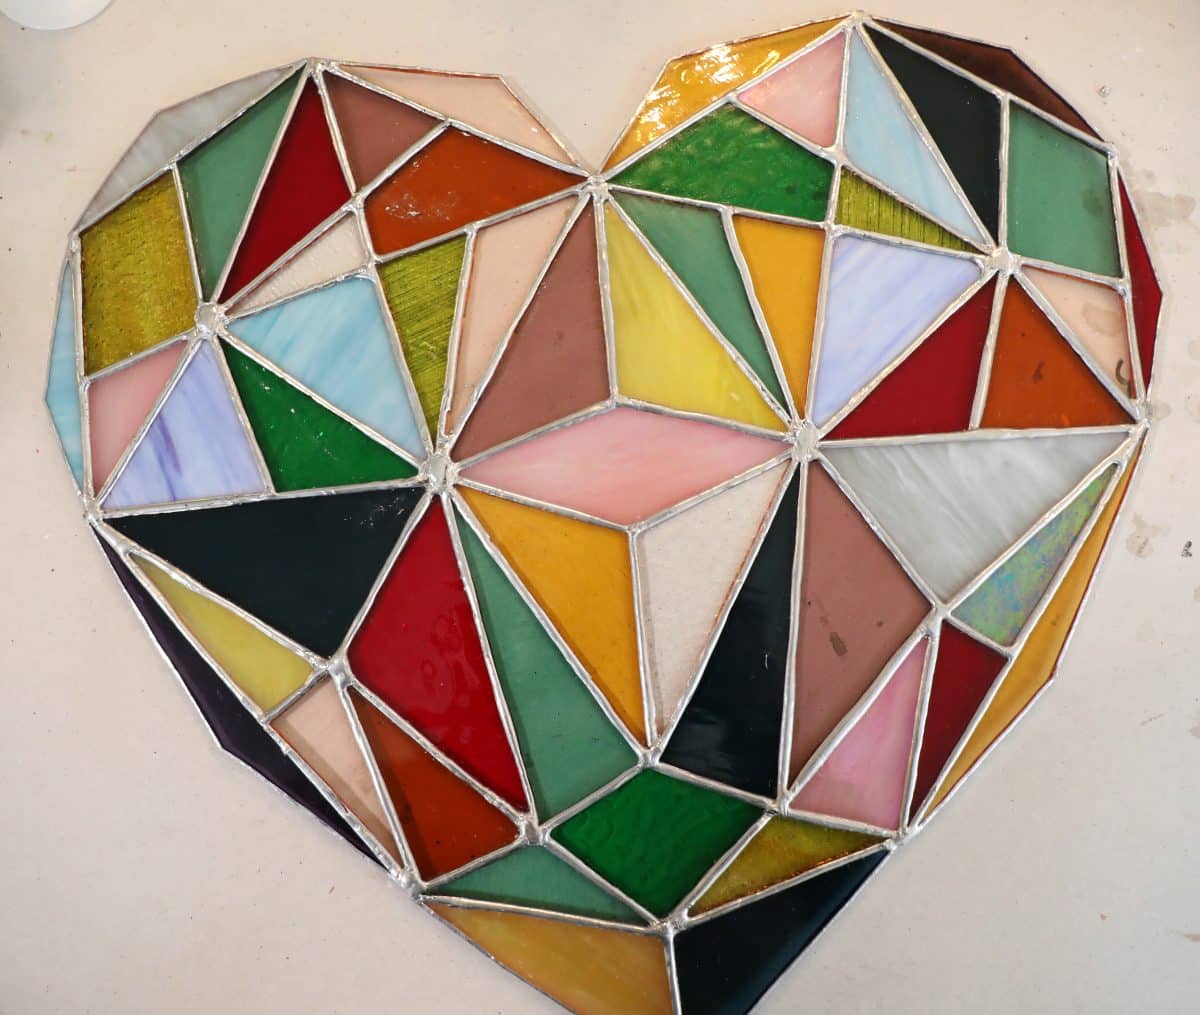
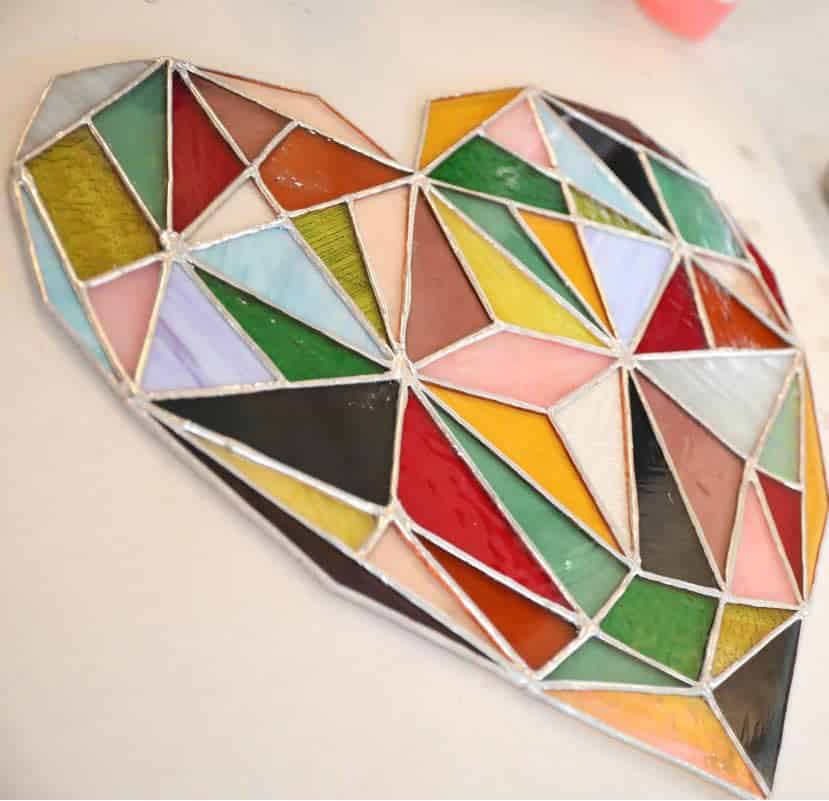
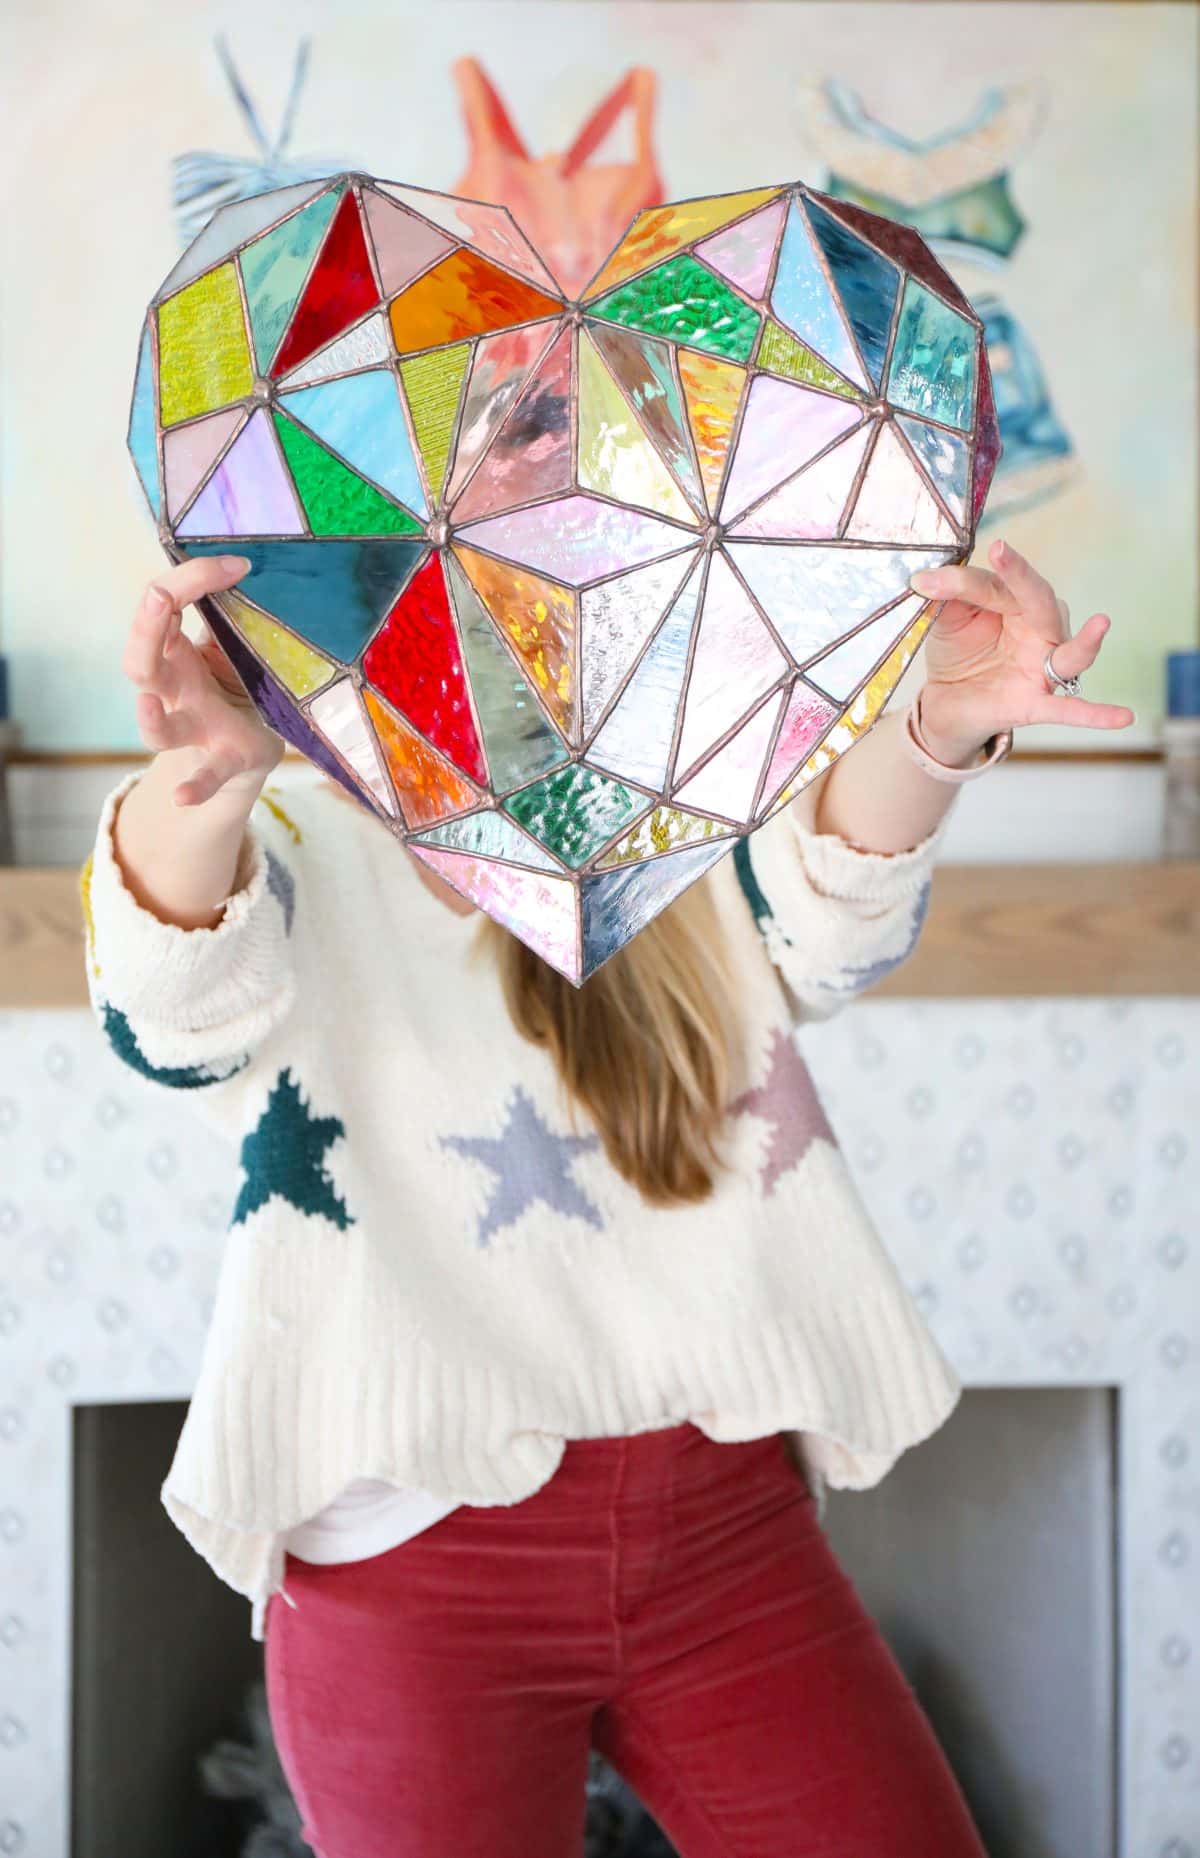
It’s a giant heart! Because why not?
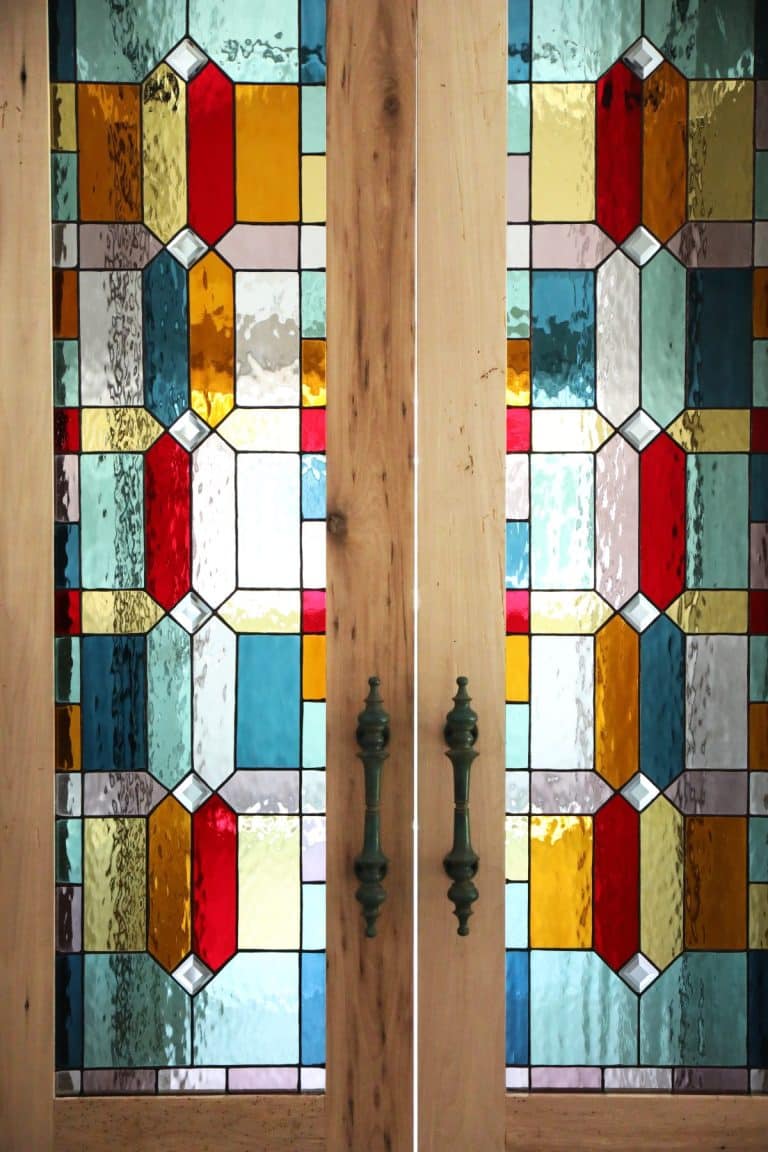
This one is a really great project if you have lots of little pieces to get rid of… I had a TON left over from my doors. I’m about to dive back in to more doors {smaller this time} but this is a good one if you’re looking to use up those smaller pieces. It’s like a fabric buster project, but with glass.
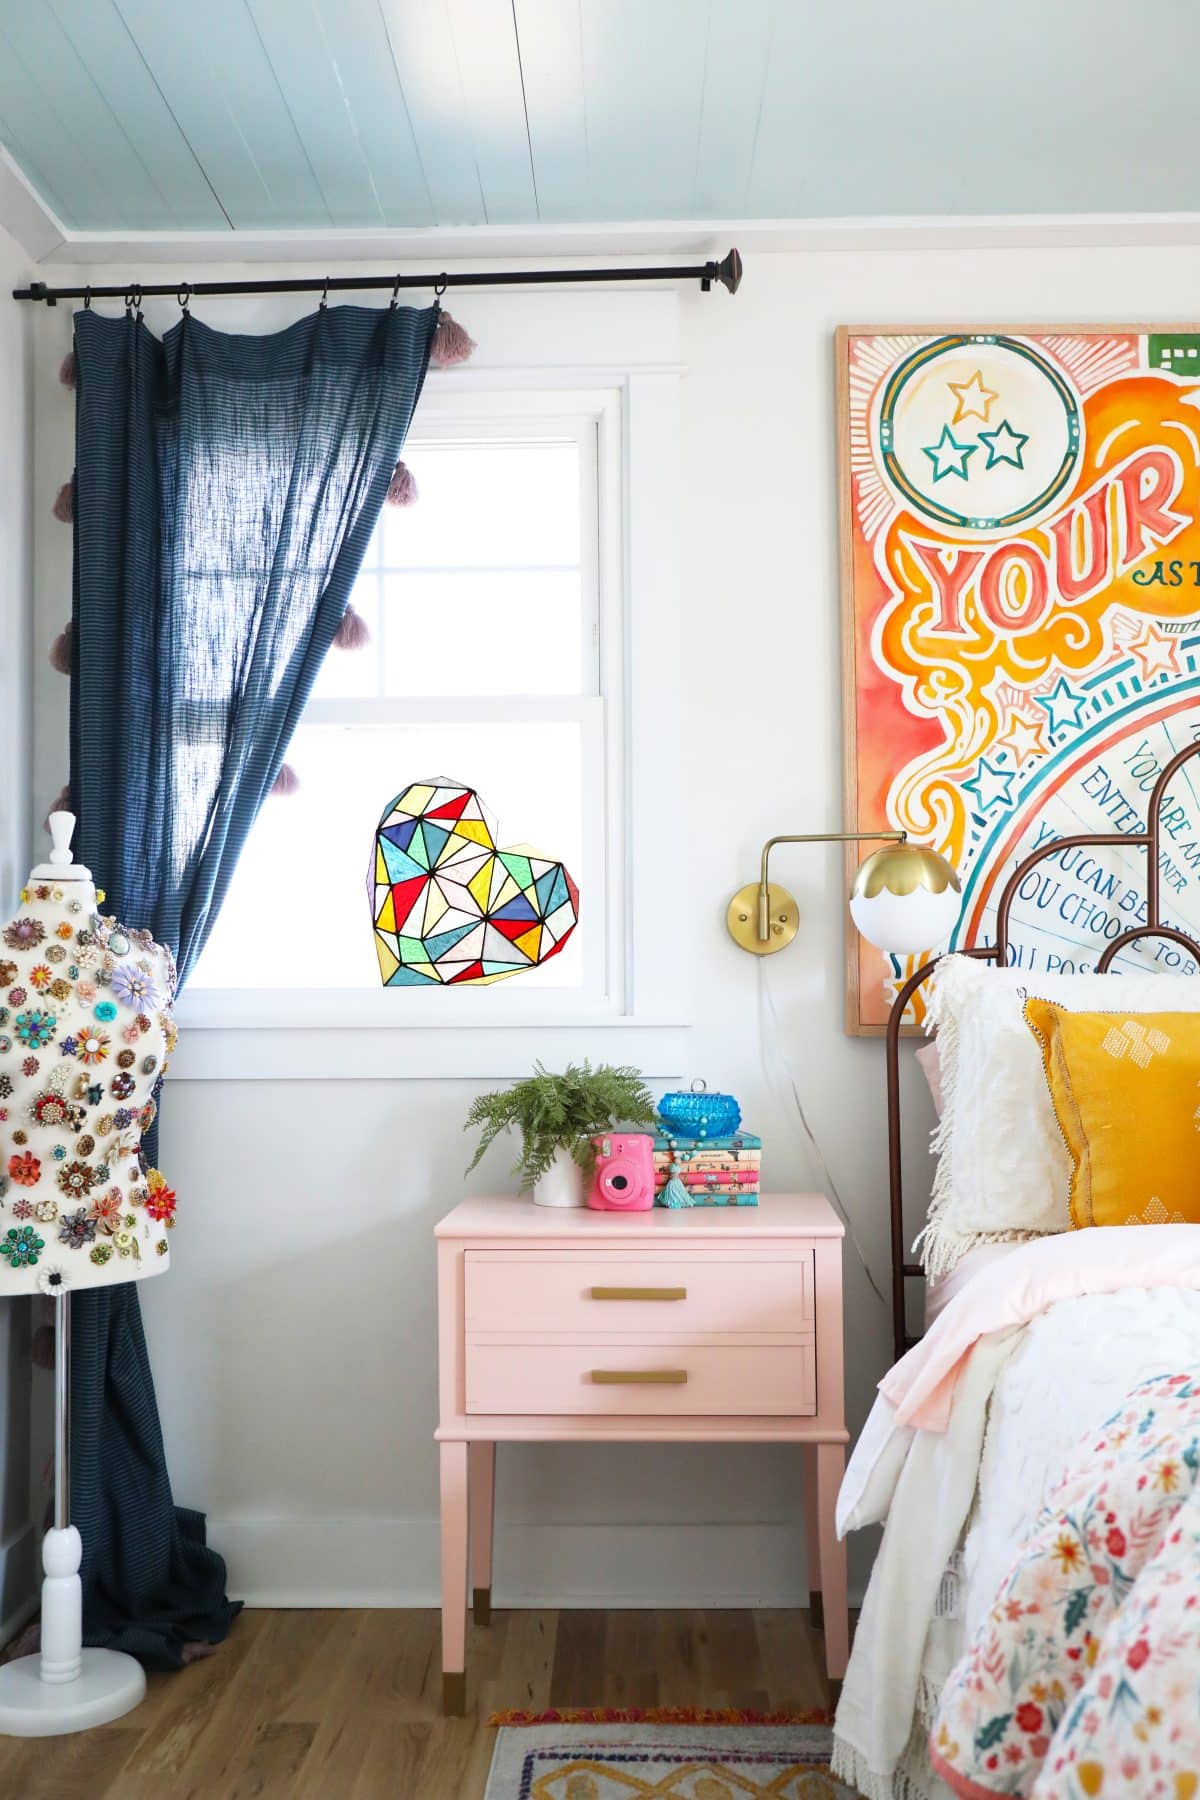
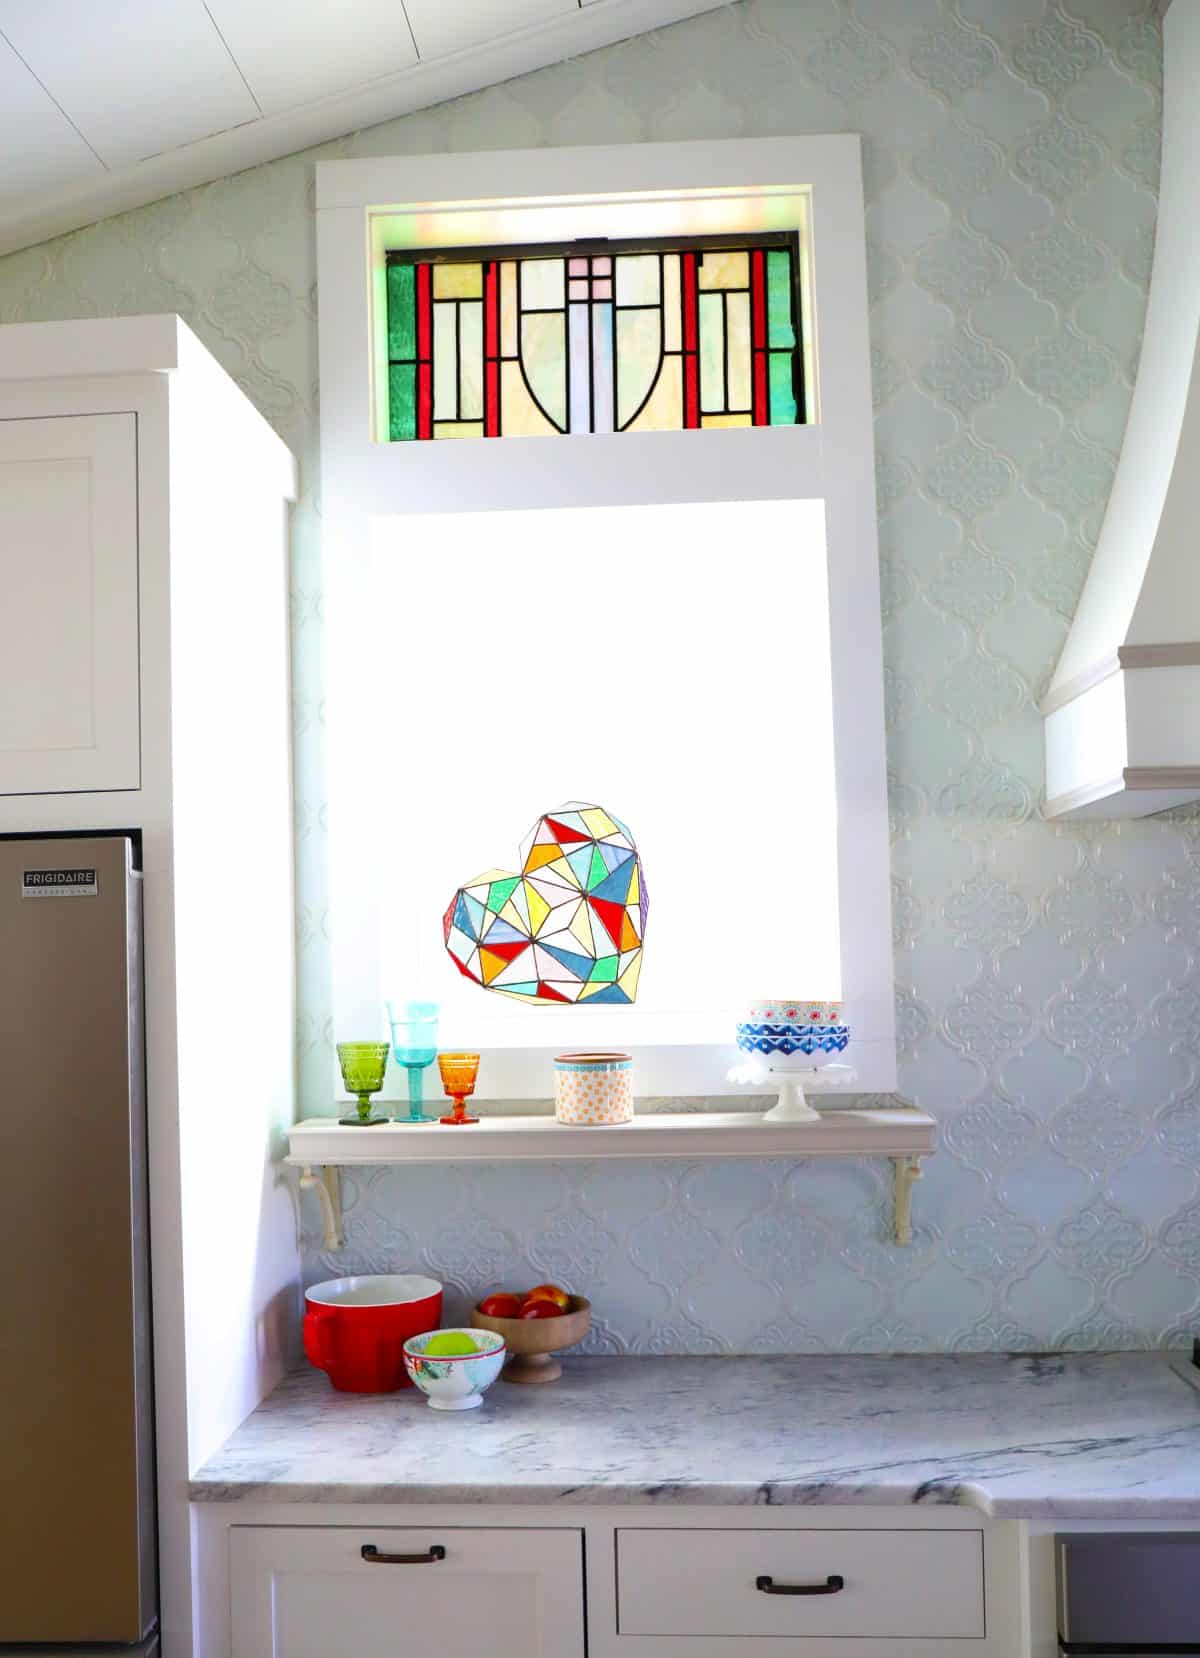
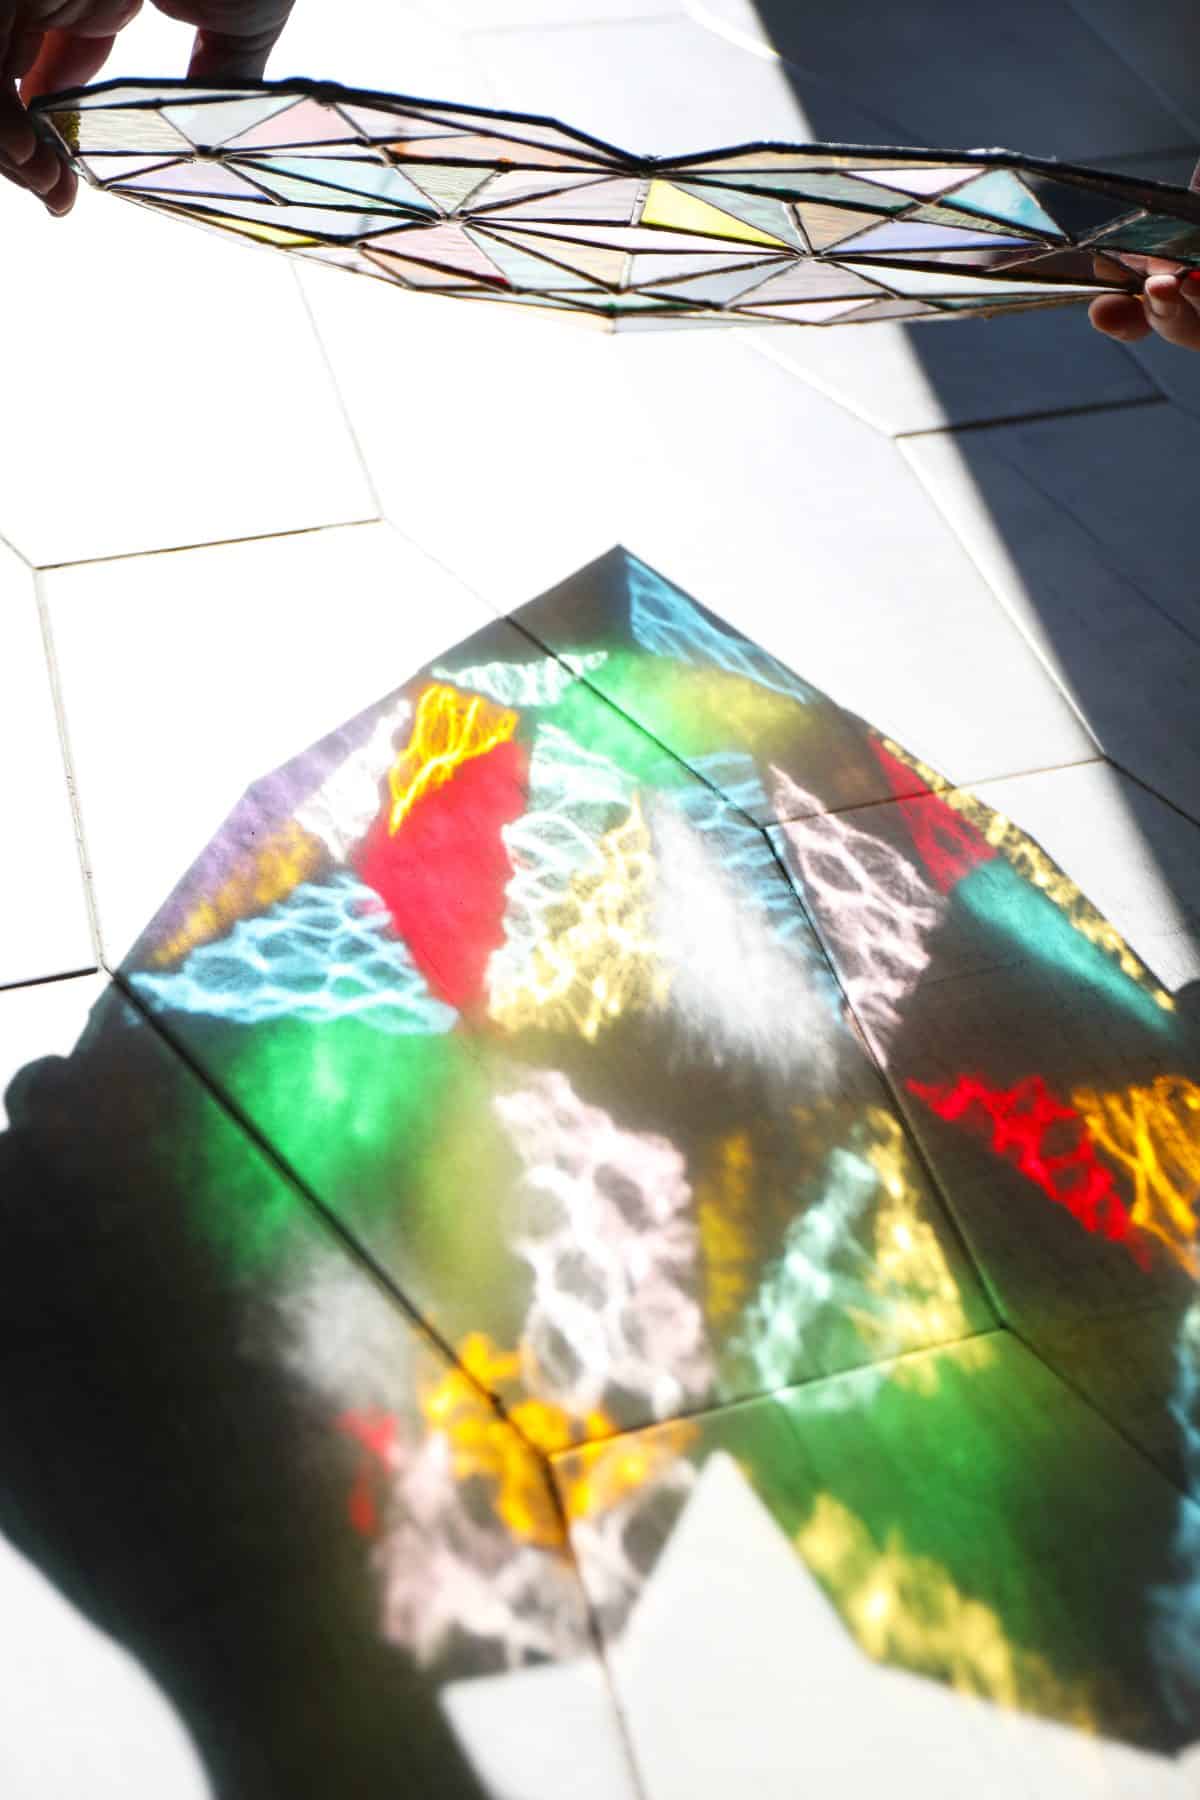
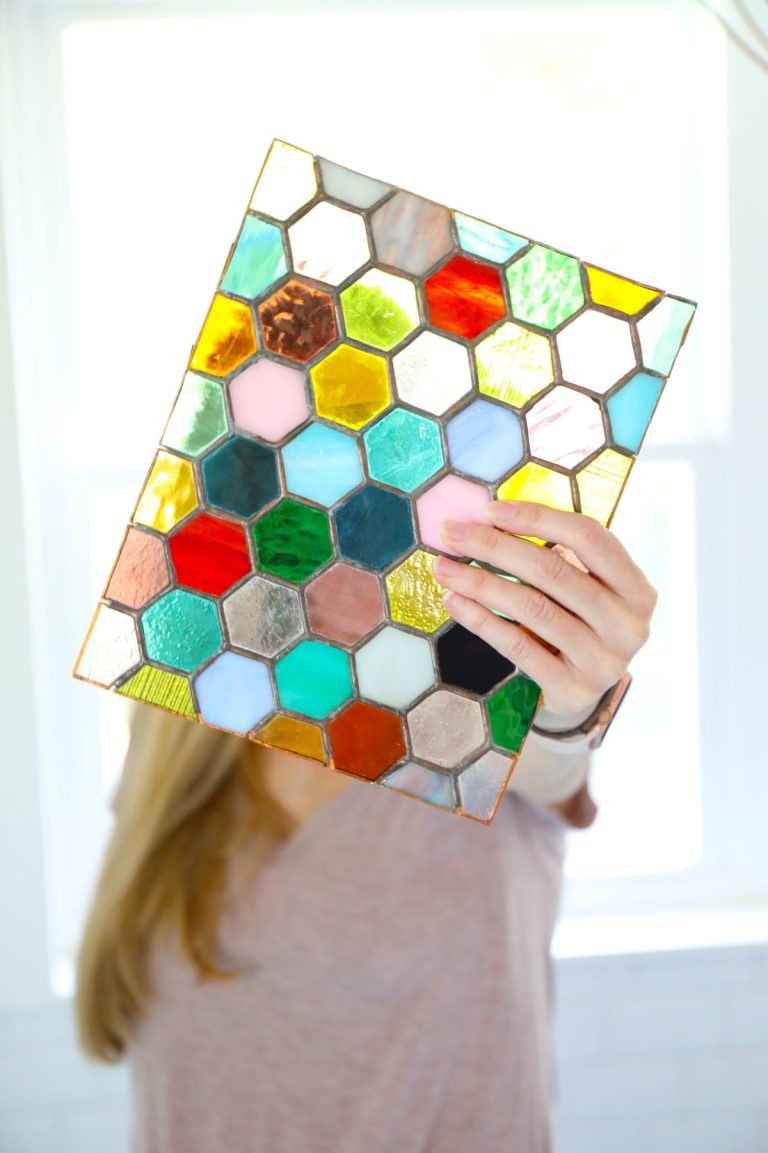
No, I couldn’t help photographing it all around the house. I haven’t found a permanent home for it yet. But I’m obsessed with the geometric approach, and love the way this turned out. There’s even a fun little video that captures all the colors, here!
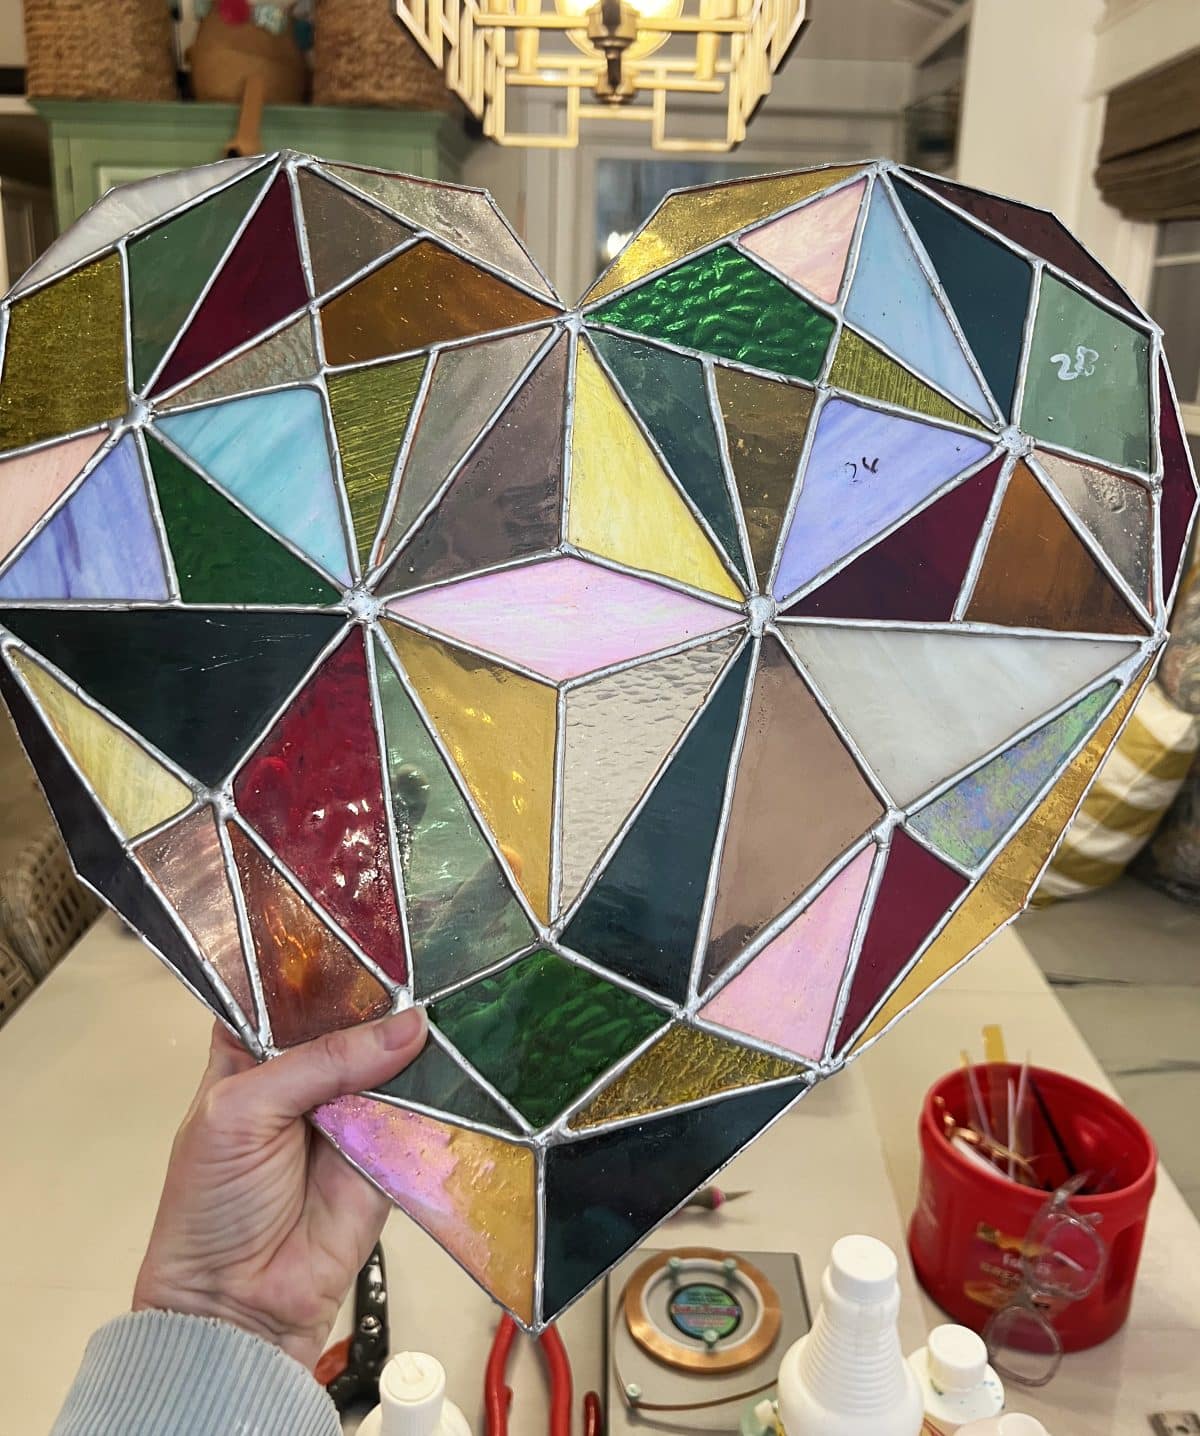
Yes, I did pose with it. Good times. I just want you to understand how large this one is. The pattern {free, below} is 16 x 16 printed out. I went larger because, well, I always do. But also because there are a lot of small angles that meet together, and this kept it doable. You can always try a smaller size, but I wouldn’t go too much smaller. This kept everything at a nice working size with the foil and cuts.
But I’m still a beginner, so what do I know? I just love that pretty, colorful end product.
Want your pattern? Get it here! Just click, and have it printed at 16 x 16

But first, a history
{You’ll want to refer back to some of these if you’re just getting your toes wet in the world of stained glass. I highly recommend familiarizing yourself with the entire process so that you know what I’m talking about below. This post will merely serve as outline form, while the in-depth process can be found below. I’ve covered them thoroughly in the past, so I’ll be covering them briefly in this actual post. Links needed are below}:
• Check out all the supplies I listed + a little take on getting started, here.
• We covered the basics of stained glass, here.
It’s pretty in-depth with good videos referenced as well, so be sure to check it out.
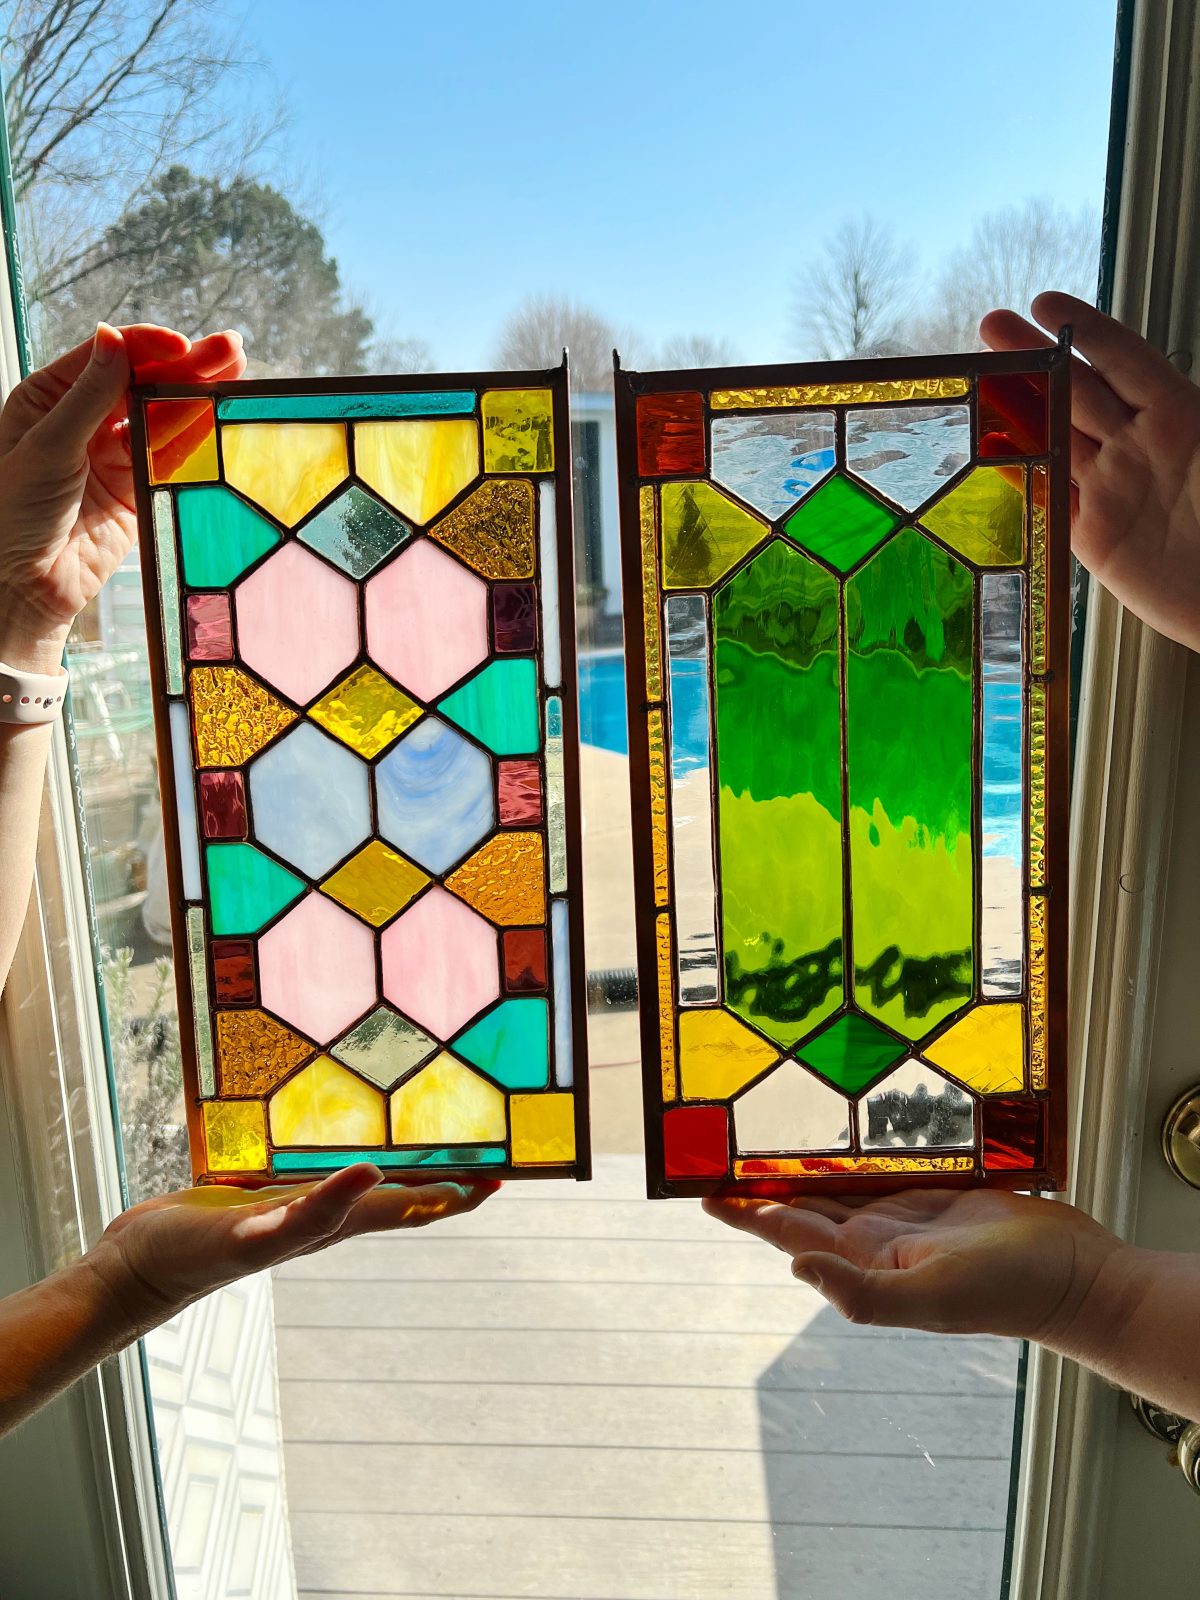
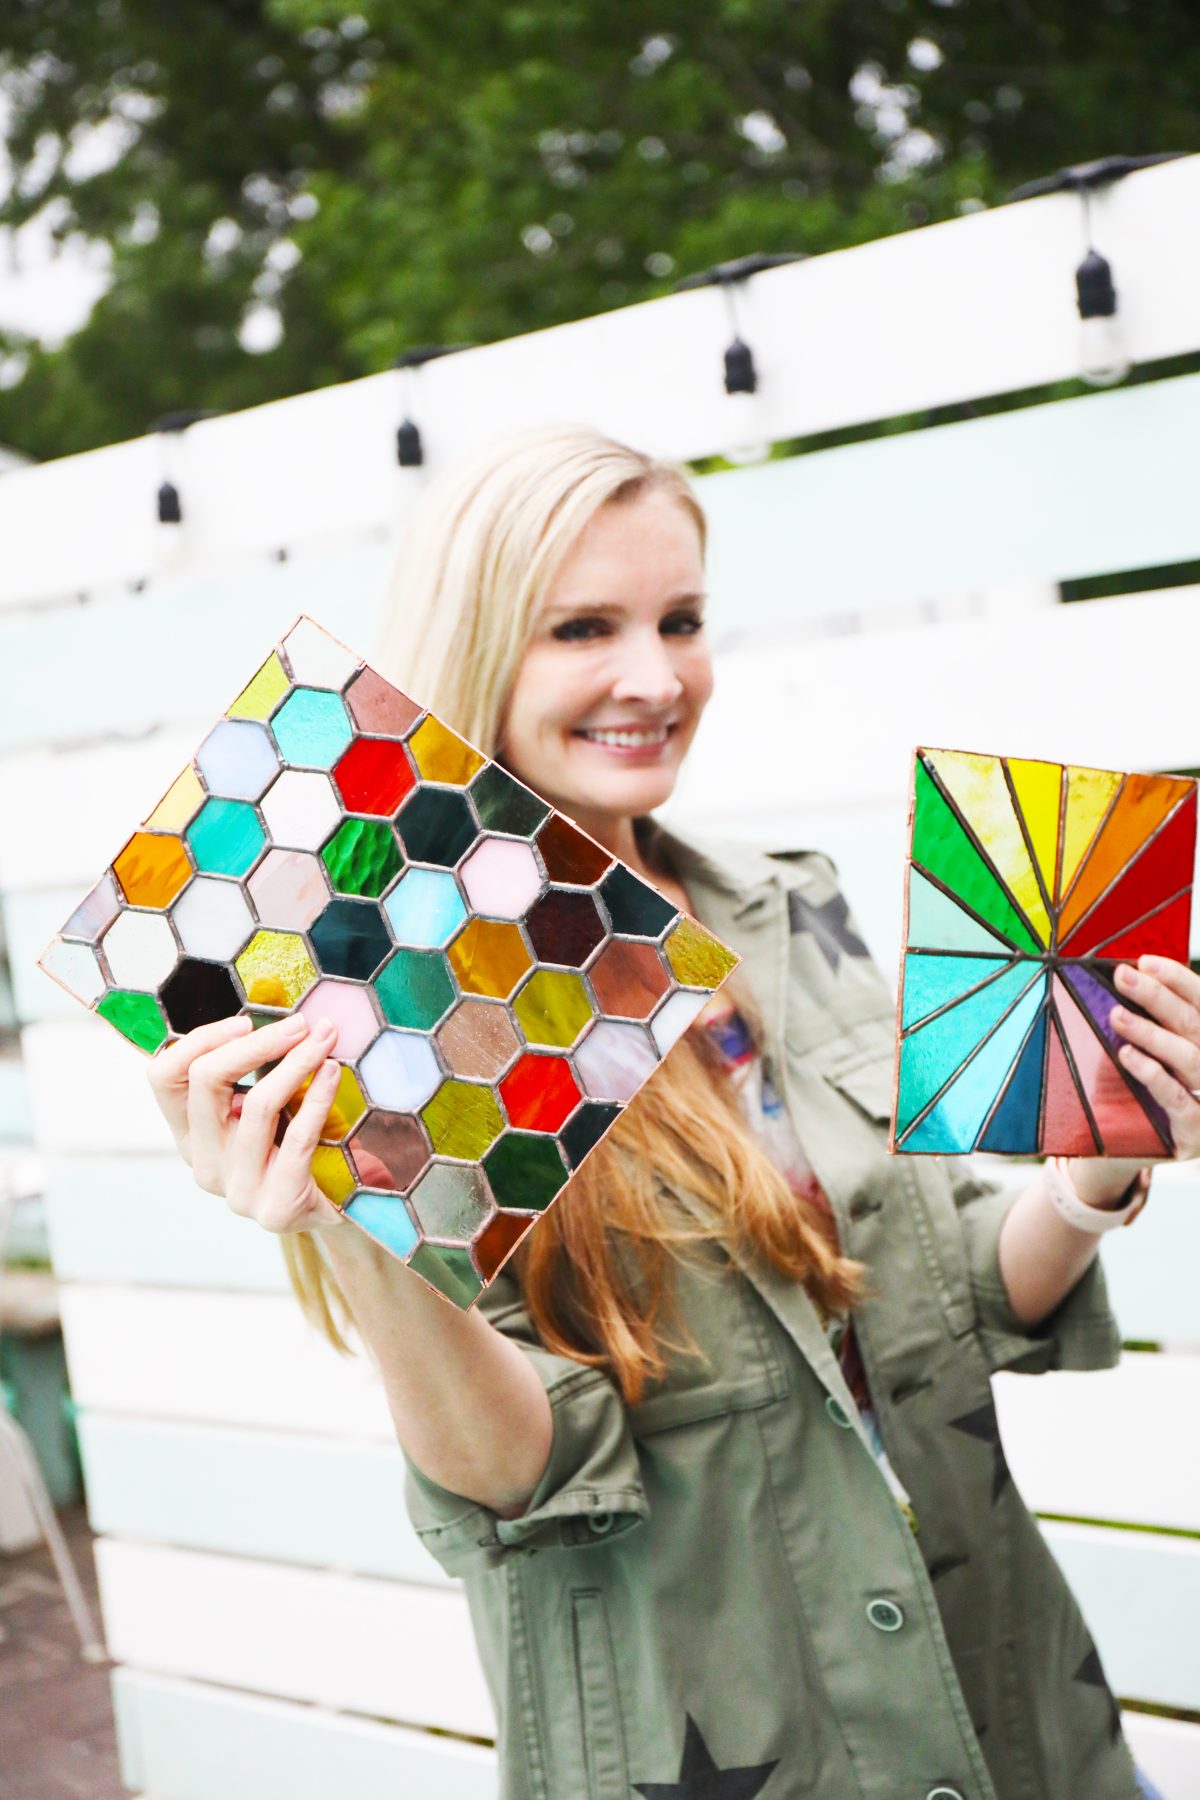
• I also shared this honeycomb pattern here
• The free window pattern for building the doors, here + links to more free patterns
• Star ornaments {really for any time of the year} here
• Check out all the supplies + a little take on getting started, here.
Again, linking to this because this is a true stained glass project. It definitely helps to have the intended supplies and I’m pretty thorough with everything here.
• When I list the steps, be sure to check out the basics of stained glass, here.
This is complete with videos and more as reference to help get you started.
Before we start, please review all safety points here. I think this article covers it perfectly on all things to consider when it comes to your safety and stained glass. I also added a fume extractor {seen below} so check that out here.
• Select the glass that you’ll want from this project. I have a plethora left over from that massive door project, so you may recognize a lot of the colors, with a few scraps, too.
• Print and laminate your pattern – I printed mine out at the local Fed Ex, and had it laminated to protect it. Again, this file prints at 16 x 16. I wouldn’t go much smaller because of all the pieces. Then I tacked it down to a piece of drywall so that I can work from there.
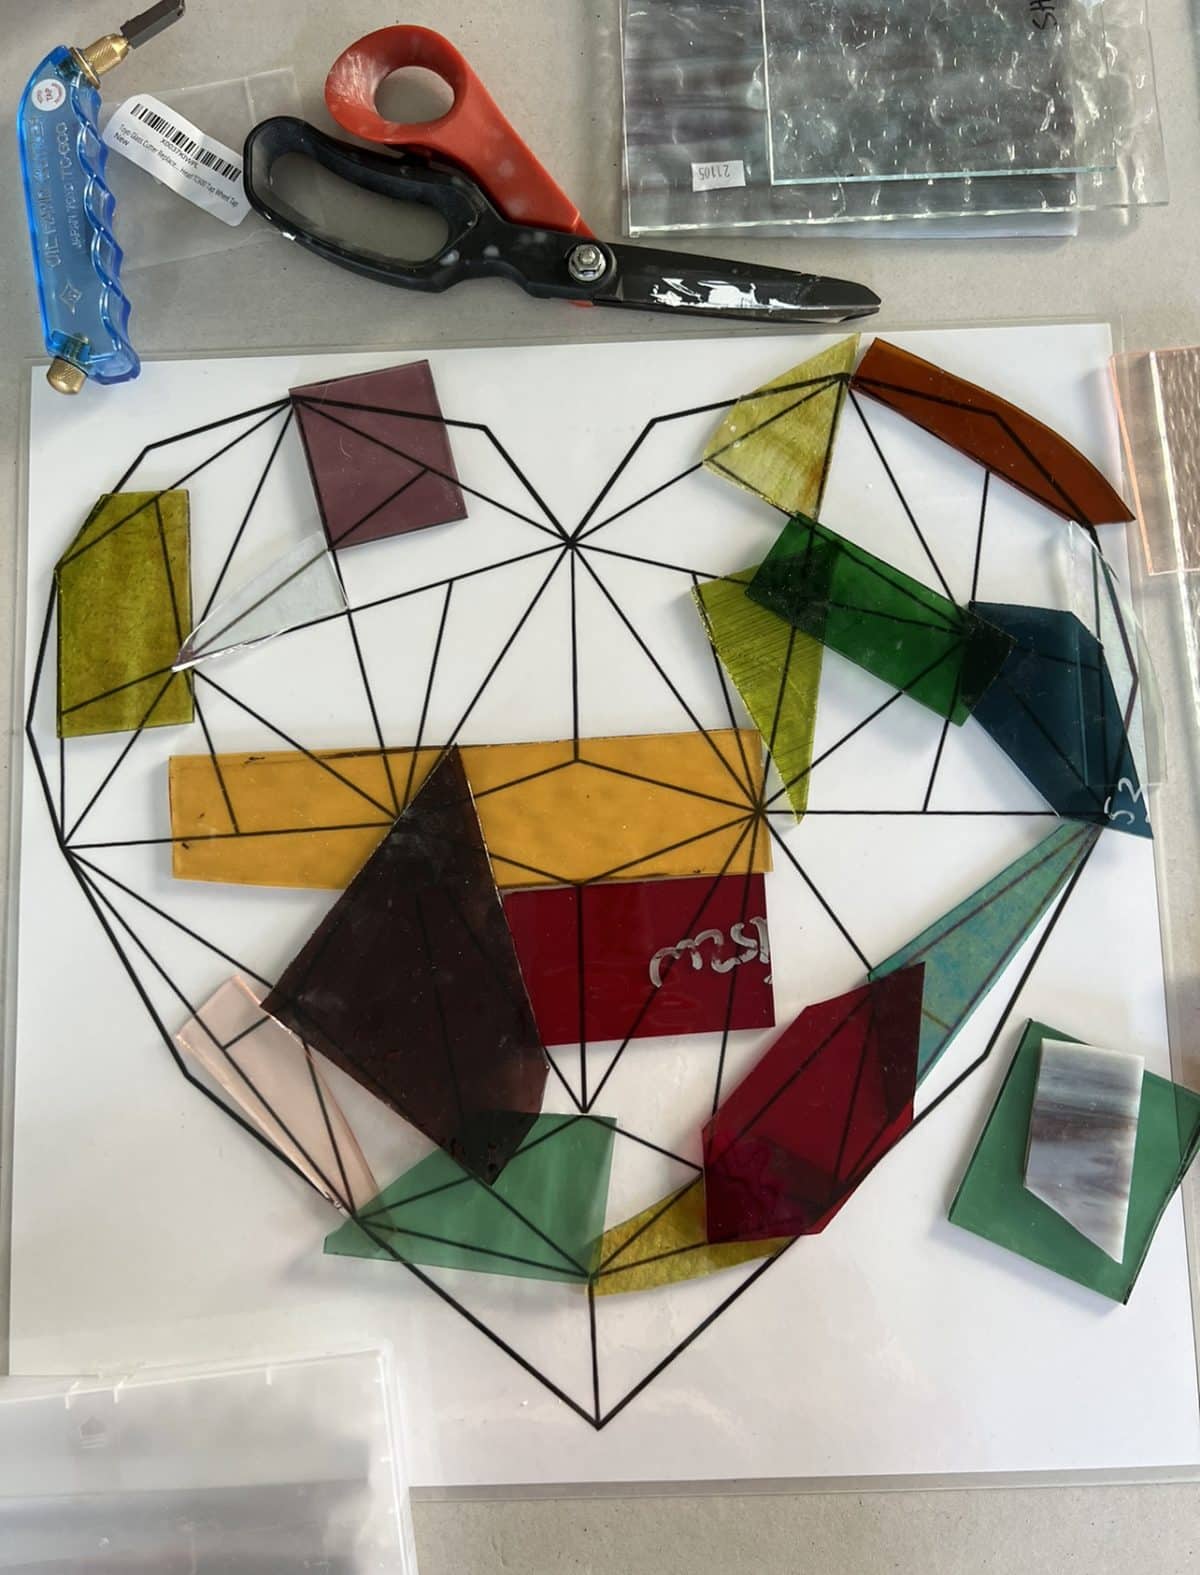
• Tracing – There are three ways to trace your pattern: You can see more of that process in detail, here.
1. Transparency film + sharpie + glue stick – Lay your transparency over your shape, trace + cut. Then lay it over your glass, and repeat to achieve the same shape.
2. You can also just lay your glass on top of the pattern, trace, and cut.
Depending on how well you can see through the glass, is what I used.
3. The Cricut method: I simply load the same pattern into my Cricut and cut it on vinyl. –This only works with smaller sized projects, but once you get the hang of it, it is a nice time saver. Check it our more in detail with this star ornament post, here.

• Cutting + Grinding – Again, I definitely outlined it in more detail, here.
Whichever way you choose, make sure you get that shape as tight as possible. Simply cut and grind it down, fitting each shape into place as you go. As always, when grinding, use protective eyewear, and I’d recommend a mask, too. This is a photo from last year, but I’ve started to wear one more often than not.

Always remember to label your pieces as you go, too. It helps to keep everything matched up and organized as you cut.
With this particular pattern, it was geometric in nature but also an organic shape with no right edges. So, I secured each edge with tacks as I went. there was a little adjusting as I went, too.

• Foiling + Burnishing
Once all your pieces are fitting oh so perfectly, {It’s okay if they’re not perfect, especially if this is your first time} it’s time to foil and burnish.
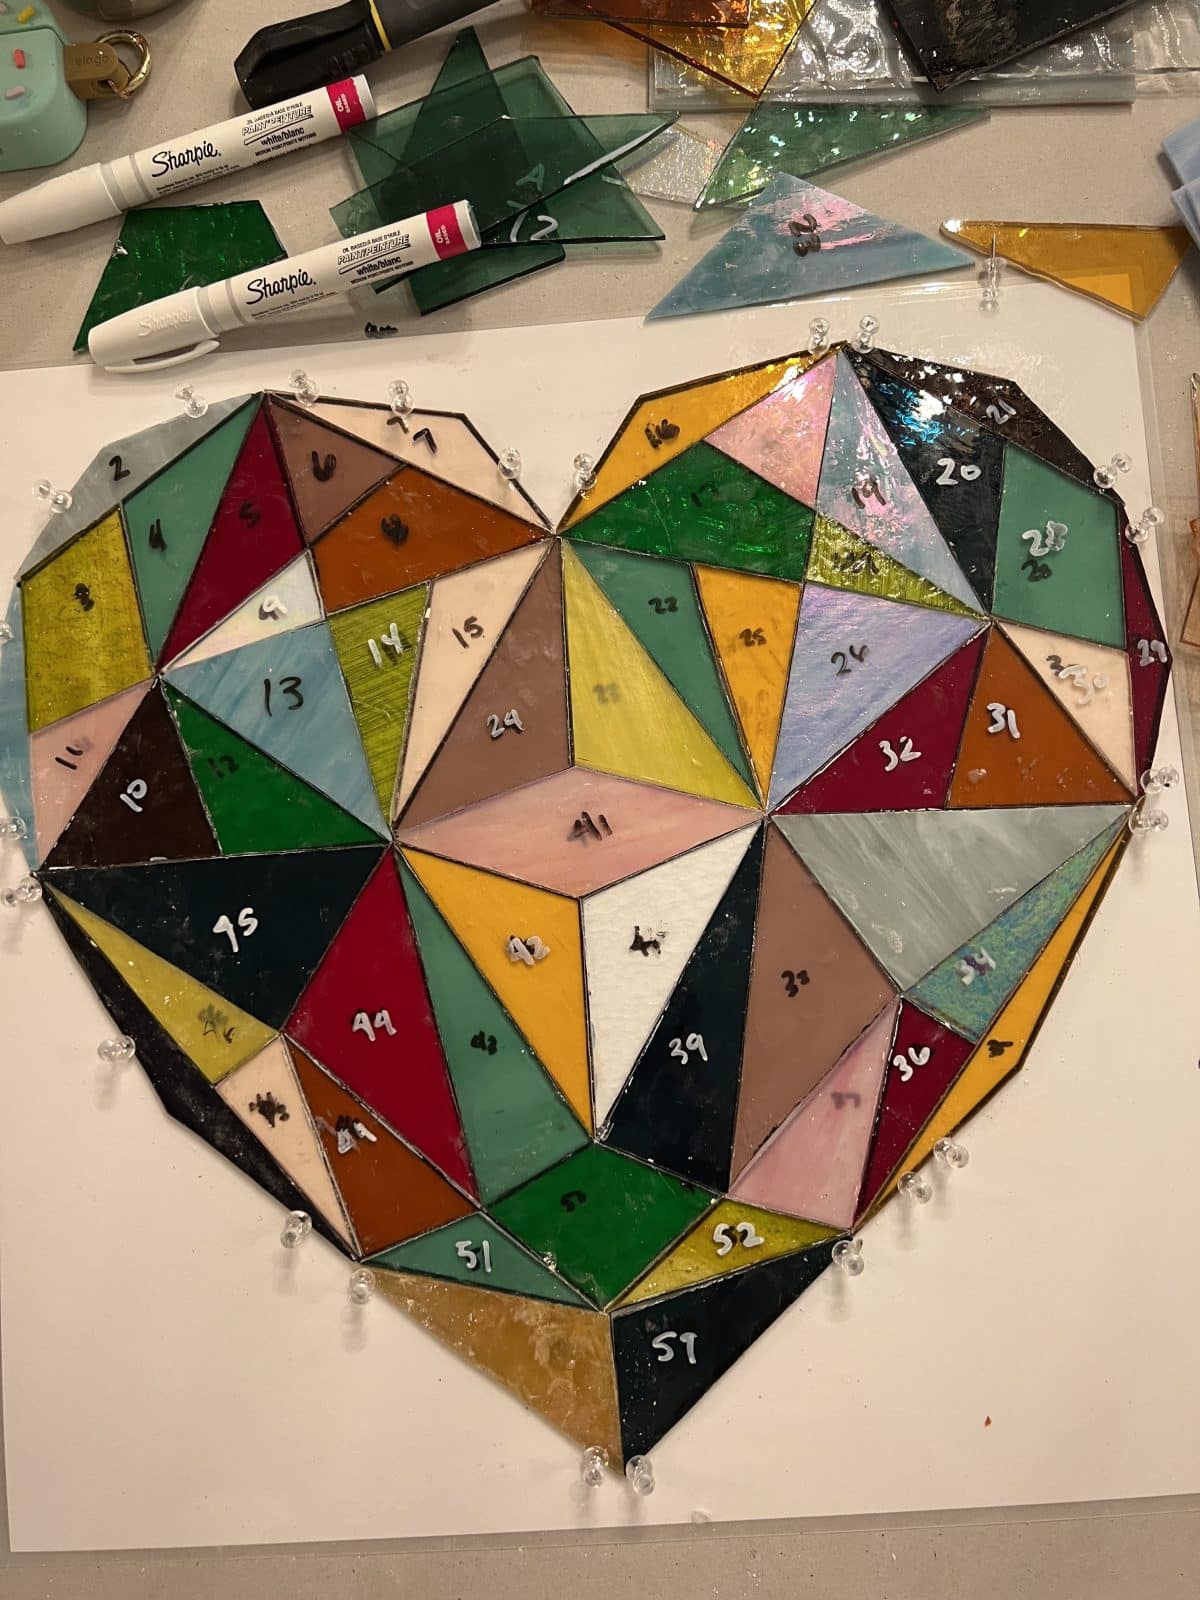
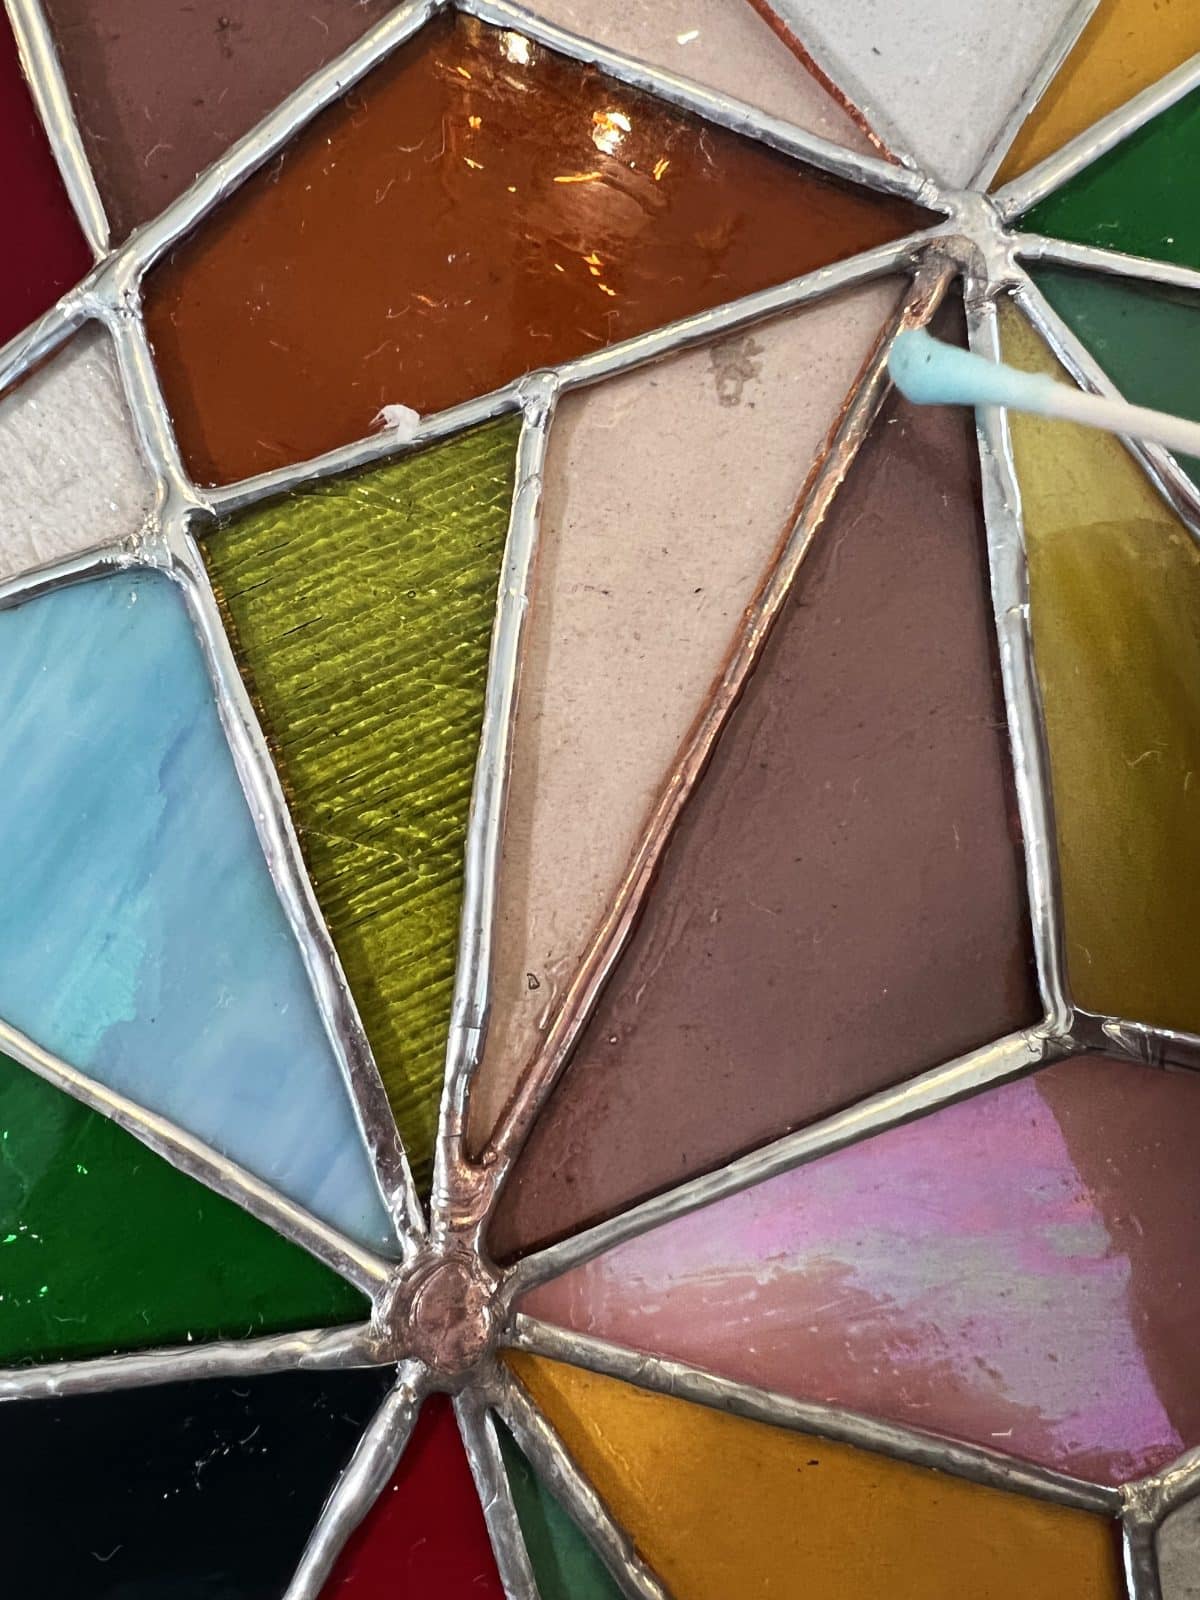
Again, you can find all of that outlined as thoroughly as possible, here. Be sure to read up on this post. I tend to clean up and grind each piece again, so that there are no shiny edges. It helps get that fit just right. This pattern is particularly complicated, so I wasn’t worried about perfection, so much as getting it as close as possible where the edges came to a point in one area. I was delightfully surprised when I didn’t have much leak-through to the other side during the soldering process.

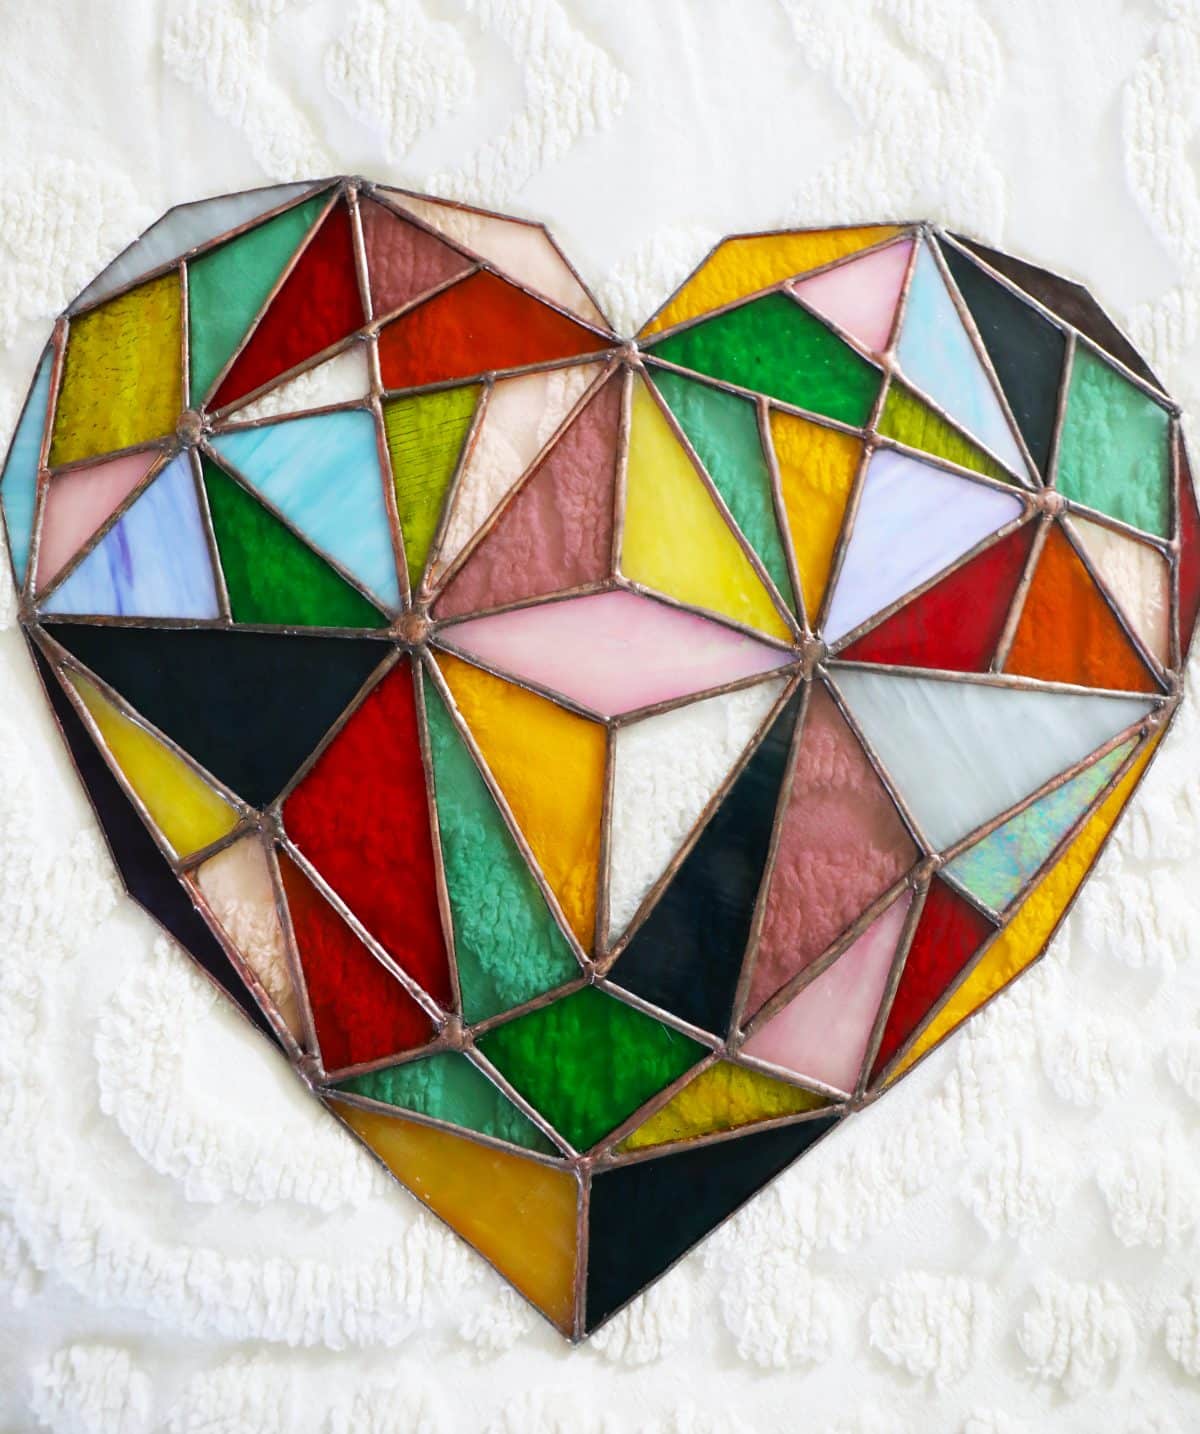
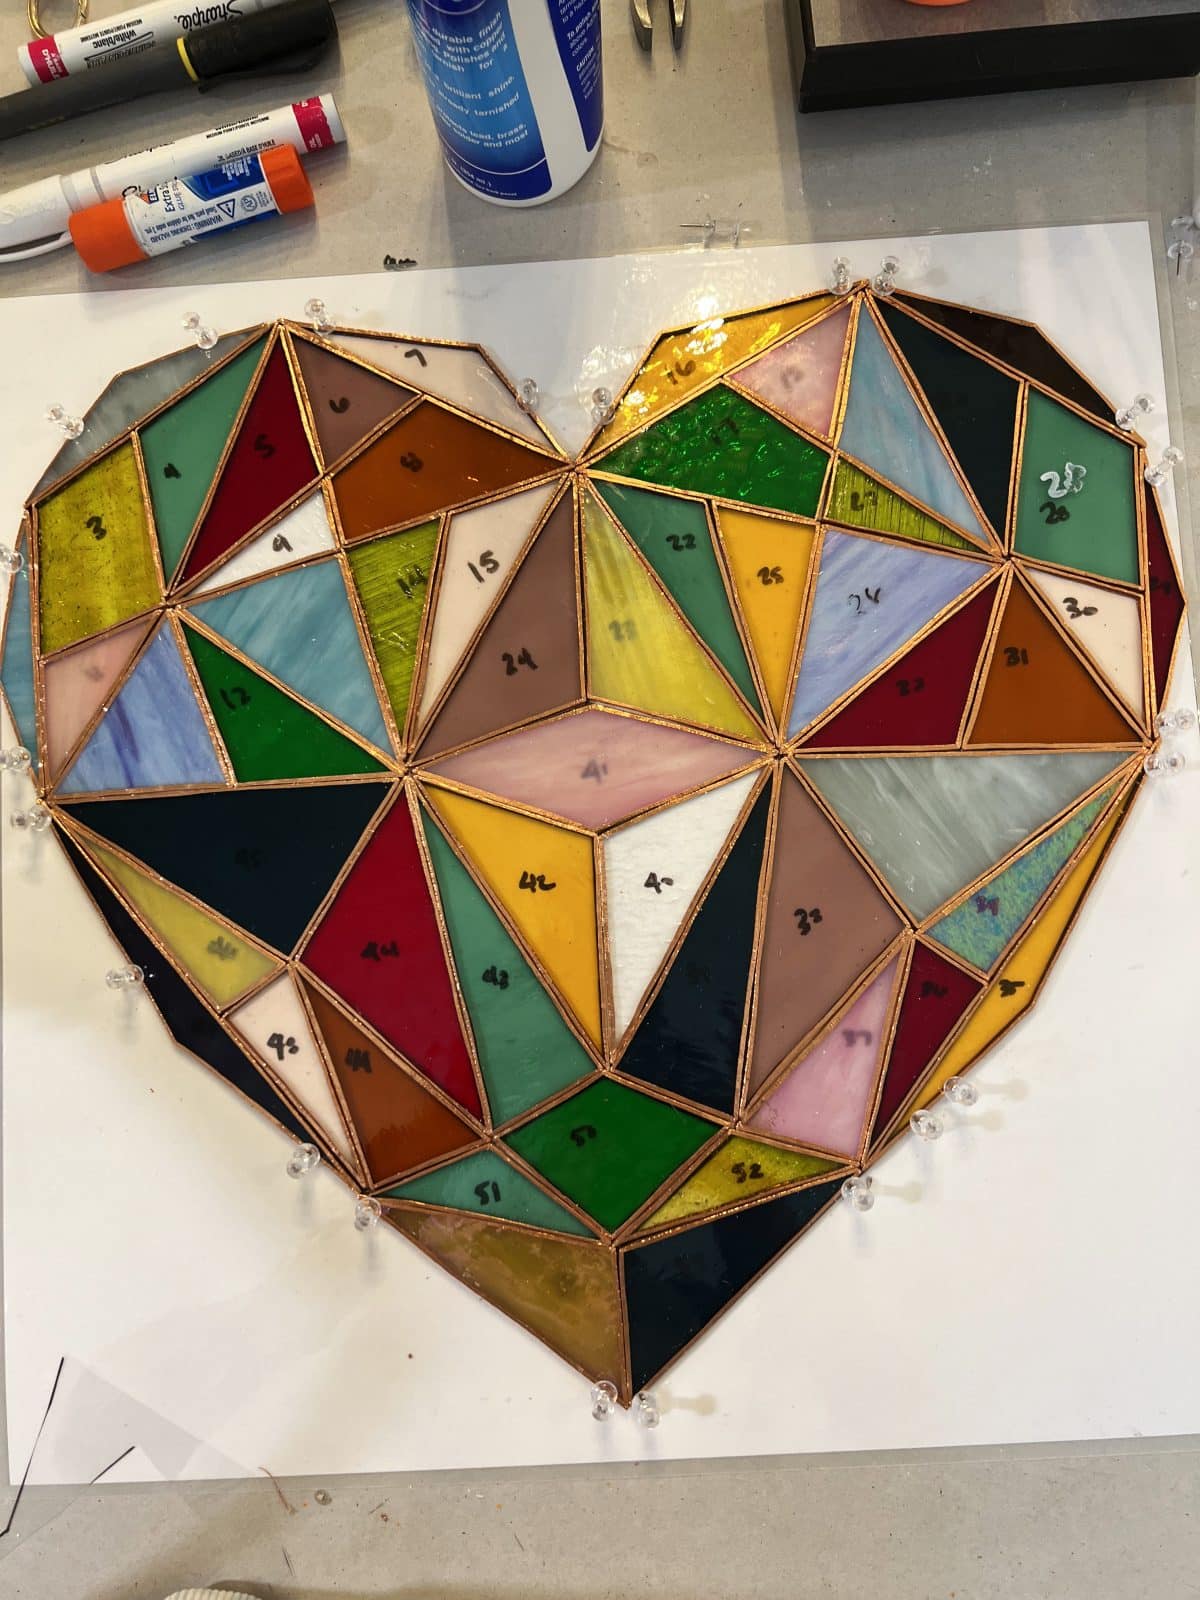
But when you’re finished, your heart should look a little something like this.
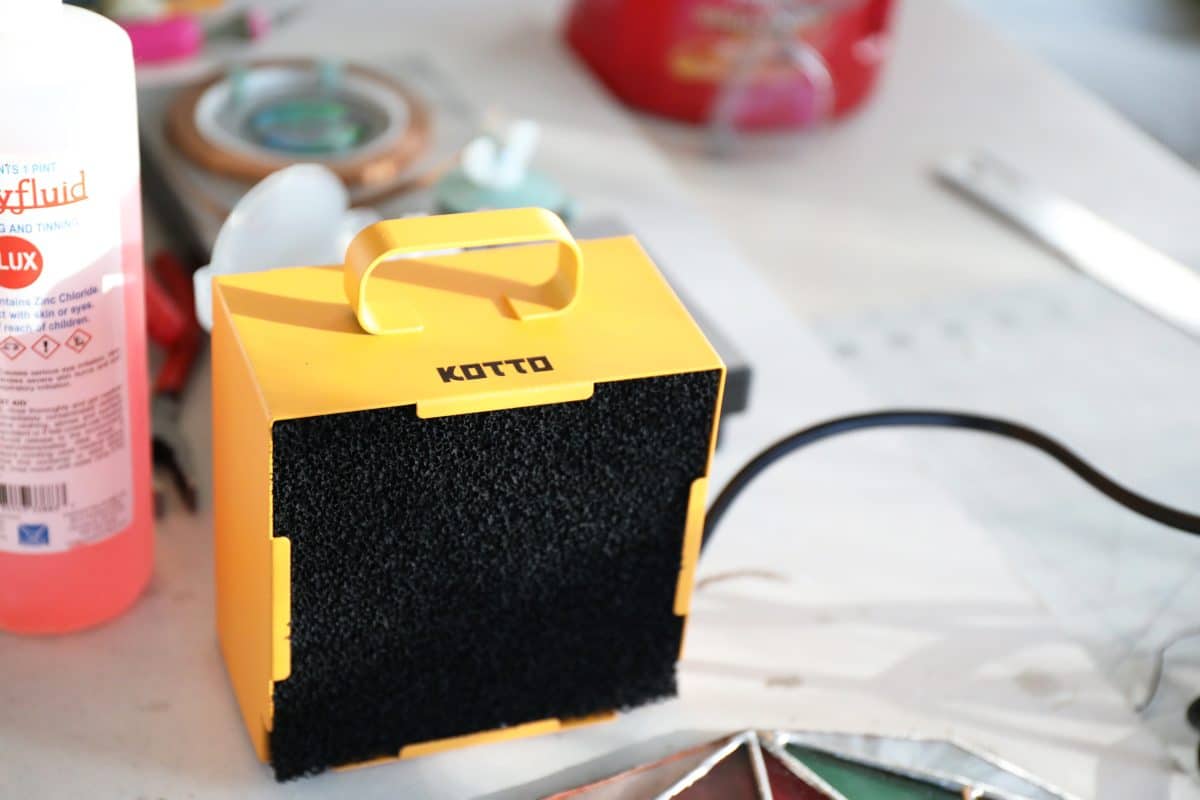
Here’s my new little fume extractor. I had the windows up {and it was freezing} but that with the filter definitely helps keep fumes out of the way.
• Soldering
Again, I’ve outlined it all here.
{Please follow all safety precautions from open windows to ventilation systems here.}
It’s starting to take shape!
Once I get my initial layer down, I go back over it with my soldering iron to get those lines as pretty as possible. I still need help with the “perfect” part of it, but I was pleased with my first go at this made-up pattern. I have found that the more I do this, the less hesitant I am to actually just dive in. So let this be an encouragement to you, if you’ve always wanted to try.
With a free form like this, it may help to dab a little of the solder on as you go, {after you apply that ruby fluid of course} to keep the points secured before going for the full monty on the entire look. Your end goal, {again covered more thoroughly here} is for your solder to have a slight curve to it on the finished piece. So feel free to work it as you go.
The center will be a little tricky, where all of the points come to a center area. Again, mine is not perfect. But you can play with it as you go to make it look better, once it’s established.
When you’re finito, your first side should look a little like this.
Once it’s all soldered together and cool, you can lift it up to admire that handiwork!
For the side coats of solder, be sure to carefully brush on your ruby fluid, and gently touch the sides to spread the solder as you go. It will probably have beaded up on the sides, so you can spread it from there after the ruby fluid is brushed on. Careful to avoid burns by rotating it as you go.
Always check the temperature of your glass often. On smaller sizes like this, it only takes a moment for it to overheat. You can’t see it here, but I did have a piece come out with a hairline fracture here. I am not sure I will replace it because it’s hard to see, and well… I was already this far. Just know that it happens sometimes.
This is the perfect moment to go ahead and polish + wax that first side of your glass just so that it gives the glass a moment to cool down, and you can get all that flux + excess solder off.
• Clean it up {see more detail here}
Breaking it down, the order just goes like this for each side:
1. Flux + Solder {You’ve already done this}
2. Kwik Clean {rub it on and clean the glass / solder
3. Clarity – It’s a stained glass finishing compound {it really makes everything shine – technically it is wax – oh so satisfying}
Flip it over, and you’re ready to do the second side.
The polishing is the most satisfying part! Once it’s all cleaned up, you’re ready to add your patina.
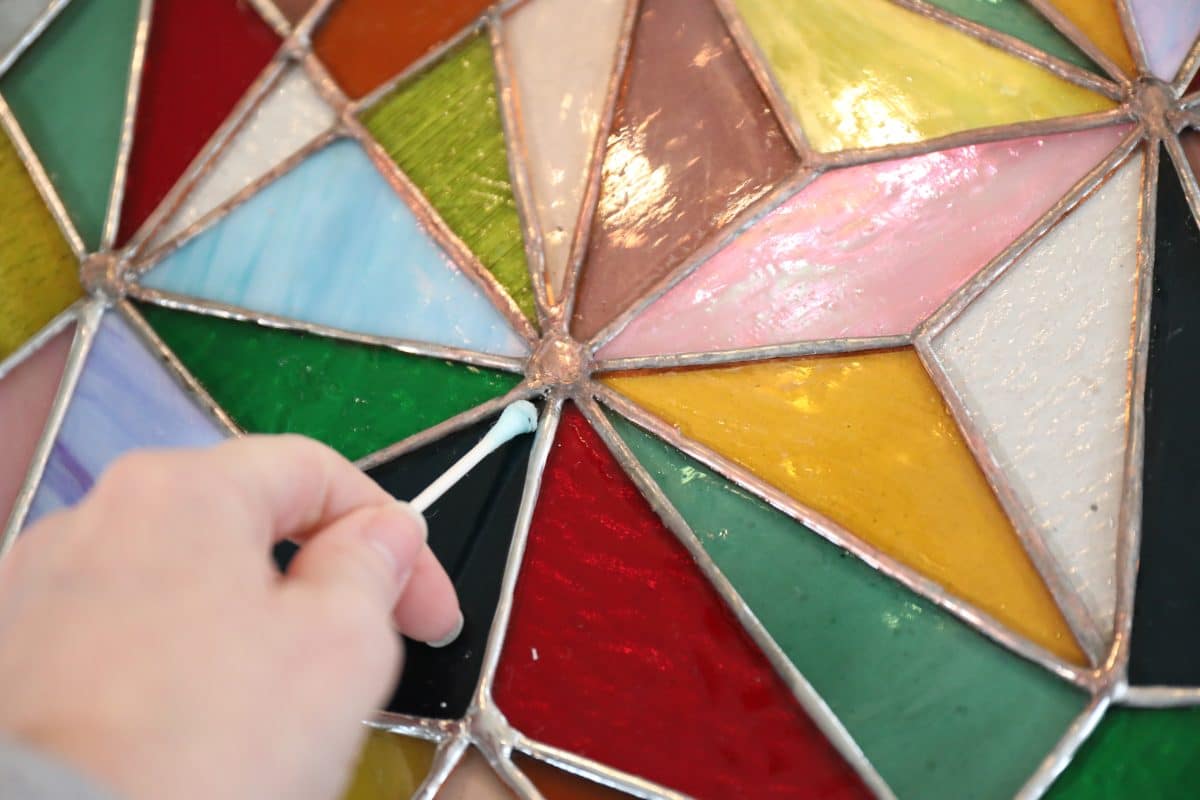
• Patina
• Then you’ll break out your Super Brite {finishes in black, copper + just leaving it silver} – I do find that the patina covers a multitude of sins.
• I use a combo of Q-tips + paper towels to rub it on, making sure to include all the sides. Remember that magic coloring book you had as a kid that had the clear marker, and when you drew on top, it made things change colors? This is that, for adults.
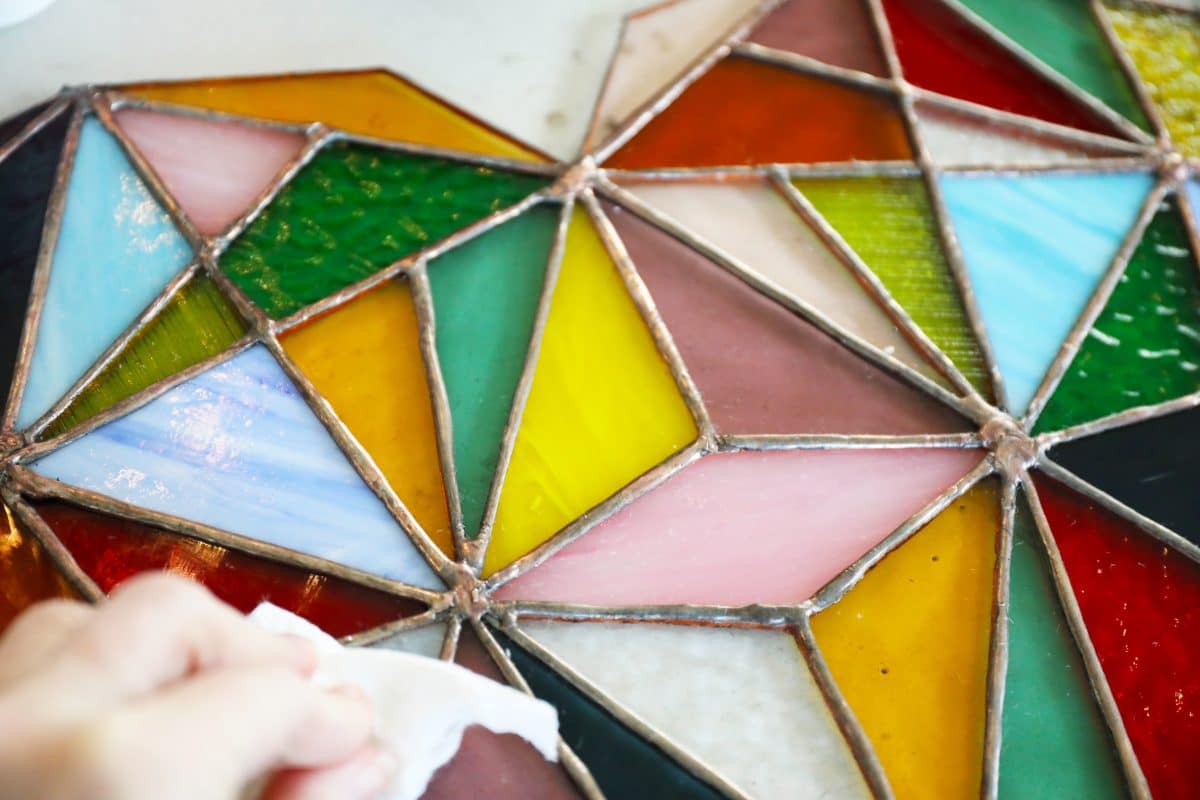
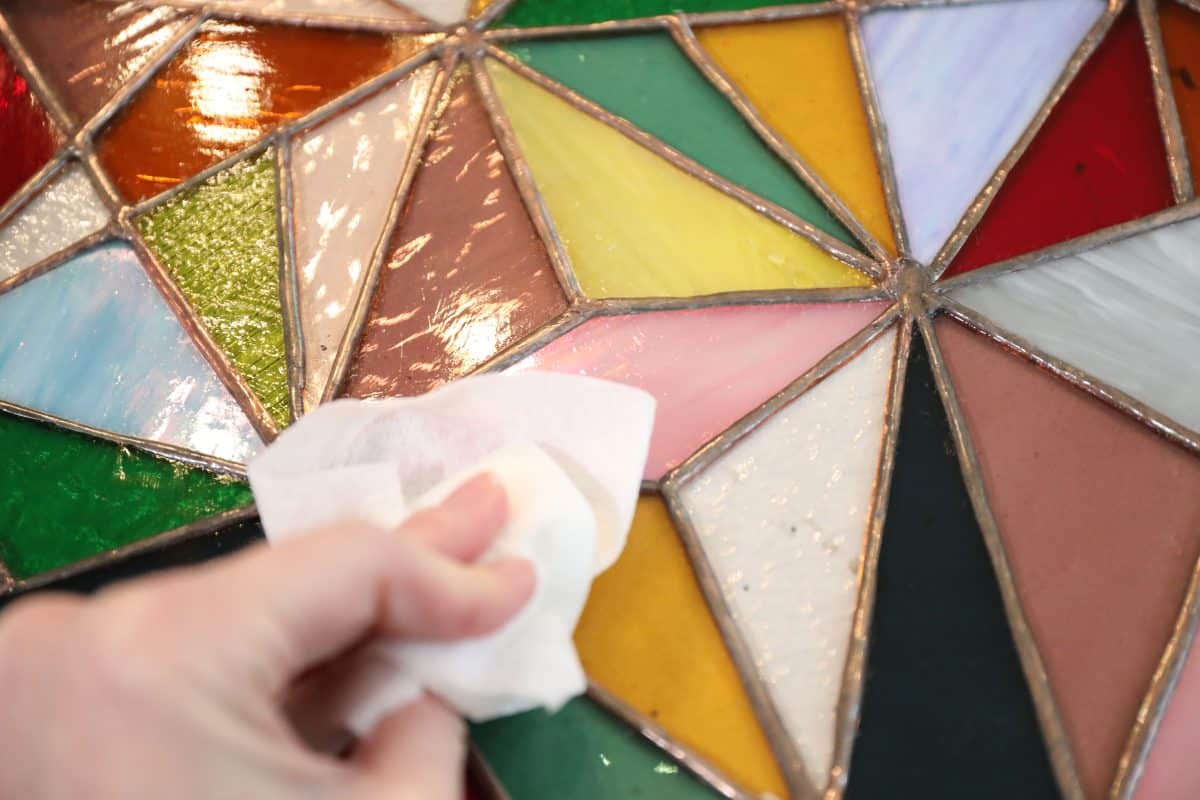
Clean + polish again: Kwik Clean + Clarity again. Just rub until it shines.
• Flip {carefully} + repeat the exact steps above from that first side. These final steps {soldering + patina + cleaning} can take a full day with a large window on both sides. I’m sure I’ll speed up over time, but just know it takes some time to finish.
• Just a note on seepage: {This was my first piece that didn’t really have any.} If you have a few little gaps, you may have areas where seepage of the Solder came through. I have yet to have a piece where I haven’t seen just a little on the other side, peeking through those cracks. I am getting better with each piece, though. Don’t freak. It’s usually easy to manipulate with your soldering iron, to cover it up and then move back into place as you go.
• A note on splatters: Don’t panic if the soldering gets on your glass. It dries and flecks right off. Just make sure you are aware that the second side {because you’re sealing the air into gaps?} tends to splatter a little. Thus the use of gloves for which you will be grateful. I already mentioned this above and clearly I can’t emphasize it enough.
I skipped the hook this time because I haven’t quite decided where I want to place it yet. But check out more of that step, here. I will probably hook it at the top 2 areas on each side, that come to a point.
And you’re done!
I just love all the ways these little pieces came together. I think the older I get, the more this feels like a colorful self portrait of some sort. On resiliency, and finding a way to pick up the pieces and make something beautiful from the broken.
I guess I’m always loving the little metaphors of life.

As always, let us know if you have any questions or decide to make some of your own. We would LOVE to see!
Have an inspired day!
See all our stained glass projects, here!


The beautiful heart you made drew me to your site. You have one of the best instructions for someone new (old – used to do this yeas ago) to get started.
Thanks
Thank you so much for letting me know – this comment makes my day! Happy creating!
Hello, I have made your beautiful heart, I have not soldered it yet. I’m wondering about the finishing of it. Should I run a thin wire around the whole outside? Maybe I add clear glass around the edges and make it into a frame? Just wondered if by now you did any finishing edges?
Hi! So excited that you have made this one! And no, I left it as-is and it sits beautifully in my window. I did not find it necessary to do a thin wire because the piece is not large enough to cause any issues. It just sits on its side as shown in the post. I hope this helps. ;} Feel free to add pieces however you like. I’d love to see!