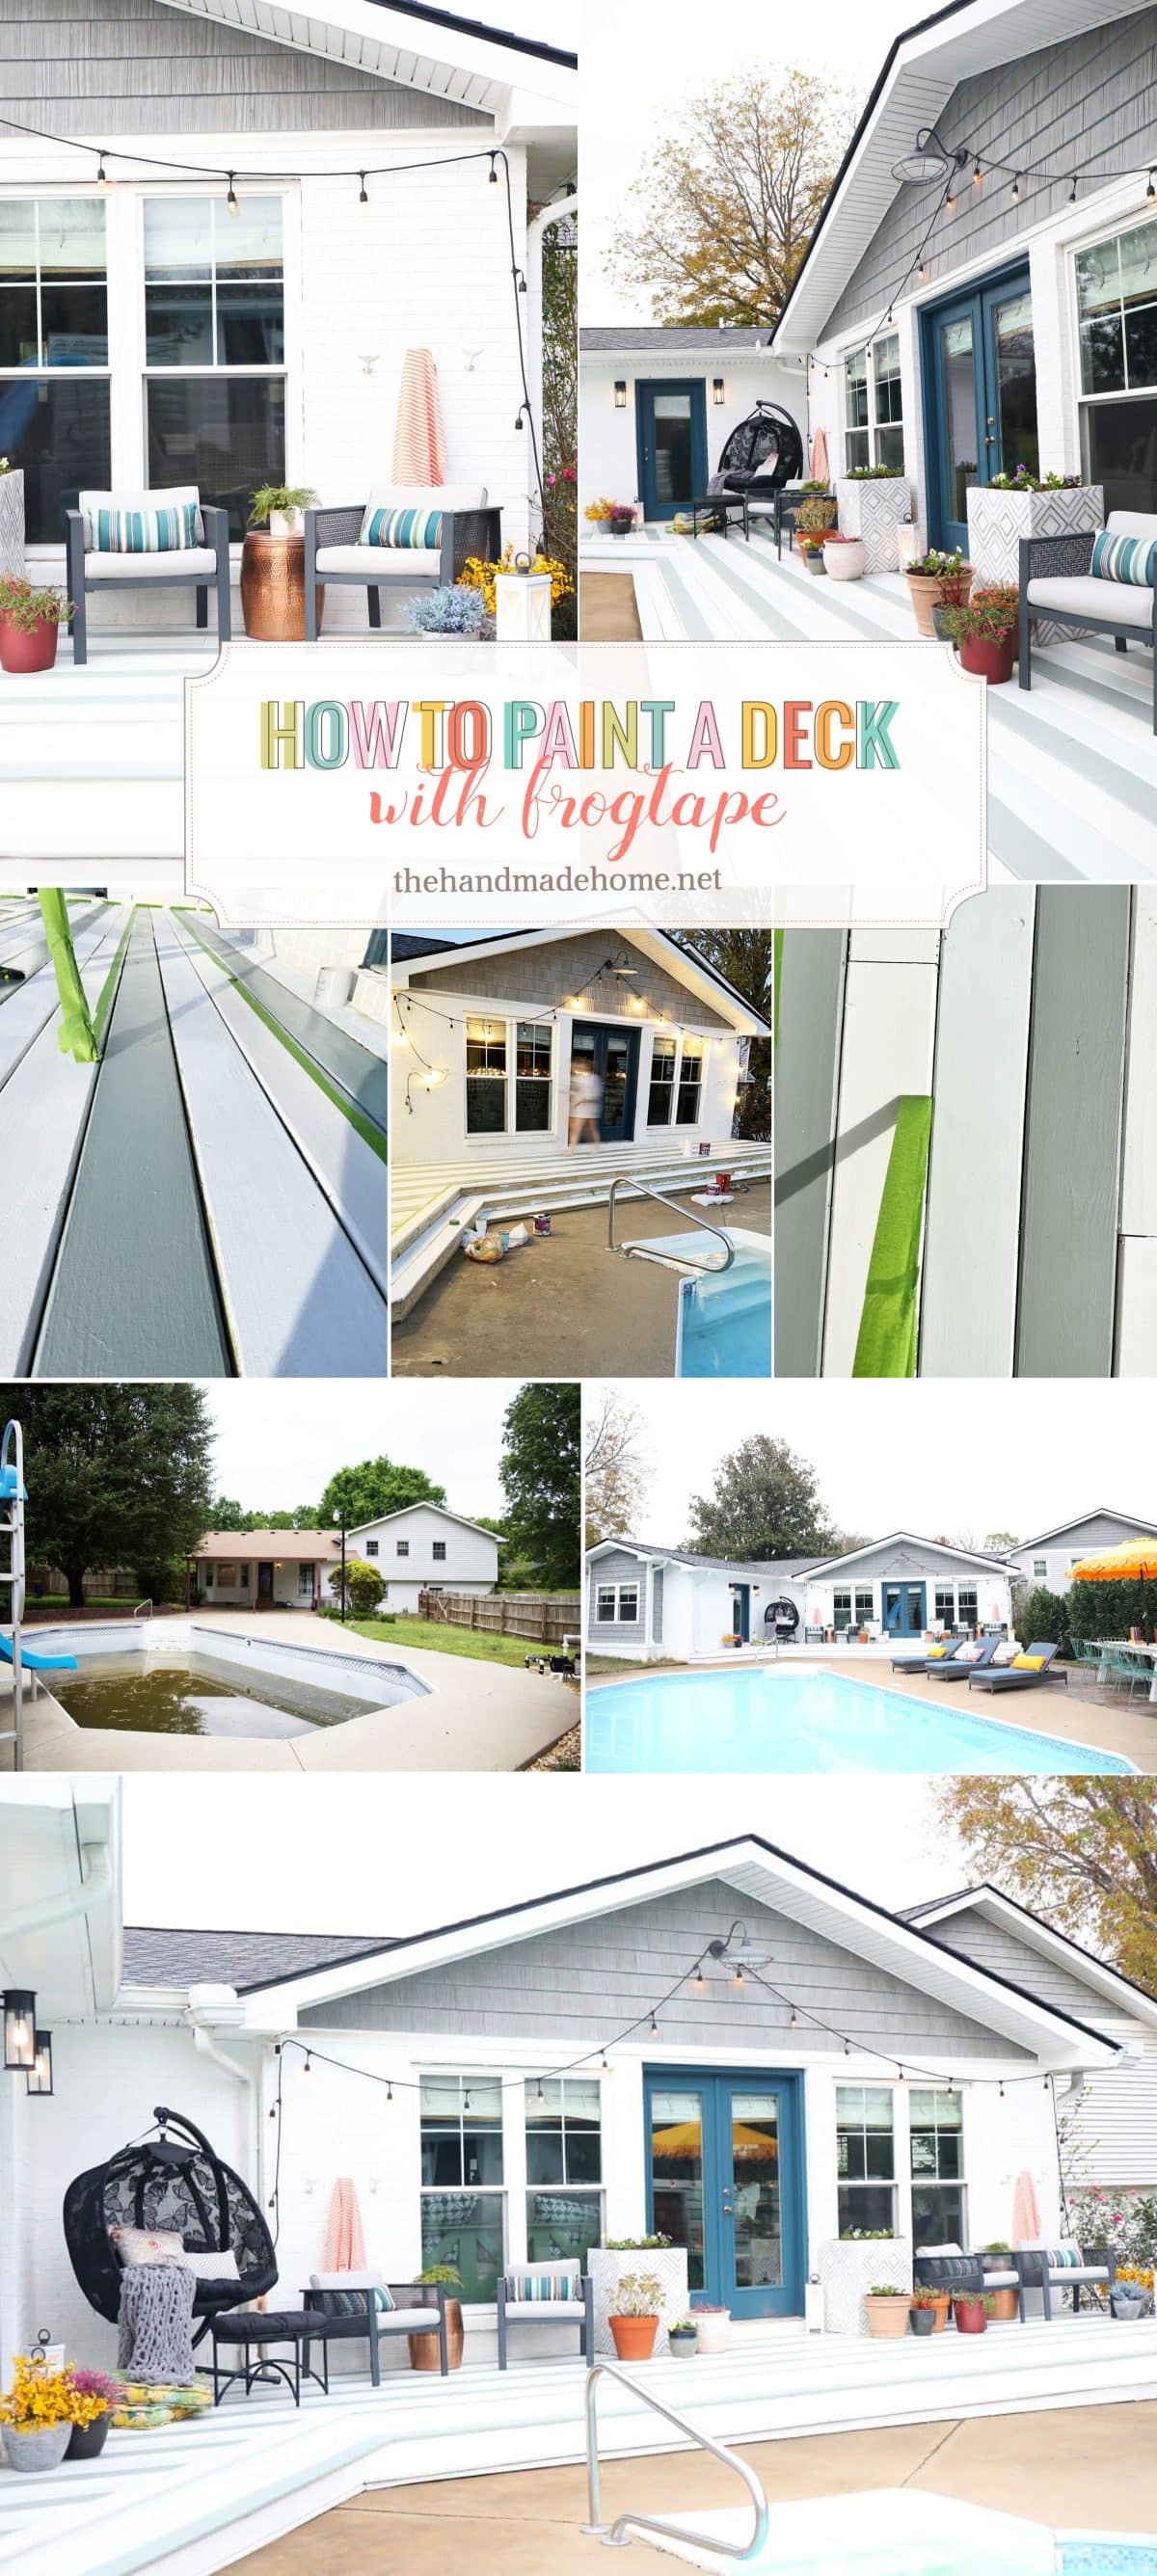
how to paint a deck with frogtape
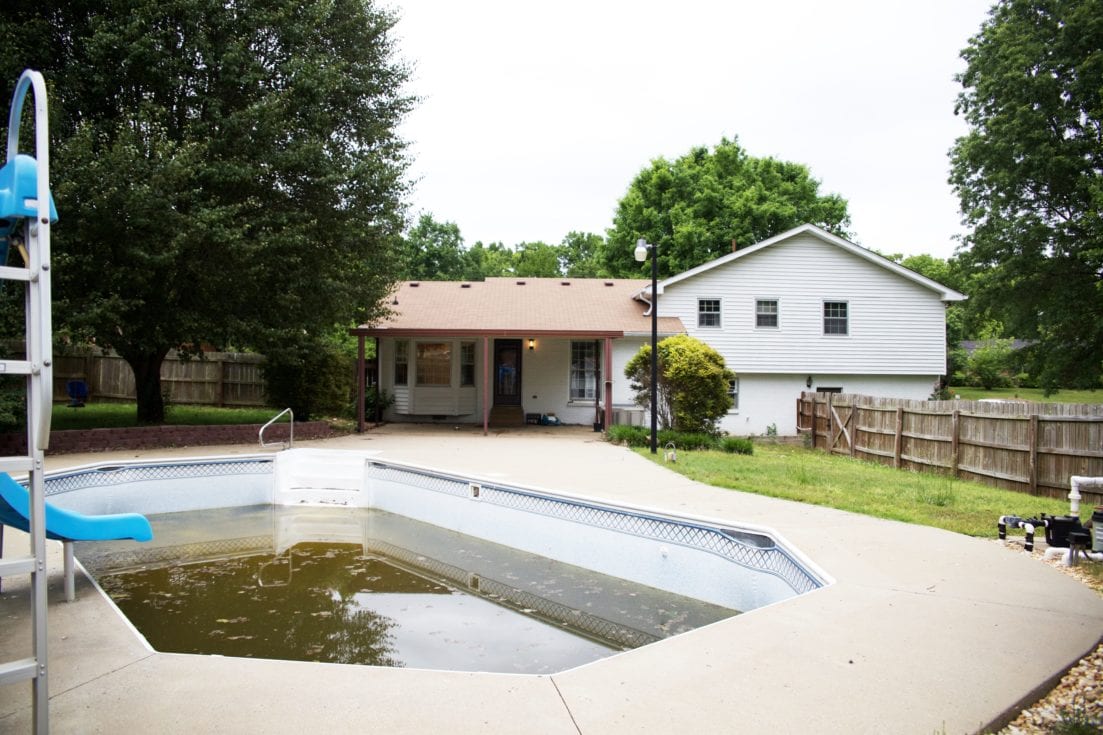
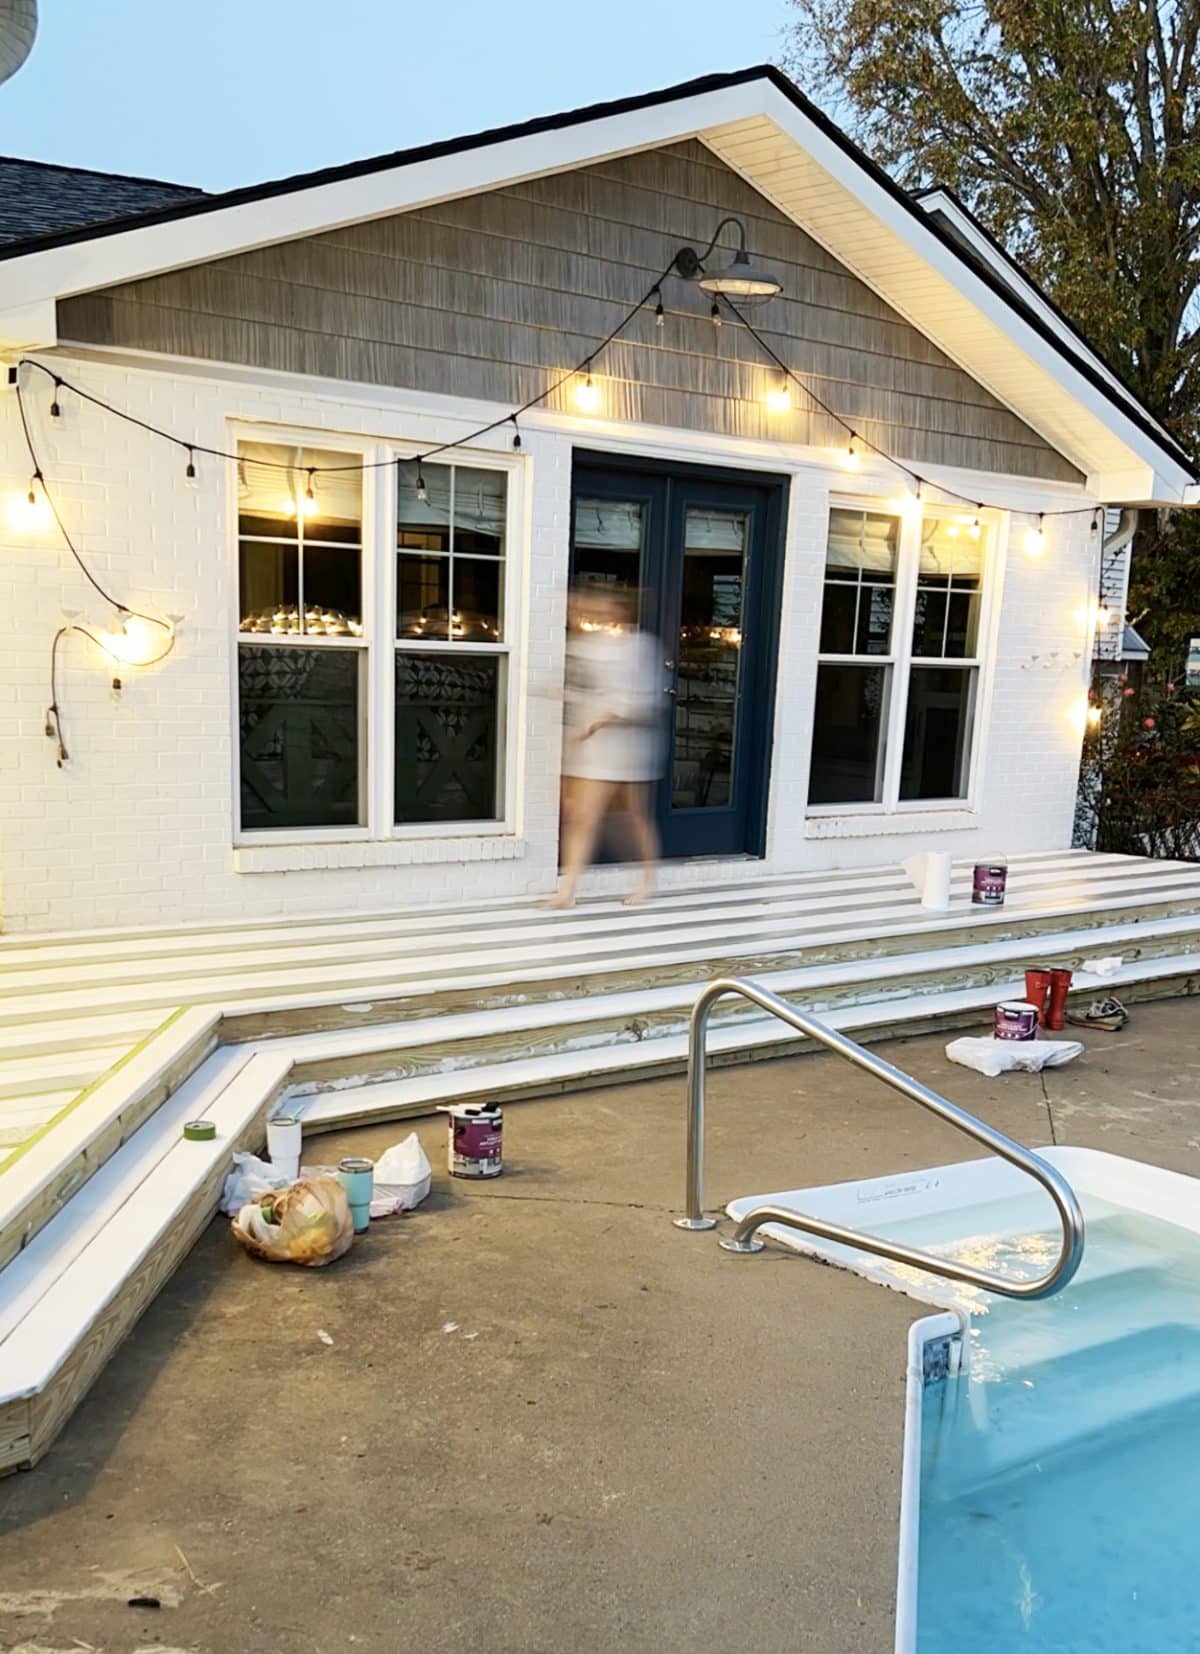
If you’ve stopped by recently, then you probably know we’ve been prepping the outdoors for those warmer months coming {sooner than it actually feels at the moment} this spring. So far we’ve brought some major curb appeal to the front yard with YellaWood® brand pressure treated pine, {we’ve shared how to build a trellis + the brick pathway}. We loved sharing the deck reveal a few weeks ago, and today we’re covering the details behind how we painted it with FrogTape®. We’ve tackled so much progress for the future and we love it! So without further ado…
How to Paint a Deck with FrogTape®
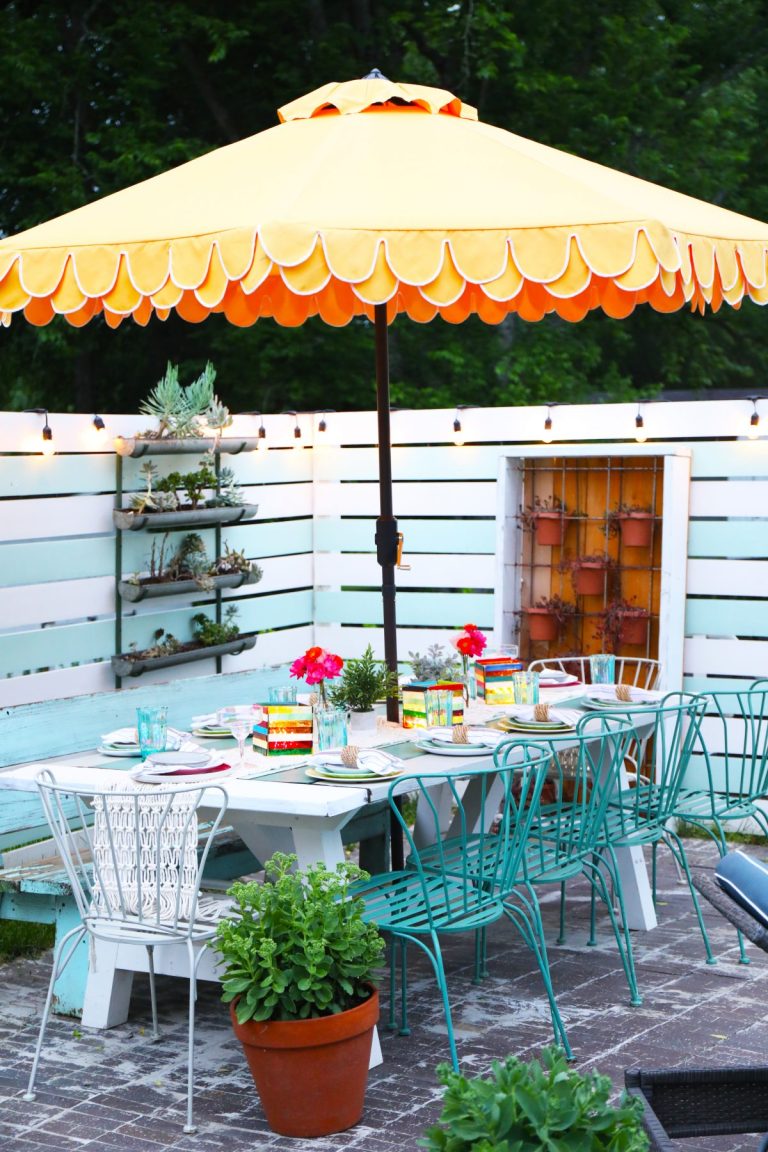
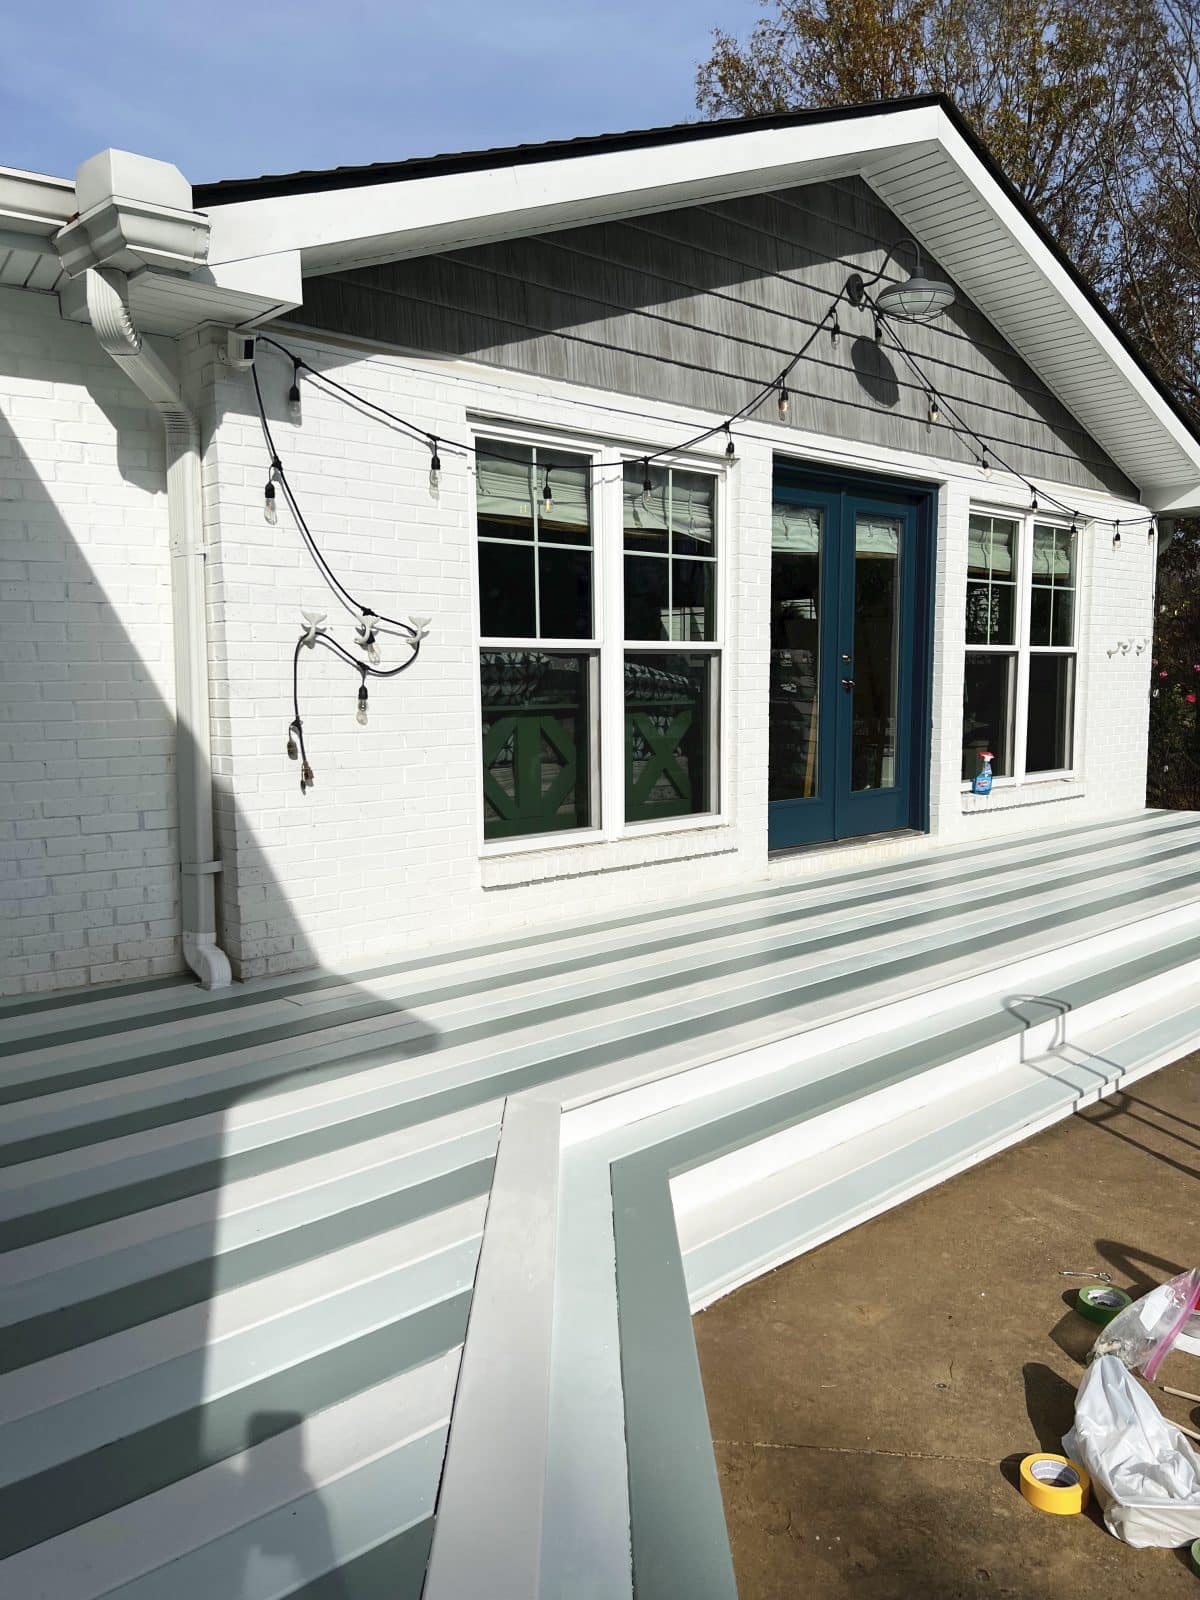
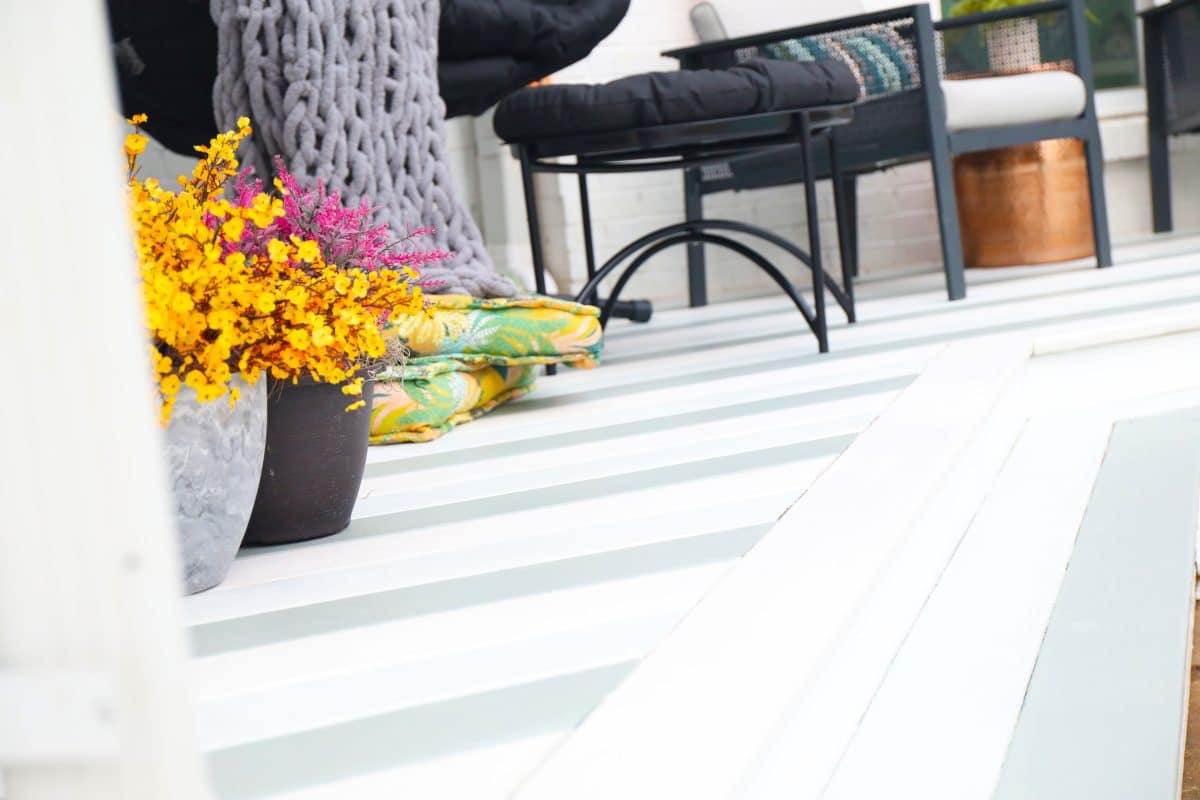
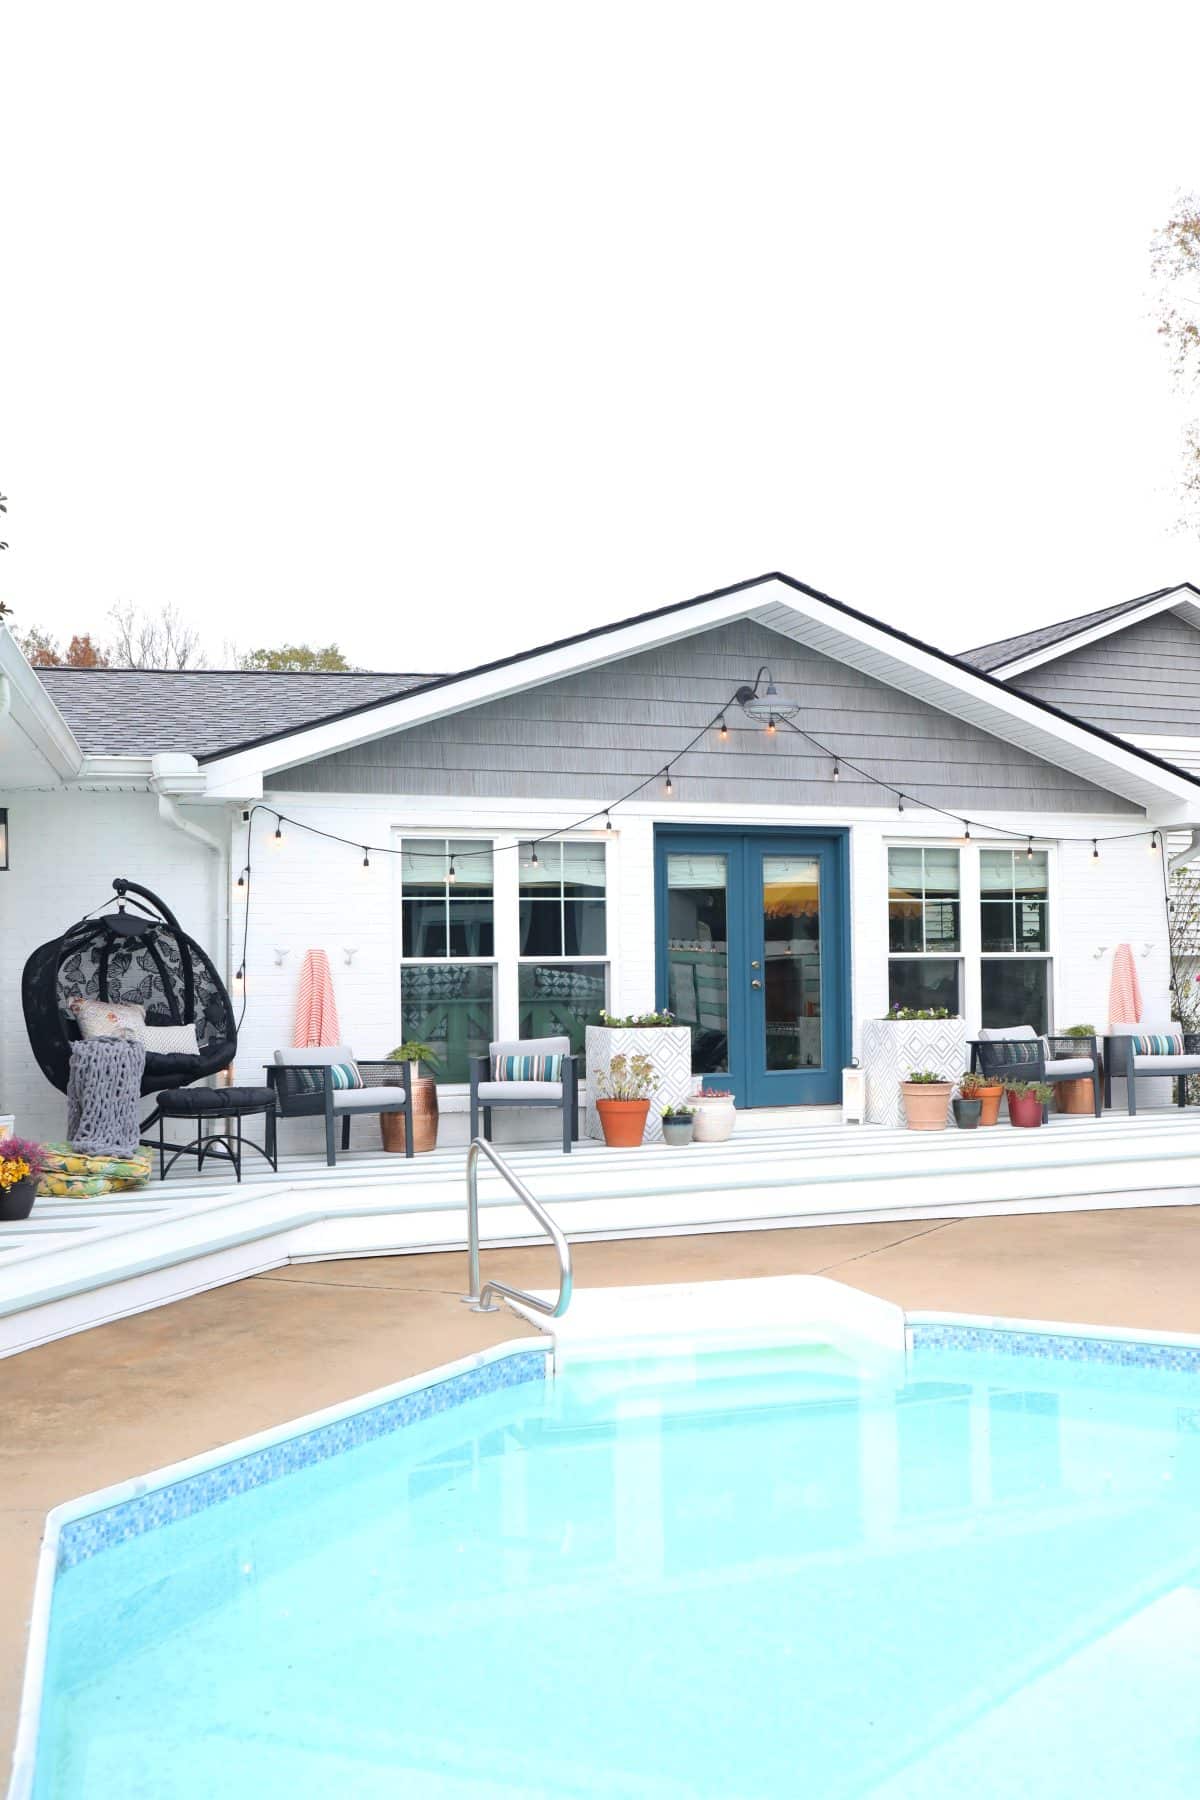
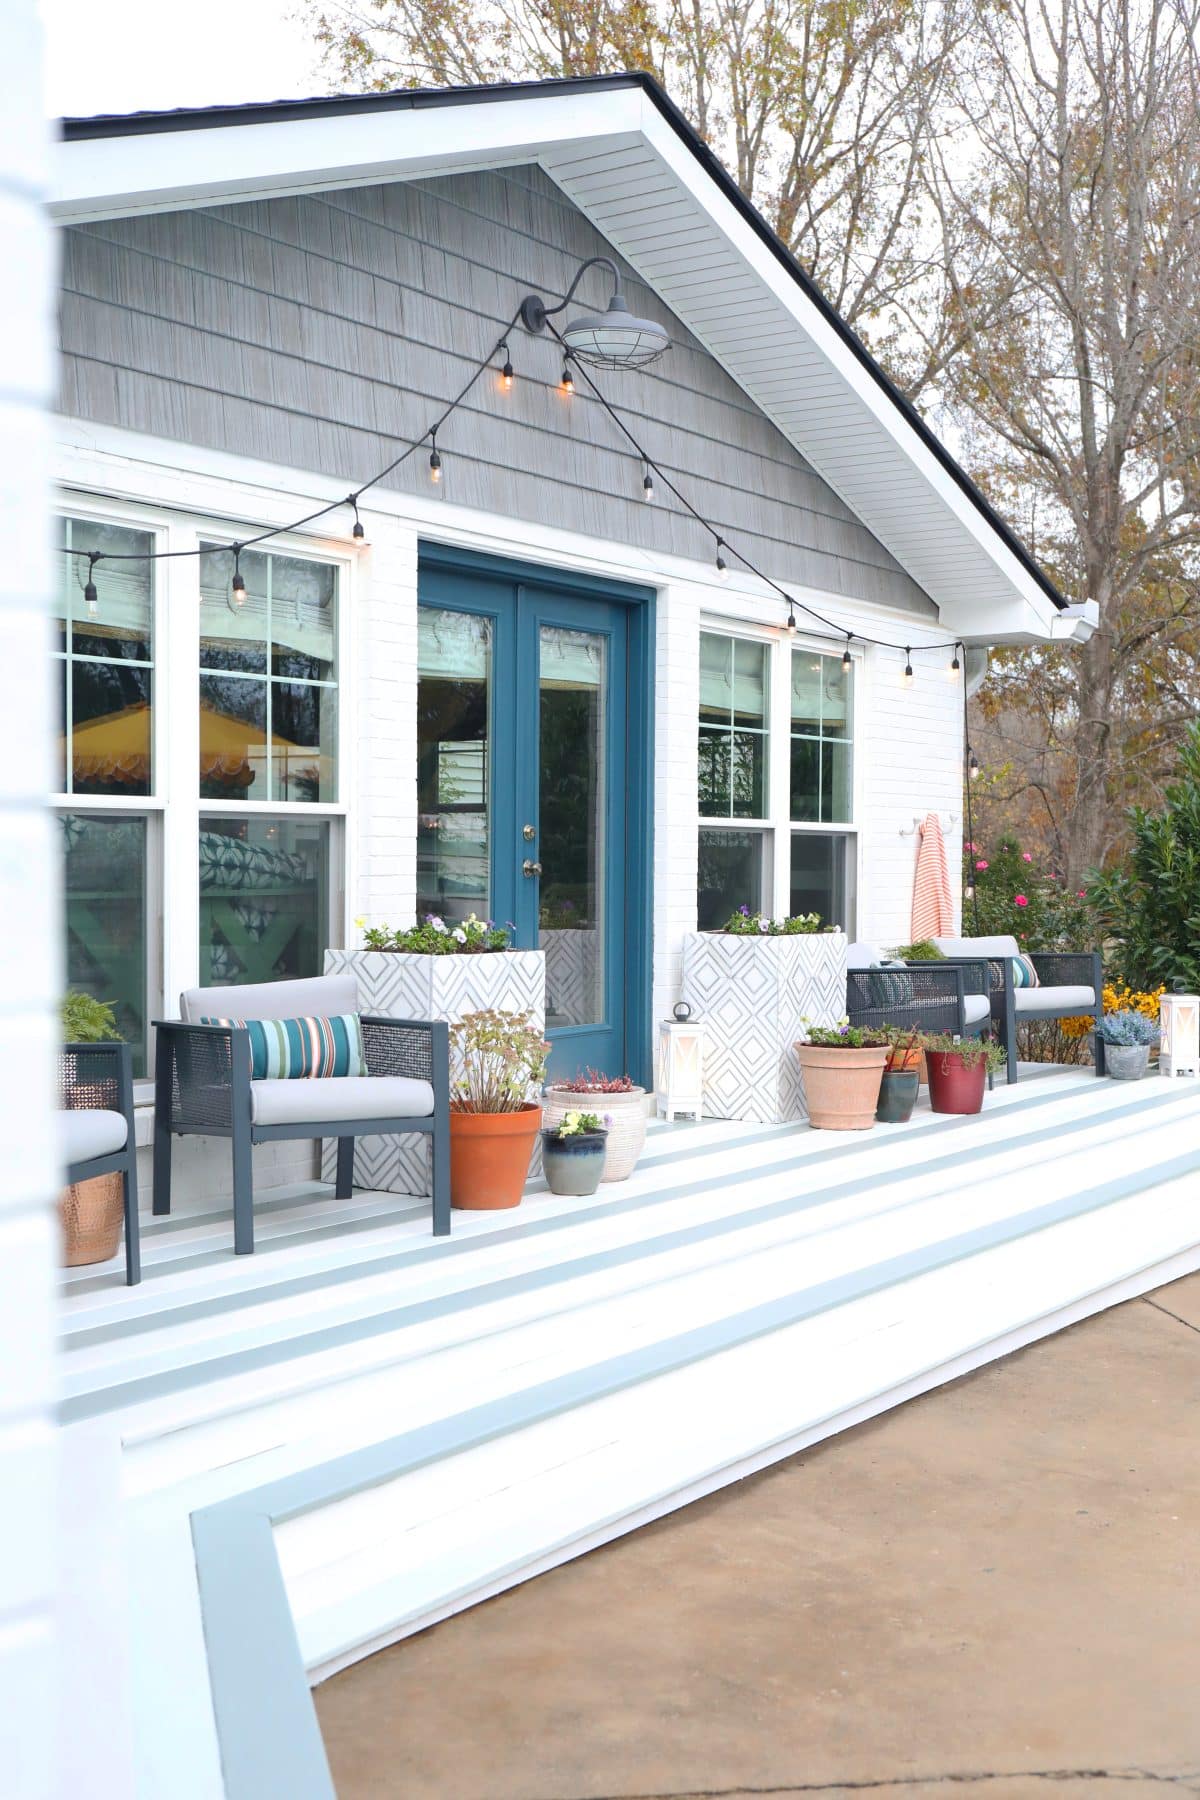
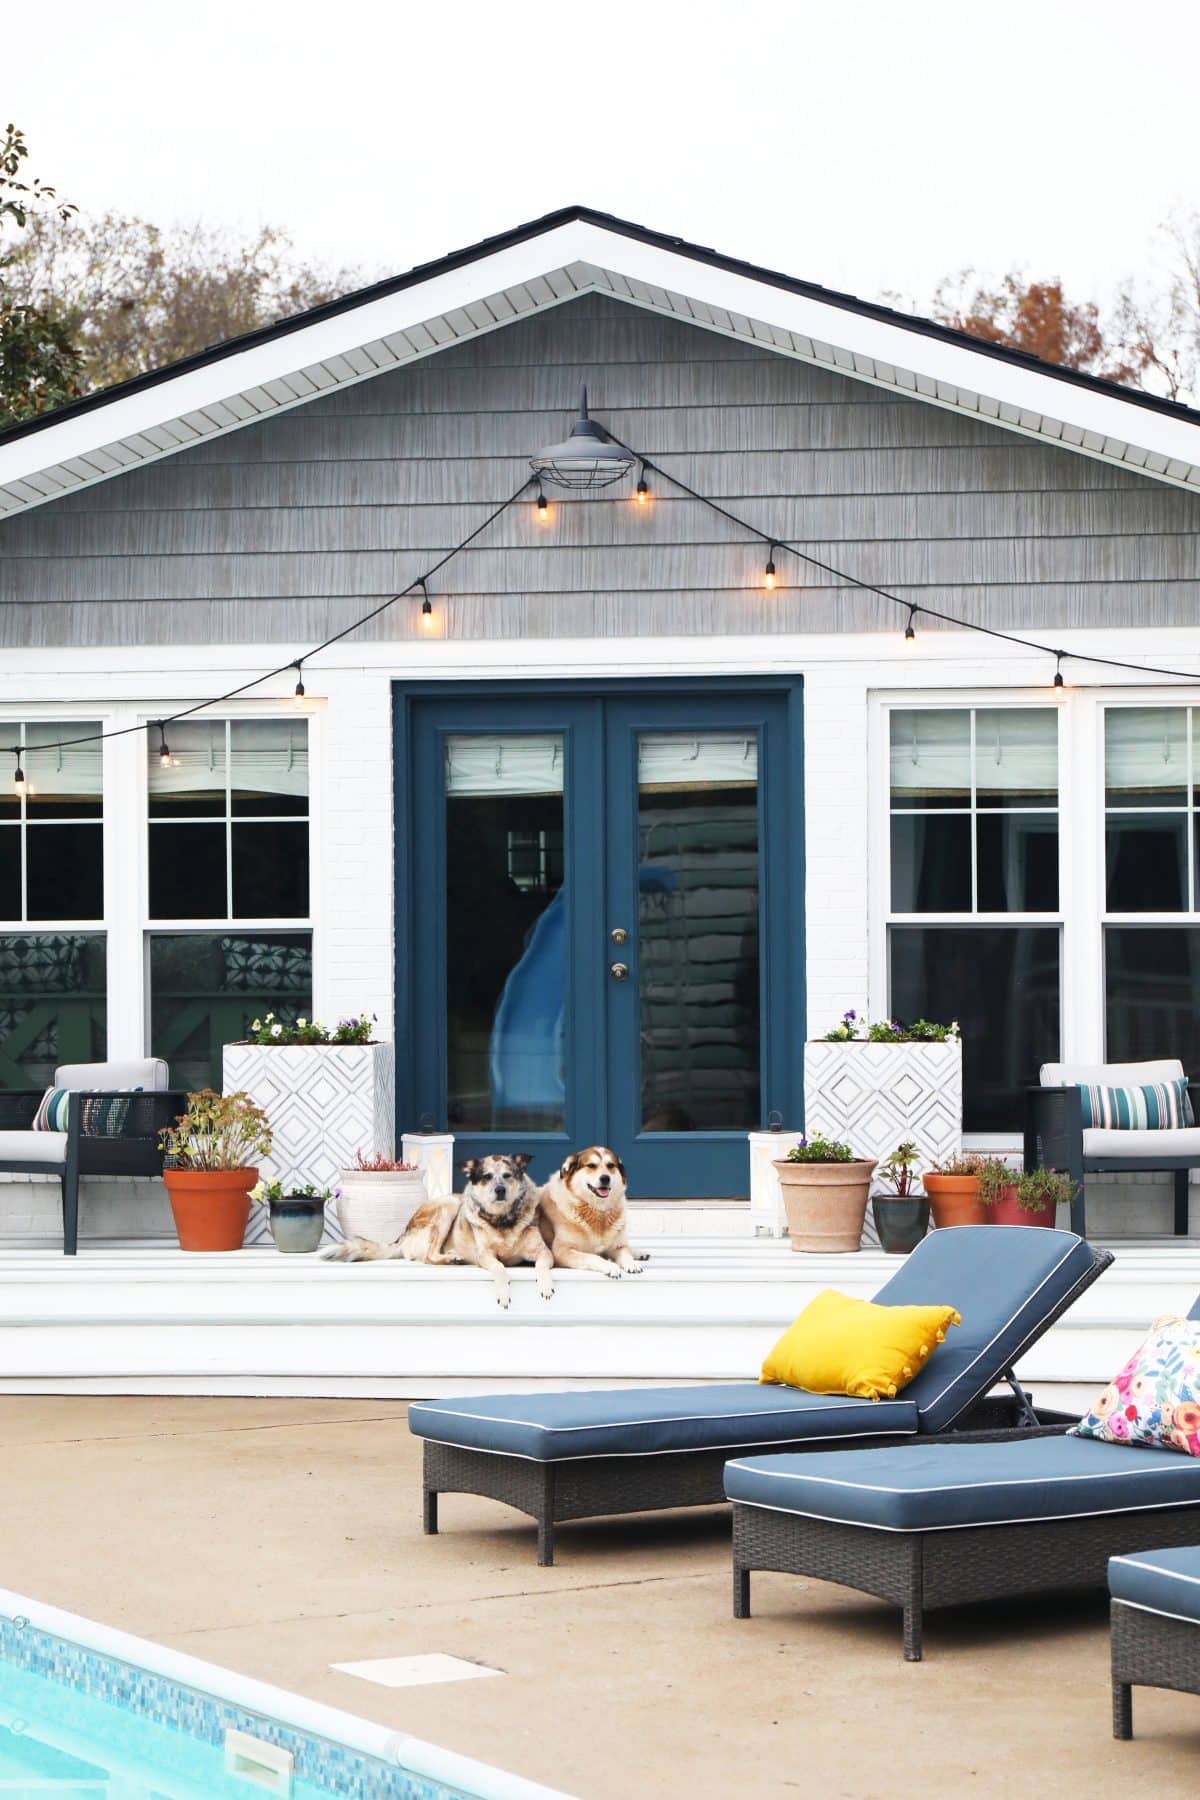
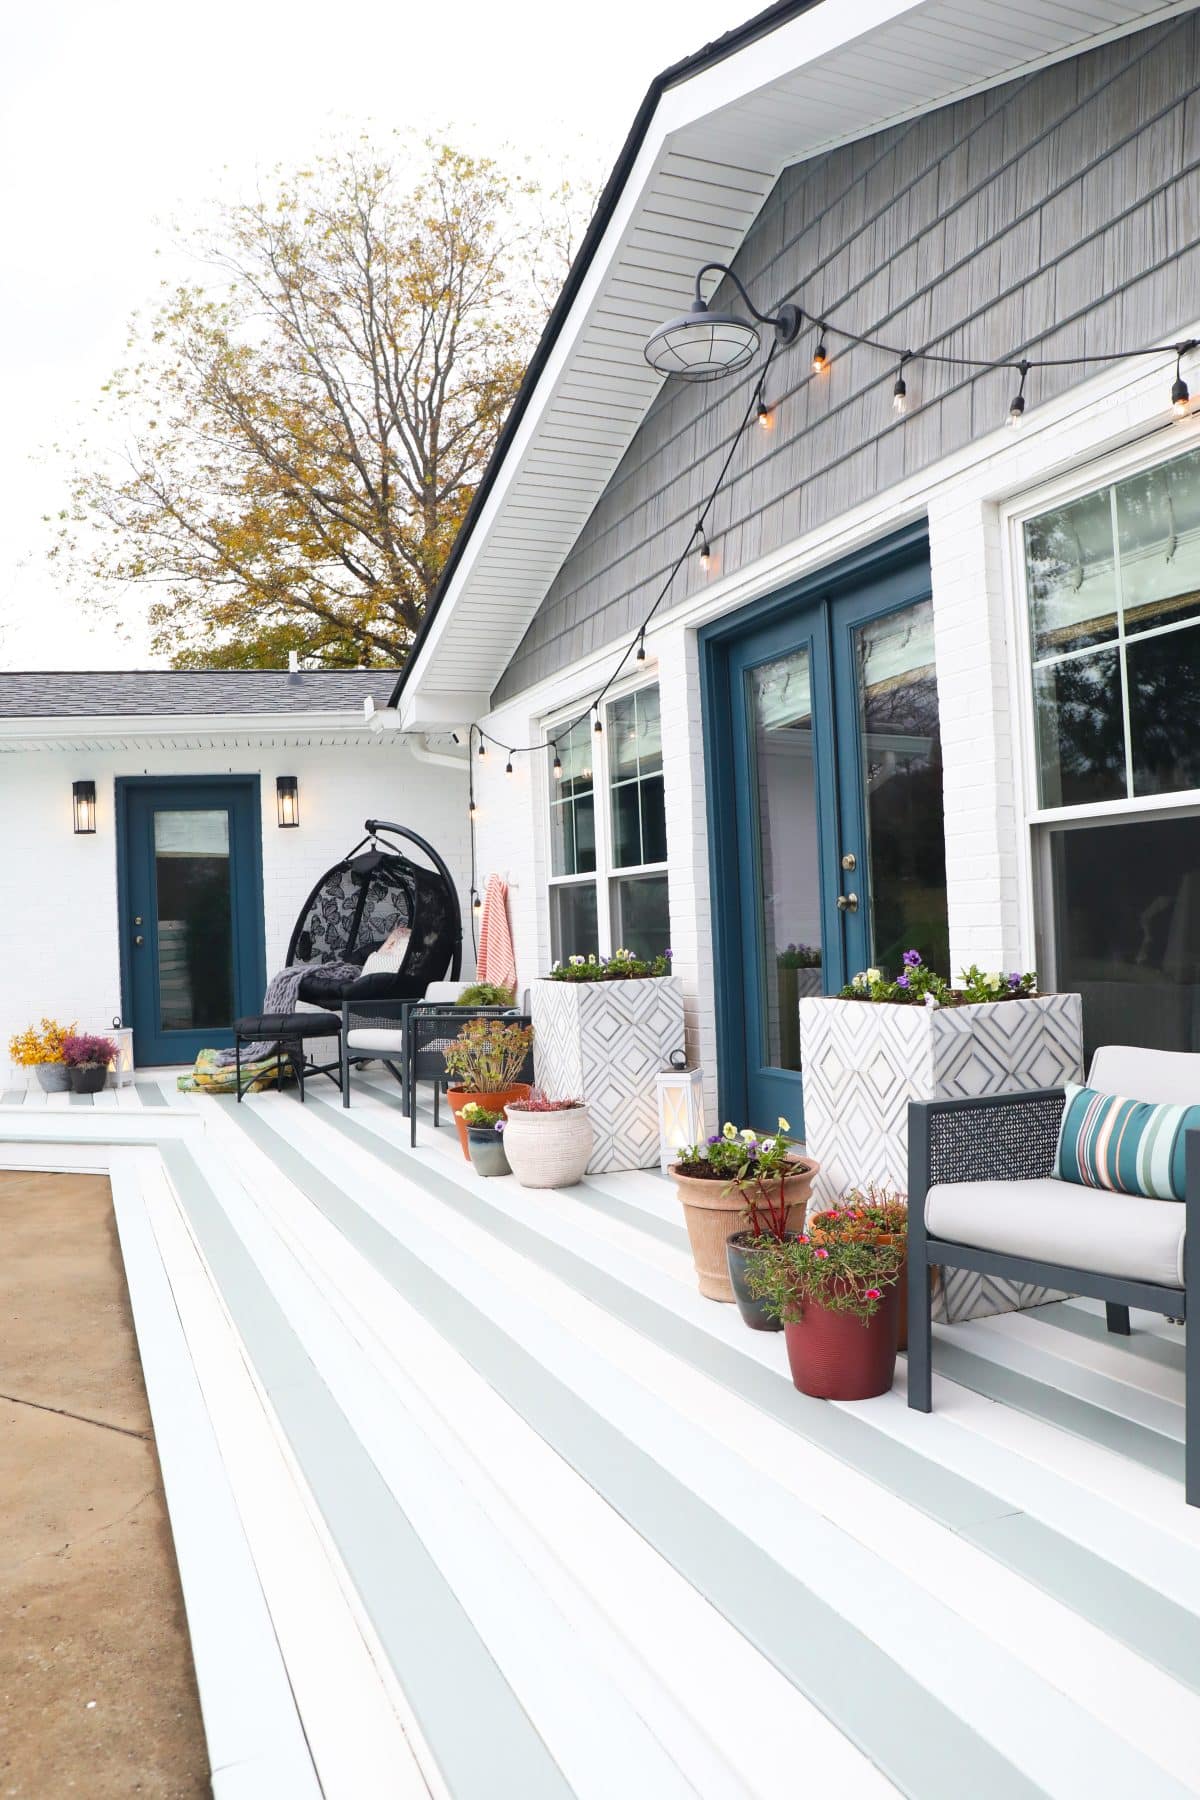
If you noticed, of course we went with stripes. I mean how could we not add a little character to this backyard area? So far we’ve used them in our cabana, the hideaway, and even our little dining area. So it made sense to have a little fun here, too.
We’ve received a few questions about it, and we thought we’d cover how we brought it all together with our very favorite tool, FrogTape®!
That’s no joke, we love the stuff. You can see so many of our projects that called for FrogTape® at this link.

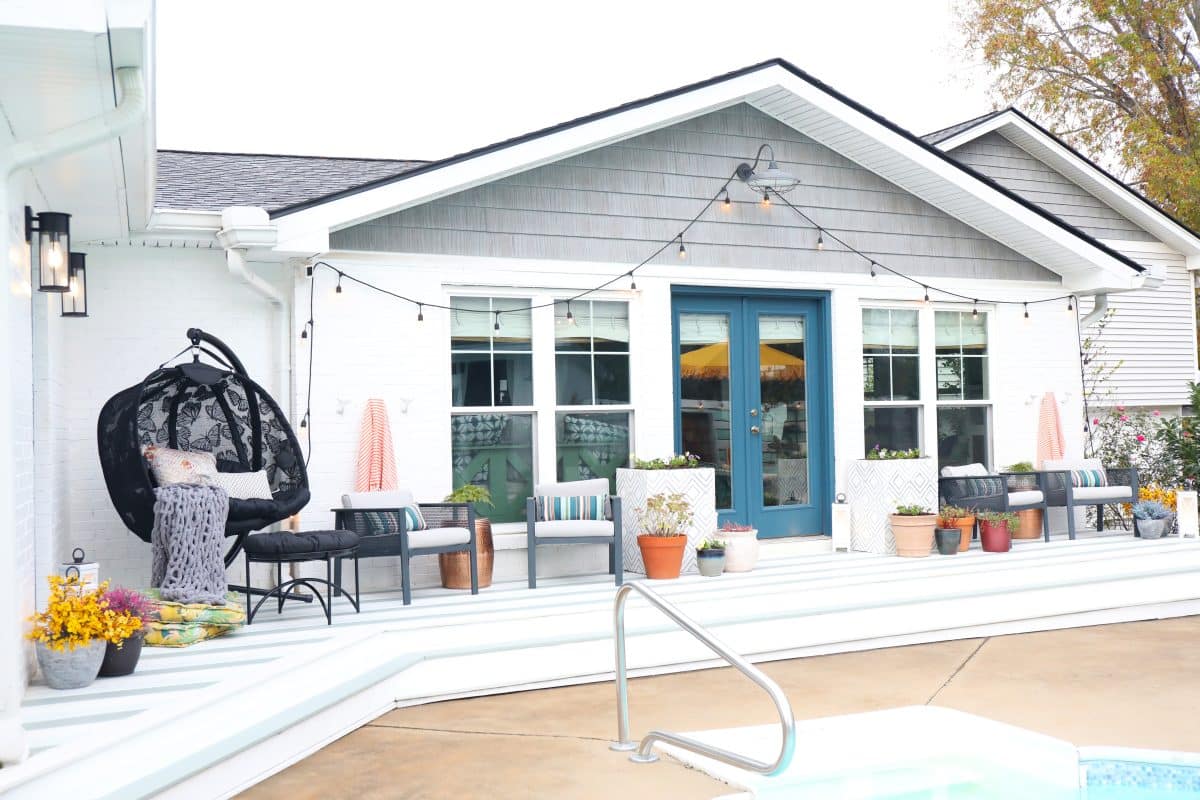
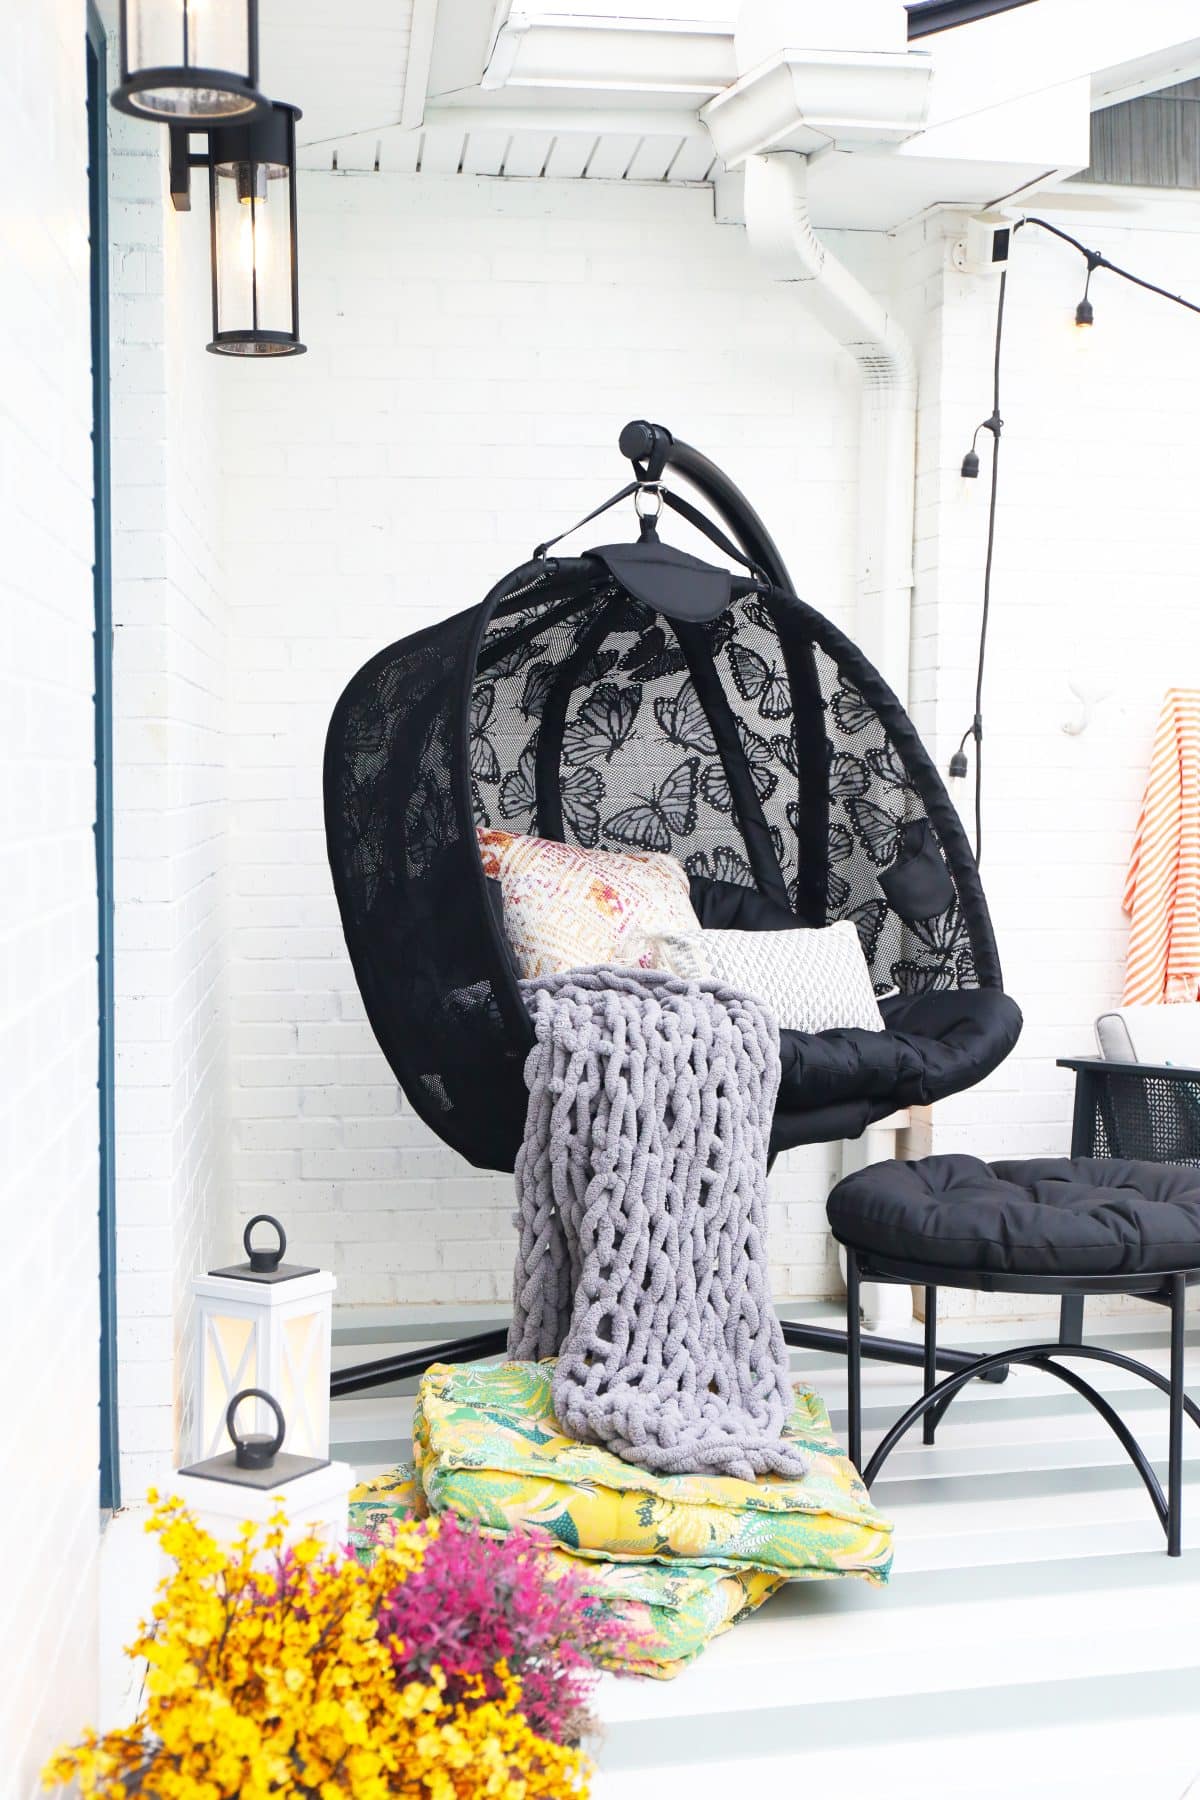
It’s just so much more inviting now, and we love all the fun character in the back. We couldn’t have pulled off these pretty, clean stripes without our handiest tool ever. It’s kind of crazy how much we use it for.
1. How to Paint a Deck with FrogTape: Choose your Colors.
First things first, we chose colors that worked with the existing elements we already had going on, but that could also read as neutrals on something connected to the house. We got a little crazy with our colors in the cabana + hideaway because they’re more for the outdoors, but I wanted it to blend with the exterior grays, whites and blues of the house.

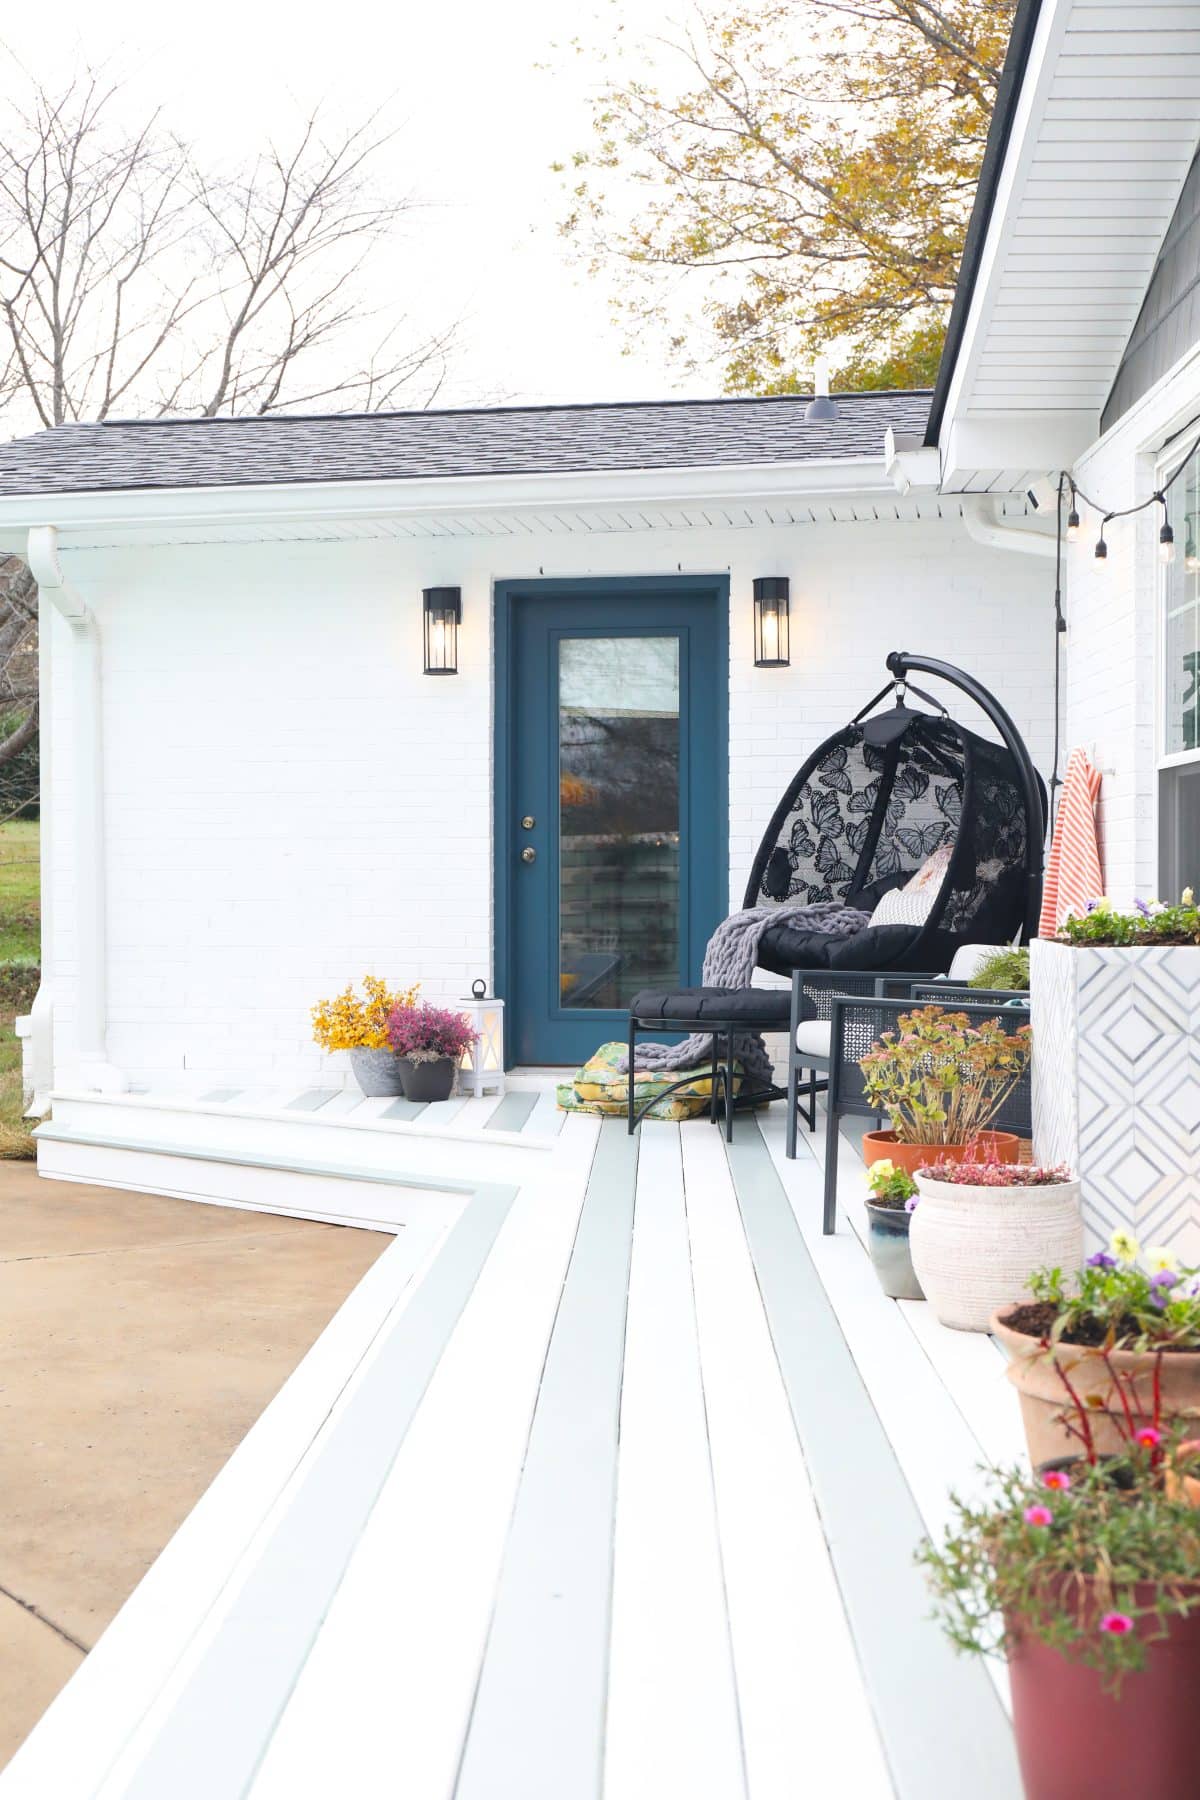
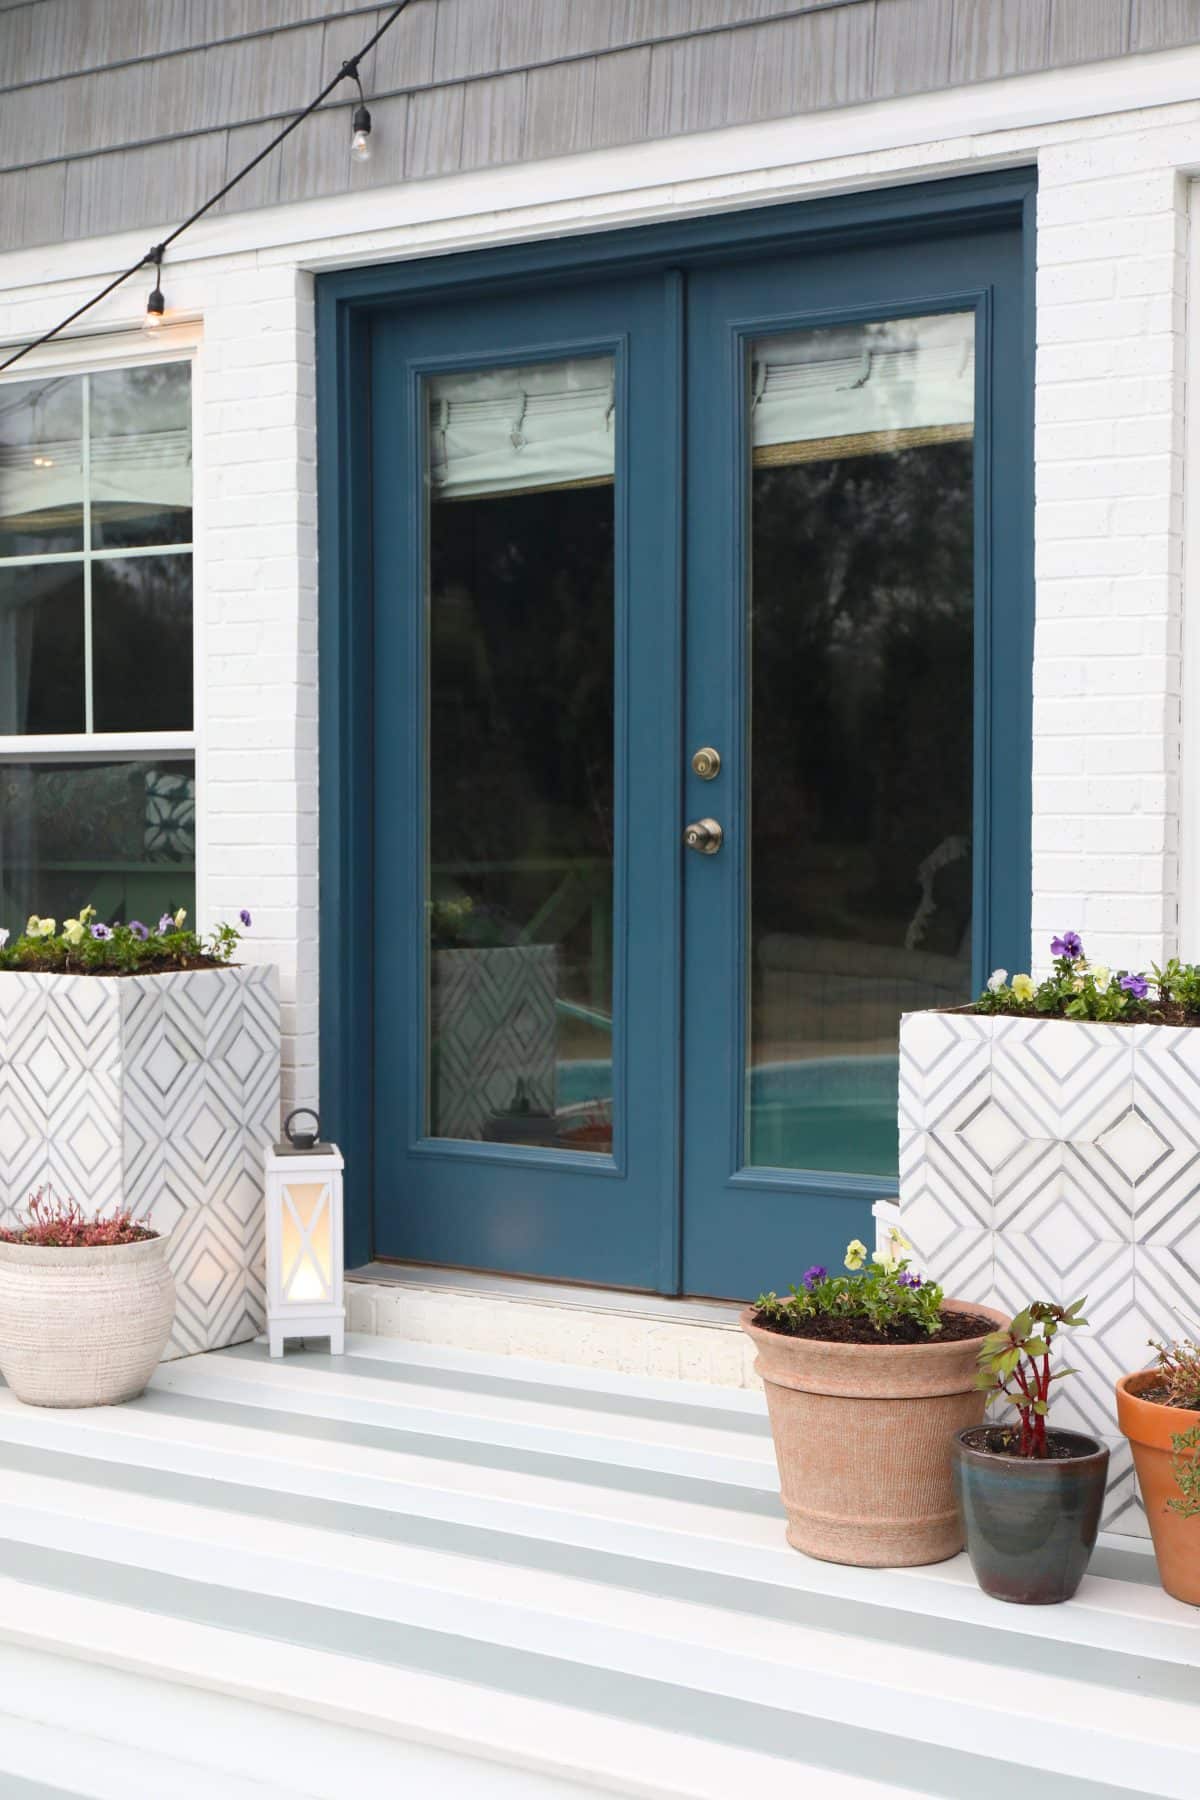
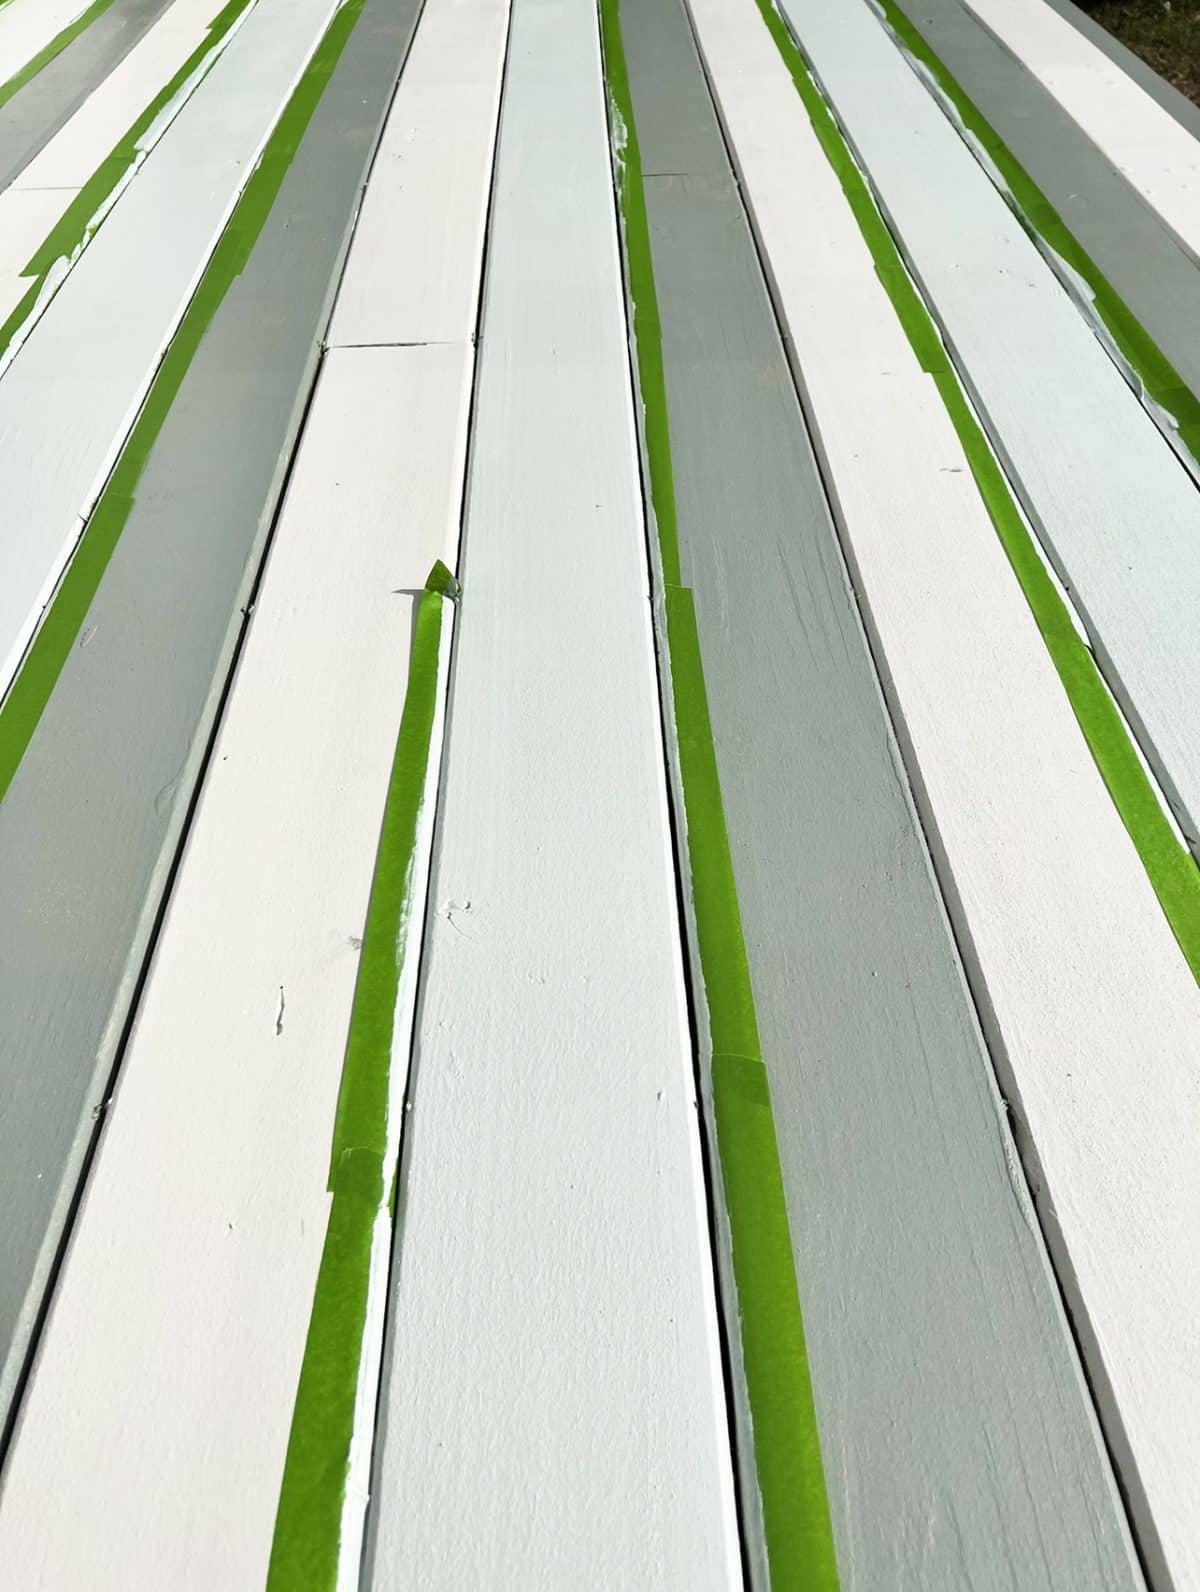
For our colors, we chose SW Drift of Mist, Sea Salt, + Acacia Haze. These are all grey, blue and green-based colors that can also read as neutrals, so they work within the space. The risers of the stairs are actually pure white, to tie in with our house. If you look closely, you can tell in the photos here.

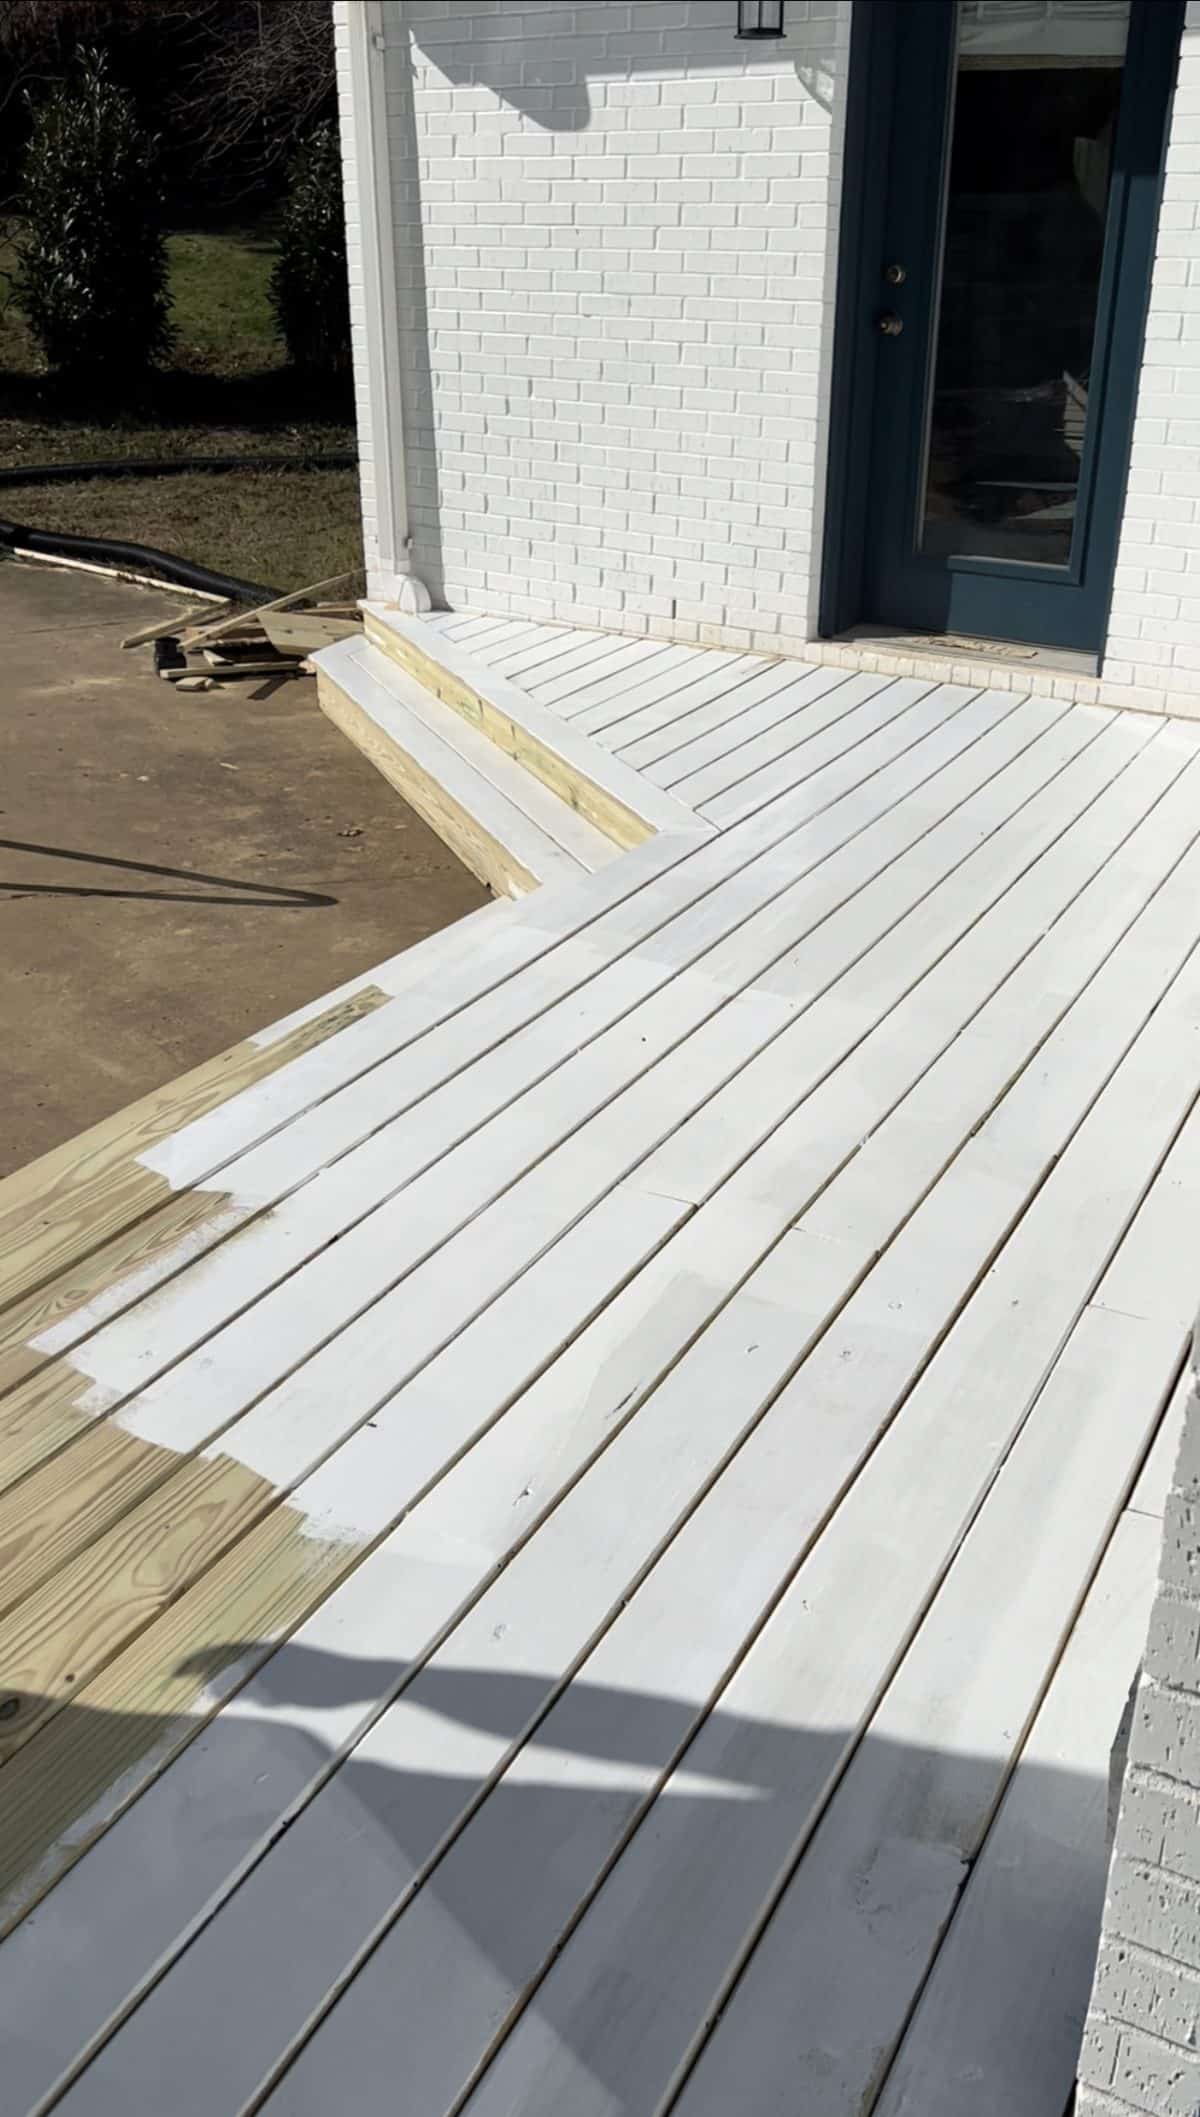
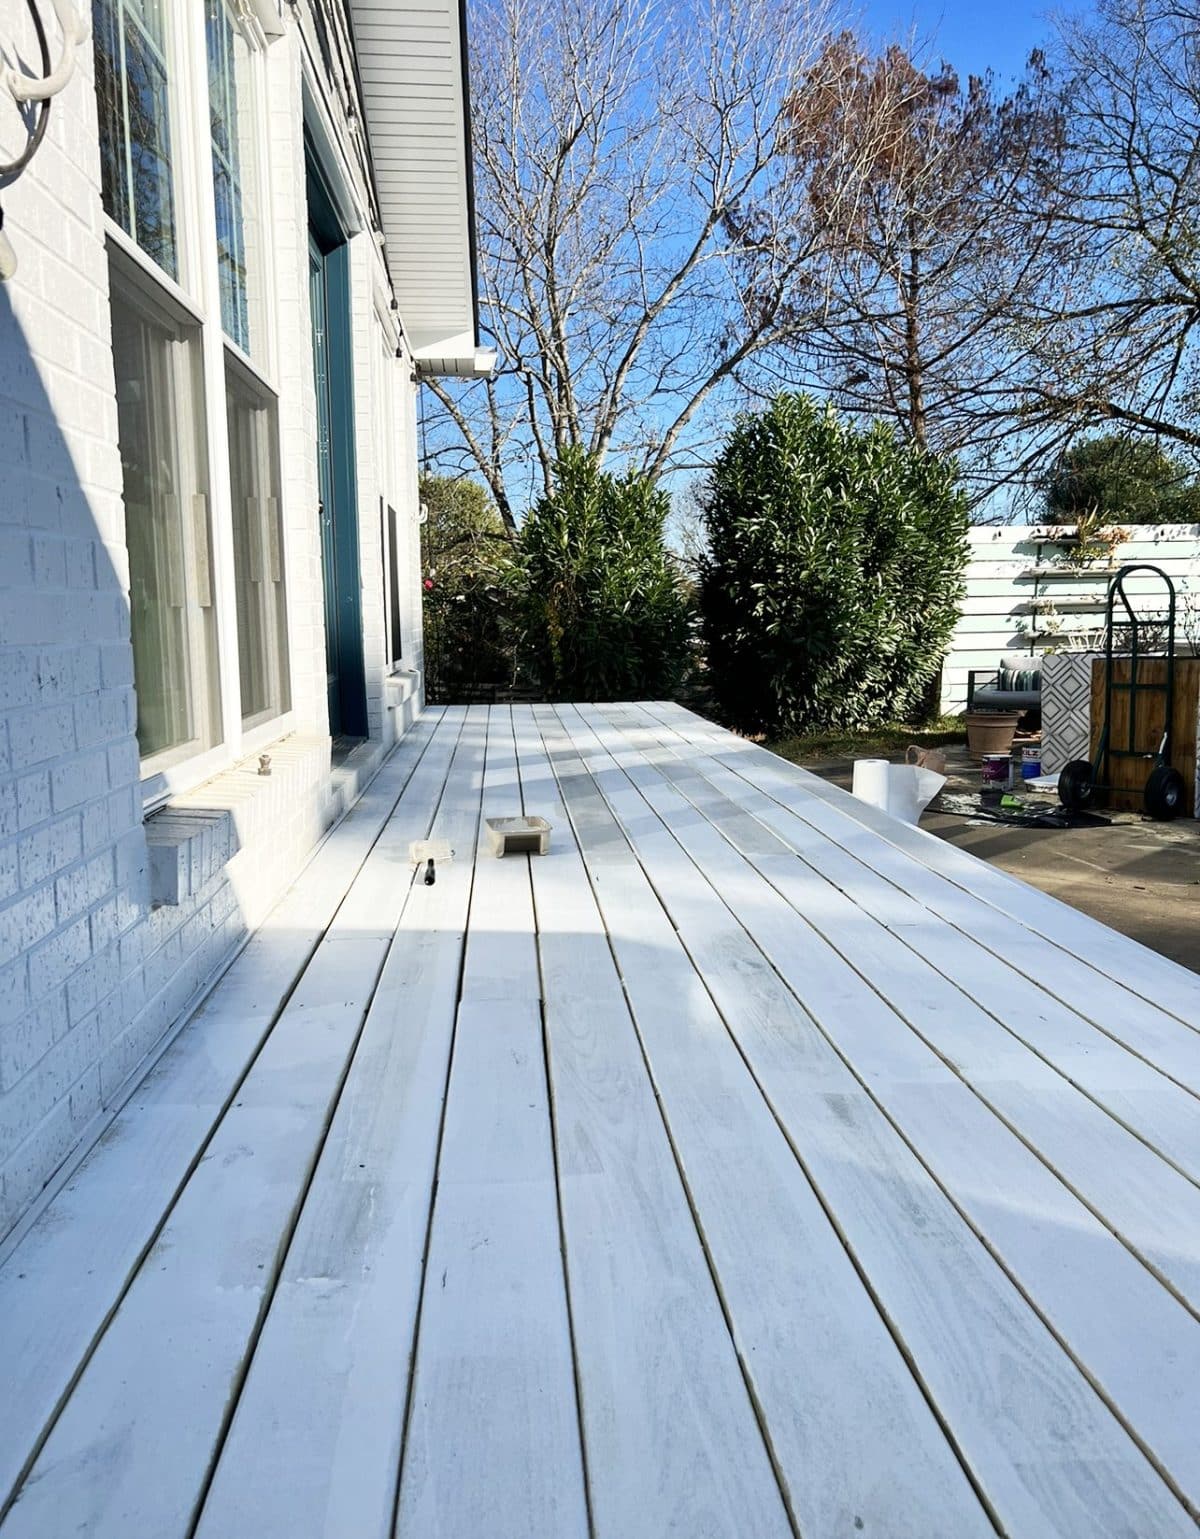
2. How to Paint a Deck with FrogTape: Prime It
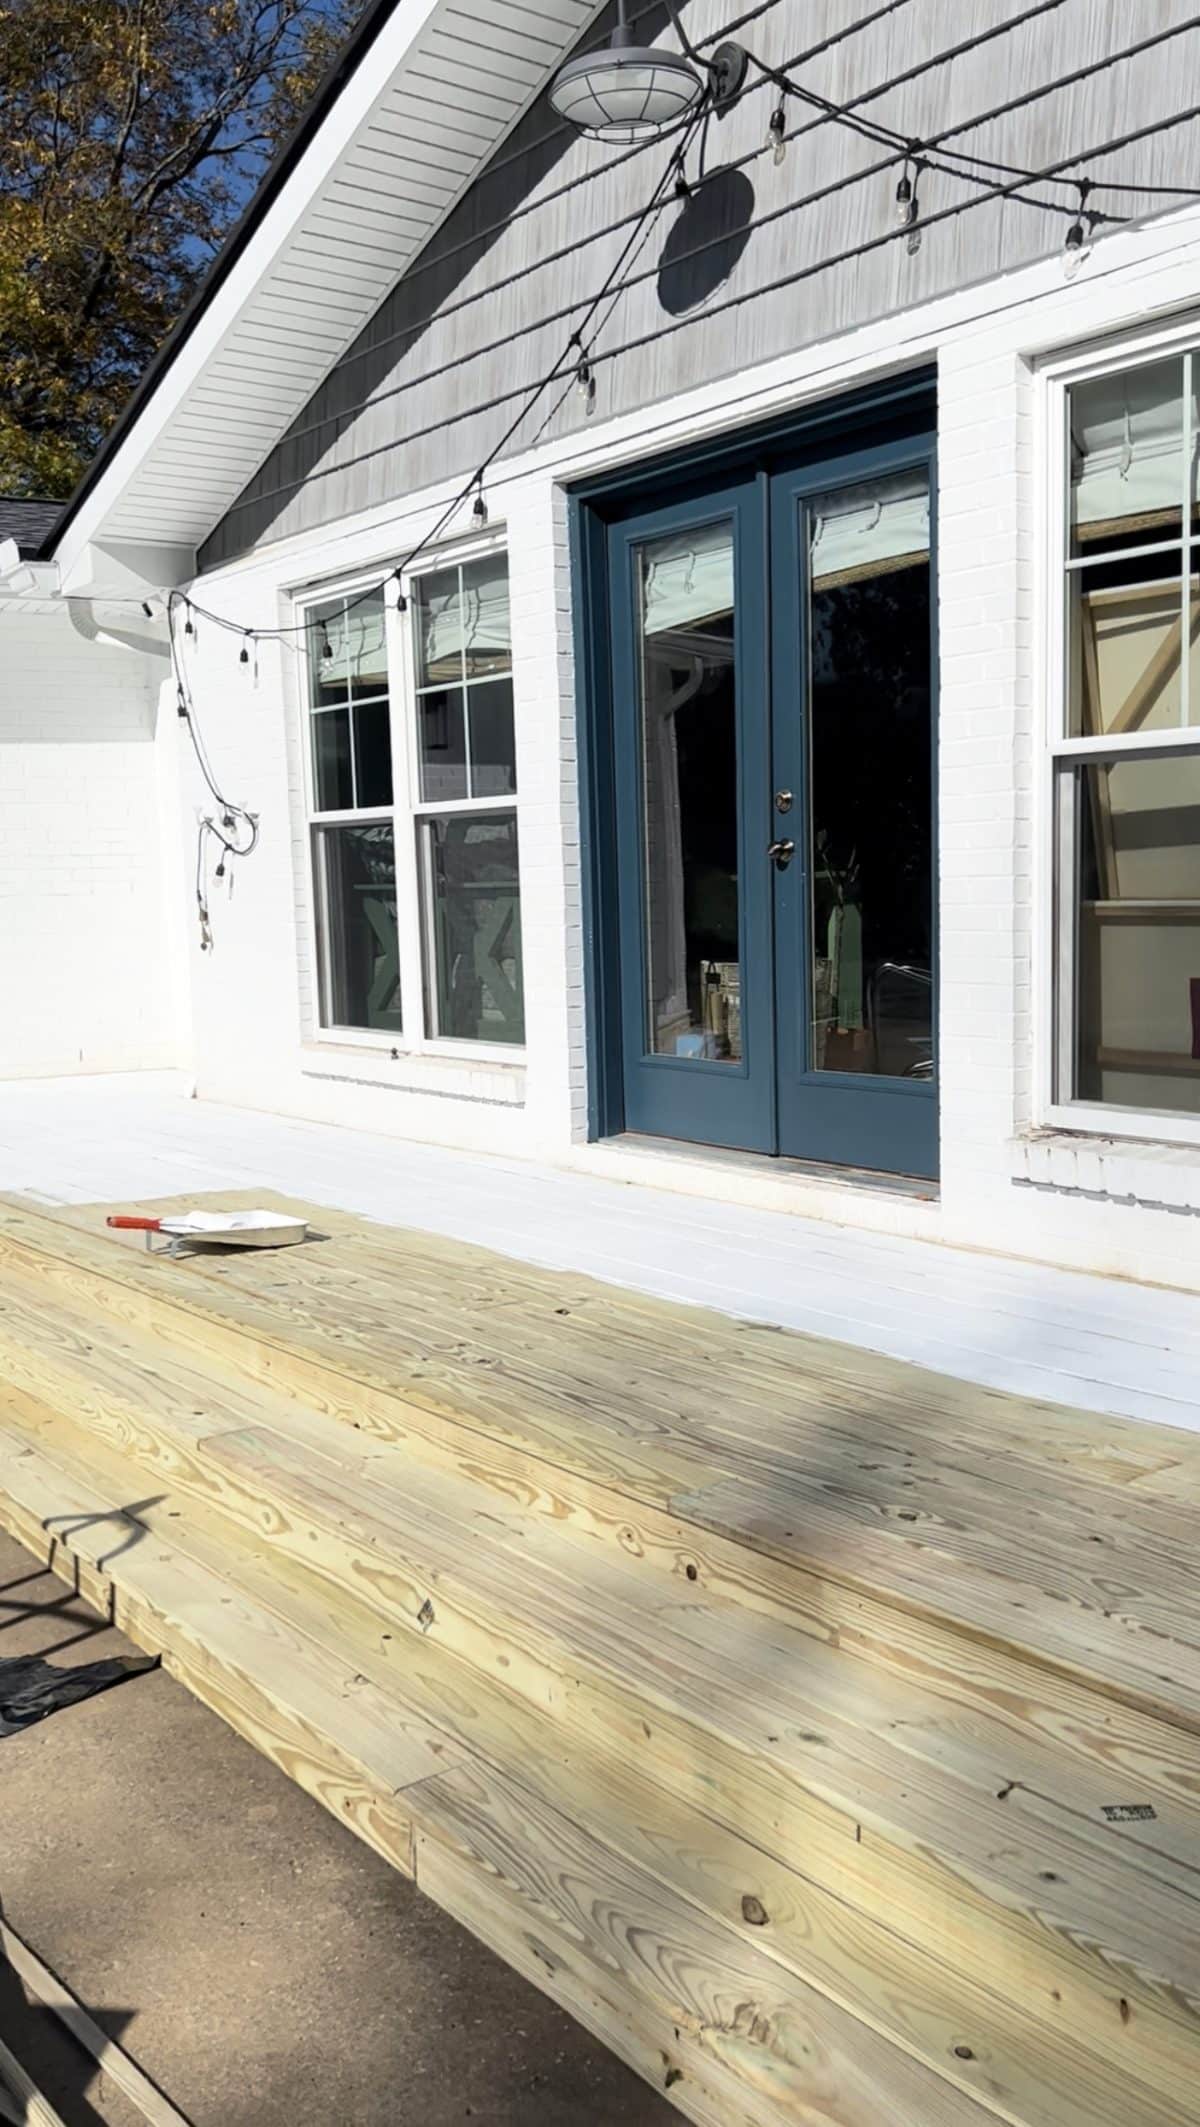
One thing we love about YellaWood® is that the stain or paint can go onto the pressure treated boards, immediately. No waiting around to make sure it’s going to set. So we got to work once it was built, and primed it first.
We knew that this West-facing deck would take a natural beating from the sun, but the dogs and its poolside location add even more needed durability.
So we primed to go ahead and prep the area for long-lasting color.
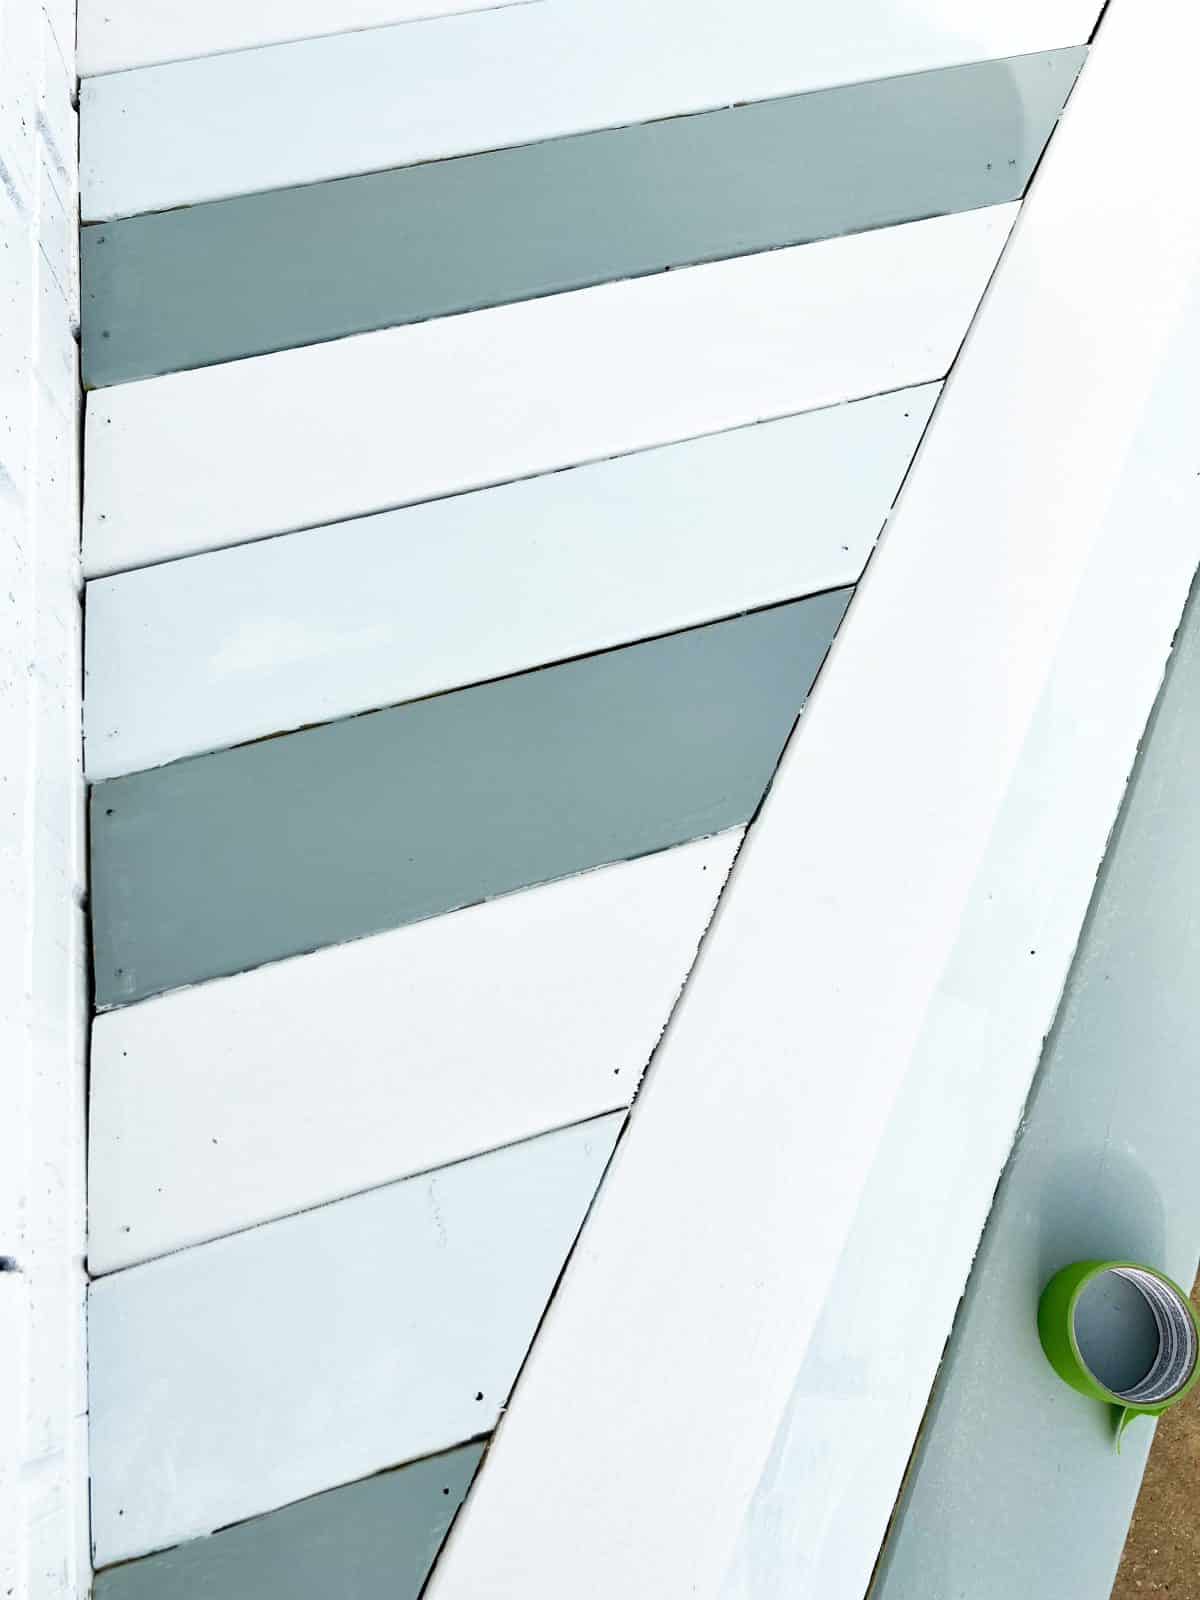
3. How to Paint a Deck with FrogTape: Tape It
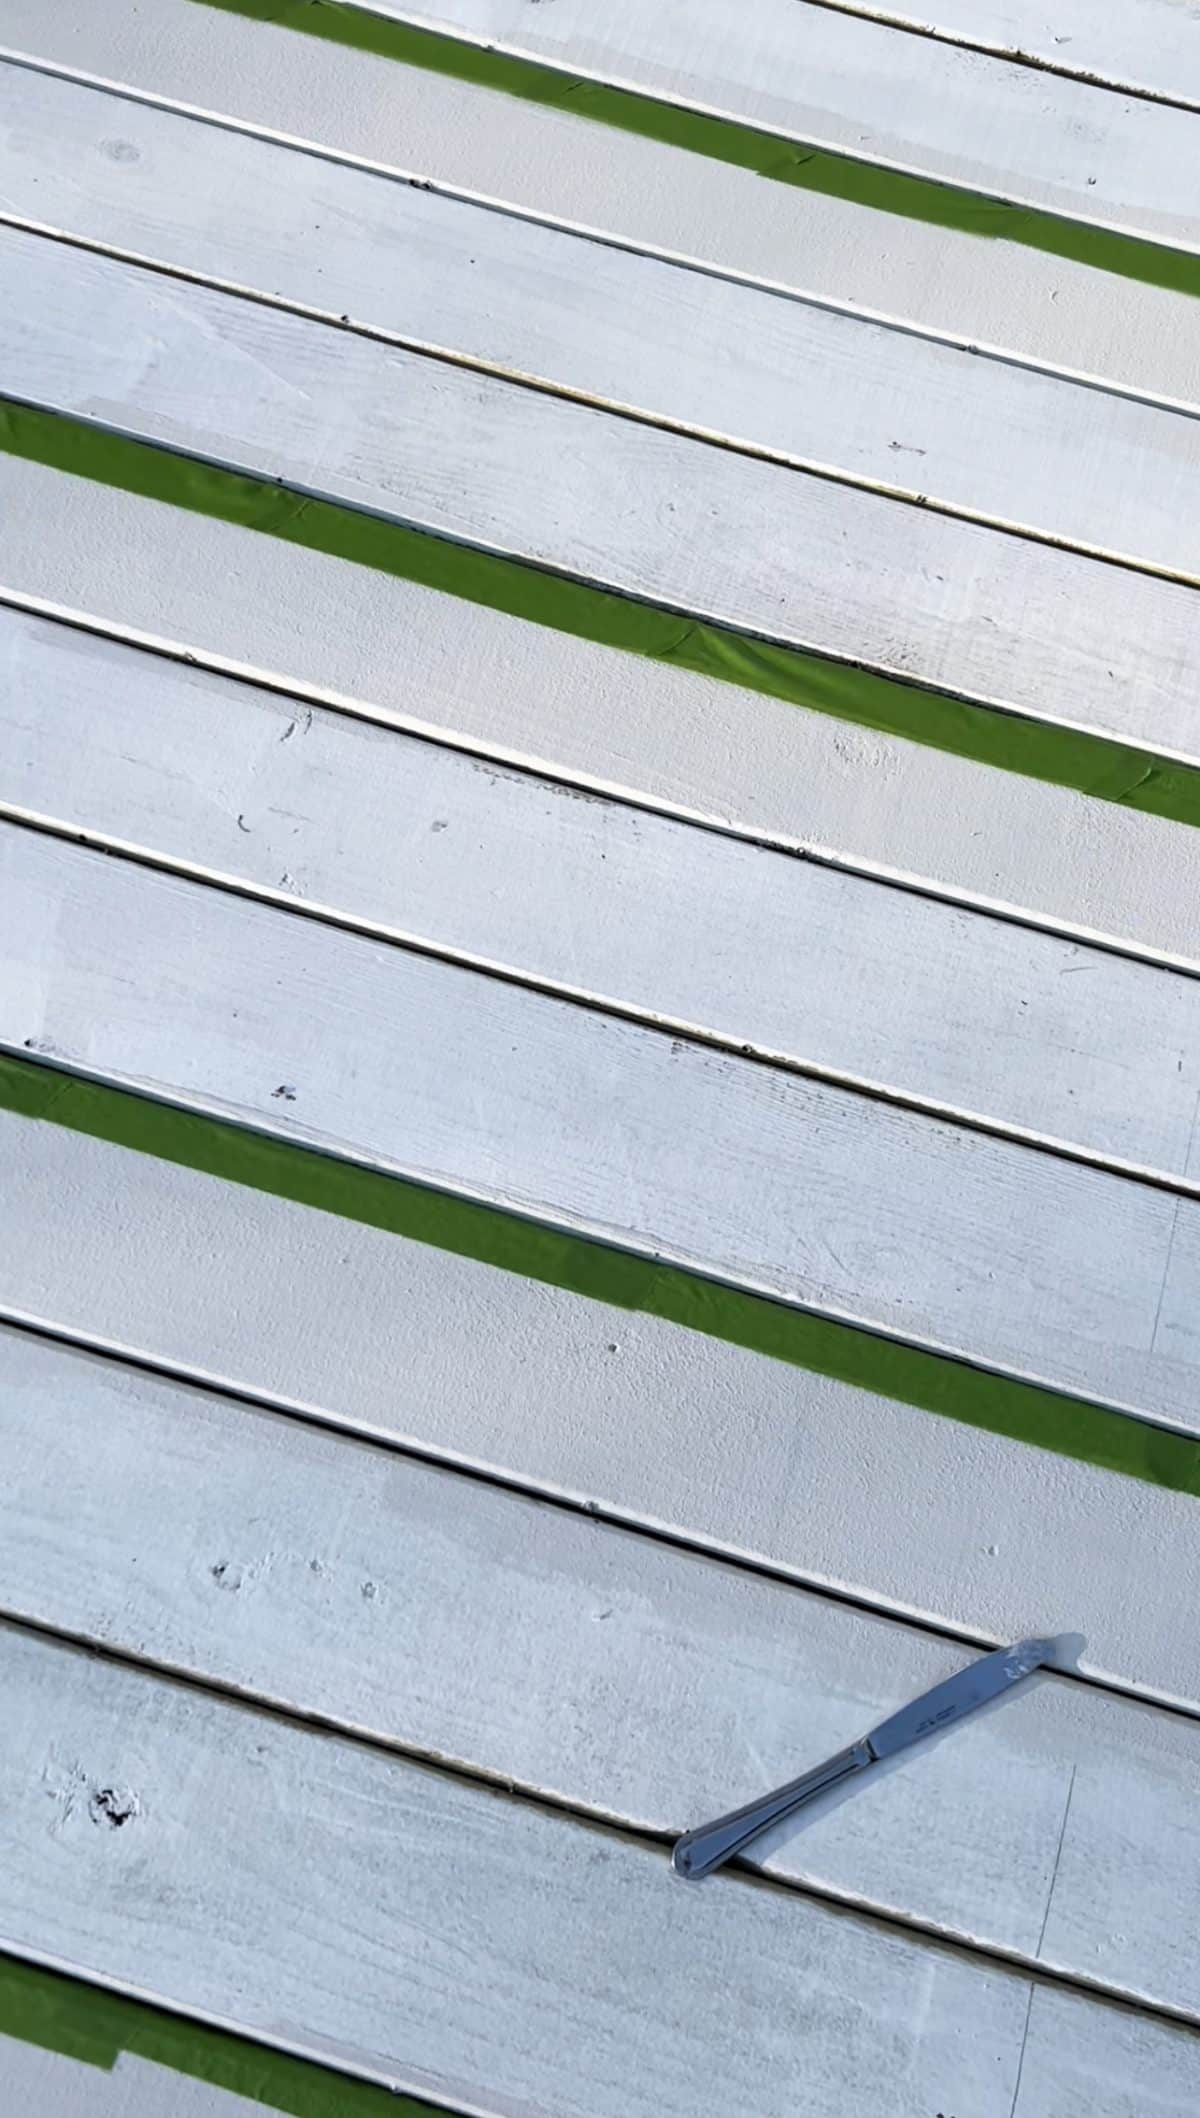
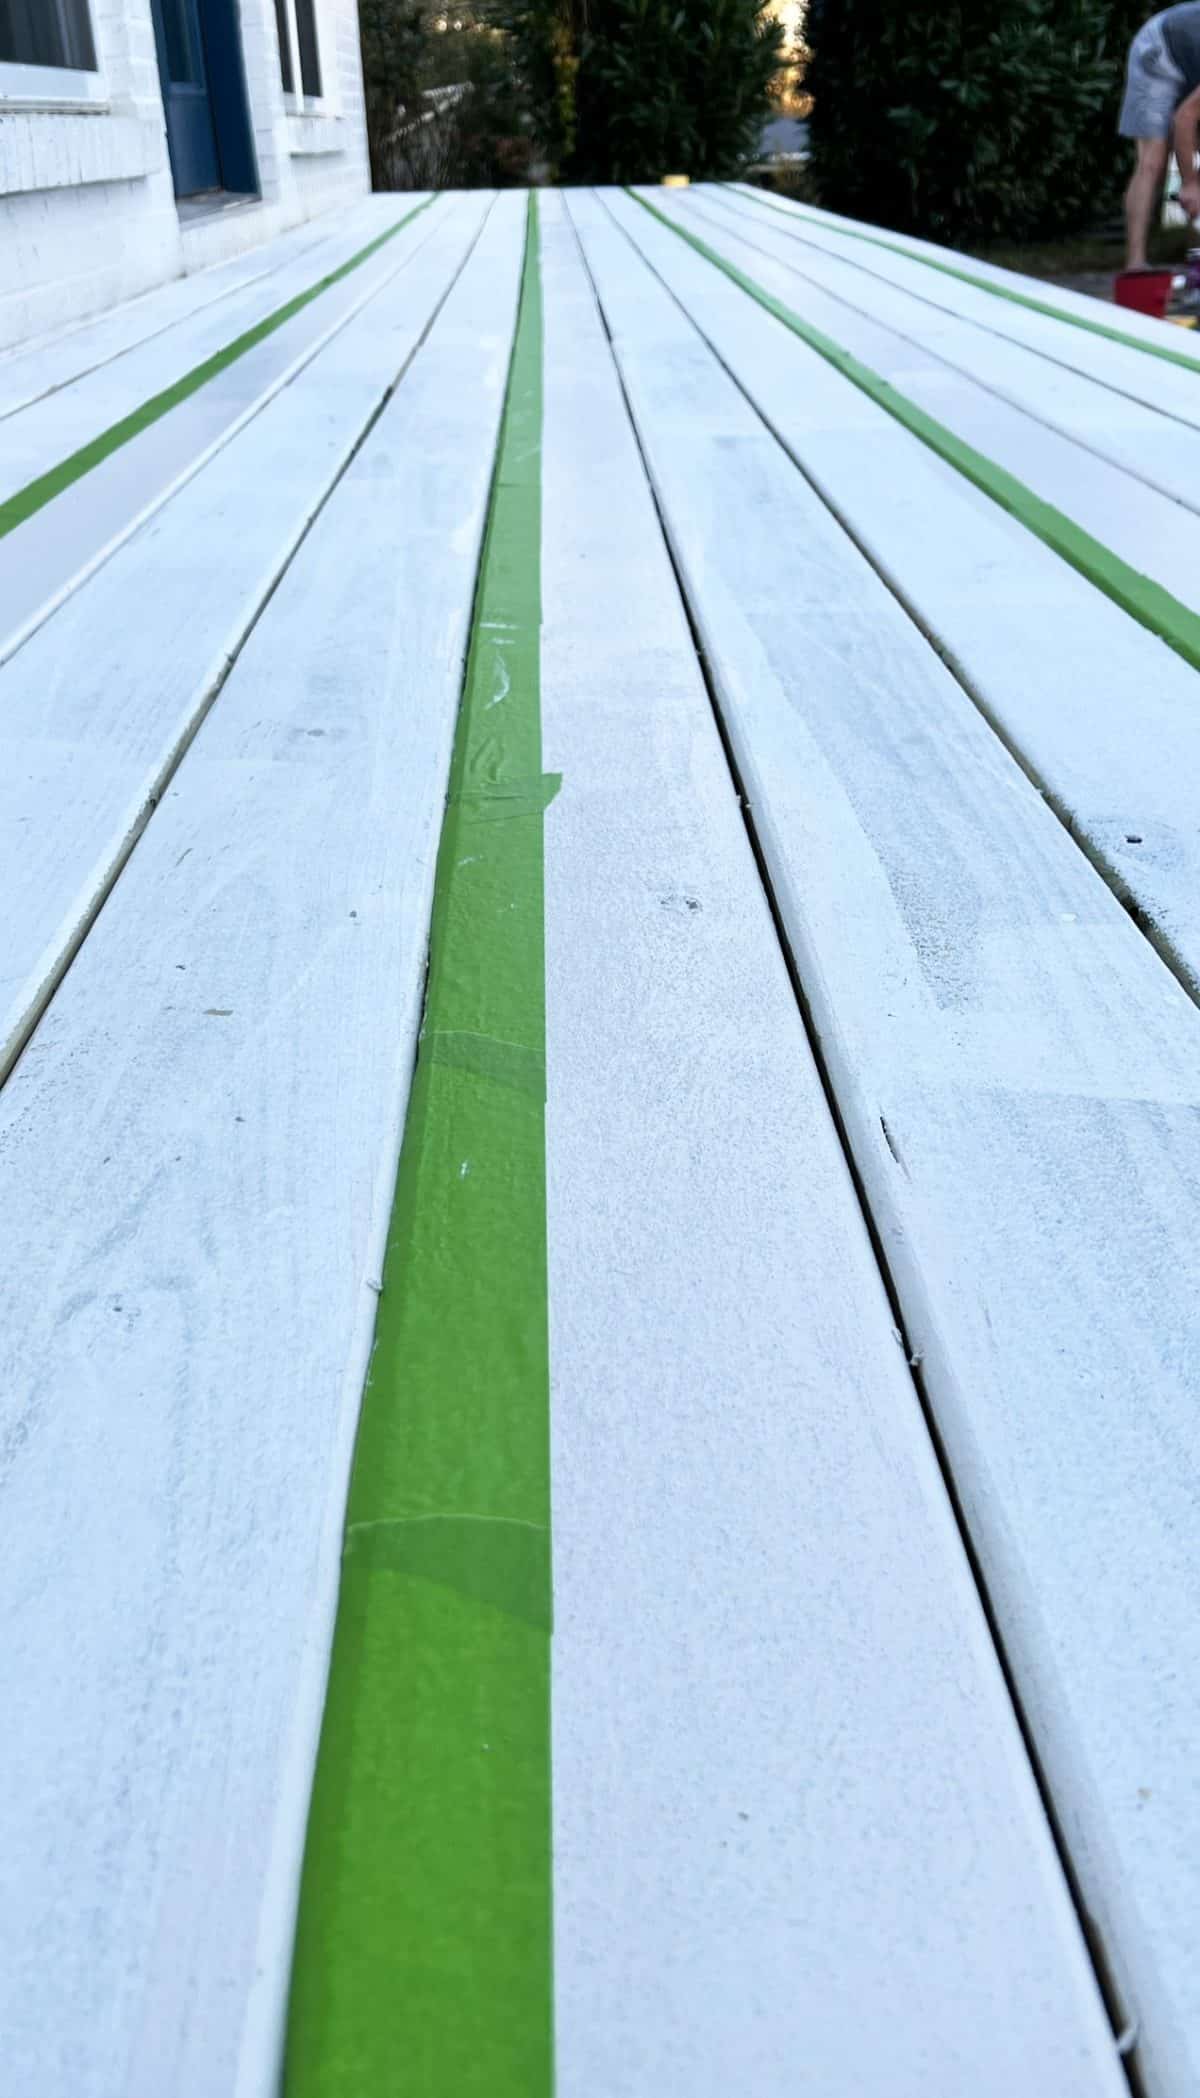
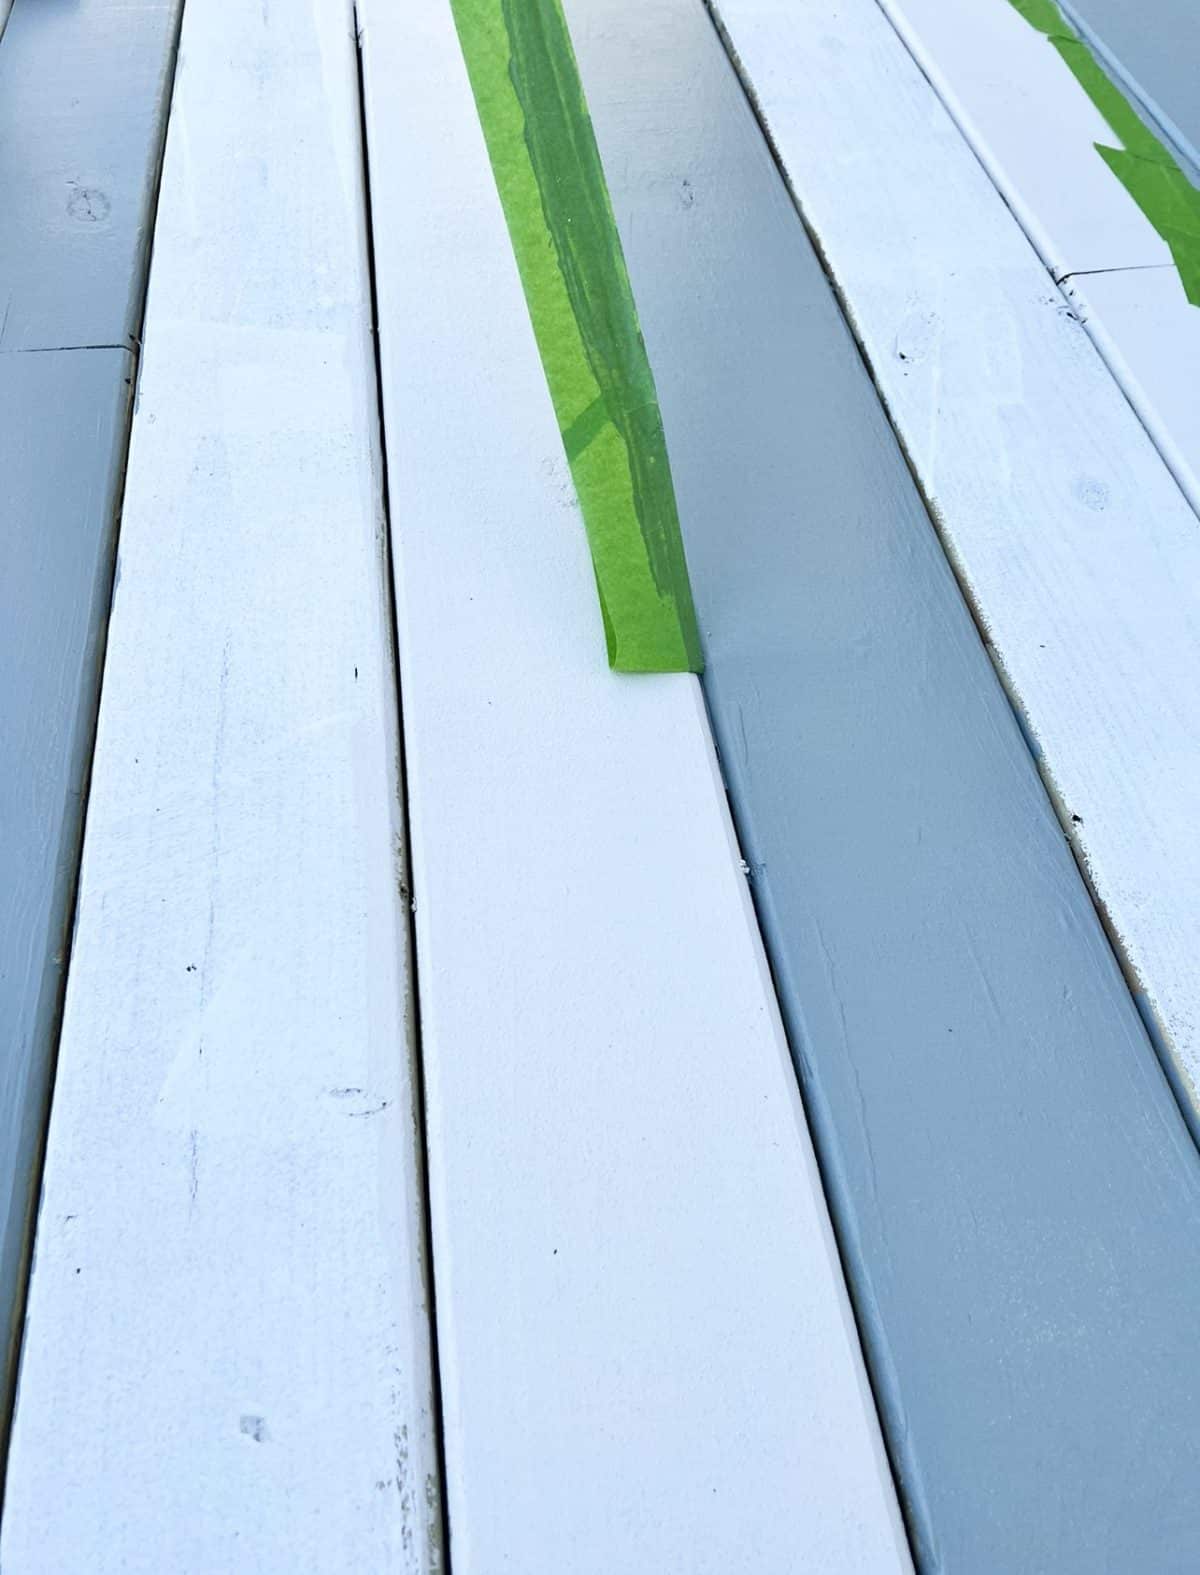
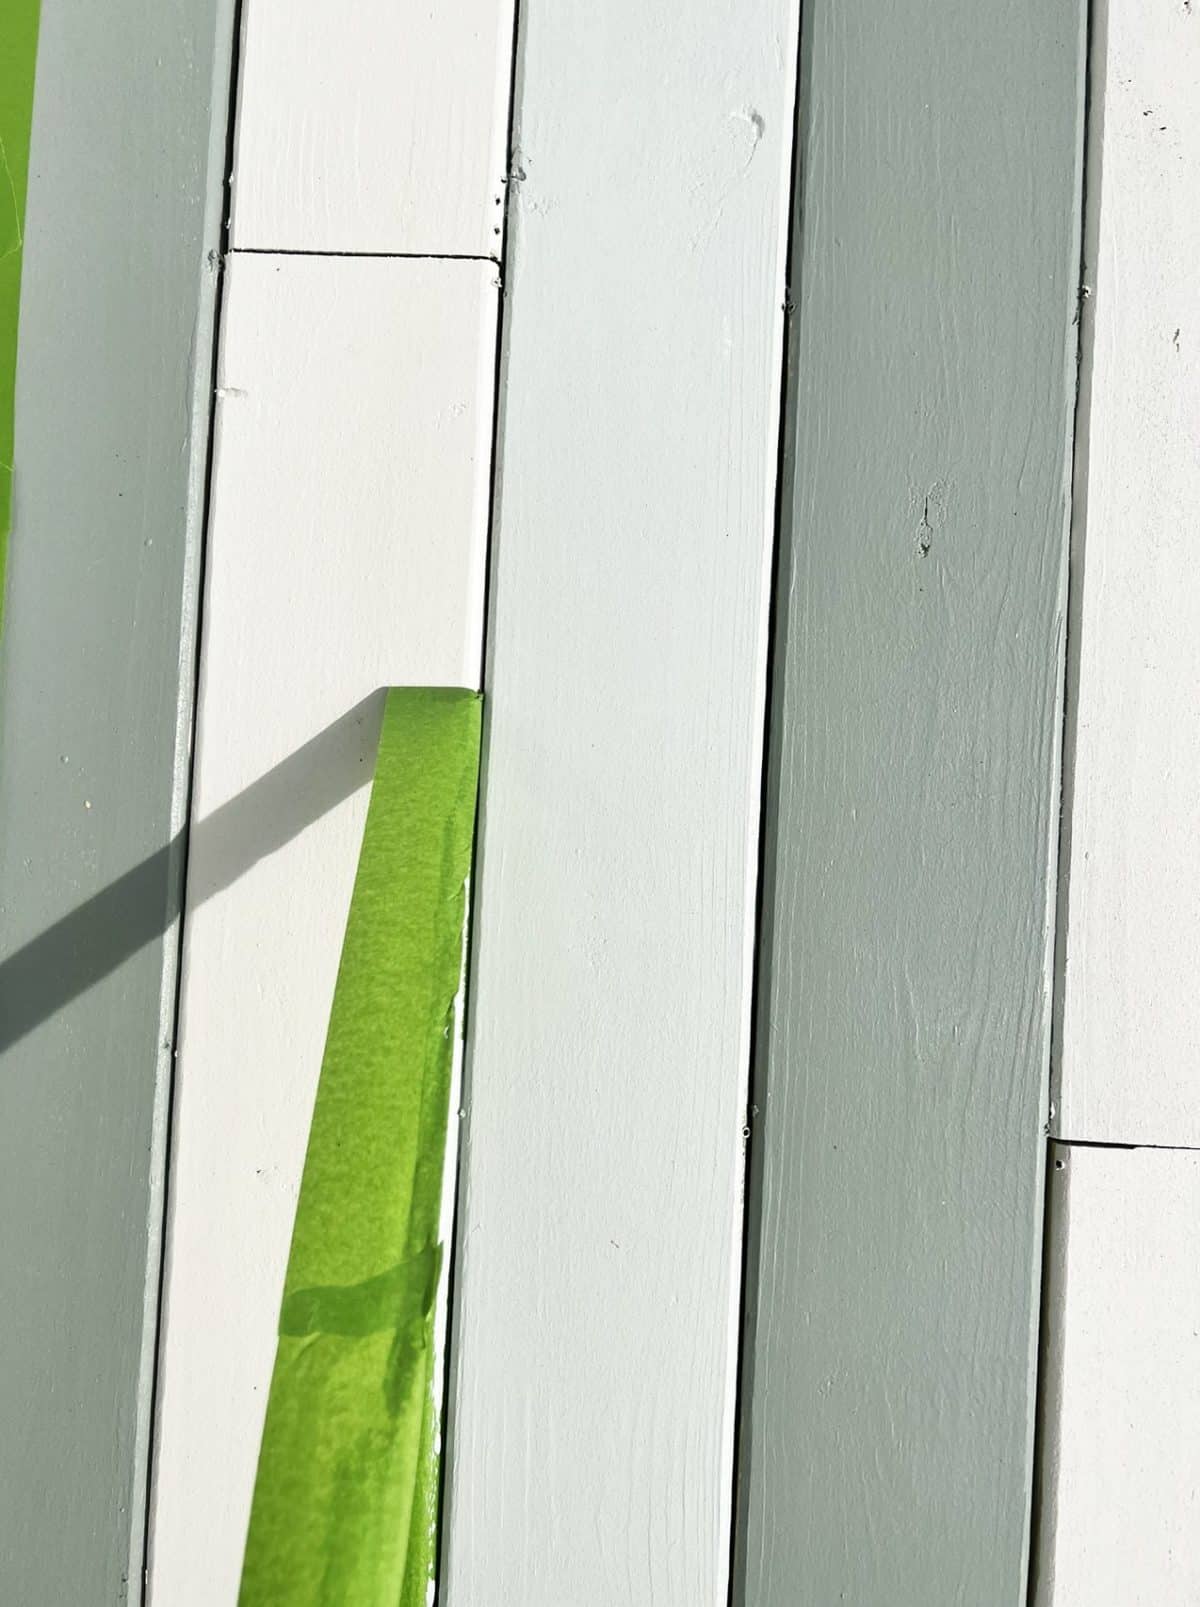
Yep. Once that primer is dry, we went back and taped the edges of the boards. Depending on the colors that you use, will determine which boards you tape off first.
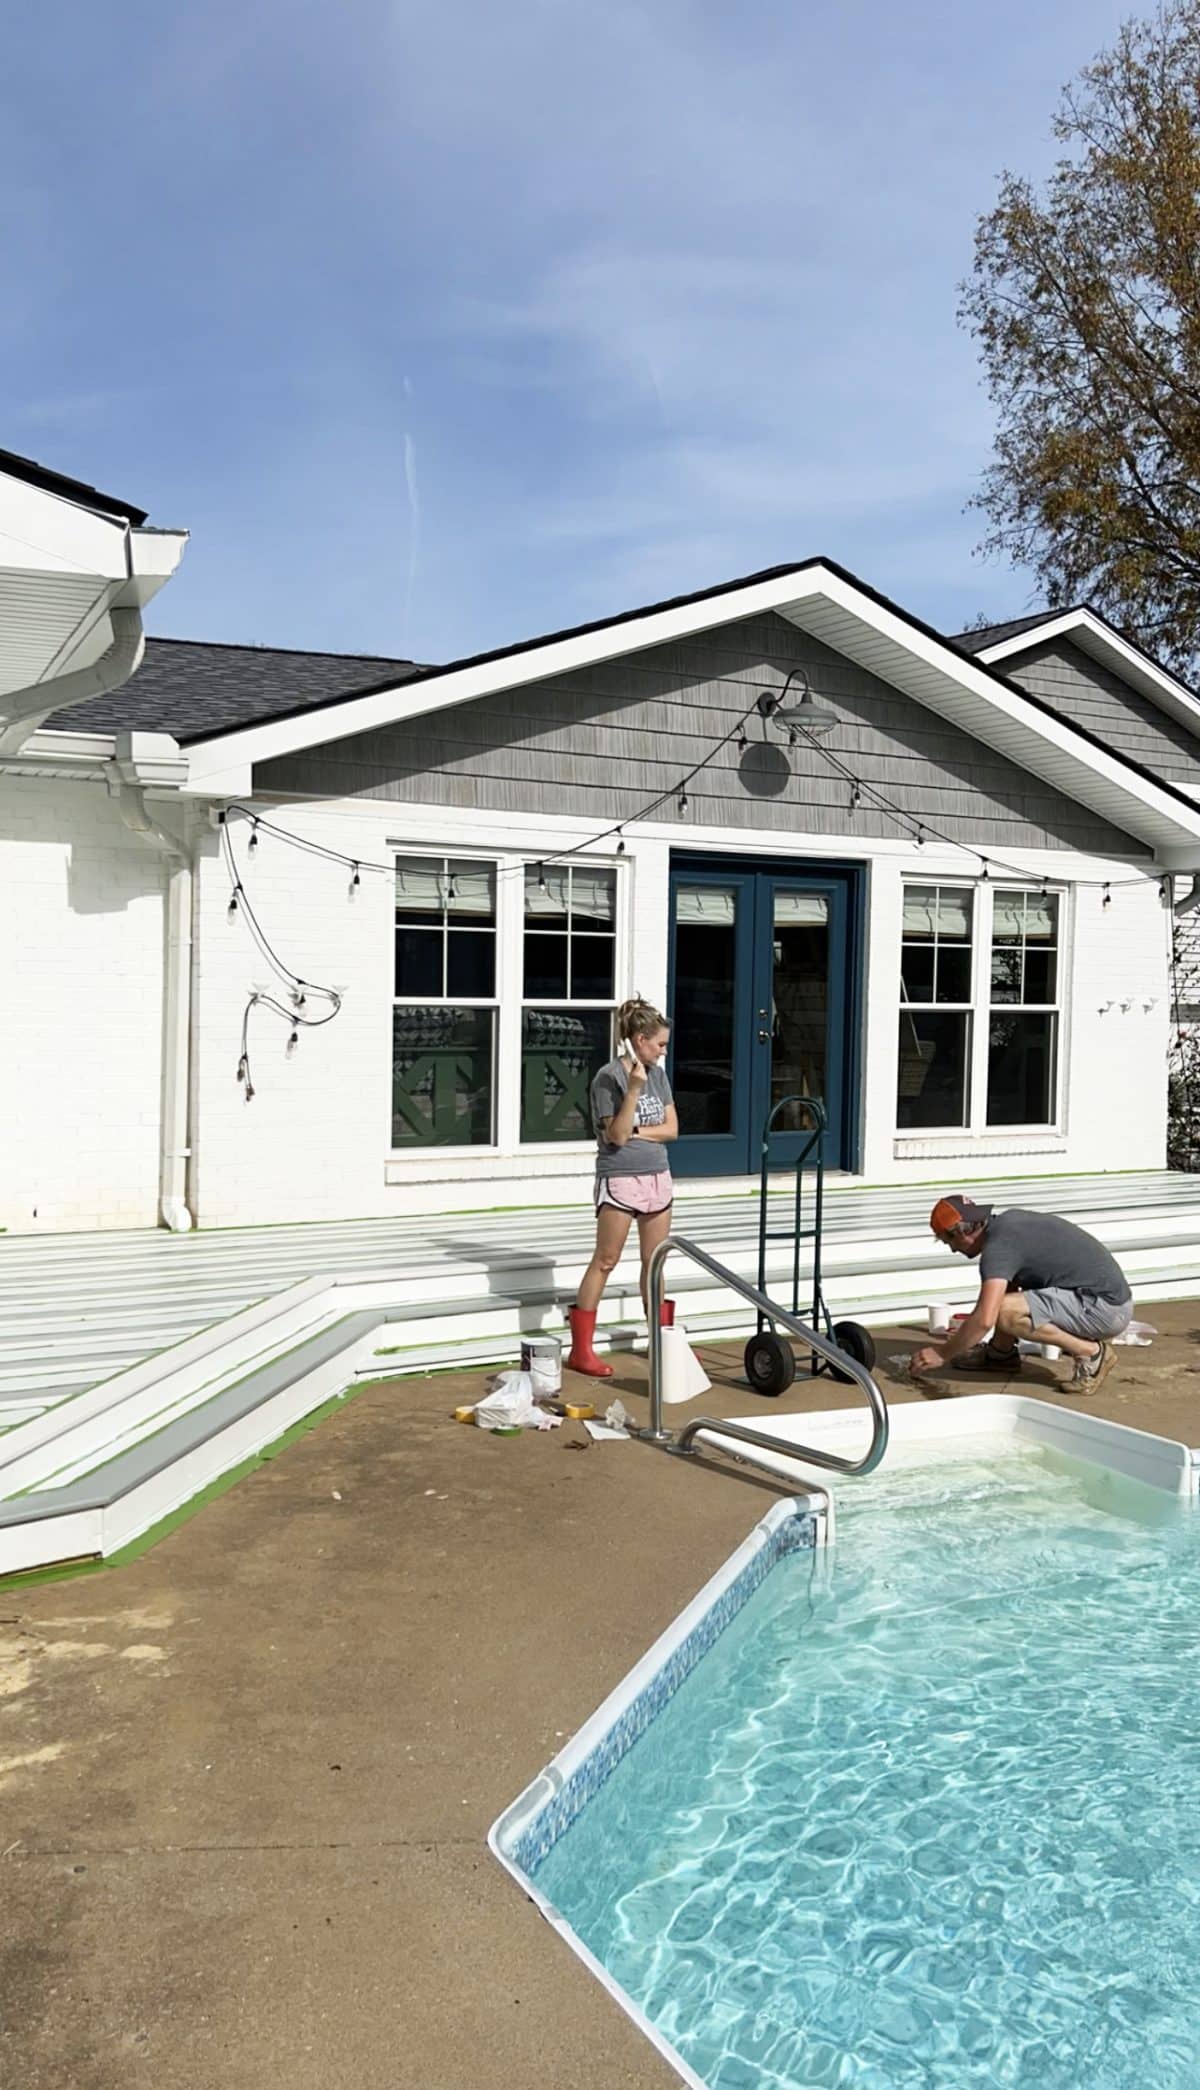
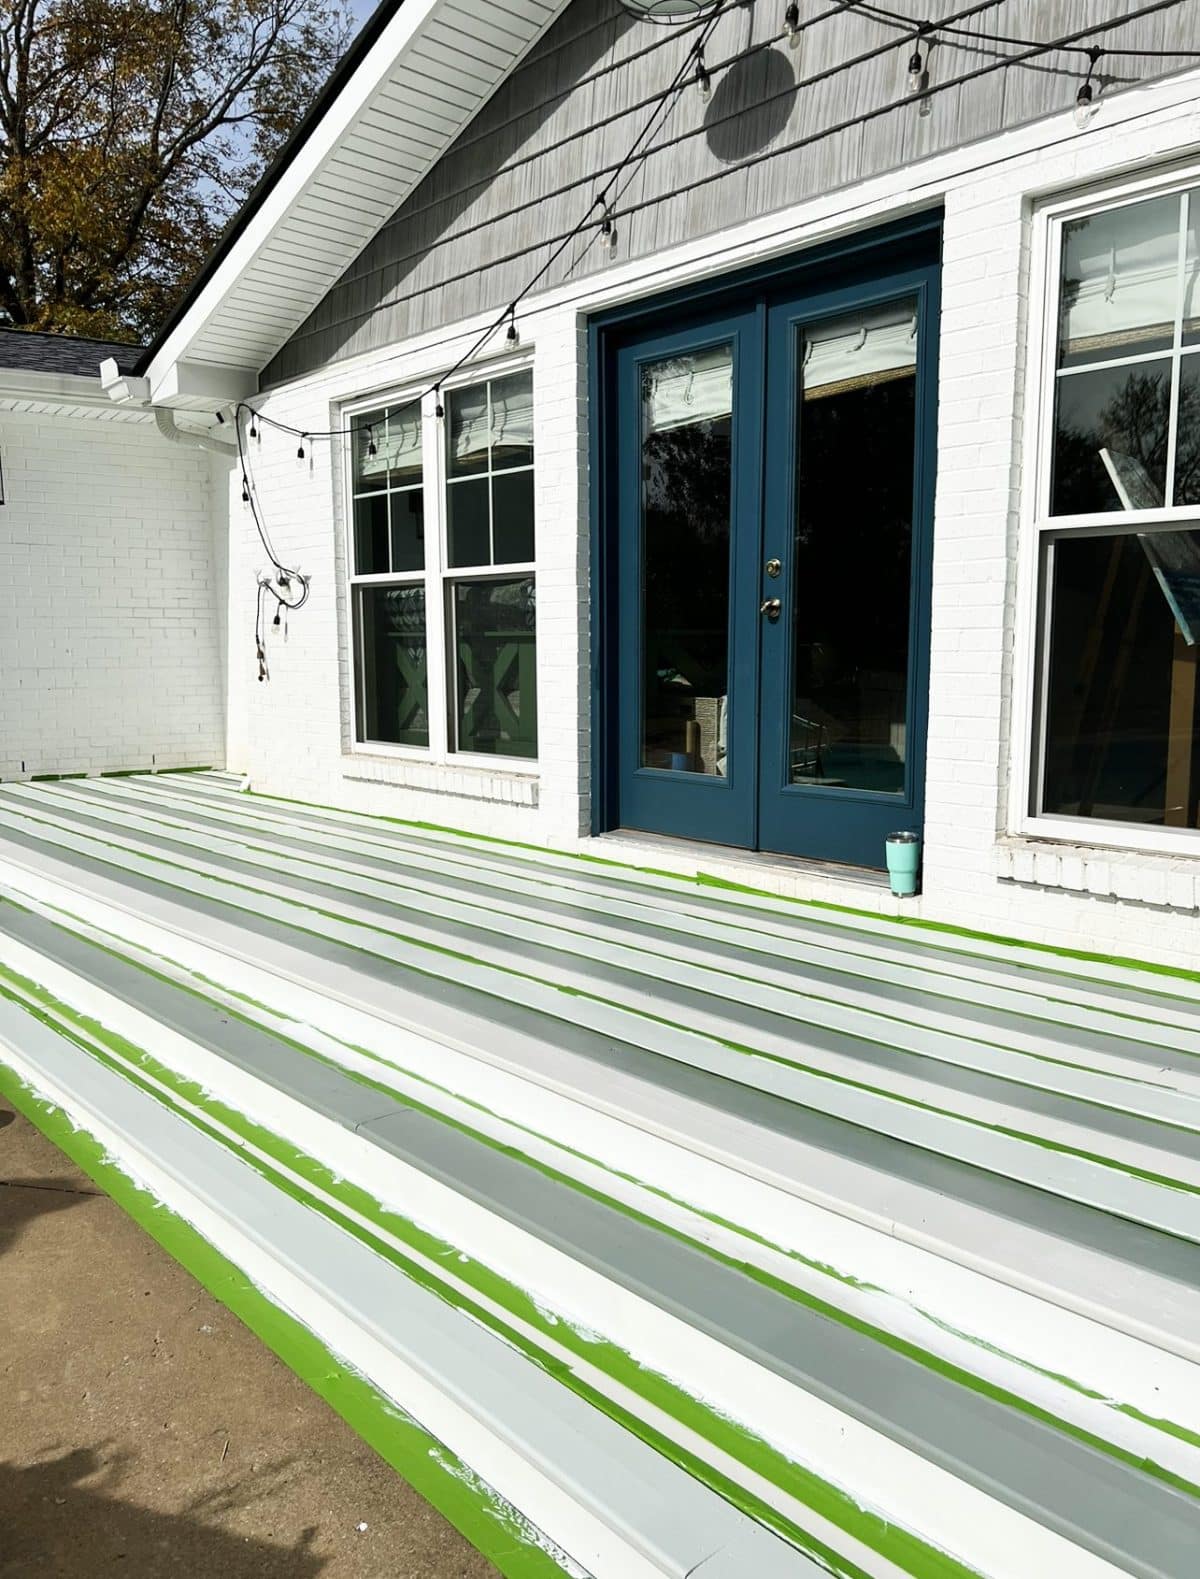
Since we knew we were using three colors, we decided to start with one, and work from there. So we taped off the surrounding boards with FrogTape so that we could get the first color down.
Here are a few things we adore about their tape: {From their site, in case you’re curious about why we’re such big fans}
FrogTape® brand painter’s tapes that are treated with PaintBlock® Technology, have a super-absorbent polymer that reacts with the water in latex paint and instantly gels to form a micro-barrier that seals the edges of the tape, preventing paint bleed and creating clean, crisp paint lines. These FrogTape® products include Multi-Surface, Delicate Surface and Pro Grade, which are perfect for any painting project. Whether you’re taping off baseboards, trim and walls for basic painting applications, or creating decorative patterns, FrogTape® makes it easy to achieve professional-looking results and is the brand pro’s rate #1 for sharp paint lines with no paint bleed.
It’s honestly kind of surprising how quickly it goes, compared to free-handing.
It’s also nice to have such peace of mind when going for a certain shape, because we know from long term experience that FrogTape always holds up.
4. How to Paint a Deck with FrogTape: Roll It.
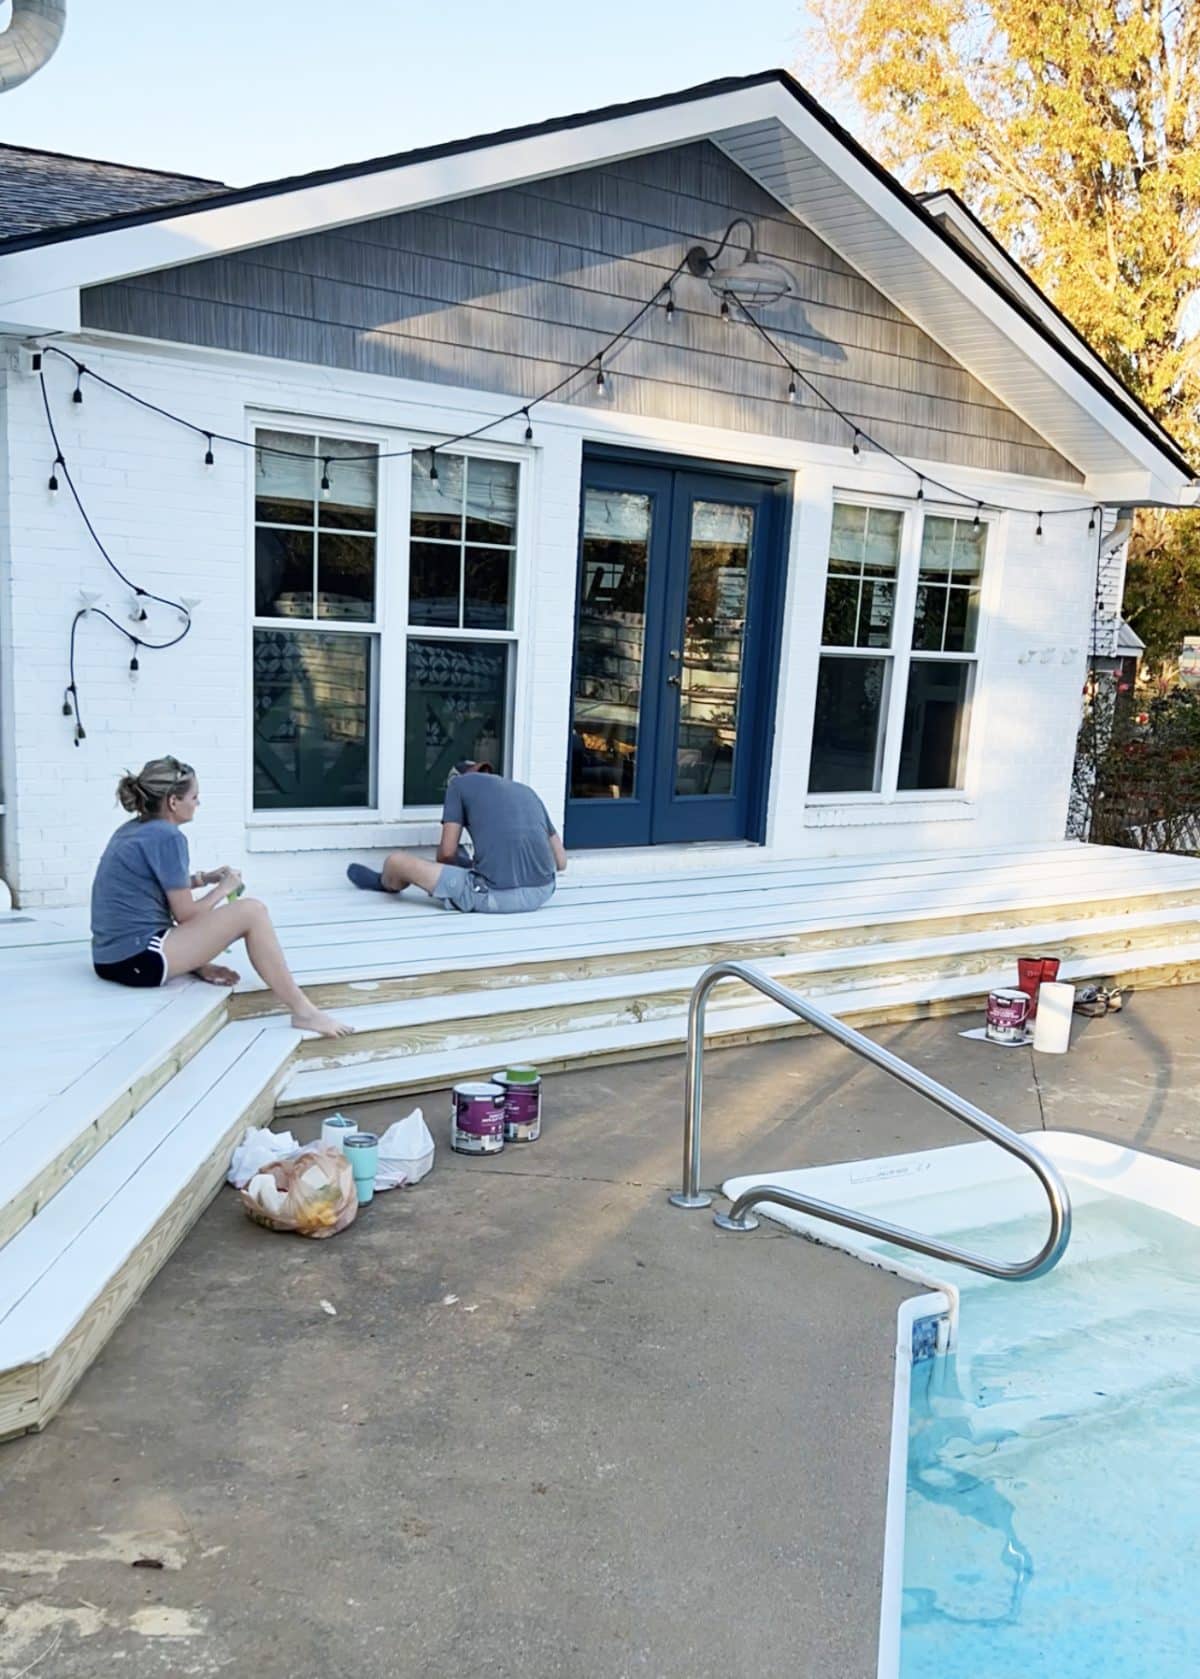
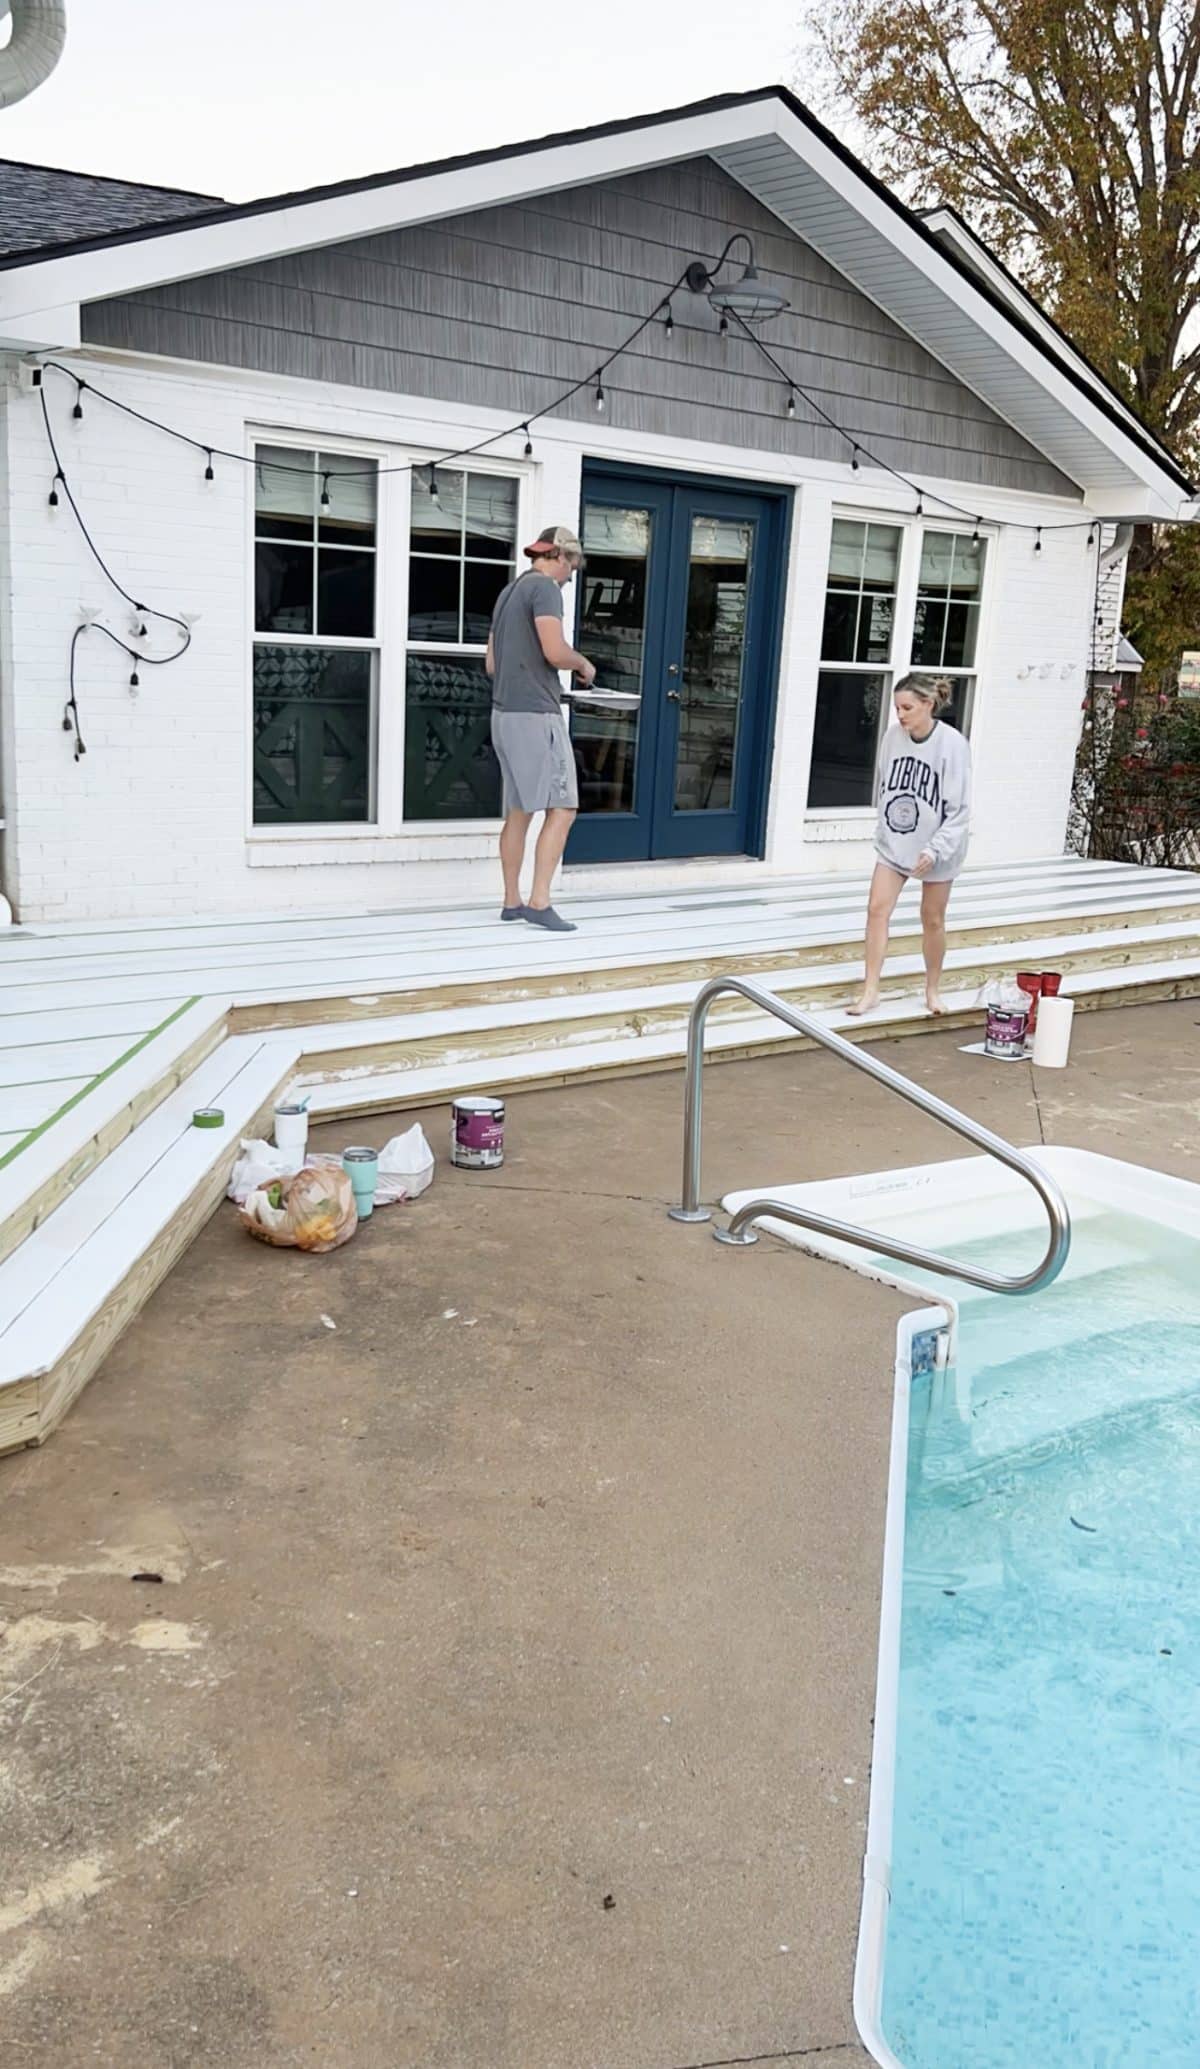
When using multiple colors, the biggest recommendation we can make, is that you initially roll out the color. If you’re taking on a larger surface area like this one, it helps to have two people: one to roll, and the other to follow up on the edges that the roller can’t reach, with a brush. That way the initial color goes on, and you can ensure that you’ve covered all of your area by using the brush in those harder to reach areas.
Tip: If it’s a surface you’ll be walking on, be sure to watch where you step. If you notice the photo above, you can tell we’re barefoot / in socked feet. It helps with scuffing and damage before the paint has had time to set.
Tip: if taping of the deck boards proves to be challenging for larger fingers, use a butter knife to wedge the tape in between. Ashley’s fingers were fine, but Jamin preferred the knife. A screw driver would work too, to make sure it’s in the cracks.

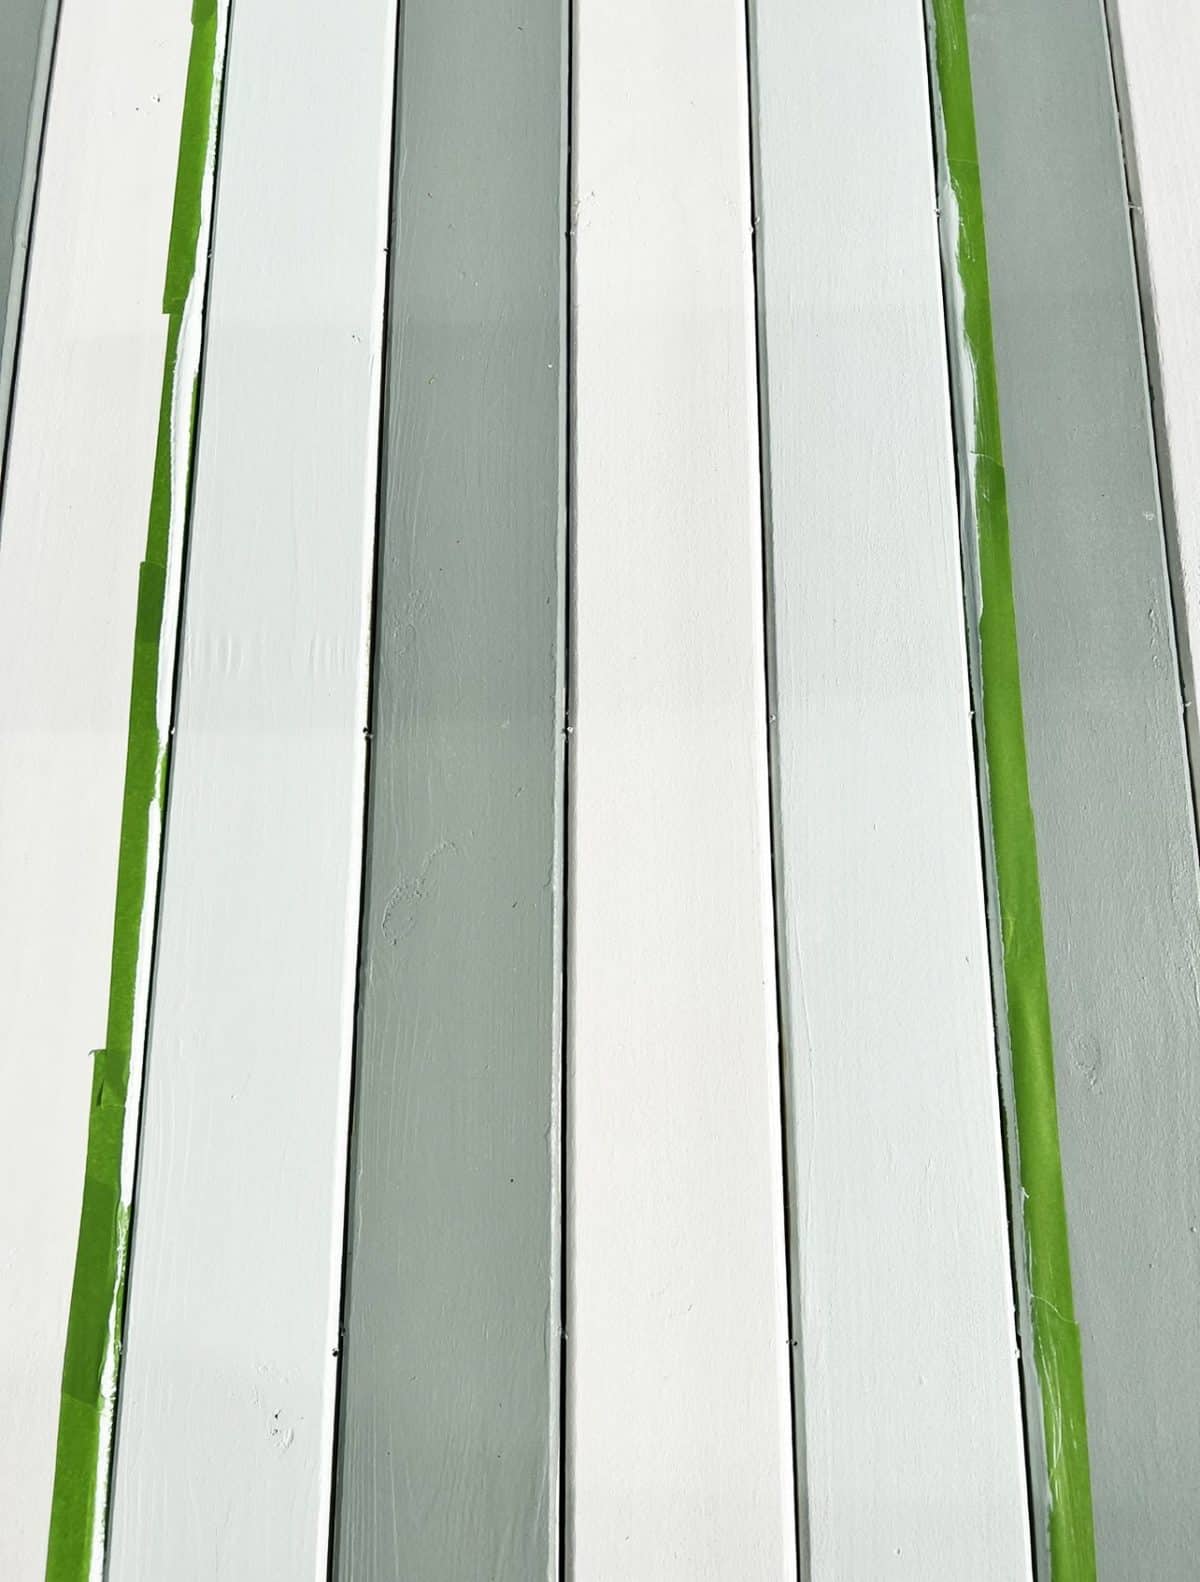
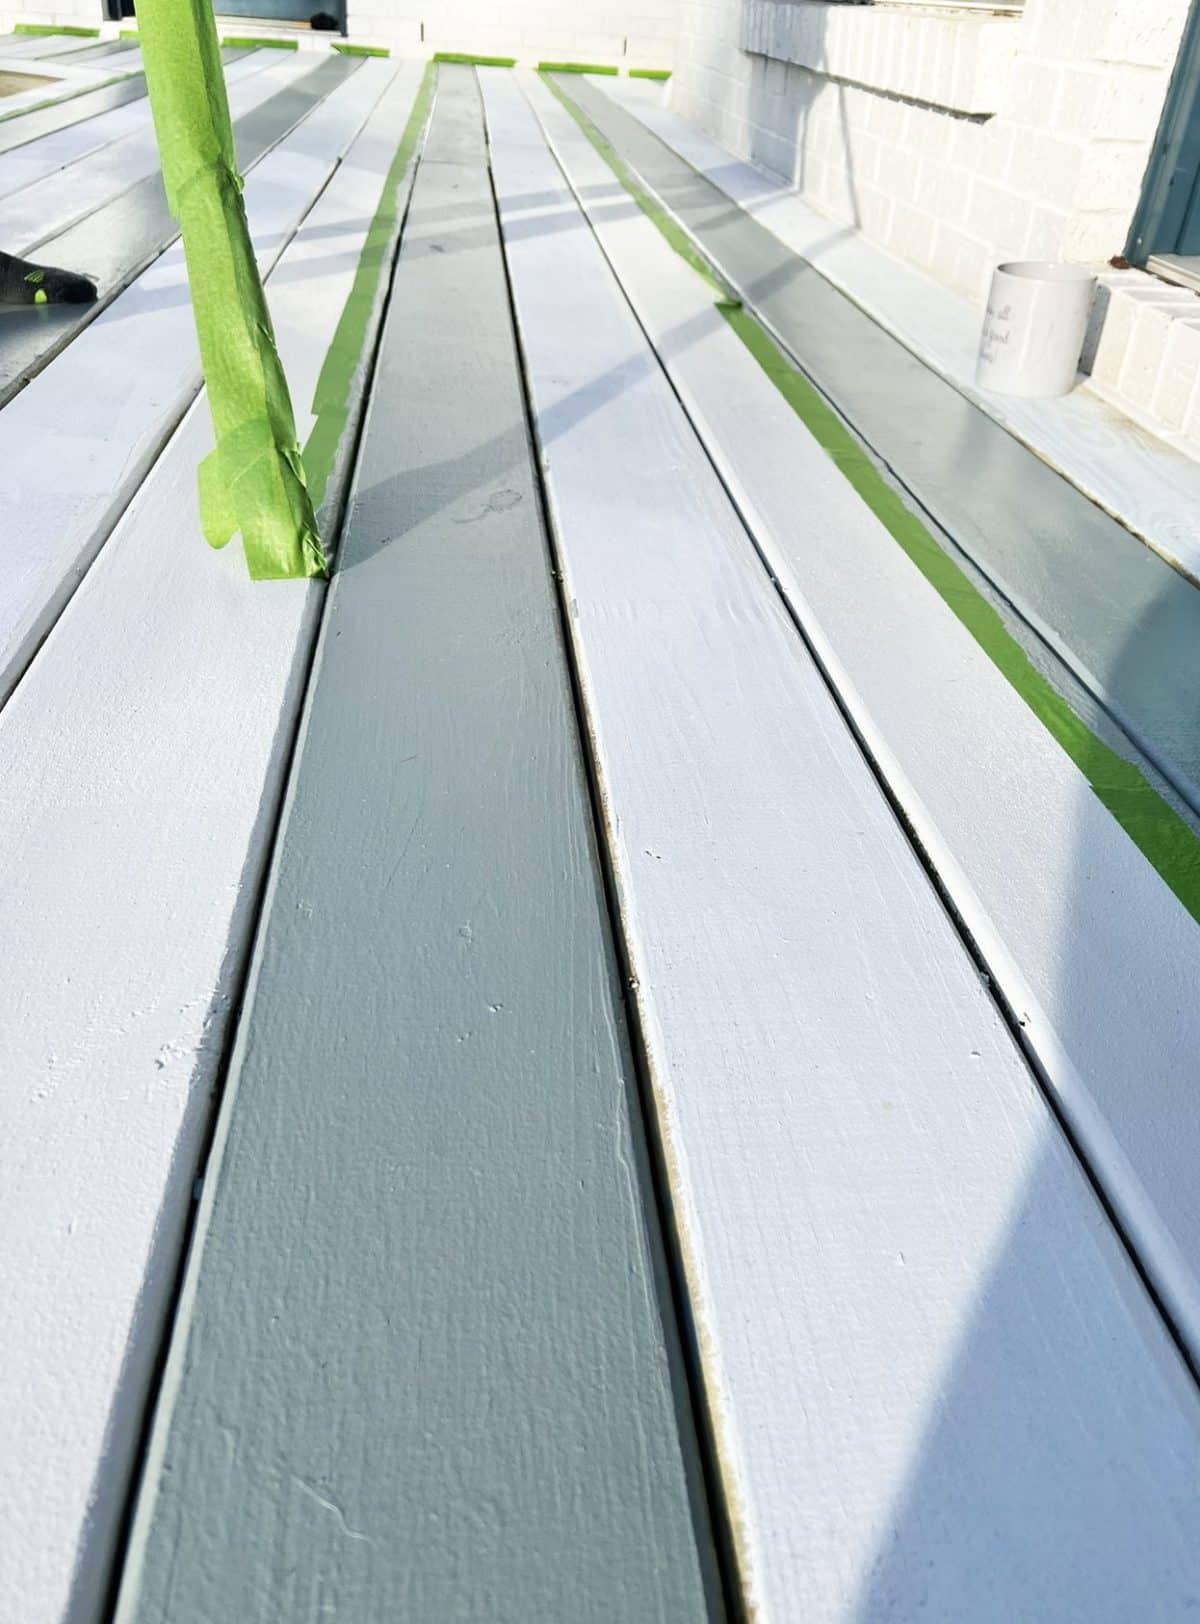
5. How to Paint a Deck with FrogTape: Repeat the Tape on the Next Boards
Here, if using multiple colors you’ll repeat the first steps in which the tape was placed, on the next neighboring boards you wish to paint. This way the color is protected for the next coat of paint. It’s a simple way to add color.

Then you’ll repeat the step again, adding it to the next boards, removing as needed to add additional colors. The steps are a mixed bag, depending on the order you proceed. It’s a slower process with a big reward in the end, so it’s fun to add all those different stripes with these extra steps.
6. How to Paint a Deck with FrogTape: Add the Risers
When you’ve finished adding the stripes to your deck, add the contrasting color for your risers or railing, whatever other areas you have included in your space.
As mentioned above, we added white here to contrast with all the striped color, but have a little accent with the house. It might have been the most satisfying step to include more interest.
7. How to Paint a Deck with FrogTape: Enjoy that Peeling Feeling
Once dry, is there anything more satisfying than removing the tape in between colors? I guess we went a little out of order here, because in between each step, you’ll be removing and then re-adhering tape to each side. But after each one, remove and then add the tape to protect the next plank.
What we’re trying to say is, this step is so satisfying, it really needed its own mention here.
In the end, you’ll have a lot of tape left, so this is the good part.
Lots of tape removal, and lots of pretty, clean lines.
Helpful Tip: don’t worry about perfection on the deck boards because honestly that’s impossible… but FrogTape gets you as close as possible while remaining sane.
This really is our very favorite part. Can you tell?
8. How to Paint a Deck with FrogTape: Touchups
Again, don’t worry too much about perfection, but now is your chance to do some touchups! Every project needs them, so just sneak it in to the obvious places, and you’re really ready to go. It’s that simple. A few extra steps for a big impact.
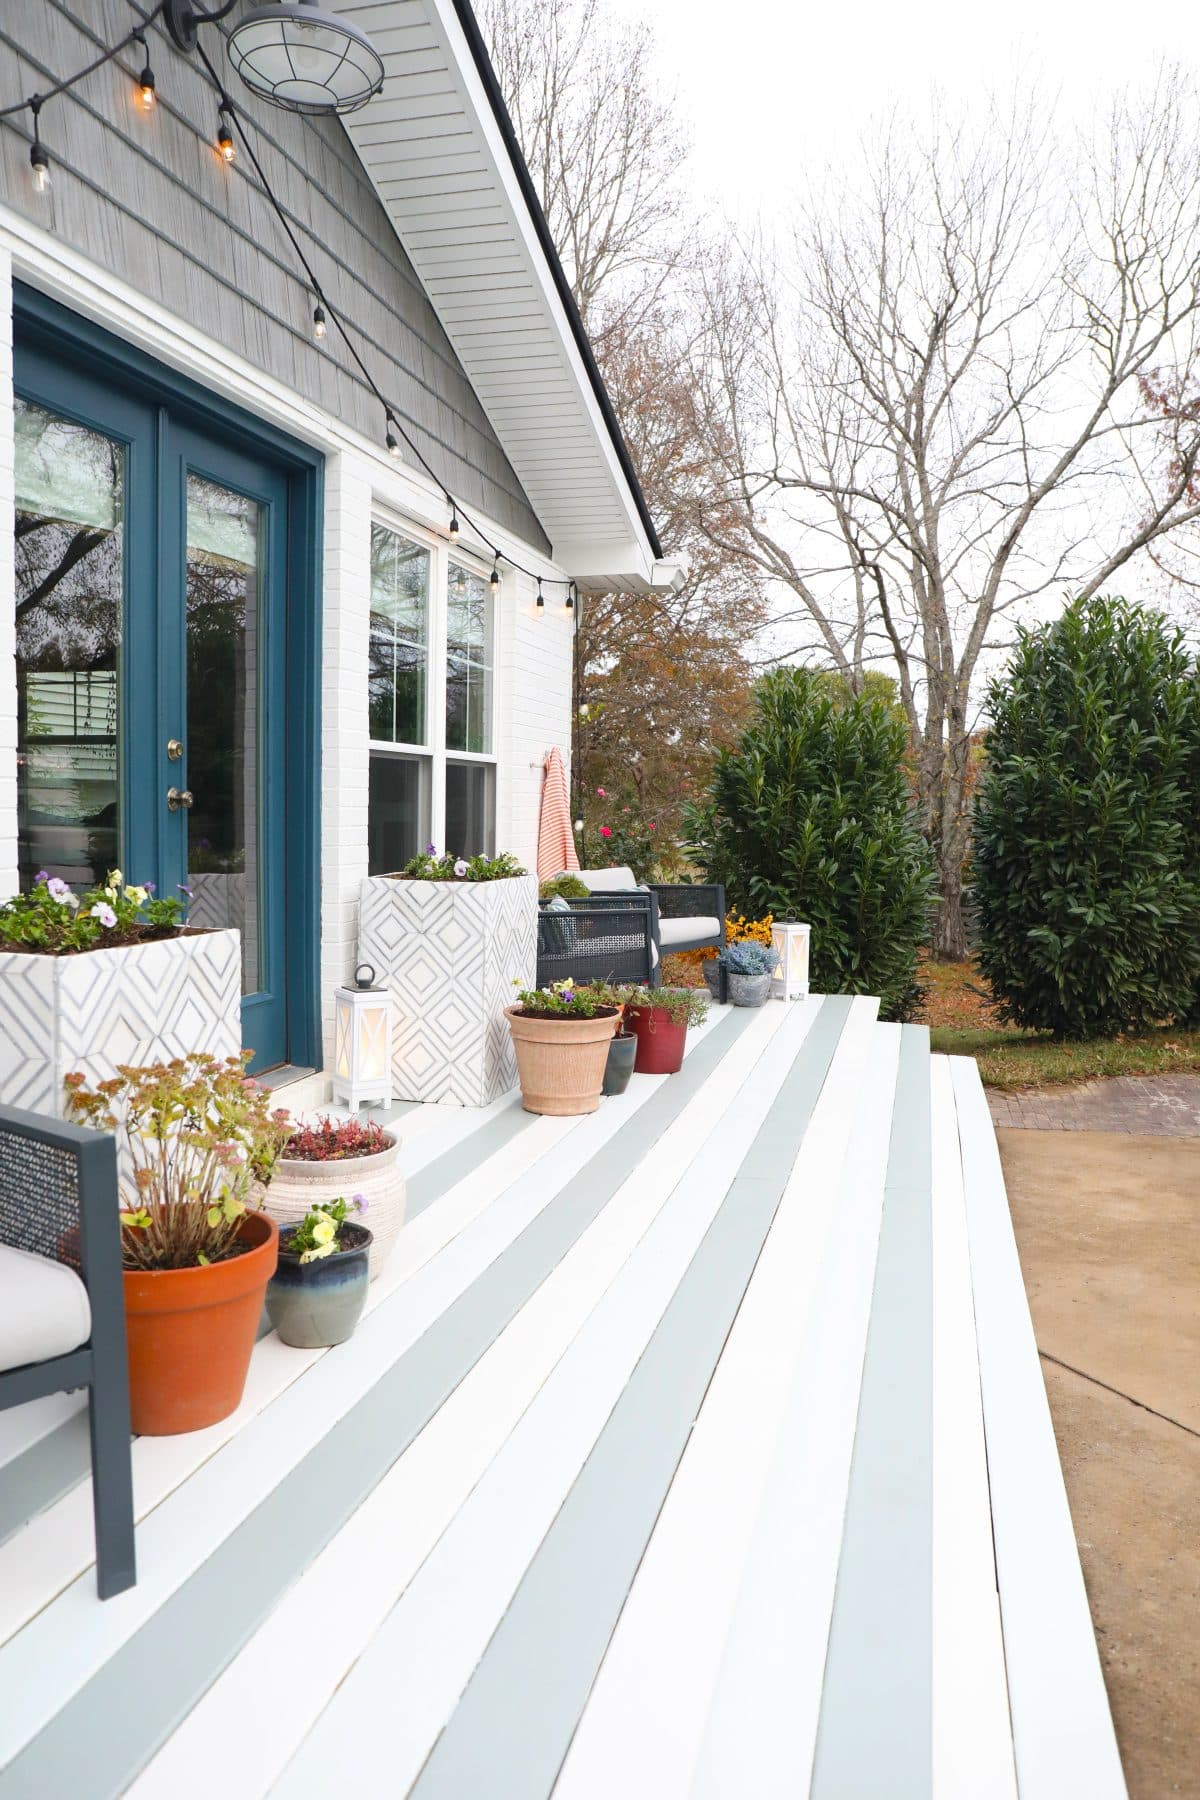
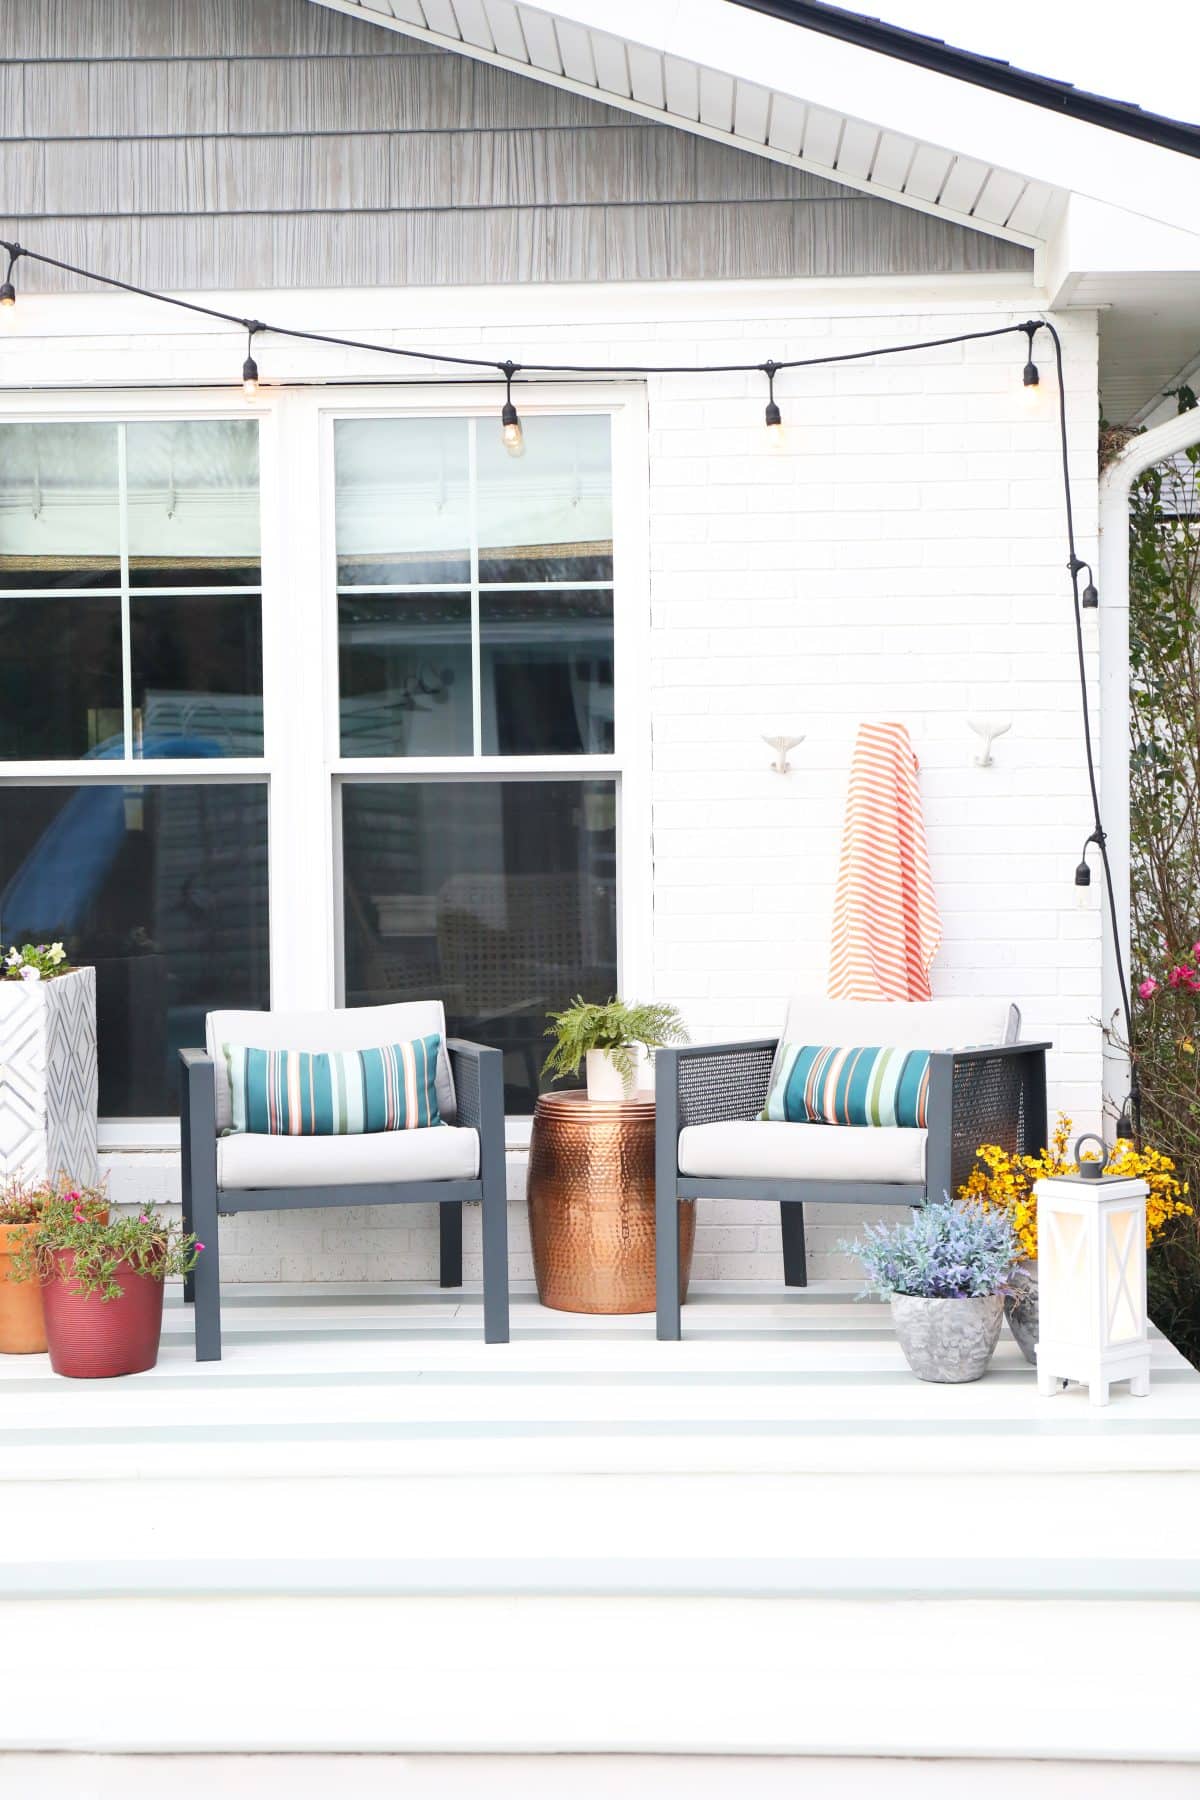
9. How to Paint a Deck with FrogTape: Sit Back and Enjoy All That Hard Work
Because you’ve earned it. This is the fun part… watching your vision come to life!
We recommend letting the paint set for a few days, just to make sure it’s nice and ready. But styling your space is our favorite part!
Style it. Photograph it and share with your friends. Throw a party.
Our point? Sit back and enjoy.
Because this is a striped deck worthy of such fabulousness.
These are just a few simple tips on how to get that one-of-a-kind look for your backyard. Have you ever considered stripes? We love that it’s so easy with FrogTape.
We hope you’ll try it too!
As always, let us know if you do, or if you have any questions.
We just adore the final look with FrogTape!
Have an inspired day!